
OLC 220B D2 - TV OK - Free user manual and instructions
Find the device manual for free OLC 220B D2 OK in PDF.
| Product Type | LCD TV 21.5 inches |
| Brand | OK |
| Model | OLC 220B D2 |
| Screen size | 21.5 inches (54.6 cm) |
| Resolution | 1920 x 1080 pixels |
| Aspect ratio | 16:9 |
| Brightness | 300 cd/m² |
| Contrast ratio | 1000:1 |
| Response time | 5 ms |
| TV system | PAL/SECAM |
| Tuner | ATV 49-863 MHz, DTV VHF/UHF (174-862 MHz) |
| Connections | 1x HDMI, 1x VGA, 1x SCART, 1x USB, 1x YPbPr, 1x AV, 1x S-Video, headphone output |
| Power supply | 100-240 V~ 50/60 Hz, max 52 W |
| Dimensions with stand | 529 x 428 x 200 mm |
| Dimensions without stand | 529 x 398 x 84 mm |
| Weight with stand and speakers | 4.8 kg |
| Special features | Teletext, Hotel Mode, Parental Control, Sleep Timer, Keypad Lock |
| Multimedia formats (USB) | Photo: .jpg, .bmp, .gif; Audio: .mp3, .wma; Video: .avi, .mpg, .vob, .dat |
| Maintenance | Clean with a soft, clean cloth; avoid chemical products |
| Safety | Unplug before cleaning; do not expose to moisture |
| Included accessories | Remote control, power cable, AV cable, 2 AAA batteries |
Frequently Asked Questions - OLC 220B D2 OK
User questions about OLC 220B D2 OK
0 question about this device. Answer the ones you know or ask your own.
Ask a new question about this device
Download the instructions for your TV in PDF format for free! Find your manual OLC 220B D2 - OK and take your electronic device back in hand. On this page are published all the documents necessary for the use of your device. OLC 220B D2 by OK.
USER MANUAL OLC 220B D2 OK
natural_image
Black and white photo of a flat-screen monitor with a blank screen and 'ok.' text on the front panel (no additional signage or symbols visible)
GebrauchsanweisunG
user Manual Manuel
natural_image
Close-up of a monitor with a 60-degree angle indicator and a remote control (no text or symbols on the device itself)Reichweite ca. 8 m
natural_image
Two grayscale UI icons: one showing a play button with 'CH' and arrow, the other showing a 'NICAM' keypad with plus and minus buttons (no text or symbols on controls)natural_image
Black-and-white cartoon illustration of a Tagalog character peeking from behind a computer monitor (no readable text or symbols)TELETEXTFUNKTION

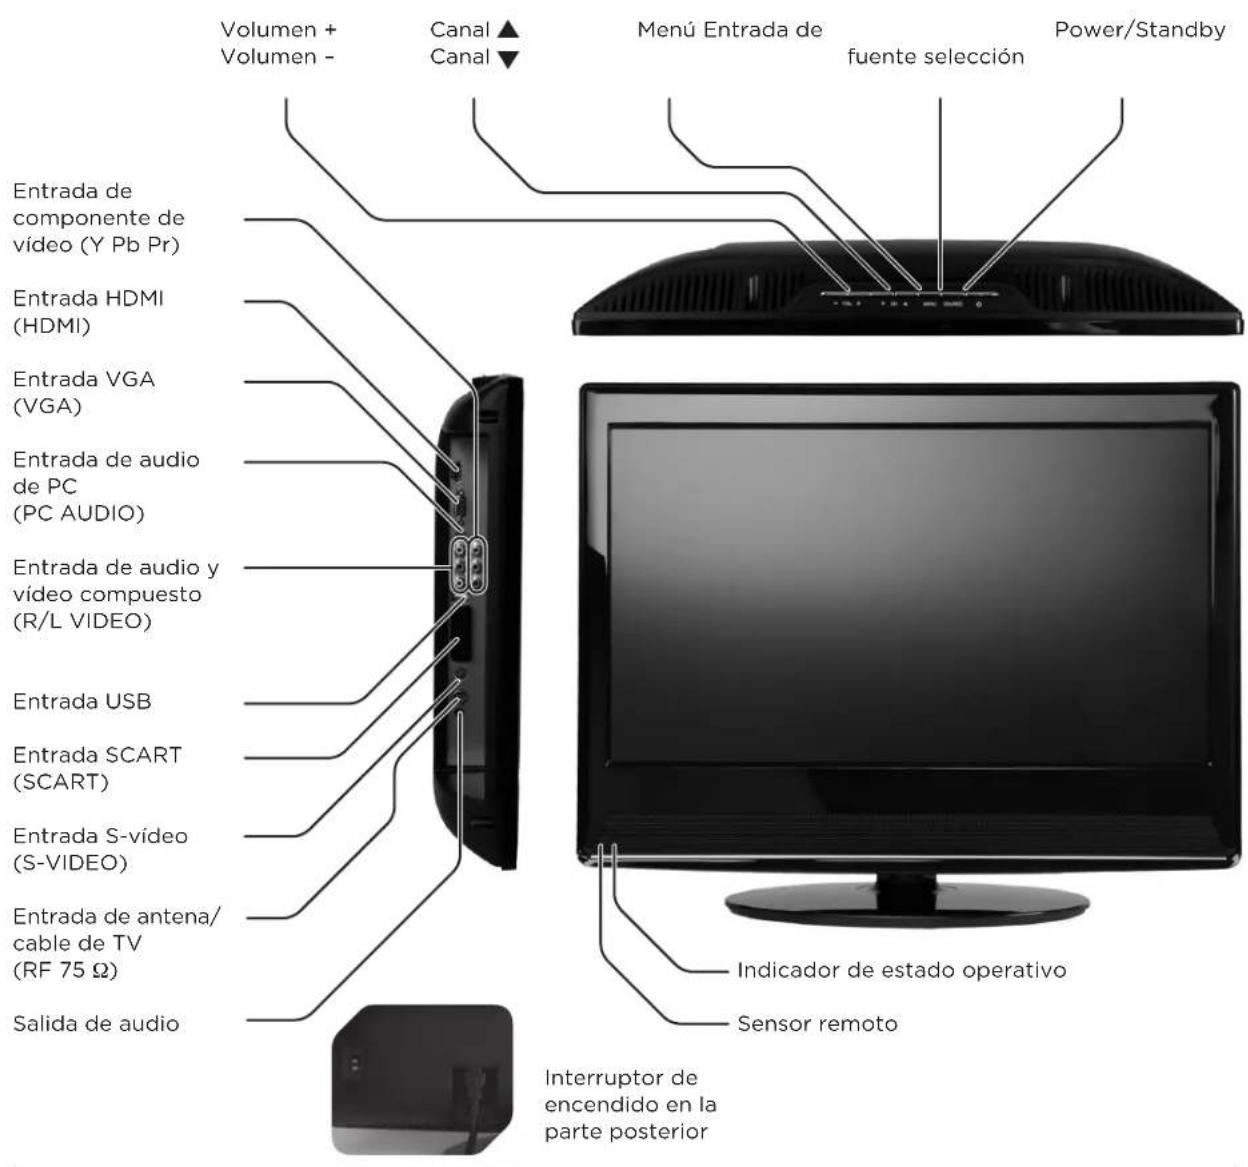
TV-Tuner (RF 75Ω): 1
Component
Videoeingang
(Y Pb Pr): 1
additional coMponents
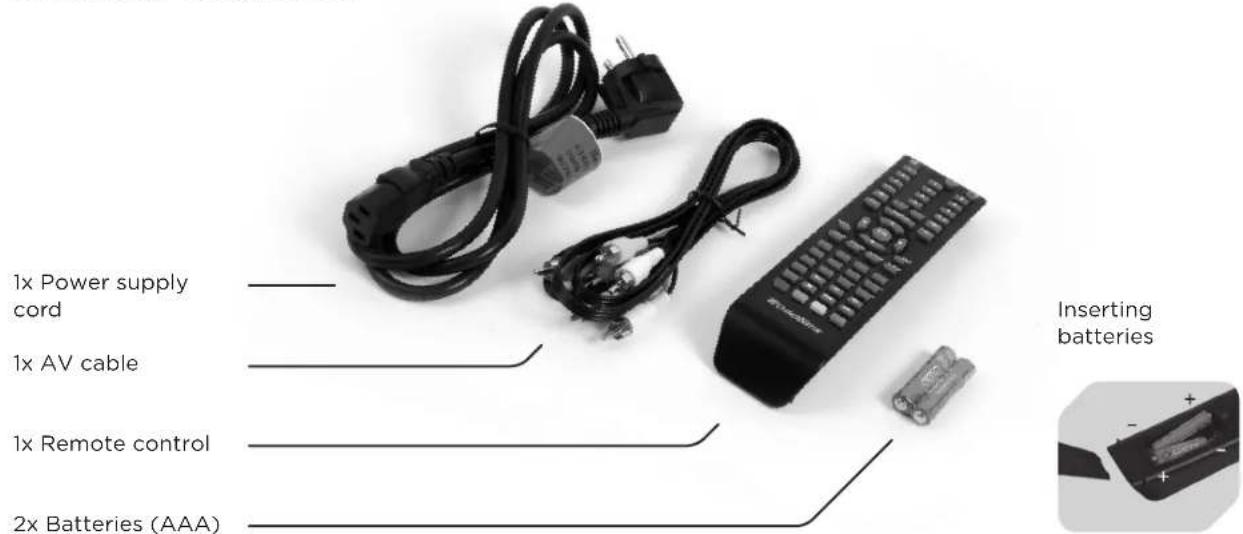
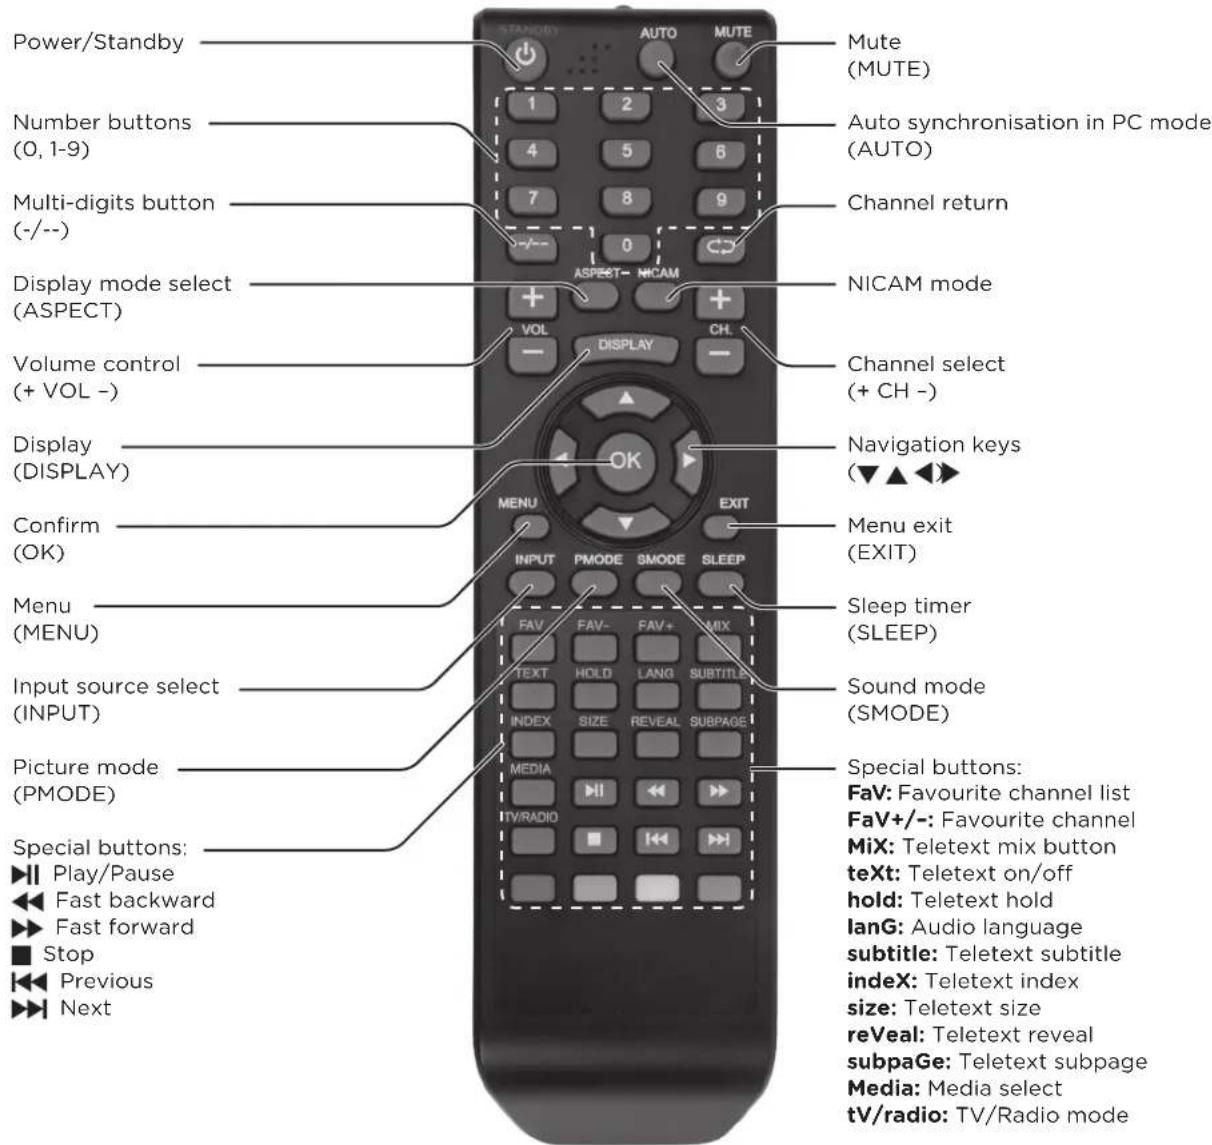
reMote control
natural_image
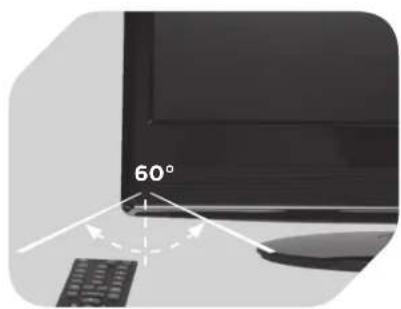
Close-up of a monitor with a 60-degree angle indicator and a remote control (no text or symbols on the device itself)Control range approx. 8 m
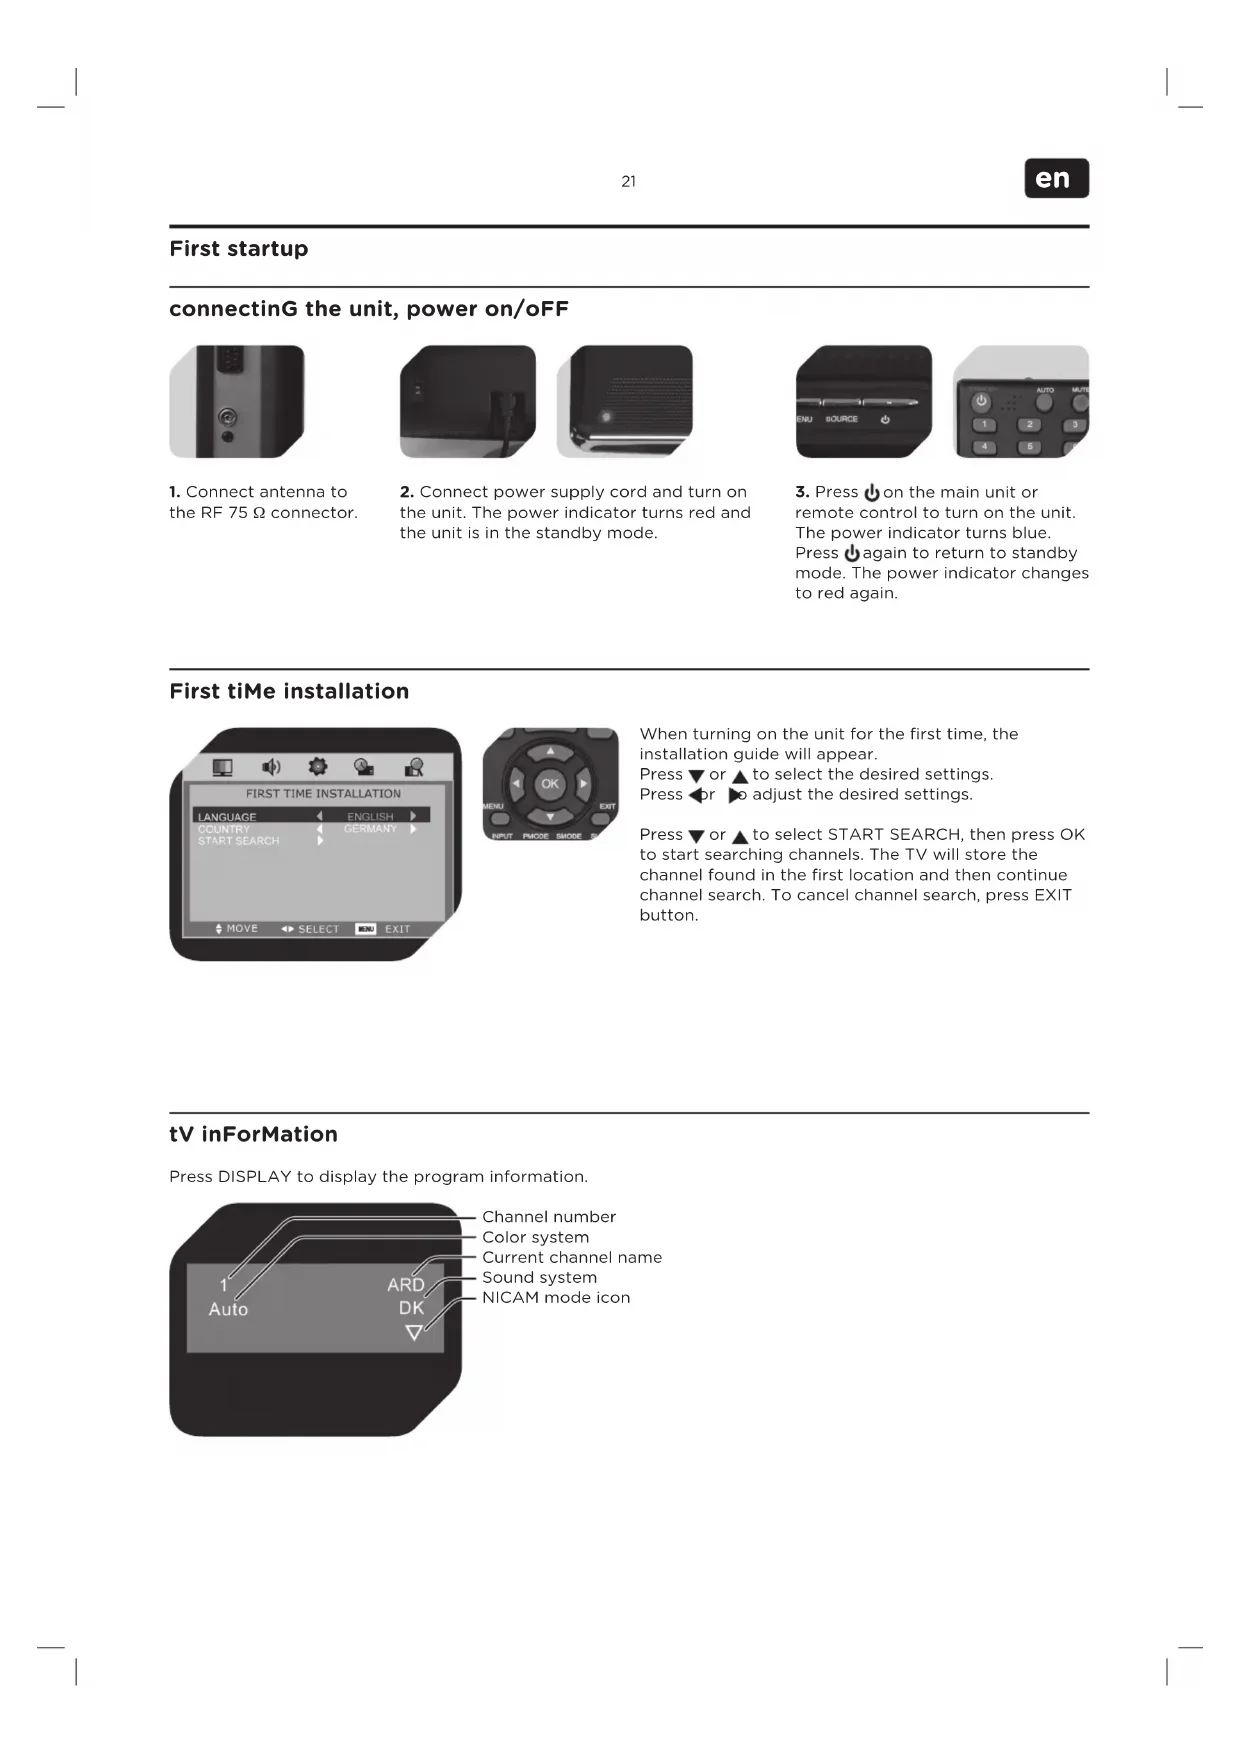
First startup
connectinG the unit, power on/oFF
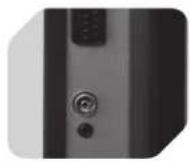
1. Connect antenna to the RF 75 Ω connector.
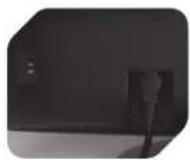
2. Connect power supply cord and turn on the unit. The power indicator turns red and the unit is in the standby mode.
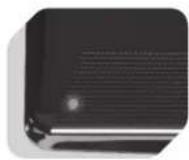
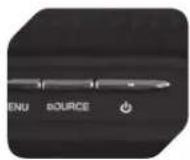
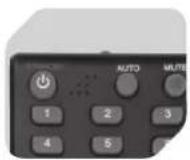
3. Press ↓ on the main unit or remote control to turn on the unit. The power indicator turns blue. Press ↓ again to return to standby mode. The power indicator changes to red again.
First tiMe installation
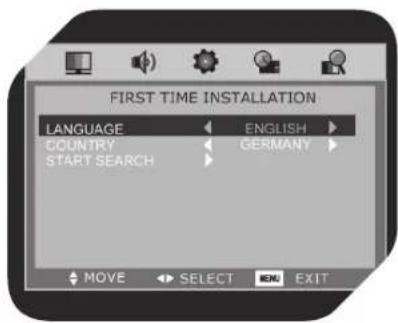

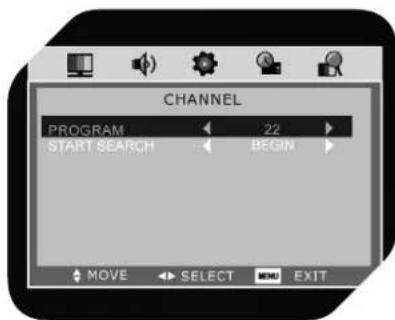
When turning on the unit for the first time, the installation guide will appear.
Press ▼ or ▲ to select the desired settings. Press ◀ or ▶ to adjust the desired settings.
Press ▼ or ▲ to select START SEARCH, then press OK to start searching channels. The TV will store the channel found in the first location and then continue channel search. To cancel channel search, press EXIT button.
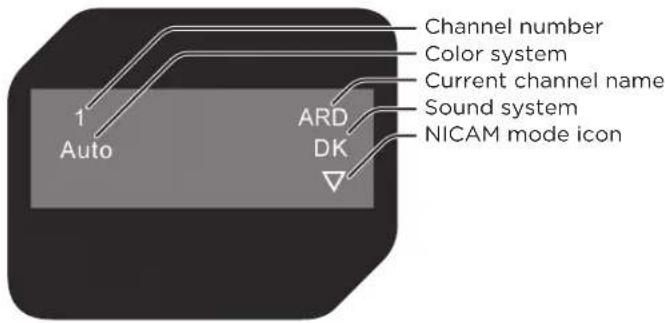
tV inFormation
Press DISPLAY to display the program information.
basic operations
select the input source
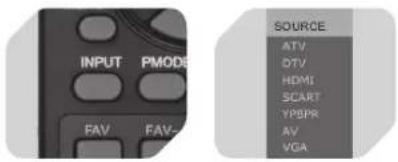
Connect the necessary external device and turn it on. Press INPUT to select the input source menu. Press ▼ or ▲ to move the high-lighted bar to the desired source. Press OK or ▶ to confirm.
usinG the sleep tiMer

The sleep timer automatically switches off the unit after a pre-set time period. Press SLEEP on the remote control repeatedly to set the desired time period between 15 min. to 120 min. in intervals of 15 minutes. After settings press SLEEP to show the remaining sleep time on the screen for a few seconds.
select the tV channel

natural_image
Two remote control buttons: one with a play button and arrow, the other with a 'NICAM' keypad (no text or symbols on the buttons themselves)To select a channel, you can either: Press + CH - on the remote control. Press CH ▼ or CH ▲ on the main unit. Press 0, 1-9 on the remote control to input the channel number directly (-/- for multi digit numbers). Press C# go back to the previously chosen channel.
Mute Function
Press MUTE on the remote control to switch off the sound temporarily. Press again (or + VOL -) to switch the sound back on.
selectinG the audio IanGuaGe
For some programs with audio language options, press LANG repeatedly to switch between available languages.
inForMation displaY

Press DISPLAY on remote control, the related information of current source appears on the screen.
sound/picture Modes

Press PMODE repeatedly to select the desired picture mode. Press SMODE repeatedly to select the desired sound mode.
adjustinG the VoluMe
Press VOL + to increase the volume. Press VOL - to decrease the volume.
nicaM Function
To alternate in the different sound options like mono, stereo, dual I and dual II, press NICAM on the remote control. This only applies to the ATV input source, but not to channels without NICAM signal.
OSD MENU SETTING
NAVIGATING THROUGH THE MENUS

Press MENU to open the OSD main menu. Press ◀ or ▶ to select menu on top. Press ▼ or ▶ on remote control to navigate through the settings of respective menu option. Press ▼ or ▶ to adjust settings. Settings are automatically safed. Press MENU to go one level up. Menu options displayed in gray colour are not available in the current setting mode.
OSD MENU STRUCTURE
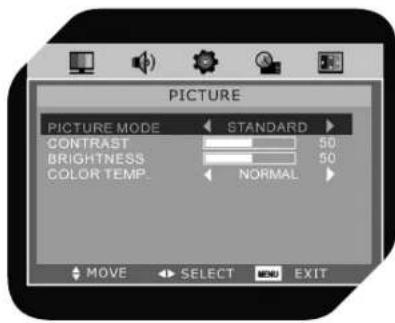
PICTURE
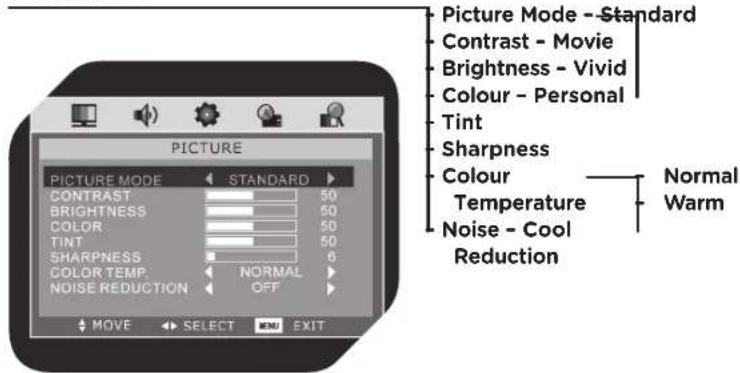
NOTE: Press PMODE repeatedly on remote control to change picture mode directly. Tint available for NTSC video signal only.
SOUND
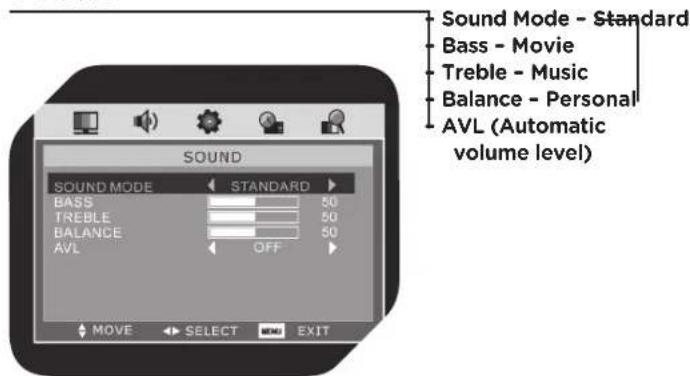
NOTE: Press SMODE repeatedly on remote control to change sound mode directly.
SETTING
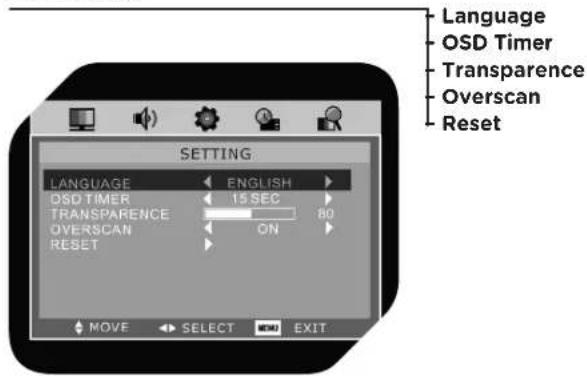
NOTE: The OSD TIMER can be set to time periods from 5 seconds to 30 seconds in intervals of 5 seconds. OVERSCAN available in HDMI source only. Press RESET▶ to reset to the original factory setting.
FUNCTION
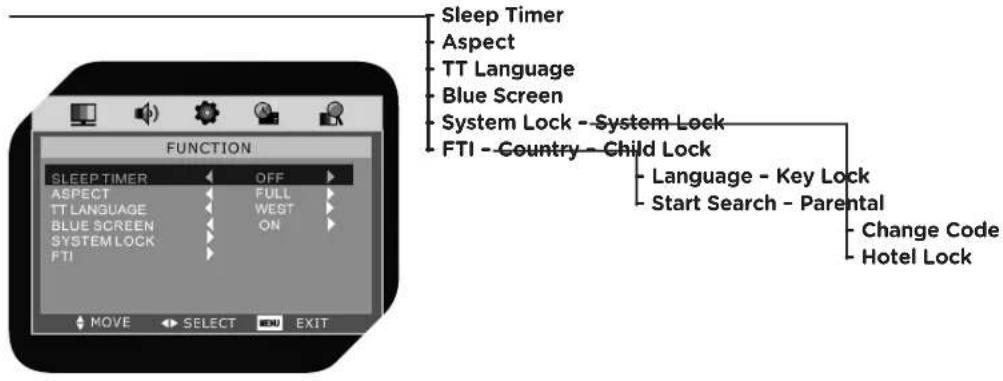
NOTE: Set SLEEP TIMER to OFF or to time periods from 15 minutes to 120 minutes in intervals of 15 minutes. Press SLEEP repeatedly on the remote control to change the sleep timer directly.
SYSTEM LOCK: Set to ON, then all settings will be available.
CHILD LOCK: Set child lock to ON or OFF. Set to ON, the channels locked under PROGRAM EDIT cannot be displayed.
KEY LOCK: Set key lock to ON or OFF. Set to ON, the key panel on the main unit cannot work.
PARENTAL: A program will be blocked if the age which it has been assigned is above the age chosen by the user. You can select OFF, 6, 10, 14, 18.
CHANGE CODE: Press ▶ to enter, input the old password first, then input the new password and enter again to confirm.
HOTEL LOCK: see page chapter HOTEL MODE.
IMPORTANT: The default PIN code is 0000. Make sure that this information is not passed on to children.
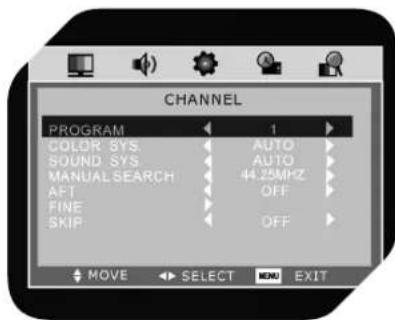
CHANNEL
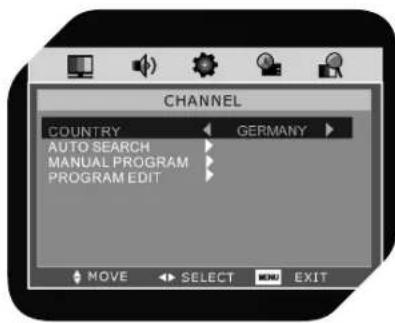
flowchart
graph TD
    A["ATV ONLY - Auto Search DTV ONLY"] --> B["Country"]
    A --> C["Manual Program"]
    A --> D["Program - Program Edit - Program"]
    A --> E["Colour System - Start Search"]
    A --> F["Sound System - Channel Found"]
    A --> G["Manual Search - Sig. Quality"]
    A --> H["AFT - Sig. Strength"]
    A --> I["Fine - Frequency"]
    A --> J["Skip -"]

ATV
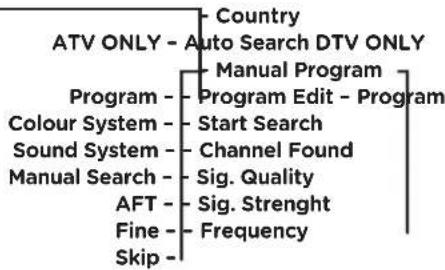
PROGRAM EDIT:
- Press Green button; press ▲ or ▼ to enter character; press ◀ or ▶ to move to the next letter position.
- To move channel, press Yellow button, then press ▲ or ▼ to select new position; press OK to confirm.
- Press Red button to lock the current channel. If the current channel is already locked, press button again to unlock.
- Press Blue button to set the current channel as your favorite channel. If the current channel is already marked as favorite channel, press button again to undo setting.
AFT: Set the automatic frequency tuning to ON or OFF.
FINE: Press ▶ to enter FINE submenu to scan current program within a frequency range accurately and store the result manually when AFT is set to OFF.

DTV
MANUAL PROGRAM: Press to enter MANUAL PROGRAM submenu.
NOTE: The other options in this menu are unavailable, as these options just display to show the current signal situation. The CHANNEL FOUND shows how many channels are found recently. The SIG. QUALITY and SIG. STRENGTH shows the quality and the strength of the current signal, and the FREQUENCY shows the frequency of the current signal.
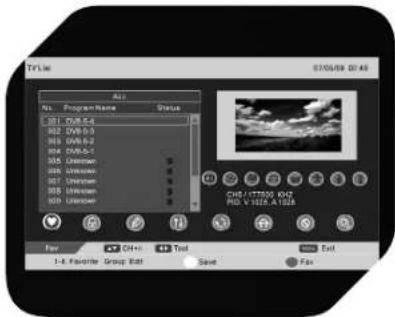
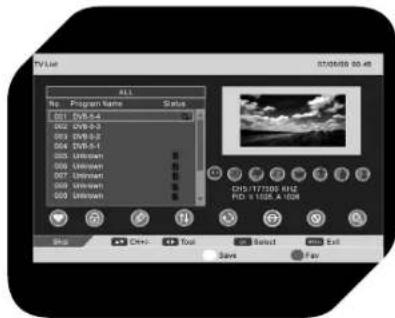
PROGRAM EDIT: Press ▶ to enter PROGRAM EDIT submenu. Press ◀▶ to switch among all options as Fav, Lock, Edit, Move, Sort, Skip, Delete and Search, then press OK to select.
1. Fav:
- Press ▼ to select channel.
- Press number buttons 1-8 to set the current channel to one of your favorite groups 1-8. If the current channel is already in one of your favorite groups 1-8, press number buttons 1-8 again to undo setting.
- Press Yellow button on the remote control, opening the following dialogue screen.

Press OK to save the changes or press MENU to return to the previous menu.
Press Blue button, the menu on the left will appear. Press ◀▶ to switch between all channels and FAV 1-8 channel.
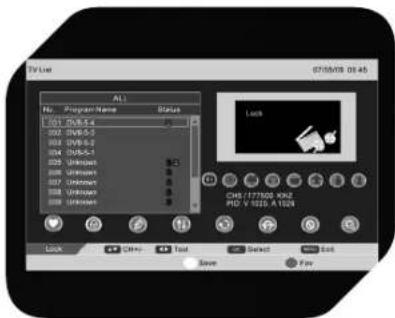
2. Lock:
- Press OK to lock current channel. If the current channel is already locked, press again to unlock.
- Press Blue button to return to previous menu.
- If CHILD LOCK set to ON, the channel locked cannot be displayed.
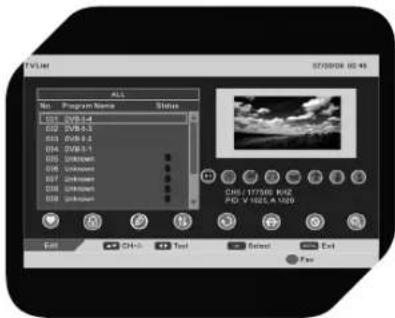
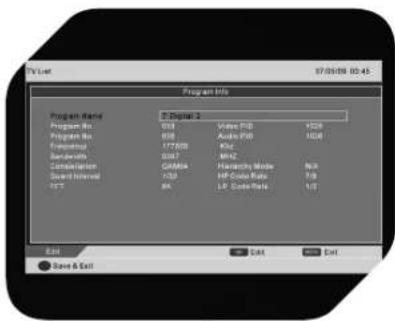
3. Edit:
Press ▼ to select channel, then press OK to enter the Program Info menu.
Press ▼ to select channel, then press OK to rename the channel.
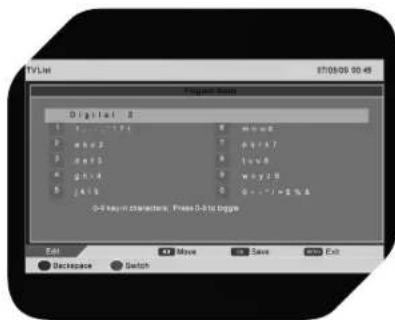
- Press number buttons 1-9 to select different character.
- Press Green button to switch between upper and lower case letters. E.g., press the number button 2 repeatedly to select among a, b, c and 2; then press OK to save.
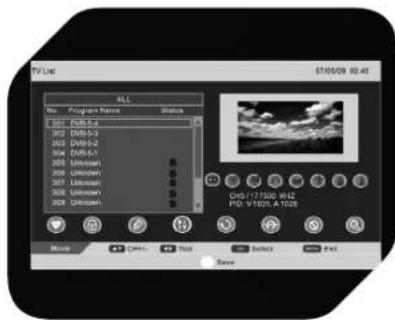
4. Move:
Press ▼ to select the channel you want to move. Then press OK; will appear next to the channel selected. To cancel move function, press OK again. Press ▼ to select a destination, then press Yellow button to save.
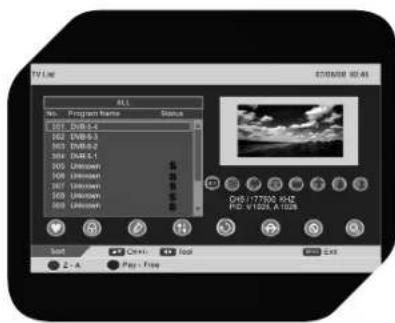
5. Sort:
Press Red button to sort all the programs from A-Z or Z-A; press Green button to sort all the programs from PAY-FREE to FREE-PAY.
6. Skip:
Press ▼ to select the channel you want to skip. Then press OK; will appear next to the channel selected. To cancel the skip function, press OK again. When a channel has been selected to skip, you may still select that channel with the number buttons.
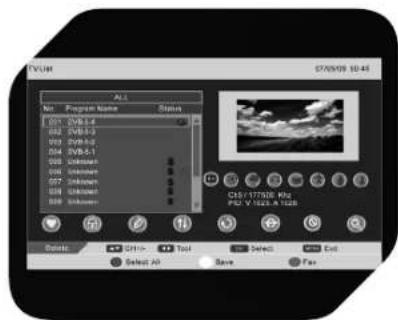
7. Delete:
Press ▼ to select the channel you wish to delete. Then press OK will appear next to the channel selected. To cancel the delete function, press OK again.
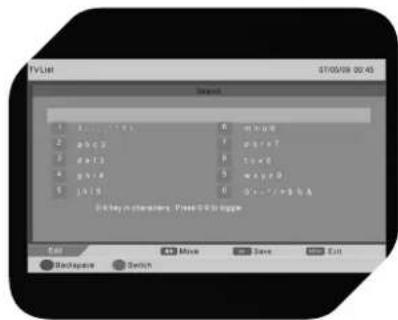
8. Search:
- Press OK to enter the search menu.
- Press number buttons to select the corresponding characters.
NOTE:
PICTURE, SOUND, SETTING menu and descriptions are the same as those • for ATV mode.
TT LANGUAGE and BLUE SCREEN are invalid in FUNCTION menu and they will be displayed in grey. For ASPECT, only FULL and AUTO may be adjusted. Other settings are the same as those for ATV mode.
input source
VGa
picture Mode: In the PICTURE menu, select PICTURE MODE, CONTRAST, BRIGHTNESS or COLOR TEMP., the operation and adjustment of which are the same as for TV modes.
pc setup
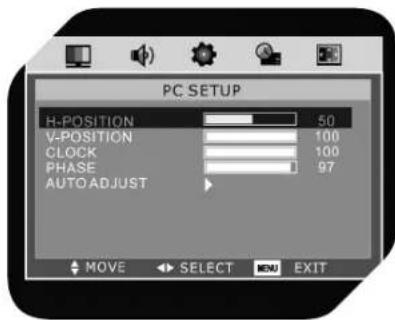
Connect PC to the unit and select VGA input source.
h-position: Adjust horizontal picture position.
V-position: Adjust vertical picture position.
clock: Adjust the clock of the picture.
phase: Adjust the phase of picture.
auto adjust: Press ▶ to adjust the above items automatically. Generally the picture's location on the screen, clock and phase will be adjusted according to the signal output from the PC connected. In some special instance, the auto adjust setting may not be effective. You may adjust the position, clock and phase manually.
note:
SOUND, SETTING and FUNCTION menu and settings are the same as for • TV mode.
VGA mode has no CHANNEL menu.
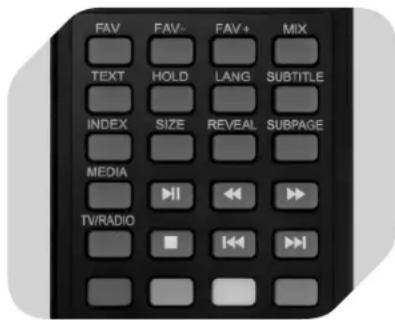
MULTIMEDIA MODE
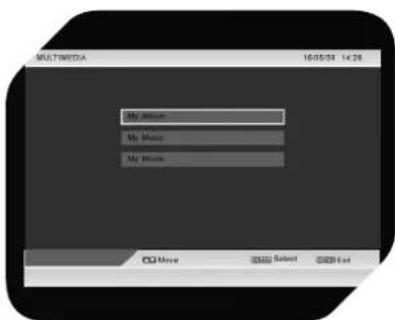
NOTE: Before operating MULTIMEDIA menu, connect USB device or memory card, then press INPUT to set the input source to DTV.
Press MEDIA to open the MULTIMEDIA menu. Press to select the options including My Album, My Music and My Movie, then press OK to enter the submenus.
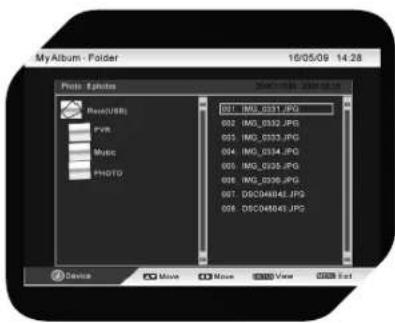
My Album:
-
The unit supports .jpg, .bmp and .gif formats.
-
Press Blue button to enter the picture folder.
- Press ▼to move to select a picture.
- Press OK to view the picture selected.
- Press DISPLAY to display information of external device.
- Press MENU to stop the picture preview.
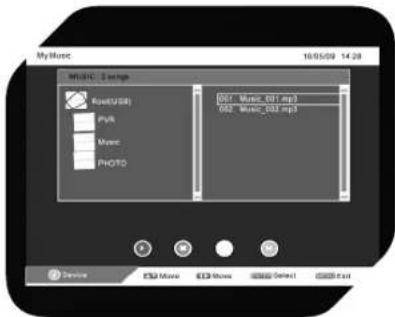
My Music:
- The unit supports .mp3, and .wma formats.
- Press Red button to play or pause a track.
- Press Green button to stop playing tracks.
- Press Yellow button to select palyback mode.
- Press Blue button to fast forward; press Red button to continue.
- Press DISPLAY to display information of external device.
- Press ▼ to select a track.
- Press OK to play the track.
- Press MENU to exit song play.
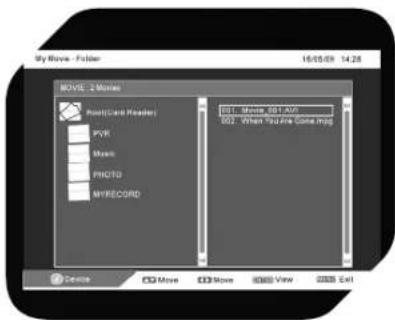
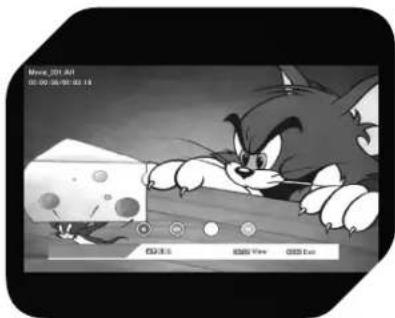
My Movie:
- The unit supports .avi, .mpg and .vob, .dat formats.
- Press Red button to pause, press it again to continue playback
- Press Green button to one-step-play, press it again for playback in slow motion.
- Press Yellow button to set rewind speed.
- Press Blue button to set fast-forward speed.
- Press DISPLAY to display the device's information.
- Press ▼ to select a movie.
- Press OK to play the movie.
- Press MENU to stop movie playback.
natural_image
Black-and-white cartoon illustration of a Manjiybug peeking over a cheese chip, with no visible text or symbols.TELETEXT FUNCTION
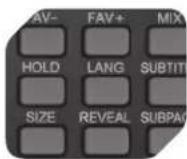
TEXT: Press this button to enter the teletext mode. Press again to exit.
MIX: Press this button to have the image and teletext page displayed simultaneously.
SUBPAGE: If there is a subpage to the current teletext page, the requirements of the subpage code entry will be displayed when pressing this button. Press again to exit.
HOLD: Press this button to stop the counting down of the pages. Press again to continue.
SIZE: Press this button once to enlarge the upper part of the page. Press again to enlarge the bottom part of the page. Press third time to return to normal display of the page.
REVEAL: Press this button to display concealed text. Press again to close the display of concealed text.
INDEX: Press this button to enter the index of all teletext pages.
Number buttons 0, 1-9 on the remote control can be used to open a certain page, ▼ switch to previous or next pages.
Press the RED/GREEN/YELLOW/CYAN buttons to get direct access to colour coded pages.
HOTEL MODE
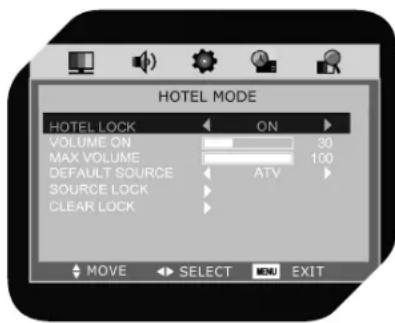
Press MENU+1+2+2+9 to enter the hotel mode menu screen.
HOTEL LOCK: Set this item to ON, then all options below are available.
VOLUME ON: Sets the desired volume when the TV is turned on.
MAX VOLUME: Sets the maximum volume value.
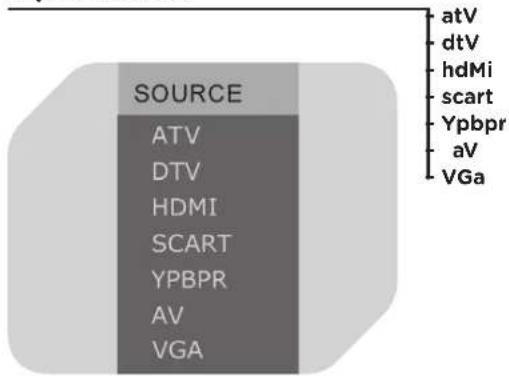
DEFAULT SOURCE: Sets the input source that is activated automatically every time the TV is turned on (ATV, DTV, HDMI, SCART, YPBPR, AV, VGA).
SOURCE LOCK: Select desired source and set to ON to lock.
CLEAR LOCK: All locks are cleared.
MAINTENANCE
Cleaning the LCD panel
The LCD panel should not be touched with sharp objects. If the LCD surface shows dust and fingerprints, wipe them off with a clean soft cloth. Wipe in a straight motion from the center to the frame of the LCD panel. Make sure not to use chemicals such as record cleaning sprays, antistatic sprays or fluids, benzene or thinner to clean the LCD panel.
Cleaning the main unit
Clean the outside of the unit with a clean soft cloth moistened with luke-warm water. Do not use benzene, thinner or alcohol, they may mar the finish of the surface.
WARNING: For your personal safety, be sure to disconnect the AC power supply cord before proceeding with any maintenance or cleaning action.
TROUBLESHOOTING
| SYMPTOM POSSIBLE CAUSE CORRECTIVE ACTION | |||
| No picture and sound Power supply | y cord is not correctlyconected with the main unit. | Connect the power supply cordwith the main unit. | |
| Power supply cord is not plugged intoan AC outlet. | Plug the power supply cord intoan AC outlet. | ||
| The wrong input source is selected. Select the correct input source. | |||
| The input source fails to connect withthe TV. | Check the connections. | ||
| No sound Volume is set to minimum | m. Turn up the volume by pressing | VOL+. | |
| The MUTE button on the remotecontrol is pressed. | Press MUTE on the remotecontrol or + VOL-. | ||
| An incorrect sound system mode isset. | Set a correct sound system fromthe main menu to match your TV. | ||
| Monochrome or no picture at all The colour system setting does notmatch the program. | Make sure the proper coloursystem is set. | ||
| The sound system setting does notmatch the program. | Make sure the proper soundsystem is set. | ||
| Sound or picture interferences Interfering equipment is nearby the TV. Keep any kind of interferingdevices away from the TV. | |||
NOTE: A few bright dots and dark dots may appear on the TV screen, that is normal appearance.
SPECIFICATIONS (subject to change without notice)
DISPLAY FEATURES
Display type: LCD
Screen size: 21.5 inch
Aspect ratio: 16:9
Active area: 476.6 (H) X 268.1 (V)
Panel resolution: 1920 (H) X 1080 (V)
Brightness: 300 cd/m
Contrast ratio: 1000:1
Dot pitch: 0.24825 (H) X 0.24825 (V) mm
Maximum color: 16.7 M
Response time: 5 ms
FEATURES
HD compatible: 480i, 480p, 576i, 576p, 720p, 1080i, 1080p
TV RECEPTION
TV system: PAL/SECAM
Sound system: B/G, I, D/K, L/L'
Antenna impedance: 75 Ohm
TUNER RECEIVING RANGE
ATV: 49MHz - 863MHz
DTV: VHF (174MHz - 230MHz)
UHF (474MHz - 862MHz)
POWER REQUIREMENTS
Power adaptor: 100-240 V\~ / 50-60 Hz
Power consumption: Maximum 52 W
CONNECTIONS
Input
TV tuner (RF 75Ω): 1
Component video
input (Y Pb Pr): 1
Video input (AV): 1
S-Video input
(S-VIDEO): 1
SCART: 1
PC audio input
(PC AUDIO): 1
VGA input (VGA): 1
HDMI input (HDMI): 1
USB port: 1
Output
Earphone jack: 1
VGA RESOLUTION SUPPORTED
Resolution: Up to 1920 x 1080
DIMENSIONS (W x H x D)
Unit w/stand &
speakers: 529 × 428 × 200 ~mm
Unit w/o stand: 529 x 398 x 84 mm
WEIGHT (N.W.)
Unit w/stand &
speakers: 4.8 kg
ENVIRONMENT
Operating
temperature: 0^ C - 40^ C
Operating humidity: 20% - 80%
DISPOSAL

Do not dispose of this appliance as municipal waste. Return it to a designated collection point for the recycling of electrical and electronic equipment.
Contact your retailer or local authorities for more information.
INTENDED USE
This appliance is intended for receiving and playing audio, video and television signals. Only use according to these instructions. Improper use is dangerous and will void any warranty claim. Observe the safety instructions.
unidad principal
natural_image
Two grayscale remote control buttons with play controls and a CD, no visible text or symbols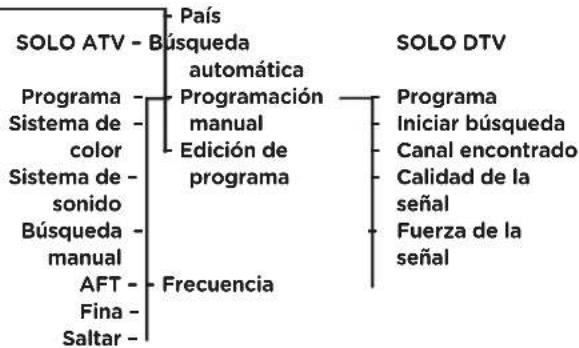
8. Buscar:
natural_image
Black-and-white cartoon illustration of a Tagalog character peeking from behind a computer monitor (no readable text or symbols)DIMENSIONES (AN x AL x P)
natural_image
Close-up of a flat-screen monitor with a 60-degree angle indicator and a remote control (no text or symbols on the device itself)Portée approx. 8 m
natural_image
Two remote control buttons with play and CH indicators (no text or symbols on the buttons themselves)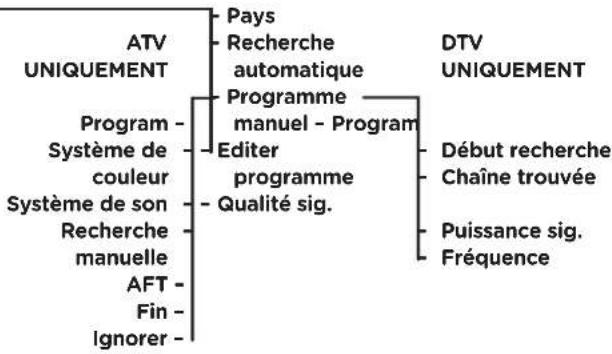
3. Edition :
natural_image
Black-and-white cartoon illustration of a Manjiybug peeking over a mouse, with no visible text or symbols in the main scene.FONCTION TÉLÉTEXTE

Turner TV (RF 75Ω): 1
Entré vidéo com-
DIMENSIONS (L x H x P)
Unité avec pied &
Do not dispose of this appliance as municipal waste.
Return it to a designated collection point for the
recycling of electrical and electronical equipment.
Contact your retailer or local authorities for more information.
INTENDED USE
natural_image
Close-up of a monitor with a 60-degree angle indicator and a remote control (no text or symbols on the device itself)Portata appross. 8 m
natural_image
Close-up of a black remote control interface with a play button and a white LCD screen (no readable text or symbols)
My Album (II mio album):
My Movie (II mio film):
natural_image
Black-and-white cartoon illustration of a Tagalog character peeking from behind a cheese chip, with no visible text or symbols.FUNZIONE TELEVIDEO

DIMENSIONI (L x A x P)
Dispositivo con
appoggio &
natural_image
Close-up of a computer monitor with a 60-degree angle indicator and a remote control (no text or symbols on the device itself)Bereik ongeveer 8 m
eerste Gebruik
natural_image
Two grayscale UI elements: a left-side switch labeled 'CH' and a right-side remote control with 'NICAM' and 'PLAY' buttons (no readable text or symbols beyond labels)Een kanaal kiezen:
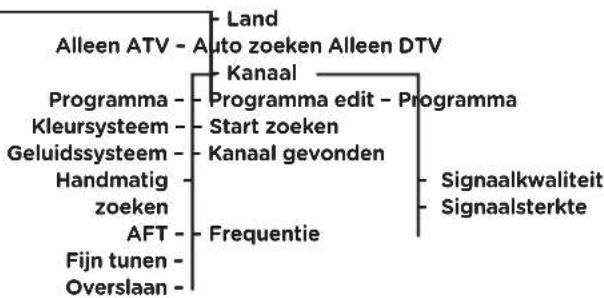
flowchart
graph TD
    A["Alleen ATV - Auto zoeken Alleen DTV"] --> B["Programma"]
    A --> C["Kleursysteem"]
    A --> D["Geluidssysteem"]
    A --> E["Handmatig zoeken"]
    A --> F["AFT"]
    A --> G["Fijn tunen"]
    A --> H["Overslaan"]
    B --> I["Programma edit - Programma"]
    C --> J["Start zoeken"]
    C --> K["Kanaal gevonden"]
    D --> L["Frequentie"]
    E --> M["Signaalkwaliteit"]
    E --> N["Signaalsterkte"]
ATV
PROGRAMMA EDIT:
8. Zoeken:
natural_image
Black-and-white cartoon illustration of a character peeking from behind a cheese chip, with no visible text or symbols.TELETEKSTFUNCTIE

Tv-tuner (RF 75Ω): 1
Component
video-ingang
(Y Pb Pr): 1
Video-ingang (AV): 1
S-Video-ingang
(S-VIDEO): 1
SCART: 1
PC-audio-ingang
(PC AUDIO): 1
VGA-ingang (VGA): 1
HDMI-ingang (HDMI): 1
USB-poort: 1