Smart Control Multi 310 - Baby monitors NUK - Free user manual and instructions
Find the device manual for free Smart Control Multi 310 NUK in PDF.
| Technical Features | 3.5-inch color screen, range up to 300 meters, infrared night vision, wireless connectivity (DECT). |
|---|---|
| Usage | Allows remote monitoring of the baby, with two-way communication and temperature alerts. |
| Maintenance and Repair | Clean the device with a soft cloth, avoid exposure to moisture, regularly check for firmware updates. |
| Security | DECT technology for a secure connection, free from interference, and protection against unauthorized access. |
| General Information | Compatible with other NUK devices, 2-year warranty, user instructions included in the packaging. |
Frequently Asked Questions - Smart Control Multi 310 NUK
User questions about Smart Control Multi 310 NUK
0 question about this device. Answer the ones you know or ask your own.
Ask a new question about this device
Download the instructions for your Baby monitors in PDF format for free! Find your manual Smart Control Multi 310 - NUK and take your electronic device back in hand. On this page are published all the documents necessary for the use of your device. Smart Control Multi 310 by NUK.
USER MANUAL Smart Control Multi 310 NUK
Please see inside cover fold-out page
Francais 38
1.Description of device 21
1.1 Proper use 21
1.2 Scope of supply 22
2. Safety information. 22
3. Constituent parts of the baby monitor 23
4.Description of function 24
5. Starting up the baby monitor - default 25
5.1 Preparing the smartphone/tablet 25
5.2 Connecting the camera. 25
5.3 Connecting smartphone/tablet and camera 25
5.4 Connecting the baby monitor to your WLAN router 26
5.5 Making the connection wirelessly 26
6. Starting up the baby monitor - special cases 27
6.1 Registering the baby monitor to the smartphone manually 27
6.2 Registering another camera to the smartphone 28
6.3 Registering the baby monitor to other smartphones 28
7. Using the app 30
7.1 Start, basic functions 30
7.2 More settings 32
8. Cleaning and maintaining the device 35
9. Faults and how to remedy them 35
10. Technical data 35
11. Disposal 36
12.Warranty. 36
13.Declaration of conformity. 37
14. Glossary 37
Notes:
The screenshots used in these instructions may deviate slightly from the actual design if you are using a newer operating system. The functions shown are the same, however.
Any reference to a "smartphone" in these operating instructions also includes tablet computers.
1. Description of device
1.1 Proper use
You can use this NUK Smart Control Multi 310 audio and video baby monitor to monitor your baby or toddlers in the nursery. A smartphone or tablet can be used to receive camera and microphone signals.
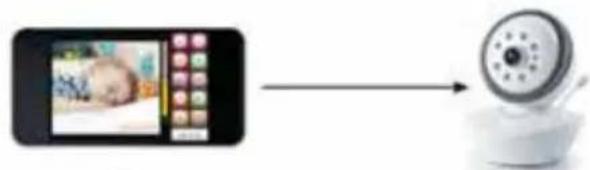
Signals can be transmitted from the camera to the smartphone either directly, via WLAN (Wi-Fi), via the internet or by wireless network.
This device is intended only for non-commercial use in private households. It is not suitable for use outdoors or in damp rooms.
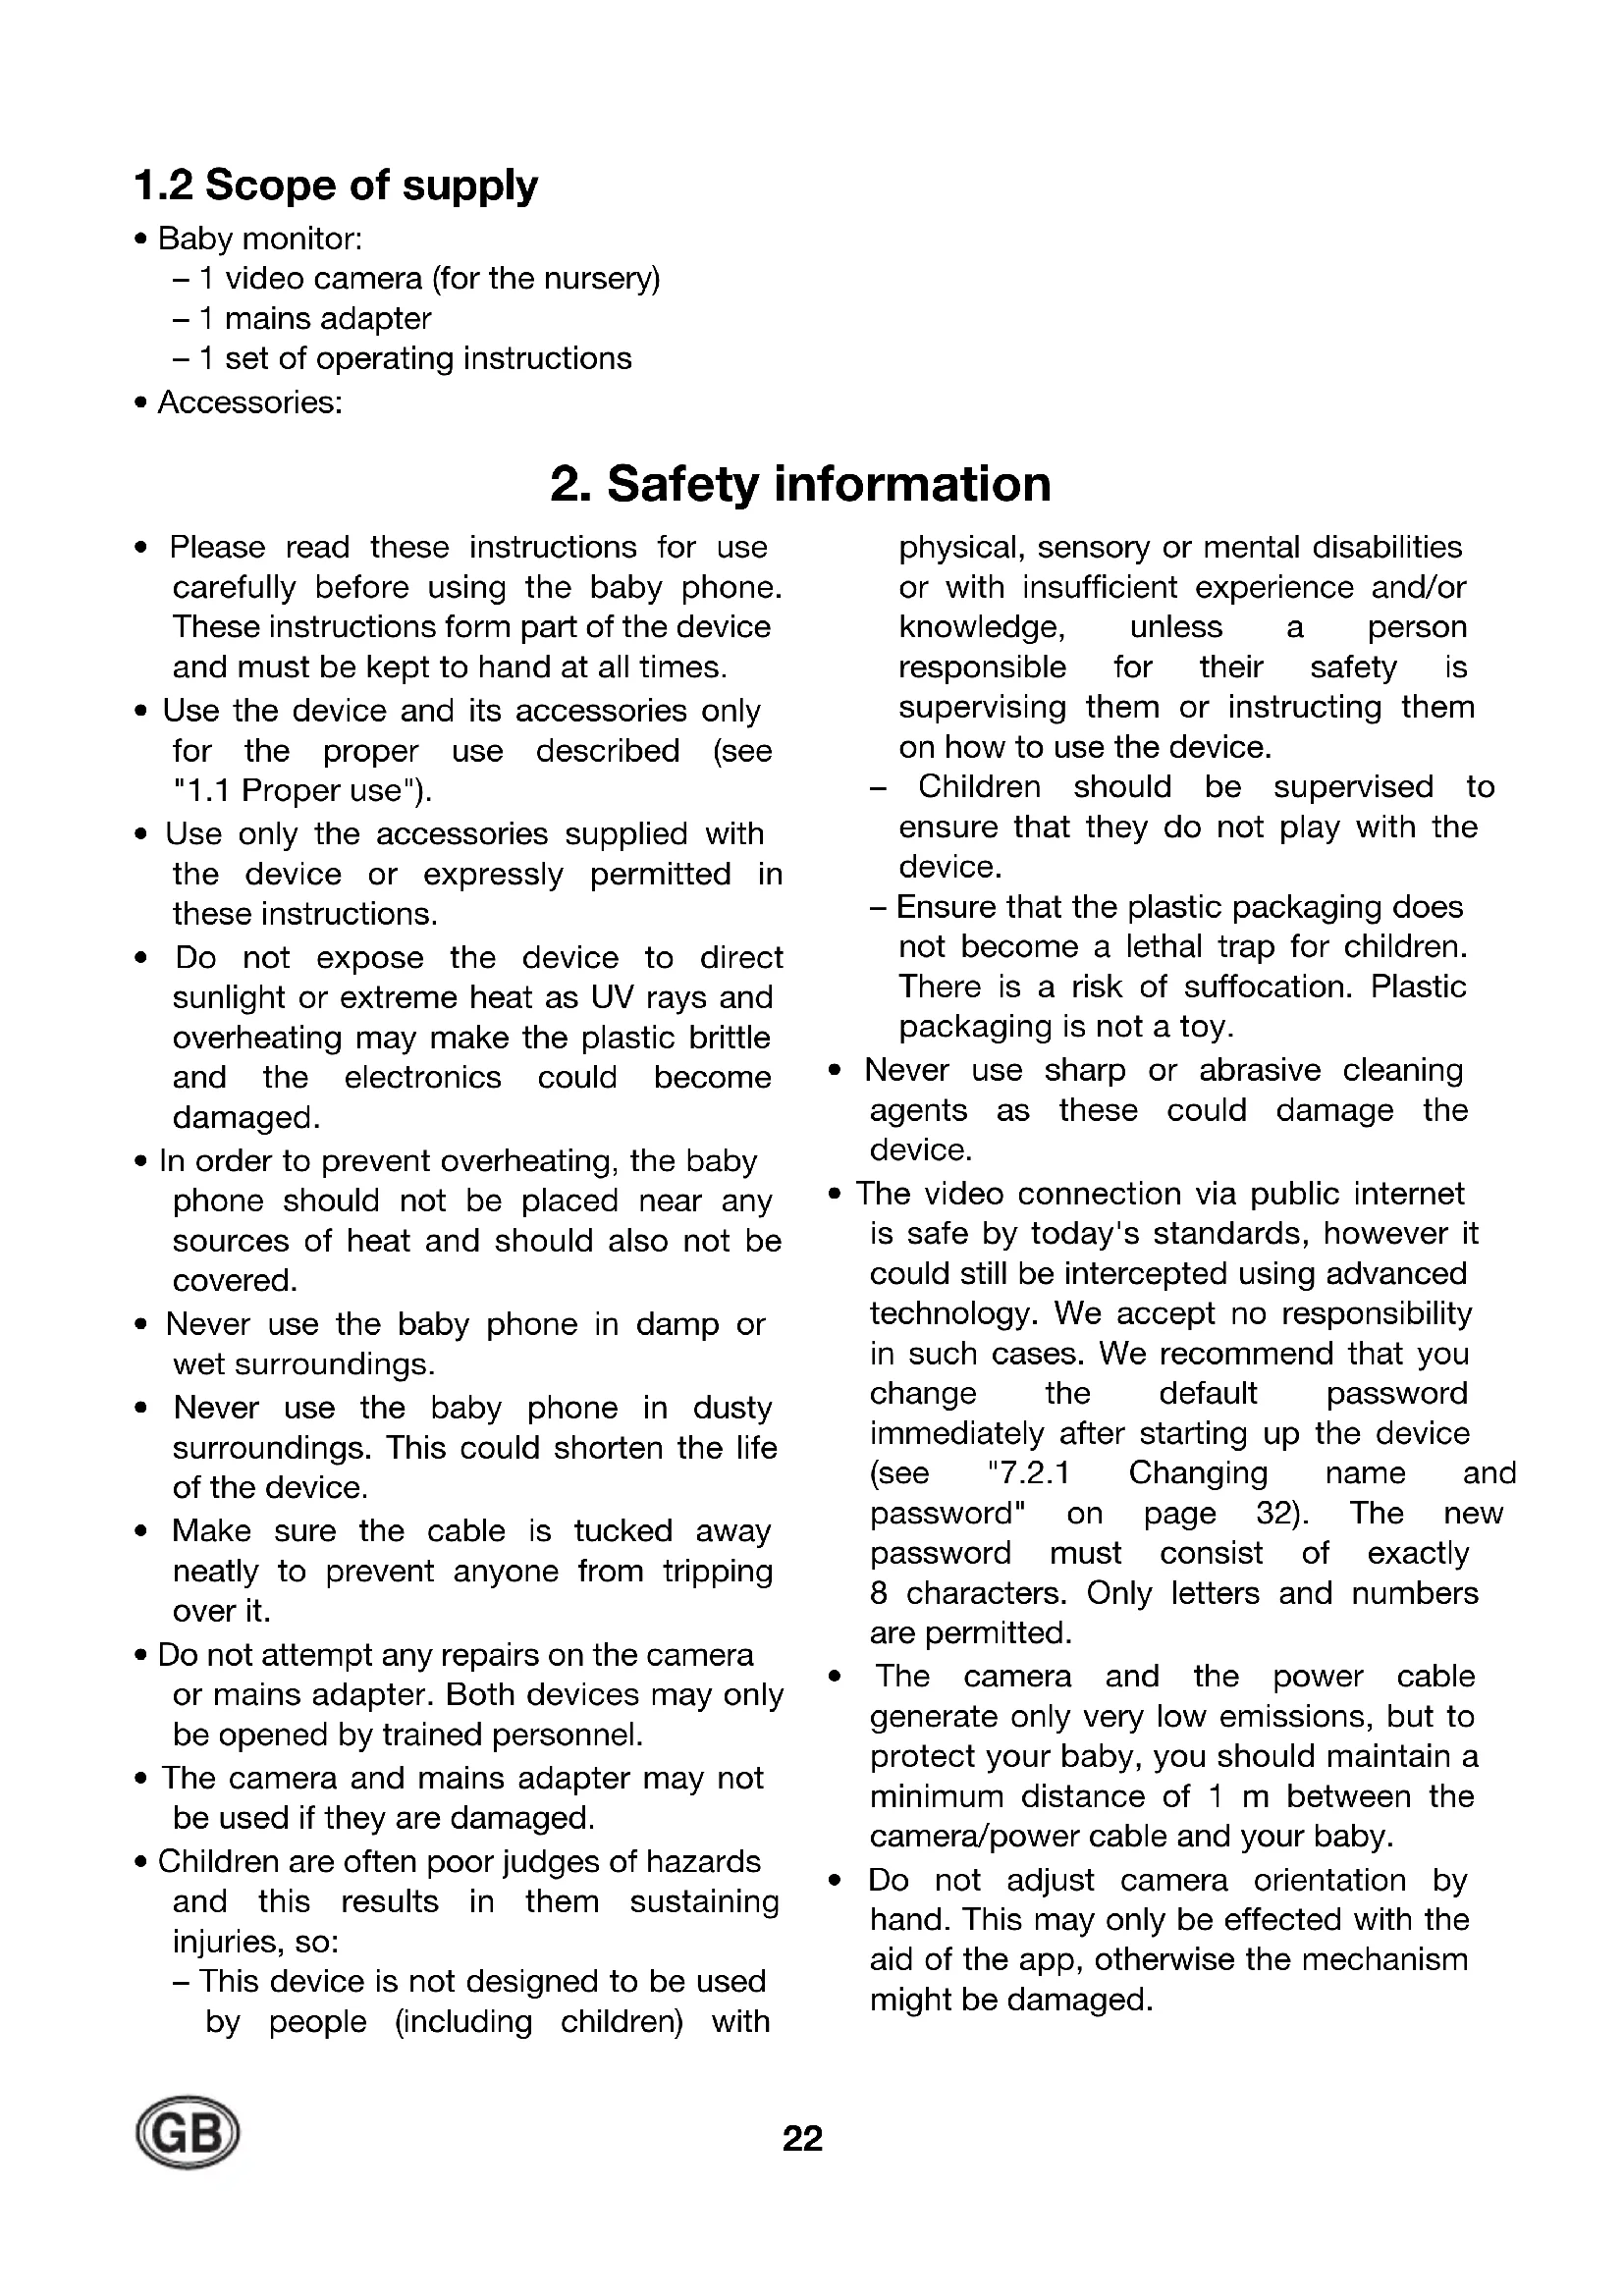
1.2 Scope of supply
Baby monitor:
- 1 video camera (for the nursery)
- 1 mains adapter
-
1 set of operating instructions
-
Accessories:
2. Safety information
-
Please read these instructions for use carefully before using the baby phone. These instructions form part of the device and must be kept to hand at all times.
-
Use the device and its accessories only for the proper use described (see "1.1 Proper use").
-
Use only the accessories supplied with the device or expressly permitted in these instructions.
-
Do not expose the device to direct sunlight or extreme heat as UV rays and overheating may make the plastic brittle and the electronics could become damaged.
-
In order to prevent overheating, the baby phone should not be placed near any sources of heat and should also not be covered.
-
Never use the baby phone in damp or wet surroundings.
-
Never use the baby phone in dusty surroundings. This could shorten the life of the device.
-
Make sure the cable is tucked away neatly to prevent anyone from tripping over it.
-
Do not attempt any repairs on the camera or mains adapter. Both devices may only be opened by trained personnel.
-
The camera and mains adapter may not be used if they are damaged.
Children are often poor judges of hazards and this results in them sustaining injuries, so:
- This device is not designed to be used by people (including children) with
physical, sensory or mental disabilities or with insufficient experience and/or knowledge, unless a person responsible for their safety is supervising them or instructing them on how to use the device.
- Children should be supervised to ensure that they do not play with the device.
-
Ensure that the plastic packaging does not become a lethal trap for children. There is a risk of suffocation. Plastic packaging is not a toy.
-
Never use sharp or abrasive cleaning agents as these could damage the device.
- The video connection via public internet is safe by today's standards, however it could still be intercepted using advanced technology. We accept no responsibility in such cases. We recommend that you change the default password immediately after starting up the device (see "7.2.1 Changing name and password" on page 32). The new password must consist of exactly 8 characters. Only letters and numbers are permitted.
- The camera and the power cable generate only very low emissions, but to protect your baby, you should maintain a minimum distance of 1m between the camera/power cable and your baby.
- Do not adjust camera orientation by hand. This may only be effected with the aid of the app, otherwise the mechanism might be damaged.
3. Constituent parts of the baby monitor
1 Microphone
2 Mobile camera head
3 Lens
4Infra-red LEDs
- Illuminate the field of vision with invisible infra-red light when it is dark.
5 Sensor for infra-red LED
6 Temperature sensor
- Measures current room temperature
7 LED display / night light
8 On/off sensor button
- Tap this button to switch on the camera:

Display LED 7 lights up 3x.
- To switch off the camera, depress the on/off sensor button for at least 3 seconds.
Display LED 7 lights up 3x and the camera is switched off.
9 Night light button
- S w i t c h o n
- Select colours
- Select rhythm
-Switchoff
Tap button repeatedly for the different colours and rhythms and for switching on and off.
10 Music button
- Start and stop lullabies. This music cannot be changed.

11 Reduce volume
- Reduces the volume of the baby monitor and of the smartphone.

12 Increase volume
- Increases the volume of the baby monitor and of the smartphone.

13 Indicator LED
- Continuously red = camera initializing
- Flashing green = camera operating as Wi-Fi access point
- Continuously green = camera is connected to WLAN router
14 Hanger for wall-mounting
15 Link/pairing selector switch
16 Reset button
17 Connecting socket for mains adapter
4. Description of function

The camera is set up in the room that will be monitored. It can transmit images and sounds.
The camera comes equipped with infrared lights which light up objects within two metres of the camera when the room is dark.
The camera is connected to the power supply network using the network cable supplied.
Within your home, the camera can transmit the signals straight to a smartphone as long as the installation is only performed in accordance with "5.3 Connecting smartphone/tablet and camera" on page 25.
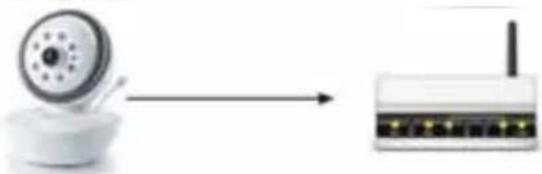
In the event of complete installation in accordance with "5.3 Connecting
smartphone/tablet and camera" on page 25 and "5.4 Connecting the baby monitor to your WLAN router" on page 26, the camera is connected to your WLAN router.
Your WLAN (Wi-Fi) router transmits signals directly to your smartphone (tablet) once you are located within transmission range.
If you are located outside the transmission range of your local WiFi router, the signals can also be transmitted via mobile radio (G3/UMTS) or an external WiFi access point on your smartphone.
Video and audio quality depends on the quality of the mobile connection. When smart device is connected to public Wi-Fi, the connection also is dependant of the Wi-Fi security level.
5. Starting up the baby monitor - default
We have tried to make it as easy as possible to set up the baby monitor. In this s
you will find a description of the default installation as it works with most smartphones, tablets, operating systems and WLAN (Wi-Fi) routers.
However, as there are a great many different devices on the market, it is possible that the default installation may not always work as described in this section.
In these cases there are special solutions which are described in "6. Starting up the baby monitor - special cases" on page 27.
5.1 Preparing the smartphone/tablet
- Download the free "NUK Multi" app from "Google PlayStore".
- Install the app on your smartphone or tablet.
5.2 Connecting the camera
- Plug the connector on the end of the cable for the mains adapter supplied into connecting socket 17.
- Plug the mains adapter into a socket which complies with the technical data (see "10. Technical data" on page 35).
5.3 Connecting smartphone/ tablet and camera
- Slide Link/pairing selector switch 15 to Pairing.
-
Tap on/off sensor button 8 to switch on the camera.
-
Display LED/night light 7 lights up 3x.
-
IndicatiorLED13httana is initializing. It takes a few minutes for the camera to be set completely.
-
As soon as indicator LED 13 is flashing action, green, the camera is ready.
-
The camera now works like a WLAN access point and is directly accessible via your tablet or smartphone.
-
On your tablet or smartphone, select the "NUK Smart Control Multi 310" camera as the WLAN (Wi-Fi) router.
-
You can change this in the settings menu for WLAN connections.
Note: That when user walks out of range with smartphone, the phone will autoswitch to 3G and the connection to the camera will be lost (see "5.5 Making the connection wirelessly" on page 26).
-
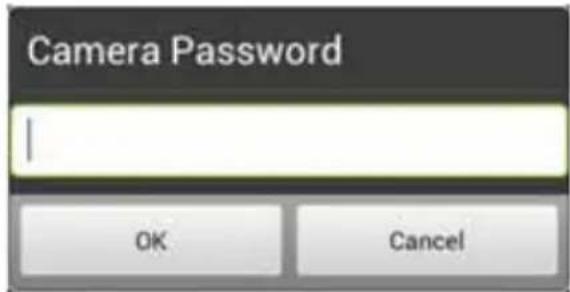
Enter "12345678" as the password.
-
Tap OK.
-
The IP number of the camera is automatically transmitted to the smartphone.
-
The successful connection is displayed on your smartphone.
-
When you are connected to the camera, start the "NUK Multi" app.
-
You will now get an image of the camera on your display.
- Continue with "5.4 Connecting the baby monitor to your WLAN router" on page 26.
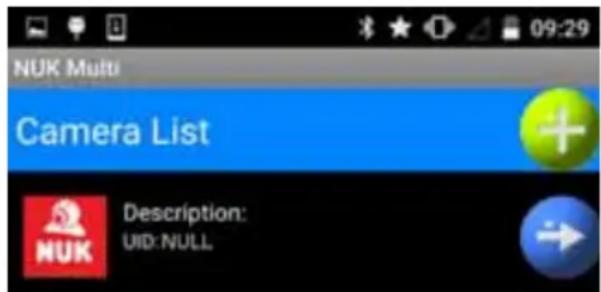
-Special case: a list of cameras and "zero" next to UID appear instead of the camera image.
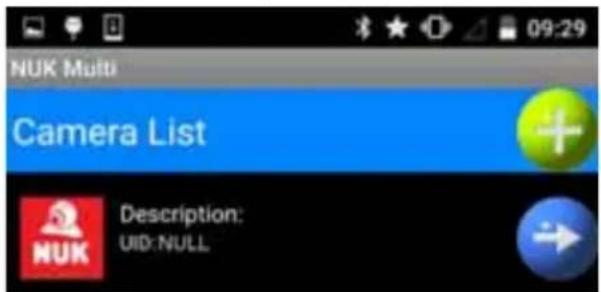
This means that transfer of camera data to the smartphone is not working. You then need to register the camera to the smartphone manually. Proceed as described in "6.1.1 Registering the camera to the smartphone using a QR code" on page 27.
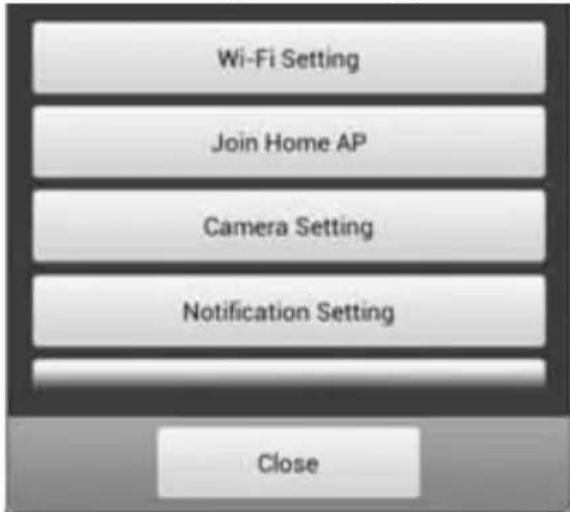
5.4 Connecting the baby monitor to your WLAN router
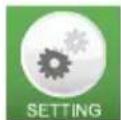
- Tap the green SETTING button.
- Enter the password "12345678" for the camera.
- Confirm entry of the password with OK.
- A pop-up menu opens.
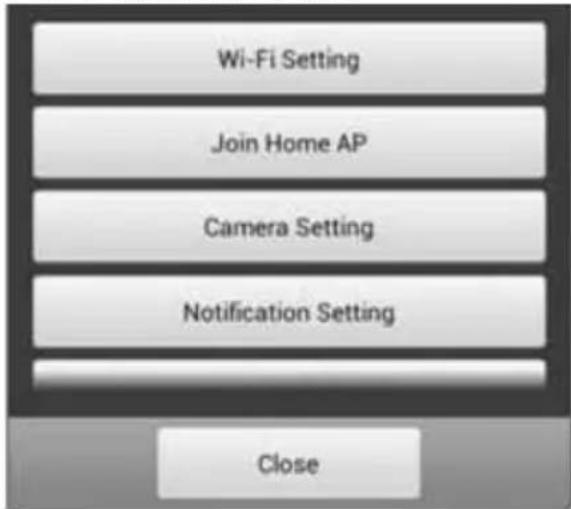
- Select Join Home AP.
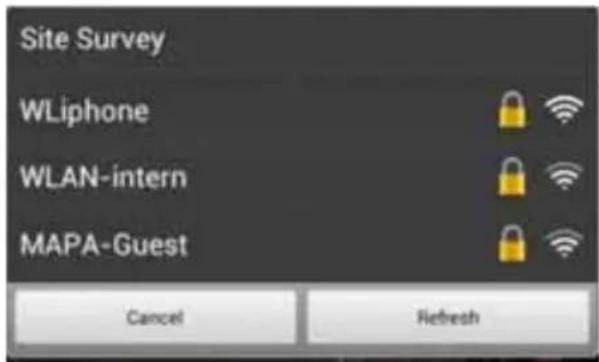
The WLAN (Wi-Fi) networks in your vicinity now appear.
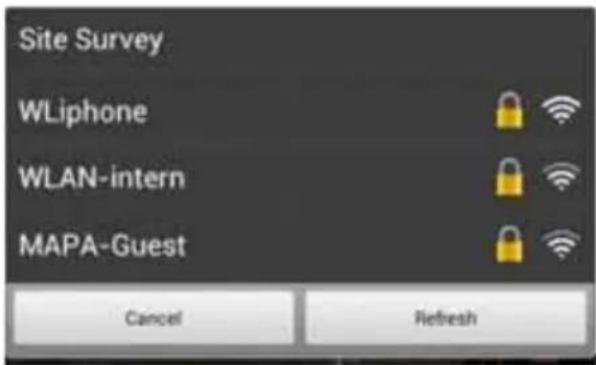
- Select your router.
A pop-up menu appears.
- Enter the password for your WLAN (WiFi) router. The password is generally on a label on the router.
Note: the baby monitor/WLAN router connection generally only works if the password for the router consists exclusively of letters and numbers. If the router password contains other symbols, such as "#%^&" for example, you need to change it to a combination of letters and numbers beforehand.
- Tap Connect.
The message that the camera has now been registered to your router appears.
-
Slide Link/pairing selector switch 15 to LINK.
-
Indicator LED 13 lights red. The camera is initialized. It takes a few minutes for the camera to be set completely.
-
Wait until indicator LED 13 lights green.
10.Tap OK.
5.5 Making the connection wirelessly
Once the camera is correctly registered to the smartphone, the "NUK Multi" app will automatically search for the most convenient connection.
If the smartphone is located within range of your WLAN (Wi-Fi) router to which it has
been registered, this connection will be selected.
If you are not within range of your WLAN (Wi-Fi) router and are registered to a WLAN (Wi-Fi) access point, this connection will be selected.
If no Wi-Fi network is available, the app will use the wireless network to connect to the camera. Your smartphone must be able to connect to the wireless network quickly enough for this to be possible (3G/UMTS required as a minimum). Please note here
that transmission quality may be restricted and you may incur costs from your provider if you do not have a sufficient flat rate.
Note: as the data rate which can be transmitted over an internet connection is limited, you should reduce image data to the smallest possible format (see "7.2.3 Camera settings" on page 33). If the bandwidth of the wireless network is inadequate, it is possible that only sound and not video will be transmitted.
6. Starting up the baby monitor - special cases
6.1 Registering the baby monitor to the smartphone manually
There are 2 instances in which you will have to register the baby monitor to the smartphone manually.
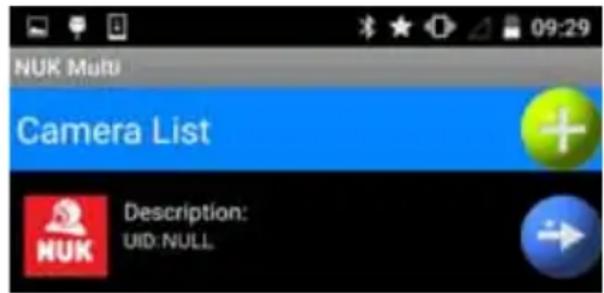
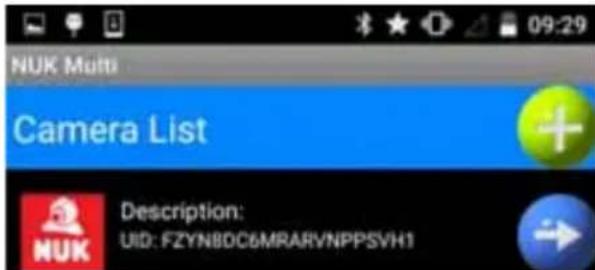
- When registering the first baby monitor, the camera data was not transmitted to the smartphone automatically. This may happen with some routers or smartphones. You will be able to tell this has happened because no UID will be entered for the camera:
In this case, proceed as described in "6.1.1 Registering the camera to the smartphone using a QR code" on page 27.
- You want to register a second baby monitor to your router or smartphone. This case is described in "6.2 Registering another camera to the smartphone" on page 28.
6.1.1 Registering the camera to the smartphone using a QR code
- If no UID is entered for the camera,
tap the button for camera data.

The input menu appears:
- Select "Scan QR code".
The QR code reader appears.
-
Hold the camera of your smartphone up against the QR code on the bottom of the baby monitor:
-
the QR code should be well-lit;
-
the focussing beam of the smartphone should hit the bottom of the baby monitor, not the area next to it. This is required for the smartphone to be able to focus the image.
If your smartphone was able to read the QR code, the camera data is now visible at the top of the screen.
In this case, proceed with the default installation in "5.4 Connecting the baby monitor to your WLAN router" on page 26.
If your smartphone was not able to read the QR code, you will have to enter the camera data by hand (see "6.1.2 Inputting camera data manually" on page 28).
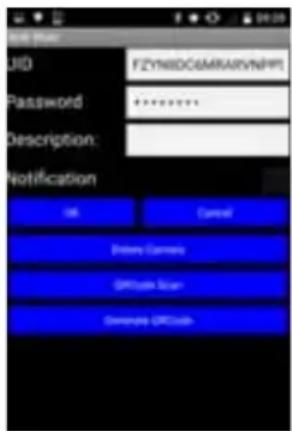
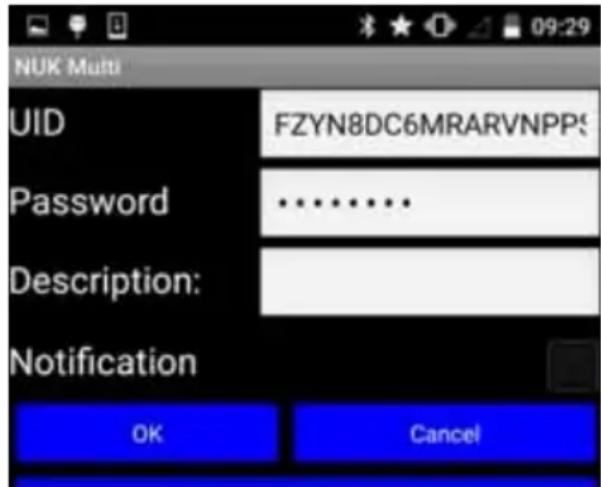
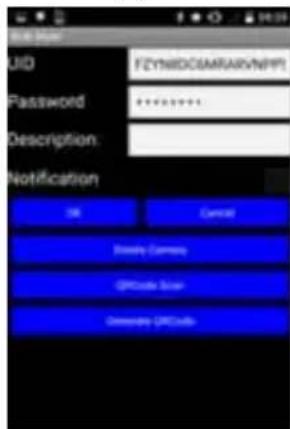
6.1.2 Inputting camera data manually
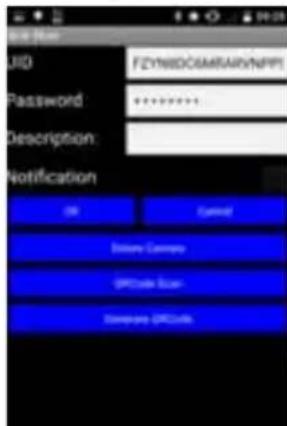
Tap on the corresponding input field to enter camera data manually.

UID: Unique IDentification Code. This code ensures that the camera is easily accessible from outside.
You will find the UID for the camera you want to register on the rating plate underneath of the baby monitor.
Password: the default password is "12345678". Change the password once the camera is registered. To prevent misuse, the password should be changed.
Description: this is the name of the camera. If an alarm message comes in on your smartphone, this is the name which will be displayed. If you are making use of several cameras, it is better to give each camera its own name.
Message: this is where you set whether the camera is to send messages in the event of an alarm. Messages can be sent if a certain noise level is exceeded or if the ambient temperature is outside a set value (see "7.2.4 Adjusting the resolution of a message" on page 33).
Now continue with the default installation (see "5. Starting up the baby monitor - default" on page 25).
6.2 Registering another camera to the smartphone
Note: up to 3 cameras can be registered to one smartphone.
- To register a new camera, tap the button for new cameras.

- Continue to enter the data with "6.1.1 Registering the camera to the smartphone using a QR code" on page 27.
6.3 Registering the baby monitor to other smartphones
It is not only possible to register two bar monitors to one smartphone. It is also possible to register an existing camera to several smartphones, e.g. the mother's and the father's.
-
Download the free "NUK Multi" app from "Google PlayStore" onto the second smartphone or tablet.
-
Install the app on the second smartphone or tablet.
-
To start the "NUK Multi" app, tap the corresponding symbol on the second smartphone.

A menu appears:
- Tap the button to add a new camera.

The input menu appears.
- Now also start the app on the first smartphone, the one to which the camera is already registered.

A menu appears.
- Tap the button for camera data.

The input menu appears:
- Tap "Generate QR code".
A QR code with the camera data will now be generated. This code is displayed at the bottom of the screen. The code generated in this way is identical to the QR code on the bottom of the baby monitor.
Note: you may need to scroll down to see the QR code.
-
On the second smartphone on which you can still see the input menu, now tap the menu item "Scan QR code".
-
Hold the camera of the second smartphone up against the QR code displayed in the first smartphone.
The QR code is now scanned in.
- As soon as the second smartphone detects the QR code on the first smartphone, tap "OK".
The camera is now also registered to the second smartphone.
7. Using the app
7.1 Start, basic functions
- To start the "NUK Multi" app, tap the corresponding symbol on your smartphone.

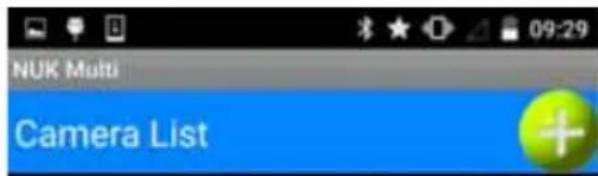
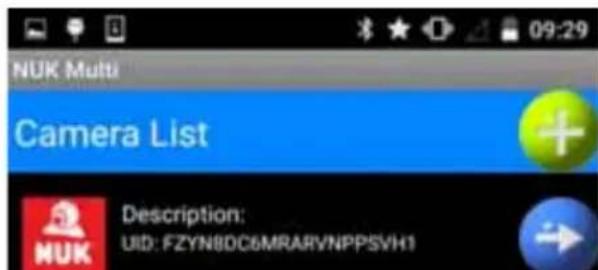
- A list of registered cameras will appear.
Note: depending on configuration, the list of cameras may be skipped and the start screen will appear immediately.
- Select the camera by tapping on the name.
The start screen appears.
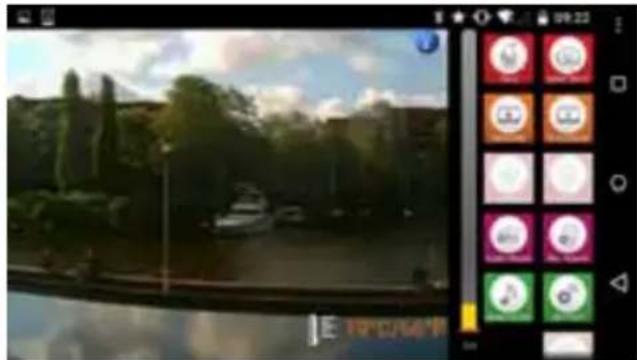
Buttons for the basic functions will appear next to the image of the camera.
- You can tell whether a function is active by the fact that the corresponding button is shown darker.

- If the button looks lighter, the corresponding function is not active.

7.1.1 Talking to your child
- tap the TALK button to talk via the camera.

- The icon switches:

-
This function is only possible with an internal WLAN (Wi-Fi) connection. The data rate is not adequate with an internet connection, so the icon does not appear in the menu.
-
If you have muted the baby monitor, this is cancelled for the duration of this function so that you can hear any responses from your child.
-
Speak into the smartphone microphone.
-
Your voice can now be heard in the nursery.
-
You should have set the volume correctly beforehand (see "7.1.6 Adjusting volume" on page 31).
-
Switch the Talk function back off by tapping the TALK button again.
The icon switches back again.


7.1.2 Taking a photo
Tap the SNAP SHOT button to take a photo of the image currently being displayed.

The photo is stored in the internal memory of the smartphone in the form "xxx.jpg".
You can view saved pictures using e.g. "Gallery" or "Photo Album" functions of the smartphone.
7.1.3 Recording video
- Tap the RECORD button to record a video of the image currently being displayed.

- To stop a video recording, tap the RECORD button again.

7.1.4 Replaying video
Tap the PLAY BACK button to play back a video recording. The available videos will be shown in a list. Select the desired video from the list.

7.1.5 Switching off picture or sound
Tap the VIDEO button to switch the image from the baby monitor on and off. All the other functions remain active.

Tap the AUDIO button to switch the sound from the baby monitor on and off. All the other functions remain active.

7.1.6 Adjusting volume
Tap the Audio Volume button to adjust the volume of the baby monitor.

- A menu appears in which you can adjust volume by means of a slide controller.
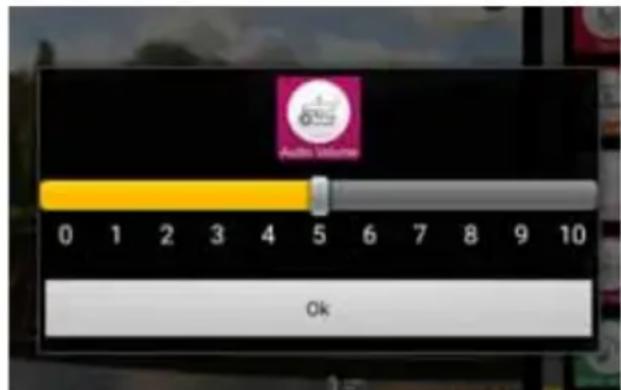
- Confirm the entry with OK.
Note: the microphone sensitivity set on your smartphone will likewise have an impact on the volume of the baby monitor (see "7.1.7 Adjusting microphone sensitivity" on page 31).
7.1.7 Adjusting microphone sensitivity
Tap the Mic. Volume button to adjust the sensitivity of the baby monitor microphone.

Note: this setting also affects the resolution of a message. If you reduce sensitivity here, you need to increase noise detection (see "7.2.4 Adjusting the resolution of a message" on page 33) in order to receive a message in the event of the same noise level in the nursery.
- A menu appears in which you can adjust sensitivity by means of the slide controller.
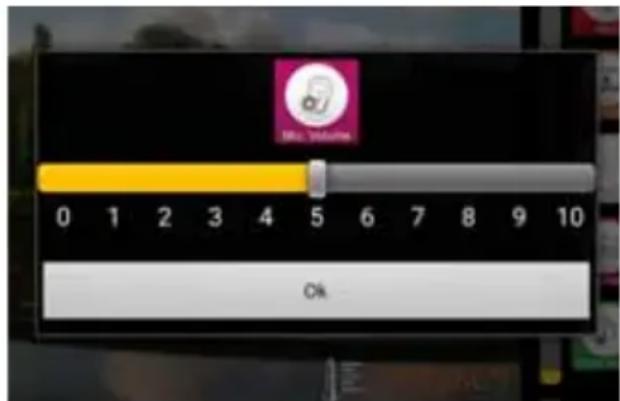
- Confirm the entry with OK.
7.1.8 Playing music via the baby monitor
- Tap the SEND MUSIC button to play music via the loudspeaker of the baby monitor.

- A list of the tracks stored on your smartphone appears. Select one of these tracks.
- If you have a large number of tracks stored, it may take some time for the app to scan the relevant list, so wait until the list appears.
- This function is only possible with an internal WLAN (Wi-Fi) connection. The data rate is not adequate with an internet connection, so the icon does not appear in the menu.
The music is played at the volume you have previously set (see "7.1.6 Adjusting volume" on page 31).
- To stop playback or to select a different track, tap the SEND MUSIC button again.

The list of MP3 files stored on your smartphone will be loaded again.
- Select Stop MP3 file to stop playback.
7.1.9 Adjusting camera orientation
Tap the button for adjusting the orientation of the camera:

- Four arrow buttons appear in the image sent by the baby monitor which you can use to control the orientation of the camera.
7.1.10 Use in the dark
The baby monitor has a built-in light sensor. As soon as it gets too dark for the camera in the nursery, the infra-red LEDs automatically switch on to illuminate an area of about 2 metres around the camera.
The image is then black and white, not colour any more.
During the transitional phase, when it is just too dark for the normal camera and the infra-red LEDs 4 are coming on, the image from the baby monitor may flicker a bit. As soon as it gets a bit darker, the flickering will stop by itself.
7.2 More settings
Note: in the case of a connection via the internet (wireless), only the "Set message" menu item is available.
- To open the menu for more settings, tap the SETTING button.
The input field for the baby monitor password appears.
-
Enter the password (default 12345678) and confirm with OK.
-
The "More settings" menu appears.
7.2.1 Changing name and password
The "Wi-Fi Setting" menu is not available via the internet.
Here you can change the name and password of the baby monitor.
If you use several baby monitors, each of them needs to have a different name. The 4 default is "NUK Smart Control Multi 310".
Following installation of the baby monitor, you should change the password immediately in order to prevent unauthorized access to the baby monitor.
- To change the name of the baby monitor, tap on the existing name.
- Enter the new name and tap OK to confirm.
Note: the new password must consist of exactly 8 characters. Only letters and numbers are permitted.
- To change the password, enter the password twice and confirm the entry with OK.
7.2.2 Connecting the baby monitor to a WLAN router (Wi-Fi access point)
This menu item is not available via the internet.
The description can be found in "5.4 Connecting the baby monitor to your WLAN router" on page 26.
7.2.3 Camera settings
This menu item is not available via the internet.
In this menu, you can adjust frame rate and resolution.
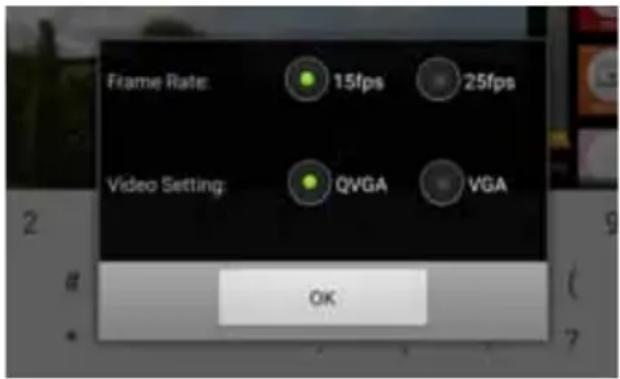
-
Frame rate can be set to 15fps (15 frames per second) or 25fps (25 frames per second).
-
25fps gives a smooth image, but has a greater bandwidth.
-
Resolution can be set as QVGA (320 x 240) or VGA (640 x 480).
VGA gives an image with more pixels, but requires a higher data transmission rate.
- Select the desired settings.
- Confirm the settings with OK.
7.2.4 Adjusting the resolution of a message
This menu item enables you to set when a message is to be sent to your smartphone.
A message can be triggered when the set temperature range is left or if noise in the nursery exceeds a certain volume.
A condition for a sent message is that this function is activated (see "6.1.2 Inputting camera data manually" on page 28).
"Trigger Duration" means how long an alarm has to be present in order to trigger a message. If the alarm is shorter, e.g. in the case of a very short sound, no message is triggered.
- To set the temperature range, select "Temperature".
A menu opens:
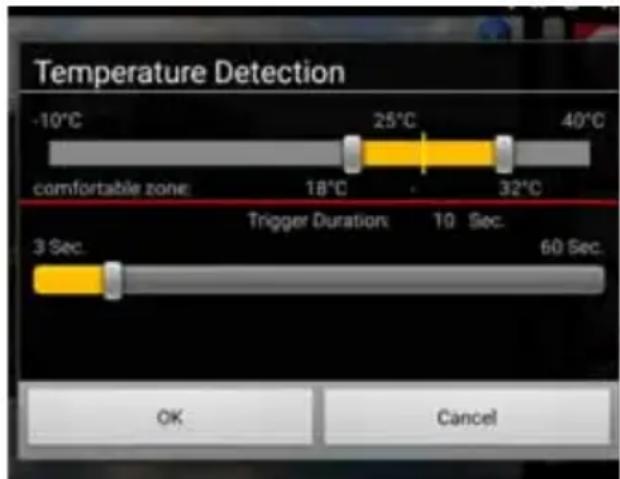
- Select the "permitted" temperature range using the slide controllers. This is shown in yellow.
- As soon as the temperature is outside the permitted range, a message is triggered after the set time (see next item).
Room temperature is measured with temperature sensor 6.
- Set "Trigger Duration" using the bottom slide controller.
- Confirm your entries with OK.
- To adjust noise detection, select "Noise sensor".
A menu opens:
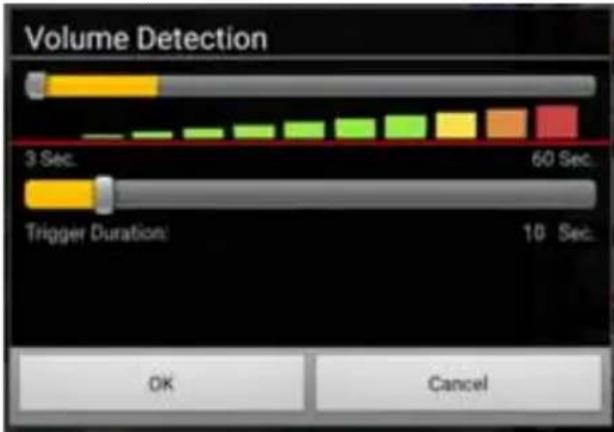
- Use the slide controllers to select the volume of the noises and "Trigger Duration".
- Confirm your entries with OK.
7.2.5 Adjusting the night light
This menu item is not available via the internet.
In this menu item, you can select from a variety of settings.
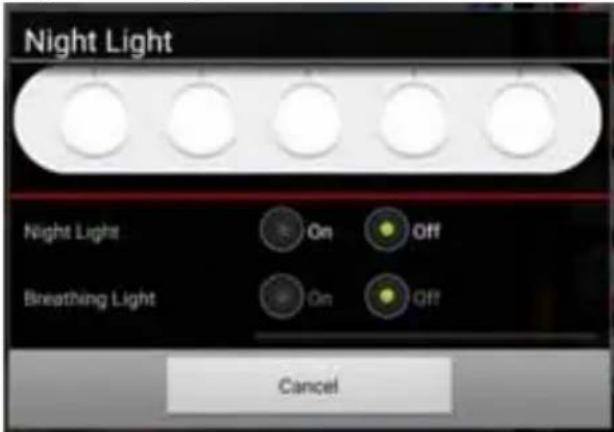
- Switch on the night light by setting the "Night light" switch to ON.
As soon as the night light is switched on, the colours available are displayed. - Select the desired colour using the slide controller.
- Set "Breathing light" to ON if you want to have a flashing blue light.
The switch for "Night light" automatically goes to OFF.
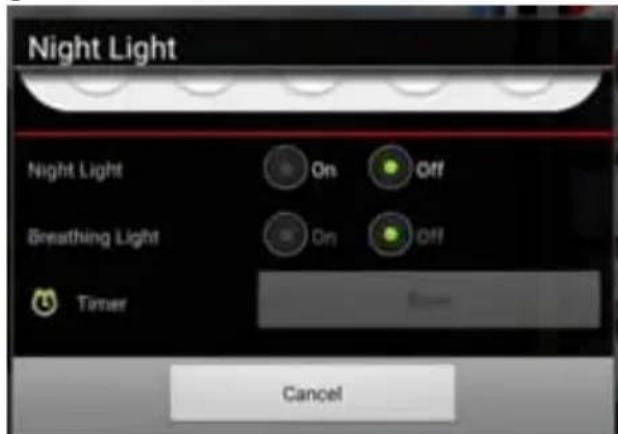
- Under "Timer", select a time between 5 and 30 minutes after which the night light will automatically switch off again.
7.2.6 MP3 upload
This menu item is not available via the internet.
Use this menu item to load an MP3 file (max. 5 MB) onto the baby monitor.
Use the music button 10 then to play the track.

There does not need to be any connection between the baby monitor and the smartphone while this track is playing.
This track is only saved temporarily. As soon as the power supply to the baby monitor is interrupted, the track will be lost and the default song will be played.
7.2.7 Resetting the baby monitor to default settings
In this menu, you can reset all settings to factory settings. The SSID name and the password are reset to factory settings.
It may be that the camera then has to be reregistered.
This menu item is not available if the smartphone and the baby monitor are connected via the internet.
- To reset the camera, keep Reset button 16 depressed for at least 10 seconds.
8. Cleaning and maintaining the device
Waming! To avoid the risk of electric shock, injury or damage:
- Always disconnect the camera network cable from the power socket before cleaning the device.
- Never immerse the individual parts in water.
Caution! Under no circumstances use abrasive, corrosive or scratching cleaning agents, as these could damage the device.
- If necessary, wipe the individual parts with a suitable cleaning cloth.
Note: you can moisten the cleaning cloth slightly (mist it) if the parts are very dirty, but no liquid may get into the device.
- Only use the baby phone again when all the parts have fully dried out.
- Carefully clean the camera lens when necessary with a soft cloth, e.g. tissue for cleaning spectacles.
9. Faults and how to remedy them
| Fault Cause | Remedy | |
| Sound but no picture is transmitted | The bandwidth (data transmission rate) of the connection is inadequate | Set camera settings to the lower values (see "7.2.3 Camera settings" on page 33). |
| No image from the camera is shown, just the list of available cameras | The UID has not been transmitted correctly | Enter camera data using QR code or by hand (see "6.1.2 Inputting camera data manually" on page 28). |
| No alarm message is sent to the smartphone | Messages have been switched off | Switch on messages (see "6.1.2 Inputting camera data manually" on page 28). |
10. Technical data
| Camera | |
| Image sensor CMOS | |
| Video illumination 8 infra-red LEDs Min. 3 LUX light intensity Baby's face clearly visible within 2 metres | |
| Compression H.264 | |
| Resolution 640X480 VGA or Q VGA | |
| White balance Automatic | |
| Audio Two-way talk function via analogue microphone and loudspeaker at 0.5 W, 16 kHz | |
| Temperature sensor | NTC type, 10 kΩ at 25 °C; deviation +/- 2 °C |
| Operating temperature | 0°C to 40°C ambient temperature |
| Storage temperature | -20°C to 70°C ambient temperature |
| Air humidity | 40 to 90% rH (no condensation) |
| Power input | External DC 5.8 V - 1000 mA |
| Mains connection | EU specifications 100 ~ 240 V 50/60 Hz |
| Wireless connection | |
| RF frequency range 2412 MHz | z - 2462 MHz (channel 1~11) |
| Wi-Fi standard 802.11b/g/n | |
| RF initial output 11b: 21 +/- 1 | dBm/11 Mbps;11g: 18 +/- 1 dBm/54 Mbps;11n: 17 +/-1 dBm/HT20 - 11n: 17 +/- 1 dBm/HT40 |
| RF sensitivity 11b: -88 dBm/1 | 1 Mbps;11g: -74 dBm/54 Mbps;11n: -71 dBm/MSC7/HT20 - 11n: -68 dBm/MSC7/HT40 |
| Range in open 80 m | |
| Antenna Dipole | |
| Internet bandwidth QVGA: min. | required 1 Mbps, recommended 2 MbpsVGA: min. required 2 Mbps, recommended 4 Mbps |
| Certificates | |
| EMC / safety CE, R&TTE Directive 1999/5/EC, Low-Voltage Directive, EMC, EMF,ERP, ROHS and WEEE directives | |
| App | |
| Operating systems iOS7.0 and above, Android 4.0 and above | |
11. Disposal
11.1 Equipment

The symbol of the crossed-through wheelie bin means, within the European Union, that the product is subject to a separate waste collection. This applies to the product and all accessories marked with this
symbol. Products labelled as such must not be disposed of with the normal household
waste collections; they must be taken to a recycling bank for electrical and electronic equipment. Recycling helps to reduce the use of raw materials and is eco-friendly.
11.2 Packaging
When you wish to dispose of the packaging, please observe the relevant environmental regulations for your country.
12. Warranty
In addition to the seller's warranty obligations arising from the contract to purchase, we as the manufacturers provide a warranty of 24 months from purchase of the appliance as long as the appliance is used properly and the operating instructions are followed. Evidence of the date of purchase and the type of appliance should be provided by means of a receipt.
The purchaser's statutory rights are unaffected by this manufacturer warranty.
During the warranty period, we undertake to remedy any defects attributable to poor
materials or workmanship. Worn parts are excluded from the warranty.
Minor deviations from specified quality which do not affect the value or usability of the appliance are not covered by the warranty. We are likewise unable to accept the warranty if the defects on the appliance are due to transport damage for which we are not responsible, if they are attributable to misuse or lack of care or if the appliance has been interfered with by persons not authorized by us to do so.
The warranty service will involve repair, replacement of parts or replacement of the appliance at our discretion. The warranty period will be neither extended nor restarted by the performance of warranty services. The warranty period for any spare parts fitted will expire with the warranty period for the appliance as a whole.
Extended or different claims, especially those relating to the making good of damage sustained outside the appliance, are excluded unless liability is compulsory in law.
We will not accept the costs or risks of transport.
An appliance sent in without evidence of the purchase date will be treated as a repair. The appliance will only be repaired following discussion with the customer.
Please keep this address and article number in case of any queries.
12.1 Service Centres
Addresses for service on issues of warranty can be found in "Contact addresses" on page 57.
The service addresses to questions about the product (installation, malfunctions, etc.) can be found in "Contact Information in Europe" on page 58.
Article No. 10.256.406
12.2 Supplier
Please note that this address is not an address for service. Contact one of the service centres mentioned above.
MAPA GmbH
13. Declaration of conformity
The device meets all applicable European directives, as well as the relevant national laws implementing them. These are shown in the EU declaration of conformity which can be requested from the manufacturer. The Declaration of Conformity can be found at www.nuk.com.
14. Glossary
App: an application is a program for your smartphone or tablet
Wi-Fi: standard for a wireless network. In many countries such as Germany, the term WLAN is used as an alternative to Wi-Fi.
Wireless access point: (Wi-Fi AP, WLAN AP): base station for a wireless network
WLAN: Wireless Local Area Network. In the USA and some European countries, the term Wi-Fi is used instead of WLAN.
Contenu
N^ article:10.256.406
12.2 Fournisseur
KARAKA PROMET D.O.O.
Blizanci bb
88260 Citluk
tel: 036 642 347
karaka@karaka-promet.com
BG-BULGARIA
Bebolino Ltd
Str. Hristo Ivanov Golemiya str.9
Sofia 1618
029557500
CZ-CZECH REPUBLIC
MAPA Spontex s.r.o.
Ceskomoravska 2408/1a
190 00 Praha 9 - Liben
info@nuk.cz
EE-ESTONIA
German Products Estonia OÜ
Laki 14a-609
10621 Tallinn - Estonia
www.gpestonia.ee
www.nuk.ee
ES - SPAIN
Roche Diagnostics, SL
Avda.de la Generalitat,171-173
Berkeley Business Park
Wainwright Road
Worcester WR4 9ZS
08453002467
www.nuk.co.uk
GE - GEORGIA
GiSi Ltd
Tsereteli 115a
Tbilis 0119
info@gisi.ge
GR - GREECE
Dapuaanpo EE-X.Tnou&
T.Θ.291-Kaλoχωρι 57009
Oeaaovikn
2310751525
Φa; 2310789621
E-mail: info@nuk.gr
HR-CROATIA
Euroalba d.o.o.
Obrtnicka 2
10000 Zagreb
+38512406488
HU - Hung
For Baby Kereskedelmi Kft
Tiefenweg u. 10
2092 Budakeszi
+36 23 454 867
info@forbaby.hu
IE - IRELAND
Intrapharma Consumer Health
Magna Business Park, Citywest Road
Dublin 24
United Drug House
IT-ITALY
Mapa Spontex Italia S.p.A.
Via S. Giovanni Bosco, 24
20010 Pogliano Milanese (MI)
www.nuk.it
Numero Verde: 800 190 191.
German Products Baltics SIA
Silzemnieki 1, Garupe
Carnikavas novads - Latvija
+370 37 39 11 38
info@gpbaltrics.lv
LV-LATVIA
German Products Baltics SIA
Silzemnieki 1, Garupe
Carnikavas novads
67299994
info@qpbaltics.lv
MK-MACEDONIA
Euroalba Skopje d.o.o
Bul. Partizanski Odredi 64 g 3/6
1000 Skopje
0038923065717
euroja@t-home.mk
NO-NORWAY
Chrom as
Karoline Kristiansens vei 3
0661 Oslo
23 34 48 30
e-mail: kundeservice@chrom.no
PL - POLAND
info@gbab.com; www.nuk.se
SI - SLOVENIA
MERIT INTERNATIONAL D.O.O.
LETALISKA C. 3C
Ljubljana
+38615484300
WWW.MERIT-INTERNATIONAL.SI
SK-SLOVAKIA
MAPA Spontex Volf & Co. s.r.o.
Prodašice 4
29404 Dolni Bousov
Czech Republic
SB-SERBIA
YUGLOB DOO
Zrenjaninski put bb (121t)
11211 Beograd, Borca
+381 11 2960-784
office@yuglob.rs
TR-TURKEY
Ithalatci Firma:
ATAK DIS TIC.A.S
Maya Akar Center K:20 Esentepe
Istanbul
02122117400
www.nuk.com.tr
UA - UKRAINE
ImnopTeB YkpaHy: