
Mini 10030100 - Oven Klarstein - Free user manual and instructions
Find the device manual for free Mini 10030100 Klarstein in PDF.
| Brand | Klarstein |
| Model | Mini 10030100 / 10030101 |
| Category | Mini oven |
| Power supply | 220-240 V~ 50/60 Hz |
| Power | 1500 W |
| Heat type | Top heat, bottom heat, convection, rotisserie |
| Settings | Thermostat (temperature), function switch, timer (up to 60 min) |
| Indicator light | On/off of heating elements |
| Included accessories | Grill, baking tray, rotisserie (capacity 3 kg), rotisserie handle |
| Rotisserie function | Yes, even cooking up to 3 kg |
| Convection function | Yes, air circulation for even baking |
| Glass door | Yes |
| Housing material | Metal |
| Cleaning | Soft cloth and mild detergent, do not use hard brush |
| Safety | Unplug after use, do not touch hot surfaces, use handle |
| Intended use | Household only |
| Recycling | Compliant with directive 2012/19/EU, do not dispose with household waste |
| Certifications | CE (RoHS, EMC, LVD) |
| Manufacturer | Chal-Tec GmbH, Berlin, Germany |
Frequently Asked Questions - Mini 10030100 Klarstein
User questions about Mini 10030100 Klarstein
0 question about this device. Answer the ones you know or ask your own.
Ask a new question about this device
Download the instructions for your Oven in PDF format for free! Find your manual Mini 10030100 - Klarstein and take your electronic device back in hand. On this page are published all the documents necessary for the use of your device. Mini 10030100 by Klarstein.
USER MANUAL Mini 10030100 Klarstein
natural_image
Row of white kitchen and appliance icons including blender, keyboard, refrigerator, oven, fan, microwave, and air conditioner (no text or labels)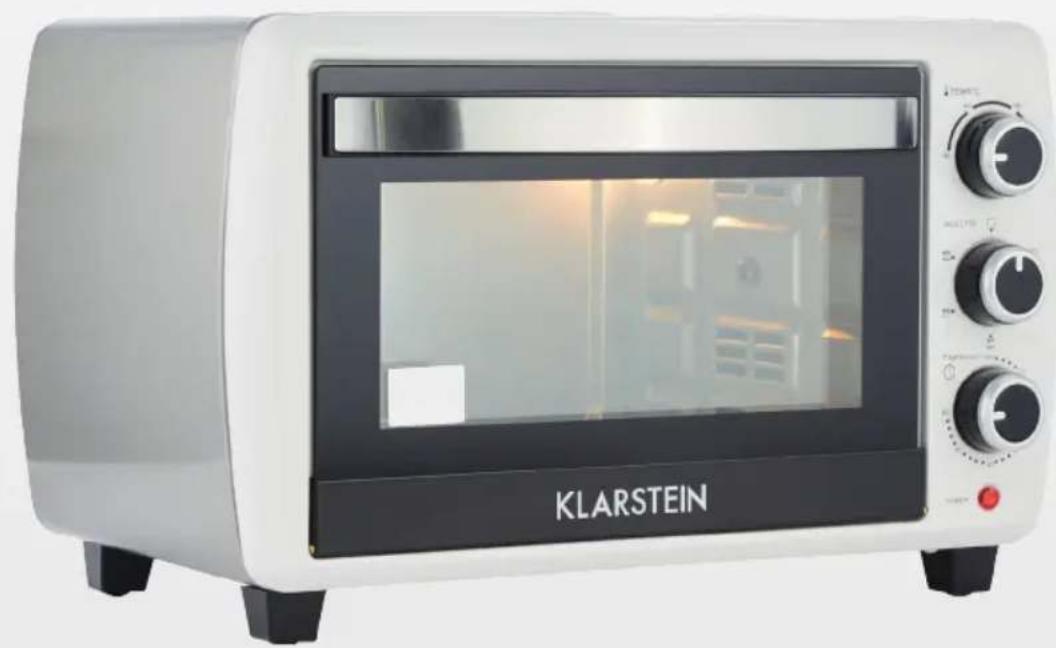
natural_image
Exterior view of a KLARSTEIN small toaster oven with control knobs and display screen (no readable text beyond branding)Mini-Backofen 20 l
10030100
10030101
KLARSTEIN
natural_image
Illustration of a tray with a lid and radiating lines, emitting light (no text or symbols)natural_image
Hand holding a crossed-out microwave oven with a hand pointing at it (no text or symbols visible)natural_image
Hand holding a pen with a square object above it, no text or symbols visiblenatural_image
Illustration of a hand holding a spray gun with droplets, no text or symbols present
natural_image
Diagram of a device interior with internal airflow arrows and a central black object (no text or symbols)links
rechts
natural_image
Simple line drawing of a Y-shaped object with a protruding rod (no text or symbols)natural_image
Diagram of a vehicle interior with directional arrows indicating flow or movement (no text or symbols)natural_image
Circular diagram with concentric rings and surrounding symbols (no text or labels)Funktionswahlregler
natural_image
Illustration of kitchen cleaning steps: hand holding a wall, microwave oven with brush, and two containers (no text or symbols)natural_image
Symbol of a trash bin crossed with a diagonal line, no text or numbers presentCongratulations on purchasing this equipment. Please read this manual carefully and take care of the following hints on installation and use to avoid technical damages. Any failure caused by ignoring the items and cautions mentioned in the operation and installation instructions are not covered by our warranty and any liability.
Content
Technical Data 14
Safety Instrucions 15
Device Overview 18
Usage....19
Cleaning 24
Disposal Considerations 25
Declaration of Conformity 25
Technical Data
| Item number 10030100 10030101 | |
| Power supply 220-240 V~ 50/60 | Hz |
| Power 1500 W | |
Safety Instrucions
Follow basic safety precautions, including:
- Read all instructions.
- Do not touch hot surfaces. Use handles or knobs.
- To protect against risk of electrical shock, do not immerse cord, plugs or cooking unit in water or other liquid.
- Close supervision is necessary when any appliance is used by or near children.
- The appliance is not intended for use by young children or infirm persons without supervision.
- Young children should be supervised to ensure that they do not play with the appliance.
- Unplug from outlet when not in use and before cleaning. Allow to cool before putting on or taking off parts and before cleaning the appliance.
- Do not operate any appliance with a damaged cord or plug or after the appliance malfunctions, or is dropped or damaged in any manner. Return appliances to the nearest authorized service facility for examination, repair, electrical or mechanical adjustment.
- The use of accessory attachments, not recommended or sold by the appliance manufacturer, may cause hazards.
- Do not use outdoors.
- Do not allow the cord to hang over the edge of a table or counter, or touch hot surfaces.
- Do not place on or near a hot gas or electric burner, or in a heated oven.
- Extreme caution must be used when moving an appliance containing hot oil or other hot substances.
- To disconnect, remove plug from wall outlet.
- Do not use appliance other than for its intended use.
- If the external flexible cable or cord of this appliance is damaged, it shall be exclusively replaced by the manufacture or his service agent or a similar qualified person in order to avoid a hazard.
- This appliance is not intended for use by persons (including children) with reduced physical, sensory or mental capabilities, or lack of experience and knowledge, unless they have been given supervision or instruction concerning use of the appliance by a person responsible for their safety. Children should be supervised to ensure that they do not play with the appliance.
- This appliance is not intended to be operated by means of an external timer or separate remote-control system.
• This appliance is for household use only.
- No user-serviceable parts inside. Refer servicing to qualified service personnel.
- A short power-supply cord is provided to reduce the hazards resulting from entanglement or tripping over a long cord. An extension cord may be used with care, however, the marked electrical rating should be at least as great as the electrical rating of this appliance. The extension cord should not be allowed to drape over the counter or tabletop where it can be pulled by children or tripped over.
Device usage safety
natural_image
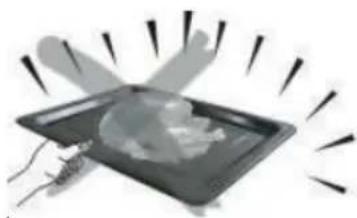
Illustration of a tray with a lid and radiating lines, emitting light (no text or symbols)Always use the food fork when inserting or removing the tray. Touching these will cause severe burns.
natural_image
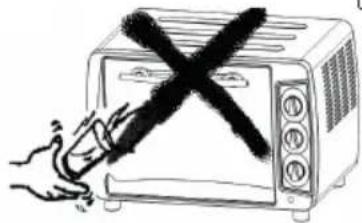
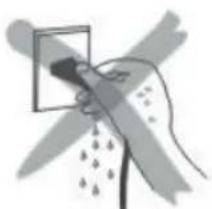
Hand holding a crossed-out kitchen microwave oven with a hand pointing at it (no text or symbols)When hot, do not apply water to the glass window. It may cause the glass to break.
natural_image
Illustration of a hand holding a small object with a magnified view, no text or symbols presentWhen unplugging the cord, always take hold of the plug itself. Never pull on the cord. Doing so could break the wires inside the cord.
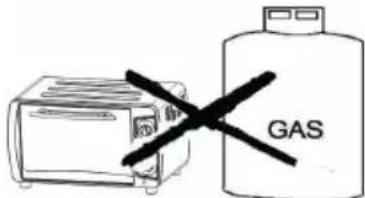
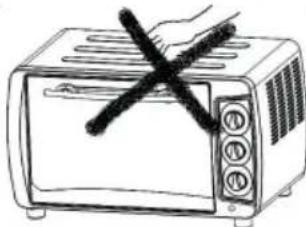
Do not position the unit close to a gas burner or other source of high temperature or do not direct an electric fan, etc, at the unit during USE. Doing so could prevent correct temperature control.
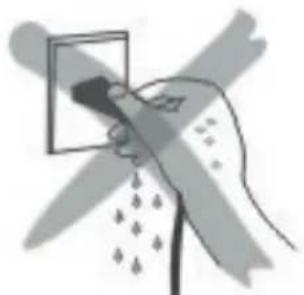
natural_image
Illustration of a hand holding a spray gun with droplets, no text or symbols presentDo not wet the power cord nor handle the unit with wet hands. Always unplug the cord after use, or whenever the unit is to be left unattended. A malfunction while the plug is inserted into the outlet could cause a fire.
 | If the oven is positioned too close to a wall, the wall will be burned or stained. Be sure the curtain, etc. are not in contact with the body.Do not put anything between the bottom of the body and the surface on which it is set. An object so placed could be burned. |
 | Do not put anything on the oven while using it, the heat could cause deformation, cracking, etc. |
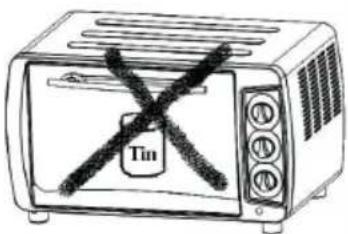 | Any bottled or tinned food can not be heated directly as the bottle or tin would be broken out and scald the person. |
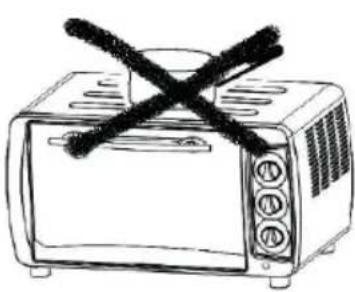
 | Be careful! Not to burn yourself during use or immediately after use. The metal parts and glass window of the door become extremely hot during use. Be careful not to touch them when opening and closing the door. |
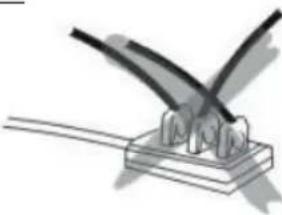 | AC power must be taken from a properly wired outlet. Insert the plug completely into the socket. If it is not, it could become abnormally hot. Do not use an electric light outlet. Never connect multiple plugs to the same outlet. |
Device Overview
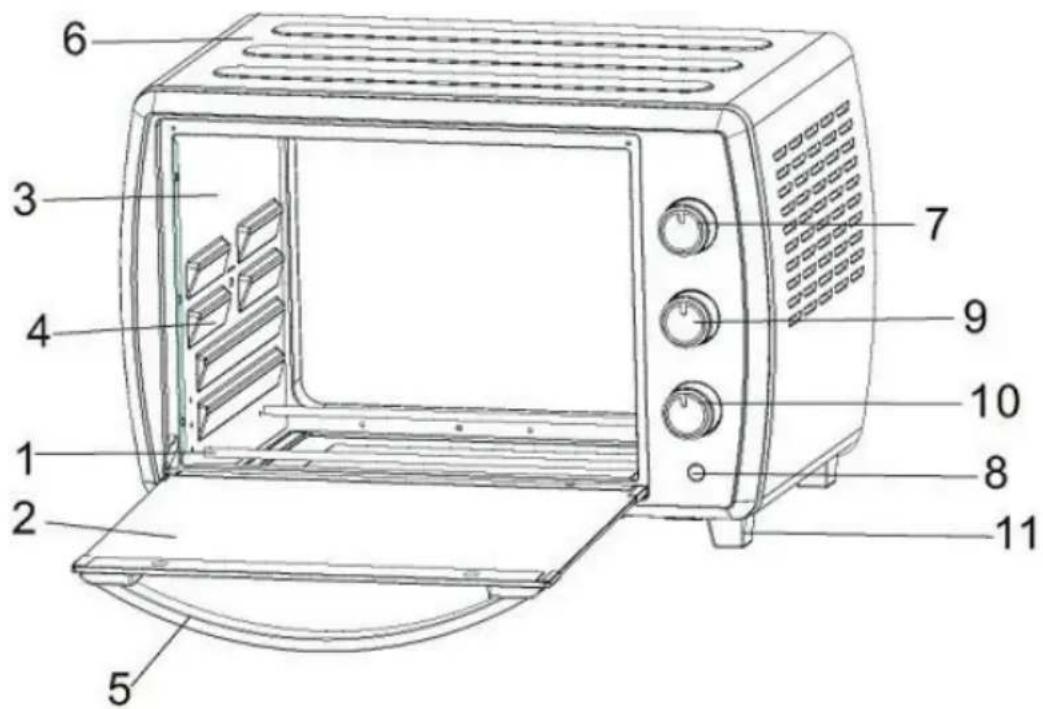

1 Heating element
2 Glass
3 Cavity
4 Rack support
5 Door handle
6 Housing
7 Thermostat knob
8 Indicator light
9 Switch knob
10 Timer knob
11 Stand
12 Wire rack
13 Tray handle
14 Bake tray
15 Rotisserie handle
16 Rotisserie Wheel
Usage
Before using the unit for the first time:
Heat the empty oven
- Insert the tray and wire rack.
- Set the heater operating switch to "UPPER & LOWER", set the temperature control dial to "230m °C" and heat the empty oven for about 10 minutes.
Note: There may be some smoke and a burning smell at first, but this is not a malfunction.
Temperature control dial
- Set the Temperature Control Dial for the dishes which you are going to cook.
Heat Operating Switch
Select "Upper" "Lower" or „Upper and Lower" according to the dishes you are going to cook. You can observe whether the heaters are working or not by observing the front Indicator light.
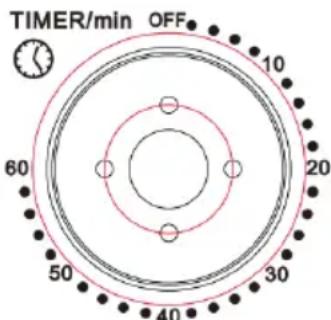
- Set the arrow on the timer knob to the number which indicates the cooking time (minutes) according to the dishes you are going to cook.
- Set the Timer by turning it clockwise.
The oven will turn off automatically at the end of the selected time and a bell will ring.
When setting the Timer to less than 5 min, turn it to more than 6 min. and then back to the selected time. - The oven can be turned off manually during cooking by turning the Timer counter-clockwise to the "OFF" position.
Note:
If the inside of the oven is dirty, cooking may take slightly longer than usual.
Use of the accessories
| Bake Tray and Wire Rack | ||
| Accessory Food (examples) | How to use Tray Handle | |
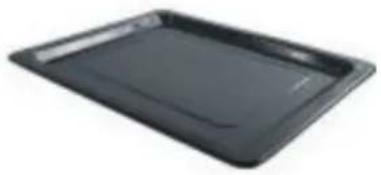 | Roast Chicken Wings, Hamburg steak, Gratin, Cake, almost all other oven-cooked foods. | 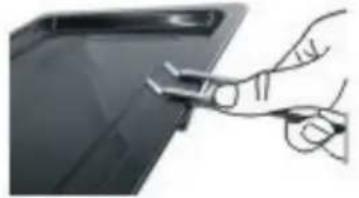 |
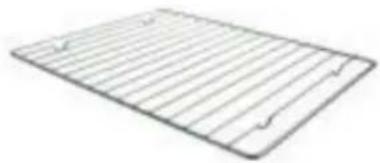 | Baked potatoes, Dry food. | 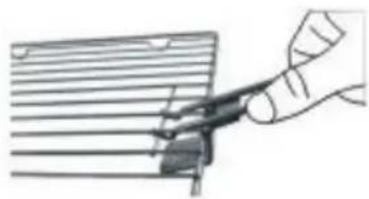 |
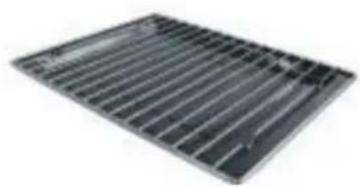 | For food which will drip, e.g. boiled fish, etc. | 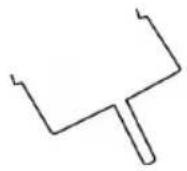 |
Be careful when removing pudding and other hot liquids.
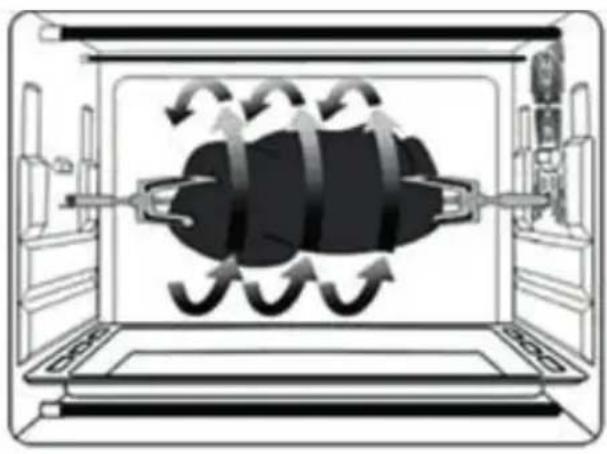
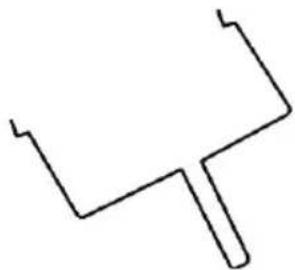
Rotisserie Function
Use with Rotisserie Forks Install Rotisserie Forks
natural_image
Diagram of a device interior with internal airflow arrows and a central black object (no text or symbols)With this function, even baking will be provided.
Rotisserie forks can carry food under 3 kilograms.
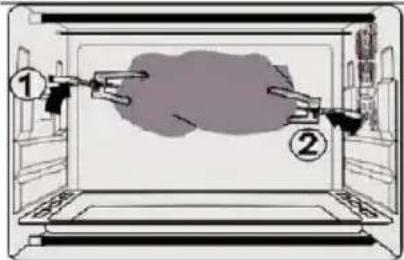
left
right
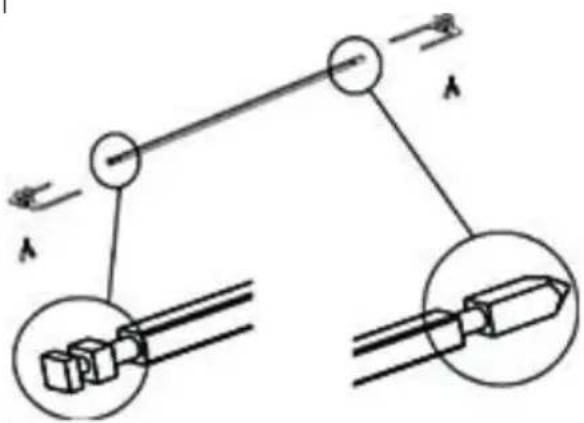
Install Rotisserie Forks Remove
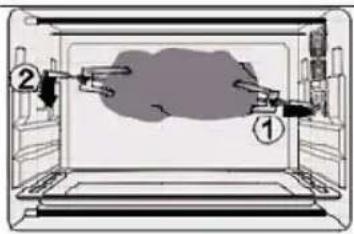
Install the Rotisserie Forks to the rotisserie hole, and then put it to the rotisserie tray.
Rotisserie Forks Rotisserie Handle
Use Rotisserie Handle to take out the Rotisserie Forks from the rotisserie tray, and then remove it from the rotisserie hole.
CAUTION:BewareofHOT dripping oil!
natural_image
Simple line drawing of a Y-shaped object with no text or symbolsPlease always use Rotisserie Handle to take out the Rotisserie Forks.
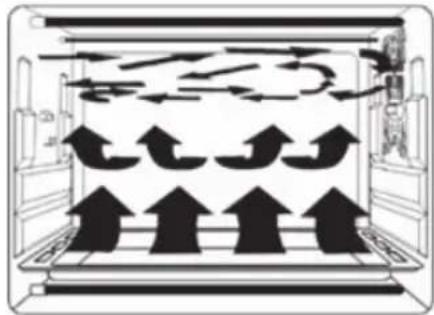
Convection function
natural_image
Diagram of a refrigerator interior with upward and downward arrows indicating airflow or movement (no text or symbols)Featured with a special convection function, strong and absolute cycling airflow by making the heating more complete. Original flavor can be kept.
Function control
- Set the "Temperature Control" by turning clockwise to select the suitable temperature according to the dishes you are going to cook.
- Set the "Timer" to the number which indicates the cooking time (minutes). Now, the oven is working.

gauge
| Temperature (°C) | | :--- | | 140 | | 190 | | 230 | | 100 |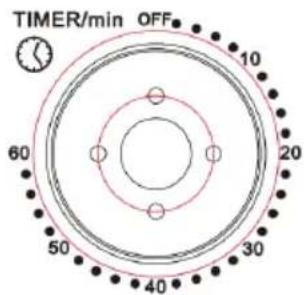
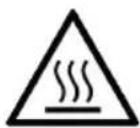
Caution: danger of scalding
DO NOT open the glass door during cooking!

Upper & Lower Heating + Convection

Upper Heating + Convection

Upper & Lower Heating

Upper Heating + Rotisserie Function

Upper & Lower Heating + Rotisserie & Convection Function
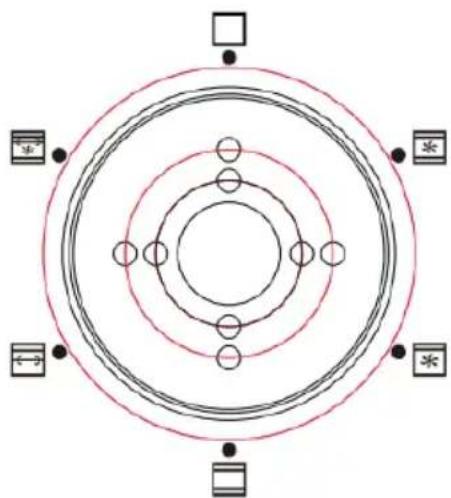
natural_image
Circular diagram with concentric rings and surrounding symbols (no text or labels)function selector
Table of cooking times
| Type of food Number or thickness Temperature (°C) Timer (min.) | |||
| Sandwich 2-3 pcs | 200 2-3 | ||
| Toast 2-4 pcs 230 | 2-5 | ||
| Hamburger 2-3 pcs | 200 3-5 | ||
| Fish / 200 7-10 | |||
| Ham 2 cm 200 7-12 | |||
| Sausage 3-4 pcs | 200-230 | 8-10 | |
| Cake / 150 | 20-30 | ||
| Steak | 1-2 cm | 230 10-15 | |
| Chicken | Half chicken | 175-200 | 30-40 |
Cleaning
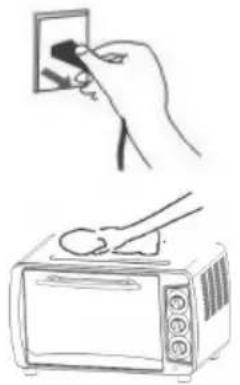
natural_image
Illustration showing a hand inserting a small black object into a microwave oven while another uses a spoon (no text or symbols present)Take off the plug and cool down before cleaning.
When cleaning, wash the interior and exterior surface, tray, grid, and rotisserie fork with soft cotton (or sponge) with neutral cleaner. Then wash with clean water. Do not use hard brush or any others to wash, so as not to scrape the interior surface of the oven, and to protect the tray, the wire rack and the rotisserie fork.
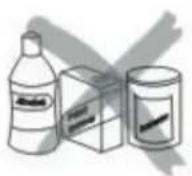
Do not use the toxic and abrasive cleaners such as gasoline, polishing powder, solvent.
Disposal Considerations
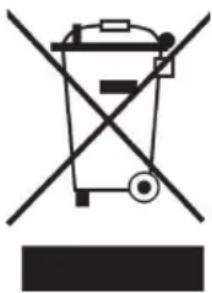
natural_image
Symbol of a trash bin crossed with a diagonal line, no text or numbers presentAccording to the European waste regulation 2012/19/EU this symbol on the product or on its packaging indicates that this product may not be treated as household waste. Instead it should be taken to the appropriate collection point for the recycling of electrical and electronic equipment. By ensuring this product is disposed of correctly, you will help prevent potential negative consequences for the environment and human health, which could otherwise be caused by inappropriate waste handling of this product. For more detailed information about recycling of this product, please contact your local council or your household waste disposal service.
Declaration of Conformity
CE
Producer: Chal-Tec GmbH, Wallstraße 16, 10179 Berlin. Germany
This product is conform to the following European Directives:
2011/65/EU (RoHS)
2014/30/EU (EMC)
2014/35/EU (LVD)
Chère cliente, cher client,
natural_image
Illustration of a tray with a lid and radiating lines, no text or symbols presentnatural_image
Illustration of a hand using a crossed-out megaphone to clean food (no text or symbols)natural_image
Illustration of a hand holding a small object with a magnified view, no text or symbols presentnatural_image
Illustration of a hand holding a spray gun with droplets, no text or symbols present
natural_image
Diagram of a device interior with internal airflow arrows and a central black object (no text or symbols)droitegauche
natural_image
Simple line drawing of a Y-shaped object with no text or symbolsnatural_image
Diagram of a vehicle interior with directional arrows indicating flow or movement (no text or symbols)natural_image
Concentric circles diagram with surrounding symbols (no text or labels)natural_image
Illustration of kitchen cleaning steps: hand holding a wall, microwave oven with brush, and two containers (no text or symbols)natural_image
Symbol of a trash bin crossed with a diagonal line, no text or numbers presentnatural_image
Illustration of a tray with a lid and radiating lines, emitting light (no text or symbols)natural_image
Hand holding a crossed-out microwave oven with a hand pointing at it (no text or symbols visible)natural_image
Hand holding a pen with a square object above it, no text or symbols visiblenatural_image
Illustration of a hand holding a spray gun with droplets, no text or symbols present
natural_image
Diagram of a device interior with internal airflow arrows and a central black object (no text or symbols)natural_image
Simple line drawing of a Y-shaped object with a protruding rod (no text or symbols)natural_image
Diagram of a vehicle interior with directional arrows indicating flow or movement (no text or symbols)natural_image
Symmetrical concentric circle diagram with four small circular elements at the center, no text or symbols present.natural_image
Illustration showing a hand inserting a small black object into a microwave oven while another uses a spoon (no text or symbols present)natural_image
Symbol of a trash bin crossed with a diagonal line, no text or numbers presentnatural_image
Illustration of a tray with a lid and radiating lines, emitting light (no text or symbols)natural_image
Hand holding a crossed-out microwave oven with a hand pointing at it (no text or symbols visible)natural_image
Hand holding a pen with a square object above it, no text or symbols visiblenatural_image
Illustration of a hand spraying water with a spray bottle (no text or symbols)
natural_image
Diagram of a device interior with internal airflow arrows and a central black object (no text or symbols)natural_image
Simple line drawing of a Y-shaped object with a protruding rod (no text or symbols)natural_image
Diagram of a vehicle interior with directional arrows indicating flow or movement (no text or symbols)natural_image
Circular diagram with concentric rings and surrounding symbols (no text or labels)natural_image
Illustration showing a hand inserting a small black object into a microwave oven while another uses a spoon (no text or symbols)natural_image
Symbol of a trash bin crossed with a diagonal line, no text or numbers present

- Mini-Backofen 20 l
- Content
- Technical Data
- Safety Instrucions
- Device usage safety
- Device Overview
- Usage
- Before using the unit for the first time:
- Temperature control dial
- Heat Operating Switch
- Use of the accessories
- Rotisserie Function
- Install Rotisserie Forks Remove
- Rotisserie Forks Rotisserie Handle
- Convection function
- Function control
- Cleaning
- Disposal Considerations
- Declaration of Conformity
Brand : Klarstein
Model : Mini 10030100
Category : Oven