Ts 251 - Saw SCHEPPACH - Free user manual and instructions
Find the device manual for free Ts 251 SCHEPPACH in PDF.
| Features | Details |
|---|---|
| Saw type | Table saw |
| Motor power | 2500 W |
| Blade diameter | 250 mm |
| Rotation speed | 5000 rpm |
| Cutting capacity (height) | 85 mm |
| Cutting capacity (width) | 630 mm |
| Work table | Aluminum, extendable |
| Weight | 45 kg |
| Recommended use | Carpentry work, cutting solid wood and panels |
| Safety system | Anti-restart protection, blade guard |
| Maintenance | Regular cleaning, checking the blade and moving parts |
| Included accessories | Saw blade, parallel guide, service key |
| Warranty | 2 years |
Frequently Asked Questions - Ts 251 SCHEPPACH
Download the instructions for your Saw in PDF format for free! Find your manual Ts 251 - SCHEPPACH and take your electronic device back in hand. On this page are published all the documents necessary for the use of your device. Ts 251 by SCHEPPACH.
USER MANUAL Ts 251 SCHEPPACH
Table Saw Translation from the original instruction manual
- Non-compliance of the operating instructions,
- Repairs by third parties, not by authorized service technicians,
- Installation and replacement of non-original spare parts,
- Application other than specified,
- A breakdown of the electrical system that occurs due to the non-compliance of the electric regulations and VDE regulations 0100, DIN 57113 / VDE0113. WE RECOMMEND: Read through the complete text in the operating instruc- tions before installing and commissioning the device. The operating instructions are intended to help the user to become familiar with the machine and take advantage of its application possibilities in accordance with the recom- mendations. The operating instructions contain important information on how to operate the machine safely, pro- fessionally and economically, how to avoid danger, costly repairs, reduce downtimes and how to increase reliability and service life of the machine. In addition to the safety regulations in the operating inst- ructions, you have to meet the applicable regulations that apply for the operation of the machine in your country. Keep the operating instructions package with the machi- ne at all times and store it in a plastic cover to protect it from dirt and moisture. Read the instruction manual each time before operating the machine and carefully follow its information. The machine can only be operated by per- sons who were instructed concerning the operation of the machine and who are informed about the associated dan- gers. The minimum age requirement must be complied with. GENERAL INFORMATION
- After unpacking, check all parts for possible transpor- tation damages. In the event of complaints, inform the supplier immediately. Any complaints made after this time will not be accepted.
- The shipment is to be checked for completeness upon receipt.
- Read through the manual carefully in order to make yourself familiar in dealing with the device before using it for the first time.
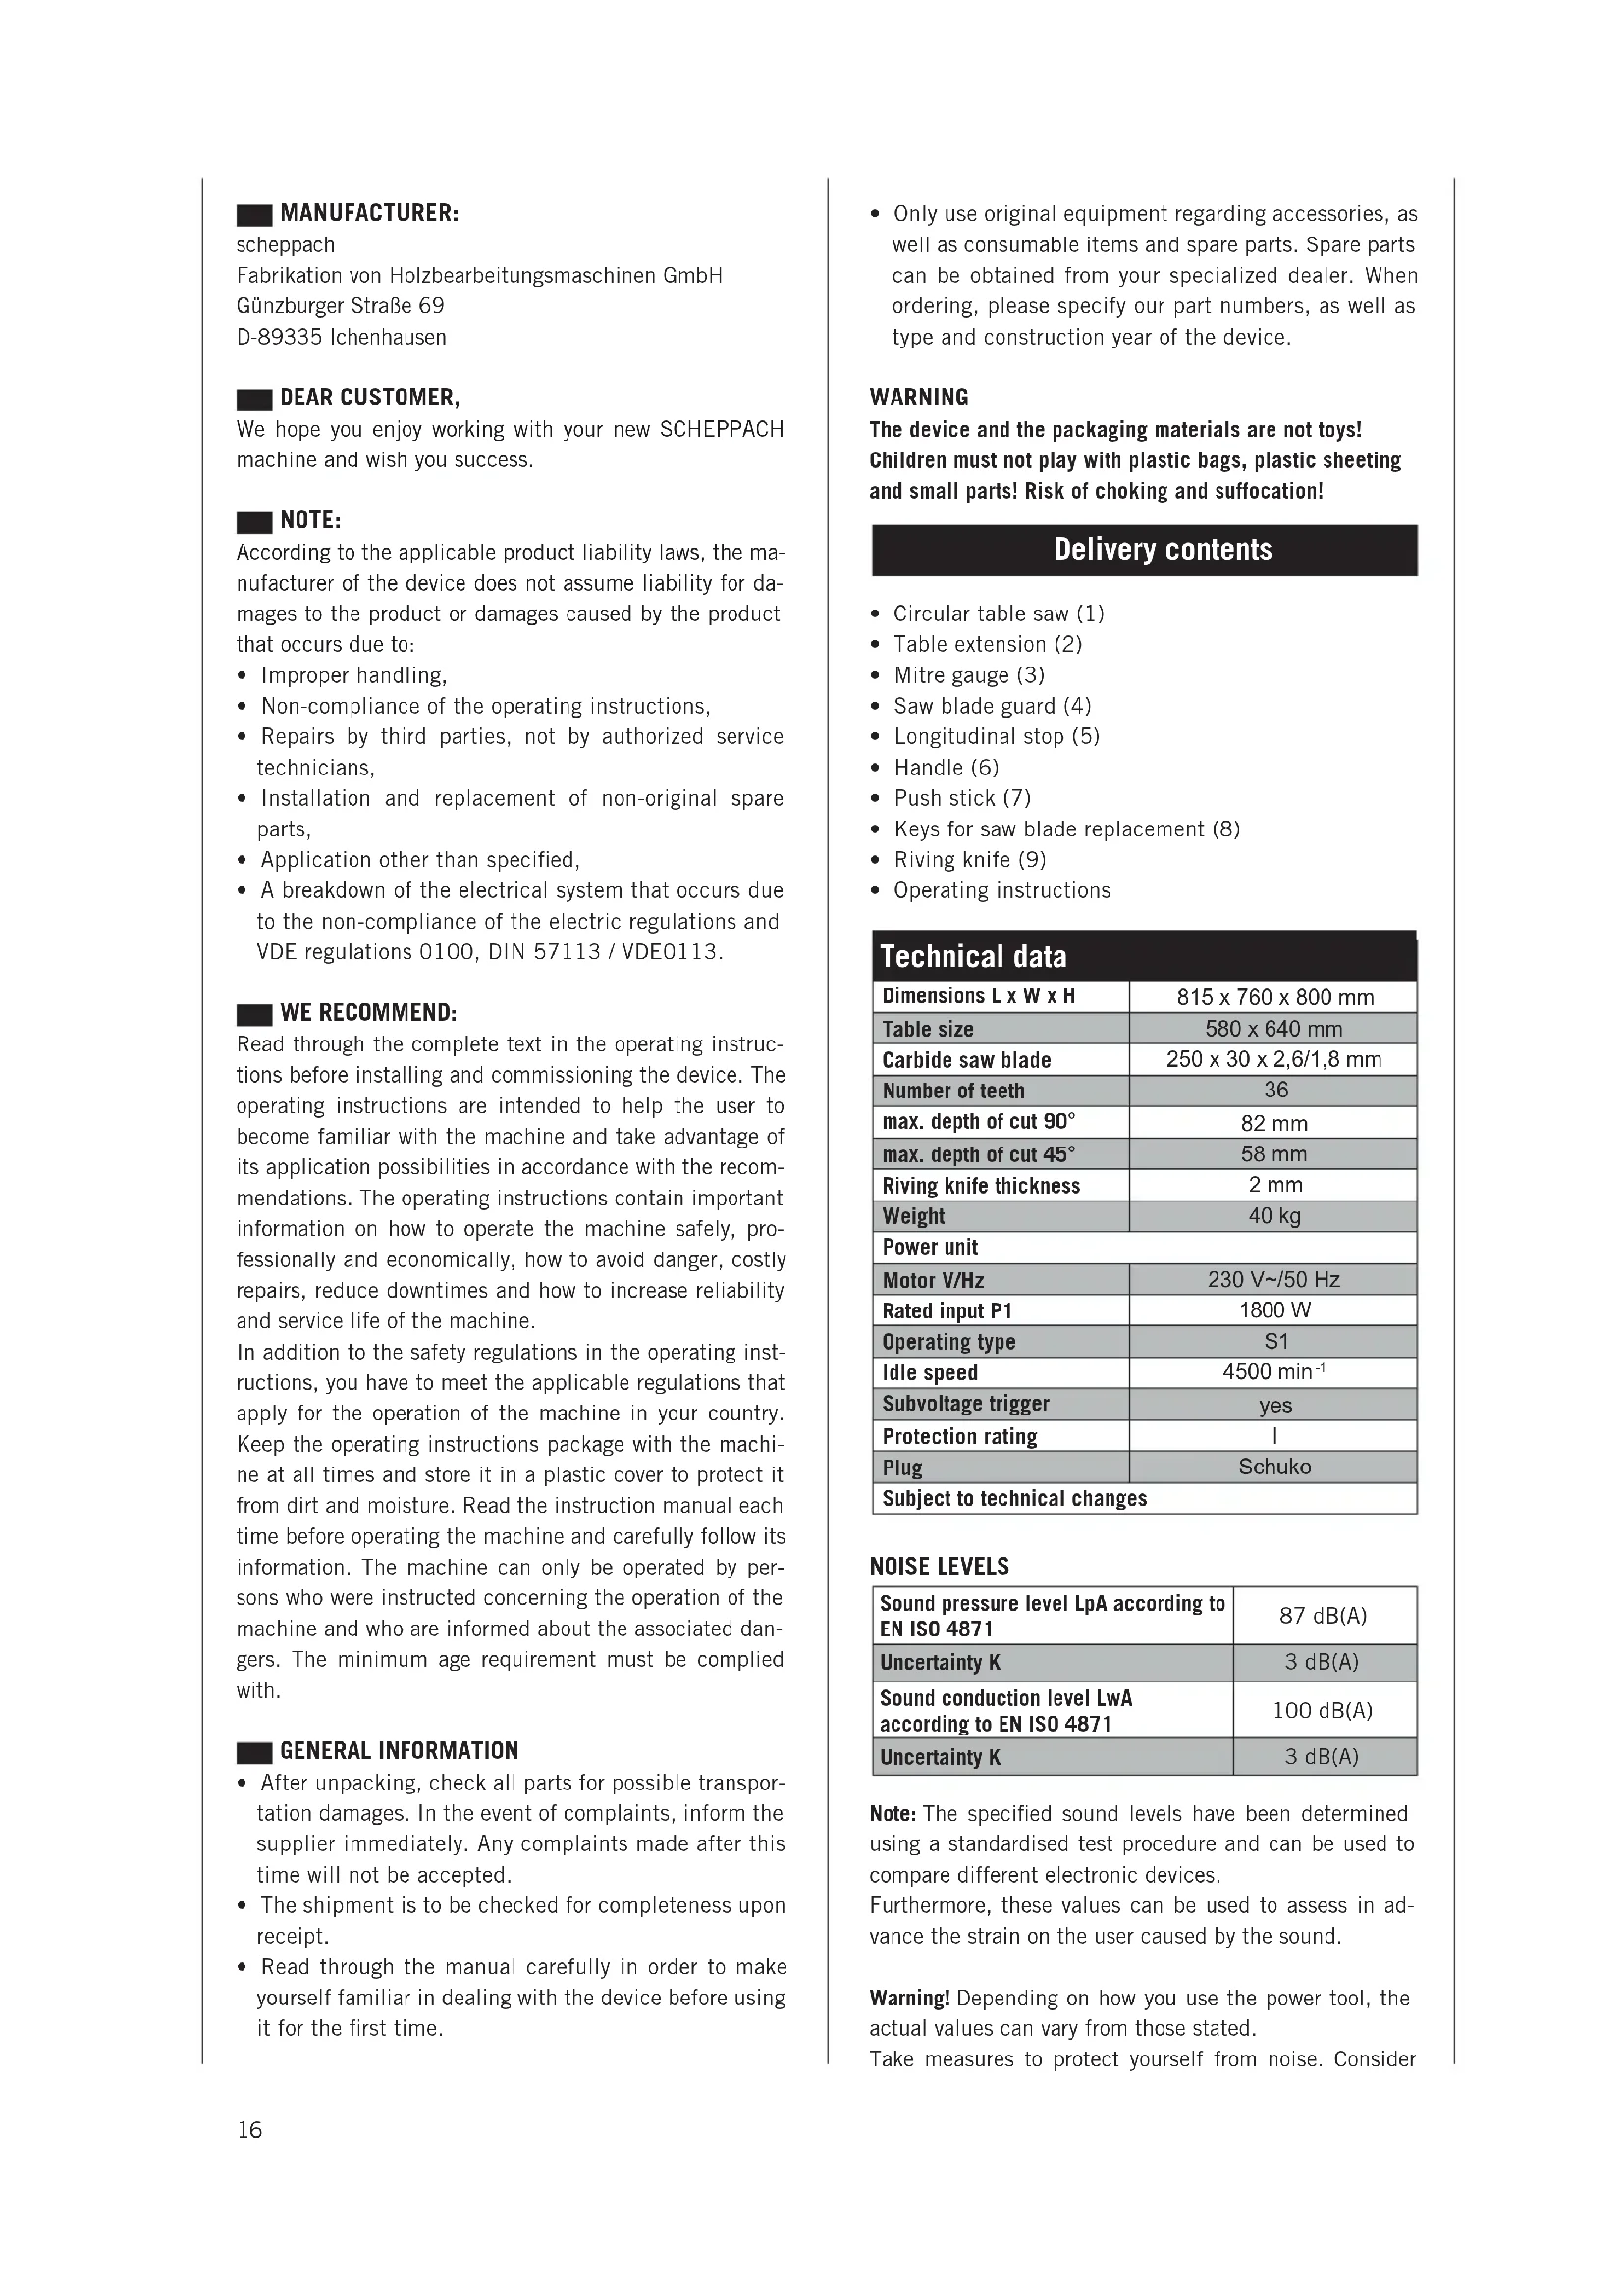
- Only use original equipment regarding accessories, as well as consumable items and spare parts. Spare parts can be obtained from your specialized dealer. When ordering, please specify our part numbers, as well as type and construction year of the device. WARNING The device and the packaging materials are not toys! Children must not play with plastic bags, plastic sheeting and small parts! Risk of choking and suffocation! Delivery contents
- Circular table saw (1)
- Keys for saw blade replacement (8)
Plug Schuko Subject to technical changes NOISE LEVELS Sound pressure level LpA according to EN ISO 4871 87 dB(A) Uncertainty K 3 dB(A) Sound conduction level LwA according to EN ISO 4871 100 dB(A) Uncertainty K 3 dB(A) Note: The specified sound levels have been determined using a standardised test procedure and can be used to compare different electronic devices. Furthermore, these values can be used to assess in ad- vance the strain on the user caused by the sound. Warning! Depending on how you use the power tool, the actual values can vary from those stated. Take measures to protect yourself from noise. Consider17 the entire work process, i.e. even times during which the power tool works without load or is switched off.Suitable measures include, amongst others, regular main-tenance and care of the power tool and the attachments, regular breaks as well as good planning of the work pro-cesses.
STATEMENT CONCERNING DUST EMISSION
The values for dust emission measured according to the “Principles for testing dust emission (concentration parameters) from wood processing machines” created by the Technical Committee Wood, lie below 2 mg/m3. That means a permanently safe compliance with the TRK threshold value for wood dust, applicable in the Federal Republic of Germany can be expected when the power tool is connected to an appropriate operational extraction unit with an air speed of at least 20 m/s. Explanation of symbols Use hearing protection.Use a dust mask.Use protective goggles. Wear protective gloves when you work with or close to the saw blade. In this operating manual, we have marked sections relating to your safety with this symbol.Read the operating manual before you start working with this power tool.Observe the instructions about the direction of travel of the work piece and the saw blade. m Safety notices
GENERAL SAFETY INFORMATION
ATTENTION! When operating power tools, the following gene-ral safety measures have to be taken in order to protect the user against electric shock, risk of injury and fire risk. Read through all of this information before operating this power tool and keep the safety informationSafe working – Disorder in the working area increases the risk of accidents. – Do not expose power tools to rain. – Do not use power tools in a humid or wet envi-ronment. – Ensure excellent illumination of the working area. – Do not operate power tools where there is a possible danger of fire or explosion. – Avoid physical contact with grounded objects. (e.g. tubes, radiators, electric stoves, cooling applian-ces). – Do not let other persons, especially children, touch the power tool or the cable. Keep them away from your working area. – Unused power tools should be kept in a dry, locked place, high and out of the reach of children. – You will work better and safer within the indicated power range. – Do not use inefficient power tools for heavy work. – Do not use the power tool for any purpose other than that for which it is intended. – E.g. do not use a portable circular saw to cut tree branches or logs. – Do not wear loose clothes or jewelry; they could be caught by moving parts. – When working outdoors, it is recommended to wear non-slip shoes. – If you have long hair, wear a hair net. – Wear safety glasses. – Wear a breathing mask for dust-generating works. – In the case that connections for dust suction and reception are available please ensure that they are connected and can be used properly. – Do not use the cable to remove the plug from the socket. Protect the cable from heat, oil and sharp edges. – Use clamping devices or a vice to fix the work pi-ece. Thus it will be held more securely than in your hand. – Ensure that you have a stable standing position and keep your balance at all times. – Keep the cutting tool sharp and clean, in order to make it work better and safer. – Follow the instructions regarding lubrication and tool change. – Check the power tool‘s connection line regularly and in case of damage have it replaced by an ack-nowledged expert.. – Check the extension cables regularly and replace them when they are damaged.18 the type of material you will work on, the impor- tance of local deposition (acquisition or source) and the proper adjustment of covering/ deflecting plate/ guide. – Do not use saw blades made out of highspeed steel (HSS steel). – In times of non-use keep the push stick or the push block with the electrical power tool at all times. 2 Maintenance and repair – The noise level depends on different factors such as the quality of the saw blades, the condition of saw blade and power tool. If possible, use saw blades that were constructed for noise reduction, maintain the electrical power tool and tool adapter regularly and keep them in good condition in order to reduce the noise level. – Inform the person who is responsible for the secu- rity of the power tool immediately when you detect defects in the electrical power tool, the protection equipment or the tool. 3 Working safely – Use the push stick or a push block to pass the work piece by the saw blade safely. – Do not carry out folds or grooves without using proper protective devices over the saw table. – Do not use this electrical power tool to create sla- shes (grooves finished on the work piece itself). – Use only saw blades for which the maximum speed is lower than the maximum spindle – speed of the table saw and which are suitable for the material you intend to cut. – Always use the transporting means for the transport of the electrical power tool. Never use the protecti- ve devices for handling and transporting the device. – Make sure that the upper part of the saw blade is covered; e.g. by the protective device. Warning! During operation this electrical power tool pro- duces an electromagnetic field which can influence acti- ve or passive medical implants under certain conditions. In order to avoid the risk of serious or fatal injuries, we re- commend persons with medical implants to consult with their doctor and the manufacturer of the medical implant before operating the electrical power tool.
1 Operate insertion tools only when you know how to handle them correctly. 2 Always consider the maximum speed. The maximum speed indicated on the power tool may not be excee- ded. Observe the speed range (if specified). 3 Do not use insertion tools with cracks. 4 Immediately take ruptured insertion tools out of ser- vice; simply repairing them is not admissible. 5 Clean the clamping surfaces of dirt, fat, oil and water. 6 Always handle insertion tools with care. If possible, keep them in their original packing or in a special container. Wear protective gloves in order to improve – Keep the handles dry, clean and free from oil and fat. – Be sure that the device is not in use , before main- tenance and while changing tools like saw blades, drills or any kind of machine tools. – Before turning the machine on, make sure that all keys and adjustment tools have been removed. – Make sure that the switch is turned off when plug- ging the plug in the socket. – For outdoor work, use only extension cables which are approved for this purpose. – Always pay attention and take the utmost care when working with an electric power tool. Do not use the power tool when you are not concentrated. – Before further using the power tool, protective de- vices and other parts have to be checked carefully in order to make sure that they function perfectly and properly. – Check to see if all movable parts function properly and that they do not jam and make sure that no parts are damaged. All parts have to be mounted properly and have to comply with all conditions in order to ensure perfect operation of the power tool. – Damaged protective devices and parts have to be repaired or replaced as intended by an acknow- ledged specialized workshop, if not specified other- wise in the operating instructions. – Damaged switches have to be replaced in a custo- mer service repair shop. – Do not use power tools where the switch cannot easily be turned on and off. – Using other application tools and accessories can cause a risk of personal injury. – This electrical power tool complies with the rele- vant safety regulations. – Repairs may only be carried out by an expert who uses original spare parts; otherwise – the operator runs the risk of accidents.
ADDITIONAL SAFETY INFORMATION
1 Safety precautions – Replace worn out stage plates. – Use only saw blades which are recommended by the manufacturer and which correspond to EN 847-1. Warning! When replacing the saw blade, ensure that the cutting width is not narrower and that the main blade width is not wider than the width of the splitting wedge. – Make sure, that you select a saw blade that is ap- propriate for the material you intend to cut. – Wear appropriate, personal protective equipment such as: – Ear protection to reduce the risk of getting hard of hearing – Respiratory protection to reduce the risk of in- haling dangerous dust – Be sure to wear gloves when working with saw blades and coarse materials – Where practicable, keep saw blades in a separate container. – Connect the power tool to a dust reception facility when cutting wood. Dust release is influenced by19 of 3200 ha or 2600 ha in order to remove splinters and saw dust. The flow rate at the extraction port must be 20 m/s.
- Automatic activation is available in the special acces- sories. Type ALV 2: Art. no. 7910 4010, 230–240 V/50 Hz
- When turning on the power tool, the extraction unit starts up automatically after 2 – 3 seconds delay. This prevents overloading the mains fuse.
- After turning off the power tool, the extraction unit continues for 3 – 4 seconds and then turns off auto- matically.
- In this way, the remaining dust is extracted as required by the German Ordinance on Hazardous Substances. This saves power and reduces noise. The extraction unit is only on when the power tool is used.
- Do not switch off or remove the extraction unit or de- duster when the machine is running.
- This power tool has been designed for the exclusive processing of wood and materials similar to wood. On- ly original tools and accessories may be used. Use the required saw blade according to Standard EN 847-1 depending on the type of cut and wood (solid wood, plywood or chipboard). Take note of the accessory parts listed in this operating manual.
- Use the machine in a technically flawless condition on- ly, as well as for its intended purpose, in a safe manner and being aware of dangers, in compliance with the operating instructions. Failures which can affect safety in particular must be removed straight away.
- The manufacturer’s stipulations concerning safety, work and maintenance as well as the measurements specified in Technical data, must be complied with.
- The relevant accident prevention stipulations and other widely recognised safety rules must be observed.
- The power tool may only be used, maintained or re- paired by expert personnel who are familiar with it and its dangers. Unauthorised changes to the power tool invalidate the manufacturer’s liability for damages re- sulting from this.
- The power tool may only be used with the manufacturer’s original accessories and original tools.
- Every use beyond that is deemed as not intended. The manufacturer is not liable for damage resulting from this, the risk lies exclusively with the user. Set-up Prepare the work place where the power tool will be used. Make sufficient space so that safe and uninterrupted work is ensured. The power tool has been designed for work in closed rooms, and it has to be set up on an even, level, solid surface in a stable position. your grip and to reduce the risk of personal injuries. 7 Before operating the insertion tool, ensure that all protective devices are attached properly. 8 Before operation also make sure that the insertion tool you intend to use meets the technical requirements for electrical power tools. 9 Use the provided saw blade only for cutting wood and never for cutting metals. RESIDUAL RISKS The power tool has been built according to the latest tech- nology and recognised safety rules. However, there is still a chance of residual risks whilst working.
- Risk of injury to fingers and hands from the rotating saw blade if the work piece is handled incorrectly.
- Injuries when the work piece is ejected during incor- rect holding or handling, such as working without a fence.
- Health risk from noise
- During work, the permitted noise level is exceeded. Make sure you wear personal protective equipment such as hearing protection.
- Injuries due to a faulty saw blade. Regularly check the saw blade for integrity and before every use.
- Electrical hazards when unsuitable electric connec- tions are used.
- When using special accessories, the special acces- sories’ operating instructions must be read carefully and followed.
- Furthermore, despite all measures taken, residual risks can occur that are not obvious.
- Residual risks can be minimised by complying with the safety notices and the intended use as well as the operating instructions overall. m Intended use The power tool complies with the relevant EC machine gui- deline.
- This power tool has been defined as a transportable power tool.
- To transport the power tool or change its position, hold on to the saw bench at the front and the back and lift the power tool.
- If the supplied frame is not used, the power tool has to be mounted on a stable work bench. The work height has to be 850 mm.
- As the operator, always position yourself in front of the power tool, to the left of the saw blade.
- The work and surrounding area of the power tool have to be free from foreign objects which could interfere, in order to prevent accidents.
- As a basic principle, the work pieces which will be processed have to be free from foreign objects such as nails or screws.
- Before commissioning, the power tool has to be con- nected to an extraction unit with a flexible, flame-re- sistant extraction line. The extraction unit has to turn on automatically when the power tool is turned on.
- If the power tool is used in closed rooms, it has to be connected to an extraction unit. Use dust extraction20 back of the handwheel. 4 Push the handle, with the screw at the front, into the opening of the handwheel. 5 Tighten the handle’s screw and close the handle’s opening again with the lid. STEP 3.
ASSEMBLY OF THE TABLE EXTENSION, FIG. 4.1 – 4.2
1 x Tabletop 2 x Allen key 2 x Open-end spanner 1 Pull the two shafts (B) of the chipping bag bracket to the outside and remove the Allen screws and the washers. 2 Attach the tabletop (2) by pushing it onto the shafts. 3 Make sure the ends of the shafts overlap with the holes on the tabletop. 4 Fix the chipping bag bracket to the tabletop and tigh- ten the screws. 5 Fix the tabletop (2) with two Allen screws (D) to the shafts (B). 6 Fix the chipping bag (8) with the Velcro to the table extension. STEP 4.
ASSEMBLY OF THE RIVING KNIFE, FIG. 5.1 – 5.2
1 Riving knife 2 Saw blade guard 1 Remove the table insert. 2 Move the saw blade to its highest position by turning the handwheel anti-clockwise for height adjustment. Loosen the riving knife clamp (E). Fig. 5.1 3 Move the riving knife (4) to the specified position. Make sure the flanges of the riving knife bracket en- gage with the holes of the riving knife. 4 Tighten the riving knife clamp (E) again. Fig. 5.2 5 Put the table insert back. STEP 5.
USING THE TRANSPORT DEVICE, FIG. 8
1 Push the button underneath the handle (F) and pull the telescope handle up until it engages. 2 Tilt the power tool slightly towards you so that it com- pletely stands on the wheels. 3 Pull the power tool to the specified position and set it up as described in Step 1. 4 Ensure a secure position and solid ground STEP 6. ASSEMBLY OF THE SAW BLADE GUARD, FIG. 6 1 Protective hood 1 Extraction hose 1 In order to assemble the saw blade guard (5), place it over the riving knife (4) so that the screw fits into the slot of the riving knife. 2 Tighten the wing nut sufficiently so that the saw blade guard stays moveable but lifts when the work piece is Description, fig. 1 1 On-/off-switch 2 Adjuster wheel 3 Saw blade 4 Riving knife 5 Saw blade guard 6 Longitudinal stop 7 Table extension 8 Chipping bag 9 Transport wheel 10 Frame foot r. 11 Frame foot l. 12 Extraction hose 13 Table insert Assembly Any assembly and retooling work may only take place with the mains plug removed. Due to packaging reasons, this power tool is not comple- tely assembled.
- Open the box and remove packaging and Styrofoam parts.
- Remove the supplied components.
- Take the power tool from the box and put it on the floor, using some cardboard as a base to protect the surface. Note: This power tool is heavy, two people should remove it from the box. Place all supplied parts on a flat surface. Group the same parts. Note: If connections are secured with a screw (round head or hexagon head), hexagon nuts and washer, the washer has to be fixed under the nut. Insert the screws from the outside to the inside, secure connections with nuts from the inside. Note: During assembly, tighten nuts and screws only so much that they cannot fall off. If you tighten nuts and screws completely before the final assembly, the final as- sembly cannot be carried out.
STEP 1. SET-UP, FIG. 2
1 Put the power tool on its side so that it stands on the wheels and the rubber buffers. 2 Loosen the wing nuts (A). 3 Fold the frame (10) up and push it into the track. 4 Tighten the wing nuts again. 5 Repeat this process for the second frame (11). STEP 2.
ASSEMBLY OF THE HANDWHEEL, FIG. 3
1 x Handle 1 x Allen key 1 x Open-end spanner 1 Remove the lid of the handle using a screwdriver. 2 Remove the nut from the handle. 3 Place the nut into the recess specified for this at the21
SETTING THE SAW BLADE ANGLE, FIG. 10
- Loosen the clamp (K) and push the handwheel (2) to- wards the saw until it engages with the tooth system.
- Adjust the handwheel until the indicator points to the correct angle on the dial (S).
- Tighten the clamp again after set-up. The dial (S) can be adjusted when checking the exact angle of the saw blade. When the power tool is off and the mains plug disconnec- ted, put an adjustable try square against the saw blade. Adjust the handwheel until the saw blade is parallel to the adjustable try square. Then set the indicator of the dial to 0°.
WORKING WITH THE TABLE EXTENSION, FIG. 11
To increase the useable width of the table, use the ta- ble extension.
- Pull the lever (L) up to loosen the lock on the table extension.
- Push the table extension into the required position.
- When you have set the required position, lock the table extension by pushing the lever back down. Operating instructions Warning!
- After every adjustment, we recommend a test cut to check the measurements you set.
- After turning on the saw, wait until the saw blade has reached its maximum revolution speed before carrying out the cut.
- Always use the device with working extraction.
- Regularly check and clean the extraction ducts.
PROTECTION AGAINST OVERLOAD
This power tool is equipped with protection against over- load. If the protection against overload is triggered, do the following: 1 Disconnect the power tool from the power supply. 2 Leave the power tool to cool down. 3 Check the power tool for potential damage that may have occurred. Have the damage repaired before using the power tool again. 4 Connect the power tool to the power supply. 5 Turn on the power tool as described and start using it.
WORKING WITH CIRCULAR SAWING MACHINES
Cutting wide work pieces, fig. 12 Width of work piece to be processed more than 120 mm Tool: Circular saw blade for longitudinal cut Process: Set the longitudinal stop according to the width of the work piece. Ensure a safe hand position. If narrow work pieces are cut off in the process, the infeed is car- ried out with the right hand only or using a push stick in the tool area. If there is a risk of the work piece getting trapped between the circular saw blade, riving knife and fence, an auxiliary fence has to be used. Note: On the pictures, the upper extraction hood was only suggested or left out in some cases to show the process or the equipment more clearly. The upper extraction hood is required for all shown processes. pushed against the saw blade. Be aware: After sawing the work piece, the saw blade guard has to return to its resting position. 3 Connect the extraction hose (12) with one end on the extraction port on the saw blade guard and with the other end on the extraction nozzle. 4 For removal of the saw blade guard (5), disassemb- le the extraction hose first, then loosen the butterfly screw and pull off the saw blade guard (5). Note: The saw blade guard (5) has to be in the operating position at all times to prevent contact with the saw bla- de. It should lift onto the work piece during sawing. STEP 7.
ASSEMBLY OF THE LONGITUDINAL STOP, FIG. 7
1 Longitudinal stop 1 Make sure the levers at the front end of the fence are loosened and position it with the back end onto the back stop rail. 2 Position the fence on the front stop rail. 3 Fold the lever down to fix the longitudinal stop. Commissioning Follow the safety notices! Important: Commissioning of the power tool may only take place with completely assembled protective and safety equipment. The protective hood has to be lowered onto the work pie- ce for every process step. Before turning on the power tool, all protective and safety equipment must be fitted according to instructions. The saw blade has to be able to move freely. Check the wood which has previously been worked on for foreign objects (nails, screws etc.). Remove all foreign ob- jects. Connect the power tool to an earthed power socket. Before turning on the main switch, make sure that the saw blade is mounted correctly and all moving parts run smoothly.
Warning: If you have any doubt, get a professional to set
up the power tool. It is too dangerous to work on assump- tions.
TURNING THE DEVICE ON AND OFF
- The saw can be turned on by pressing the green but- ton “I”.
The power tool has to be set up in such a way that the top of the highest sawtooth is a little higher than the work piece.
- Set the required cutting height by turning the height adjuster wheel (2).
- Turning anti-clockwise increases the cutting height.
- Turning clockwise decreases the cutting height.22 BEVEL CUTS Note: As a basic principle, bevel cuts are carried out using the longitudinal stop (9).
- Set the saw blade (3) to the required cutting angle.
- Set the longitudinal stop (6) according to the width of the work piece.
- Carry out the cut according to the width of the work piece. m Electric connection The installed electric motor is connected and operational. The connection complies with relevant VDE and DIN sti- pulations. The customer’s mains connection as well as extension lead used must comply with these provisions. Important notices The electric motor 230V~/50 Hz is designed for opera- ting type S6 40%. If there is a motor overload, it turns off automatically. Af- ter a cool-down period (timing varies), the motor can be turned on again. Hazardous electric connections Insulation damage often occurs on electric connections. Causes include:
- Pressure marks when connections are guided through windows and doors
- Kinks due to inappropriate attachment or guidance of the connection
- Cuts when the connection is run over
- Insulation damage when being pulled out of the wall socket
- Tears from ageing insulation Such hazardous electric connections must not be used and are dangerous to life due to the insulation damage. Regularly check electric connections for damage. Make sure the connection is not connected to the mains when checking. Electric connections must comply with relevant VDE and DIN stipulations. Only use connections marked H 07 RN. Printing the type designation on the connection is the law.
- The product meets the requirements of EN 61000-3- 11 and is subject to special connection conditions. This means that use of the product at any freely selectable connection point is not allowed.
- Given unfavorable conditions in the power supply the product can cause the voltage to fluctuate temporarily.
- The product is intended solely for use at connection points that a) do not exceed a maximum permitted supply impe- dance “Z”, or b) have a continuous current-carrying capacity of the mains of at least 100 A per phase.
- As the user, you are required to ensure, in consultation with your electric power company if necessary, that the connection point at which you wish to operate the pro- duct meets one of the two requirements, a) or b), named above.
CUTTING OF NARROW WORK PIECES
Width of the work piece to be processed under 120 mm Tool: Circular saw blade for longitudinal cut Process: Set the longitudinal stop according to the width of the work piece. Push the work piece forwards with both hands. Use the push stick in the area of the saw blade and push the work piece through to the other side of the riving knife. For short work pieces, use the push stick from the start of the cut for pushing.
CROSS CUTTING OF NARROW WORK PIECES
Note: For cross cutting of narrow work pieces, we recom- mend the use of an offcut guide. This is not part of the delivery contents. Tool: Fine-toothed cross cut blade Process: Set the offcut guide so that offcuts from the work piece cannot touch the ascending part of the saw blade. Always feed the work pieces using a cross stop or a cross pusher. Do not remove waste from the area of the work piece with your hands. LONGITUDINAL CUTS
- Use the longitudinal stop for longitudinal cuts.
- The longitudinal stop (6) can be fixed to any side of the tabletop.
- Loosen the clamping lever by pulling it up.
- To use the dial, move the fence up to the saw blade and take the measurement at the dial. Now push the fence away from the saw blade. The difference in mea- surement is identical to the cutting width. In order to get an exact measurement, you have to carry out a test cut, measure the work piece and adjust the fence.
- Push the fence into the required position.
- Tighten the clamping lever again.
Warning: The longitudinal stop (6) always has to be ad-
justed in parallel with the saw blade (3). Regularly check the alignment and the secure position during use and af- ter long periods of not using it, if required, tighten the screws (P) again and adjust the longitudinal stop with a stop bracket (R). Vibrations can lead to the screws (P) coming loose and the longitudinal stop moving. Fig. 12.1
- Push the mitre gauge into the groove of the tabletop.
- Tighten the knob again.
Warning: Regularly check the alignment and the secure
position during use and after long periods of not using it, if required, tighten the screws again and adjust the fence. Vibrations can lead to the screws coming loose and the fence moving.23 Replacing the saw blade, fig. 14.1-14.2 You must wear gloves when handling the saw bla- de.
- Turn the height adjuster wheel (2) until the saw blade has reached its highest position.• Remove the protective hood (5).• Remove the table insert (13).• Lock the arbor with the saw blade key (G).• Use the flat spanner (H) to loosen the saw blade nut (M) by turning it anti-clockwise (right-hand thread).• Remove the outer flange (K) and pull off the saw blade.• Clean both flanges carefully before attaching a new saw blade.• Attach and secure the saw blade in reverse order.
Warning: Be aware of the saw blade’s direction of ro-
tation. The cutting edge of the teeth must point in the direction of travel, i.e. forwards (see the arrow on the saw blade). • Assemble the table insert again.• Before working with the saw again, make sure that all safety equipment is functional. Important: After as-sembly, check by turning with your hand that the saw blade rotates smoothly. • Connect the saw blade to the power supply and leave it in idle before starting to saw.WARNING There are no parts inside the power tool which can be maintained by the user! Never open the power tool! Take it to a qualified expert for further maintenance work! REPAIRS Damage must exclusively be repaired by qualified tech-nical staff.WARNING If the mains cable or the mains plug is damaged, it has to be replaced by an electrician to prevent risks.WARNING After carrying out any cleaning and maintenance work, make sure all safety equipment, if present, is attached correctly and safely. Never use the power tool wit-hout safety equipment! Storage and Transport STORAGE 1 Clean the power tool as described in section “Cleaning”. 2 Store the power tool and its accessories in a dark, dry, frost-free and well-ventilated place out of the reach of children. The ideal storage temperature is between 10 and 30°C. 3 Wrap the mains cable around the cable organiser on the back of the power tool when you are not using it.4 Cover the power tool to protect it from dust and hu-midity.5 Keep the operating manual with the power tool.Storing the push stick and the mitre gauge, fig. 15When you are not using the mitre gauge and the push stick, they can be stored on the side in the bracket.AC motor• The power voltage has to be 230 Volt – 50 Hz.• Extension leads up to 25 m in length must have a cross section of 1.5 mm2, at more than 25 m length, it has to be at least 2.5 mm2.• The mains connection is protected against short circuit with a 16 A slow fuse.Connections and repairs to the electrical equipment may only be carried out by a trained electrician.If there are any questions, please provide the following data:• Motor manufacturer• Motor’s type of power• Data from the machine’s type plateWhen sending back the motor, always send the entire mo-tor unit with switch. Follow the safety notices! Cleaning, Maintenance and Repair WARNING Before working on the power tool itself (e.g. transport, set-up, retooling, cleaning and maintenance), disconnect the mains plug from the socket! CLEANING 1 Always leave the power tool to cool down after use.2 Clean the power tool after every use with a damp cloth and some soap. Use a paint brush or a brush for areas which are difficult to access.Note: Do not use aggressive cleaning agents or solvents. They may affect the plastic and metal parts of the power tool.3 Regularly free the inside of the power tool from resi-dual wood and chippings, such as the tooth segment and gear of the revolving mechanism. 4 Remove possible saw dust blockages from the extrac-tion port with a suitable blunt tool.WARNING Do not remove blockages with hands or fingers!5 Remove particularly persistent residual dust in in-accessible places with compressed air (max. 3 bar). MAINTENANCE Before and after every use, check the power tool as well as the accessories (e.g. tool attachments) for wear and tear and damage. If required, replace them with new ac-cessories as described in this operating manual. Comply with technical requirements for this.1 Check the saw blade regularly. Use well-sharpened, flawless and true saw blades only. Only use tools which comply with the European Standard EN 847-1.2 Immediately replace a worn-out table insert with a new one of the same type.3 Always keep the table’s surface free from resin.24 Trouble-shooting Problem Possible cause Solution
loose after the motor is turned off. Mounting nut has not been tightened enough. Tighten the mounting nut (right-hand thread).
2. Motor does not start. a) Failure mains fuse a) Check the mains fuse.
b) Extension lead faulty b) Replace the extension lead. c) Connections on motor or switch not ok c) Have an electrician check them. d) Motor or switch faulty d) Have an electrician check them.
direction of rotation a) Capacitor faulty a) Have an electrician check it. b) Incorrect connection b) Have an electrician change the polarity of the wall socket.
4. Motor does not have
any power, fuse is tripped a) Cross section of the extension lead not sufficient a) See Electric connection. b) Overload due to blunt saw blade b) Replace the saw blade.
5. Burnt area on the
ETAPE 1. INSTALLATION, FIG. 2
hereby declares the following conformity under the EU Directive and standards for the following article
Do not dispose of electric tools together with household waste material! In observance of european directive 2012/19/EU on wasted electrical and electronic eqipment and its implementation in accordance with national law, electric tools that have reached the end of their life must be collected separately and returned to an environmentally compatible recycling facility.