BLC18750DMS - Blender BLACK & DECKER - Free user manual and instructions
Find the device manual for free BLC18750DMS BLACK & DECKER in PDF.
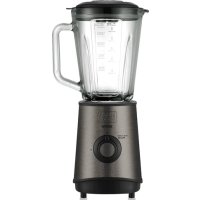
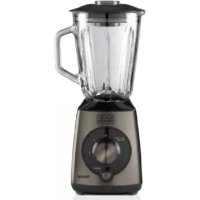
| Technical features | BLACK & DECKER BLC18750DMS blender, 750 W power, 1.5 L jug capacity, 2 speeds, pulse function. |
|---|---|
| Usage | Ideal for making smoothies, soups, sauces, and other culinary preparations. |
| Maintenance and repair | Easy to disassemble for quick cleaning, compatible parts available for repair. |
| Safety | Lid locking system, non-slip feet for stable use. |
| General information | 2-year warranty, compact design, easy to store, dishwasher safe for removable parts. |
Frequently Asked Questions - BLC18750DMS BLACK & DECKER
Questions des utilisateurs sur BLC18750DMS BLACK & DECKER
0 question sur cet appareil. Repondez a celles que vous connaissez ou posez la votre.
Poser une nouvelle question sur cet appareil
Download the instructions for your Blender in PDF format for free! Find your manual BLC18750DMS - BLACK & DECKER and take your electronic device back in hand. On this page are published all the documents necessary for the use of your device. BLC18750DMS by BLACK & DECKER.
USER MANUAL BLC18750DMS BLACK & DECKER
IMPORTANTSAFEGUARDS When using electrical appliances, basic safety precautions should always be followed, including the following:
Read all instructions.
To protect against risk of electrical shock do not immerse cord, plugs or appliance in water or other liquid.
Close supervision is necessary when any appliance is used by or near children.
Unplug from outlet when not in use, before putting on or taking off parts, and before cleaning.
Avoid contacting moving parts.
Do not operate any appliance with a damaged cord or plug or after the appliance malfunctions, or is dropped or damaged in any manner. Return appliance to the nearest authorized service facility or call the appropriate toll-free number on the front of this manual for examination, repair or electrical or mechanical adjustment. Or, call the appropriate toll-free number on the cover of this manual.
The use of attachments, including canning jars, not recommended by the manufacturer may cause fire, electric shock or injury.
Do not use outdoors.
Do not let cord hang over edge of table or counter.
Keep hands and utensils out of container while blending to reduce the risk of severe injury to persons or damage to the blender. A scraper may be used, but must be used only when the blender is not running.
Blades are sharp. Handle carefully.
To reduce the risk of injury, never place cutter-assembly blades on base without jar properly attached.
Always operate blender with cover in place. ❑ When blending hot liquids, remove center piece of two-piece cover.
Do not use appliance for other than intended use. SAVETHESEINSTRUCTIONS. Thisproductisforhouseholduseonly. POLARIZEDPLUG(120VModelsOnly) This appliance has a polarized plug (one blade is wider than the other). To reduce the risk of electric shock, this plug is intended to fit into a polarized outlet only one way. If the plug does not fit fully into the outlet, reverse the plug. If it still does not fit, contact a qualified electrician. Do not attempt to modify the plug in any way. TAMPER-RESISTANTSCREW
Warning:Thisapplianceisequippedwithatamper-resistantscrewto
preventremovaloftheoutercover.Toreducetheriskofreorelectric shock,donotattempttoremovetheoutercover.Therearenouser-ser- viceablepartsinside.Repairshouldbedoneonlybyauthorizedservice personnel. ELECTRICALCORD a) A short power-supply cord (or detachable power-supply cord) is to be provided to reduce the risk resulting from becoming entangled in or tripping over a longer cord. b) Longer detachable power-supply cords or extension cords are available and may be used if care is exercised in their use. c) If a long detachable power-supply cord or extension cord is used,
1) The marked electrical rating of the detachable power-supply cord
or extension cord should be at least as great as the electrical rating of the appliance,
2) If the appliance is of the grounded type, the extension cord should
be a grounding-type 3-wire cord, and
3) The longer cord should be arranged so that it will not drape over the
countertop or tabletop where it can be pulled on by children or tripped over. Note: If the power supply cord is damaged, it should be replaced by qualified personnel. In Latin America, by an authorized service center. Thissymbolisplacednearinformationthat requiresyourspecialattention.4
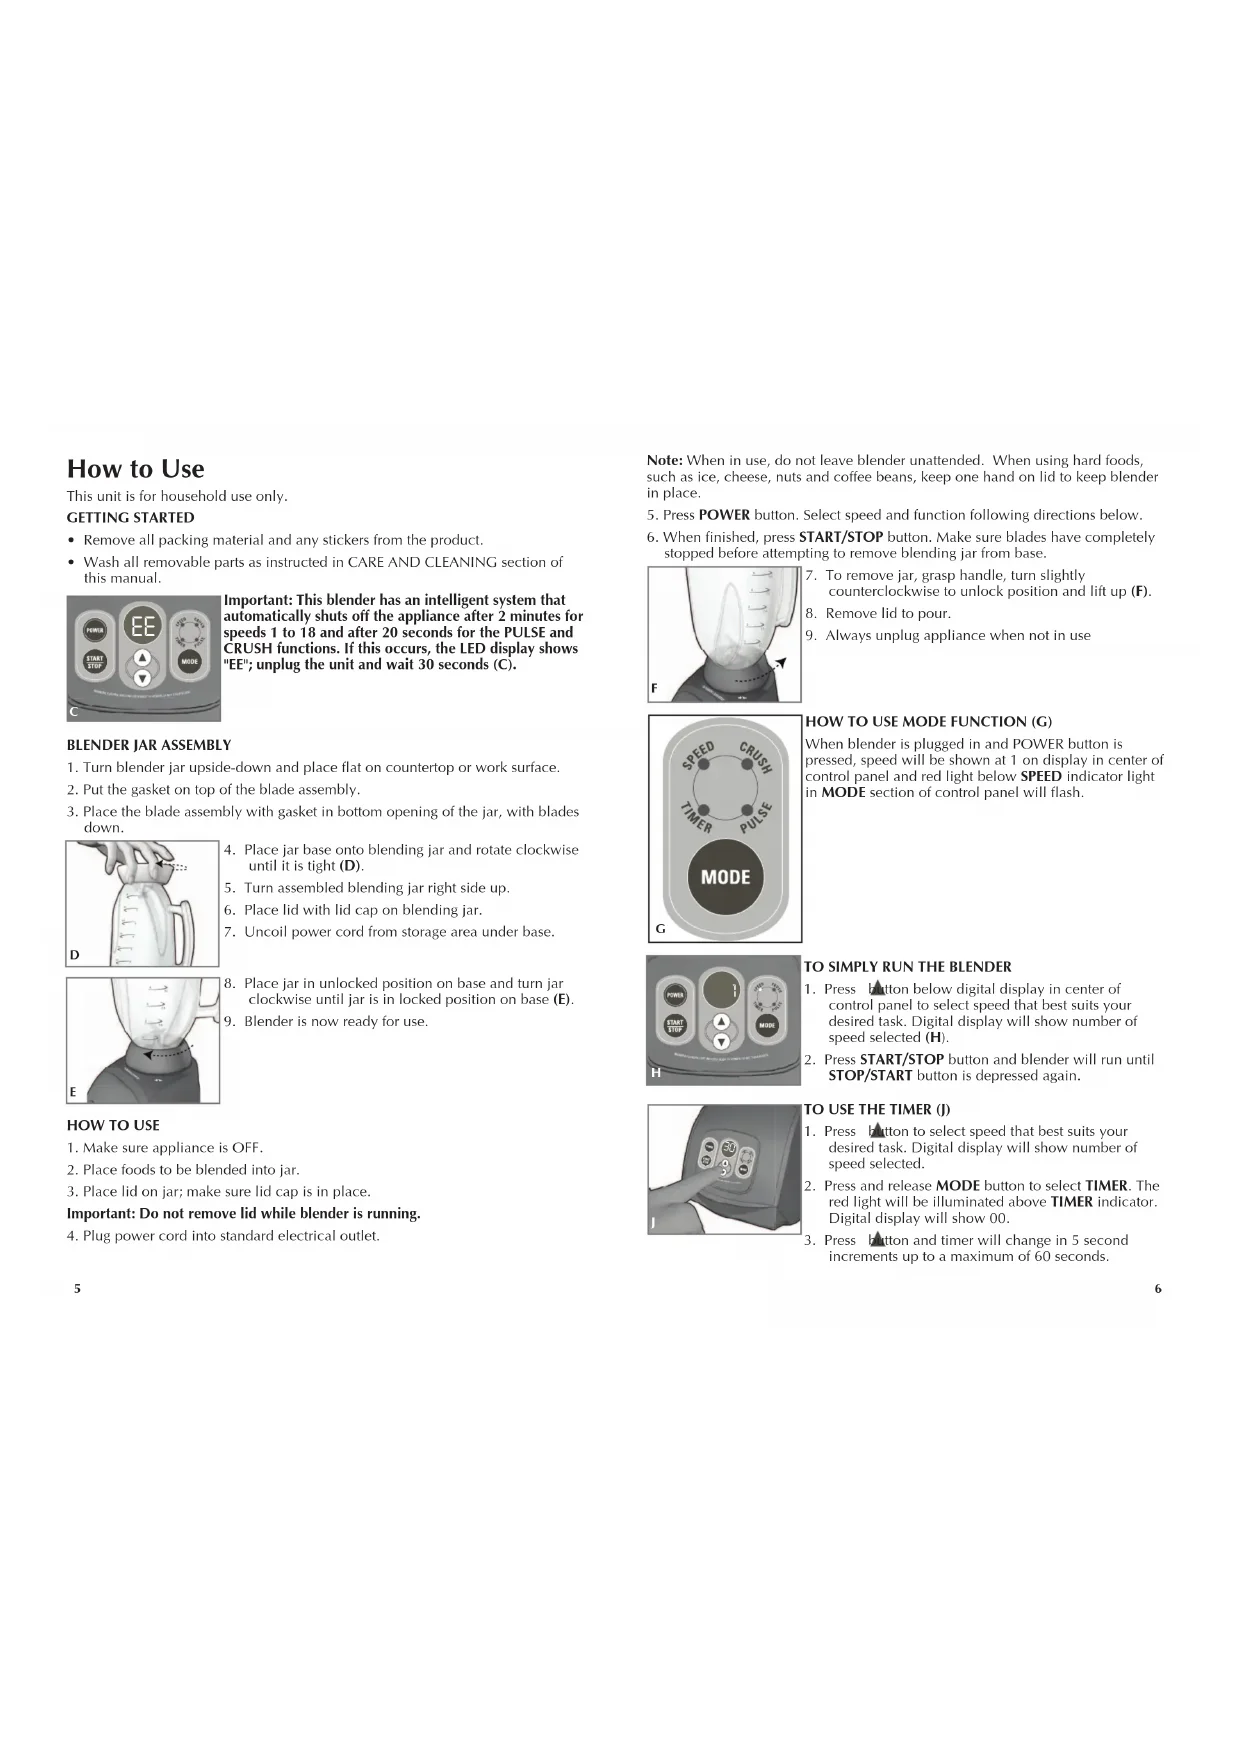
Note: When in use, do not leave blender unattended. When using hard foods, such as ice, cheese, nuts and coffee beans, keep one hand on lid to keep blender in place.
5. Press POWER button. Select speed and function following directions below.
6. When finished, press START/STOP button. Make sure blades have completely
stopped before attempting to remove blending jar from base.
7. To remove jar, grasp handle, turn slightly
counterclockwise to unlock position and lift up (F).
HOWTOUSEMODEFUNCTION(G) When blender is plugged in and POWER button is pressed, speed will be shown at 1 on display in center of control panel and red light below SPEED indicator light in MODE section of control panel will flash. TOSIMPLYRUNTHEBLENDER
1. Press button below digital display in center of
control panel to select speed that best suits your desired task. Digital display will show number of speed selected (H).
2. Press START/STOP button and blender will run until
STOP/START button is depressed again. TOUSETHETIMER(J)
1. Press button to select speed that best suits your
desired task. Digital display will show number of speed selected.
2. Press and release MODE button to select TIMER. The
red light will be illuminated above TIMER indicator. Digital display will show 00.
3. Press button and timer will change in 5 second
increments up to a maximum of 60 seconds. CUPSOZS
HowtoUse This unit is for household use only. GETTINGSTARTED
- Remove all packing material and any stickers from the product.
- Wash all removable parts as instructed in CARE AND CLEANING section of this manual. Important:Thisblenderhasanintelligentsystemthat automaticallyshutsofftheapplianceafter2minutesfor speeds1to18andafter20secondsforthePULSEand CRUSHfunctions.Ifthisoccurs,theLEDdisplayshows "EE";unplugtheunitandwait30seconds(C). BLENDERJARASSEMBLY
1. Turn blender jar upside-down and place flat on countertop or work surface.
2. Put the gasket on top of the blade assembly.
3. Place the blade assembly with gasket in bottom opening of the jar, with blades
4. Place jar base onto blending jar and rotate clockwise
until it is tight (D).
5. Turn assembled blending jar right side up.
6. Place lid with lid cap on blending jar.
7. Uncoil power cord from storage area under base.
8. Place jar in unlocked position on base and turn jar
clockwise until jar is in locked position on base (E).
9. Blender is now ready for use.
1. Make sure appliance is OFF.
2. Place foods to be blended into jar.
3. Place lid on jar; make sure lid cap is in place.
Important:Donotremovelidwhileblenderisrunning.
4. Plug power cord into standard electrical outlet.
4. Press START/STOP button and blender will begin running. Display will show
countdown in 1-second increments and blender will automatically stop once time has run down.
5. If longer blending is required, simply press / buttons to select additional
time desired. Then START/STOP button again. Note: To run blender longer than 60 seconds or if mixture needs more blending once blender has stopped, press button to select additional time desired and press START/STOP button to resume blending. Important:IfSPEEDisselectedfirstandthenTIMEisselected,visualdisplaywill showthetimecountdownasblenderruns.Otherwise,countdownwillnotbe shown. TOUSEPULSE(K) This is useful for blending tasks such as grinding coffee beans or nuts, or when blending thick mixtures.
1. Press / buttons to select the speed that best
suits your task. Digital display will show the number of the speed selected.
2. Press and release MODE button to select PULSE. The
red indicator light will be illuminated above PULSE.
3. Press and hold START/STOP button for no more than 5 seconds. Release and
press again until food has desired consistency. Releasing START/STOP button automatically turns blender off.
4. Allow several seconds between pulses.
Note:Use PULSE button to begin blending process when preparing beverages that include ice cubes; this helps to produce smoother texture.
5. Once mixture is ready for continuous blending, press and release MODE
button to select TIMER. Press / buttons to select desired amount of running time.
6. Press START/STOP button and blender will begin running. Display will show
countdown in 1-second increments and blender will automatically stop when time has run down. TOUSECRUSH(L) Use to crush up to 1½ cups ice cubes to a fine crush in just 10 seconds.
buttons to select speed that best suits your task. Crush up to 1 cup from speed 12-18. Crush 1½ cups from speed 15-18. Digital display will show number of speed selected.
2. Press and release MODE button to select CRUSH. The
red indicator light will be illuminated below CRUSH.
3. Press START/STOP button. Two ice cubes will flash on digital display while
blender is running on this function.
4. Blender will continue to run until START/STOP button is depressed again.
TOADDFOODSWHILETHEBLENDERISRUNNING Open lid cap to add ingredients while blender is running. Drop or pour ingredients through opening. (M) Important:Donotremovelidwhileblenderisrunning. BLENDINGTIPSANDTECHNIQUES
- Cut food into pieces no larger than ¾-inch for use in blender.
- When preparing foods that have several different kinds of ingredients, always add liquid ingredients first.
- When ingredients splatter onto sides of jar or mixture is very thick, press START/STOP button to turn appliance off. Remove lid and use a rubber spatula to scrape down sides of the jar and to redistribute food, pushing food toward blades. Replace lid and continue blending. Important:Applianceshouldalwayshavecoverinplacewheninuse. Caution:Donotplaceblenderjaronbasewhenmotorisrunning.
- Lid cap holds up to 2 oz. of liquid and can be used as a measure when adding ingredients such as juices, milk, cream and liquor (N).
- When making bread crumbs, chopping nuts or grinding coffee beans, make sure blender jar is completely dry.
- When using PULSE function, use short bursts. Allow blades to stop rotating between pulses. Do not use pulse for more than 2 minutes.
- Use PULSE function to begin blending process when preparing beverages that include ice cubes; this helps to produce a smoother texture. Once mixture begins to come together: o Set MODE to SPEED; select desired speed. o Change MODE to TIMER; select desired running time. o Press START/STOP and let blender run.
- PULSE function is helpful when short bursts of power are needed, such as when preparing thick smoothies or milkshakes, chopping nuts or grinding coffee beans.
- It is helpful to begin blending process on lowest speed and then increase to higher speeds, if necessary.
- When blending hot ingredients always open lid cap and replace it ajar with opened side away from you. Cover lid with a cloth to avoid splattering and only use lowest speed. Do not blend more than 2½ to 3 cups at a time (P). Important:DONOTplaceanyofthefollowinginblender:
- Large pieces of frozen foods
- Tough foods such as raw turnips, sweet potatoes and potatoes
- Boiling liquids (cool for 5 minutes before placing in blending jar) SeveralotherDONT'S:
- Do not operate blender without the lid on blending jar.
- Do not store foods in blending jar.
- Do not overfill blender. (Blender is more efficient with less, rather than more.)
- Do not put boiling liquids into blender.
- Do not use PULSE for more than 5 seconds at a time. Release PULSE button, allow blender to rest briefly and then continue.
- Do not run blender for longer than 1½ minutes at a time. Scrape down sides on blender jar, if necessary, and continue blending.
- Do not use if blender jar is chipped or cracked. TasksNOTrecommendedfortheblender:
- Extracting juice from fruits and vegetables CUPS OZS
PULSE • Use for thick mixtures Speeds1–4 • For quick cleaning blend drop of dishwashing liquid and hot water
- Reconstitute frozen juices, drink mixes and condensed soups
- Make superfine sugar
- Aerate soups and beverages
- Chop nuts, coarse to fine
- Grind coffee beans, spices and chocolate
- Grind hard cheese, cooked meats and coconut Speeds9-13 • Puree baby foods – cooked fruits and vegetables
- Blend pancake and waffle batter or mixes
- Beat eggs for omelets and custards
- Make cookie, cereal and bread crumbs Speeds14-18 • Blend protein drinks
- Liquefy frozen drinks; smoothies
- Blend milk shakes and malteds
- Remove lumps from gravies12
CareandCleaning This product contains no user serviceable parts. Refer service to qualified service personnel. CLEANING
1. Before cleaning, turn off and unplug the appliance.
2. Lift the jar by the handle off the power base.
3. Remove jar base by turning it counterclockwise until loose.
4. Remove the gasket and the blade assembly.
Caution:Bladesaresharp,handlecarefully.
5. Remove lid and lid cap.
6. Wash removable parts by hand or in the dishwasher. Place the jar on the
bottom rack and the rest of the parts on the top rack only. HelpfulTip:
- For quick cleanup, combine 1 cup hot water and drop of liquid dish soap in blending jar.
- Cover and blend on any speed from 1 – 4 for about 30 seconds.
- Discard liquid and rinse thoroughly. Important:
- Removestubbornspotsbyrubbingwithadampclothandnonabrasivecleaner. Note: If liquids spill onto base, wipe with damp cloth and dry thoroughly. Do not use rough scouring pads or cleansers on parts or finish.
PROBLEM POSSIBLECAUSE SOLUTION
Jar bottom does A vacuum has been Place the jar on the not come off of jar. formed. blender and turn counter clockwise until jar is released from the bottom. Liquid is leaking Gasket is either missing Check that jar is from bottom of jar. or not in place correctly. assembled correctly. Appliance does Appliance is not Check that appliance not turn on. plugged in. is plugged into a working outlet. Mixture in blender Not enough liquid in Turn the blender off does not seem to mixture being blended and use a rubber be blending. or too much ice. spatula to redistribute the food; add some liquid and pulse the mixture to aid in the blending process. Herbs or bread are Blender jar, food to be Always make sure that sticking to sides of chopped and blade are the jar, the blade and blender and not not dry. the food to be chopped getting chopped. are dry. Jar separates from Jar was twisted when When removing jar bottom when being being removed from from blender base, removed from base of blender. simply lift up; do blender. Liquid not twist. spills onto counter. TROUBLESHOOTING14
RECIPES MOCHAJAVASMOOTHIE 1 cup mocha flavored soymilk ½ cup cold strong brewed coffee 2 cups frozen vanilla soy yogurt 3 tbsp. hazelnut spread 2 cups ice cubes In blending jar, combine all ingredients in order listed. Place cover on jar. Press PULSE several times for about 5 seconds each to blend ingredients and begin crushing ice. Select speed 18 and blend until mixture is smooth and well blended (about 30 seconds). Makes about 4 ½ cups. PUMPITUPSMOOTHIE 1 cup fat free milk 2 tbsp. protein soy powder 1 tbsp. sugar free French Vanilla Café instant coffee 2 cups ice cubes In blending jar, combine all ingredients in order listed. Place cover on jar. Press PULSE several times for about 5 seconds each to blend ingredients and begin crushing ice. Select speed 18 and blend until mixture is smooth and well blended (about 30 seconds). Makes about 2 ½ cups. BREAKFASTINAGLASS 1 cup milk ½ cup plain yogurt 1 banana, cut into pieces ½ cup creamy peanut butter ¼ cup wheat germ ¼ cup peanuts 1 tbsp. honey 2 cups ice cubes In blending jar, combine all ingredients in order listed. Place cover on jar. Press PULSE several times for about 5 seconds each to blend ingredients and begin crushing ice. Select speed 18 and blend until mixture is smooth and well blended (about 30 seconds). Makes about 4 cups. CAESARSALADDRESSING 1 egg, slightly beaten ¼ cup fresh lemon juice 1 tsp. Worcestershire sauce ½ cup grated Parmesan cheese 2 medium garlic cloves ½ tsp. Anchovy paste ½ tsp. coarse ground pepper ½ cup corn or vegetable oil In blending jar, combine all ingredients, except oil, in order listed. Place cover on jar. Blend ingredients on speed 2 for 10 seconds. With blender running, open lid cap and pour oil in slow steady stream into blender. Continue blending until mixture is smooth and well blended. Spoon mixture into glass bowl and cover with plastic wrap; refrigerate until ready to use. Dressing may be kept for up to 1 week. Makes about 1 cup of dressing.15
PEAANDPOTATOBISQUE 1 small onion, chopped 2 medium cloves garlic, minced 2 tbsp. butter or margarine 4 cups chicken broth or stock 2 cups cubed peeled potatoes ½ tsp. ground ginger ½ tsp. salt ¼ tsp. black pepper 1½ cups frozen peas ¼ cup loosely packed parsley leaves ½ cup heavy cream In medium saucepan, cook onion and garlic in butter over medium heat until tender. Add chicken broth, potatoes ginger, salt and pepper. Bring to boil. Cover and simmer 8 minutes. Add peas and parsley; continue cooking until potatoes are tender. Remove from heat and let stand at least 5 minutes. Spoon about 2½ cups of soup mixture into blending jar. Cover and remove lid cap; replace it ajar with open side facing away. Cover lid with cloth. Blend on speed 3 until creamy and smooth. Pour into measuring cup. Repeat with remaining mixture until all is pureed. Return soup to saucepan; stir in cream. Heat, stirring; do not allow bisque to boil. Serve with dollop of sour cream or yogurt, if desired. Garnish with additional chopped parsley. Makes about 6½ cups. MEDIDASIMPORTANTES DESEGURIDAD Cuando se utilizan aparatos eléctricos, siempre se debe respetar ciertas medidas de seguridad, incluyendo las siguientes:
5. ToucheMARCHE/ARRÊT
PROBLÈME CAUSEPOSSIBLE SOLUTION
NEEDHELP? For service, repair or any questions regarding your appliance, call the appropriate "800" number on the cover of this book. Donot return the product to the place of purchase. Donot mail the product back to the manufacturer nor bring it to a service center. You may also want to consult the website listed on the cover of this manual. ONE-YEARLIMITEDWARRANTY (AppliesonlyintheUnitedStatesandCanada) Whatdoesitcover?
- Any defect in material or workmanship; provided; however, Applica’s liability will not exceed the purchase price of the product Forhowlong?
- One year after the date of original purchase Whatwillwedotohelpyou?
- Provide you with a reasonably similar replacement product that is either new or factory refurbished Howdoyougetservice?
- Save your receipt as proof of the date of sale.
- Check our on-line service site at www.prodprotect.com/applica, or call our toll- free number, 1-800-231-9786, for general warranty service
- If you need parts or accessories, please call 1-800-738-0245. Whatdoesyourwarrantynotcover?
- Damage from commercial use
- Damage from misuse, abuse or neglect
- Products that have been modified in any way
- Products used or serviced outside the country of purchase
- Glass parts and other accessory items that are packed with the unit
- Shipping and handling costs associated with the replacement of the unit
- Consequential or incidental damages (Please note, however, that some states do not allow the exclusion or limitation of consequential or incidental damages, so this limitation may not apply to you.) Howdoesstatelawrelatetothiswarranty?