
C96SSS09E - Egg cooker Carlton - Free user manual and instructions
Find the device manual for free C96SSS09E Carlton in PDF.
| Product type | Steam cooker multifunction |
| Brand | Carlton |
| Model | C96SSS09E |
| Power supply | 230 V, 50 Hz |
| Power | 750 W |
| Water tank capacity | 1200 ml (max level) |
| Number of steam baskets | 3 |
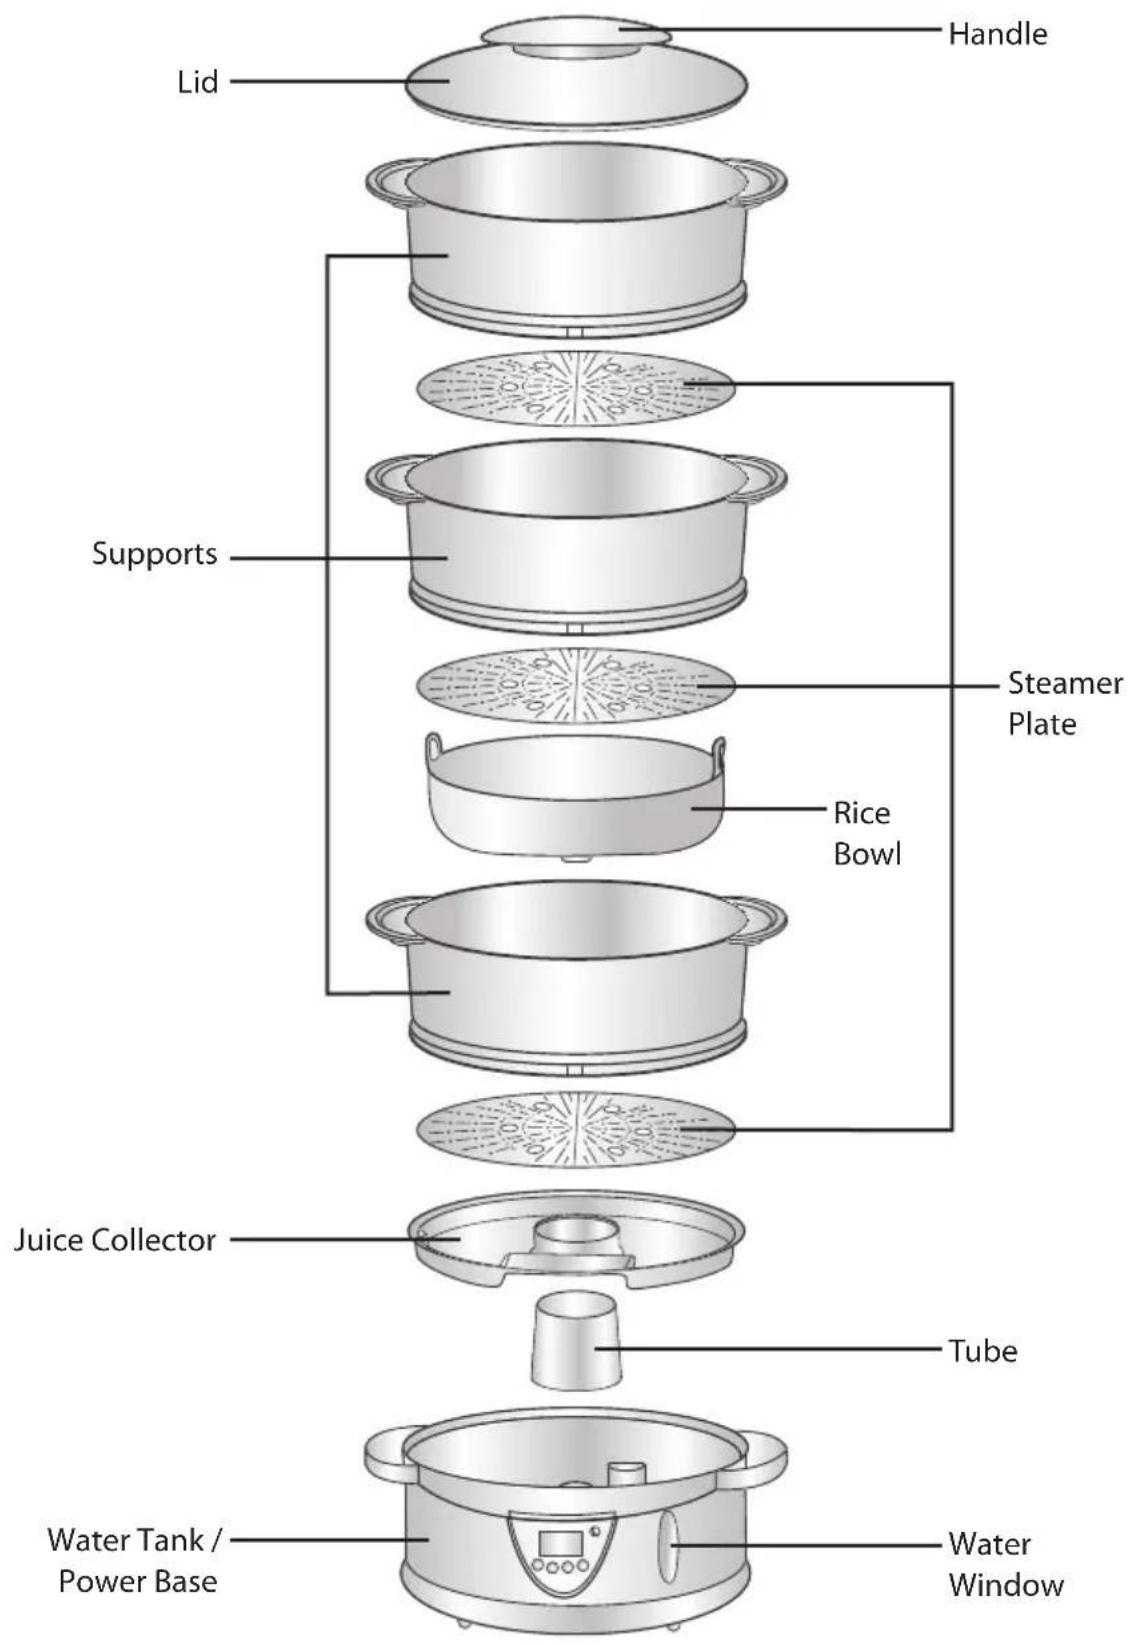
| Included accessories | Water tank/base, lid, 3 supports, 3 steam plates, rice bowl, juice tray, tube, manual |
| Materials | Plastic (base, baskets), stainless steel (steam plates?) Check on the appliance |
| Cooking programs | Bread, rice, fish, chicken, vegetables |
| Timer | Up to 59 minutes cooking |
| Delayed timer | Up to 12 h 59 min |
| Low water level protection | Automatic shut-off and display "E EE" |
| Power indicator | Green (standby), flashing green (timer), red (cooking) |
| Cleaning | Baskets and accessories dishwasher-safe; base to be cleaned with a damp cloth |
| Descaling | Recommended every 2-3 months with white vinegar |
| Safety | Do not immerse base; hot surfaces; hot steam |
| Spare parts | Available: lid (FS1149-1), support (FS1149-4), steam plate (FS1149-3), rice bowl (FS1149-5), juice tray (FS1149-6), tube (FS1149-7) |
| Repairability | Do not attempt to repair yourself; contact an authorized center |
| Manual reference | FS1149-E |
| General information | Read the manual before use; for household use only |
Frequently Asked Questions - C96SSS09E Carlton
User questions about C96SSS09E Carlton
0 question about this device. Answer the ones you know or ask your own.
Ask a new question about this device
Download the instructions for your Egg cooker in PDF format for free! Find your manual C96SSS09E - Carlton and take your electronic device back in hand. On this page are published all the documents necessary for the use of your device. C96SSS09E by Carlton.
USER MANUAL C96SSS09E Carlton
Unpacking the Steamer 5
Getting to know your Steamer 6
Control Panel 7
Assembling the Steamer Baskets 8
Cleaning Before First Use 9
How to use your Steamer 10
Boil-Dry Protection System 11
Using the Steamer Baskets and Rice Bowl 11
Using a single basket 11
Using multiple baskets 11
Using a single basket with rice bowl 11
Using the Automatic Timer 12
Cleaning and Maintenance. 13
Dscaling the Water Tank 13
Recipes 14
Technical Specification 14
Safety 75
Innhold
NO
Pakke opp dampkokeren 15
Slik Virker Matdampkokeren 16
Kontrollpanel 17
Hvordan Sette Sammen Dampekuvene 18
Specifications techniques 64
Sécurité 77
περιεχόμενα
GR
Apaieon tou atouayepa ano tn ouokeuaia 65
Ivpiote tov atmuayepa .66
Iivakac 67
ZuvapuoJoyonTwvKaalaiWvTouaHouayepa 68
Congratulations on the purchase of your new Carlton Food Steamer.
We recommend that you spend some time reading this instruction manual in order to fully understand all the operational features it offers.
Read all the safety instructions carefully before use and keep this instruction manual for future reference.
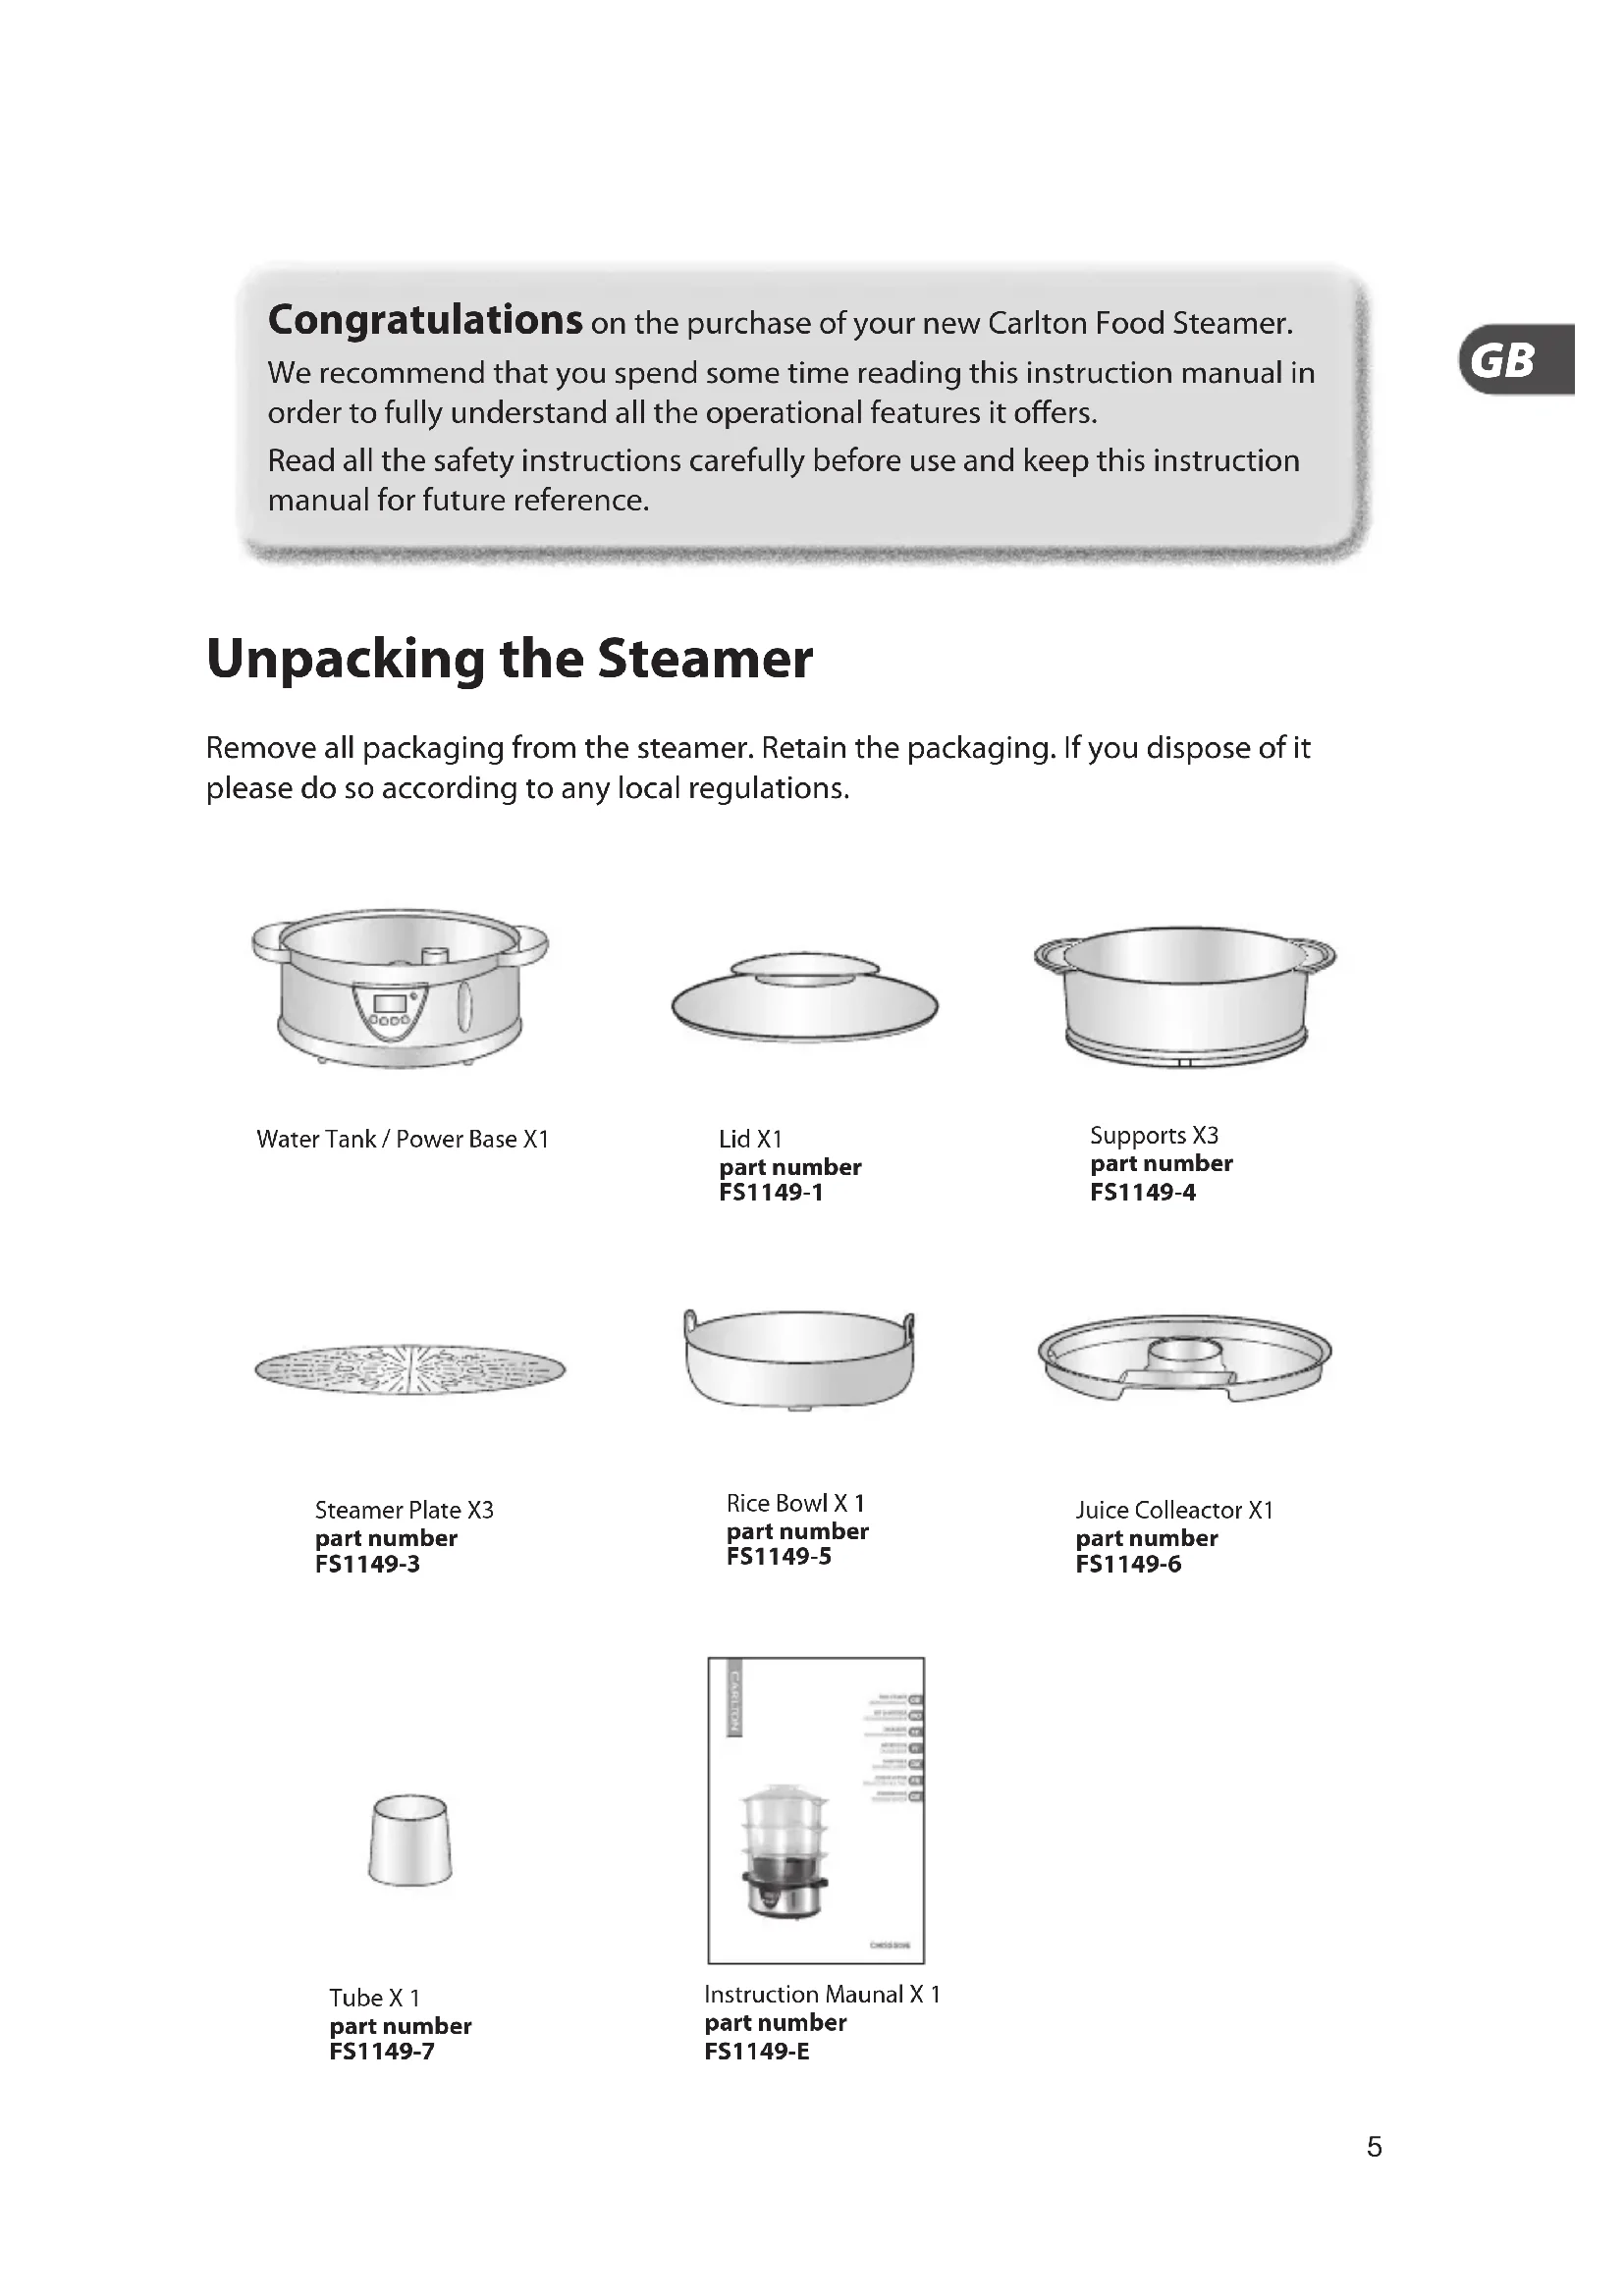
Unpacking the Steamer
Remove all packaging from the steamer. Retain the packaging. If you dispose of it please do so according to any local regulations.
Water Tank / Power Base X1
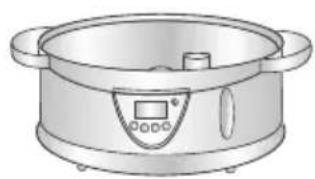
Lid X1 part number FS1149-1

Supports X3 part number FS1149-4

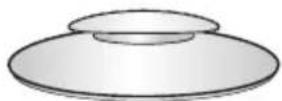
Steamer Plate X3 part number FS1149-3
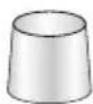
Rice Bowl X 1 part number FS1149-5
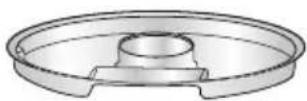
Juice Collector X1 part number FS1149-6
Tube X1 part number FS1149-7
Instruction Maunal X 1 part number FS1149-E
Getting to know your Steamer

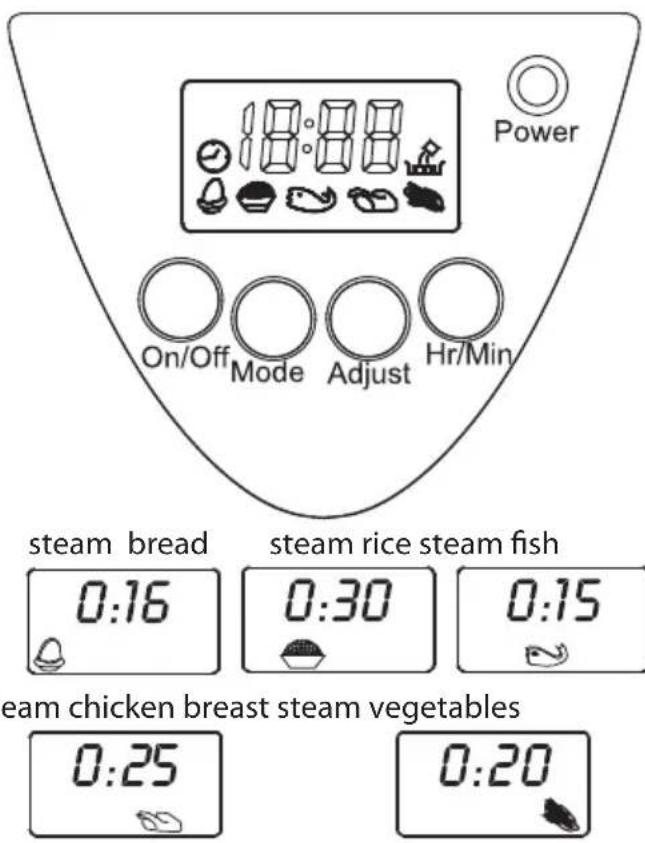
Control Panel
GB
On/Off button:1.
Press this button to start the steamer.
Press and hold this button for 2 seconds to stop the steamer.
Mode button:2.
Press this button to select your desired programme (bread, rice, fish, chicken breast, or vegetables).
Adjust button: 3.
Press this button to increase the steaming time (up to 59 minutes)
Hr/Min button: 4.
The steamer can start automatically after a set time (up to 12 hours, 59 minutes). Press this button to switch between "hour" and "minute" and then press the Adjust button to set the start time.
Power indicator: 5.
Displays different colours to show the steamer status: steady green: standby mode flashing green: automatic start time is counting down red: steaming in progress
Display:6.
Shows the steaming mode and time.
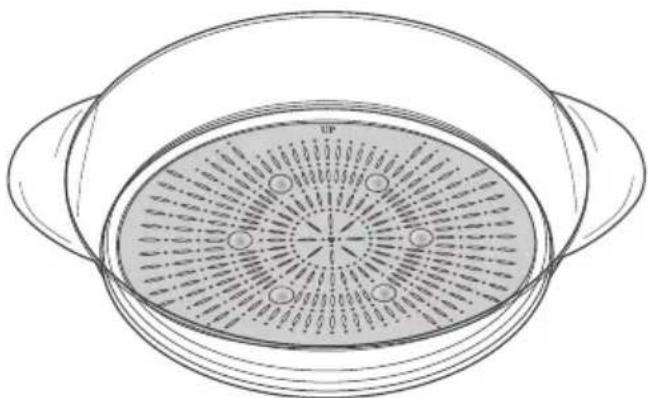
Assembling the Steamer Baskets

You assemble each steamer basket by attaching a steamer plate to a support.
Make sure the plate is facing upward.1.
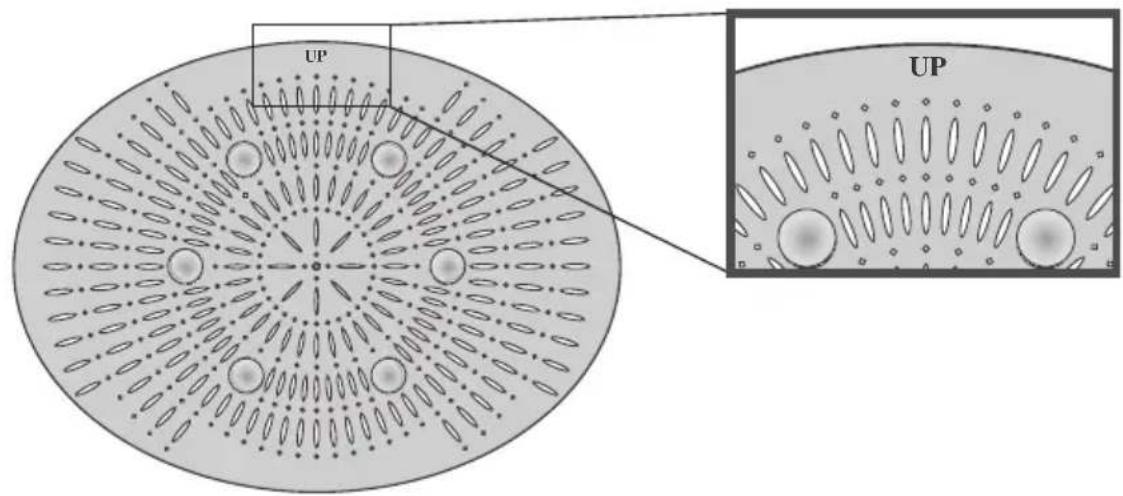
Insert one end of the plate into the support slot first.2.

Use one hand to lift the other end of plate to about 2cm.3.
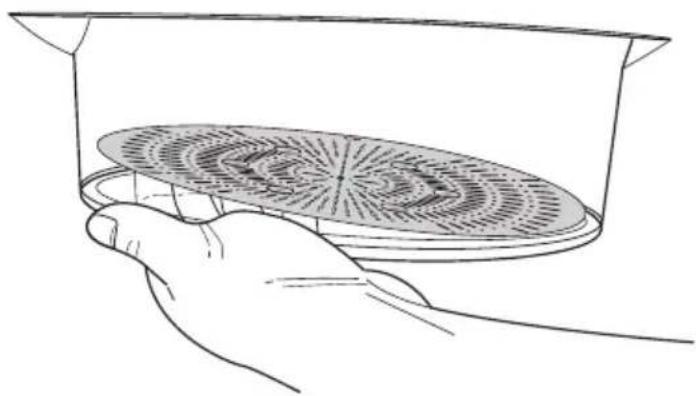
Use your other hand to push the end of the plate down and into the slot, then 4. release.
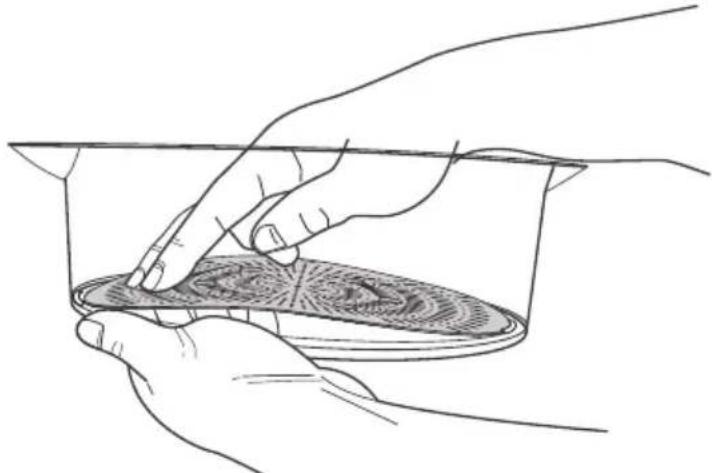
The steamer basket assembly is complete.5.
Cleaning Before First Use
Wash the steamer plates and supports, lid, juice collector and rice bowl in hot 1. Soapy water, rinse and dry completely.

The flow marks on the steamer plates' surface are not a defect, and they will not affect the cooking quality, cooking time, and the functionality of the plates.
- Operate the steamer as described in How to Use Your Steamer on the next page, filling the water tank to the Max level with cold water. Place the empty baskets and lid on the power base.
When the water is boiling, press the 3. On/Off button for 2 seconds to switch off. Allow the steamer to cool down completely and then discard the water.

How to use your Steamer
Place the power base on a stable surface, away from any objects which could be 1. damaged by the steam escaping.
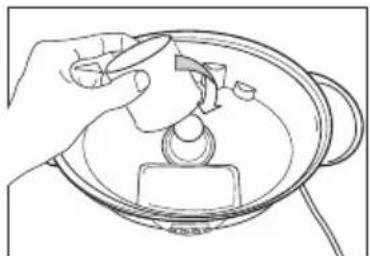
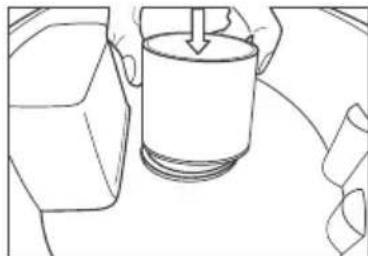
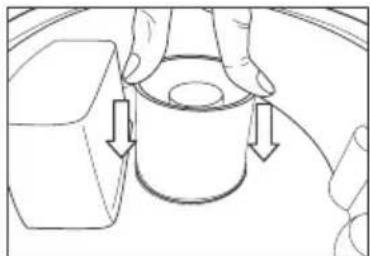
Place the tube firmly over the heating element in the water tank as per the below 2. screenshots. Ensure the tube is snugly inserted into the ring mark in the water tank.
Fill the water tank with cold water:3.
Fill to the Max level for food requiring at least 13 minutes of steaming time.
Fill to the Min level for food requiring less than 13 minutes of steaming time.
Place the juice collector on the base and check that it is level.4.

Don't add any salt, pepper, herbs, seasoning, wine, stock, or any liquid other than water to the water tank.
-
Put the food into the steamer baskets and place the baskets on the power base. Cover the top basket with the lid.6.
-
Plug the steamer into the mains socket. The Power indicator will turn green. Press the 8. Mode button to choose a steam program: bread, rice, fish, chicken, vegetables. The display shows the minimum steam time for each food type. To increase the steam time, press the Adjust button.
-
Press the On/Off button to start the steamer. The Power indicator will turn red. When steaming finishes, the steamer will beep. Remove the baskets immediately, 10 using oven gloves to prevent burns.

To stop the steamer during operation, press the On/Off button for 2 seconds.
Unplug the steamer from the mains socket and allow it to cool down completely.11.
- Empty the water tank and refill it with fresh water before each use.

Be careful when removing the drip tray. While other parts of the steamer may have cooled down, water in the water tank and drip tray may still be very hot.
Don't operate the steamer without the baskets and lid in place.
While the steamer is operating, don't touch the base, lid, steamer baskets or rice bowl unless wearing oven gloves.
GB
Boil-Dry Protection System
If the water level in the water tank is too low during operation, the boil-dry protection system will turn off the steamer and sound a buzzer. The display will show "E EE". Add water to the tank and ensure the water level is between the Max and Min marks before resuming operation.

Using the Steamer Baskets and Rice Bowl
Your steamer is equipped with three steamer baskets.
Using a single basket
Place the food in the basket.1.
Place the basket on the power base and put the lid on.2.
Using multiple baskets
Place the food in the baskets. We recommend that you put the largest pieces of 1. food in the lowest basket.
Stack the baskets on the power base and put the lid on. The baskets can be placed 2. on the power base in any order.
Using a single basket with rice bowl
Place the rice and water in the rice bowl.
Place the rice bowl in steamer basket.
Place the basket on the power base and put the lid on.

-
You can put different foods in the baskets, but since steam will drip from the upper layer, make sure their flavours complement each other. When steaming meat and vegetables, always place the meat in the lowest basket so that juice can't drip onto the other food.
-
If you are cooking food with different cooking times, place the food that requires the longest cooking time in the lowest basket and start cooking it first. When the timer reaches the setting for the next basket of food, remove the lid using oven gloves or a cloth, and add the basket to the stack on the power base. Replace the lid.
Using the Automatic Timer
This steamer has an automatic start timer. If you do not want the steamer to start operating immediately, you can set the automatic start timer by pressing the Hr/Min button.
For example, to set the steamer to turn on after 2 hours and 15 minutes:
Follow steps 1-7 of 1. How to Use Your Steamer.
Press the 2. Hr/Min button once. A clock icon will appear on the left of the display and the "00" (minutes) will flash.
Press the 3. Adjust button until the minutes display shows"15".
Press the 4. Hr/Min button again. The "0" (hours) will flash.
Press the 5. Adjust button until the hours display shows"2".
Press the 6. Hr/Min button to confirm the setting.
- Press the On/Off button. The Power indicator will start flashing green and the display will show the timer counting down. When the timer reaches "0:00", the steamer will turn on.

To cancel the timer, press the On/Off button for 2 seconds.
Cleaning and Maintenance
Allow the appliance to cool down completely before cleaning.
Wash the steamer plates, support, lid, juice collector and rice bowl in hot soapy water, rinse and dry completely.
Do not clean any part with abrasive cleaners such as metal scouring pads or scouring powder.
Do not immerse the water tank in water. Pour warm water into the water tank, rinse thoroughly and discard the water, then dry with a soft cloth. All parts except the water tank can be cleaned in a dishwasher; however, continual cleaning in a dishwasher may result in a slight loss of polish.
Store the steamer in a dry place. The mains cable can be wound under the bottom of the power base.
Descaling the Water Tank
After about 2-3 months' use, some chemical deposits may build up in the water tank or on the heating element, depending on the hardness of the water. It is essential to descale the water tank regularly to prolong the product life.
Fill the water tank to the Max mark with a mixture of white vinegar and water. Do 1. not use any other chemical or detergent.
Plug the steamer into the mains socket. The steamer baskets, lid, juice collector 2. and rice bowl are not to be used during this operation.
Set timer for approx.20-25 minutes and start steaming. If the vinegar mixture boils 3. over, switch off the steamer and unplug from the mains socket.
When steaming finishes, unplug the steamer from the mains socket and allow it to 4. cool down before pouring the vinegar mixture out.
Rinse the water tank several times.5.
Recipes
| Type Weight | Water required Steaming time | |
| Rice Rice | 330g, water 200g 1200ml 30-50 minutes | |
| Egg 6pcs | (drill a hole on the top) 1200ml 16-26 minutes | |
| Fish 300g | 1200ml 15-25 minutes | |
| Meat 300g | 1200ml 25-45 minutes | |
| Chicken 400g | 1200ml 25-35 minutes | |
| Potato 1pcs (1-inch thick) | 1200ml 30-35 minutes | |
| Carrot 250g (1-inch thick) | 1200ml 20-30 minutes |
Notes:
- Use the above chart as a guide only and make sure food is cooked through thoroughly before consumption.
- Steaming times in the chart are based on the use of cold water.
- Do not block the holes in the steam plates.
- The cooking times and weights indicated in the chart may vary depending on the size of the pieces of food, the space between items, the quality of the food and individual taste. Once you are familiar with the steamer, you will be able to adjust the cooking time accordingly.
- When using the appliance at high altitude, steaming time may need to be increased.
- A single basket of food steams faster than multiple baskets. Therefore, steaming time for a large quantity of food is much longer.
- Put the largest pieces of food in the lowest steamer basket.
- Do not crowd the food in a basket. There should be space between pieces to allow the steam to flow.
- Completely thaw frozen meat or poultry before steaming.
Technical Specification
| Model | C96SSS09E |
| Mains supply | 230V ~ 50Hz |
| Power consumption | 750W |
We continually strive to improve our products. Specifications may change without prior notice.
Stalla in (Adjust): 3.
Virta paallee/virran (On/Off):1.
Taend/sluk (On/Off):1.
Bouton Mode (Mode) :2.
Specifications techniques
EvpyooinAnevpeyoinOn (On/Off):1.
apou e nlaeene npoypauma kai xpov maeyepaotc oTov ato, natote to yia va Eekivnoe i n aeitoupyia tou aouayepa. Ieote kai kpatnoe natnevo yia 2 etepolentaa ia va otapatnoeTe n aeitoupyia tou aouayepa.
KataoTaon etoupyiac (Mode):2.
When using electrical appliance, basic safety precautions should always be followed, including the following:
Read all instruction before using the food steamer.1.
This equipment has been designed and manufactured to meet international 2. safety standards but, like any electrical equipment, care must be taken if you are to obtain the best results and safety is to be assured.
DO ensure that all electrical connections (including the mains plug, extension 3.1) leads and inter-connections between the pieces of equipment) are properly made and in accordance with the manufacturer's instructions. Switch off and withdraw the mains plug before making or changing connections.
DO consult your dealer if you are ever in doubt about the installation, 4. operation or safety of your equipment.
DON'T remove any fixed cover as this may expose dangerous voltages.5.
DON'T obstruct the ventilation openings of the equipment with items such as 6. newspapers, tablecloths, curtains, etc.
DON'T allow electrical equipment to be exposed to dripping or splashing, or 7. objects filled with liquids, such as vases, to be placed on the equipment.
DON'T continue to operate the equipment if you are in any doubt about it 8. working normally, or if it is damaged in any way - switch off, withdraw the mains plug and consult your dealer.
NEVER guess or take chances with electrical equipment of any kind - it is better 9. to be safe than sorry!
Before connecting the appliance to the power supply, check the voltage on 10. the label corresponds with the voltage on you home, if this is not the case, please don't use the appliance and contact your dealer.
Do not touch the hot surfaces. Use handles or knobs, Always use mitts when 11 handling hot materials, avoid hot steam rising from top of steamer at all times when in use, do not touch over appliance while it is generating steam. Remove lid by lifting slowly away from you. Always use the handle when moving the unit.
Allow the unit to cool completely before cleaning or storing.12.
Allow the unit to cool before putting on or taking off parts.13.
When the appliance is not in use and before cleaning, unplug the food 14. steamer from the outlet.
To protect against the risk of electrical shock, do not immerse the unit bottom, 15. cord or plug in water or other liquid.
Close supervision is always necessary when this or any appliance is used 16- near children.
Do not operate any appliance with a damaged cord or plug or after the 17. appliance malfunctions or has been damaged in any manner. Return appliance to the nearest authorized service facility for examination, repair or adjustment.
Do not use attachments not recommend by manufacturer, they may cause fire, 18. electronic shock or injury.
-
Use the appliance on a level and stable work surface away from water.
-
Do not use outdoors or for commercial purpose, do not use this for other than intended purpose.
Do not let the cord hang over the edge of table or counter.21.
-
Do not let the cord touch hot surface.
-
Do not place the appliance near the hot gas or electronic burner or other toaster oven, for this will cause fire.
Do not operate the appliance without water, it may damage the heating 24. element, if the case happens for incaution, you should immediately unplug the appliance from the outlet. After cooling the appliance for 15 minutes, pour cool water in the appliance.
-
Always use sufficient water for steaming time.
-
When using, position the appliance at the balanced place where the children can't touch it.
During steaming, please be careful of the steam coming out from the steamer 27. lid and don't face directly to any part of the body when opening the lid.
-
Extreme caution must be used when moving an appliance containing hot oil or other hot liquid.
-
Always attach plug to appliance first, then plug cord in the wall outlet. To disconnect, turn any control to "off", then remove plug from wall outlet.
-
Never steam food in the water tank.
-
Be careful of the hot steam, especially from the top lid and power base handle.
-
Save these instructions.
This appliance is not intended for use by persons (including children) with 33. reduced physical, sensory or mental capabilities, or lack of experience and knowledge, unless they have been given supervision or instruction concerning use of the appliances by a person responsible for their safety.
- Children should be supervised to ensure that they do not play with the appliance.
Sikkerhet Først!
NO
This symbol on the product or in the instructions means that your electrical and electronic equipment should be disposed at the end of its life separately from your household waste. There are separate collection systems for recycling in the EU. For more information, please contact the local authority or your retailer where you purchased the product.