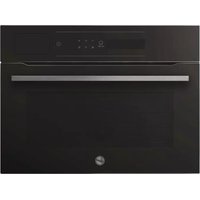
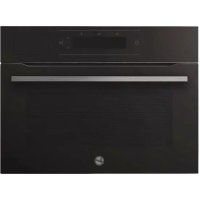
HOAZ 8673 INE - Oven HOOVER - Free user manual and instructions
Find the device manual for free HOAZ 8673 INE HOOVER in PDF.

User questions about HOAZ 8673 INE HOOVER
0 question about this device. Answer the ones you know or ask your own.
Ask a new question about this device
Download the instructions for your Oven in PDF format for free! Find your manual HOAZ 8673 INE - HOOVER and take your electronic device back in hand. On this page are published all the documents necessary for the use of your device. HOAZ 8673 INE by HOOVER.
USER MANUAL HOAZ 8673 INE HOOVER
- During cooking, moisture may condense inside the oven cavity or on the glass of the door. This is a normal condition. To reduce this effect, wait 10-15 minutes after turning on the power before putting food inside the oven. In any case, the condensation disappears when the oven reaches the cooking temperature.
- Cook the vegetablesinacontainer with a lid insteadofanopentray.
- Avoid leaving food inside the oven after cooking for more than 15/20 minutes.
- WARNING: the appliance and accessible parts become hot during use. Be careful not to touch any hot parts.
- WARNING: the accessible parts can become hot when the oven is in use. Childrenmust be kept atasafe distance.
- WARNING: ensure that the appliance is switched off before replacing the bulb, toavoid the possibility of electric shocks.
- WARNING: before initiating the automatic cleaning cycle:
- Clean the ovendoor;
- Remove large or coarse foodresidues from the inside of the oven using a damp sponge. Do not use detergents;
- Remove all accessories and the sliding rackkit(where present);
- Do not place tea towels
- In ovens with meat probe it is necessary, before making the cleaning cycle, close the hole with the nut provided. Always close the hole with the nut when the meat probe is not used.
- Children under 8 must be kept at a safe distance from the appliance if not continuously supervised.
- Children must not play with the appliance. The appliance can be used by those aged 8 or over and by those with limited physical, sensorial or mental capacities, without experience or knowledge of the product, only if supervised or provided with instruction as to the operation of the appliance, in a safe way with awareness of the possibilerisks.
- Cleaning and maintenance should not be carried out by unsupervised children.
- Do not use rough or abrasive materials or sharp metal scrapers to clean the oven door glasses, as they can scratch the surface and cause the glass toshatter.
- The oven must be switched off before removing the removable parts and, aftercleaning, reassemble them according the instructions.
-
Only use the meat probe recommended for this oven.
-
Do not use a steam cleaner for cleaning operations.
- Connect a plug to the supply cable that is able to bear the voltage, current and load indicated on the tag and having the earth contact. The socket must be suitable for the load indicated on the tag and must be having the earth contact connected and in operation. The earth conductorisyellow-green in colour. This operation should be carried out by a suitably qualified professional. In case of incompatibility between the socket and the appliance plug, ask a qualified electrician to substitute the socket with another suitable type. The plug and the socket must be conformed to the current norms of the installation country. Connection to the power source can also be made by placing an omnipolar breaker between the appliance and the power source that can bear the maximum connected load and that is in line with current legislation. The yellow-green earth cable should not be interrupted by the breaker. The socket or omnipolar breaker used for the connection should beeasily accessible when the applianceisinstalled.
- The disconnection may be achieved by having the plug accessible or by incorporating a switch in the fixed wiring in accordance with the wiring rules.
- If the power cable is damaged, it must be substituted with a cable or special bundle available from the manufacturer or by contacting the customer service department.
- The type of powercable mustbeH05V2V2-F.
- Failure to comply with the above can compromise the safety of the appliance and invalidate the guarantee.
- Any excess of spilled materials should be removed before cleaning.
- During the pyrolytic cleaning process, surfaces can heat up more than usual, children must therefore be kept atasafe distance.
- The appliance must not be installed behind a decorative door in order to avoid overheating.
- When you place the shelf inside, make sure that the stop is directed upwards and in the back of the cavity.
The shelf mustbeinserted completely into the cavity - WARNING: Do not line the oven walls with aluminum foil or single-use protection available from stores. Aluminum foil or any other protection, in direct contact with the hot enamel, risk melting and deteriorating the enamel of the insides.
- WARNING: Neverremove the oendoarseal.
- No additional operation/setting is required in order to operate the appliance attherated frequencies.
General Instructions
5
1.1 Safety indications
1.2 Electrical safety
1.3 Recommendations
1.4 Installation
1.5 Waste management
1.6 Conformity declaration
Product Description
7
2.1 Overview
2.2 Accessories
2.3 First use
Use of the Oven
8
3.1 Display description
3.2 Cooking modes
Oven Cleaning and Maintenance
11
4.1 General notes on cleaning
4.2 Steam cleaning
4.3 Maintenance
- Removal and cleaning of grills
- Removal of the oven window
- Removal and cleaning of the glass door
- Changing the bulb
Troubleshooting
14
5.1 F.A.Q.
1. General Instructions
We thank you for choosing one of our products. For the best results with your oven, you should read this manual carefully and retain it for future reference. Before installing the oven, take note of the serial number so that you can give it to customer service staff if any repairs are required. Having removed the oven from its packaging, check that it has not been damaged during transportation. If you have doubts, do not use the oven and refer to a qualified technician for advice. Keep all of the packaging material (plastic bags, polystyrene, nails) out of the reach of children. When the oven is switched on for the first time, strong
smelling smoke can develop, which is caused by the glue on the insulation panels surrounding the oven heating for the first time. This is absolutely normal and, if it occurs, you should wait for the smoke to dissipate before putting food in the oven. The manufacturer accepts no responsibility in cases where the instructionscontained in this document are not observed.
NOTE: the oven functions, properties and accessories cited in this manual will vary, depending on the model you havepurchased.
1.1 Safety Indications
Only use the oven for its intended purpose, that is only for the cooking of foods; any other use, for example as a heat source, is considered improper and therefore dangerous. The manufacturer cannot be held responsible for any damage resulting from improper, incorrector unreasonable usage.
The use of anyelectrical appliance implies the observanceof some fundamental rules:
- do not pull on the power cable to disconnect the plug from the socket;
- do not touch the appliance with wet or damp hands or feet;
- in generalthe use of adaptors.multiple sockets and extensioncables is not recommended:
- in case of malfunction and/or poor operation, switchoff the appliance and do not tamper with it.
1.2 Electrical Safety
ENSURE THAT AN ELECTRICIAN OR QUALIFIED TECHNICIAN MAKES THE ELECTRICAL CONNECTIONS.
The power supply to which the oven is connected must conform with the laws in force in the country of installation. The manufacturer accepts no responsibility for any damage caused by the failure to observe these instructions. The oven must be connected to an electrical supply with an earthed wall outlet or a disconnector with multiple poles, depending on the laws in force in the country of installation. The electrical supply should be protected with suitable fuses and the cables used must have a transverse section that can ensure correct supply to the oven.
CONNECTION
The oven is supplied with a power cable that should only be connected to an electrical supply with 220-240 Vac 50Hz power between the phases or between the phase and neutral. Before the oven is connected to the electrical supply, it is important to check:
- power voltage indicated on the gauge;
- the setting of the disconnector.
The grounding wire connected to the oven's earth terminal must be connected to the earth terminal of the power supply.
WARNING
Before connecting the oven to the powersupply, ask a qualified electrician to check the continuity of the power supply's earth terminal. The manufacturer accepts no responsibility for any accidents or other problems caused by failure to connect the oven to the earth terminal or by an earth connection that has defective continuity.
NOTE: as the oven could require maintenance work, it is advisable to keep another wall socket available so that the oven can be connected to this if it is removed from the space in which it is installed. The power cable must only be substituted by technical service staff or by technicians with equivalent qualifications.
1.3 Recommendations
After each use of the oven, a minimum of cleaning will help keep the oven perfectly clean.
Do not line the oven walls with aluminium foil or single-use protection available from stores. Aluminium foil or any other protection, in direct contact with the hot enamel, risks melting and deteriorating the enamel of the insides. In order to prevent excessive dirtying of your oven and the resulting strong smokey smells, we recommend not using the oven at very high temperature. It is better to extend the cooking time and lower the temperature a little. In addition to the accessories supplied with the oven, we advise you only use dishes and baking moulds resistanttovery high temperatures.
1.4 Installation
The manufacturers have no obligation to carry this out. If the assistance of the manufacturer is required to rectify faults arising from incorrect installation, this assistance is not covered by the guarantee. The installation instructions for professionally qualified personnel must be followed. Incorrect installation may cause harm or injury to people, animals or belongings. The manufacturer cannot be held responsible for such harm or injury.
The oven can be located high in a column or under a worktop. Before fixing, you must ensure good ventilation in the oven space to allow proper circulation of the fresh air required for cooling and protecting the internalparts. Make the openings specified on last page according to the type of fitting.
1.5 Waste management and environmental protection
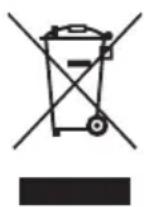
This appliance is labelled in accordance with European Directive 2012/19/EU regarding electric and electronic appliances (WEEE). The WEEE contain both polluting substances (that can have a negative effect on the environment) and base elements (that can be reused). It is important that the WEEE undergo specific treatments to correctlyremove and dispose of the pollutants and recover all the materials. Individuals can play an important role in ensuring that the WEEE do not become an environmental problem; it is essential to follow a fewbasic rules:
- the WEEE should not be treated as domesticwaste;
- the WEEE should be taken to dedicated collection areas managed by the town council or a registered company.
In many countries, domestic collections may be available for large WEEEs. When you buy a new appliance, the old one can be returned to the vendor who must accept it free of charge as a one-off, as long as the appliance is of an equivalent type and has the same functions as the purchased appliance.
SAVING AND RESPECTING THE ENVIRONMENT
Where possible, avoid pre-heating the oven and always try to fill it. Open the oven door as infrequently as possible, because heat from the cavity disperses every time it is opened. For a significant energy saving, switch off the oven between 5 and 10 minutes before the planned end of the cooking time, and use the residual heat that the oven continues to generate. Keep the seals clean and in order, to avoid any heat dispersal outside of the cavity. If you have an electric contract with an hourly tariff, the "delayed cooking" programme makes energy saving more simple, moving the cooking process to start at the reducedtarifftime slot.
1.6 Declaration of compliance
The parts of this appliance that may come into contact with foodstuffs comply with the provisionsof EEC Directive89/109.
By placing the mark on this product, we are confirming compliance to all relevant European safety, health and environmental requirements which are applicable in legislation for this product.
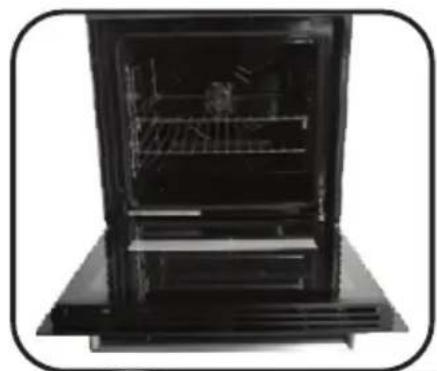
2. Product Description
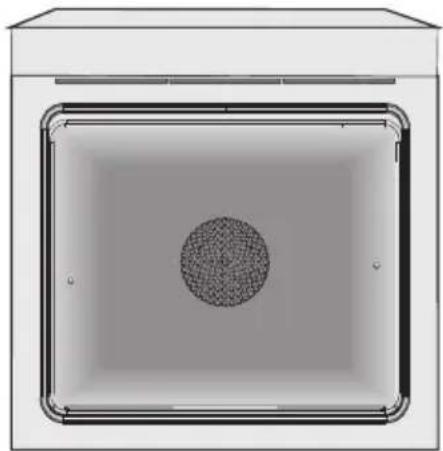
2.1 Overview
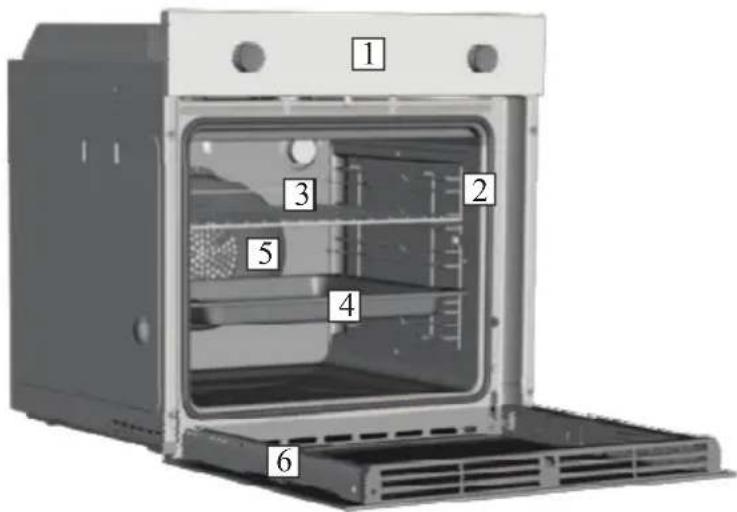
- Control panel
- Shelf positions
(lateral wire grid if included)
- Metal grill
- Drip pan
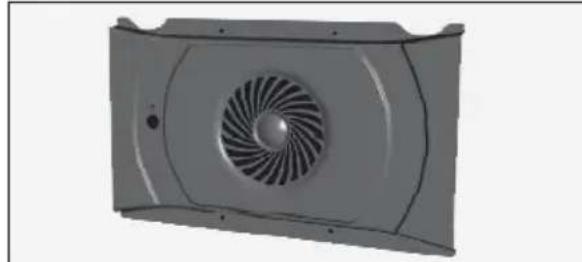
- Fan (behind the steel plate)
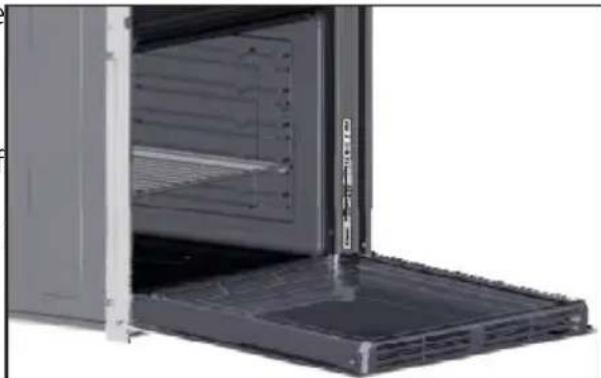
- Oven door
2.2 Accessories
1 Drip pan
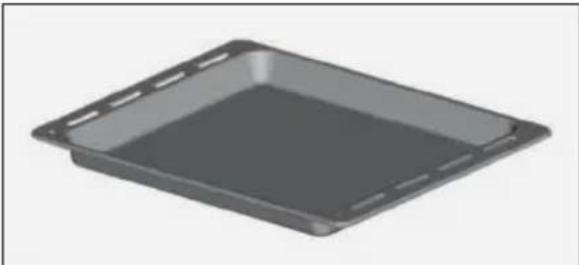
Collects the residuessthatdripduringthecooking of foodson the grills.
2 Metal grill
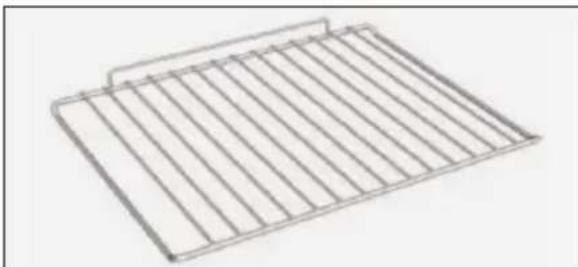
Holds baking trays and plates.
3 Chef Panel
All ovens with this technology boast a function typical of professional models, the fruit of innovative technologies and the vast experience acquired by the Candy Hoover Group in this sector. The Chef Panel is an air conveyor that increases air circulation inside the oven. This allows for an increase in oven cooking performance, more standard cooking of food at all temperatures, shorter cooking times and, lastly, a uniform temperature distribution inside the oven.
4 Lateral wire grids
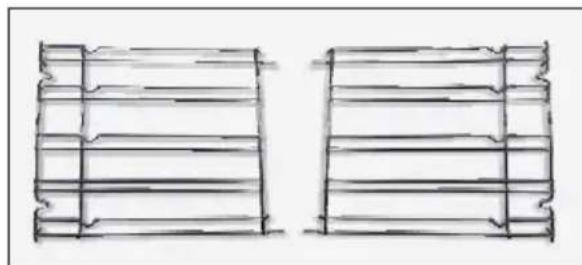
Lateral wire grid if included.
2.3 First Use
PRELIMINARYCLEANING
Clean the oven before using for the first time. Wipe over external surfaces with a damp soft cloth. Wash all accessories and wipe inside the oven with a solution of hot water and washing up liquid. Set the empty oven to the maximum temperature and leave on for about 1 hour, this will remove any lingering smells ofnewness.
3. Use of the Oven
3.1 Display description
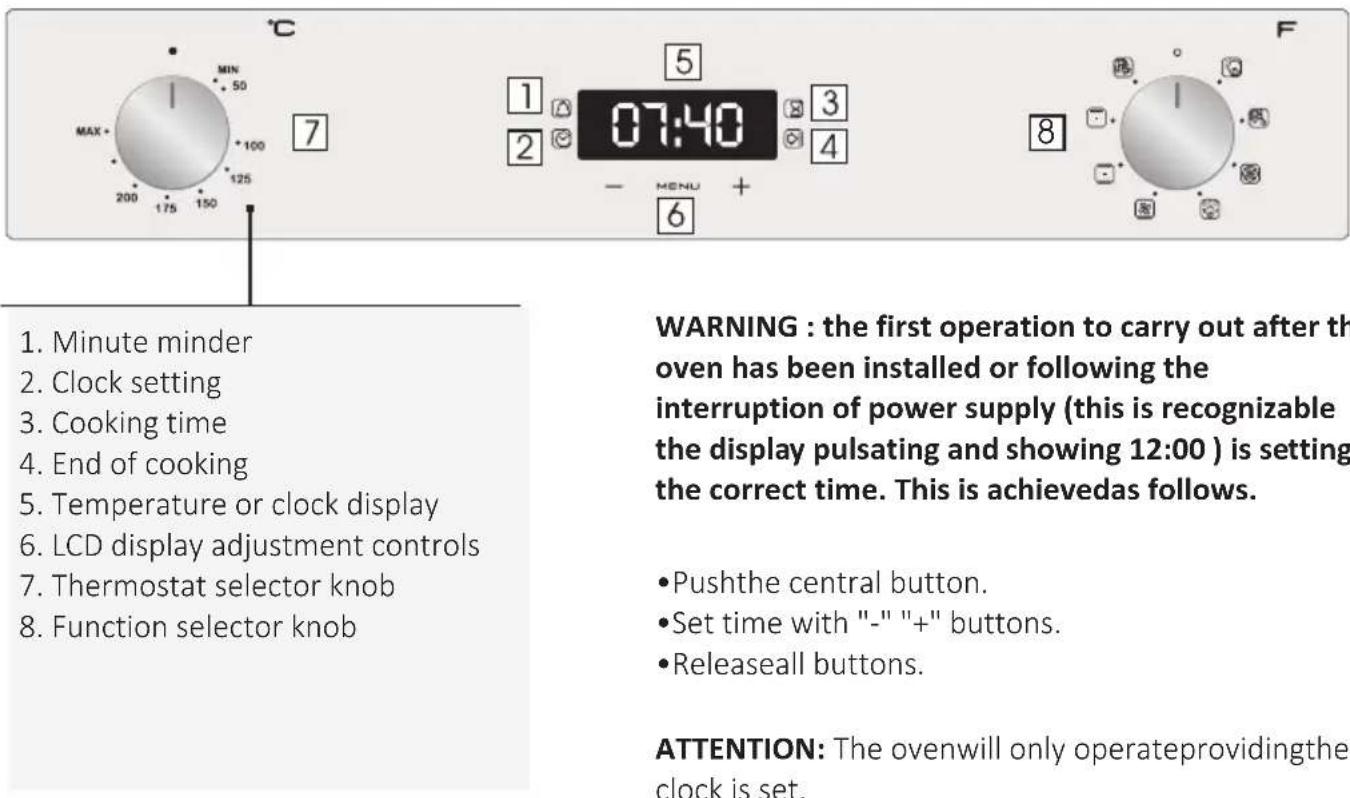
| FUNCTION | HOW TO DEACTIVATE WHAT IT DOES WHY IT ISNEEDEDHOW TO USE | ||
| KEY LOCK | Child Lock function is activated by touching Set (+) for a minimum of 5 se cond. F rom this moment on all other function are locked and the display will flash STOP and preset time intermittently. | Child Lock function is deactivated by touching touchpad Set (+) again for a minimum of 5 se cond. F ro m t his moment on all functions areselectableagain. | |
| MINUTE MINDER | Push the central button 1 timesPress the buttons "-"+"+"to set the required timeRelease all the buttons | When the set time as elapsed an audible alarm is activated (this alarm will stop on its own, ho wever it can be stopped immediately by pressing the button) SELECT. | Sounds an alarm at the end of the set time.During the process, the display shows the remaining time. |
| COOKING TIME | Push the central button 2 timesPress the buttons "-" or "+"to set the lenght of cookingrequiredRelease all buttonsSet the cooking function with the oven function selector | Push any button to stop the signal. Push the central button to return to the clock function. | It allows to preset the cooking time required for the recipe chosen.To check how long is left to run press the SELECT button2 Times.To alter/change the preset time press SELECT and "-"+"+" buttons. |
| END OF COOKING | Push the central button 3 times Press the buttons "-"+"+" to set the time at which you wish the oven to switchoffReleasethe buttonsSet the cooking function with the oven function selector. | At the time set, the oven will switch off. To switch off manually, turn the oven function selectortoposition O. | Enables you to set the end of cooking timeTo check the preset time push the central button3 timesTo modify the preset time pre s b utt o ns SELECT + "-"+"+" |
| This function is typically used with "cooking time" function.For example if the dish has to be cooked for 45 minutes and needs to be ready by 12:30, simply select the required function, set the cooking time to 45 minutes and the end of cooking time to12:30.At the end of the cooking set time, the oven will switch off automatically and an audible alarm will ring.Cooking will start automatically at 11:45 (12:30 minus 45 mins) and will continue until the preset end-of-cooking-time, when the oven will switch itself off automatically.WARNING.If the END of cooking is selected without setting the length of cooking time, the oven will start cooking immediately and it will stop at the END of cooking time set. |
3.2 Cooking Modes
| Function Dial | T°C default | T°C range | Function (Depends on the oven model) |
| LAMP: Turns on the oven light. | |||
| 40 | 40 ÷ 40 | DEFROST: When the dial is set to this position. The fan circulates air at room temperature around the frozen food so that it defrosts in a few minutes without the proteincontent of the foodbeingchangedor altered. | |
| 180 | 50 ÷ 240 | FAN COOKING: We recommend you use this method for poultry, pastries, fish and vegetables. Heat penetrates into the food better and both the cooking and preheating times are reduced. You can cook different foods at the same time with or without the same preparation in one or more positions. This cooking method gives evenheat distributionandthe smells are not mixed. Allow about ten minutes extrahencookingfoods at the same time. | |
| 210 | 50 ÷ 240 | ||
| * | 220 50 ÷ 280 | CONVENTIONAL COOKING: Both top and bottom heating elements are used. Preheat the oven for about ten minutes. This method is ideal for all traditional roasting and baking. For seizing redmeats, roastbeef, leg of lamb, game, bread, foilwrappedfood (papillotes), flaky pastry. Place the food and its dish on a shelf in mid position. | |
| 210 50 ÷ 230 | BOTTOM: Using the lower element. Ideal for cooking all pastry based dishes. Use this for flans, quiches, tarts, pate and any cooking that needs more heat frombelow. | ||
| 210 | 50 ÷ 230 | FAN + LOWER ELEMENT: The bottom heating element is used with the fan circulatingthe air inside the oven. This method is ideal forjuicy fruit flans, tarts, quiches and pâté. It prevents food from drying and encourages rising in cakes, bread dough and other bottom-cooked food. Place the shelf in thebottomposition. | |
| 200 | 150 ÷ 220 | FAN ASSISTED GRILL: use the turbo-grill with the door closed. The top heating element is used with the fan circulating the air inside the oven. Preheating is necessary for red meats but not for white meats. Ideal for cooking thick food items, whole pieces such as roast pork, poultry, etc. Place the food to be grilled directly on the shelf centrally, at the middle level. Slide the drip tray under the shelf to collect the juices. Make sure that the food is not too close to the grill. Turn the foodover halfway through cooking. | |
| L3 | L1 ÷ L5 | GRILL: use the grill with the door closed. The top heating element is used alone and you can adjust the temperature. Five minutes preheating is required to get the elements red-hot. Success is guaranteed forgrills, kebabs and gratin dishes. White meats should be put at a distancefromthe grill; the cooking time is longer, but the meat will be tastier. You can put red meats and fish fillets on the shelf with the drip tray underneath. The oven has two grill positions: Grill: 2140 W Barbecue: 3340 W | |
| 220 50 ÷ 230 | PIZZA - With this function hot air circulatedin the oven to ensureperfect result fordishessuch as pizzora cake. | ||
| * | 190 50 ÷ 230 | The "ECO" function allows you to cook in a healthier way, by reducing the amount of fat or oil required. Thanks to the use of the grill and fan combined with a pulsating cycle of air, it will retain the moisture content of the food, grilling the surface and using a shortercookingtime,withoutcompromising on taste. It is particularly suitable for cooking meat, roasted vegetables and omelettes. The cycle of pulsed air keeps the humidity inside the oven and the moisture content of the food, preserving the nutritional values and ensuring a rapid uniform cooking process. Try all your recipes and reduce the amount of dressing you usually use and experiencechelightnessofthisnewfunction! | |
*Tested in accordance with the CENELEC EN 60350-1 used for definition of energy class.
4. Oven cleaning and maintenance
4.1 General notes on cleaning
The lifecycle of the appliance can be extended through regular cleaning. Wait for the oven to cool before carrying out manual cleaning operations. Never use abrasive detergents, steel wool or sharp objects for cleaning, so as not irreparably damage the enamelled parts. Use only water, soap or bleach-based detergents (ammonia).
GLASS PARTS
It is advisable to clean the glass window with absorbent kitchen towel after every use of the oven. To remove more obstinate stains, you can use a detergent-soaked sponge, well wrung out, and then rinse with water.
OVENWINDOW SEAL
If dirty, the seal can be cleaned with a slightly damp sponge.
ACCESSIONS
Clean accessories with a wet, soapy sponge before rinsing and drying them: avoid using abrasive detergents.
DRIP PAN
After using the grill, remove the pan from the oven. Pour the hot fat into a container and wash the pan in hot water, using a sponge and washing-up liquid.
If greasy residues remain, immerse the pan in water and detergent. Alternatively, you can wash the pan in the dishwasheroruseacommercialoven detergent.Never put a dirty pan back intotheoven.
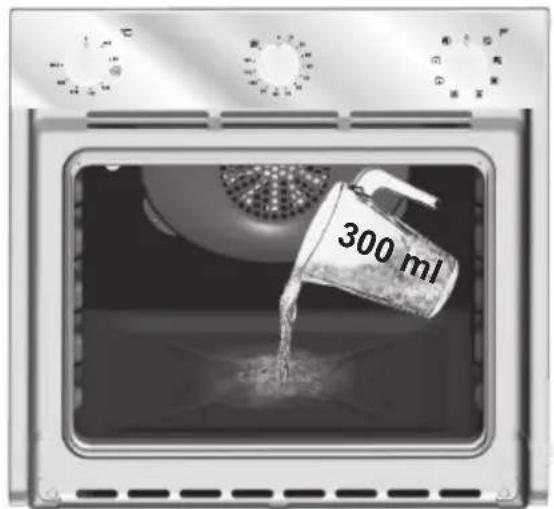
4.2 Steam Cleaning
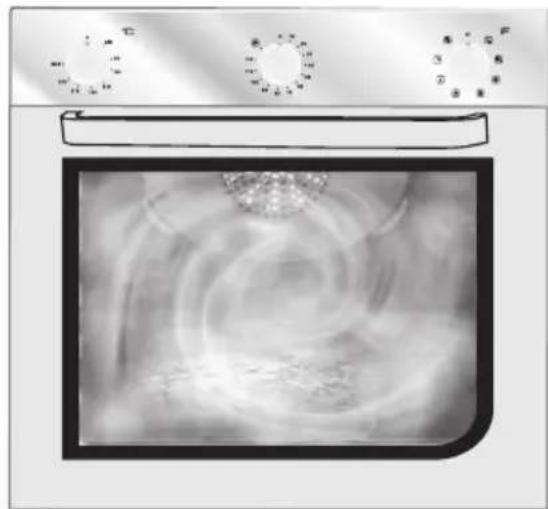
This procedure uses steam to help remove remaining fat and food particles from the oven.
- Pour 300ml of water into the bottom of the oven.
- Set the oven function to Static ( - ) or Bottom heater ( - ).
- Set the temperature at 90^
- Allow the program to operate for 30 minutes.
- After 30 minutes switch off the program and allow the oven to cool down.
- When the appliance is cool, clean the inner surfaces of the oven with a cloth.
Warning: Make sure that the appliance is cool before you touch it.
Care must be taken with all hot surfaces as there is a risk of burns. Use distilled or drinkable water.
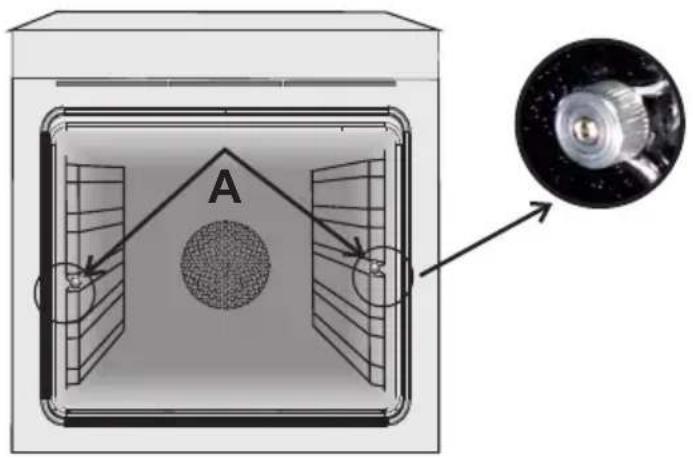
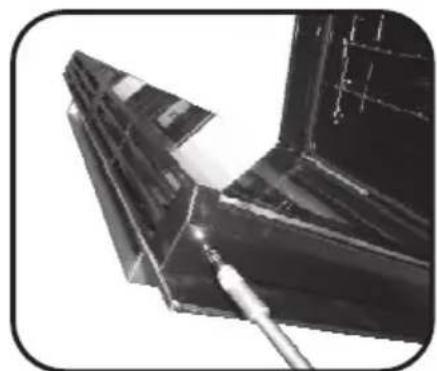
REMOVAL AND CLEANINGOFTHESIDERACKS
- Unscrewthe boltinananti-clockwise direction.
- Remove the side racks by pulling them towards you.
- Clean the side racks in a dishwasherorwithawet sponge and then dry them immediately.
- Having cleaned the side racks, put them back in and reinsert the bolts, ensuring that they are fully tightened.
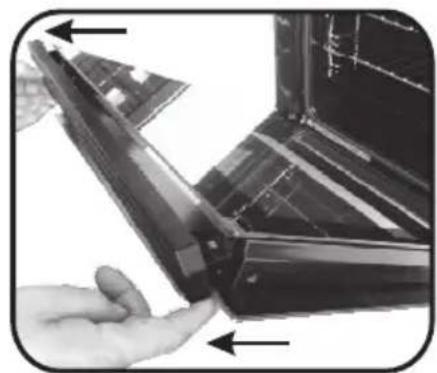
REMOVAL OF THE OVENWINDOW
- Open the front window.
- Open the clamps of the hinge housing on the right and left side of the front window by pushing them downwards.
- Replacethewindowby carrying out the procedure in reverse.
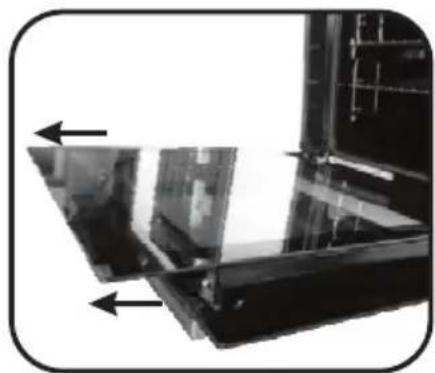
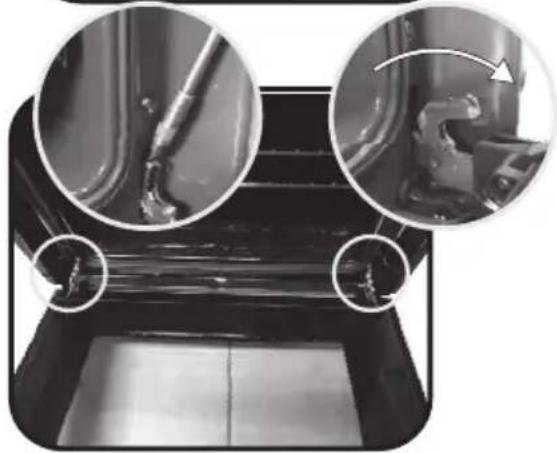
REMOVAL AND CLEANINGOFTHEGLASSDOOR
- Open the overdoor.
2.3.4. Lock the hinges, remove the screws and remove the upper metalcoverbypullingitupwards.
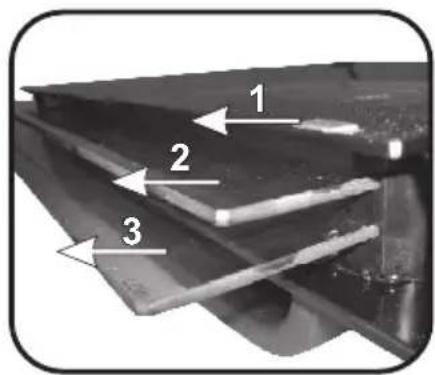
5.6. Remove the glass, carefully extracting it from the oven door (NB: in pyrolytic ovens, also remove the secondandthird glass (if present)). - Attheendofcleaningorsubstitution,reassemble the parts in reverseorder.
On all glass, the indication "Pyro" must be legible and positioned on the left side of the door, close to the left-hand lateralhinge. Inthisway, the printed label of the first glass will be inside the door.
1.
5.
2.
6.
3.
7.

4.
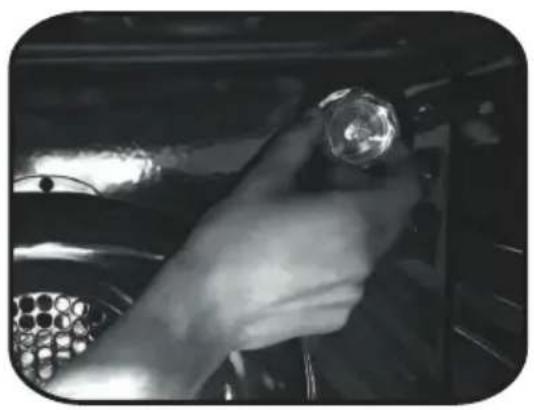
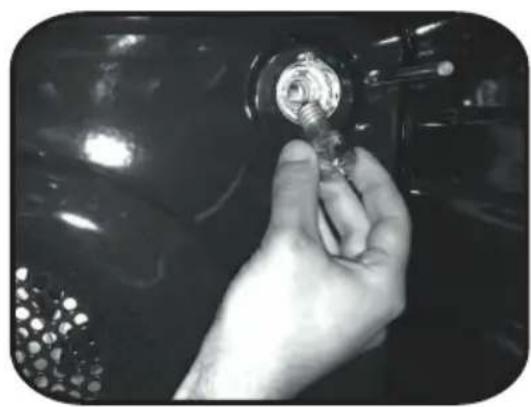
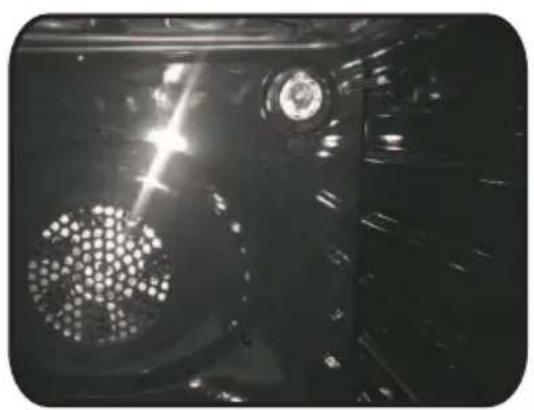
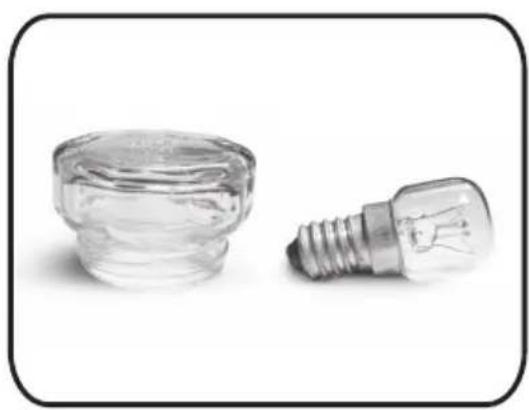
CHANGING THE BULB
- Disconnecttheovenfrom the mains supply.
- Undo the glass cover,unscrew the bulb and replaceitwithanew bulb of the same type.
- Once the defective bulbisreplaced,replace the glass cover.
5. Troubleshooting
5.1 FAQ
| PROBLEM POSSIBLE CAUSE SOLUTION | ||
| The oven does not heat up | The clock is not set Set the | clock |
| The oven does not heat up | The child lock is on | Deactivate the child lock |
| The oven does not heat up | A cooking function and temperature has not been set | Ensure that the necessary settings are correct |
| No reaction of the touch user interface | Steam and condensation on the user interface panel | Clean with a microfiber cloth the user interface panel to remove the condensation layer |
Conseils De Securite
REEMPLACEMENTDE L'AMPOULE
Tel: 039.2086.1 Fax: 039.2086.403
www.candy-group.com
GARANTI BELGESI
ANKASTRE FIRIN
The manufacturer will not be responsible for any inaccuracy resulting from printing or transcript errors contained in this brochure. We reserve the right to carry out modifications to products as required, including the interests of consumption, without prejudice to the characteristics relating to safety or function.