
Rear - Child bike seat Urban Iki - Free user manual and instructions
Find the device manual for free Rear Urban Iki in PDF.
| Product Type | Rear child bike seat |
| Brand | Urban Iki |
| Model | Rear |
| Maximum child weight | 22 kg |
| Recommended age | 9 months to about 6 years |
| Safety standard | EN14344, TÜV certified |
| Compatible rack width | 120 - 175 mm |
| Required max rack load | 25 kg (ISO11243 standard) |
| Mounting | On rack with clip system and combination lock |
| Footrests | Adjustable, with foot straps |
| Safety harness | Integrated, adjustable |
| Material | Sturdy plastic and padding |
| Warranty | 2 years |
| Care | Clean with cloth, warm water and mild detergent |
| Included accessories | Mounting frame, footrests, Allen key #5, user manual |
| Use | Urban bike, not for MTB |
| Country of origin | Dutch design, Japanese manufacturing |
Frequently Asked Questions - Rear Urban Iki
User questions about Rear Urban Iki
0 question about this device. Answer the ones you know or ask your own.
Ask a new question about this device
Download the instructions for your Child bike seat in PDF format for free! Find your manual Rear - Urban Iki and take your electronic device back in hand. On this page are published all the documents necessary for the use of your device. Rear by Urban Iki.
USER MANUAL Rear Urban Iki
numeric code lock included

e-bike fitting

no.5 included
Scan for instruction video

Bike away in just a few minutes
Rear seat Carrier mounting
Fietszitje achefter Drager montage ハヤリヤ取付けタイフ自軀車用ヤシト

021-83657490

urban iki
丰 BYOGK

Hi.
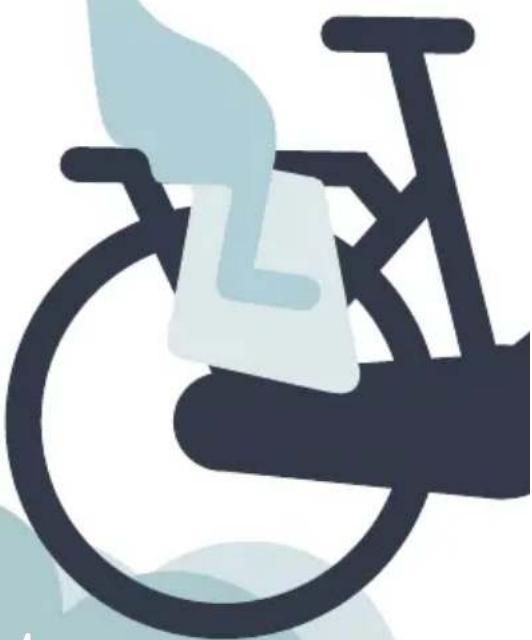
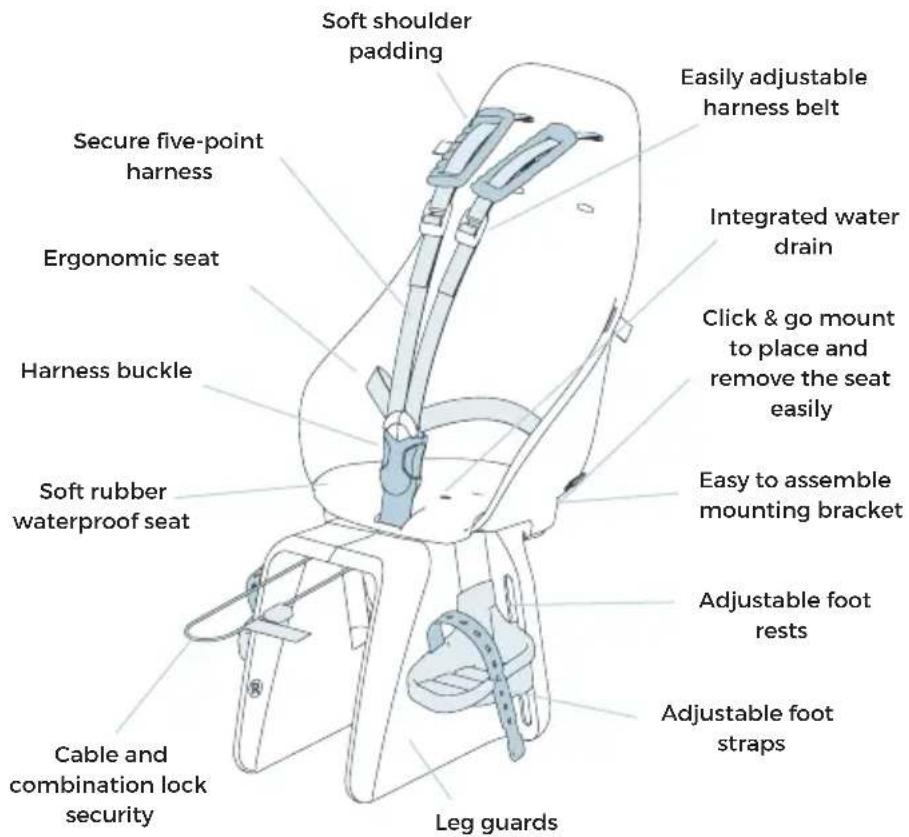
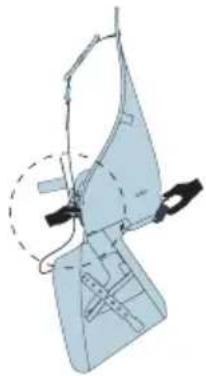
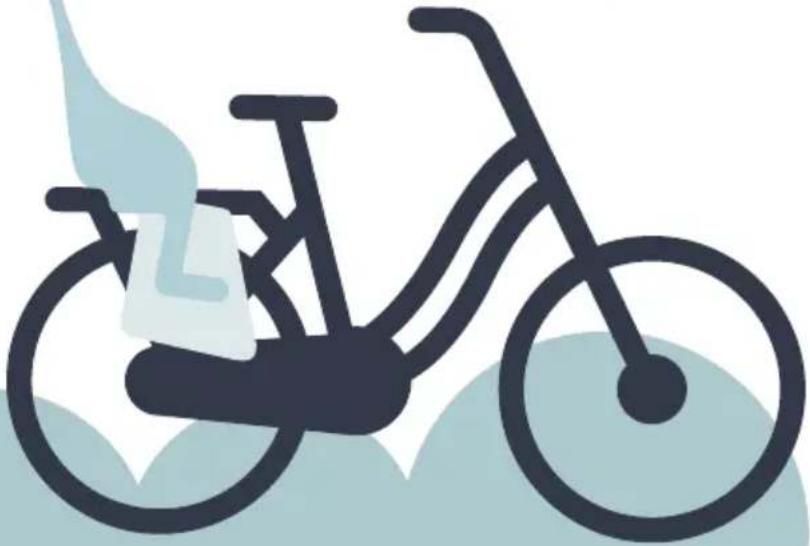
You made an excellent choice in buying the Urban Iki Rear seat, the child bike seat for taking your child on the best bike trips.
Urban Iki by OGK has been developed by Dutch and Japanese designers and the Urban Iki products truly combine the best of both worlds. OGK has been producing innovative products for cycling consumers for eighty years and is the ultimate bike seat expert in Japan, the world's utmost bicycle country. Technology and safety at the highest level. Japanese know-how and world-renowned Dutch design are brought together in perfect harmony in your Urban Iki bike seat.
The Urban Iki Rear seat child bike seat can be easily attached to your bike rack. To this end and for the safety of both you and your child, your bicycle must be fitted with an ISO 11243 (EN 14872 for Europe) compliant luggage rack that can support a weight of up to 25kg . A separate mounting bracket is available for bikes without a (suitable) rack. An additional luggage rack frame for a second bicycle is also available as a separate accessory. The Urban Iki Rear seat is no longer suitable for transporting your child if he or she has outgrown the seat and exceeds the weight of 22kg . Visit www.urbaniki.com for our complete range of products and all available accessories.
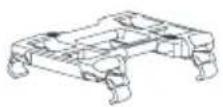
Box contents
1 Urban Iki Rear seat bike seat
2 leg protectors (left + right)

wrench
1 luggage rack mounting bracket
1 user manual No ^ 5 soc
User Manual
The Urban Iki Rear seat is easy to assemble and attach to your bike. This user manual will explain step by step how to do this quickly and easily for you to be on your way quickly and enjoy your bike together with your child. Please read the manual carefully before using the Urban Iki Rear seat and follow the instructions for safe use closely. This will ensure lots of safe cycling fun.

To avoid risk of suffocation, keep all plastic packaging materials out of reach of babies and children. Dispose of the packaging immediately.
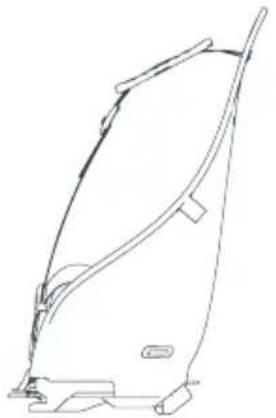
What makes the Urban Iki Rear seat unique
How to assemble your Urban Iki Rear seat
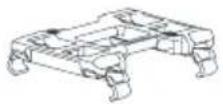
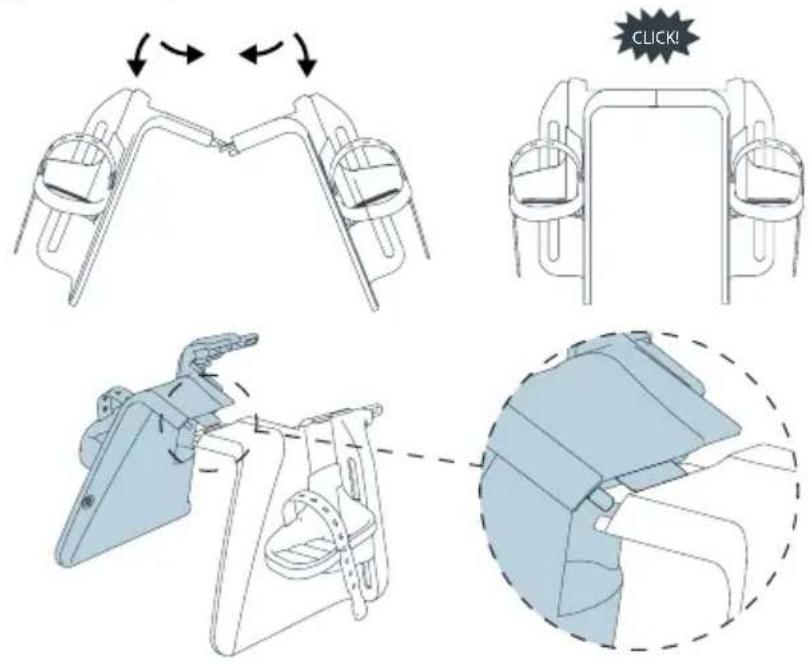
Your Urban Iki Rear seat child bike seat is easy to assemble. You only need to click together the left and right leg parts and slide them onto the seat as a whole. The leg parts are attached to the seat correctly when you hear a click and feel that the leg parts can no longer slide back.
Step 1: Snap leg parts together

Scan for instruction video
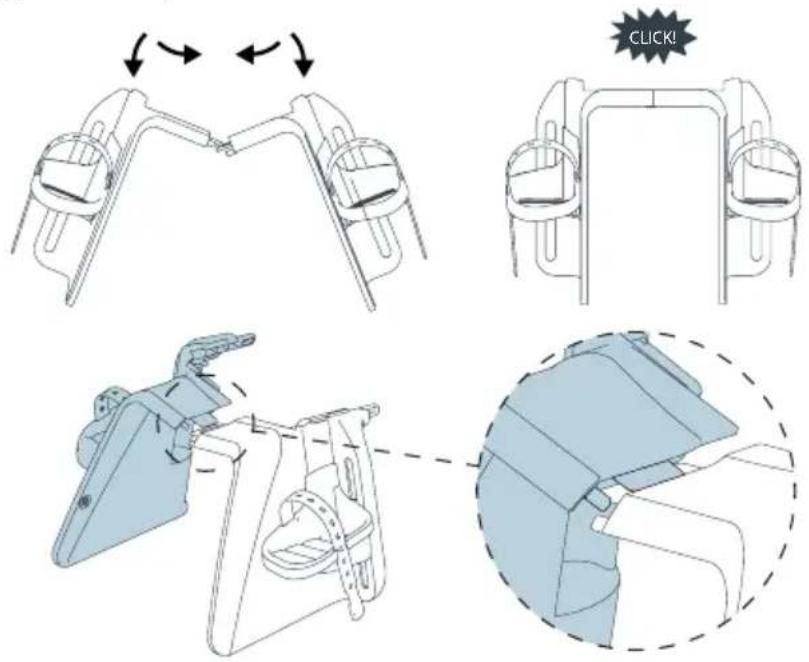
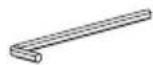
Leg parts (left + right)
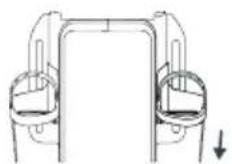
Step 2: Slide leg parts under the seat
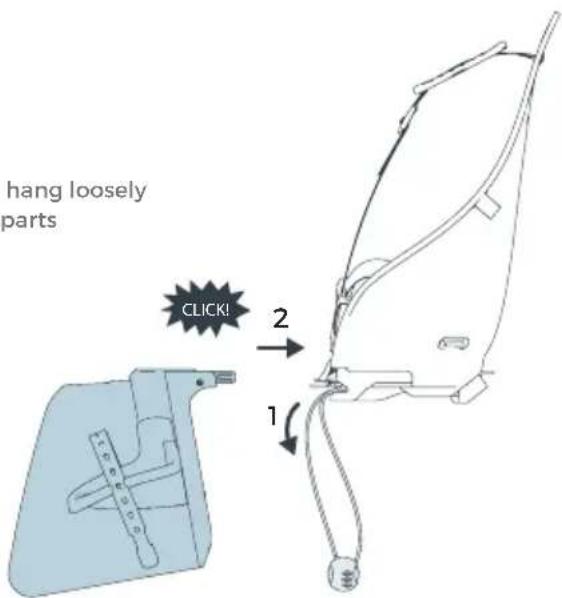
1. Let cable hang loosely
2. Slide leg parts

Scan for instruction video
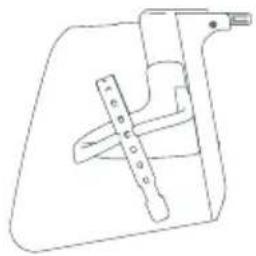
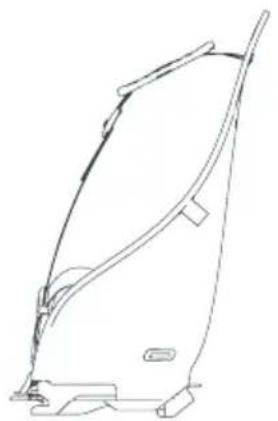
How to attach your Urban Iki Rear seat to your bicycle
The Urban Iki Rear seat is suited for transporting children with a maximum weight of 22kg between the ages of nine months to about six years old. Check whether using the Urban Iki Rear seat is legally permitted in the country in which you wish to use it.
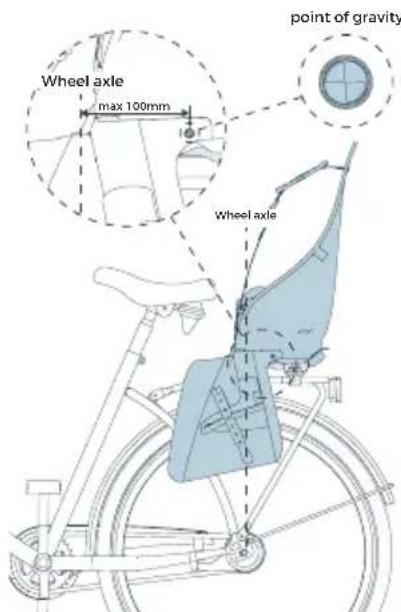
The bike seat can be attached to any bike rack with a width between 120 and 175mm . Only use the Urban Iki Rear seat on bikes that are equipped to carry heavier loads.
Consult your bicycle's manual or ask the bicycle's manufacturer. If your bicycle is technically equipped to carry the Urban Iki bike seat, then you can attach it as follows.
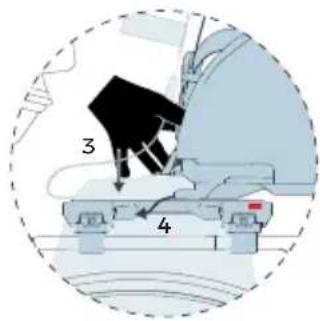
Step 1: Loosen Step 2: Place on the carrier
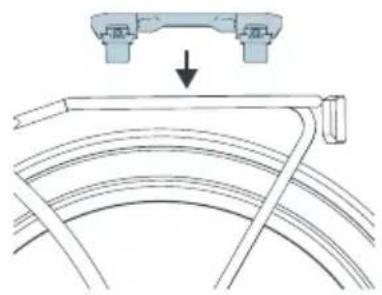
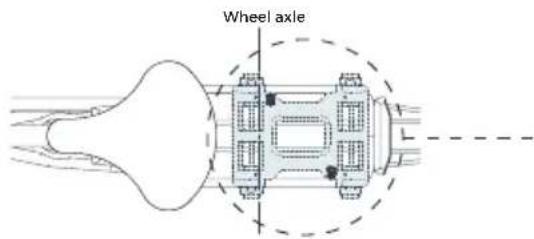
Step 3: Position on the carrier
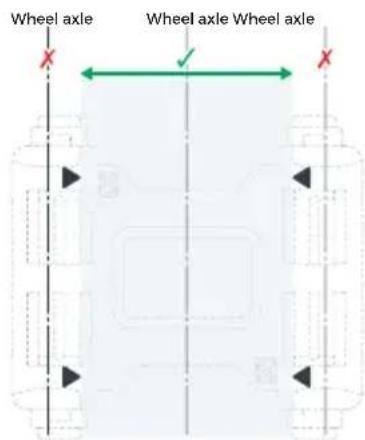
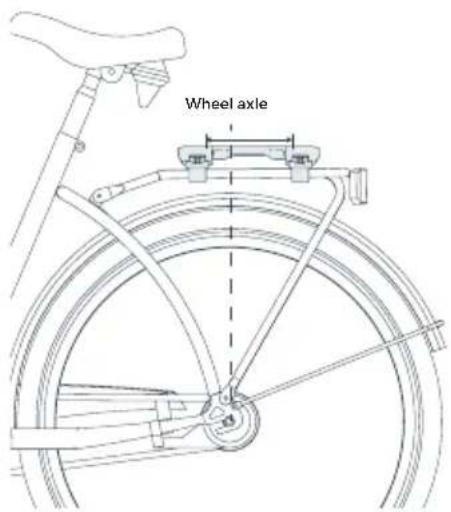
Step 4: Check position
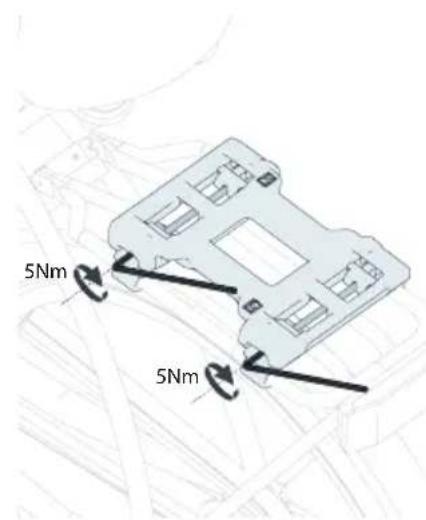
Step 5: Tighten
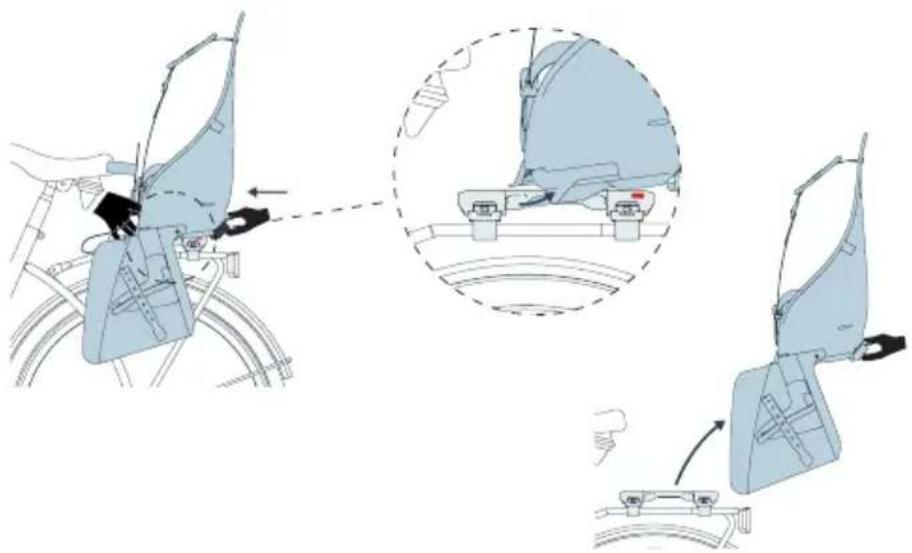
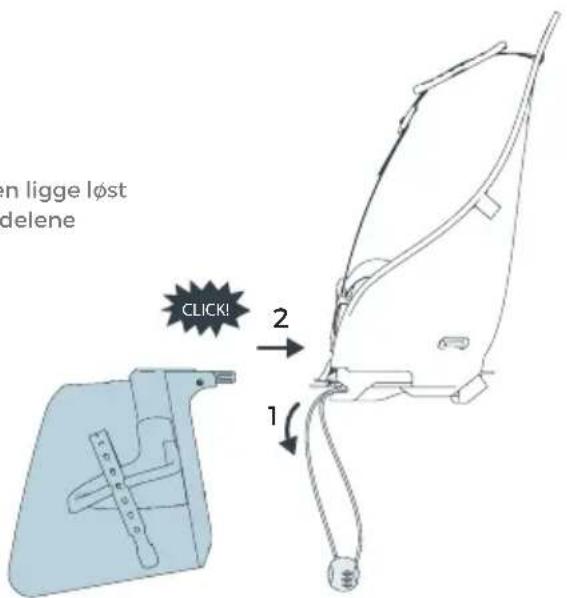
Step 6: Place seat on the carrier
1. Hold the cable lock and the buckle in one hand
2. Slide the bicycle seat in a horizontal position over the bracket
3. Press down the leg parts while sliding forward
4. Slide until the seat is in the most front position
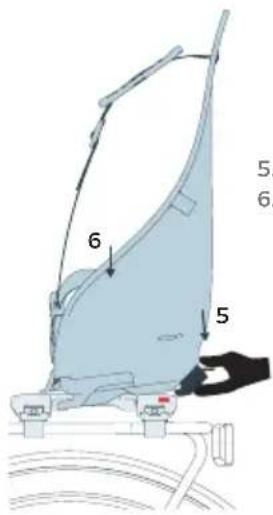
5. Press the clip down
6. Press down the seat
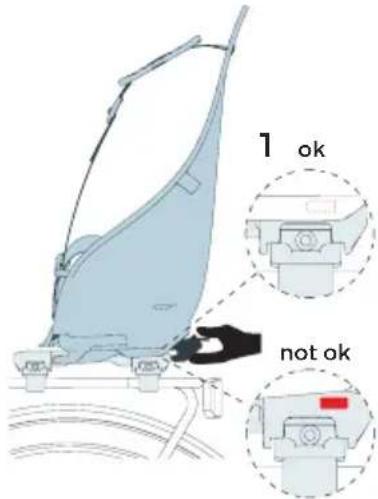

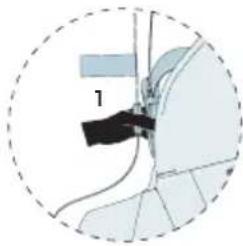
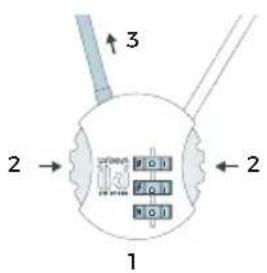
The seat is attached correctly if the red sticker on the side1 and handle2 is no longer visible.
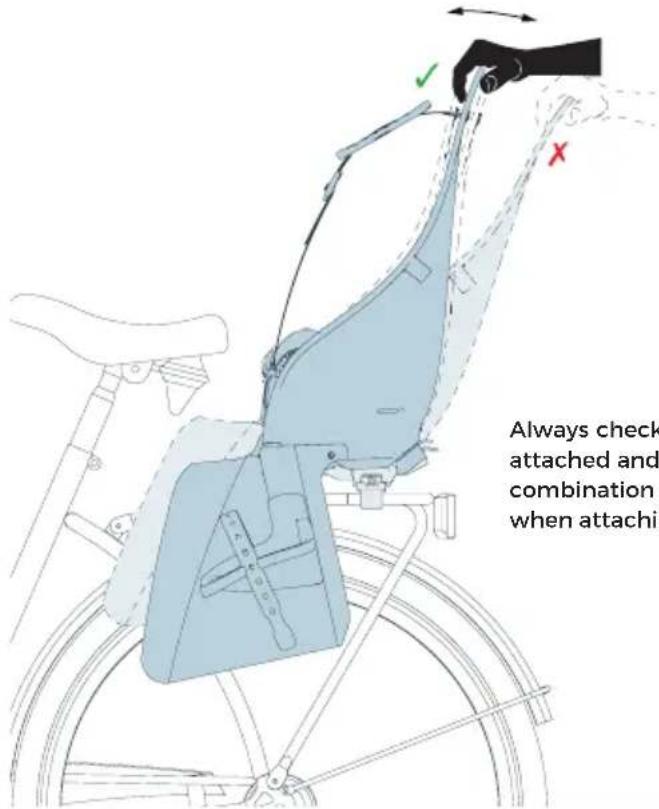
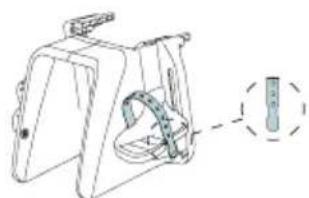
Always check to see if you properly attached and locked the cable with combination lock around the frame when attaching the bike seat.
Step 7: Set personal code
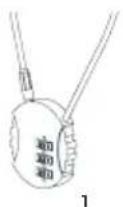
1. Enter code 000 2. Press button
3. Set personal code
4. Release button
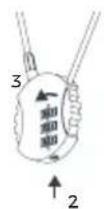
Step 8: Open the lock
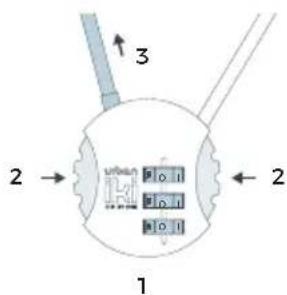
1. Enter code
2. Press the two sides
3. Uncouple cable
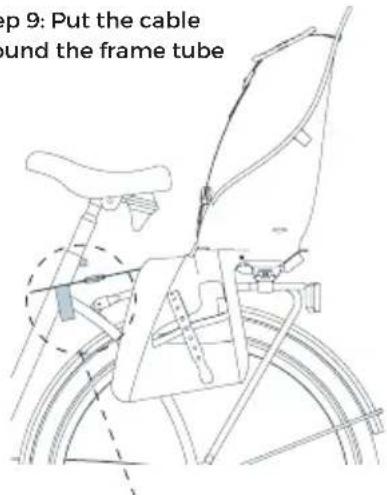
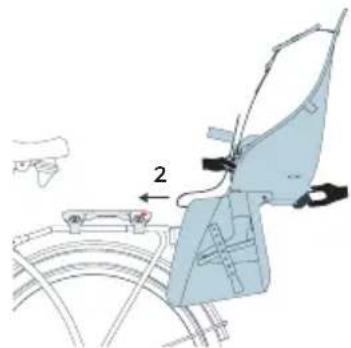
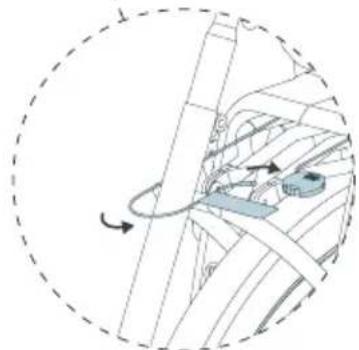
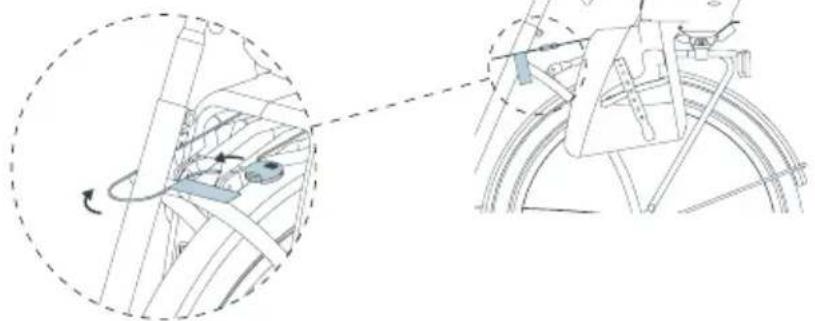
Step 9: Put the cable around the frame tube

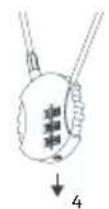
Step 10: Close the lock
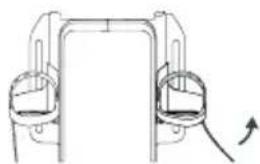
Demounting the bicycle seat
The bike seat can also be detached easily when you are not using the seat.

Step 1: Open the lock
- Enter code
- Press the two sides
- Uncouple cable

Scan for
instruction video
Step 2: Remove the cable
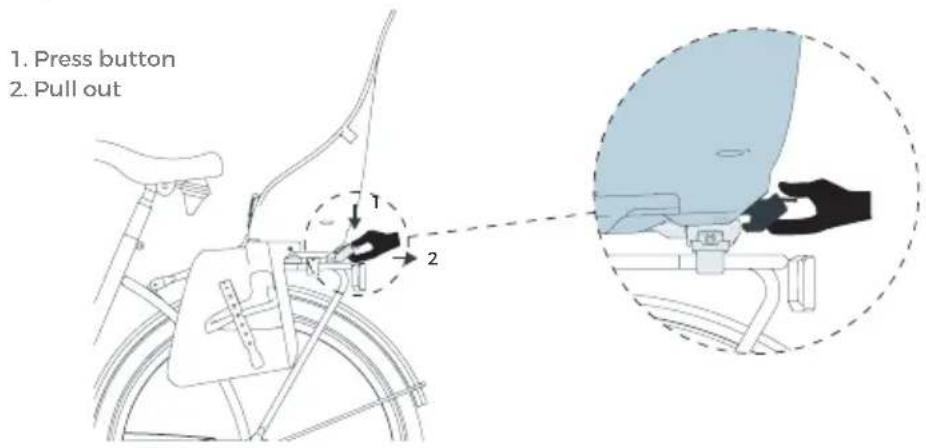
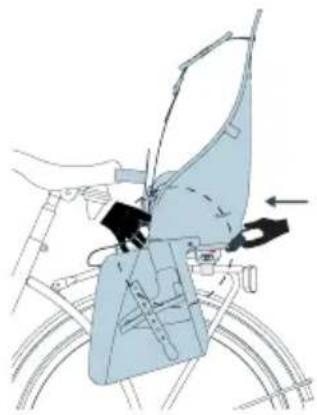
Step 3: Remove bike seat from carrier
How to Use Your Urban Iki Rear seat
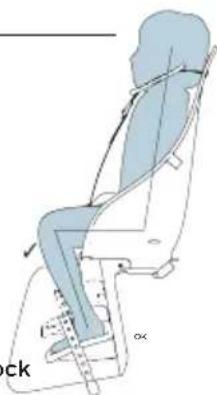
When using the Urban Iki Rear seat bike seat, check to see if the seat is attached correctly and do a short trial run without your child. If everything functions properly and you are not hindered when cycling, then you are ready to go cycling together with your child. Place your child in the seat and attach the safety harness tightly without squeezing. Set the foot rests to the correct height and make sure that the feet are locked into place by using the foot straps. Always make sure that no sharp bike parts are within reach of your child and make sure that your child does not wear clothes that can come into contact with any moving or turning parts of your bike.
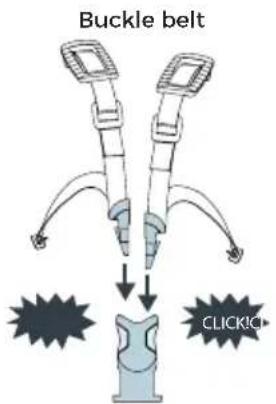
Opening and closing the seatbelt


Scan for instruction video
Adjusting seatbelt strap
Tighten belt
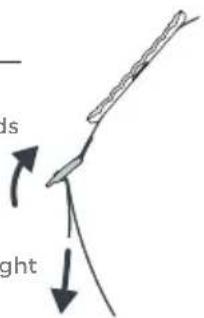
Tip upwards
Pull belt tight
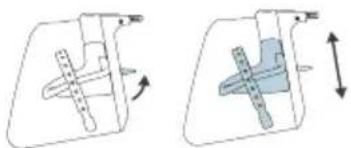
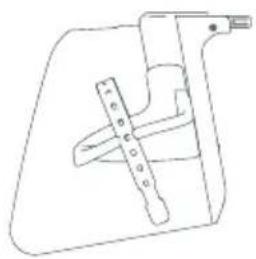
Adjust foot supports

Step 1: Unlock Step 2: Slide Step 3: Lock
Adjusting foot straps
Step 1: Insert foot strap Step 2: Adjust Step 3: Loosen
Safe use, a few warnings:
- Only transport your child of nine months or older with a weight of 9 kg or more when he or she can sit upright independently for the duration of the planned trip. Check regularly whether your growing child is not too big or too heavy - a maximum of 22 kg - for the seat you are using.
Always make sure your child is wearing suitable clothes for the trip and is protected against the rain; after all, your child sits motionless and will get cold quickly. - Never leave your child in the bike seat by himself/herself without you holding the bicycle. Make sure your bike is equipped with a sturdy (double) kickstand.
If you have a bike saddle with saddle springs, then cover these springs to avoid crushing and injuring your child's hands and fingers. - Ensure the bike seat has not been exposed to the heat of the sun before placing your child in the seat.
- Never make custom adjustments to the bike seat and always contact the store where you bought the seat or Urban Iki's customer service in case of any defect. Do not use the bike seat in case of a defect part.
Always remove the bike seat when transporting your bike on a car bicycle rack. Turbulence can damage or dislodge the seat, thus making it unsafe for use.
Always lock the harness of the bike seat, even when cycling without your child. This prevents entanglement with the harness. - Only use the bike seat for transporting a child on your bike. Bags or other luggage are best transported on the bike or attached to the opposite position of your child, thus equally distributing the weight on your bike.
Do not lift your bicycle by the bike seat.
-
Urban Iki recommends using a helmet that fits your child well.
-
Your Urban Iki child bike seat is intended for day-to-day transport of your child; it is not suitable for off-road and ATB tracks.
- Cycling with a child in a child bike seat can influence your bicycle's handling. This applies especially to cornering, braking and departing.
- You need to be 16 or older to be allowed to transport a child with an Urban Iki bike seat. Corresponding legislation may differ depending on the country.
Maintenance, Warranty and Service
If you maintain your Urban Iki bike seat well, it will last you a very long time. Cleaning the bike seat with a cloth, lukewarm water and a mild cleaning agent from time to time is sufficient.
Urban Iki products have been developed and manufactured according to the highest quality standards. The Urban Iki Rear seat bike seat has been tested according to the highest applicable European standard EN 14344. The renowned institute TÜV has issued a certificate as proof of meeting the requirements of this standard.
We issue a two-year warranty on your Urban Iki Rear seat bike seat. This warranty period enters into effect on the date of purchase as stated on the receipt. Store this receipt safely to be able to make use of this warranty.
Warranty is excluded in the following case:
- Improper use of the product other than stated in the user manual.
Not offering the product with the original receipt within the warranty period.
Repairs performed on the Urban Iki bike seat by third parties
- Any defect that is the result of improper, careless use or maintenance, negligence or accident.
Normal wear and tear of components that is to be expected in the daily use of a product.
The issued warranty is in accordance with European Directive 99/44/EC of 25 May 1999.
In case of a complaint or a defect of your Urban Iki bike seat, please feel free to contact the store where you bought your Urban Iki bike seat directly or contact our customer service.
Urban Iki customer service
OCK Europe B.V.
Energiestraat 13
7442 DA Nijverdal
The Netherlands
www.urbaniki.com
E: info@urbaniki.com

丰 BYOGK

Halo
1 Urban Iki Rear seat
2 beendelen (links + rechts)
inbussleutel No 5
1 bagagedrager montagekader
Urban Iki customer care service
OCK Europe B.V.
Energiestraße 13
7442 DA Nijverdal
The Netherlands
www.urbaniki.com
E: info@urbaniki.com
urban iki
BYOGK
好乙
Urban Iki customer service
OCK Europe B.V.
Energiestraat 13
7442 DA Nijverdal
The Netherlands
www.urbaniki.com
E: info@urbaniki.com
urban iki
丰 BYOGK

Hej,
Urban Iki customer service
OCK Europe B.V.
Energiestraße 13
7442 DA Nijverdal
The Netherlands
www.urbaniki.com
E: info@urbaniki.com
urban iki
丰 BYOGK

Hola,

Scan for instruction video

Scan for instruction video

Scan for instruction video
- Presione
- Presione
3.Up
Urban Iki customer service
OCK Europe B.V.
Energiestraße 13
7442 DA Nijverdal
The Netherlands
www.urbaniki.com
E: info@urbaniki.com
urban iki
丰 BYOGK

Hel,

Scan for instruction video

Scan for instruction video

Scan for instruction video
Urban Iki customer service
OCK Europe B.V.
Energiestraße 13
7442 DA Nijverdal
The Netherlands
www.urbaniki.com
E: info@urbaniki.com

丰 BYOGK

Bonjour
Comment assembler I'Urban Iki Rear seat?
Urban Iki customer service
OCK Europe B.V.
Energiestraße 13
7442 DA Nijverdal
The Netherlands
www.urbaniki.com
E: info@urbaniki.com

丰 BYOGK

Hel,

Scan for instruction video

Ben deler (venstre + hôyre)
Trinn 2: Skyv bendelene under setet
1. La kabelen ligge Iost
2. Skyy bendelene

Scan for instruction video

Scan for instruction video
Trinn 2: Fjern kabelen
Urban Iki customer service
OCK Europe B.V.
Energiestraße 13
7442 DA Nijverdal
The Netherlands
www.urbaniki.com
E: info@urbaniki.com

丰 BYOGK
Hej
Leg parts (left + right)

Scan for instruction video

Scan for instruction video
Urban Iki customer service
OCK Europe B.V.
Energiestraße 13
7442 DA Nijverdal
The Netherlands
www.urbaniki.com
E: info@urbaniki.com

For you to discover
Osaka - Amsterdam