
Rock Solid Beta 180 Carbon - Tripod ROLLEI - Free user manual and instructions
Find the device manual for free Rock Solid Beta 180 Carbon ROLLEI in PDF.
| Product type | Professional tripod |
| Brand | Rollei |
| Model | Rock Solid Beta 180 Carbon |
| Material | Carbon |
| Maximum height (estimated) | 180 cm |
| Minimum height | Low position possible with short column |
| Center column | Adjustable, with 3D lock and short column included |
| Leg angle | 3 positions (high, medium, low) individually adjustable |
| Locking system | Quick-release lever with Allen key adjustment |
| Feet | Universal rubber with retractable metal spikes |
| Hook | Retractable hook for counterweight |
| Safety | Automatic safety lock, anti-twist screw |
| Side arm function | Yes, for macro and nature photography |
| Graduated markings | Yes, for leg length selection |
| Handle | Foam grip on legs |
| Power supply | None (manual) |
| Maintenance | Tighten the locking lever with Allen key if necessary, do not exceed 45° |
| Spare parts available | Standard and short center column, base plate, ballast hook |
Frequently Asked Questions - Rock Solid Beta 180 Carbon ROLLEI
User questions about Rock Solid Beta 180 Carbon ROLLEI
0 question about this device. Answer the ones you know or ask your own.
Ask a new question about this device
Download the instructions for your Tripod in PDF format for free! Find your manual Rock Solid Beta 180 Carbon - ROLLEI and take your electronic device back in hand. On this page are published all the documents necessary for the use of your device. Rock Solid Beta 180 Carbon by ROLLEI.
USER MANUAL Rock Solid Beta 180 Carbon ROLLEI
in German | English | French | Spanish | Italian | Portuguese | Chinese (traditional and simplified)
Rock Solid Tripods Beta and Gamma 180
Carbon or Aluminium
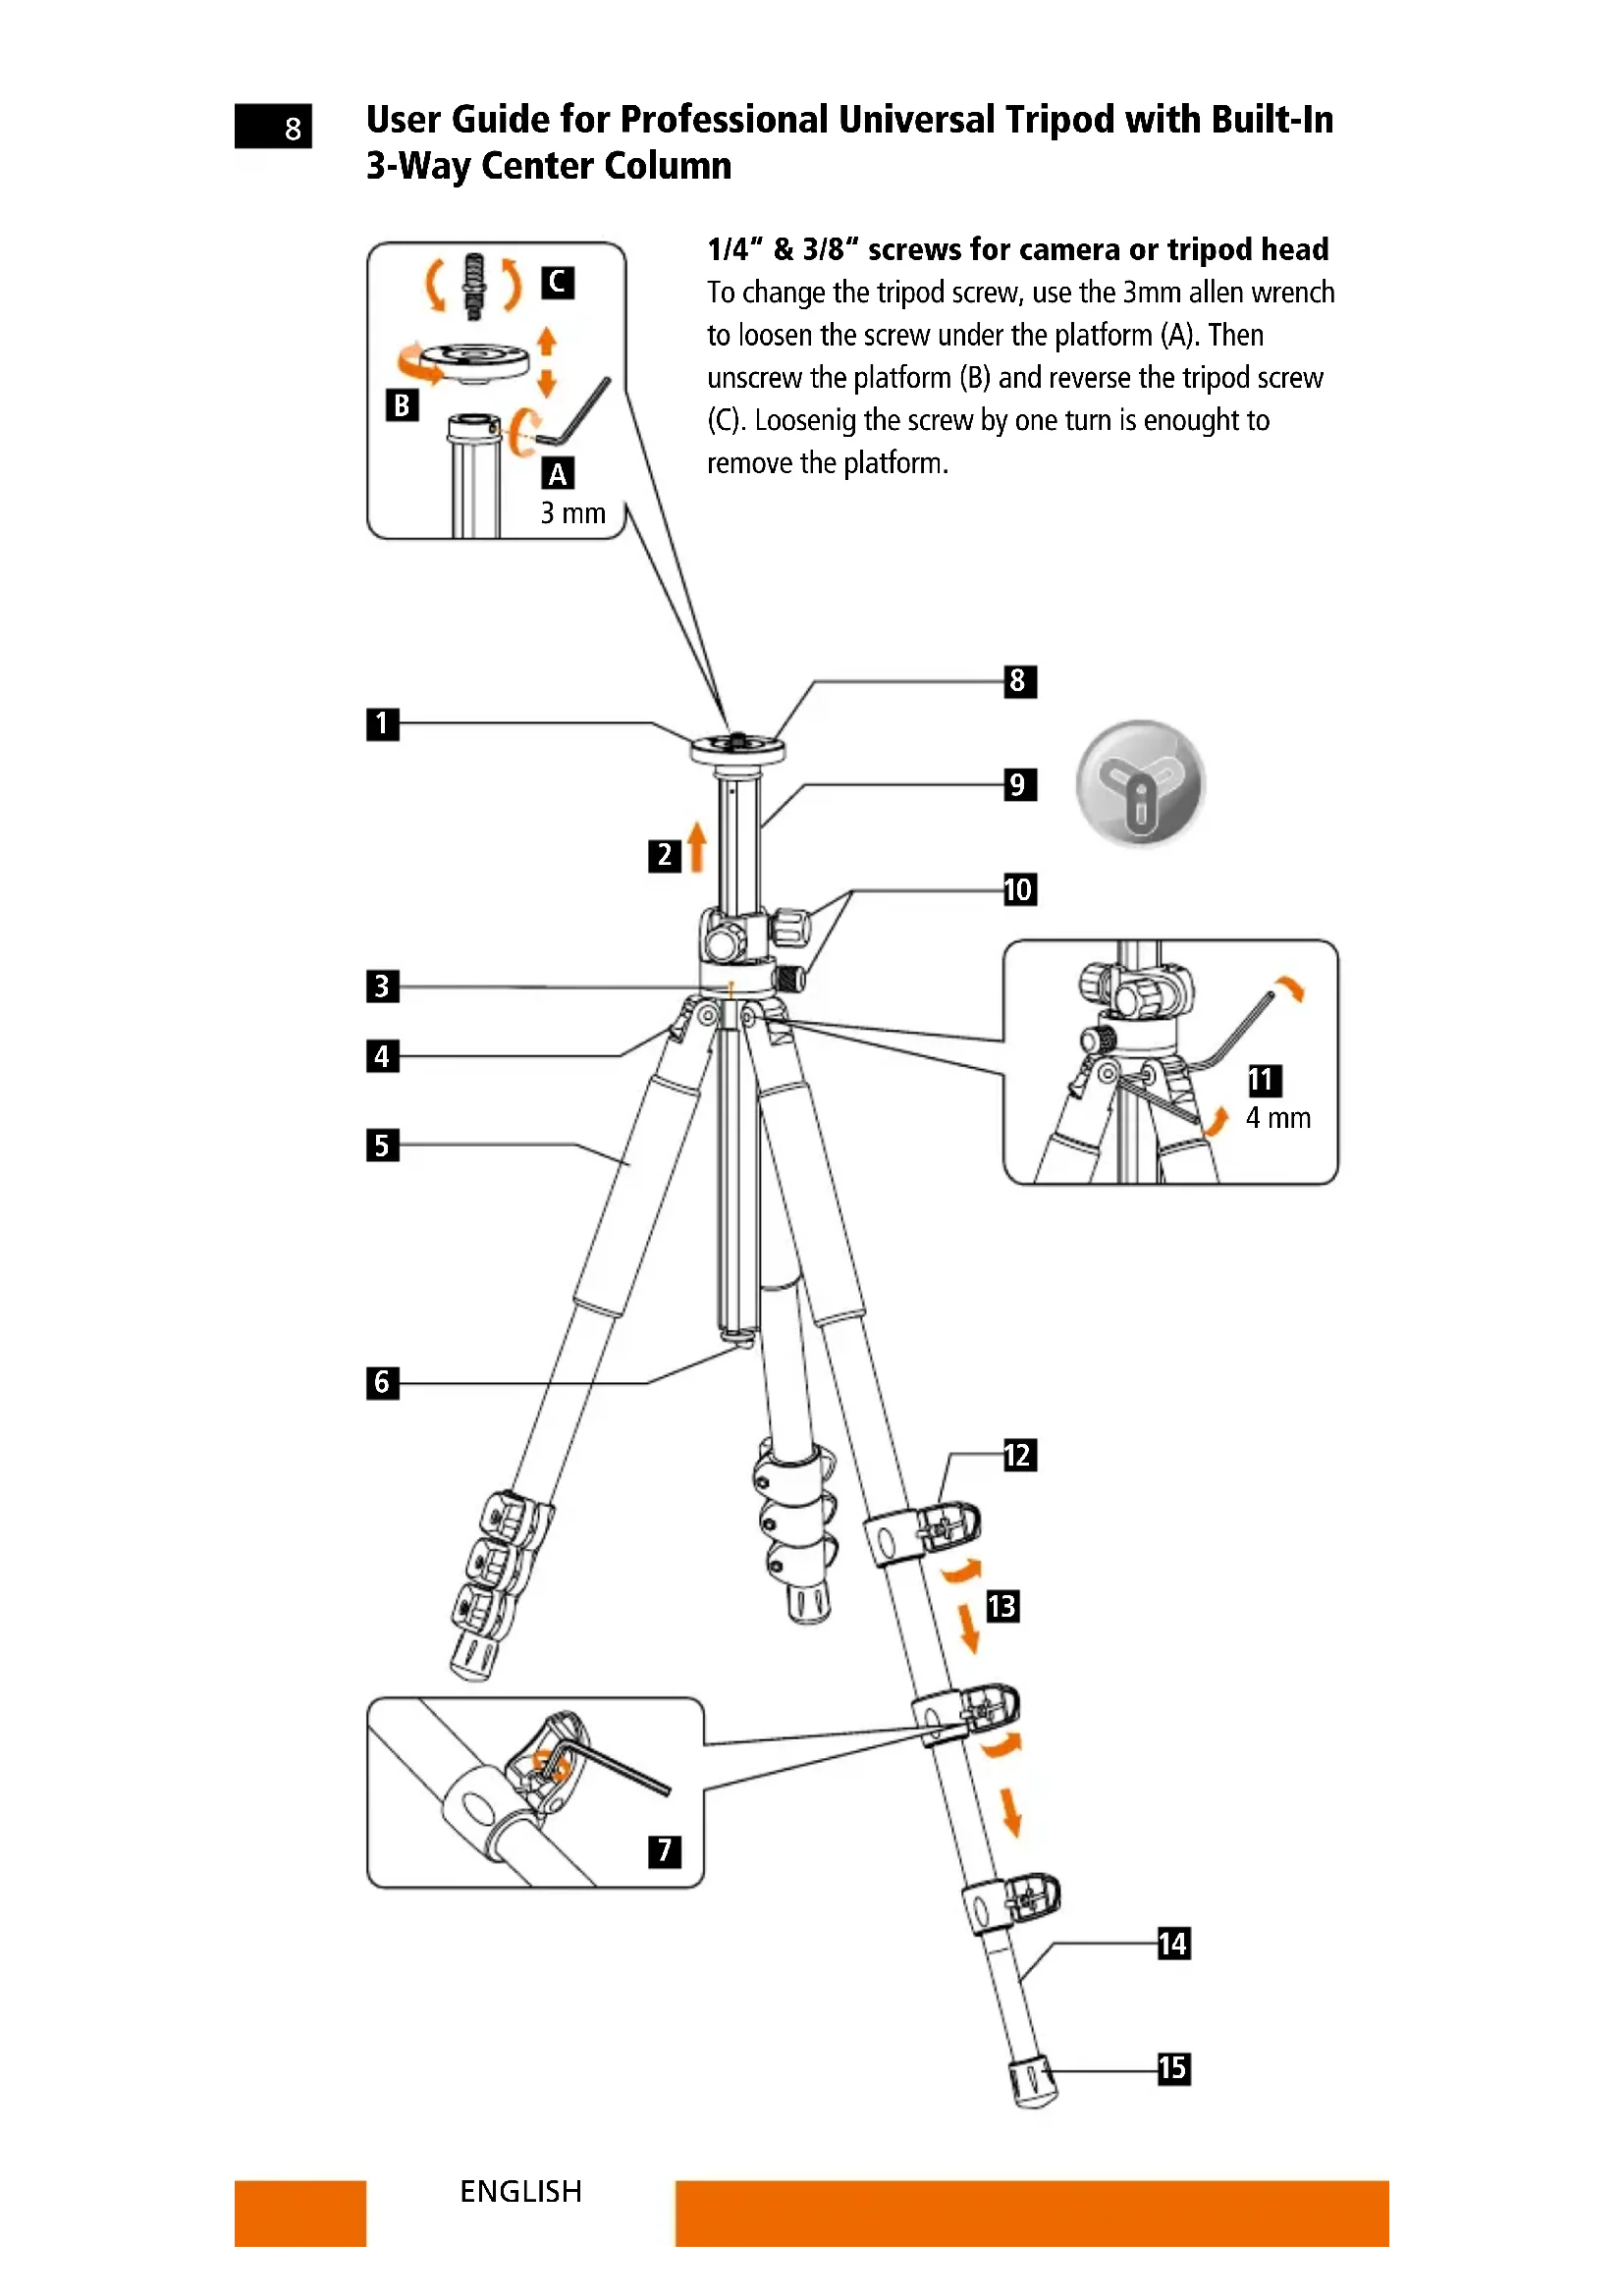
User Guide for Professional Universal Tripod with Built-In 3-Way Center Column
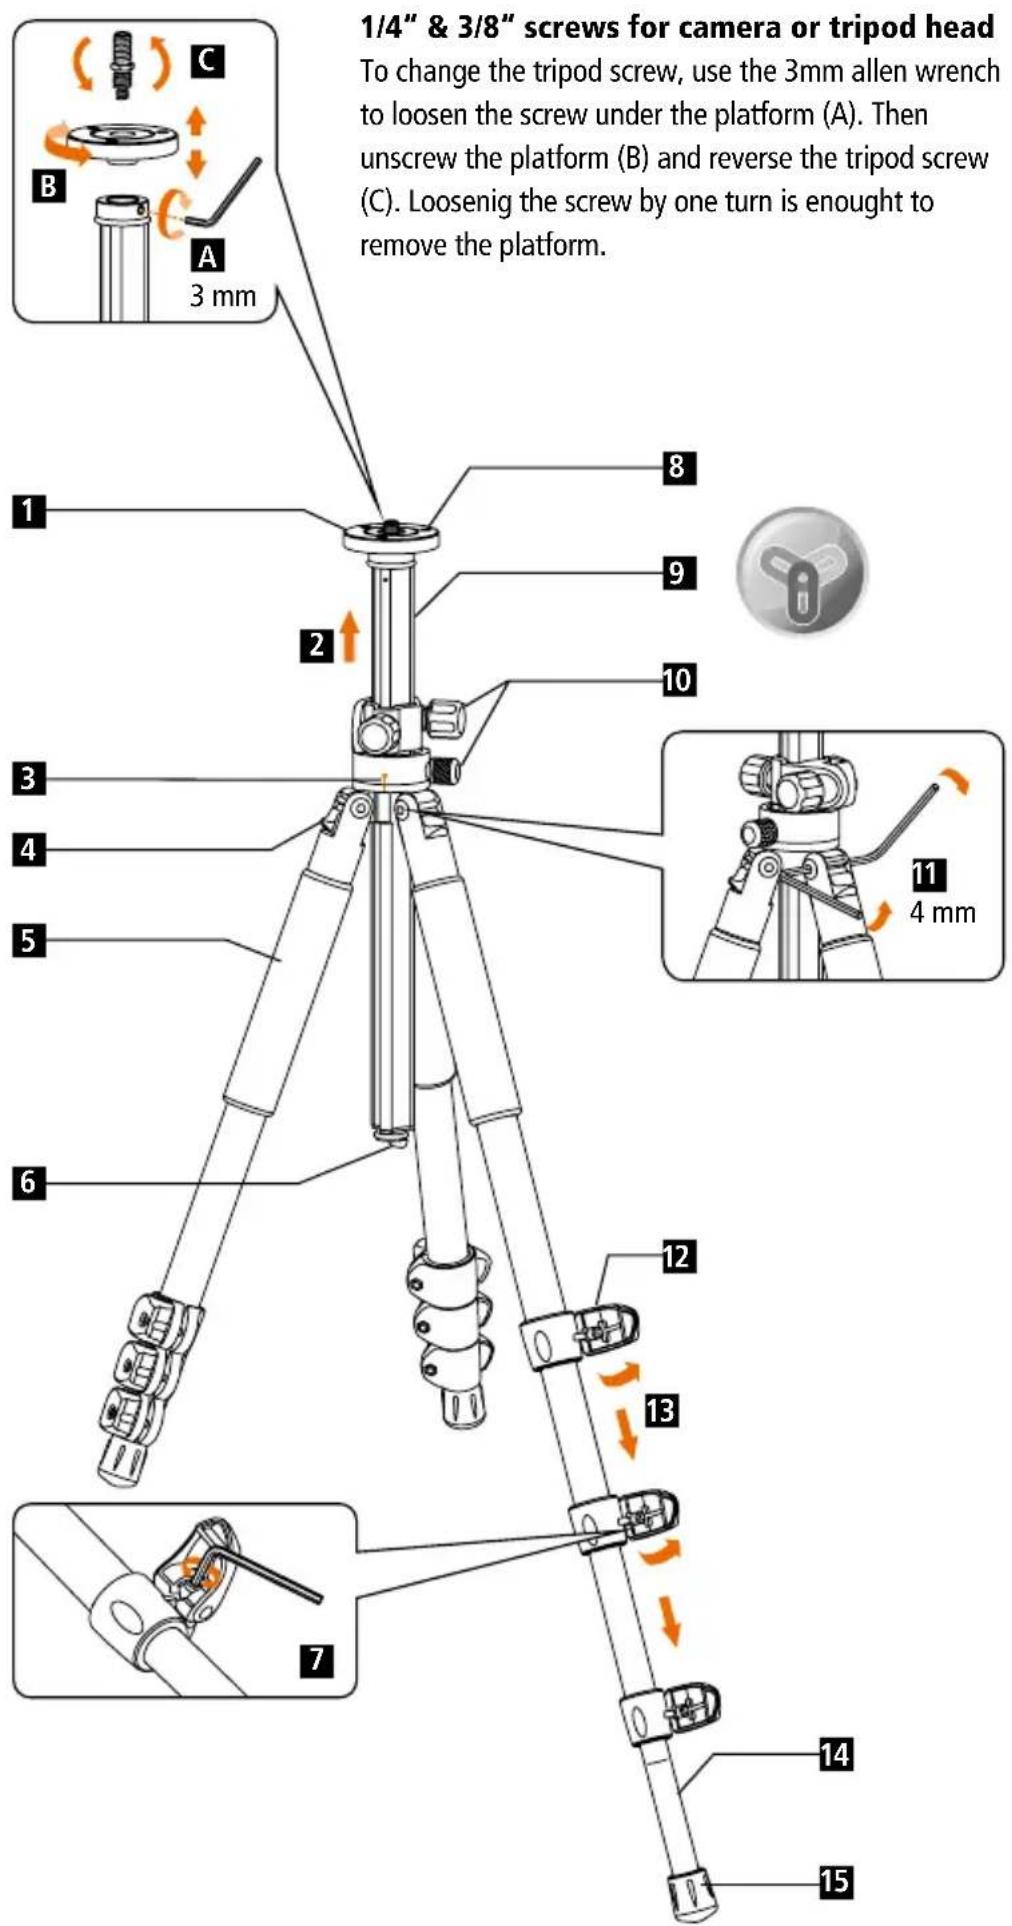
1 Non-slip platform
Pull out
Before the tripod will be folded, Align the center column to the mark shown on the shoulder.
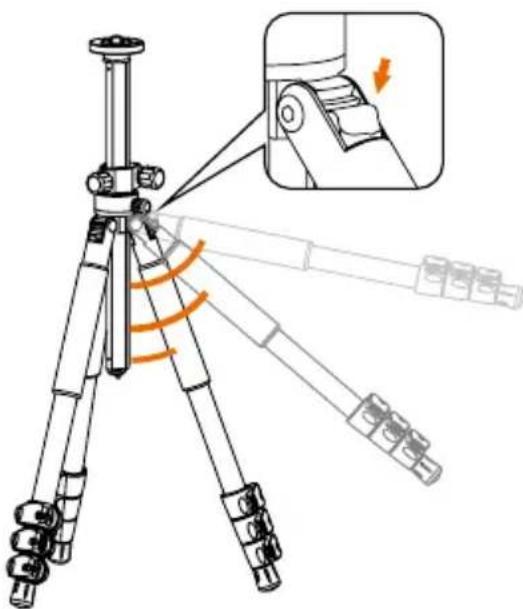
4 Leg angle adjustment
5 Foam hand grip
6 Hook for counter weight
7 Adjustment for quick lock: If the quick lock loosens after prologed use, use the allen wrench to tighten.
Attention: Do not tighten the screws more than 45 degree. Otherwise the quick locks or the tripod leg can be damaged. The the warranty expires!
8 Anti-twist screws for secure fixing
9 Y-tube center column
10 Locking knob
11 Use the two 4 mm allen wrenches to tighten the screws if they loosen.
12 Quick locking system
13 Pull out the leg
14 Printed scale: Easy to set up leg tube length
Rubber feet with integrated Spikes: The universal rubber foot is ideal for every ground that needs a stable stand. The spikes are designed to be used in a wet or soft soil
Push the leg angle adjustment knob to set different angles individually on every leg:

High

Medium

Low
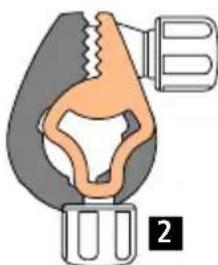
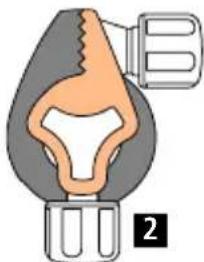
Attention: Please lock the 3-Way lock if the 3-way function as lateral arm is not used. Therefore the center column will keep the right position and won't get scratched.
CORRECT! Wrong!
1
1
1 3-WAY LOCK
Center Column Lock
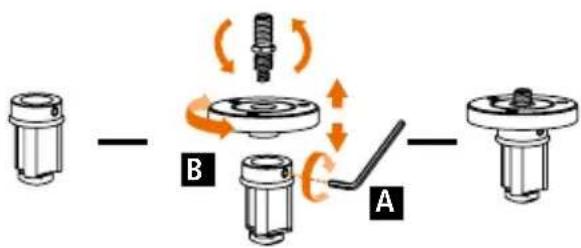
Short center column for lowest position
To change the center column, loosen the screw below the platform by using the 3mm allen wrench (A). One turn is enough to loosen the platform. Then unscrew the platform (B) as well as the hook at the bottom of the center column. Remove the standard center column and insert the short one. Afterwards screw on the platform again. Please note that the short center column has a safety lock at the bottom. If you want to take out the short center column you need to bring the safety lock into a position that the center column can be removed.
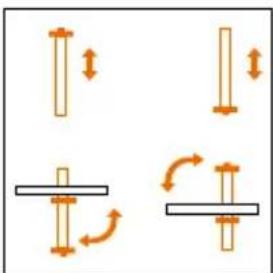
To use the tripod in the lowest position please use the short center column. It provides 360 degrees horizontal and 180 degrees vertical adjustments.
1 Center column locking knob
2 Tilt locking knob
Pan locking knob

Auto Safety Lock
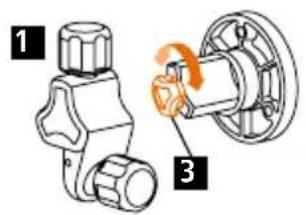
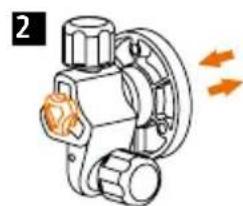
Insert the auto safety lock to the slot of tripod, rotate the short center column anticlockwise to 120 degrees, push the short center column to the slot of tripod. The auto safety lock will lock automatically and prevent the short center column for accidentally fall off. Rotate the auto safety lock anticlockwise to 120 degrees then pull out the short center column.
1 Rotate the lock
2 Take out or insert
3 Auto Safety Lock
Horizontal position for lateral arm,
please be aware of the gravity to avoid that the tripod will fall down.
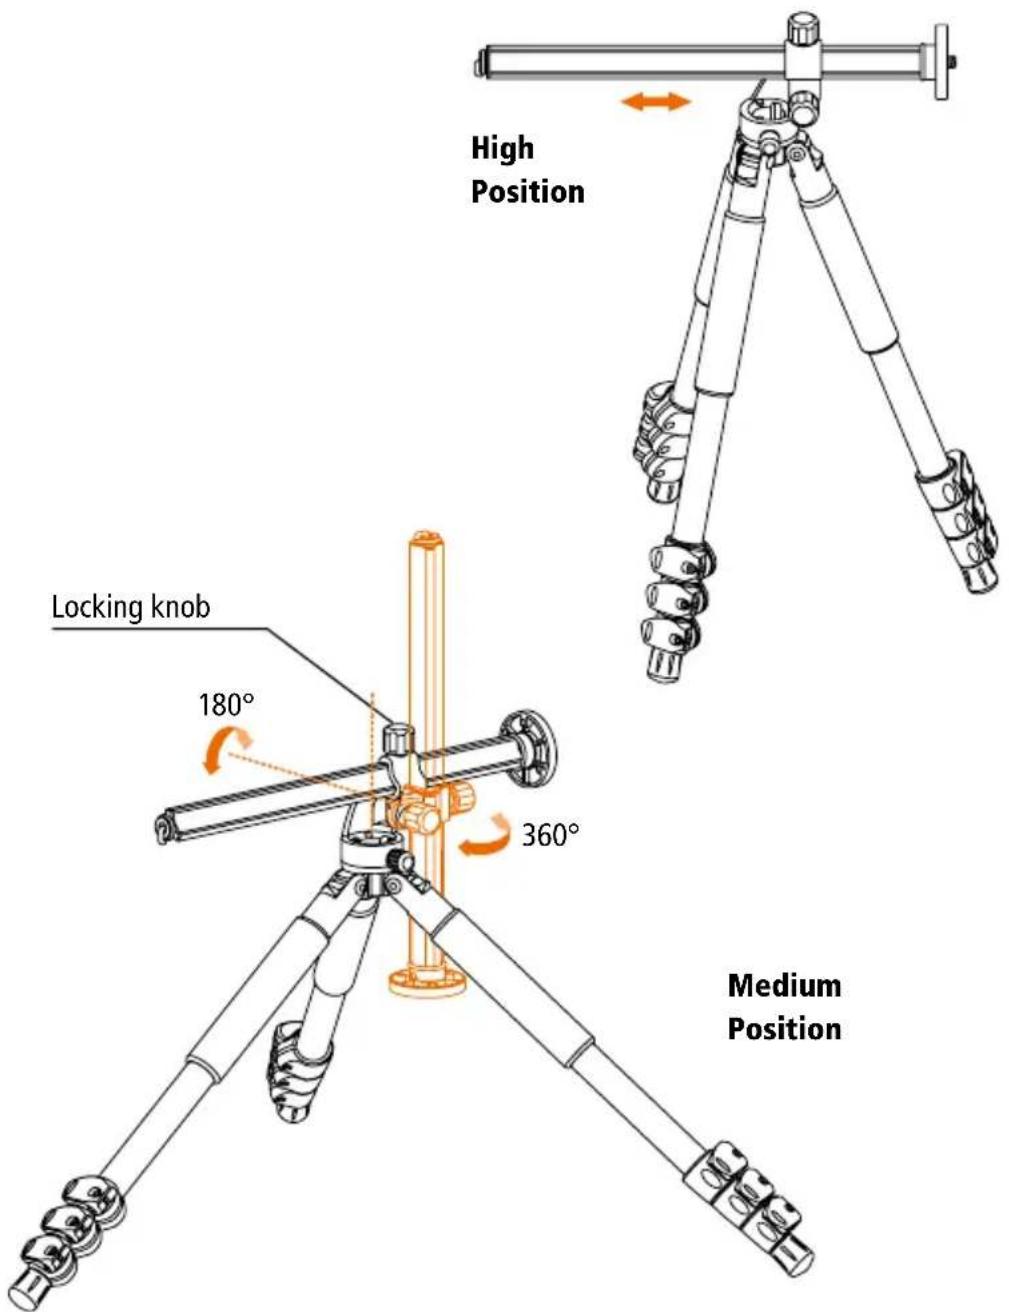
3-Way Center Column with anti-twist
The center column can be used up side down, vertical or horizontal as a lateral arm for nature and macro photography. It allows 360^ horizontal an 180^ vertical adjustment. The column can be positioned and set-up quickly with the locking knob.
Note:
To avoid any damages of the photographic equipment through an overturning of the tripod when shooting with laterally unfolded center column, the tripod should always be secured with an appropriate counterweight.
www.rollei.com/social
For Asia
分銷: Rollei HK Limited
香港九龍觀塘成業街7號
寧晋中心 17/F D2
Tel +852 2377 9023
Fax +852 2366 8091
Email info-hk@rollei.com
分销:RolleiHKLimited
香港九龙观塘成业街7号
宁晋中心 17/F D2
Tel +852 2377 9023
Fax +852 2366 8091
Email info-hk@rollei.com


www.cn.rollei.com/social
Brand : ROLLEI
Model : Rock Solid Beta 180 Carbon
Category : Tripod