
H9 - Slicer GRAEF - Free user manual and instructions
Find the device manual for free H9 GRAEF in PDF.

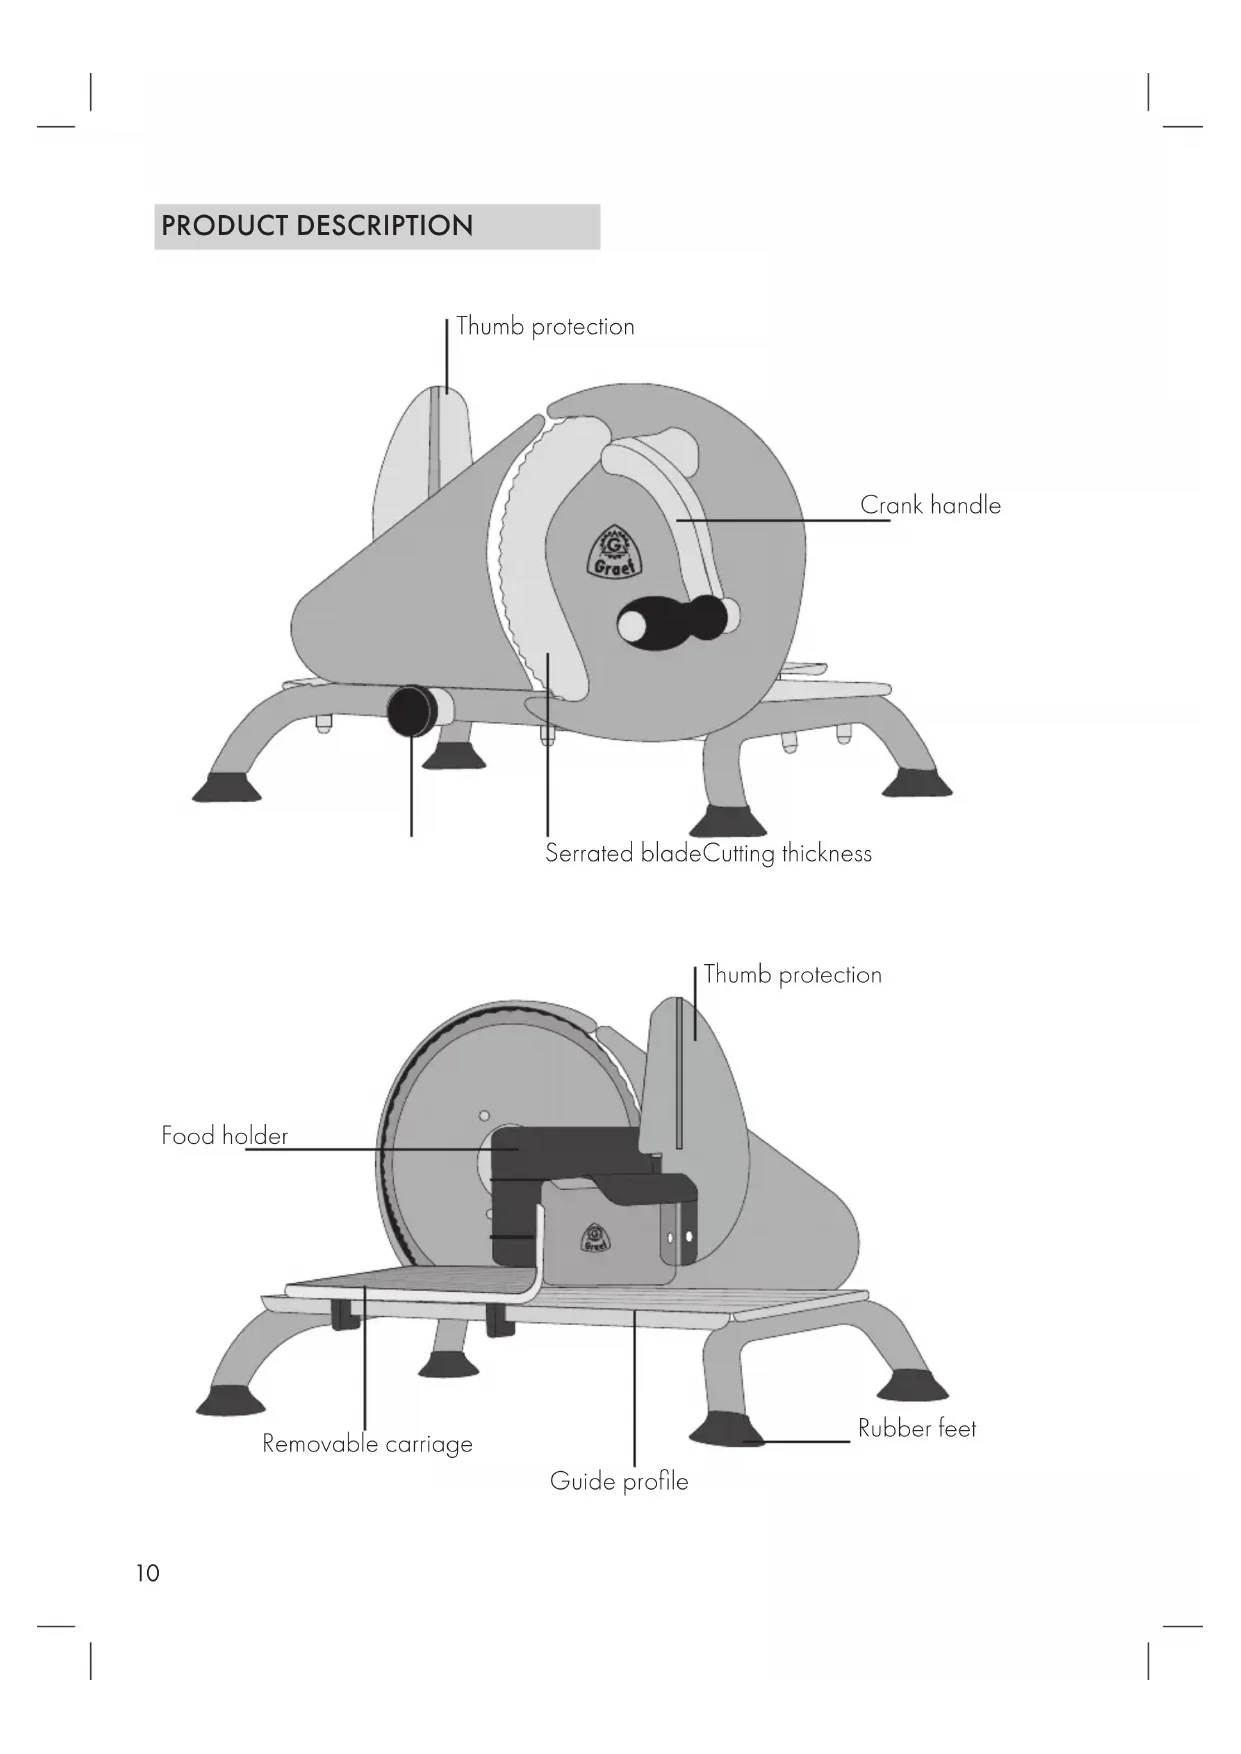


| Product type | Manual slicer |
| Brand | Graef |
| Model | H9 |
| Usage | Domestic |
| Blade type | Serrated stainless steel knife |
| Slice thickness adjustment | Yes, adjustment wheel |
| Crank | Yes, mounted on the right side |
| Detachable carriage | Yes |
| Food press | Yes, for small pieces |
| Non-slip suction cups | Yes |
| Thumb guard | Yes |
| Materials to slice | Bread, ham, sausage, cheese, fruits, vegetables |
| Cleaning | Damp cloth for the exterior; disassembly of the blade for interior cleaning |
| Lubrication | Graef petroleum jelly on the blade pivot points and gear wheel |
| Warranty | 2 years manufacturer |
| Customer service | 02932-9703677 / service@graef.de |
Frequently Asked Questions - H9 GRAEF
User questions about H9 GRAEF
0 question about this device. Answer the ones you know or ask your own.
Ask a new question about this device
Download the instructions for your Slicer in PDF format for free! Find your manual H9 - GRAEF and take your electronic device back in hand. On this page are published all the documents necessary for the use of your device. H9 by GRAEF.
USER MANUAL H9 GRAEF
natural_image
Illustration of a stylized whale-like creature with a Grael logo on its side (no text or symbols beyond the emblem)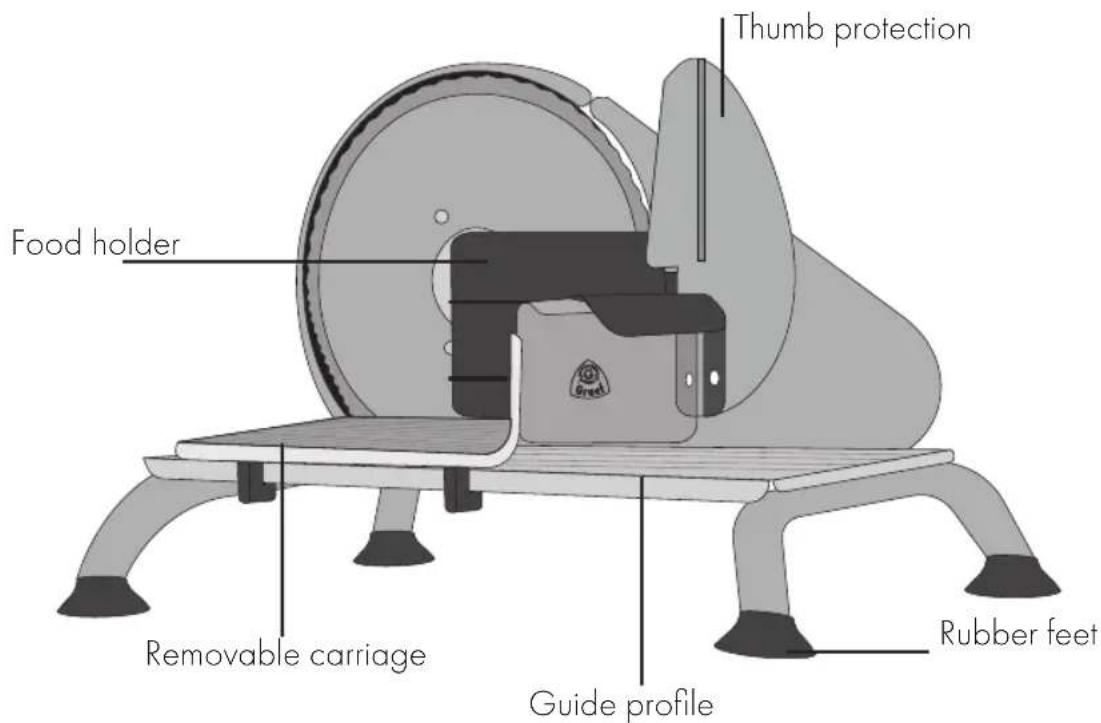
SAFETY INSTRUCTIONS
This unit complies with the statutory safety regulations. Improper use can, however, lead to personal injury and property damage.
To handle the unit safely, follow the instructions below:
- Repairs are only allowed to be performed by a specialist or by the Graef customer service department. Improper repairs can lead to extreme hazards for the user. Furthermore, the warranty claim expires.
- Only Graef customer service is authorised to repair the unit during the warranty period, otherwise the warranty expires for subsequent damages.
- Defective components must be replaced solely with genuine spare parts. Fulfilment of the safety regulations is only guaranteed if these parts are used.
• This unit may not be used by children.
• Children should be supervised to ensure that they do not play with the unit. - This unit is intended to be used in household and similar applications such as: staff kitchen areas in shops, offices and other working environments; farm houses; by clients in hotels, motels and other residential type environments; bed and breakfast type environments.
- This unit must be used with the carriage and food holder unless the size and shape of the items to be sliced do not permit its usage.
- Do not use the packing material as a toy. Danger of suffocation.
- Do not use any aggressive or abrasive cleaning agents and do not use any solvents.
- Do not scratch off stubborn soiling with hard objects.
- Do not put the appliance in the dishwasher.
UNPACKING
To unpack the unit, proceed as below:
• Take the unit out of the carton.
- Remove all pieces of the packing.
- Remove any possibly extant labels on the manual universal slicing machine (do not remove the rating plate).
REQUIREMENTS FOR THE INSTALLATION LOCATION
For safe and flawless operation of the unit, the place of location must meet these prerequisites:
- The unit must be set up on a firm, flat, level, and non-slip base that has sufficient load bearing capacity.
- Select the place of location so that children cannot reach the sharp blade in the unit.
KURBELMONTAGE
After unpacking your hand-held slicer, you must screw the crank (located at the top of the box) onto the machine. As the machine is driven with the right hand, the GRAEF logo on the sliding carriage should face you and be legible.
On the right-hand side of the blade housing, insert the crank into the hole in the protruding crank bearing. Then turn the crank clockwise several times while pressing it into the housing with light pressure in the direction of the blade. The indicated direction of rotation is also for operating the machine.
The crank is correctly mounted when the blade starts to rotate.
If the crank cannot be mounted even after several turns, the gear wheel inside can be accessed by dismantling the blade.
ATTENTION
If done improperly, cuts can occur due to the sharpness of the knife, which is why the cloth should be used when holding it. Excess Vaseline can simply be absorbed with a paper towel and disposed of in the residual waste.
• The machine is now ready for use.
SLICING
- Place the carriage on the carriage guide profile.
- Place the items to be sliced on the carriage.
- Set the desired slicing thickness.
- Turn the handle away from your body and push the items to be sliced to the front.
- Soft items to be sliced (e.g., cheese or ham) can be sliced best when cool.
- Soft items can be sliced better when you turn faster and push the items to be sliced forward more slowly.
- To slice vegetables, it is sufficient to turn slowly, partially even only scraping while the blade is stationary.
- When slicing cucumbers or carrots, it is advantageous if they are cut to a uniform length beforehand.
FOOD HOLDER
- The unit must not be used without the food holder unless the size and shape of the items to be sliced do not permit its use.
- As soon it is no longer possible to correctly hold onto the items to be sliced, the food holder must be used.
- Place the food rests or the small items for slicing on the carriage.
- Set the food holder on the rear of the carriage and put the food holder onto the items to be sliced.
- Proceed as above as described in "Slicing".
CLEANING
- Clean the exterior of the unit with a soft, moist cloth. If heavily soiled, a mild detergent can be used.
REMOVING THE BLADE
Please occasionally unscrew the blade and clean the interior of the unit. Handle the blade with great care! Caution: sharp blade.
- Remove the carriage.
- Turn the blade, e.g. using a coin.
- Clean the blade with a moist cloth.
- Subsequently clean the blade with a dry cloth.
- Grease the gear.
- Replace the blade and tighten it firmly.
• Periodically grease the gears.
CARRIAGE GUIDE
Periodically grease the carriage guide.
- Remove the carriage.
- Turn the carriage over.
- Grease the carriage guide with a bit of acid-free sewing machine oil.
- Replace the carriage.
CUSTOMER SERVICE DEPARTMENT
If your Graef unit becomes damaged, please contact your dealer or the Graef customer service department.
2 YEAR WARRANTY
As from the date of purchase we assume manufacturer warranty of twenty-four months for defects which can be traced back to manufacturing and material defect. Your legal
warranty claim in conformity with Section 437 ff. of the German Civil Code (BGB) shall remain unaffected by this regulation. The guarantee does not cover any damage which is caused by incorrect handling or use as well as defects which only slightly influence the function or the value of the unit. Moreover, transport damage provided we are not responsible shall be excluded from the claims under guarantee. Guarantee shall be ruled out for damage, the repair of which has not been carried out by us or one of our representations. In case of justified complaints, we shall repair the defective product or replace it by a product without defects at our discretion.
DESCRIPTION DU PRODUIT
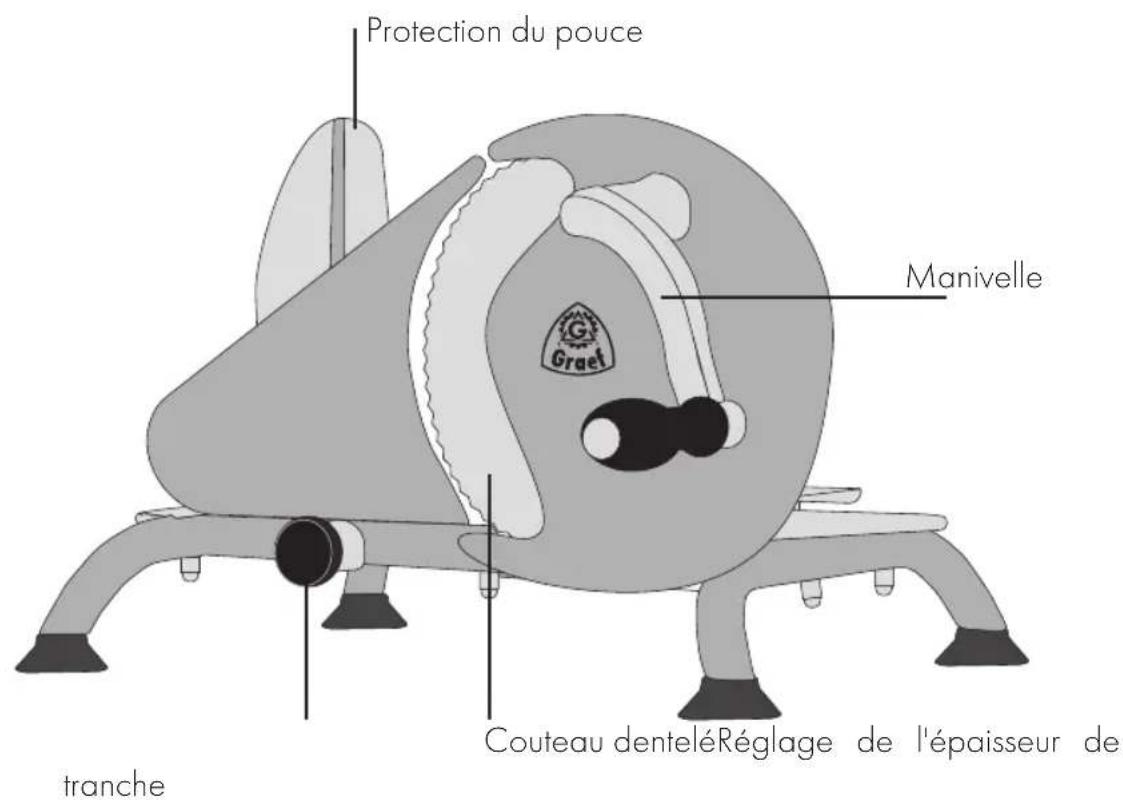


Brand : GRAEF
Model : H9
Category : Slicer