DCP490 - Radio DAEWOO - Free user manual and instructions
Find the device manual for free DCP490 DAEWOO in PDF.
| Product Type | Projection Alarm Clock Radio |
| Brand | Daewoo |
| Model | DCP490 |
| Power Supply | Mains 230 V / 50 Hz ; 2 AAA batteries (for time backup) |
| Main Functions | FM radio, dual alarm (beep or radio), time projection, nap, timer, screen brightness adjustment |
| Radio Memory | 10 preset FM stations |
| Display | Digital screen with brightness adjustment (high/low) |
| Projection | Time projection onto flat surface; rotatable 180° |
| Snooze | 9 minutes |
| Dimensions | Approximately 20 x 12 x 8 cm (estimated) |
| Weight | Approximately 500 g (estimated) |
| Care and Cleaning | Unplug before cleaning; use a soft, dry cloth; do not use abrasive products or solvents |
| Safety | Do not expose to water or humidity; check voltage before plugging; do not open the device |
| Warranty | 2 years from date of purchase against manufacturing defects |
| Included Accessories | Power cable, built-in antenna |
Frequently Asked Questions - DCP490 DAEWOO
User questions about DCP490 DAEWOO
0 question about this device. Answer the ones you know or ask your own.
Ask a new question about this device
Download the instructions for your Radio in PDF format for free! Find your manual DCP490 - DAEWOO and take your electronic device back in hand. On this page are published all the documents necessary for the use of your device. DCP490 by DAEWOO.
USER MANUAL DCP490 DAEWOO
Director de Marketing
GARANTIA
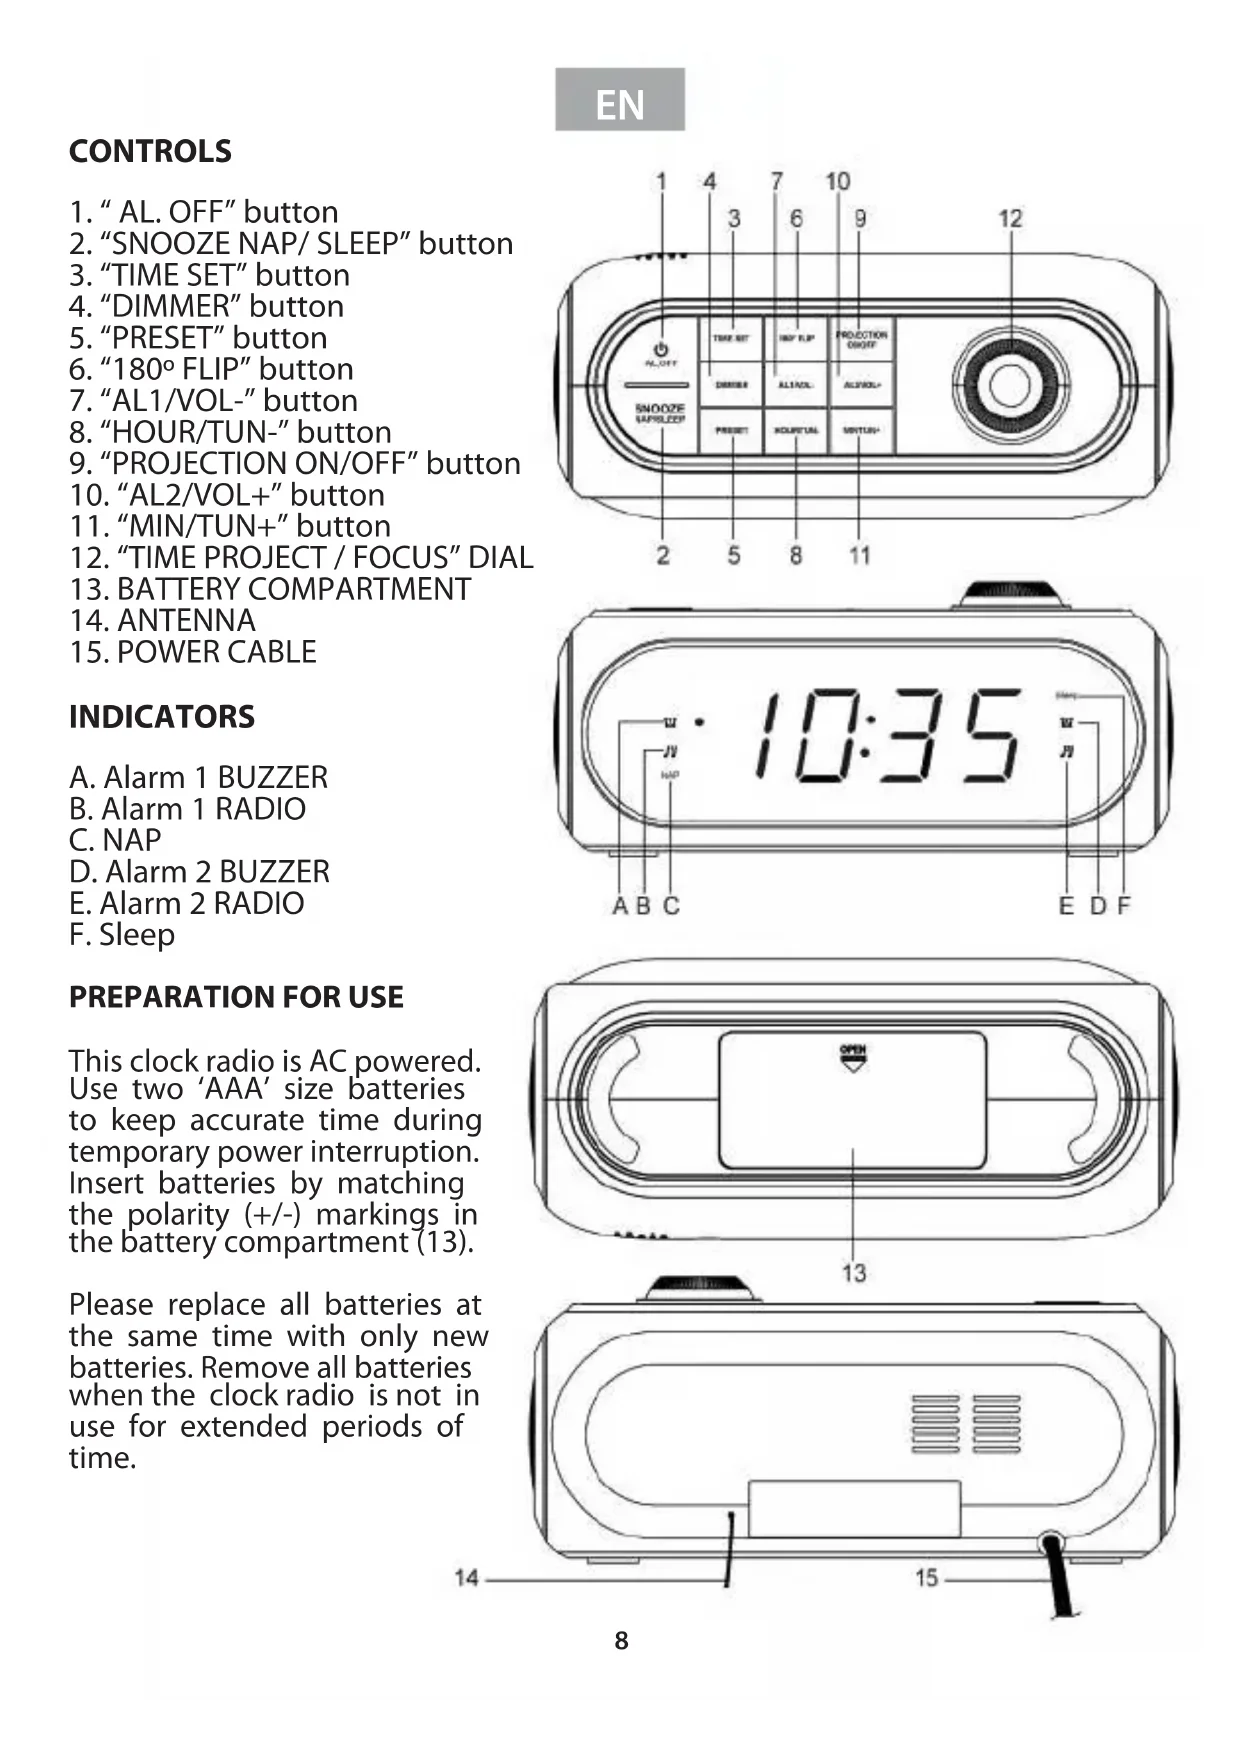
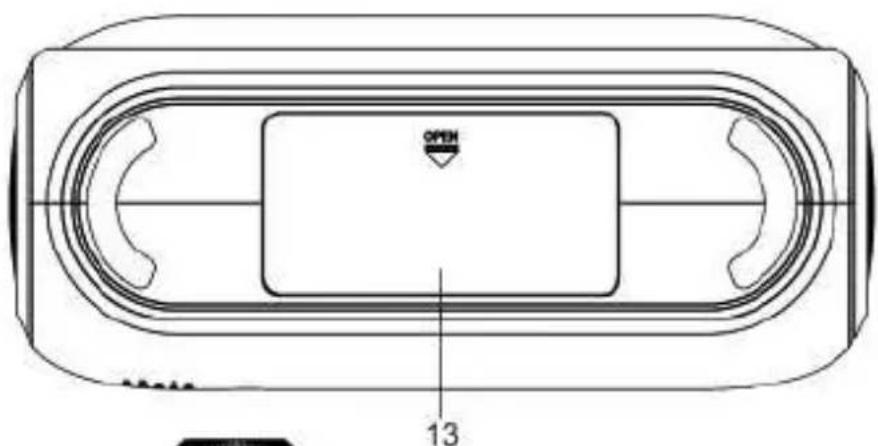
This clock radio is AC powered. Use two 'AAA' size batteries to keep accurate time during temporary power interruption. Insert batteries by matching the polarity (+/-) markings in the battery compartment (13).
Please replace all batteries at the same time with only new batteries. Remove all batteries when the clock radio is not in use for extended periods of time.
EN
Place the clock radio only on protected furniture. Avoid direct sunlight and any area that is exposed to water or moisture.
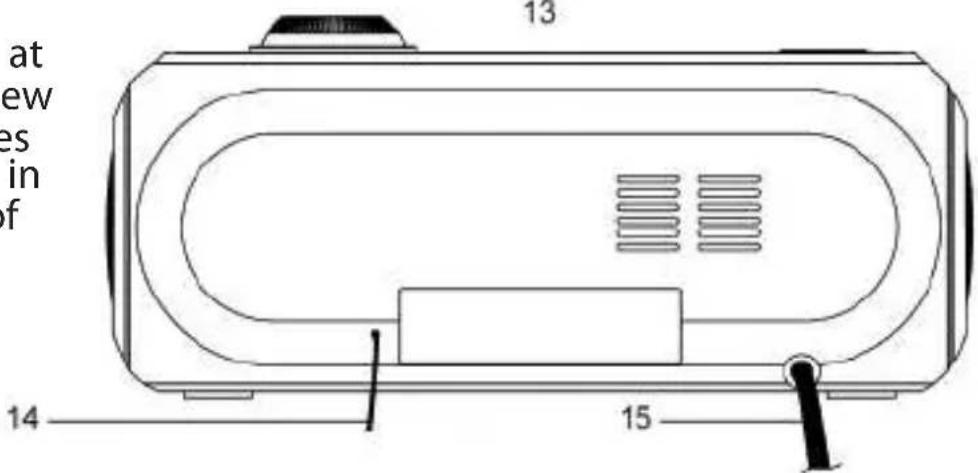
Plug power cable (15) into electrical outlet with correct voltage. Check rating labels on the radio.
DO NOT PLUG THE RADIO INTO AN ELECTRICAL OUTLET IF YOU ARE UNSURE OF THE VOLTAGE.
Unwind the radio antenna (14) on the back of the clock radio. Extend and reposition the antenna for best radio reception.
CLOCK and ALARM CLOCK OPERATION
Note: The time and alarm times can only be set when the radio is turned off.
SETTING THE TIME AND DAY
- The digits will flash after connecting power, or press and hold down "TIME SET" button (3) for approximately 3 seconds until the display flashes.
- Press "HOUR/TUN-" button (8) repeatedly to change the hour setting.
- Press "MIN/TUN+" button (11) repeatedly to change the minute setting.
- Press "TIME SET" button (3) to confirm the time.
SETTING THE ALARM TIME
This clock radio has dual alarms that can be set and used concurrently. The procedure to set both alarms are the same. Both alarms can either sound the buzzer or wake up to radio. Follow the instructions below to set alarm time 1.
For alarm time 2, substitute "AL1/VOL-" button (7) with "AL.2/VOL+" button (10)
- Press "AL1/VOL-" button (7) to view alarm time 1. The digits will flash.
- Press "HOUR/TUN-" button (8) repeatedly to change the hour setting.
- Press "MIN/TUN+" button (11) repeatedly to change the minute setting.
- Press "AL1/VOL-" button (7) once to confirm and digits will stop flashing.
(Note: This will turn on the alarm buzzer.)
ACTIVATING THE ALARM
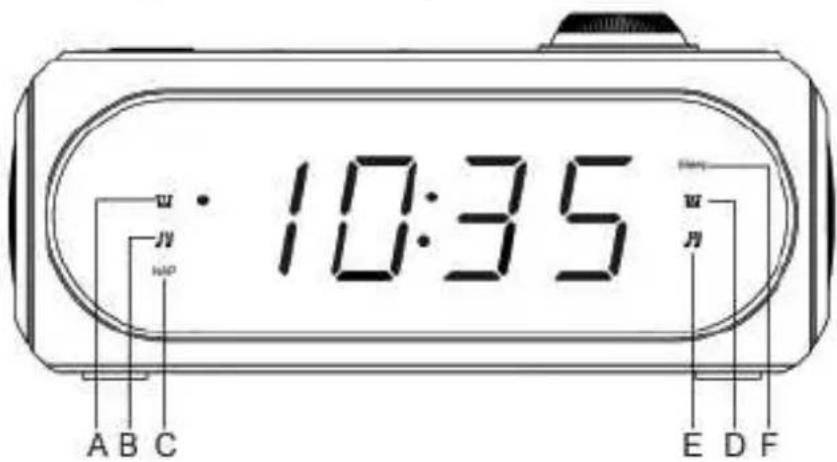
- Once the alarm time is set, press "AL1/VOL-" button (7) once for alarm with buzzer (Indicator A will be on) and twice for alarm with radio (Indicator B will be on).
- Digits will stop flashing after a short while.
- Press "AL1/VOL-" button (7) until all indicators off to turn off alarm.
EN
WHEN THE ALARM SOUNDS
- When the alarm sounds, press "AL.OFF" button (1) to turn off alarm or press "SNOOZE NAP/SLEEP" button (2) for snooze.
- Once in snooze, alarm will sound again after 9 minutes
DISPLAY BRIGHTNESS
When the radio is off and the current time showing, press "DIMMER" button (4) to change the brightness of the display between high and low.
(Note: Do not change the display brightness while setting the clock radio and when the alarm is on.)
TIME PROJECTION
Press "PROJECTION ON/OFF" button (9) to turn time projection on and off. It is most visible on a flat white surface. Press "180° FLIP" button (6) to rotate time projection by 180^ . Tilt and adjust "time projection / focus dial" (12) as needed.
RADIO OPERATIONS
General Operations
- Press "AL.OFF" button (1) to turn radio on and off. The radio station frequency will appear on the is play.
- Press "HOUR/TUN-" button (8) or "MIN/TUN+" button (11) to change radio frequency. Or, press and hold down "HOUR/TUN-" button (8) or "MIN/TUN+" button (11) for approximately 3 seconds to auto scan for the next available station.
- Press "AL1/VOL-" button (7) or "AL2/VOL+" button (10) to adjust volume level.
- Radio will show the time in a few seconds after changing frequency. Press "HOUR/TUN-" button (8) or "MIN/TUN+" button (11) to view radio frequency.
Pre-set Station Memory
- The radio can store up to 10 FM stations. To store a station in memory, tune to the desired radio station. Press and hold down "PRESET" button (5) and a number starting with "P" on the display will flash. This "P" number represent one of the ten memory stations. Press "HOUR/TUN-" button (8) or "MIN/TUN+" button (11) to change the station number. Press "PRESET" button (5) to confirm.
- To recall a pre-set station, turn the radio on. Press "PRESET" button (5) repeatedly until station number is found. The station frequency will be display momentarily.
Sleep mode
With the radio on, press "SNOOZE NAP/SLEEP" button (2) to enter sleep mode. Digits represents radio to be automatically turned off in minutes. (Indicator F will be on).
Nap mode
With the radio off, press "SNOOZE NAP/SLEEP" button (2) to enter NAP mode. Digits represents radio to be turned on in minutes. (Indicator C will be on).
PRODUCT DISPOSAL
Attention should be drawn to the environmental aspects of battery disposal.

Don't throw used batteries in dustbin. Please contact your retailer in order to protect the environment. Electrical products should not be disposal of with household waste.
Please recycle where facilities exist.
GUARANTEE
This product is guaranteed against all manufacturing defects for 2 years from the date of purchase. If the care advice and instructions contained in this manual are not followed the guarantee will be automatically void.
For this guarantee to be valid, it is necessary to present the original receipt or invoice. Industrias Masats S.L.U., www.fl amagas.com.
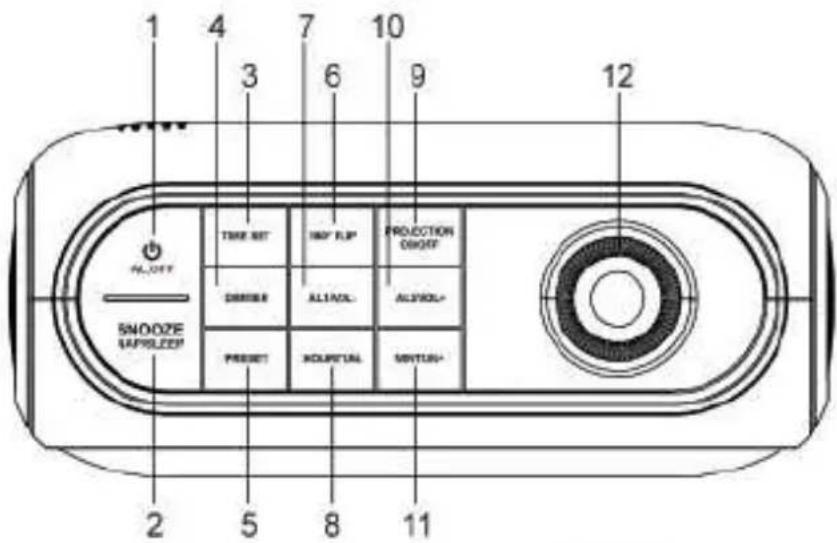
CONTROLES
- Touche "AL. OFF"
- Touche "SNOOZE NAP/SLEEP"
- Touche "TIME SET"
- Touche "DIMMER"
- Touche "PRESET"
- Touche "180° FLIP"
- Touche "AL1/VOL-"
- Touche "HOUR/TUN-"
- Touche "PROJECTION ON/OFF"
- Touche "AL2/VOL+
- Touche "MIN/TUN+
- Sélecteur "TIME PROJECT/FOCUS"
- COMPARTIMENT POUR PILES
14.ANTENNE - CABLE D'ALIMENTATION