DBF139 - Radio DAEWOO - Free user manual and instructions
Find the device manual for free DBF139 DAEWOO in PDF.
| Product type | Radio |
| Brand | Daewoo |
| Model | DBF139 |
| Power supply | Mains 230 V AC or batteries (3 x R14/UM2/C) |
| Main functions | FM radio, clock, alarm, snooze, sleep, MP3 player (USB, Micro SD, AUX) |
| Frequency band | FM |
| Tuning | Manual and automatic |
| Presets | Up to 50 stations |
| Antenna | Telescopic |
| Display | Digital screen |
| Connectors | USB port, Micro SD slot, AUX 3.5 mm input |
| Volume control | VOLUME + and - buttons |
| Clock | 12/24 h format, adjustable |
| Alarm | Programmable with multiple ringtones (beep, USB, radio) and adjustable snooze (5 to 25 min) |
| Sleep function | Timer from 15 to 90 min or OFF |
| MP3 playback | From USB flash drive, Micro SD card or external source via AUX |
| Electrical compliance | Directive 2004/108/EC (Electromagnetic compatibility) |
| Maintenance | Clean with a dry cloth; do not use abrasive products |
| Precautions | Do not expose to rain, moisture or extreme temperatures; do not open; remove batteries if not used for a long time |
| Recycling | Do not dispose of with household waste; follow WEEE regulations |
Frequently Asked Questions - DBF139 DAEWOO
User questions about DBF139 DAEWOO
0 question about this device. Answer the ones you know or ask your own.
Ask a new question about this device
Download the instructions for your Radio in PDF format for free! Find your manual DBF139 - DAEWOO and take your electronic device back in hand. On this page are published all the documents necessary for the use of your device. DBF139 by DAEWOO.
USER MANUAL DBF139 DAEWOO
MANUEL D'INSTRUCTIONS
MANUAL DE INSTRUÇÕES
Open the battery compartment and insert as indicated in the compartment three Batteries, type R14, UM2 o C cells.
Mains Supply
Connect the mains lead to the wall socket. The mains Supply is switched on. To disconnect the set from the mains completely, withdraw the mains plug from the wall socket.
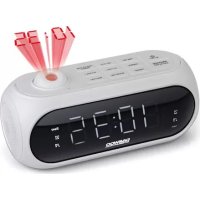
Setting the Clock
- Check the radio is switched off.
- Press TIME/PROG for 3 seconds on the front panel to start clock setting.
- Press PRESET + button for 12-hours/24-hours selection.
- Press TIME/PROG on the front panel to hour setting.
- To set the hours, press PRESET + or PRESET - while the display is still flashing.
- Press TIME/PROG on the front panel to minute setting and follow same method for minute setting. Press TIME/PROG to confirm.
Setting The Alarm
- Check the radio is switched off.
- Press AL/MODE for 3 seconds on the front panel to start alarm setting.
- To set the hours, press PRESET + or PRESET -. Press AL/MODE to minute setting and follow same method.
- Press AL/MODE again and press PRESET + or PRESET - to select the alarm sound as "bb" (Normal alarm), "USB" or Rad "Radio".
- Press AL/MODE to set the Snooze time: 5,10,15,20 or 25. Press AL/MODE to confirm.
Remark: Press AL/MODE to enable / disable the alarm function. An alarm icon will appear on the display when it is switch on.
Snooze function
- When your alarm sounds, you can press the SNOOZE/SLEEP Button to turn off the alarm temporary for the snooze time duration selected. The radio will then turn on again.
- Snooze can be repeated until the AL/MODE Button is pressed.
Sleep function
- Turn on the radio, press the SLEEP Button to select a time, you can choose 15 / 30 / 45 / 60 / 75 / 90 or OFF.
For example, when the LED display shows 15 minutes, the radio turns on and then turns off automatically after 15 minutes.
- To turn off the radio at any time, press the ON / STAND BY Button.
ENG
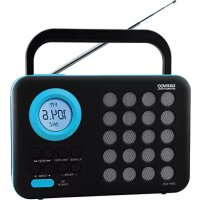
Radio
- Press ON / STAND BY to switch on the radio.
- Press AL/MODE once or more to select FM radio mode.
- The display shows the radio station details, Select your station by using TUNING + or TUNING -.
Tuning
Manual tuning: Press TUNING + or TUNING – briefly, once or more until the right frequency is found.
Automatic tuning: Press and hold down TUNING + or TUNING – until the display frequency starts to run. When a station of sufficient strength has been found tuning stops, or you can stop automatic tuning by pressing TUNING + or TUNING – again.
Presets
You can store the frequencies of up to 50 radio stations in the memory. A stored frequency can be erased from the memory by storing another frequency in its place.
- Turn on the radio and press TIME/PROG once to enter programming mode.
- Select desired station and press TIME/PROG once again to confirm.
- Press PRESET + or PRESET – to select the desired memory location.
To listen to a preset station:
- press the PRESET + or PRESET – for selecting your desired station.
To improve reception: pull out the telescopic aerial incline and turn the aerial to improve the reception.
Volume
Adjust the sound with the controls VOLUME + or VOLUME -
AUX IN, USB, MICRO SD CARD PLAYBACK
You can play MP3 files stored in the memory media with USB connector, MICRO SD Card Slot or connect an external player using the AUX IN jack.
- Press AL/MODE to select USB, SD or AU.
- Connect the USB media to the unit or insert the MICRO SD Card. The radio will automatically start reading the MP3 fi les stored.
- Press PRESET + or PRESET – buttons to select the desired track, you can press TIME/PROG to Pause/Play the MP3 device.
Wrongly connect the USB Storage Media or MICRO SD Card upside down could damage the unit or the USB Storage Media or MICRO SD Card. A locked MICRO SD Card cannot be detected or playback.
PRECAUTIONS:
- For AC operation, make sure the voltage is compatible. Always use the provided AC power cord; never use other AC power cord.
- Always disconnect the AC power cord from the AC power source when it is not in use or when DC power is operating.
- Do not leave the batteries in the compartment for a long time. Remove the batteries to avoid leakage and damage.
- Do not expose the unit to extreme temperature nor high humidity to ensure normal functioning for a long lifetime.
For instances, never place the unit in bathing areas nor around stoves and radiators. - If you find the unit is not working properly, please take it to your nearest services centre. Do not attempt to repair by yourself.
WARNING:
To prevent fi re or shock hazard, do not expose the unit to rain or moisture. To avoid electrical shock, do not open the cabinet, refer to service agent or qualifi ed engineer only.
If at any time in the future you should need to dispose of this product please note that Waste electrical products should not be disposed of with household waste. Please recycle where facilities exist. Check with your Local Authority or retailer for recycling advice. (Waste Electrical and Electronic Equipment Directive).
STATEMENT OF COMPLIANCE
Flamagas S.A. hereby declares that the DRP-120 product complies with the requisites and basic safety requirements of Directive 2004/108/EC on Electromagnetic Compatibility
For a full copy of the statement of compliance please see: www.electronicafl amagas.com