Astomi 80 - Air purifier OLIMPIA SPLENDID - Free user manual and instructions
Find the device manual for free Astomi 80 OLIMPIA SPLENDID in PDF.
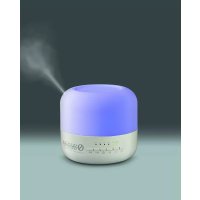
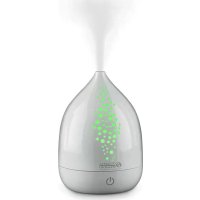
| Product type | Ultrasonic humidifier and essential oil diffuser |
| Brand | Olimpia Splendid |
| Model | Astomi 80 |
| Tank capacity | 70 ml maximum |
| Power supply | USB 5V, 1A (USB cable included) |
| Mist type | Ultrasonic |
| LED light function | Yes, with on/off button |
| Essential oil compatibility | 100% natural oils suitable for ultrasonic mist diffusers |
| Recommended oil quantity | 2 to 3 drops per 70 ml of water |
| Tank material | Oil-resistant plastic |
| Lid material | Oil-resistant plastic |
| Safety | Automatic shut-off when water runs out; red flashing indicator |
| Water level indicator | LED indicator (red/green) |
| Routine maintenance | Rinse with clean water after each use |
| Descaling | With a mixture of white vinegar and water (1:1) |
| Recommended water type | Distilled or drinking water; avoid very hard water |
| Included accessories | USB cable |
| Warranty | Manufacturer's warranty (void if unauthorized opening) |
Frequently Asked Questions - Astomi 80 OLIMPIA SPLENDID
User questions about Astomi 80 OLIMPIA SPLENDID
0 question about this device. Answer the ones you know or ask your own.
Ask a new question about this device
Download the instructions for your Air purifier in PDF format for free! Find your manual Astomi 80 - OLIMPIA SPLENDID and take your electronic device back in hand. On this page are published all the documents necessary for the use of your device. Astomi 80 by OLIMPIA SPLENDID.
USER MANUAL Astomi 80 OLIMPIA SPLENDID
ASTOMI 80 ASTOMI 200
ASTOMI 80 ASTOMI 200
ISTRUZIONI PER INSTALLAZIONE, USO E MANUTENZIONE IT INSTRUCTIONS FOR INSTALLATION, USE AND MAINTENANCE EN INSTRUCTIONS POUR L'INSTALLATION, L'EMPLOI ET L'ENTRETIEN FR INSTALLATIONS, BEDIENUNS AND WARTUNGSANWEISUNGEN DE INSTRUCCIOES PARA LA INSTALLACION, USO Y MANTENIMIENTO ES
We wish to thank you, first of all, for purchasing an appliance produced by our company.
This document is restricted in use to the terms of the law and may not be copied or transferred to third parties without the express authorization of the manufacturer. Our machines are subject to change and some parts may appear different from the ones shown here, without this affecting the text of the manual in any way.
Read this manual carefully before performing any operation (installation, maintenance, use) and follow the instructions contained in each chapter.
Keep the manual carefully for future reference.
After removing the packaging, check that the appliance is in perfect condition.
The packaging materials must not be left within reach of children as they can be dangerous.
THE MANUFACTURER IS NOT RESPONSIBLE FOR DAMAGES TO PERSONS OR PROPERTY CAUSED BY FAILURE TO FOLLOW THE INSTRUCTIONS IN THIS MANUAL.
The manufacturer reserves the right to make any changes it deems advisable to its models, although the essential features described in this manual remain the same.
2 - GENERAL WARNINGS
WHEN USING ELECTRICAL APPLIANCES, BASIC SAFETY PRECAUTIONS SHOULD ALWAYS BE FOLLOWED TO REDUCE THE RISK OF FIRE, ELECTRIC SHOCK, AND INJURY TO PERSONS, INCLUDING THE FOLLOWING:

This product should be used only in accordance with the specifications outlined in this manual. Usage other than what has been specified here may result in serious injury.
1 - CAUTION This is an electrical appliance and requires attention when in use.
2 - CAUTION To reduce the risk of severe burns, keep this product out of the reach of children and pets.
3 - CAUTION Do not allow children to play with any product packaging such as plastic bag.
4 - Disassembly, repair or remodelling by an unauthorized person may result in serious harm and will void the manufactures warranty.
5 - Do not activate the appliance if the cable or plug is damaged, after a malfunction, or if the appliance has been dropped or damaged in any way. Return the appliance to the manufacturer for examination or repairs.
6 - Always place the appliance on a stable surface, flat and levelled, at least 60~cm from the floor and at least 10~cm from the walls. This humidifier may not work properly if placed on an irregular surface.
7 - Do not block air inlet or outlet.
8 - Do not place the appliance on surfaces lined with fabric, on carpets/ rugs, or on absorbing surfaces. This may obstruct the air inlet.
9 - Never place the appliance near sources of heat, such as heaters, radiators etc.
10 - Do not place the appliance near a power outlet.
11 - Place the appliance in a free space, to allow the mist to spread freely: Keep the appliance away from any other appliance or object, in particular those sensitive to water, to avoid damaging them.
12 - This product releases a mist. Do not place the appliance directly on wooden furniture, floor or any other surface that may be damaged by water. Manufacturer does not accept any liability for damage in the case of the unit being placed incorrectly.
13 - Before filling or cleaning the appliance, make sure it is unplugged from the power outlet.
14 - Once the humidifier has been plugged in, do not tilt or move the unit.
15 - Do not remove the cover from the body of the appliance while it is working.
16 - Do not handle the plug with wet hands.
17 - Do not excessively bend, twist, pull or damage the power cord.
18 - Avoid placing the appliance in such a manner that the humidity nozzle points directly to an object or person.
19 - Do not inhale the mist/steam released from the appliance and do not drink water from the reservoir.
20 - Do NOT fill the reservoir above the "MAX" marking on the inner wall. Overfilling will cause the appliance not to work.
21 - Do not fill the water reservoir with hot or boiling water.
22 - Do not use the appliance under direct sunlight or close to sources of heat, such as heaters or radiators.
23 - Do not use the appliance if its body or cover present fissures or damages.
24 - Do not leave the appliance running for a long period of time.
25 - Unplug the appliance when not in use for a long period of time and/or when there is no one home.
26 - Do not leave water in the reservoir if you do not plan to use the appliance for a long period of time.
27 - Empty and clean the reservoir when the appliance is not in use.
28 - Do not clean the body of the appliance, the reservoir and the cover with detergents or chemical substances of any kind.
29 - Do not use the appliance near any other electronic devices.
30 - Never cover the mist nozzle during use. Never place anything on or within the appliance.
31 - Do not place the power cable on objects.
32 - Do not get water in or on the power cord or where it connects to the product.
33 - Do not use the appliance near sinks.
34 - Do not immerse the appliance in water or other liquids. Do not pour water on the appliance.
35 - When emptying the reservoir, pour the water from the side.
36 - Do not cover the lid with a cloth or with your hand. Do not cover the appliance without its lid.
37 - Use drinkable or distilled water in the reservoir. Using particularly hard water (rich in lime) means the appliance must be cleaned more often.
38 - If you notice humidity forming on the walls or on the window of the room, switch the appliance off.
The room already has plenty of humidity and additional moisture may cause damage.
39 - Keep the power cable from dangling from the surface on which the appliance is resting, to avoid people from tripping or pulling on it involuntarily, causing the appliance to fall.
40 - Do not open the body of the appliance, for any reason. Electric shock hazard!
41 - Do not add too many drops of oil.
42 - The appliance must be regularly topped up with water when in use. Switch off the appliance and unplug it from the power outlet before filling it.
For domestic use only
3 - INFORMATION ON THE USE OF ESSENTIAL OILS
Follow these instructions for the proper use of essential oils to avoid malfunctions or damages to the product, or cause damage to users.
- Use 100% natural essential oils, suitable for use with electric ultrasound diffusers.
-
Add the essential oil
-
for the "ASTOMI 80" model >2 ÷ 3 drops in 70 ml of water.
- for the "ASTOMI 200" model >5 ÷ 10 drops in 200 ml of water.
Do not use more than this amount.
- Wash the reservoir very carefully after each use, to remove residues.
- Some types of aromatic oils are not very soluble in water, and tend to remain in the reservoir. Regularly clean the water reservoir.
- Clean the reservoir every time you change oil. If the oil you used before has not been completely removed, the aromatic mixture may release an unpleasant smell and/or form residues.
- Some types of oil may stain the inner parts of the reservoir. This is absolutely normal.
- Do not apply undiluted oil directly on the skin; do not ingest it. Seek medical help immediately in the event of ingestion of the oil.
- Do not allow oil to come into contact with skin. If this happens, rinse it off immediately.
- Do not allow oil to come into contact with the eyes. If this happens, rinse immediately with water. If necessary, seek medical help.
- If you feel ill while using the product, switch the appliance off immediately.
- Pregnant women, elderly subjects, small children and people with chronic health conditions can be more sensitive to the smell. Immediately stop using if anyone feels ill.
- The reservoir and the lid are made of anti-oil materials. Other parts of the appliance may be damaged by contact with the oil.
Be careful not to drip oil outside of the reservoir.
- Store your essential oils in a dark, cool place, well capped and away from the reach of children and pets.
- Do not use the essential oil after its expiry date.
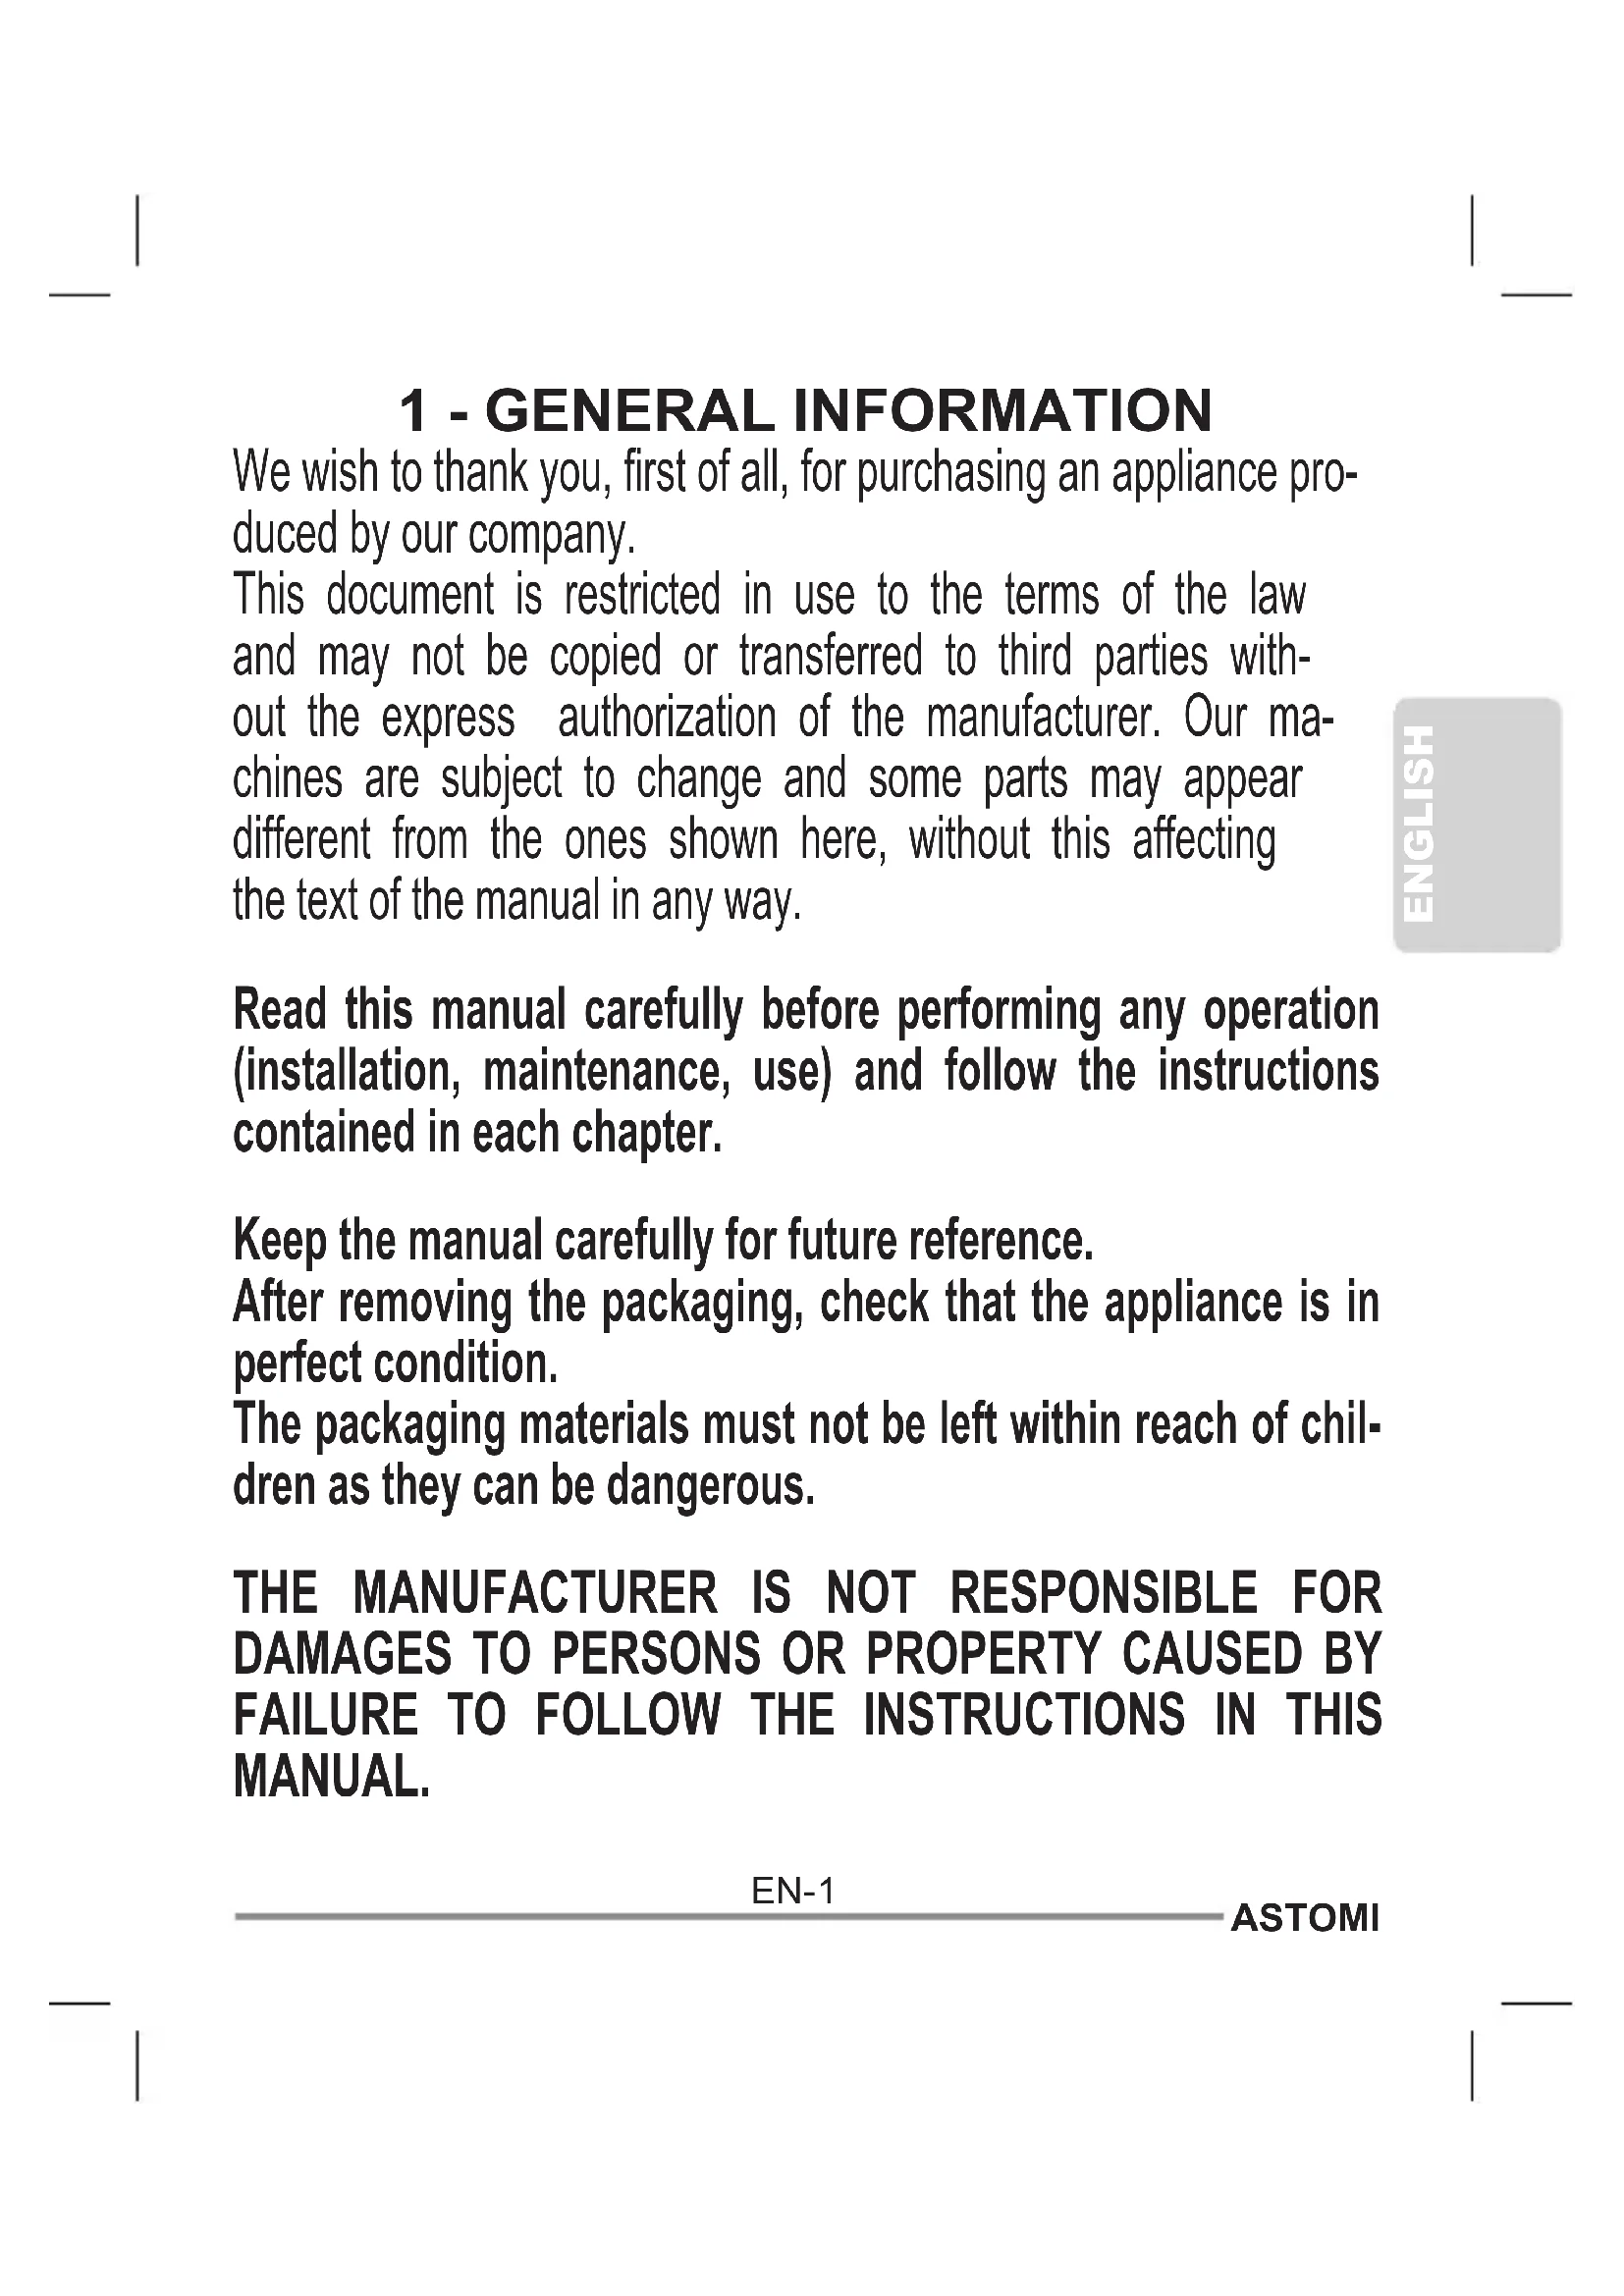
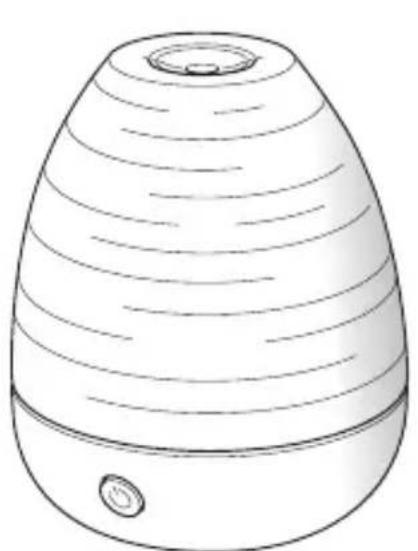
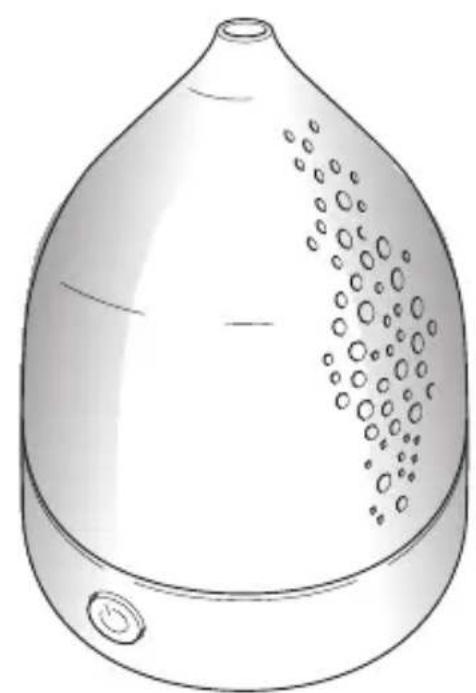
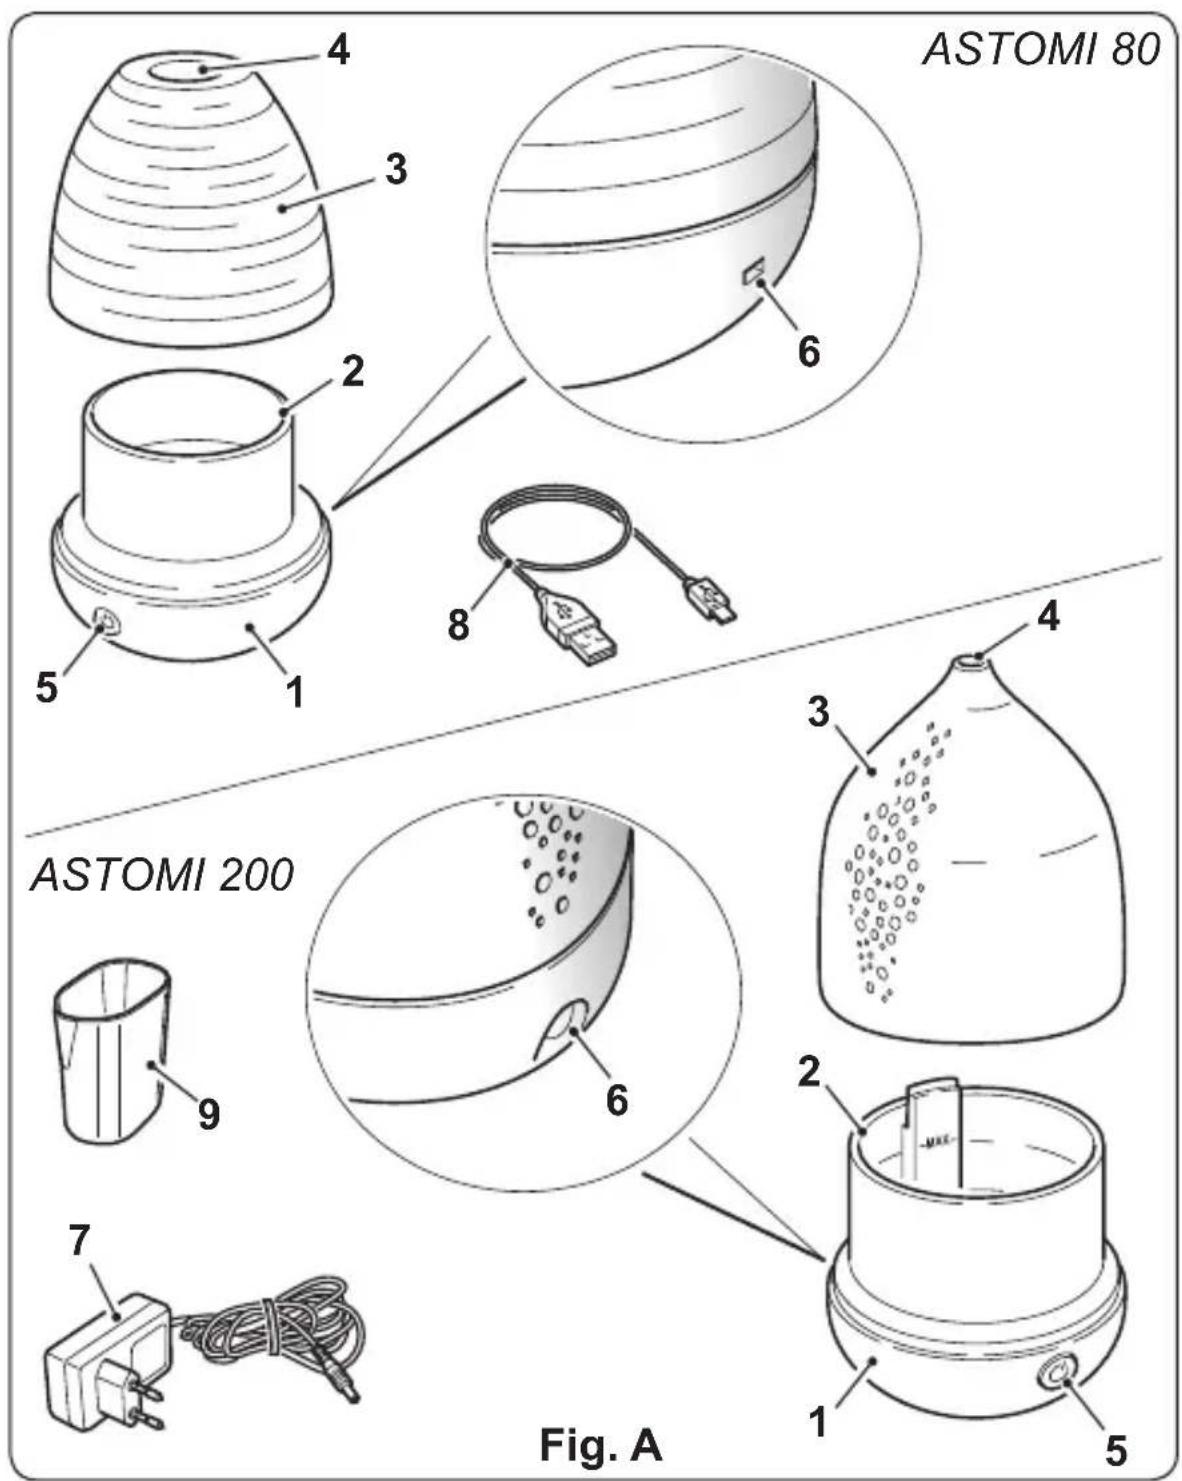
4 - DESCRIPTION OF THE APPLIANCE
1) Body of appliance
2) Reservoir
3) Lid
4) Mist nozzle
5) On/Off button
6) Power plug
7) Feeder (for ASTOMI 200 model)
8) USB cable (for ASTOMI 80 model)
9) Tappet (for ASTOMI 200
model)
5 - OPERATIONS
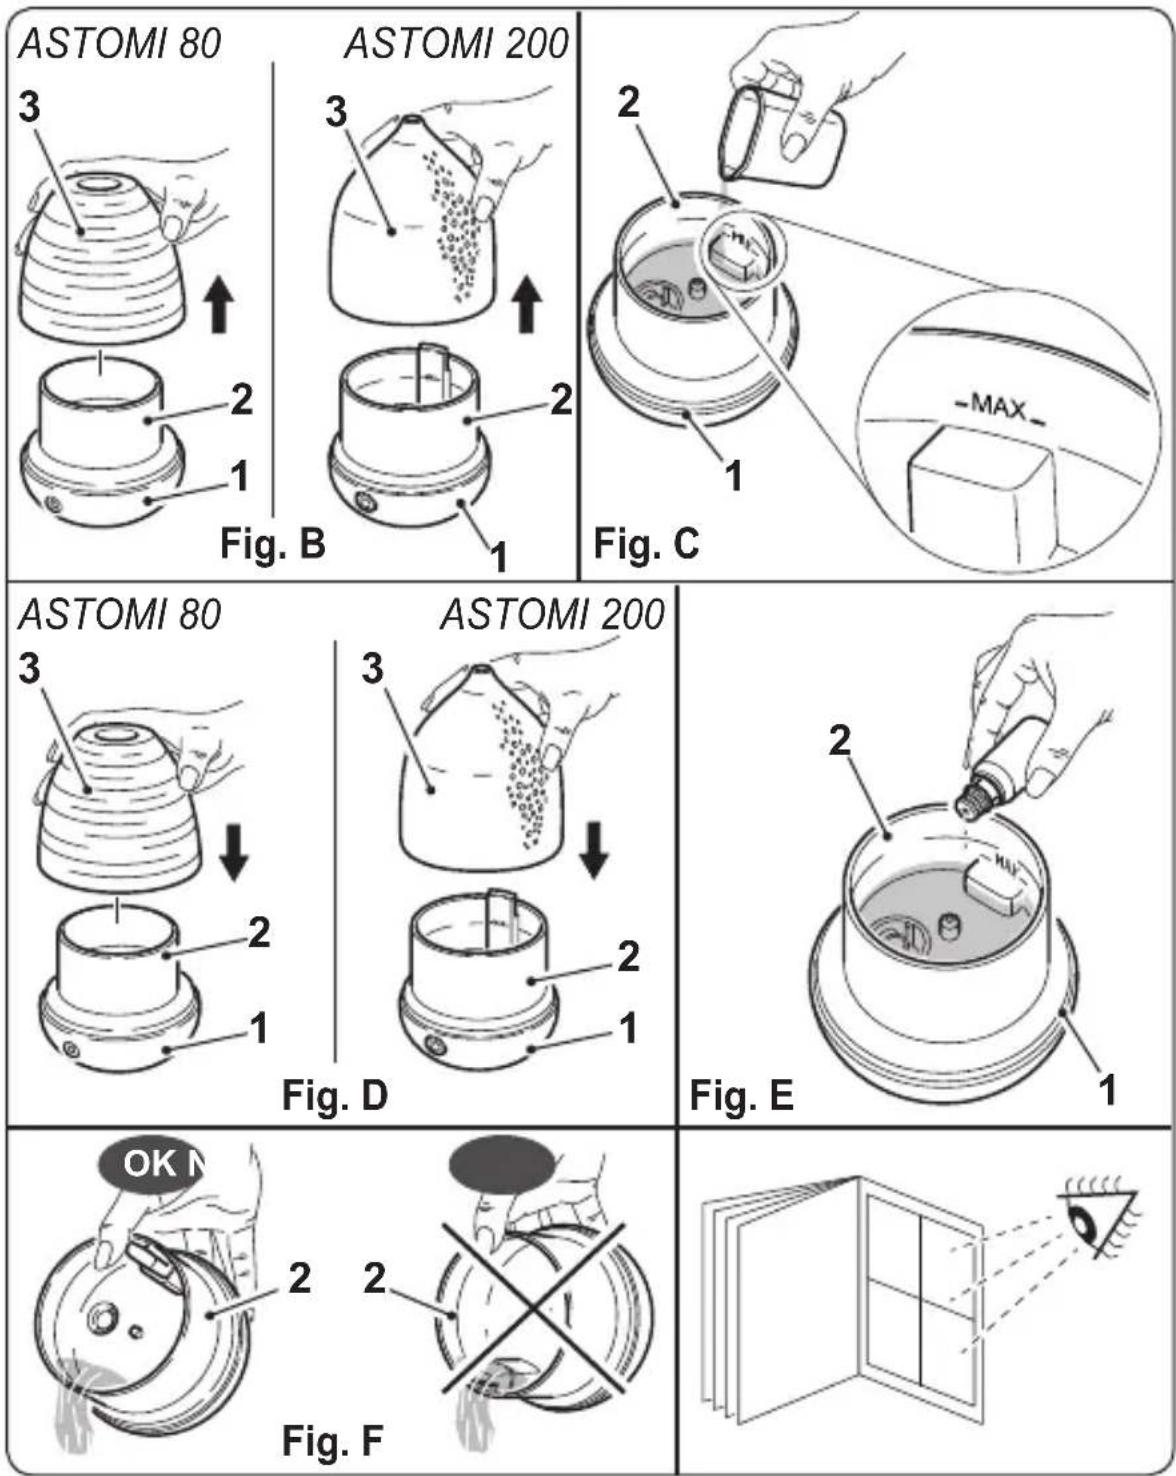
a. Remove the cover (3) (Fig. B)
b. Add water to the reservoir (2) (Fig. C)
- for the ASTOMI 80 model - max 70 ml
- for the ASTOMI 200 model - max 200 ml

Do not fill the reservoir over the "MAX" marking (2), or the appliance will not work.
EN-9
ASTOMI
c. Add the essential oil (Fig. E).
- for the "ASTOMI 80" model >2 ÷ 3 drops in 70 ml of water.
- for the "ASTOMI 200" model >5 ÷ 10 drops in 200 ml of water.

Do not use more than this amount.
d. Place the cover (3) over the body of the appliance (1) (Fig. D).
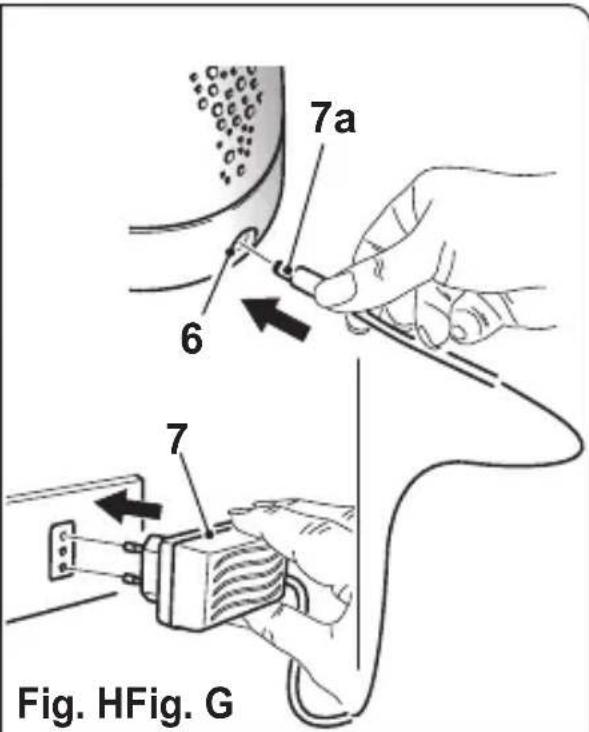
ASTOMI 80 model (Fig. G)
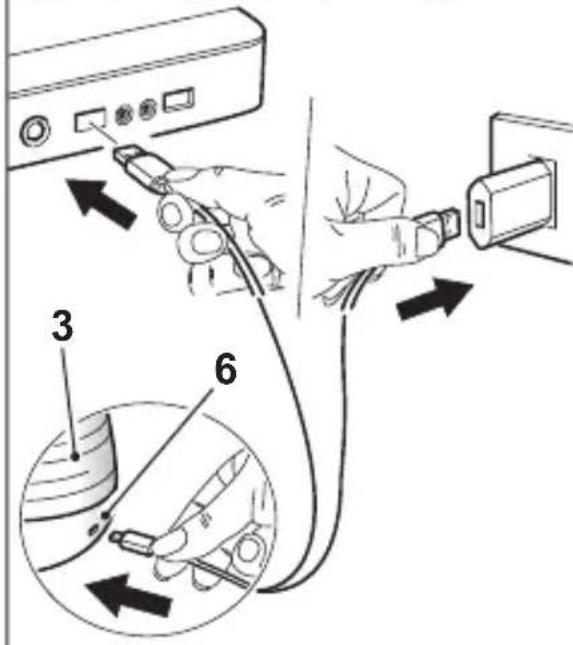
e1. Connect the USB plug of the power supply cable (8) to a socket that supplies voltage of at least 5V, 1A (or higher).
If the power supply is lower than 5V, 1A, only a small amount of mist is produced. Normally, the USB power supply from a laptop is excellent, while USB power supply from a desktop computer is not correct.
e2. Connect the USB mini connector to the power supply socket (6) on the body of the appliance; the LED light in the reservoir switches on for one second.
ASTOMI 200 model (Fig. H)
f1. Connect the feeder (7) to the power input and the plug (7a) to the power outlet (6) on the body of the appliance. The appliance emits a "beep" and the LED light in the reservoir switches on for one second.

-
Make sure the power mains voltage corresponds to the information on the feeder (8).
-
Only use the feeder (8) included with the product.
SWITCH-ON (for all models)
g. Press the button to start the appliance.
The appliance distributes the mist and the LED light in the reservoir switches on alternating from red to green.
NOTE:
- If there is no water in the reservoir (2), when the button has been pressed, the red LED flashes 3 times and switches off.
h. Press the button again to switch the LED light off (distribution continues).
i. Press the button to switch the appliance off.
6a - CLEANING AFTER USE
After each use, and if you wish to use another oil, proceed as follows:

Switch off the appliance and unplug it from the power outlet.
a. Remove the cover (3).
b. Empty the reservoir (2) carefully so it does not come into contact with the air outlet (Fig. F).
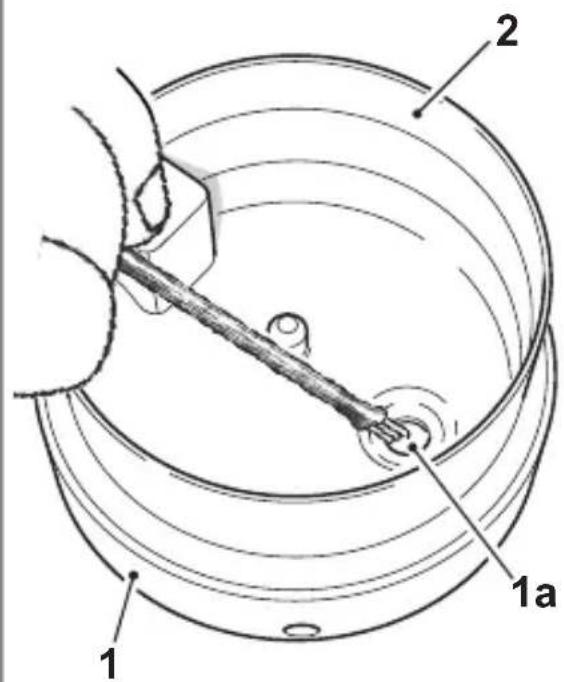
c. Rinse the reservoir and dry it carefully with a soft cloth or a paper towel to remove all residues. Carefully clean and dry the ultrasound transducer (1a), if necessary, using a soft brush (Fig. L).

-
Use only water to clean. Do not use detergents or chemical substances.
-
Do not rub or scrub the ultrasound disc (1a)
d. Wash and dry the cover (3).
e. Clean the outer part of the body of the appliance (1) with a soft cloth, slightly damp if necessary.

-
Do not immerse the appliance body (1), the transformer (7) and the USB cable (8) into water or other liquids.
-
Do not leave the appliance with water in the reservoir, especially if you do not intend to use it now.
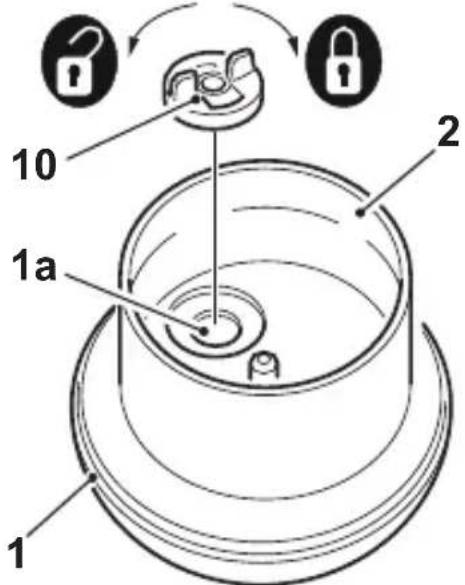
ASTOMI 80 model
The lid (10) protects the transducer (1a) (Fig. M).
It can be removed to facilitate cleaning of the transducer, by rotating it anti-clockwise. If the transducer and the lid are dirty, the mist distributed may not be continuous or in low quantities. Clean the lid with water and dry it.
Operate as described in the "Cleaning after use" paragraph to clean the transducer.
Before using the appliance, position the lid correctly and rotate it in a clockwise direction (Fig. M).
6b - DECALCIFICATION
-
It is advised to use distilled water, especially if water in your geographical area is particularly hard. This helps reduce the precipitation of minerals and white powder.
-
If lime becomes difficult to remove with the brush:
-
Fill the reservoir (2) with a mixture of 1 teaspoon of white vinegar and 1 teaspoon of water.
- Let it work for 5 minutes.
- With the vinegar in the reservoir, clean all the inner surfaces with a soft cloth or a soft brush to help remove lime scale.
- Rinse with water and dry carefully to remove the lime scale and the vinegar solution.

DONOT ATTEMPTTO OPEN THE MOTOR COMPARTMENT IF YOU DETECT A PROBLEM. THIS MAY ANNULL THE WARRANTY AND CAUSED DAMAGES TO THE APPLIANCE OR PERSONAL INJURIES.
7 - TECHNICAL DATA
Check the data plate on the product for the technical data listed below:
- Power supply voltage - Power absorbed
DISPOSAL
This symbol on the product or its packaging indicates that the appliance cannot be treated as normal domestic trash, but must be handed in at a collection point for recycling electric and electronic appliances.
Your contribution to the correct disposal of this product protects the environment and the health of your fellow men. Health and the environment are endangered by incorrect disposal.
Further information about the recycling of this product can be obtained from your local town hall, your refuse collection service, or in the store at which you bought the product.
This regulation is valid only in EU member states.
8 - TROUBLESHOOTING GUIDE
| PROBLEM POSSIBLE SOLUTION | |
| The appliance does not work. | Power plug: Disconnect it from the power outlet and plug it in again. Power Failure: When the power is returned, try again. |
| Air blows but water vapor is not produced. | There may be oil residues in the reservoir; wash the reservoir and try again. The surface of the ultrasonic disk is dirty: Clean ultrasonic disk (Fig. L). If you use hard water, replace with softer water. |
| Humidity level is low. The surface of the ultrasonic disk is dirty: Clean ultrasonic disk (Fig. L). The water in the unit is too cold: Replace with cool, but not cold water. | |
| The humidity has a bad smell. | Poor maintenance or dirty water: Accurately clean the reservoir and fill it up with clean water. |
| White powder is formed near the appliance. | Hard water may deposit a certain of dust. Dust in the air also settles because of added humidity in the room. Use distilled water if this becomes a nuisance. |
| The appliance has stopped working. | Little or no water. Unplug the appliance and fill up the reservoir. |
| Water accumulates outside the appliance or around it. | Humidity saturation. Lower the mist control setting. Point the nozzle away from objects. Lift the appliance onto a wa-ter-resistant levelled surface at least 60 cm above the floor. |
| The appliance will not start. Too much water in the reservoir. Do not exceed the MAX marking. | |
1 - INFORMATIONS GÉNÉRALES
ASTOMI 80 ASTOMI 200
OPEN CLOSE
Fig. MFig. L
ASTOMI

OLIMPIA SPLENDID
HOME OF COMFORT
OLIMPIA SPLENDID spa
via Industriale 1/3
25060 Cellatica (BS)
www.olimpiasplendid.it
info@olimpiasplendid.it