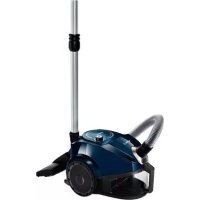
USER MANUAL BGS31430 BOSCH
Register your new Bosch now: www.bosch-home.com/welcome

BGS3..

BOSCH
de Gebrauchsanleitung pt Instruções de utilização
en Operating instructions fr Notice d'utilisation
it Istruzioni per l'uso pl Instrukcja obsługi nl Gebruiksaanwijzing
da Brugsanvisning bg Ръководство за употреба
no Bruksanvisning ro Instrucțiuni de folosire
sv Bruksanvisning
fi Käyttöohje uk Інструкція з експлуатації
Please keep this instruction manual for future reference.
When passing the vacuum cleaner on to a third party, also pass on this instruction manual.
Intended use
This appliance is intended for domestic use only and not for commercial use. Only use this vacuum cleaner in accordance with the information provided in this instruction manual. The manufacturer shall not accept any responsibility for damage caused by improper use or incorrect operation.
You must therefore note the following points.
The vacuum cleaner must only be operated with:
- Original replacement parts, accessories or special accessories
In order to prevent injuries and damage, the vacuum cleaner must not be used for:
Vacuuming persons or animals. Vacuuming up:
- Small creatures (e.g. flies, spiders, etc.).
- Hazardous, sharp-edged, hot or red-hot substances.
- Damp or liquid substances.
- Highly flammable or explosive substances and gases.
- Ash, soot from tiled stoves and central heating systems.
- Toner dust from printers and copiers.
This vacuum cleaner complies with the recognised rules of technology and the relevant safety regulations.
The appliance may be used by children over the age of 8 years and by persons with reduced physical, sensory or mental capacity or by persons with a lack of experience or knowledge if they are supervised or have been instructed on the safe use of the appliance and they have understood the potential dangers of using the appliance.
Children must never play with the appliance. - Cleaning and user maintenance must never be carried out by children without supervision. - Plastic bags and films must be kept out of the reach of children and disposed of. ⇒ There is a risk of suffocation.
Proper use
The vacuum cleaner must only be connected and operated as specified on the rating plate.
- Never vacuum without the dust bag or dust container, motor protection or exhaust filter.
This may damage the appliance.
- Keep the vacuum cleaner away from your head when using nozzles and tubes.
There is a risk of injury.
- When vacuuming stairs, the appliance must always be positioned below the user.
- Do not use the power cord or the hose to carry or transport the vacuum cleaner.
If the power cord of this appliance is damaged, it must be replaced by the manufacturer, customer service or a similarly qualified person, in order to prevent injury.
Fully extend the power cord when using the vacuum cleaner continuously for several hours.
- When disconnecting the appliance from the mains, pull the plug itself to remove it; do not pull on the power cord.
- Do not pull the power cord over sharp edges or allow it to become trapped.
Pull out the mains plug before carrying out any work on the vacuum cleaner.
- Do not operate the vacuum cleaner if it is damaged. Unplug the appliance from the mains if a fault is detected.
For safety reasons, only authorised after-sales service personnel are permitted to carry out repairs and fit replacement parts to the vacuum cleaner.
- Protect the vacuum cleaner from outside weather conditions, moisture and sources of heat.
- Do not pour flammable substances or substances containing alcohol onto the filters (dust bag, motor protection filter, exhaust filter, etc.). The vacuum cleaner is not suitable for use on construction sites.
> Vacuuming up building rubble may damage the appliance.
Switch off the appliance when it is not in use. At the end of its service life, the appliance should immediately be rendered unusable, then disposed of in an appropriate manner.
Please note
The mains socket must be protected by at least a 16-amp circuit breaker.
If a circuit breaker is tripped when you switch on the vacuum cleaner, this may be because other electrical appliances which have a high current draw are connected to the same power circuit.
To prevent the fuse from blowing, select the lowest power setting before switching the appliance on, and increase the power only once it is running.
Instructions on disposal
Packaging
The packaging is designed to protect the vacuum cleaner from being damaged during transportation. It is made of environmentally friendly materials and can be recycled. Dispose of packaging that is no longer required at an appropriate recycling point.
Old appliances
Old appliances still contain many valuable materials. You should therefore take appliances that have reached the end of their service life to your retailer or recycling centre so that they can be recycled. For current disposal methods, enquire at a retailer or your local council.
Disposal of filters and dust bags
Filters and dust bags are manufactured from environmentally friendly materials. Provided they do not contain substances that are not permitted in household waste, you can dispose of them with your normal household waste.
The electric vacuum cleaner is intended for use in the home and not for professional use. Use the electric vacuum cleaner exclusively in accordance with the instructions in these operating instructions. The manufacturer is not liable for any damage resulting from improper use or handling. Please also observe the following instructions!
The electric vacuum cleaner may only be used with:
Original spare parts and accessories or the original accessory
To avoid injury and damage, the electric vacuum cleaner must not be used for:
Use on people or animals. For vacuuming:
Instructions for the user
Packaging
The packaging protects the electric vacuum cleaner from damage during transport. It is made of environmentally friendly materials and is therefore recyclable. Dispose of packaging materials that are no longer needed at the collection points for recyclable materials.
Packaging
This appliance can be used by children aged from 8 years and above and persons with reduced physical, sensory or mental capabilities or lack of experience and knowledge if they have been given supervision or instruction concerning use of the appliance in a safe way and understand the hazards involved. Children shall not play with the appliance. Cleaning and user maintenance shall not be made by children without supervision.
Description of the appliance and its accessories
The filters and the accessories of the filters are made of materials that are environmentally friendly. As long as they do not contain substances that are prohibited for household waste, they can be disposed of together with the normal household waste.
Safety instructions
This appliance complies with the relevant technical rules and safety regulations.
The appliance can be used by children aged from 8 years and above and persons with reduced physical, sensory or mental capabilities or lack of experience and knowledge, if they have been given supervision or instruction concerning use of the appliance in a safe way and understand the hazards involved. Children shall not play with the appliance. Cleaning and user maintenance shall not be made by children without supervision.
Children must not play with the appliance. Cleaning and user maintenance must not be carried out by children without supervision. The packaging materials and the appliance must be kept out of reach of children and must be disposed of properly.
Danger of suffocation!
Intended use
Connect the appliance to the mains and operate the vacuum cleaner only according to the information on the rating plate. Never use the appliance without the filter bag, respectively the dust container, motor protection filter and exhaust filter.
The appliance can be damaged! Avoid vacuuming up dust close to the head. There is a danger of injury! The vacuum cleaner is designed for normal use and should not be used for vacuuming construction debris. Do not use the cable for pulling or carrying the appliance. If the connection cable to the mains is damaged, it must be replaced by the manufacturer or its service agent or a similarly qualified person in order to avoid hazards. Do not use the appliance with a damaged cable or plug.
Do not pull the cable to unplug the appliance, but pull the plug. Do not run the cable over sharp edges and do not pinch it. Before any work on the vacuum cleaner, unplug it from the mains. Do not operate a damaged vacuum cleaner. Pulling out the plug from the socket can cause electric shock. To avoid hazards, repairs and replacement of spare parts on the vacuum cleaner must only be carried out by authorized service personnel. Keep the vacuum cleaner away from heat sources, moisture and sharp edges. Do not place any flammable materials (filter bags, motor protection filter, exhaust filter, etc.) on the appliance. The vacuum cleaner is not suitable for use on construction sites.
Vacuuming up construction debris can damage the appliance.
Unplug the appliance when not in use. Before disposing of the appliance, make it unusable and dispose of it in accordance with local regulations.
Attention
The appliance must be connected to a socket with a minimum rating of 16 A.
If the appliance trips the circuit breaker when switched on, the cause may be that other electrical appliances with high total power consumption are simultaneously connected to the same electrical circuit.
Tripping of the circuit breaker can be avoided by setting the appliance to the lowest power level before switching it on, and then gradually increasing the power level.
Disposal instructions
Packaging
The packaging protects the appliance from damage during transport. The packaging materials are environmentally friendly and can therefore be recycled. Dispose of any unnecessary packaging materials at the collection points for the recycling system "Green Dot".
Old appliance
Old appliances contain valuable materials. Therefore, take your old appliance to your dealer or to one of the recycling centers for reuse. You can obtain information about current disposal methods from your dealer or your local council.
Disposal of filters and filter bags
Filters and filter bags are made from environmentally friendly materials. If they do not contain substances prohibited for household waste, you can dispose of them with normal household waste.
ru
Keep the operating instructions. When passing the vacuum cleaner on to a new owner, do not forget to also hand over the operating instructions.
Intended use
This vacuum cleaner is intended for cleaning domestic rooms and is not suitable for industrial use. Use the vacuum cleaner only in accordance with the instructions given in the operating manual. The manufacturer is not liable for damage resulting from use of the appliance other than as intended or from incorrect handling. Therefore, strictly observe the instructions given below!
The vacuum cleaner may only be used with:
original spare parts and accessories, special accessories
To avoid injury and damage to the vacuum cleaner, do not use it for:
cleaning animals; vacuuming: - insects (e.g., flies, spiders, etc.), - harmful substances, sharp, hot, or burning objects; - wet objects and liquids; - flammable or explosive substances and gases; - foam, soot from tiled stoves and central heating systems; - toner from printers or copiers.
Safety instructions
Safety
This vacuum cleaner complies with generally recognized technical requirements and special safety regulations.
Use of the appliance by children over 8 years of age and persons with reduced physical, sensory, or mental capabilities, as well as persons lacking experience or knowledge, is permitted only under supervision or after instruction on safe use of the appliance and understanding of the dangers involved.
Children must not play with the appliance. Cleaning and user maintenance must not be performed by children without supervision. Keep plastic bags and packaging film out of reach of children.
Danger of injury!
Proper use
Connection to the power supply and switching on the vacuum cleaner must only be done in accordance with the data in the table. Do not use the vacuum cleaner without the dust bag or dust container, motor protection filter, and exhaust filter.
Possible damage to the vacuum cleaner!
Do not point the suction nozzle or tube at your head.
This may cause injury!
When cleaning with the vacuum cleaner, always keep it away from the user.
Do not use the power cord or plug to carry or transport the vacuum cleaner.
To avoid danger, replacement of a damaged power cord may only be carried out by the manufacturer or an authorized service center with similar qualifications.
For long hours of continuous operation, pull out the power cord completely.
When disconnecting the appliance from the mains, always hold the plug, not the power cord.
Make sure that the power cord is not pinched or caught on sharp edges of objects.
Before performing any repair or maintenance operations on the vacuum cleaner, disconnect it from the mains.
Do not use a faulty vacuum cleaner. If a fault occurs, remove the plug from the socket.
To avoid danger, all repair and replacement of parts of the vacuum cleaner should be carried out only in an authorized service center.
Protect the vacuum cleaner from the effects of unfavorable weather conditions, humidity, and body fluids.
Do not expose the filters (replaceable dust bag, motor filter, exhaust filter, etc.) to flammable or alcohol-containing substances. The vacuum cleaner is not intended for use on construction sites.
When vacuuming construction debris, the vacuum cleaner may be damaged.
Turn off the vacuum cleaner even during short pauses in cleaning. Make used appliances suitable for further use, then dispose of them in accordance with applicable regulations.
Attention:
The mains socket must be protected by a circuit breaker and rated at least 16A.
The circuit breaker of the device may trip immediately if other appliances with high total power consumption are connected to the same electrical circuit at the same time.
Tripping of the fuse can be prevented if, before turning on the device, you set the minimum power and then gradually increase it.
Disposal instructions
Packaging
The packaging serves to protect the vacuum cleaner from damage during transport. It is made of environmentally friendly materials, so it can be handed over for recycling. Used packaging materials should be taken to recycling collection points.
Disposal of the device
Disposal of the device is valuable raw material for further use. Therefore, the used device should be taken to a recycling collection point for further disposal.
Disposal of filters and dust bag
Filters and dust bags are made of environmentally harmless materials.
If they do not contain any substances prohibited for disposal with household waste, you can dispose of them together with household waste.
Please keep the operating instructions. If you pass the vacuum cleaner on to a third party, please also hand over the operating instructions.
Please note
- The mains socket must have a minimum fuse rating of 16 A.
Intended use:
- Dry household dust (carpet dust, dust from floors, furniture, etc.), - Do not vacuum liquids, hot ashes, sharp or pointed objects, - Do not vacuum water or wet dirt, - Do not vacuum flammable or explosive substances.
Materials, 30 creams of gases,
- according to their purpose for central heating devices, burners for gas or kerosene.
Safety instructions
The device complies with the established rules for technical means and relevant safety standards.
Children or persons with reduced physical, sensory or mental capabilities, or lack of experience and knowledge, may use the device only under supervision or after being instructed on safe use and understanding of the hazards involved. Children must not play with the device. Cleaning and user maintenance must not be performed by children without supervision. The packaging and foil must be kept out of reach of small children.
Danger of tipping over!
Proper use
Instructions for using the device
Connecting the device to the electrical network and its operation must be carried out only in accordance with the data on the nameplate. Never use the device without the dust container, filters, inlet and outlet filters.
The device may be damaged! Do not immerse the tube and nozzle in water during operation.
May cause injury! When carrying the device, always hold it below yourself. It is forbidden to carry or move the device by the power cord. In case of emergency, work on replacing the power cord must be performed only by the manufacturer, authorized service or a person with similar qualifications. During prolonged continuous operation, the power cord must be unplugged. When disconnecting from the network, never pull the power cord, hold it only by the plug. Make sure that the power cord is not pinched by sharp edges and is not stretched. Before any maintenance work, disconnect the device from the electrical network. Do not use a faulty device. If a malfunction is detected, disconnect the device from the electrical network. To avoid possible danger, repair and replacement of parts must be carried out only by qualified technical personnel. The device must be protected from adverse weather conditions, moisture, heat sources. The filters of the dust container (dust container, motor protection filter, outlet filter) must not come into contact with easily flammable or alcohol-containing substances. The device is not intended for use in wet work. Collecting wet dust may cause damage to the device. After finishing work, the device must be turned off. If you have been working for a long time, let it cool down and store it properly.
Attention
The device should be plugged into a socket with a circuit breaker of at least 16 A.
If the circuit breaker trips immediately after plugging in the device, it may indicate that the electrical network is overloaded with high-power appliances.
To prevent the circuit breaker from tripping, plug the device into a socket with minimal load, then gradually increase it.
The packaging protects the product during transportation. It is made from environmentally friendly materials and can be recycled. Unnecessary packaging materials should be handed in at a collection point for secondary raw materials.
Disposal of the device
Old devices contain many valuable materials. Therefore, when the device's service life has ended, it should be handed in for recycling or sold, or taken to a special collection point for recycling. For clarification on disposal, contact the seller or local competent authorities.
Disposal of filters and dust bags
Filters and dust bags are made from environmentally friendly materials. They can be disposed of as household waste, provided they do not contain substances harmful to the environment.
(1) Grüner Punkt
Congratulations on your purchase of the Bosch Relyy'v vacuum cleaner.
This instruction manual describes various Relyy'y models, meaning that some of the equipment features and functions described may not be available on your model. You should only use original Bosch accessories, which have been specially developed for your vacuum cleaner, in order to achieve the best possible vacuuming results.
Please keep this instruction manual for future reference. When passing the vacuum cleaner on to a third party, also pass on this instruction manual.
Fold out the picture pages.

Your vacuum cleaner
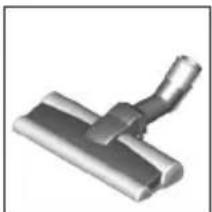
1 Adjustable floor tool (For the same functions, the appearance of the nozzle may differ from the picture) 2 Telescopic tube with sliding switch but without accessory connection 3 Telescopic tube with adjusting sleeve and accessory connection 4 Flexible hose 5 Handle 6 Foam filter 7 Parking aid on the back of the appliance 8 Exhaust filter lid 9 Power cord 10 Appliance lid 11 Foam filter lid 12 On/off button with electronic suction regulator 13 Filter control display (Sensor Control) 14 Dust container with carrying handle 15 Storage aid on the underside of the appliance 16 Fluff filter cover 17 Professional upholstery nozzle 18 Professional crevice nozzle 19 Accessories holder 20 Upholstery nozzle 21 Crevice nozzle 22 Brush ring (for fitting on the upholstery nozzle) 23 Drill dust nozzle 24 Hard-floor nozzle*
25 TURBO-UNIVERSAL® brush for floors 26 Hard-floor nozzle
Replacement parts and special accessories
A TURBO-UNIVERSAL® brush for upholstery BBZ42TB

All-in-one brushing and vacuuming of upholstered furniture, mattresses, car seats, etc. Especially suitable for picking up pet hair. The brush roller is driven by the suction air flow through the vacuum cleaner.
No separate electric connection is needed.
B TURBO-UNIVERSAL® brush for floors BBZ102TBB

All-in-one brushing and vacuuming of rugs and carpets as well as all hard floor coverings.
Especially suitable for picking up pet hair. The brush roller is driven by the suction air flow through the vacuum cleaner.
No separate electric connection
is needed.
C Hard-floor nozzle BBZ123HD

For vacuuming hard floors (parquet, tiles, terracotta, etc.)
D Hard-floor nozzle BBZ124HD

With 2 rotating brush rollers. For caring for expensive hard floors and for the improved collection of coarse dirt.
Initial use
Fig. 1
- Push the flexible hose adapter into the air intake opening on the appliance and lock it in place. You will hear an audible 'click'.
Fig. 2*
a) Telescopic tube without accessory connection: Push the handle into the telescopic tube. b) Telescopic tube with accessory connection: Push the handle into the telescopic tube until it locks into place.
a) Nozzle without accessory connection: Push the telescopic tube into the connecting piece of the floor nozzle. b) Nozzle with accessory connection: Push the telescopic tube into the connecting piece of the floor nozzle until it locks in place.
- Unlock the telescopic tube by moving the sliding switch or adjusting sleeve in the direction of the arrow, and adjust it to the desired length. The slide resistance on carpet is at its lowest when the telescopic tube has been completely pulled out.
a) Place the accessories holder in the required position on the telescopic tube. b) Use some pressure to insert the upholstery nozzle with brush ring and the crevice nozzle into the accessories holder from above or below.
- Holding the power cord by the plug, pull it out to the required length and insert the plug into the mains socket.
To switch the vacuum cleaner on or off, press the ON/OFF button.
Controlling the suction level
Turn the control knob to infinitely adjust the suction level to the level required.
Low power range

For vacuuming delicate materials, e.g. delicate upholstery, curtains, etc.
Medium power range

For daily vacuuming of lightly soiled floors.

High power range
For vacuuming durable floor coverings, hard floors and heavily soiled surfaces.
Vacuuming
Caution
Floor nozzles are subject to a certain amount of wear, depending on the type of hard floors you have (e.g. rough, rustic tiles). You must therefore check the underside of the floor nozzle at regular intervals. Worn undersides of floor nozzles may have sharp edges that can damage sensitive hard floors, such as parquet or linoleum. The manufacturer does not accept any responsibility for damage caused by worn floor nozzles.
Fig. 9
Set the adjustable floor nozzle:
Rugs and carpets
Hard floors/parquet


If you are vacuuming up relatively large particles, make sure that you vacuum them up successively and carefully to ensure that the vacuum channel of the floor nozzle does not become blocked.
If necessary, you should raise the nozzle in order to better vacuum up the dirt particles.
Vacuuming with accessories
Fig. 10*
Attach the nozzles to the suction pipe or handle as required:
a) Crevice nozzle for vacuuming crevices and corners, etc. b) Upholstery nozzle for vacuuming upholstered furniture, curtains, etc. c) Upholstery nozzle with fixed brush ring for vacuuming window frames, cupboards, profiles, etc.
After use, reinsert the crevice nozzle and upholstery nozzle into the accessories holder.
d) Professional crevice nozzle: Extra-long crevice nozzle for cleaning crevices, corners and narrow spaces, e.g. in a car. e) Professional upholstery nozzle: For gently and thoroughly cleaning upholstered furniture, curtains, etc. For cleaning the professional upholstery nozzle, simply vacuum it using the handle. f) Hard-floor nozzle for vacuuming hard floor coverings (tiles, parquet flooring, etc.)
Cleaning the hard-floor nozzle
Fig. 11*
a) Vacuum the nozzle from below to clean it. b) Use scissors to cut through threads and hairs wound round the rollers and then vacuum them away.
Drill dust nozzle
Fig. 12*
- Fasten the drill dust nozzle onto the handle and position it on the wall so that the drill hole opening on the nozzle is placed directly over where the hole is to be drilled.
- Set the appliance to the lowest power level and then switch it on.
- The drill dust nozzle is held in the required position by suction. Depending on the condition of the wall to be drilled, you may need to adjust to a higher power setting to ensure that the drill dust nozzle remains in place.
During drilling, the fine dust is automatically vacuumed up.
Turbo brush
If your appliance is equipped with a turbo brush, refer to the accompanying instruction manual for instructions on its use and maintenance.
Fig. 13
You can use the parking aid on the back of the vacuum cleaner if you want to stop vacuuming for a short time.
After switching off the appliance, slide the hook on the floor nozzle into the parking aid.
Fig. 14
When vacuuming stairs, the appliance must be positioned at the bottom of the stairs. If it does not reach far enough, the appliance can also be carried using the carrying handle or the handle on the dust container.
After vacuuming
Fig. 15
Switch off the appliance. Remove the main plug. Briefly pull on the power cord and then let go. (The power cord retracts automatically.)
Fig. 16*
- Unlock the telescopic tube by moving the sliding switch in the direction of the arrow, and slide one tube into the other.
Fig. 17
To store the appliance, use the storage aid on the underside.
a) Prop up the appliance with the hose or dust container handle. b) Slide the hook on the floor nozzle into the storage aid.
Disassembly
Fig. 18
To remove the flexible hose, press the two catches together and pull the hose out of the appliance's suction opening.
Fig. 19*
a) Telescopic tube without accessory connection: To release the connection, turn the handle slightly and pull it out of the telescopic tool. b) Telescopic tube with accessory connection: To release the connection, press the locking collar on the telescopic tube and pull out the handle.
Fig. 20*
a) Nozzle without accessory connection: To release the connection, turn the telescopic tube slightly and pull it out of the floor nozzle. b) Nozzle with accessory connection: To release the connection, press the locking collar and pull the telescopic tube out of the floor nozzle.
Cleaning and care
Emptying the dust container
Fig. 21
In order to achieve the best possible vacuuming results, the dust container should be emptied after every use or, at the latest, when dust in the dust container has reached the marking at any point.
Caution
The dust container can only be removed when the appliance is in a horizontal position. Therefore, place the appliance on the floor to unlock the release button.
Fig. 22
a) Press the release button and pull the dust container out of the appliance using the handle. b) Remove the lid from the dust container and empty the dust container. c) Put the lid back on the dust container. d) Remove any dirt which may have been lodged underneath the container ejector opening. e) Insert the dust container in the appliance, so that it clicks audibly into place.
Maintaining the dust separation system
Your appliance is equipped with a Sensor Control indicator. This function constantly monitors whether your vacuum cleaner is working at its optimum power level.
Fig. 23
In normal operation
Fig. 23
The indicator (blue ring) flashes red when the foam filter needs to be cleaned. The appliance is automatically adjusted to the lowest power level.
Cleaning the foam filter
Switch off the appliance.
Fig. 24
a) Open the lid of the foam filter by pulling on the locking lever. b) Remove the filter cartridge with foam filter using the tab.
Remove the foam filter from the filter cartridge and tap out both parts.
c) If they are very dirty, the foam filter and filter cartridge should be cleaned under running water. Alternatively, the unit can be cleaned in the washing machine at max. 30°C using a gentle programme and the lowest spin speed.
TIP: To protect other laundry items, put the filter unit into a laundry bag.
d) Allow the foam filter and filter cartridge to dry completely (at least 24 hours) and then reinsert the foam filter into the filter cartridge. e) Insert the filter cartridge with foam filter back into the appliance. Close the lid of the foam filter.
Caution
The lid will only close if a filter has been inserted.
In the event of a fault
The Sensor Control indicator also flashes after the foam filter has been cleaned:
Removing a blockage from the dust separation unit
Fig. 25
Switch off the appliance.
a) Hold the appliance lid by the recessed handle and open it. b) Unlock the cover by turning it anti-clockwise, and remove it from the appliance.
Remove the blockage from the collecting unit.
c) Put the cover back on and lock it in place by turning it clockwise. Close the appliance lid.
If the Sensor Control indicator continues to flash red, check whether the nozzle, suction pipe or flexible hose are blocked. This can also trigger the Sensor Control indicator.
Exhaust filter care
Depending on the model, your appliance is equipped with either a HEPA filter (Fig. 26) or a micro filter (Fig. 28).
Depending on the model, your appliance has additional sound insulation behind the HEPA or micro filter. This does not have to be cleaned.
HEPA filter
You can determine with which HEPA filter your appliance is equipped by looking at the imprint on the filter frame next to the reference number:
"washable" - the filter can be washed.
No additional imprint - the filter must be replaced.
Cleaning a washable HEPA filter
The HEPA filter with the "washable" imprint is designed so that it does not need to be replaced, provided the appliance is used as intended in the household.
To ensure that the vacuum cleaner is working at its optimum power level, the exhaust filter should be rinsed out after one year. The filtering action of the filter remains intact, even if the filter surface becomes discoloured.
Fig. 26*
a) Open the lid of the exhaust filter by pushing and pulling on the locking tab. b) Unlock the HEPA filter and remove it from the appliance. c) Tap out the filter unit and rinse it under running water.
Alternatively, the unit can be cleaned in a washing machine at max. 30°C using a gentle programme and the lowest spin speed.
TIP: To protect other laundry items, put the filter unit into a laundry bag.
d) Once the HEPA filter has dried completely (at least 24 hours), insert it back into the appliance and lock it in place. >= Close the exhaust filter lid. In doing so, push the lock bar upwards until it audibly clicks into place.
Replacing the HEPA filter
(only for appliances without a washable HEPA filter)
To ensure that the vacuum cleaner can work at its optimum power level, the HEPA filter should be replaced after one year.
Fig. 27*
a) Open the lid of the exhaust filter by pushing and pulling on the locking tab. b) Unlock the HEPA filter and remove it from the appliance. c) Dispose of the old HEPA filter with your household waste. d) Insert the new HEPA filter into the appliance and lock it in place.
>= Close the exhaust filter lid. In doing so, push the lock bar upwards until it audibly clicks into place.
Micro filter
Cleaning the micro filter
The micro filter is designed so that it does not need to be replaced, provided the appliance is used as intended in the household.
To ensure that the vacuum cleaner is working at its optimum power level, the exhaust filter should be rinsed out after one year. The filtering action of the filter remains intact, even if the filter surface becomes discoloured.
Fig. 28*
a) Open the lid of the exhaust filter by pushing and pulling on the locking tab. b) Pull the locking tab to unlock the filter unit with foam filter and microfilter and remove it from the appliance. c) Remove the foam filter and microfilter from the filter frame.
d) Rinse the foam filter and micro filter under running water. Alternatively, they can be cleaned in the washing machine at max. 30°C using a gentle programme and the lowest spin speed. TIP: To protect other laundry items, put the unit into a laundry bag. e) Once the foam filter and microfilter have dried completely (at least 24 hours), insert them back into the filter frame. f) Insert the filter unit in the appliance and ensure that the locking tabs audibly click into place. g) Close the exhaust filter lid. In doing so, push the lock bar upwards until it audibly clicks into place.
Cleaning instructions
Always switch off the vacuum cleaner and disconnect the power cord from the mains before cleaning the vacuum cleaner. The vacuum cleaner and plastic accessories can be cleaned with an ordinary plastic cleaner.
Caution:
Do not use abrasive materials, glass-cleaning agents or all-purpose cleaning products. Never immerse the vacuum cleaner in water.
Subject to technical modifications.

Press the On/Off button to switch the appliance on and off.
Setting the suction power
Fig. 8
By turning the rotary knob, you can continuously adjust the suction power.

Low suction power
For suctioning delicate materials, e.g. curtains, upholstery, etc.

No electrical connection required.
TURBO-UNIVERSAL® floor brush BBZ102TBB

Extraction and suction of dust from carpets and hard floors, ideal for all surfaces with one operation.
Particularly suitable for suctioning carpets. The brush roller is driven by the suction air flow.
No electrical connection required.
Hard floor brush BBZ123HD

For suctioning dust from smooth floors (parquet, laminate, tiles, ...)
Hard floor brush BBZ124HD

The brush is suitable for hard floors and for gentle cleaning of heavily soiled surfaces.
Operating instructions
Fig. 1
Insert the plug into the socket of the vacuum cleaner until it clicks into place.
Fig. 2*
a) Telescopic tube without accessory connection: Insert the handle into the telescopic tube. b) Telescopic tube with accessory connection: Insert the handle into the telescopic tube until it clicks into place.
Fig. 3*
a) Floor nozzle without accessory connection: Insert the telescopic tube into the opening of the floor nozzle. b) Floor nozzle with accessory connection: Insert the telescopic tube into the opening of the floor nozzle until it clicks into place.
Fig. 4*
- By pressing the button, respectively the slide, in the direction of the arrow, release the telescopic tube and adjust it to the desired length. The resistance when pulling out is minimal when the telescopic tube is fully extended.
Fig. 5*
a) Place the accessory holder in the desired position on the telescopic tube. b) Place the upholstery nozzle and the crevice nozzle, respectively the brush, with a slight pressure into the accessory holder.
Fig. 6
Hold the cable for winding, insert it into the slot and turn the handle to wind the cable.
Fig. 7
Press the button for on/off. Switch the vacuum cleaner on or off.
Suction power adjustment
Fig. 8
By turning the regulator, the suction power can be adjusted continuously and safely.

Low power range
For cleaning dust from sensitive materials, such as sensitive parquet, carpets, etc.

Medium power range
For daily cleaning with light soiling.

High power range
For cleaning coarse dirt particles, hard floors, and heavy soiling.
Dust suction
Attention
The floor nozzles, depending on the condition of the hard floor (e.g., parquet, laminate, tiles), are subject to certain wear. Therefore, you should check at regular intervals whether the nozzle is worn; worn or sharp edges may damage sensitive hard floors such as parquet or linoleum. The manufacturer is not liable for any damage caused by a worn nozzle.
Fig. 9
Adjusting the floor nozzle being used:
Tbbpnəd/napkeT ⇒


If you are vacuuming delicate parts, then be careful to vacuum these parts one after another, so as not to jam the vacuum channel of the vacuum cleaner.
If necessary, you may need to raise the nozzle so that the parts can be vacuumed better.
Vacuuming dust with the supplied accessories
Fig. 10*
Place the nozzles according to the arrow on the vacuum cleaner or the handle:
a) Nozzle for dry and vacuuming dust from dry and other similar surfaces. b) Nozzle for upholstery for vacuuming dust from upholstered furniture, curtains, etc. c) Nozzle for upholstery with a placed brush ring for vacuuming dust from open frames, cabinets, profiles, etc.
After use, put the nozzle for dry and the nozzle for upholstery back in the holder for accessories.
d) Professional nozzle for crevices for cleaning crevices, narrow spaces, e.g., in automobiles, etc. e) Professional nozzle for upholstery for easy and basic cleaning of upholstered furniture, carpets, etc. For cleaning, simply use the handle with the professional nozzle for upholstery. f) Nozzle for hard floors for vacuuming dust from hard floors (tiles, parquet, etc.)
Cleaning the nozzle for hard floors
Fig. 11*
a) For cleaning, vacuum the dust from the nozzle. b) Wind the bristles and cut them with scissors, then vacuum.
Nozzle for openings
Fig. 12*
Attach the nozzle for openings to the handle and place it on the wall so that the opening of the nozzle is directly over the opening to be drilled. Set the lowest power level and then turn on. - The nozzle for openings is held in the desired position by the force of the vacuum. If necessary, the power can be adjusted to a higher level, according to the surface characteristics of the wall being drilled, to ensure proper adhesion of the nozzle for openings.
When ironing, the steam is automatically sucked in.
Turbo setting
If your iron is equipped with the "Turbo" setting, please read the instructions for use and maintenance in the attached manual.
Fig. 13
During short pauses while ironing, you can use the automatic shut-off device on the soleplate of the iron.
To switch off the iron, press the button on the handle to place the iron on its side.
Fig. 14
When ironing, the iron should be placed at the beginning of the garment. If this is not the case, the iron can be transported by the handle or by the cord storage hook.
After ironing
Fig. 15
- Switch off the iron.
- Unplug the power cord.
- Briefly press and release the cord retraction button. (The cord winds up automatically).
Fig. 16*
- By pressing the button in the direction of the arrow, the telescopic rod will extend and lock into place.
Fig. 17
To leave the hose in place, you can use the suction device to supply the lower side of the hose.
a) Place the hose in a vertical position for marking or for the hook of the dust container. b) Insert the handle of the floor nozzle into the holder. Part for placing the hose on one side.
Demounting
Fig. 18
To remove the suction marking, press the two suction elements and pull the marking out of the suction opening of the hose.
Fig. 19*
a) Telescopic tube without accessory connection: to release the connection, turn the handle slightly and pull it out of the telescopic tube.
b) Telescopic tube with accessory connection: to release the connection, press the unlocking button on the telescopic tube and remove the handle.
Fig. 20*
a) Floor nozzle without accessory connection: to release the connection, turn the telescopic tube slightly and pull the floor nozzle out.
b) Floor nozzle with accessory connection: to release the connection, press the unlocking button and remove the telescopic tube from the floor nozzle.
Cleaning and maintenance
Emptying the dust container
Fig. 21
To achieve good results when emptying the dust container, it should be emptied after each vacuuming procedure, but most importantly when the dust in the container reaches the height of the marking.
Warning
The dust container can only be removed when the appliance is in a horizontal position. Therefore, leave the appliance on the floor so that you can release the release button.
Fig. 22
a) Press the release button and remove the dust container using the handle. b) Empty the dust container and clean it. c) Place the lid back on the dust container. d) Remove any possible dirt from the air outlet opening. e) Place the dust container back into the appliance and secure it by pressing it down.
Maintenance of the dust extraction system
Your vacuum cleaner is equipped with the "Sensor Control" function. This function continuously monitors your vacuum cleaner's performance to ensure it operates at an optimal power level. 23
In normal mode
Fig. 23
The indicator (red light) will light up if the filter made of foam material needs to be cleaned. The appliance adjusts automatically back to the highest power level.
Cleaning the foam filter
First, switch off the appliance.
Fig. 24
Cleaning the washable HEPA filter
The HEPA filter marked "washable" is designed so that it does not need to be replaced if the appliance is used as intended in the household. To ensure the vacuum cleaner operates at an optimal power level, the exhaust filter should be cleaned once a year. The filter's filtering action is maintained regardless of the possible discoloration of the filter surface.
a) Open the exhaust air filter cover by pressing and releasing the latch. b) Remove the HEPA filter and take it out. c) Rinse the filter element under running water.
Cleaning should be done in the first cycle at max. 30°C with a delicate program and at the lowest spin speed.
TIP: To protect the remaining dishes, place the filter element in the cutlery basket.
d) Put the HEPA filter back in place, let it dry completely (min. 24h) and lock it. >= Close the exhaust air filter cover. Press the lock until it clicks.
Replacing the HEPA filter
(depending on model) For the dryer to work at optimal performance, the HEPA filter should be replaced after one year.
a) Open the exhaust air filter cover by pressing and releasing the latch. b) Remove the HEPA filter and take it out. c) Dispose of the old HEPA filter as household waste. d) Place the new HEPA filter in the slot and connect it.
=Close the exhaust air filter cover. Press the lock until it clicks.
Microfilter
Cleaning the microfilter
The microfilter is designed so that it does not need to be replaced if the device is used as intended in the household.
For the dryer to work at optimal performance, the exhaust air filter should be replaced after one year. The filter's effectiveness is maintained regardless of possible lighting of the filter surface.
a) Remove the dust bag and clean the filter. b) The filter elements are made of foam material and microfibre. Remove them by pulling them out of the dust bag. c) Remove the foam filter and the microfibre filter from the filter frame. d) Rinse the foam filter and the microfibre filter under running water. The temperature should not exceed 30°C. Use a mild detergent and the lowest spin speed of the centrifuge.
TIP: To protect the remaining filters, the filter elements and the dust bag should be cleaned.
e) Place the foam filter and the microfibre filter in the filter frame after they have dried completely (min. 24 h). f) Insert the filter element into the appliance and close the dust bag flap. g) Close the dust bag holder. Press the lock until it clicks into place.
Cleaning instructions
Before any cleaning, the dust bag must be removed and the pre-filter must be taken out of the container. The dust bag and the plastic parts can be cleaned with the usual cleaning agents for plastic.
Caution:
Do not use abrasive cleaners, glass cleaners or universal cleaners. Never immerse the dust bag in water.
We reserve the right to make technical changes.
We are pleased that you have chosen a Bosch vacuum cleaner from the Relyy series.
This instruction manual describes various models of the Relyy series. Therefore, it is possible that some functions and accessories described here may not be present on your appliance. To guarantee optimal cleaning results, you must use only original Bosch accessories developed specifically for your vacuum cleaner.
Keep the instruction manual. If you pass the vacuum cleaner on to a new owner, do not forget to include the instruction manual.
Fold out the pages with the illustrations!

Description of the appliance
1 Switchable nozzle for hard floors/carpets* (the nozzle may have the same functions but differ in appearance from the illustration) 2 Telescopic tube with slide switch without accessory holder 3 Telescopic tube with slide switch and accessory holder* 4 Suction hose 5 Handle 6 Motor protection filter 7 Lock for parking the tube on the rear of the vacuum cleaner 8 Cover of the exhaust filter 9 Mains cable 10 Vacuum cleaner lid 11 Cover of the motor protection filter 12 Switch with electronic power control 13 Filter change indicator (Sensor Control) 14 Dust container with handle 15 Lock for parking the tube on the rear of the vacuum cleaner 16 Cover of the dust separation compartment (cyclone) 17 Upholstery nozzle Profi 18 Crevice nozzle Profi 19 Accessory holder 20 Combination nozzle
21 Brush for soft furniture* 22 Brush (for mounting on the nozzle for soft furniture)* 23 Nozzle for removing dust when drilling* 24 Brush for hard floor coverings* 25 Turbo brush TURBO-UNIVERSAL for floors* 26 Brush for hard floor coverings*
Special and additional nozzles
A Turbo brush TURBO-UNIVERSAL® for soft furniture BBZ42TB

Simultaneously cleans with the brush and sucks up dust when cleaning soft furniture, mattresses, car seats, etc. Especially effective for removing pet hair. The brush roller is driven by the air flow sucked in by the vacuum cleaner.
No additional connection to the power outlet is required.
B Turbo brush TURBO-UNIVERSAL® for floors BBZ102TBB

Simultaneously cleans and sucks up dust from carpets with short pile, hard floor coverings, and any other coverings. Especially effective for removing pet hair. The brush roller is driven by the air flow sucked in by the
vacuum cleaner.
No additional connection to the power outlet is required.
C Nozzle for hard floor coverings BBZ123HD

Cleaning smooth floors (parquet, ceramic tiles, etc.)
D Nozzle for hard floor coverings BBZ124HD

With two rotating roller brushes for cleaning hard floor coverings and additionally removing coarse dirt.
Preparation for work
Fig. 1
Insert the hose into the suction opening of the vacuum cleaner so that it locks into place with the telescopic tube.
Fig. 2*
a) Telescopic tube without latch for accessories:
Insert the handle into the telescopic tube.
b) Telescopic tube with latch for accessories:
Insert the handle into the telescopic tube until it clicks into place.
Fig. 3*
a) Nozzle without latch for accessories: Insert the telescopic tube into the nozzle socket for floor/carpet cleaning. b) Nozzle with latch for accessories: Insert the telescopic tube into the nozzle socket for floor/carpet cleaning until it clicks into place.
Fig. 4*
Press the slider button or slide sleeve in the direction of the arrow to unlock the telescopic tube and set the desired length. Resistance to movement over the floor covering is minimal when the telescopic tube is fully extended.
Fig. 5*
a) Place the accessory holder on the telescopic tube in the lower position. b) Insert the nozzle for upholstery and crevice tool into the holder from above or below.
Fig. 6
Take the plug of the power cord, pull the cord to the required length, and insert the plug into the socket.
Fig. 7
Switching on/off the vacuum cleaner is carried out by pressing the switch.
Power adjustment
Fig. 8
The power is set by turning the regulator.
Minimum power
For cleaning delicate materials such as, for example, soft upholstery of furniture, curtains, etc.
Medium power
For daily cleaning with light dirt.

Maximum power
For cleaning durable and hard floor coverings and with heavy dirt.
Cleaning
Attention
The nozzles for cleaning floors/coverings are subject, depending on the quality of the hard floor covering in your home (e.g., rough coarse ceramic tiles), to a certain wear. Therefore, it is necessary to regularly check the working surface of the nozzle. Worn nozzles with sharpened edges of the working surface can lead to damage to delicate hard floor coverings, such as parquet or linoleum. The manufacturer is not liable for possible damages caused by a worn nozzle.
Fig. 9
Adjusting the switchable nozzle for cleaning floors/coverings:
For hard floor coverings ⇒ for hard floor coverings parquet ⇒


If you need to remove dust that is larger than usual, make sure that it is sucked up one at a time so that the vacuum cleaner hose does not get clogged.
If necessary, follow the nozzle to make it easier for dirt particles to be sucked up by the vacuum cleaner.
Cleaning with additional accessories
Fig. 10*
Attach the nozzle to the handle or the tube:
a) Crevice nozzle for cleaning crevices, corners, etc. b) Nozzle for soft furniture for cleaning soft furniture, curtains, etc. c) Nozzle for soft furniture with a brush insert for cleaning window frames, cabinets, profiles, etc. d)
After cleaning, insert the crevice nozzle or the soft furniture nozzle into the accessory holder.
d) Crevice nozzle Profi
Especially the crevice nozzle for cleaning crevices, corners and narrow gaps (e.g., in cars, etc.).
e) Nozzle for soft furniture Profi for gentle and thorough cleaning of soft furniture, curtains, etc. To clean the nozzle for soft furniture Profi, simply rinse it. f) Nozzle for hard floor coverings (carpet, parquet, etc.)
Cleaning the nozzle for hard floor coverings
Fig. 11*
a) To clean the nozzle, rinse it from below. b) Cut off any threads or hairs that have wrapped around with scissors and collect them with the vacuum cleaner.
Nozzle for removing dust when sanding
Fig. 12*
Attach the dust extraction nozzle for drilling. When drilling, hold the nozzle on the handle and position it in such a way relative to the wall that the nozzle opening is directly above the hole being drilled. Set the vacuum cleaner to a low power level and then switch it on. The dust extraction nozzle for drilling will be held in the required position by the suction force. It may be necessary to increase the power depending on the wall material in which the hole is being drilled, in order to ensure reliable dust extraction with the nozzle.
When drilling, the dust will be removed automatically.
Turbo brush
If the appliance is equipped with a turbo brush, instructions for its use can be found in the enclosed operating instructions.
Fig. 13
During short breaks in the cleaning process, use the parking aid to park the tube on the rear side of the appliance.
After switching off the vacuum cleaner, insert the nozzle protrusion for cleaning floors/carpets into the parking aid for the tube.
Fig. 14
When cleaning stairs, the vacuum cleaner should always be placed at the bottom, at the base of the stairs. If this is not sufficient, the vacuum cleaner can be carried by the handle on the vacuum cleaner itself or on the dust container.
After cleaning
Fig. 15
Switch off the appliance. Remove the plug from the socket.
Slightly pull the mains cable and release it (the cable automatically rewinds).
Fig. 16*
Turn the telescopic tube in the direction indicated by the arrow, unlock the tube and fold it.
Fig. 17
For storing the vacuum cleaner, you can use the parking brackets located at the bottom.
a) Lift the vacuum cleaner vertically by the handle or the dust container handle.
b) Insert the floor nozzle protrusion into the parking bracket.
Disassembly
Fig. 18
To disconnect the suction hose, press both locks simultaneously and pull the hose out of the suction opening of the vacuum cleaner.
Fig. 19
a) Telescopic tube without accessory lock: To unlock the connection, slightly turn the handle and pull it out of the telescopic tube. b) Telescopic tube with accessory lock:
To unlock the connection, press the unlocking sleeve on the telescopic tube and pull out the handle.
Fig. 20*
a) Nozzle without accessory lock: To unlock the connection, slightly turn the telescopic tube and pull it out of the floor nozzle. b) Nozzle with accessory lock: To unlock the connection, press the unlocking sleeve and pull the telescopic tube out of the floor nozzle.
Cleaning and care
Emptying the dust container
Fig. 21
To achieve good results, empty the dust container after each cleaning, in any case no later than when the dust level in the container reaches the marked level.
Attention
The dust container can only be removed when the vacuum cleaner is in a horizontal position. Therefore, place the vacuum cleaner on the floor to unlock the locking clip.
Fig. 22
a) Press the locking button and remove the dust container from the vacuum cleaner by the handle. b) Remove the lid of the dust container and empty the container. c) Put the lid back on the dust container. d) If necessary, remove dirt from the outlet opening. e) Insert the container into the vacuum cleaner and lock it in place.
Maintenance of the dust extraction system
Your vacuum cleaner is equipped with the "Sensor Control" indicator. This function constantly monitors whether the vacuum cleaner is operating at the optimal performance level. Fig. 23
During normal operation
Fig. 23
If the indicator (blue circle) starts to glow red, this means that the foam filter needs cleaning. The power of the vacuum cleaner is automatically reduced to a minimum.
Cleaning the motor protection filter: Switch off the vacuum cleaner.
Fig. 24
a) Open the motor filter cover by pulling the latch. b) Remove the cassette with the foam filter by the handle. c) Remove the motor filter from the cassette and knock out the dust from both parts. d) In case of heavy soiling, the motor filter and cassette must be rinsed under running water. Alternatively, the block can be washed in a washing machine at a temperature not exceeding 30°C in a gentle cycle with minimum spin speed.
TIP: To wash the filter block in the washing machine, place the filter block in a laundry bag.
e) After cleaning, let the motor filter dry for at least 24 hours and then reinstall the motor filter in the cassette. f) Insert the cassette with the motor filter back into the vacuum cleaner and close the motor filter cover.
Attention
The cover closes only when the filter is installed.
In case of malfunction
The "Sensor Control" indicator lights up even after cleaning the foam filter:
Possible clogging of the separator (cyclone)
Fig. 25
Turn off the vacuum cleaner.
a) Open the vacuum cleaner cover by pulling on its tabs. b) Unlock the cover by turning it counterclockwise and remove it from the vacuum cleaner. > Remove the clogging from the separator. c) Put the cover back on and lock it by turning it clockwise. > Close the vacuum cleaner cover.
If the "Sensor Control" indicator continues to flash red, check whether the nozzle, suction hose, or suction tube are clogged. This may also cause the "Sensor Control" indicator to activate.
Maintenance of the exhaust filter
Depending on the model, the vacuum cleaner may be equipped with a HEPA filter (Fig. 26) or a micro filter (Fig. 28).
Depending on the model, your vacuum cleaner has an additional sound insulation after the HEPA filter or micro filter. It does not require cleaning.
HEPA filter
For the HEPA filter included with the vacuum cleaner, the order number is indicated on the label on the filter frame:
«washable» - washable, can be cleaned. rinse.
If no additional instructions are given, the filter must be replaced.
Cleaning the washable HEPA filter
If you use the vacuum cleaner at home, the washable HEPA filter does not need to be replaced.
To ensure the optimal power level, it is recommended to rinse the filter once a year of vacuum cleaner operation. The functionality of this filter is preserved even if the color of the filter surface changes.
Fig. 26*
a) Open the exhaust filter cover by pulling the latch. b) Pull the latch, unlock the HEPA filter and remove it from the vacuum cleaner. c) Shake off dust from the filter element and rinse it under running water. The block can be washed in a washing machine at a temperature not exceeding 30 °C in the gentle cycle and at minimum spin speed.
TIP: To wash in a washing machine, place the filter block in a laundry bag.
d) After the HEPA filter has dried (see Fig. 24 u), install it back into the vacuum cleaner and secure it.
Close the exhaust filter cover. When doing so, push the latch upward so that it locks with the click.
Replacing the HEPA filter
(Only for vacuum cleaners without a washable HEPA
To ensure the optimal power level, it is recommended to replace the HEPA filter after one year of vacuum cleaner operation.
Fig. 27*
a) Open the exhaust filter cover by pulling the latch. b) Pull the latch, unlock the HEPA filter and remove it from the vacuum cleaner. c) Dispose of the old HEPA filter with household waste. d) Insert the new HEPA filter into the vacuum cleaner and secure it.
Close the dust outlet filter cover. When doing so, push the latch up so that it clicks into place with a distinct sound.
Microfilter
Cleaning the microfilter
When using the vacuum cleaner for normal household use, replacement of the microfilter is not required.
It is recommended to rinse the filter once a year of vacuum cleaner operation. The functionality of this filter is maintained even if the color of the filter surface changes.
Fig. 28*
a) Open the dust outlet filter cover by pressing the latch. b) Disconnect the filter block with the foam filter and microfilter by pulling the latch, and remove it from the vacuum cleaner. c) Remove the foam filter and microfilter from the frame. d) Rinse the foam filter and microfilter under a stream of water. Alternatively, they can be washed in a washing machine at a temperature not exceeding 30 °C in a gentle cycle with minimal spin speed.
TIP: For washing in a washing machine, place the filter block in a laundry bag.
e) After the foam filter and microfilter have dried (approx. 24 hours), install them back into the filter frame. f) Insert the filter block back into the vacuum cleaner and secure it with the latch. g) Close the dust outlet filter cover. When doing so, push the latch up so that it clicks into place with a distinct sound.
Cleaning instructions
Before each cleaning of the vacuum cleaner, turn it off and unplug the power cord from the outlet. The vacuum cleaner and plastic accessories can be cleaned with regular plastic cleaning agents.
Attention:
Do not use abrasive cleaning agents, glass cleaning agents, or universal cleaning agents. Do not immerse the vacuum cleaner in water.
We reserve the right to make technical changes.
We are pleased that you have decided to purchase a Bosch vacuum cleaner from the Relyy series.
In case of an incident
The Sensor Control display flashes intermittently even after cleaning the foam filter:
Adjusting the suction power
Fig. 8
By turning the rotary knob, you can smoothly set the required suction power.

Low suction power mode
For cleaning delicate materials, such as curtains, upholstered furniture, etc.

Medium suction power mode
High suction power mode
For cleaning heavily soiled carpets, hard floors, and for stubborn dirt.
Cleaning
Warning
The wear of the floor nozzle depends on the properties of your hard floor (e.g., parquet, laminate, tiles). Therefore, you need to regularly check the lower (contact) part of the nozzle. A worn lower part of the nozzle with sharp edges can damage sensitive floor surfaces, such as parquet or laminate. The manufacturer is not liable for possible damage caused by a worn floor nozzle.
Fig. 9
The vacuum cleaner is switched on by pressing the button:
For hard floors or carpets =>

For hard floors or parquet =>

To avoid the need to clean the large parts of the filter, it is necessary to clean it regularly and carefully, so that the filter cleaning is not forgotten.
If necessary, it is necessary to slightly shake the filter so that the parts of the brush are cleaned better.
Changing the nozzle
Fig. 10*
Insert your hand or tube into the required nozzle:
a) Nozzle for floors: for cleaning floors, corners, etc. b) Nozzle for soft furniture: for cleaning soft furniture, curtains, etc. c) Nozzle for soft furniture with a brush installed: for cleaning window frames, wardrobes, etc. After use, reinstall the brush for the nozzle for floors and for soft furniture. d) Crevice nozzle: the long nozzle for cleaning floors, for cleaning floors, corners and surfaces in confined spaces, upholstery, car interiors. e) Crevice nozzle for soft furniture of light and delicate surfaces of soft furniture, etc. The crevice nozzle for soft furniture can be cleaned simply by hand with the vacuum cleaner, having turned on the cleaning. f) Soft brush for furniture: for cleaning window frames, wardrobes, etc. g) Nozzle for hard floors: for cleaning hard surfaces (parquet, etc.)
Cleaning the nozzle for hard floors
Fig. 11*
a) The nozzle should be cleaned from below. b) Cut the threads and hairs wound on the brush with scissors and remove them with the cleaning.
Nozzle for drilling
Fig. 12
To use the nozzle for drilling, hold it against the wall so that the drill hole is directly opposite the hole on the nozzle. Set the lowest suction power and turn on the vacuum cleaner. The nozzle for drilling is held in place by the suction force. If the nozzle for drilling does not hold well, it may be necessary to increase the suction power, depending on the surface of the wall.
All rights reserved.
Turbo nozzle
If your vacuum cleaner is equipped with a turbo nozzle, you will find instructions for its use and maintenance in the manual for this accessory.
Fig. 13
Cleaning the filter
Turn off the appliance.
Fig. 24
a) Press the latch and open the filter cover. b) Remove the filter cassette with the foam filter, pulling it by the special lugs. c) Remove the foam filter from the cassette and shake out the coarse dirt. d) In case of heavy soiling, rinse the foam filter and the cassette in running water. The filter can be washed at max. 30°C in a gentle cycle and with a low spin speed in a washing machine.
ADVICE: To protect the motor, dry the filter system in a special container before use.
e) Let the filter insert and the filter cassette dry for about 24 hours, then insert the insert back into the filter cassette. f) Insert the filter cassette with the foam insert back into the appliance. Close the cover of the foam filter.
Attention
The cover will close only with the filter correctly installed.
Troubleshooting
The Sensor Control indicator lights up when the foam filter needs cleaning:
Clean the separator
Man. 25
BnMkhItb npnna.
a) BiKpnTe KpUkky npnAyn 3a DonomoroO pyuKnJxol6ka. b) Po36IokyTe 3axnchny naneB, NOBepHyBwn II npOTn rOAnHHNKOBoi CTpiIKN, Ta BnIMtB 3 nnlococa.
> BnIaJIb3acMiuEHHa 3cenapaTopa.
c) YctaHObitb 3axnchy naHelen Ta 3aΦikcynte II, NOBepHyBwH 3a rOHNHHKOBOIO cTpiNKoI.
=3akpiHTe KpHk Ky npHnay.
IHKUo IHnKaTOp Sensor Control npOIOBkYe 6HmAtupeBOnHM,nepeBiPe, uH He 3acMieHi cOnna, TpyBaBCMOKtYBaHHa60 WJHaHr. Ce TaKoX MoKe npN3BeCTNo CnpaBoByBaHHaIHnKaTopa Sensor Control.
Dorna 3a BnnyckHm fInbtpom
3anexho BID BnKoHaHH BaI npnaO6naHaHn 26 a6o mikpoinbTpom Man. 28
3anexho BID moDeni npnady, nicra fInbtpy HEPA a6o mikpofInbtpy MoKnBa haABHictb wymoi3onraii - II He notpi6Ho uHCTHTN.
Φinbtp "HEPA"
KIMΦIbTpOM"HEPA"obnaHaHo BaW npnlaM, MoKHa Bn3HaunrNo BiTnCKy Ha pamiΦIbTpY npuy 3 HOMepo3aMOBHeHH:
"washable"- 1iNbTPOMOKHaMHTN.
OdaTkoBO HiOro He HaPyKoBO pIbTp noTpio6Ho 3aMIHTN.
OuunenHn phinbtpy "HEPA", 0o Mntbca.
The "HEPA" filter is not washable. Its design does not require washing if used as intended in a household.
For the vacuum cleaner to operate at its optimal power level, the exhaust filter needs to be washed periodically. Its filtering capacity remains unchanged regardless of the color change of the surface.
Fig. 26*
a) Open the exhaust filter cover by pressing the latch handle and pulling it. b) Disassemble the "HEPA" filter and remove it from the vacuum cleaner. c) Shake out the filter system and rinse it under running water.
The system components can be briefly washed in a washing machine at max. 30°C in a gentle cycle with low spin speed.
TIP: To protect the filter system, it is recommended to wash it in a special bag for washing.
d) After the "HEPA" filter has completely dried (approx. 24 hours), reinsert it into the device and secure it.
Close the exhaust filter cover. When doing so, press the latch until it clicks into place.
Replacing the "HEPA" filter
(for models without a "HEPA" filter, if applicable)
For the vacuum cleaner to operate at its optimal power level, the "HEPA" filter needs to be washed periodically.
Fig. 27*
a) Open the exhaust filter cover by pressing the latch handle and pulling it. b) Disassemble the "HEPA" filter and remove it from the vacuum cleaner. c) Dispose of the "HEPA" filter with household waste. d) Insert a new "HEPA" filter into the device and secure it.
Close the exhaust filter cover. When doing so, press the latch until it clicks into place.
Microfilter
Washable microfilter
Microfilter for the vacuum cleaner, which does not need to be washed, is attached according to the purpose for household use.
To ensure the vacuum cleaner operates at its optimal suction power, the exhaust filter needs to be washed periodically. Its filter element remains unchanged, regardless of the color change of the surface.
Fig. 28*
a) Open the exhaust filter cover by pulling the latch and pulling it towards you. b) Disassemble the filter system with the porous gasket, pulling the latches, and remove it from the device. c) Remove the filter insert with the microfilter from the frame. d) Rinse the microfilter and the porous insert under running water. They can be pre-washed in a washing machine at max. 30°C in a gentle cycle with mild detergent. e) TIP: To protect the filter, place it in a special bag for washing. f) Install the porous filter insert and microfilter only after they have completely dried (approx. 24 hours) back into the filter frame. g) Install the filter system back into the device for audible sound, fixing the latches. h) Close the exhaust filter cover. When doing so, press the latch until you hear a click.
Recommendations for use
Before each use of the vacuum cleaner, first remove it and unplug it from the outlet. The vacuum cleaner and accessories made of plastic can be cleaned with a standard plastic cleaner.
ATTENTION:
Do not use abrasive agents, alkaline cleaners, or universal cleaners. It is forbidden to immerse the vacuum cleaner in water!
Technical specifications are subject to change without notice.
(d
jaliu jaii Juaui "washable"
yall aal 1
20*
090
18
19*
b0
4
a 150 150 150 150 150 150 150 150 150 150 150 150 150 150 150 150 150 150 150 150 150 150 150 150 150 15

9


<=45j1/aaaia
1 1 1 1 1 1 1 1 1 1 1 1 1 1 1 1 1 1 1 1 1 1 1 1 1 1 1 1 1 1 1 1 1 1 1 1
10°

(b)
L 1
4*
5*
6
J 1 J 2 3 4 5 6 7 8 9 10 11 12
7
8
a 1
(4·3) = g
23
*aall 24
*TURBO-UNIVERSAL 25
*aall 26
J 1
山
1
a aag jg jll bai l aas gai ai gbi . 1
2*
aaalal aag g ygsslll oogwol (a .gygsslll oggwol jg aall jd J 1 :aaalal al aag go aygsslll oogwol (b
ar
AE United Arab Emirates,
BSH Home Appliances FZE
Round About 13
Plot Nr MO-0532A
Jebel Ali Free Zone - Dubai
Tel.: 04 881 4401
mailto:service.uae@bshg.com
www.bosch-home.com/ae
AL Republika e Shqiperise, Albania
AERTECH SH.P.K.
Rruga Qemal Stafa
Pallati ri perball Prokuroris se
General
Entrance C, 10th Floor
Tirana
Tel.: 066 206 47 94
mailto:g.volina@aertech.al
HEATHERTON, Victoria 3202
Tel.: 1300 368 339
mailto:bshau-as@bshg.com
www.bosch-home.com.au
BA Bosnia and Herzegovina, Bosnia-Herzegovina
"HIGH" d.o.o.
Gradačka 29b
71000 Sarajevo
Info-Line: 061 100 905
Fax: 033213513
mailto:delicnanda@hotmail.com
BE Belgium
BSH Home Appliances S.A.
European Trade Center Building,
5th floor
1784 Sofia
Tel.: 02 892 90 47
Fax: 02 878 79 72
mailto:informacia.servis-bg@
bshg.com
www.bosch.home.bg
BH Bahrain,
Khalafat Company
Manama
Tel.: 01 7400 553
mailto:service@khalaifat.com
BY Belarus, Benapycb
OOO"BCX BbITOBa TeXnka"
tel.: 495 737 2961
mailto:mok-kdl@bshg.com
CH Schweiz, Suisse, Svizzera, Switzerland
BSH Hausgeräte AG
+7 snt/min (alv 23%)
+17 snt/min (alv 23%)
FR France
BSH Electroménager S.A.S.
To arrange an engineer visit, to
order spare parts and accessories
or for product advice please visit
www.bosch-home.co.uk
or call
*Calls from a BT landline will be charged at up to 3 pence per minute. A call set-up fee of up to 6 pence may apply.
GR Greece, Ελλάς
BSH Ikiakes Siskeves A.B.E.
Central Branch Service
17 km E.O. Athinon-Lamias &
Potamou 20
14564 Kifisia
Unit 1 & 2, 3rd Floor
North Block, Skyway House
3 Sham Mong Road
Tai Kok Tsui, Kowloon
Hong Kong
Tel.: 2565 6151
Fax: 25656681
mailto:bosch.hk.service@bshg.com
www.bosch-home.cn
HR Hrvatska, Croatia
BSH kućni uređaji d.o.o.
Kneza Branimira 22
10000 Zagreb
Tel.: 01 640 36 09
Fax: 01 640 36 03
mailto:informacije.servis-hr@bshg.com
www.bosch-home.com/hr
HU Magyarország, Hungary
www.bosch-home.com/hu
IE Republic of Ireland
BSH Home Appliances Ltd.
Unit F4, Ballymount Drive
Ballymount Industrial Estate
Walkinstown
Dublin 12
Service Requests,
Spares and Accessories
Tel.: 01450 2655
Fax: 01450 2520
www.bosch-home.co.uk
IL Israel.
C/S/B Home Appliance Ltd.
Uiel Building
2, Hamelacha St.
Industrial Park North
71293 Lod
Tel.: 08977222
Fax: 089777245
mailto:csb-serv@zahav.net.il
www.bosch-home.co.il
IN India, Bharat,
BSH Customer Service Front Office
Shop No.4, Everest Grande,
Opp. Shanti Nagar Bus Stop,
Mahakali Caves Road, Andheri East
Mumbai 400093
IS Iceland
Smith & Norland hf.
Noatuni 4
105 Reykjavik
Tel.: 0520 3000
Fax: 05203011
www.sminor.is
IT Italia, Italy
www.bosch-home.com/it
KZ Kazakhstan, Kazakhstan
IP Turebekov Yerzhan
Nurmanovich
Jangeldina str. 15
Shimkent 160018
Tel.: 0252 31 00 06
mailto:evrika_kz@mail.ru
LB Lebanon,
Teheni, Hana & Co.
Boulevard Dora 4043 Beyrouth
P.O.Box 90449
Jdeideh 1202 2040
Tel.: 01 255 211
mailto:Info@Teheni-Hana.com
LT Lithuania
Senuku prekybos centras UAB
Jonavos g. 62
44192 Kaunas
Tel.: 0372 12146
Fax: 0372 12165
www.senukai.it
LU Luxembourg
General Serviss Limited
Bullu street 70c
1067 Riga
Tel.: 07424137
mailto:bt@olimpeks.lv
Elkor Serviss
Brivibas gatve 201
1039 Riga
Tel.: 067 0705 20; -36
Fax: 067 0705 24
mailto:domoservice@elkor.lv
www.servisacentrs.lv
MD Moldova
S.R.L. "Rialto-Studio"
str. Lyceba 98
2012 Chisinau
Tel./Fax: 022 23 81 80
mailto:bosch-md@mail.ru
ME Crna Gora, Montenegro
Elektronika komerc
UI.Slobode17
84000 Bijelo Polje
Tel./Fax: 050 432 575
Mobil: 069 324 812
mailto:ekobosch.servis@
t-com.me
MK Macedonia, MaKeDoHnja
GORENEC
Jane Sandanski 69 lok.3
1000 Skopje
Tel.: 022454600
Mobil: 070697463
mailto:gorenec@yahoo.com
MT Malta
Oxford House Ltd.
Notabile Road
Mriehel BKR 14
Tel.: 021 442 334
Fax: 021 488 656
www.oxfordhouse.com.mt
MV Raajjeyge Jumhooriyyaa, Maledives
Lintel Investments
Ma. Maadheli, Majeedhee Magu Malé
Tel.: 0331 0742
mailto:mohamed.zuhuree@
lintel.com.mv
NL Nederland, Netherlands
Unit F 2, 4 Orbit Drive
Mairangi Bay
Auckland 0632
Tel.: 094770492
Fax: 094772647
mailto:bshnz-cs@bshg.com
www.bosch-home.co.nz
PL Polska, Poland
OOO "ECX BbITOBaTExHnKa"
CepBuc OT pOn3BODnteIa
Mana KaNYKcKa 19/1
119071 MockBa
TeJ.: 495 737 2961
mailto:mok-kdhl@bshg.com
www.bosch-home.com
SA Kingdom Saudi Arabia,
BSH Home Appliances
Saudi Arabia L.L.C.
Bin Hamran Commercial Centr.
6th Floor 603B
Jeddah 21481
Tel.: 800 124 1247
mailto:service.ksa@bshg.com
www.bosch-home.com/sa
SE Sverige, Sweden
BSH Hushallsapparater AB
Landsvagen 32
169 29 Solna
Tel.: 0771 11 22 77 local rate
mailto:Bosch-Service-SE@
bshg.com
www.bosch-home.se
SG Singapore, Singapore
BSH Home Appliances Pte. Ltd.
37 Jalan Pemimpin
Union Industrial Building
Block A, #01-03
577177 Singapore
Tel.: 6751 5000
Fax: 6751 5005
mailto:bshsgp.service@bshg.com
www.bosch-home.com.sg
SI Slovenija, Slovenia
BSH Hišni aparati d.o.o.
Litostrojska 48
1000 Ljubljana
Tel.: 01 583 07 01
Fax: 01 583 08 89
www.bosch-home.com/tr
4th floor, No. 112 Sec 1
Chung Hsiao E Road
Taipei ROC 100
Tel.: 02 2321 6222
mailto:Bosch@achelis.com.tw
UA Ukraine, Ukraine
LLC "BSH Household Appliances"
Tel.: 044 490 2095
gama-electronics.com
XS Serbia, Serbia
BSH Home Appliances d.o.o.
Milutina Milankovica 11a
11070 Novi Beograd
Tel.: 011 205 23 97
Fax: 011 205 23 89
mailto:informacije.servis-sr@
bshg.com
www.bosch-home.rs
ZA South Africa
BSH Home Appliances (Pty) Ltd.
15th Road Randjespark
Private Bag X36, Randjespark
1685 Midrand-Johannesburg
Tel.: 086 002 6724
Fax: 086 617 1780
mailto:applianceserviceza@
bshg.com
www.bosch-home.com/za


de
This appliance is labelled in accordance with European Directive 2012/19/EU concerning used electrical and electronic appliances (waste electrical and electronic equipment - WEEE). The guideline determines the framework for the return and recycling of used appliances as applicable throughout the EU.
GB Conditions of guarantee
For this appliance the guarantee conditions as set out by our representatives in the country of sale apply. Details regarding same may be obtained from the dealer from whom the appliance was purchased. For claims under guarantee the sales receipt must be produced.
FR Conditions de garantie
| SENEHORPAD, OOO: Tnncncaa, 124365, r. Senenlmpad, konm 1804, ton (499)738 43 33, 71 80 74, d#ckc. (499)738 43 33 |
| 3NDAVYC, OOO: C##eKb, C##eKb, 455228, yni. Ta###hckn, m, 204, ton (3513)65-65, 65-65, 65-65, 65-65, 65-65, 65-65, 65-65, 65-65, 65-65, 65-65, 65-65, 65-65, 65-65, 65-65, 65-65, 64-64, 64-64, 64-64, 64-64, 64-64, 64-64, 64-64, 64-64, 64-64, 64-64, 64-64, 64-64, 64-64, 64-64, 64-64,64-64, 64-64, 64-64, 64-64, 64-64, 64-64, 64-64, 64-64, 64-64, 64-64, 64-64, 64-64, 64-64, 64-64, 65-65, 65-65, 65-65, 65-65, 65-65, 65-65, 65-65, 65-65, 65-65, 65-65, 65-65, 65-65, 65-65, 65-65,65-65, 65-65, 65-65, 65-65, 65-65, 65-65, 65-65, 65-65, 65-65, 65-65, 65-65, 65-65, 65-65, 65-65, 60-60, 60-60, 60-60, 60-60, 60-60, 60-60, 60-60, 60-60, 60-60, 60-60, 60-60, 60-60, 60-60, 60-60, 60-60,60-60, 60-60, 60-60, 60-60, 60-60, 60-60, 60-60, 60-60, 60-60, 60-60, 60-60, 60-60, 60-60, 60-60, 65-65, 65-65, 65-65, 65-65, 65-65, 65-65, 65-65, 65-65, 65-65, 65-65, 65-65, 65-65, 65-65, 65-65, |
| HBAHOBO, OOO: Htnepepepepepepepepepepepepepepepepepepepepepepepepepepepepepepepepepepepepepepepepepepepepepepepepepepepepepepepepepepepepepepepepepepepepepepepepepepepepepepepepepepepepepepepepepepepepepepepepepepepepe pepepepepepepepepepepepepepepepepepepepepepepepepepepepepepepepepepepepepepepepepepepepepepepepepepepepepepepepepepepepepepepepepepepepepepepepepepepepepepepepepepepepepepepepepepepepepepepepepepepepeopepepepepepepepepepepepepepepepepepepepepepepepepepepepepepepepepepepepepepepepepepepepepepepepepepepepepepepepepepepepepepepepepepepepepepepepepepepepepepepepepepepepepepepepepepepepepepepepepepepepeperpepepepepepepepepepepepepepepepepepepepepepepepepepepepepepepepepepepepepepepepepepepepepepepepepepepepepepepepepepepepepepepepepepepepepepepepepepepepepepepepepepepepepepepepepepepepepepepepepepepe-pepepepepepepepepepepepepepepepepepepepepepepepepepepepepepepepepepepepepepepepepepepepepepepepepepepepepepepepepepepepepepepepepepepepepepepepepepepepepepepepepepepepepepepepepepepepepepepepepepepepeapepepepepepepepepepepepepepepepepepepepepepepepepepepepepepepepepepepepepepepepepepepepepepepepepepepepepepepepepepepepepepepepepepepepepepepepepepepepepepepepepepepepepepepepepepepepepepepepepepepepePEPEPEPEPEPEPEPEPEPEPEPEPEPEPEPEPEPEPEPEPEPEPEPEPEPEPEPEPEPEPEPEPEPEPEPEPEPEPEPEPEPEPEPEPEPEPEPEPEPEPEPEPEPEPEPEPEPEPEPEPEPEPEPEPEPEPEPEPEPEPEPEPEPEPEPEPEPEPEPEPEPEPEPEPEPEPEPEPEPEPEPEPEPEPEPEPEPEPEPE PEPEPEPEPEPEPEPEPEPEPEPEPEPEPEPEPEPEPEPEPEPEPEPEPEPEPEPEPEPEPEPEPEPEPEPEPEPEPEPEPEPEPEPEPEPEPEPEPEPEPEPEPEPEPEPEPEPEPEPEPEPEPEPEPEPEPEPEPEPEPEPEPEPEPEPEPEPEPEPEPEPEPEPEPEPEPEPEPEPEPEPEPEPEPEPEPEPEPEPEPAPEPAPEPAPEPAPEPAPEPAPEPAPEPAPEPAPEPAPEPAPEPAPEPAPEPAPEPAPEPAPEPAPEPAPEPAPEPAPEPAPEPAPEPAPEPAPEPAPEPAPEPAPEPAPEPAPEPAPEPAPEPAPEPAPEPAPEPAPEPAPEPAPEPAPEPAPEPAPEPAPEPAPEPAPEPAPEPAPEPAPEPAPEPAPEPAPEPAPEPAAPEPAPEPAPEPAPEPAPEPAPEPAPEPAPEPAPEPAPEPAPEPAPEPAPEPAPEPAPEPAPEPAPEPAPEPAPEPAPEPAPEPAPEPAPEPAPEPAPEPAPEPAPEPAPEPAPEPAPEPAPEPAPEPAPEPAPEPAPEPAPEPAPEPAPEPAPEPAPEPAPEPAPEPAPEPAPEPAPEPAPEPAPEPAPEPAPEPAPETAPEPAPEPAPEPAPEPAPEPAPEPAPEPAPEPAPEPAPEPAPEPAPEPAPEPAPEPAPEPAPEPAPEPAPEPAPEPAPEPAPEPAPEPAPEPAPEPAPEPAPEPAPEPAPEPAPEPAPEPAPEPAPEPAPEPAPEPAPEPAPEPAPEPAPEPAPEPAPEPAPEPAPEPAPEPAPEPAPEPAPEPAPEPAPEPAPEPAPERAPEPAPEPAPEPAPEPAPEPAPEPAPEPAPEPAPEPAPEPAPEPAPEPAPEPAPEPAPEPAPEPAPEPAPEPAPEPAPEPAPEPAPEPAPEPAPEPAPEPAPEPAPEPAPEPAPEPAPEPAPEPAPEPAPEPAPEPAPEPAPEPAPEPAPEPAPEPAPEPAPEPAPEPAPEPAPEPAPEPAPEPAPEPAPEPAPEPAPEAPEPAPEPAPEPAPEPAPEPAPEPAPEPAPEPAPEPAPEPAPEPAPEPAPEPAPEPAPEPAPEPAPEPAPEPAPEPAPEPAPEPAPEPAPEPAPEPAPEPAPEPAPEPAPEPAPEPAPEPAPEPAPEPAPEPAPEPAPEPAPEPAPEPAPEPAPEPAPEPAPEPAPEPAPEPAPEPAPEPAPEPAPEPAPEPAPEPAPEPCPAPEPAPEPAPEPAPEPAPEPAPEPAPEPAPEPAPEPAPEPAPEPAPEPAPEPAPEPAPEPAPEPAPEPAPEPAPEPAPEPAPEPAPEPAPEPAPEPAPEPAPEPAPEPAPEPAPEPAPEPAPEPAPEPAPEPAPEPAPEPAPEPAPEPAPEPAPEPAPEPAPEPAPEPAPEPAPEPAPEPAPEPAPEPAPEPAPEPADEPAPEPAPEPAPEPAPEPAPEPAPEPAPEPAPEPAPEPAPEPAPEPAPEPAPEPAPEPAPEPAPEPAPEPAPEPAPEPAPEPAPEPAPEPAPEPAPEPAPEPAPEPAPEPAPEPAPEPAPEPAPEPAPEPAPEPAPEPAPEPAPEPAPEPAPEPAPEPAPEPAPEPAPEPAPEPAPEPAPEPAPEPAPEPAPEPAPEPANEPAPEPAPEPAPEPAPEPAPEPAPEPAPEPAPEPAPEPAPEPAPEPAPEPAPEPAPEPAPEPAPEPAPEPAPEPAPEPAPEPAPEPAPEPAPEPAPEPAPEPAPEPAPEPAPEPAPEPAPEPAPEPAPEPAPEPAPEPAPEPAPEPAPEPAPEPAPEPAPEPAPEPAPEPAPEPAPEPAPEPAPEPAPEPAPEPAPEPAPAPEPAPEPAPEPAPEPAPEPAPEPAPEPAPEPAPEPAPEPAPEPAPEPAPEPAPEPAPEPAPEPAPEPAPEPAPEPAPEPAPEPAPEPAPEPAPEPAPEPAPEPAPEPAPEPAPEPAPEPAPEPAPEPAPEPAPEPAPEPAPEPAPEPAPEPAPEPAPEPAPEPAPEPAPEPAPEPAPEPAPEPAPEPAPEPAPEPAREPAPEPAPEPAPEPAPEPAPEPAPEPAPEPAPEPAPEPAPEPAPEPAPEPAPEPAPEPAPEPAPEPAPEPAPEPAPEPAPEPAPEPAPEPAPEPAPEPAPEPAPEPAPEPAPEPAPEPAPEPAPEPAPEPAPEPAPEPAPEPAPEPAPEPAPEPAPEPAPEPAPEPAPEPAPEPAPEPAPEPAPEPAPEPAPEPAPEPAPECPAPEPAPEPAPEPAPEPAPEPAPEPAPEPAPEPAPEPAPEPAPEPAPEPAPEPAPEPAPEPAPEPAPEPAPEPAPEPAPEPAPEPAPEPAPEPAPEPAPEPAPEPAPEPAPEPAPEPAPEPAPEPAPEPAPEPAPEPAPEPAPEPAPEPAPEPAPEPAPEPAPEPAPEPAPEPAPEPAPEPAPEPAPEPAPEPAPEPAERPAPEPAPEPAPEPAPEPAPEPAPEPAPEPAPEPAPEPAPEPAPEPAPEPAPEPAPEPAPEPAPEPAPEPAPEPAPEPAPEPAPEPAPEPAPEPAPEPAPEPAPEPAPEPAPEPAPEPAPEPAPEPAPEPAPEPAPEPAPEPAPEPAPEPAPEPAPEPAPEPAPEPAPEPAPEPAPEPAPEPAPEPAPEPAPEPAPEPAPERPAPEPAPEPAPEPAPEPAPEPAPEPAPEPAPEPAPEPAPEPAPEPAPEPAPEPAPEPAPEPAPEPAPEPAPEPAPEPAPEPAPEPAPEPAPEPAPEPAPEPAPEPAPEPAPEPAPEPAPEPAPEPAPEPAPEPAPEPAPEPAPEPAPEPAPEPAPEPAPEPAPEPAPEPAPEPAPEPAPEPAPEPAPEPAPEPAPEPAPerPAPEPAPerPAPEPAPerPAPerPAPer PAPer PAPer PAPer PAPer PAPer PAPer PAPer PAPer PAPer PAPer PAPer PAPer PAPer PAPer PAPer PAPer PAPer PAPer PAPer PAPer PAPer PAPer PAPer PAPer PAPer PAPer PAPer PAPer PAPer PAPer PAPer PAPer PAPer PAPer PAPer PAPer PAPer PAPer PAPer PAPer PAPer PAPer PAPer PAPer PAPer PAPer PAPer PAPer PAPer PAPer PAPAPAPAPAPAPAPAPAPAPAPAPAPAPAPAPAPAPAPAPAPAPAPAPAPAPAPAPAPAPAPAPAPAPAPAPAPAPAPAPAPAPAPAPAPAPAPAPAPAPAPAPAPAPAPAPAPAPAPAPAPAPAPAPAPAPAPAPAPAPAPAPAPAPAPAPAPAPAPAPAPAPAPAPAPAPAPAPAPAPAPAPAPAPAPAPAPAPAPAPATAPAPAPAPAPAPAPAPAPAPAPAPAPAPAPAPAPAPAPAPAPAPAPAPAPAPAPAPAPAPAPAPAPAPAPAPAPAPAPAPAPAPAPAPAPAPAPAPAPAPAPAPAPAPAPAPAPAPAPAPAPAPAPAPAPAPAPAPAPAPAPAPAPAPAPAPAPAPAPAPAPAPAPAPAPAPAPAPAPAPAPAPAPAPAPAPAPAPAPAHAPAPAPAPAPAPAPAPAPAPAPAPAPAPAPAPAPAPAPAPAPAPAPAPAPAPAPAPAPAPAPAPAPAPAPAPAPAPAPAPAPAPAPAPAPAPAPAPAPAPAPAPAPAPAPAPAPAPAPAPAPAPAPAPAPAPAPAPAPAPAPAPAPAPAPAPAPAPAPAPAPAPAPAPAPAPAPAPAPAPAPAPAPAPAPAPAPAPAPAMAPAPAPAPAPAPAPAPAPAPAPAPAPAPAPAPAPAPAPAPAPAPAPAPAPAPAPAPAPAPAPAPAPAPAPAPAPAPAPAPAPAPAPAPAPAPAPAPAPAPAPAPAPAPAPAPAPAPAPAPAPAPAPAPAPAPAPAPAPAPAPAPAPAPAPAPAPAPAPAPAPAPAPAPAPAPAPAPAPAPAPAPAPAPAPAPAPAPAPANPANPANPANPANPANPANPANPANPANPANPANPANPANPANPANPANPANPANPANPANPANPANPANPANPANPANPANPANPANPANPANPANPANPANPANPANPANPANPANPANPANPANPANPANPANPANPANPANPANPANpANPANpANPANpANPANpANPANpANPANpANPANpANPANpANPANpANPANpANPANpANPANpANPANpANPANpANPANpANPANpANPANpANPANpANPANpANPANpANPANpANPANpANPANpANPANpANPANpANPAN pANPANpANPANpANPANpANPANpANPANpANPANpANPANpANPANpANPANpANPANpANPANpANPANpANPANpANPANpANPANpANPANpANPANpANPANpANPANpANPANpANPANpANPANpANPANpANPANpANPANq, 65-70, 65-70, 65-70, 65-80, 65-80, 65-80, 65-80, 65-80, 65-80, 65-80, 65-80, 65-80, 65-80, 65-80, 65-80, 65-80, 65-80, 65-80,
65-80, 65-80, 65-80, 65-80, 65-80, 65-80, 65-80, 65-80, 65-80, 65-80, 65-80, 65-80, 65-80, 65-80, 60-60, 60-60, 60-60, 60-60, 60-60, 60-60, 60-60, 60-60, 60-60, 60-60, 60-60, 60-60, 60-60, 60-60,
60-60, 60-60, 60-60, 60-60, 60-60, 60-60, 60-60, 60-60, 60-60, 60-60, 60-60,
60-60, 60-60, 60-60, 60-
60-60, 60-60, 60-60, 60-60, 60-60, 60-60,
60-60, 60-60, 60-60, 60-60, 60-60, 60-60,
60-60, 60-60, 60-60, 60-60,
60-60, 60-60, 60-60, 60-60,
60-60, 60-60, 60-60,
60-60, 60-60, 60-60,
60-60, 60-60, 60-60,
60-60, 60-60, 60-60,
60-60, 60-60, 60-60
60-60, 60-60, 60-60,
60-60, 60-60, 60-60,
60-60, 60-60, 60-60,
60-60, 60-60, 60-60,
60-60, 60-60, 60-60, 60-60,
60-60, 60-60, 60-60,
60-60, 60-60, 60-60,
60-60, 60-60,
60-60, 60-60,
60-60, 60-60,
60-60, 60-60,
60-60, 60-60,
60-60, 60-60,
60-60, 60-60,
60-60, 65-80, 65-80, 65-80, 65-80, 65-80, 65-80,
65-80, 65-80, 65-80,
65-80, 65-80, 65-80,
65-80, 65-80, 65-80,
65-80, 65-80, 65-80,
65-80, 65-80, 65-80
65-80, 65-80, 65-80,
65-80, 65-80, 65-80,
65-80, 65-80, 65-80,
65-80, 65-80, 65-80,
65-80, 65-80, 65-80, 65-80,
65-80, 65-80, 65-80,
65-80, 65-80, 65-80,
65-80, 65-80, 65-80,
65-80, 65-80,
65-80, 65-80,
65-80, 65-80,
65-80, 65-80,
65-80, 65-80,
65-80, 65-80,
65-80, 65-80,
65-80, 60-60,
65-80, 65-80,
65-80, 65-80,
65-80, 65-80,
65-80, 65-80,
65-80, 65-80,
65-80, 65-80,
65-80, 65-80,
65-80,
65-80, 65-80,
65-80, 65-80,
65-80, 65-80,
65-80, 65-80,
65-80, 65-80,
65-80, 65-80,
65-80, 65-80,
65-80, 64-64, 64-64, 64-64, 64-64, 64-64, 64-64, 64-64, 64-64, 64-64, 64-64, 64-64, 64-64, 64-64, 64-64,
64-64, 64-64, 64-64, 64-64, 64-64, 64-64, 64-64, 64-64, 64-64, 64-64, 64-64, 64-64, 64-64, 64-64, 6
65-80, 65-80, 65-80,
65-80, 65-80,
65-80, 65-80,
65-80, 65-80,
65-80, 65-80,
65-80, 65-80,
65-80, 65-80,
6.
65-80, 65-80,
65-80, 65-80,
65-80, 65-80,
65-80, 65-80,
65-80, 65-80,
65-80, 65-80,
65-80, 65-80,
65-80, 6
65-80, 65-80,
65-80, 65-80,
65-80, 65-80,
65-80, 65-80,
65-80, 65-80,
65-80, 65-80,
65-80, 65-80,
65-80, 6.
65-80, 65-80,
65-80, 65-80,
65-80, 65-80,
65-80, 65-80,
65-80, 65-80,
65-80, 65-80,
65-80, 65-80,
65-80,
6.
65-80, 65-80,
65-80, 65-80,
65-80, 65-80,
65-80, 65-80,
65-80, 65-80,
65-80, 65-80,
65-80, 65-80,
65-80, 65-80,
65-80, 65-80,
65-80, 65-80,
65-80, 65-80,
65-80, 65-80,
65-80, 65-80,
65-80, 65-80,
65-80, 65-80,
6.
65-80,
65-80,
65-80,
65-80,
65-80,
65-80,
65-80,
65-80,
65-80,
65-80,
65-80,
65-80,
65-80,
65-80,
65-80,
65-80,
65-80,
65-80,
65-12
65-12
65-12
65-12
65-12
65-12
65-12
65-12
65-12
65-12
65-12
65-12
65-12
65-12
65-12
65-12
65-12
65-80
65-80
65-80
65-80
65-80
65-80
65-80
65-80
65-80
65-80
65-80
65-80
65-80
65-80
65-80
65-80
65-80
65-
65-
65-
65-
65-
65-
65-
65-
65-
65-
65-
65-
65-
65-
65-
65-
65-
65-
65-
65-
65-
65-
65-
65-
65-
65-
65-
65-
65-
65-
65-
65-
65-
65-
.
.
.
.
.
.
.
.
.
.
.
.
.
.
.
.
.
.
.
.
.
.
.
.
.
.
.
.
.
.
.
.
.
.
.
.
.
.
.
.
.
.
.
.
.
.
.
.
.
.
.
.
.
.
.
.
.
.
.
.
.
.
.
.
.
.
.
.
.
.
.
.
.
.
.
.
.
.
.
.
.
.
.
.
.
.
.
.
.
.
.
.
.
.
.
.
.
.
.
.
;
.
.
.
.
.
.
.
.
.
.
.
.
.
.
.
.
.
.
.
.
.
.
.
.
.
.
.
.
.
.
.
.
.
.
.
.
.
.
.
.
.
.
.
.
.
.
.
.
.
.
.
.
.
.
.
.
.
.
.
.
.
.
.
.
.
.
.
.
.
.
.
.
.
.
.
.
.
.
.
.
.
.
.
.
.
.
.
.
.
.
.
.
.
.
.
.
.
.
.
?
.
.
.
.
.
.
.
.
.
.
.
.
.
.
.
.
.
.
.
.
.
.
.
.
.
.
.
.
.
.
.
.
.
.
.
.
.
.
.
.
.
.
.
.
.
.
.
.
.
.
.
.
.
.
.
.
.
.
.
.
.
.
.
.
.
.
.
.
.
.
.
.
.
.
.
.
.
.
.
.
.
.
.
.
.
.
.
.
.
.
.
.
.
.
.
.
.
.
.
、
.
.
.
.
.
.
.
.
.
.
.
.
.
.
.
.
.
.
.
.
.
.
.
.
.
.
.
.
.
.
.
.
.
.
.
.
.
.
.
.
.
.
.
.
.
.
.
.
.
.
.
.
.
.
.
.
.
.
.
.
.
.
.
.
.
.
.
.
.
.
.
.
.
.
.
.
.
.
.
.
.
.
.
.
.
.
.
.
.
.
.
.
.
.
.
.
.
.
.
2
2
2
2
2
2
2
2
2
2
2
2
2
2
2
2
2
2
2
2
2
2
2
2
2
2
2
2
2
2
2
2
2
2
2
2
2
2
2
2
2
2
2
2
2
2
2
2
2
2
2 |
| ABAKAH, INK Kobayashi, Tomohara Cerebrum, 655016, D. I. I. I. I. I. I. I. I. I. I. I. I. I. I. I. I. I. I. I. I. I. I. I. I. I. I. I. I. I. I. I. I. I. I. I. I. I. I. I. I. I. I. I. I. I. I. I. I. I. I. II. |
| tnc(3902) 26-65-64, qmc (3902) 22-65-64 |
| ANTMEBETBCK, OOO Amaaee Bocchini, Cenapin, Lichnax, 23250, |
| tnc(3902) 26-65-64, qmc (3902) 22-65-64, qmc (3902) 22-65-64 |
| ANTAPCPC, OOO Amaaee Bocchini, 663338, B. M. Kuppappa, B. 8-8A, B. 7A, B. 7A, B. 7A, B. 7A, B. 7A, B. 7A, B. 7A, B. 7A, B. 7A, B. 7A, B. 7A, B. 7A, B. 7A, B. 7A, B. 7A, B. 7A, B. 7A, B.
ANHEKPOY, OOO Amaaee Bocchini, Cenapin, Pichy, Pichy, Mucic, |
| tnc(3902) 26-65-64, qmc (3902) 22-65-64, qmc (3902) 22-65-64 |
| ANTHEH, INK Kobayashi, H. O. 14-20-20, N. Chinnam, B. 722, |
| tnc(3902) 26-65-64, qmc (3902) 22-65-64, qmc (3902) 22-65-64, qmc (3902) 22-65-64, qmc (3902) 22-65-64, qmc (3902) 22-65-64, qmc (3902) 22-65-64, qmc(3902) 22-65-64, qmc (3902) 22-65-64, qmc (3902) 22-65-64, qmc (3902) 22-65-64, qmc (3902) 22-65-64, qmc (3902) 22-72, |
| ANTAPMC, ANPAMO, ANPAMO, ANPAMO, ANPAMO, ANPAMO, ANPAMO, ANPAMO, ANPAMO, ANPAMO, ANPAMO, ANPAMO, ANPAMO, ANPAMO, ANPAMO, ANPAMO, ANPAMO, ANPAMO, ANPAMO, ANPAMO, ANPAMO, ANPAM0, ANPAM0, ANPAM0, ANPAM0, ANPAM0, ANPAM0, ANPAM0, ANPAM0, ANPAM0, ANPAM0, ANPAM0, ANPAM0, ANPAM0, ANPAM0, ANPAM0, ANPAM0, ANPAM0, ANPAM0, ANPAM0, ANPAM0, ANPAMO, ANPAM0, ANPAM0, ANPAM0, ANPAM0, ANPAM0, ANPAM0, ANPAM0, ANPAM0, ANPAM0, ANPAM0, ANPAM0, ANPAM0, ANPAM0, ANPAM0, ANPAM0, ANPAM0, ANPAM0, ANPAM0, ANPAMO, ANPAMO, ANPAM0, ANPAM0, ANPAM0, ANPAM0, ANPAM0, ANPAM0, ANPAM0, ANPAM0, ANPAM0, ANPAM0, ANPAM0, ANPAM0, ANPAM0, ANPAM0, ANPAM0, ANPAM0, ANPAM0, ANPAMO, ANPAM0, ANPAMO, ANPAM0, ANPAM0, ANPAM0, ANPAM0, ANPAM0, ANPAM0, ANPAM0, ANPAM0, ANPAM0, ANPAM0, ANPAM0, ANPAM0, ANPAM0, ANPAM0, ANPAM0, ANPAM0, ANPAM0, ANPAMO, ANPAMO, ANPAMO, ANPAM0, ANPAM0, ANPAM0, ANPAM0, ANPAM0, ANPAM0, ANPAM0, ANPAM0, ANPAM0, ANPAM0, ANPAM0, ANPAM0, ANPAM0, ANPAM0, ANPAM0, ANPAM0, ANPAMO, ANPAM0, ANPAM0, ANPAMO, ANPAM0, ANPAM0, ANPAM0, ANPAM0, ANPAM0, ANPAM0, ANPAM0, ANPAM0, ANPAM0, ANPAM0, ANPAM0, ANPAM0, ANPAM0, ANPAM0, ANPAM0, ANPAM0, ANPAMO, ANPAM0, ANPAMO, ANPAMO, ANPAM0, ANPAM0, ANPAM0, ANPAM0, ANPAM0, ANPAM0, ANPAM0, ANPAM0, ANPAM0, ANPAM0, ANPAM0, ANPAM0, ANPAM0, ANPAM0, ANPAM0, ANPAM0, ANPAMO, ANPAMO, ANPAM0, ANPAMO, ANPAM0, ANPAM0, ANPAM0, ANPAM0, ANPAM0, ANPAM0, ANPAM0, ANPAM0, ANPAM0, ANPAM0, ANPAM0, ANPAM0, ANPAM0, ANPAM0, ANPAM0, ANPAM0, ANPAMO, ANPAMO, ANPAMO, ANPAMO, ANPAM0, ANPAM0, ANPAM0, ANPAM0, ANPAM0, ANPAM0, ANPAM0, ANPAM0, ANPAM0, ANPAM0, ANPAM0, ANPAM0, ANPAM0, ANPAM0, ANPAM0, ANPAMO, ANPAM0, ANPAM0, ANPAM0, ANPAMO, ANPAM0, ANPAM0, ANPAM0, ANPAM0, ANPAM0, ANPAM0, ANPAM0, ANPAM0, ANPAM0, ANPAM0, ANPAM0, ANPAM0, ANPAM0, ANPAM0, ANPAM0, ANPAMO, ANPAM0, ANPAM0, ANPAMO, ANPAMO, ANPAM0, ANPAM0, ANPAM0, ANPAM0, ANPAM0, ANPAM0, ANPAM0, ANPAM0, ANPAM0, ANPAM0, ANPAM0, ANPAM0, ANPAM0, ANPAM0, ANPAM0, ANPAMO, ANPAM0, ANPAMO, ANPAM0, ANPAMO, ANPAM0, ANPAM0, ANPAM0, ANPAM0, ANPAM0, ANPAM0, ANPAM0, ANPAM0, ANPAM0, ANPAM0, ANPAM0, ANPAM0, ANPAM0, ANPAM0, ANPAM0, ANPAMO, ANPAM0, ANPAMO, ANPAMO, ANPAMO, ANPAM0, ANPAM0, ANPAM0, ANPAM0, ANPAM0, ANPAM0, ANPAM0, ANPAM0, ANPAM0, ANPAM0, ANPAM0, ANPAM0, ANPAM0, ANPAM0, ANPAM0, ANPAMO, ANPAMO, ANPAM0, ANPAM0, ANPAMO, ANPAM0, ANPAM0, ANPAM0, ANPAM0, ANPAM0, ANPAM0, ANPAM0, ANPAM0, ANPAM0, ANPAM0, ANPAM0, ANPAM0, ANPAM0, ANPAM0, ANPAM0, ANPAMO, ANPAMO, ANPAM0, ANPAMO, ANPAMO, ANPAM0, ANPAM0, ANPAM0, ANPAM0, ANPAM0, ANPAM0, ANPAM0, ANPAM0, ANPAM0, ANPAM0, ANPAM0, ANPAM0, ANPAM0, ANPAM0, ANPAM0, ANPAMO, ANPAMO, ANPAMO, ANPAM0, ANPAMO, ANPAM0, ANPAM0, ANPAM0, ANPAM0, ANPAM0, ANPAM0, ANPAM0, ANPAM0, ANPAM0, ANPAM0, ANPAM0, ANPAM0, ANPAM0, ANPAM0, ANPAM0, ANPAMO, ANPAMO, ANPAMO, ANPAMO, ANPAMO, ANPAM0, ANPAM0, ANPAM0, ANPAM0, ANPAM0, ANPAM0, ANPAM0, ANPAM0, ANPAM0, ANPAM0, ANPAM0, ANPAM0, ANPAM0, ANPAM0, ANPAMO, ANPAM0, ANPAM0, ANPAM0, ANPAM0, ANPAMO, ANPAM0, ANPAM0, ANPAM0, ANPAM0, ANPAM0, ANPAM0, ANPAM0, ANPAM0, ANPAM0, ANPAM0, ANPAM0, ANPAM0, ANPAM0, ANPAM0, ANPAMO, ANPAM0, ANPAM0, ANPAM0, ANPAMO, ANPAMO, ANPAM0, ANPAM0, ANPAM0, ANPAM0, ANPAM0, ANPAM0, ANPAM0, ANPAM0, ANPAM0, ANPAM0, ANPAM0, ANPAM0, ANPAM0, ANPAM0, ANPAMO, ANPAM0, ANPAM0, ANPAMO, ANPAM0, ANPAMO, ANPAM0, ANPAM0, ANPAM0, ANPAM0, ANPAM0, ANPAM0, ANPAM0, ANPAM0, ANPAM0, ANPAM0, ANPAM0, ANPAM0, ANPAM0, ANPAM0, ANPAMO, ANPAM0, ANPAM0, ANPAMO, ANPAMO, ANPAMO, ANPAM0, ANPAM0, ANPAM0, ANPAM0, ANPAM0, ANPAM0, ANPAM0, ANPAM0, ANPAM0, ANPAM0, ANPAM0, ANPAM0, ANPAM0, ANPAM0, ANPAMO, ANPAM0, ANPAMO, ANPAM0, ANPAM0, ANPAMO, ANPAM0, ANPAM0, ANPAM0, ANPAM0, ANPAM0, ANPAM0, ANPAM0, ANPAM0, ANPAM0, ANPAM0, ANPAM0, ANPAM0, ANPAM0, ANPAM0, ANPAMO, ANPAM0, ANPAMO, ANPAM0, ANPAMO, ANPAMO, ANPAM0, ANPAM0, ANPAM0, ANPAM0, ANPAM0, ANPAM0, ANPAM0, ANPAM0, ANPAM0, ANPAM0, ANPAM0, ANPAM0, ANPAM0, ANPAM0, ANPAMO, ANPAM0, ANPAMO, ANPAMO, ANPAM0, ANPAMO, ANPAM0, ANPAM0, ANPAM0, ANPAM0, ANPAM0, ANPAM0, ANPAM0, ANPAM0, ANPAM0, ANPAM0, ANPAM0, ANPAM0, ANPAM0, ANPAM0, ANPAMO, ANPAM0, ANPAMO, ANPAMO, ANPAMO, ANPAMO, ANPAM0, ANPAM0, ANPAM0, ANPAM0, ANPAM0, ANPAM0, ANPAM0, ANPAM0, ANPAM0, ANPAM0, ANPAM0, ANPAM0, ANPAM0, ANPAM0, ANPAMO, ANPAMO, ANPAM0, ANPAM0, ANPAM0, ANPAMO, ANPAM0, ANPAM0, ANPAM0, ANPAM0, ANPAM0, ANPAM0, ANPAM0, ANPAM0, ANPAM0, ANPAM0, ANPAM0, ANPAM0, ANPAM0, ANPAM0, ANPAMO, ANPAMO, ANPAM0, ANPAM0, ANPAMO, ANPAMO, ANPAM0, ANPAM0, ANPAM0, ANPAM0, ANPAM0, ANPAM0, ANPAM0, ANPAM0, ANPAM0, ANPAM0, ANPAM0, ANPAM0, ANPAM0, ANPAM0, ANPAMO, ANPAMO, ANPAM0, ANPAMO, ANPAM0, ANPAMO, ANPAM0, ANPAM0, ANPAM0, ANPAM0, ANPAM0, ANPAM0, ANPAM0, ANPAM0, ANPAM0, ANPAM0, ANPAM0, ANPAM0, ANPAM0, ANPAM0, ANPAMO, ANPAMO, ANPAM0, ANPAMO, ANPAMO, ANPAMO, ANPAM0, ANPAM0, ANPAM0, ANPAM0, ANPAM0, ANPAM0, ANPAM0, ANPAM0, ANPAM0, ANPAM0, ANPAM0, ANPAM0, ANPAM0, ANPAM0, ANPAMO, ANPAMO, ANPAMO, ANPAM0, ANPAM0, ANPAMO, ANPAM0, ANPAM0, ANPAM0, ANPAM0, ANPAM0, ANPAM0, ANPAM0, ANPAM0, ANPAM0, ANPAM0, ANPAM0, ANPAM0, ANPAM0, ANPAM0, ANPAMO, ANPAMO, ANPAMO, ANPAM0, ANPAMO, ANPAMO, ANPAM0, ANPAM0, ANPAM0, ANPAM0, ANPAM0, ANPAM0, ANPAM0, ANPAM0, ANPAM0, ANPAM0, ANPAM0, ANPAM0, ANPAM0, ANPAM0, ANPAMO, ANPAMO, ANPAMO, ANPAMO, ANPAM0, ANPAMO, ANPAM0, ANPAM0, ANPAM0, ANPAM0, ANPAM0, ANPAM0, ANPAM0, ANPAM0, ANPAM0, ANPAM0, ANPAM0, ANPAM0, ANPAM0, ANPAM0, ANPAMO, ANPAMO, ANPAMO, ANPAMO, ANPAMO, ANPAMO, ANPAMO, ANPAMO, ANPAMO, ANPAMO, ANPAMO, ANPAMO, ANPAMO, ANPAMO, ANPAMO, ANPAMO, ANPAMO, ANPAMO, ANPAMO, ANPAMo, ANPAMo, ANPAMo |
bosch-infoteam@bshg.com