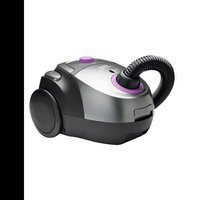
AVC850A - Vacuum Cleaner BESTRON - Free user manual and instructions
Find the device manual for free AVC850A BESTRON in PDF.
| Product type | Cordless hand vacuum |
| Brand | Bestron |
| Model | AVC850A |
| Power supply | 220-240 V ~ 50/60 Hz |
| Power | 120 W |
| Runtime | Approx. 30 minutes |
| Charging time | Approx. 4 hours |
| Battery type | Rechargeable (Li-ion) |
| Dimensions (L x H x D) | 11 x 20 x 30.5 cm |
| Cord length | 67 cm (adapter) |
| Protection class | II |
| Filtration system | Washable filter with dust separator |
| Included accessories | Motorized turbo brush, combination brush (large/small), crevice tool, flat nozzle, tube, wall mount |
| Main functions | Normal mode and Power-Turbo |
| Maintenance | Empty the dust container, clean the filter and turbo brush |
| Safety | Do not use on wet surfaces, do not vacuum hot or sharp objects, automatic shut-off in case of overheating (cooling 20-30 min) |
| Intended use | For hard floors, carpets, furniture, crevices, radiators |
Frequently Asked Questions - AVC850A BESTRON
User questions about AVC850A BESTRON
0 question about this device. Answer the ones you know or ask your own.
Ask a new question about this device
Download the instructions for your Vacuum Cleaner in PDF format for free! Find your manual AVC850A - BESTRON and take your electronic device back in hand. On this page are published all the documents necessary for the use of your device. AVC850A by BESTRON.
USER MANUAL AVC850A BESTRON
| Technical Specifications | |
| Model ARC850A | |
| Mains 220-240V | |
| Frequency (Hz) 50/60 | |
| Safety Class II | |
| Power (Watt) 120 | |
| Noise (dB(A)) - | |
| Max. Capacity | - |
| Maximum continuous operating time (KB) | - |
| Dimensions (L x W x H) (cm) | 11x20,5x30,5 |
| Cable length (cm) | 67 |
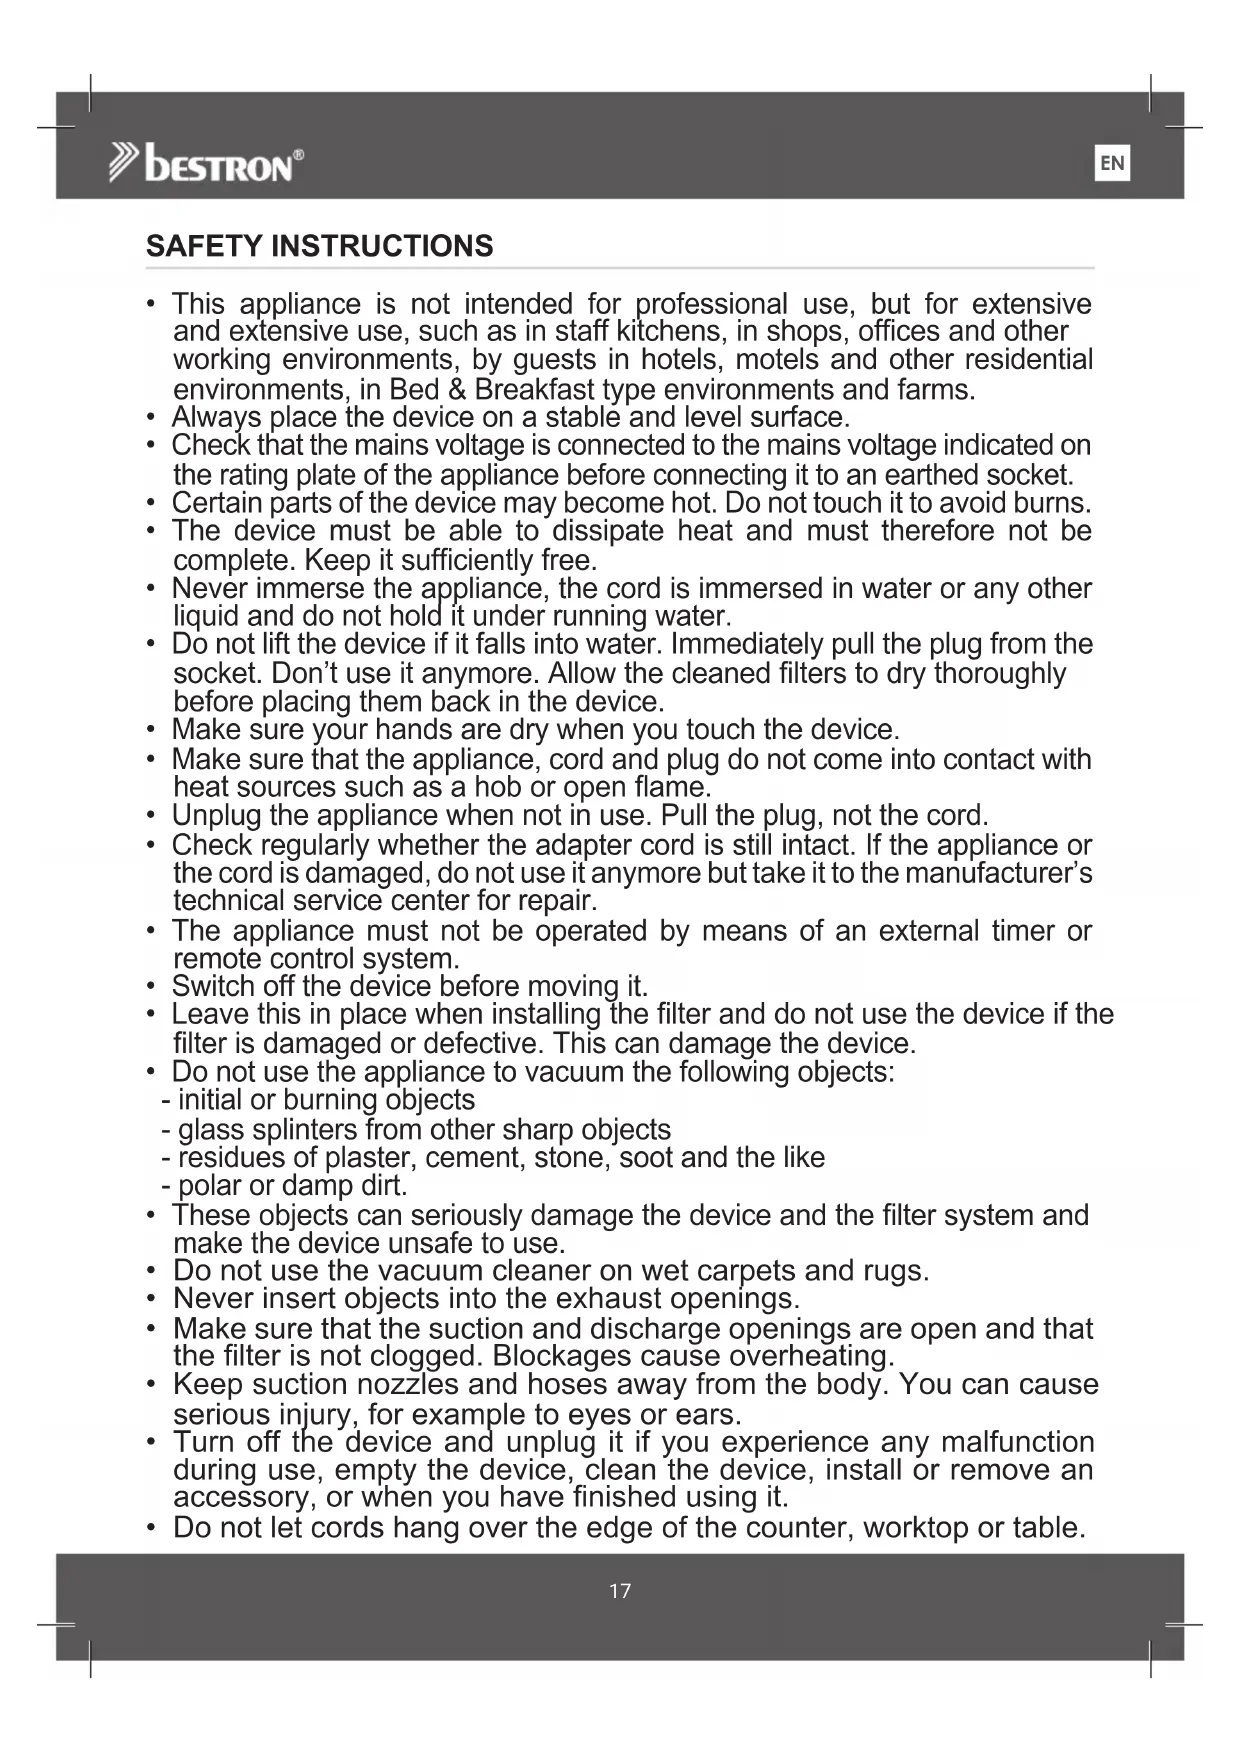
SAFETY INSTRUCTIONS
- This appliance is not intended for professional use, but for extensive and extensive use, such as in staff kitchens, in shops, offices and other working environments, by guests in hotels, motels and other residential environments, in Bed & Breakfast type environments and farms.
Always place the device on a stable and level surface. - Check that the mains voltage is connected to the mains voltage indicated on the rating plate of the appliance before connecting it to an earthed socket.
- Certain parts of the device may become hot. Do not touch it to avoid burns.
- The device must be able to dissipate heat and must therefore not be complete. Keep it sufficiently free.
- Never immerse the appliance, the cord is immersed in water or any other liquid and do not hold it under running water.
- Do not lift the device if it falls into water. Immediately pull the plug from the socket. Don't use it anymore. Allow the cleaned filters to dry thoroughly before placing them back in the device.
- Make sure your hands are dry when you touch the device.
- Make sure that the appliance, cord and plug do not come into contact with heat sources such as a hob or open flame.
- Unplug the appliance when not in use. Pull the plug, not the cord.
- Check regularly whether the adapter cord is still intact. If the appliance on the cord is damaged, do not use it anymore but take it to the manufacturer's technical service center for repair.
- The appliance must not be operated by means of an external timer or remote control system.
- Switch off the device before moving it.
- Leave this in place when installing the filter and do not use the device if the filter is damaged or defective. This can damage the device.
- Do not use the appliance to vacuum the following objects:
- initial or burning objects
- glass splinters from other sharp objects
- residues of plaster, cement, stone, soot and the like
- polar or damp dirt.
- These objects can seriously damage the device and the filter system and make the device unsafe to use.
- Do not use the vacuum cleaner on wet carpets and rugs.
- Never insert objects into the exhaust openings.
- Make sure that the suction and discharge openings are open and that the filter is not clogged. Blockages cause overheating.
- Keep suction nozzles and hoses away from the body. You can cause serious injury, for example to eyes or ears.
- Turn off the device and unplug it if you experience any malfunction during use, empty the device, clean the device, install or remove an accessory, or when you have finished using it.
-
Do not let cords hang over the edge of the counter, worktop or table.
-
Be careful when using the device outdoors.
- Never use the device in damp areas.
- Clean the device thoroughly after use (see Cleaning and maintenance).
- Make sure that the suction and discharge openings are open and the filter is not clogged. Blockages cause the device to overheat. Then switch off the vacuum cleaner! Once you have resolved the fault, wait 20 - 30 minutes for the vacuum cleaner to cool down completely. Then you can use it again.
- This appliance can be used by children aged from 8 years and above and persons with reduced physical, sensory or mental capabilities or lack of experience and knowledge if they have been given supervision or instruction concerning use of the appliance in a safe way and understand the dangers.
- Children are not allowed to clean or maintain the appliance unless they are over 8 years old and supervised.
- Keep the appliance and the cord out of the reach of children under the age of 8.
- Children must be supervised to ensure that they do not play with the appliance.
ENVIRONMENT
Dispose of packaging material such as plastic and cardboard boxes in the designated containers.
Do not dispose of this product as normal domestic waste at the end of its life, but hand it in at a collection point for the reuse of electric and electronic equipment. Look for the symbol on the product, the user instructions or the packaging showing the type of waste.
- The materials can be used as indicated. By helping us reuse and process the materials or otherwise recycle the old equipment, you will be making an important contribution towards the protection of the environment.
- Your municipality can tell you where to find the designated waste collection point in your neighbourhood.
SERVICE
In the unlikely event of a malfunction, please contact Bestron customer service: www.bestron.com/service
OPERATION - General information
The below description goes with the image on page 2.
- Tube connection and release button
- Dust container release button
- On/off switch
- Handle
- Charging port
- Exhaust opening
-
Dust container
-
Dust container bottom flap release button
- Motor-driven turbo nozzle
- Tube
- Adapter
12/13. Large brush tool / Furniture suction nozzle
14/15. Small brush tool / Crevice tool - Wall mount
The text below refers to the images found on page 2.
OPERATION - Charging the battery
- Plug the adapter's charging plug into the charging port (5) of the vacuum cleaner.
- Plug the adapter (11) into the wall socket. The indicator lights on top of the appliance start flashing in red.
- Allow the vacuum cleaner to charge (about 4 hours). The adapter may become slightly warm whilst it is charging; this is normal and does not indicate that the appliance is defective. When the device is fully charged, the indicator lights will stop flashing, then light up in green.
- Remove the adapter plug from the mains socket. The indicator lights go out.
OPERATION - Use
- Powerful cordless hand-held vacuum cleaner for about 30 minutes of continuous operation.
- Click the tube (10) or one of the included brush tools into the tube connection (1) (see figure 2A). When using the tube, subsequently click one of the included brush tools into the end of the tube. To remove an accessory, push the button (1) at the top of the tube connection (see figure 2B) and pull it out.
- Press the on/off switch (3) and start vacuum cleaning.
- Press the on/off switch again to activate the Power-Turbo function.
- Press the on/off switch again to turn off the appliance.
ACCESSIONS
This vacuum cleaner is supplied with four brush tools (see figure 3 and 4):
- a motor driven turbo nozzl (9) for optimum suction performance on hard floors and carpet;
- a combined tool with a large brush (12) for cleaning delicate or irregular surfaces and a furniture suction nozzle (13) for furniture, Venetian blinds, and similar;
- a combined tool with a small brush (14) and a crevice tool (15) with a narrow nozzle, for cleaning radiators, window frames, crevices, small openings, and similar.
OPERATION - Storage after use
This vacuum cleaner is supplied with a wall mount (16), which can be attached to the wall using two screws. Place the vacuum cleaner and the accessories onto the wall mount to store them neatly in a fixed place (figure 4).
CLEANING AND MAINTENANCE - Removing waste from the dust container
- Do not empty the dust container during charging. Remove the adapter from the wall socket.
- Remove the tube from the vacuum cleaner.
- Hold the vacuum cleaner above a waste-bin.
- Press the button (7) to open the bottom flap (8) (see figure 5).
- If so required, use your hand to remove any waste sticking to the container.
- Close the bottom flap, and press until it clicks into place.
CLEANING AND MAINTENANCE - Cleaning the housing
- Do not clean the vacuum cleaner during charging. Remove the adapter from the wall socket.
- Clean the outer surface of all parts with a damp cloth and a cleaner suitable for plastics.
WARNING:
- Never immerse the appliance, plug or power cord in water.
- Never use corrosive or scouring cleaning agents or sharp objects (such as knives or hard brushes) to clean the appliance.
CLEANING AND MAINTENANCE - Cleaning the turbo nozzle
- Remove the turbo nozzle from the vacuum cleaner. Push the button (1) at the top of the tube connection and pull the turbo nozzle out.
- Unlock the locking plate at the bottom of the turbo nozzle housing by sliding the slider outwards (see figure 6).
- Remove the rotating brush from the turbo nozzle (Figure 6) and clean the rotating brush.
- Put the rotating brush back into the turbo nozzle.
- Mount the locking plate and lock it by sliding the slider inwards.
CLEANING AND MAINTENANCE - Cleaning or replacing the filter
For best results clean or replace the filter after every second or third use of the vacuum cleaner, or more frequently if the filter is visibly blocked.
WARNING:
- Clean the filter regularly to avoid that the filter becomes clogged and the engine overheated.
- Do not clean or replace the filter during charging. Remove the adap-ter from the wall socket.
- Remove the tube from the vacuum cleaner
- Remove the waste from the dust container (see "Removing waste from the dust container").
- Remove the dust container from the vacuum cleaner by pressing the release button (see figure 7A) and taking out the dust container (figure 7B).
- Turn the upper lid and remove it from the dust container (figure 7C).
- Take the dust separation system and filter from the dust separation system (figure 7D).
- Rinse the filter and the dust separation system thoroughly in lukewarm water.
- Allow the filter to dry thoroughly.
- Mount the holders and filters in the reverse sequence.
WARNING:
Water could penetrate into the appliance if the filter is not thoroughly dry. This could result in (electrical) damage.
- Do not clean the filter in a washing machine.
- Do not dry the filter with a hairdryer.
PABOTA - 3APEXDAHE HA BATEPURA
- BkIIOHcTe 3a 3apeKdaHe Ha aadTepa B npTa 3a 3apeKdHe (5) Ha npaxocMykaKata.
- BkIIOHcTe aAnTepa (11) B CTeHHN KONTaKT. INHdNKaTOpHnTE JAMNnKn B rOpHaTa YacT Ha ypeDa 3anOuBaT Da MmraT B YepBeHo.
- Octabete npaxocmykaKata da ce 3apei (okono 4 yaca). AaantepbT moke neko da ce 3atonn, Dokato ce 3apekda; TOBa e HopmaHIO n He O3haUaba, ye ypeBt e depeKeTH. Korato ycToICTBOTo e HAnbJHO 3apeJeHO, CBETINHHTe INHInKaTOPn Iue CnpaT Da MmraT, CneD KOeTO Iue CBeTHaT B 3eNeHO.
4.ИЗbaDéTe Μεncenα Ha aadantepa OT KOHTaTc.BetJIHHHnTE INHДNKaTOpN n3racBaT.
EKCPILOATAUJN3NOJ3BAHE
- MoHa 6e3XnHa pUHa npaxOcMvKaUka 3a OKoJIO 30 MmHTn HEnpeKbChaTa pa6Ota.
- ⅢpaKHeTe Bbpyx Tpb6ata (10) nH eIN OH TBKIOueHIne HcTpyMeHTn 3a YeTKa BBB Bp3KaTa Ha Tpb6ata (1) (BnxTe pIrgya 2A). Korato n3non3BaTe Tpb6ata, cneToBa IpaKHeTe Bbpxy eINH OT BKNIOueHIne IHCTpyMeHTn 3a YETka B Kpaar Ha Tpb6ata. 3a da npemaxheTe akcecoap, HATNCHEte 6yToHa (1) B rOpHaT aYact Ha Tpb6HaTbPb3ka (BnxTe pIrgya 2B) n ro n3dbpnaTe.
- Hatnche Te npeBknOuBaTeJra 3a BKnIOUbaHe/INKIOUbaHe (3) n 3anoHHe TBAkyMHO NOYnCTBaHe.
- Hatnche OTHOBO 6yToHa 3a BkIIOUbaHe/u3KIOUbaHe, 3a da aKTnBnpate cyHKunra Power-Turbo.
- HatncheTe OTHOBO 6yToHa 3a BkNIOUbaHe/N3KIOUbaHe, 3a Da N3KIOUHTe ypeDa.
AKCECOAPN
Ta3 npaxocmykaKa ca doCTaBc cHTnpu cETKn (BnKTe pHyprn 3 n 4):
- MOTOPHO 3aBnKbHa Tpy6o DIO3a (9) 3a ONTImaJIHO 3aCMyKBaHe Ha TBbpDn NOOBE N KINIMN;
KOMbHnpaH INCTpyMeHT C rOJMa YeTka (12) 3a NOuCTBaHe Ha DeNkATH NIN HepaBHomepH NOBbpxHOCTN HAKpaHnK 3a N3cMyKBaHe Ha Me6eN (13) 3a Me6eN, BHeueNaHCK NOpN IND06Hn;
KOMbHnpaH NcTpyMeHT C MaJIka YeTKa (14) INHCtpyMeHT 3a CEIIKN (15) c TeceH HApaiHK, 3a NoHCTBaHe Ha paHaTOPu, DOrpAMN, UeHNATUNH, MaIKN OTBOPN I dp.
EKCNPLOATAURA - CbXPAHEHNE CNEYNOTPEBA
Ta3n npaxocmykaKaCe eoCTabc CToIka 3a CTeHa (16), KOrTO MOKe Da ce 3aKpeN KbM CTeHaTc NOMOuTa Ha DBA BnHTa. NocTabeTe npaxocmykaKaTa n akcecoapnte Bbpxy CToIkaTa 3a CTeHa, 3a Da Tn cbxpaHbATE cnpetHaTo Ha qnkupaHo MrcTo (fngrypa4).
IOnHCTBAHE IN NOIDPbKKA - INPEMAXBAHE HA OTNADbLHTE OT KOHTENHEPA 3A INPAX
- He n3npa3BaIte KOHTeHepa 3a npax no BpeMe Ha 3apeXdaHe. N3BaIeTe aIaITepa OT cTeHHnKoHTaKT.
- ⅢBaTe Tpb6aTa OT npaxOcMykaKaTa.
3.ДрьхтпрахOCMykaKaTaHaнКоТeнHepa3aOТПаNbU. - HatucheTe 6yToHa (7), 3a da OTbOpnte dOnHHa Kanak (8) (Bx. fHpya 5).
5.Ako e Heo6xOIMO, n3noI3BaIte pIbKaTcN, 3a da OTCTpaHITe NOJIENHaJIHTe NO KOHTeHepa OtnaDbu. - 3aTbOpTe DOnHaTa Knana HHaTcHete, DoKATO upaKaHe Ha MrcTOTo cN.
IOnHCTBAHE INIOIDPbXKA - NocntBaHe Ha Kopnyca
- He nouchte npaxocmykaKaTa NO BpeMe Ha 3apeKdahe. N3BaTe aadTepa OT CTeHHN KONTAKT.
- NocTeBbHnHaTIOBbpxHOCT Ha BCnKu Yactn C BnaXHa KbpNa I NoHcTBaU npenapat, NOxOJa3 aPiactMacn.
BHIMAHHE:
- Hnkora He notanrYepea, uencela nn 3axpaHbau ng Ka6eB BbB BOda.
- HnKora He n3noJ3BaIe Kopo3BHN nn TbpKaun noNCTBaun npenapaTN nn octpn ppeMeTn (kato HOKOBe nnn TBbpDn YeTkn) 3a noNCTBaHe Ha ypeDa.
IOnHCTBAHE IN OIOINPbXKA - IOnHCTBaHe Ha Typ6o IIO3a
- OTrpaHETe Tpy6o DIO3aTAt OT npaxocMyKaKATA. HATnCHTe 6yToHa (1) B rOpHata Yact Ha Tpb6HaTa BPb3ka N3DbpnaHTe Tpy6o DIO3aTAt HABbH.
- Otknoyete 3aknoybaaata nactna B doHaT aacr Ha Kopnyca Ha Typ6o dio3ata, kato nIb3Hete nnb3raa HABbH (BnKTe fHypa 6).
- OTrpaHete Bbptraata Ce YetKa OT Typ6o DIO3aT (FHypra 6) n NoHCTe Bbptraata Ce YetKa.
- NocTaBete BbPraaTa ce YeTka o6paTHo B Typ6o IIO3aTa.
- MoHTnpaIte 3akHIOUbaUata nloya n 3akHIOUcTe, KATO Nlb3HETe Nlb3raU haBBTpe.
IOnHCTBAHE IN NOIDPbXKA - NOpHCTBaHe Hn CMHa HaΦNITbpa
3a Hai-dobpi pezyntata nOuHCTBaIe IIN CmEHNTE qnITbpa CneB BcRA Ka BTopa IN TpeTa ynoTpe6a Ha npaxocmykaKATA INI NO-yeCTO, Ako qnITbpbTe E BNIMMO 3anyueH.
BHIMAHHE:
-Почистовпсинтьра рedingбо,зддзбггете зanyшанeto My nperряванeto Ha DBuratЯ.
1. He nouchBaIte n He cMeHnTe fntbpa nO BpeMe Ha 3apeXdaHe. N3BaTe aanTepa OT CTeHHN KOHTaKT.
2.ИЗbaДeTe TрБбАТо ntpaxOcMyKaчКаТa.
3. OTCpaHeTe OTnAbuNTe OT KOHTeHepa 3a npax (BnKTe ,PpeMaxBaHe Ha OTnAbuNTe OT KOHTeHepa 3a npax").
4. 13BaTe KOHeHepa 3a npax OT npaxOcMyKaKkata, KaTo HaTnCHe6yToHa 3a OCBO6OJaBAhe (BnKTe) Hrpya 7A) n 3BaTe KOHeHepa 3a npax (Hrpya 7B).
5. 3aBbptTe rohna kana n ro n3BaTe oT KOHTeHepa 3a npax (furpa 7C).
6. B3emete cnctemata 3a otdejhe Ha npax n cnltbpa ot cnctemata 3a otdejhe Ha npax (cnypa 7D)
7. ɪnʌŋkHete Φɪntbpaɪ n CɪsTeMaT a 3a OɪdɛŋHe Ha npax ÓɒnHNo B Xʌnʌkɑ Bɔːda.
8. OctaBeTe fHNTbpa da n3cbxHe HAnbHIO.
9. MoHTnpaIe TbPkaUte n cHITpNTe B O6paTHa NocJeIOBATEJIHOCT.
BHIMAHHE:
Bodata MoKe Da npOHKe B ypea, aKo fHnTbPbT He e HAnbJIHO cyx. ToBa MoKe Da DoBeDe DO (eJeKTpueecka) NOpeDa.
He nouchBaIte pfntbpa B nepaIIH.
He cywete qntbpa cbc cewoap.

ALL YOU WANT TO KNOW ABOUT YOUR UNIQUE 5 YEAR WARRANTY
ALLES, WAS SIE ÜBER IHRE EINZIGARTIGE 5-JAHRES-GARANTIE WISSEN MÖCHTEN TOUT CE QUE VOUS VOULEZ SAVOIR SUR VOTRE GARANTIE UNIQUE DE 5 ANS ALLES WAT U WILT WETEN OVER UW UNIEKE GARANTIE VAN 5 JAAR TUTTO QUELLO CHE VUOI SAPERE SULLA TUA GARANZIA UNICA DI 5 ANNI TODO LO QUE QUIERES SABER SOBRE TU UNICA GARANTÍA DE 5 ANOS
BESTRON.COM/GUARANTEE

NEED HELP?
CHECK OUT OUR SERVICE PAGE
BRAUCHEN SIE HILFE? SCHAUEN SIE SICH UNSERE SERVICESEITE AN BESOIN D'AIDE? DISCUTE AVEC NOUS! CONSULTEZ NOTRE PAGE DE SERVICE HULP NODIG? CHAT MET ONS! BEKIJK ONZE SERVICEPAGINA SIOGNO DI AIUTO? CHATTA CON NOI! GUARDLA LA NOSTRAPAGINA SERVIZI 2NECESITAS AYUDA? CONSULTE NUESTRA PAGINA DE SERVICIO
BESTRON.COM/SERVICE

EASTERN EUROPE CUSTOMER SERVICE
POLSKA bestron.service.pl@sertronics.de HRVATSKA bestron.service.hr@sertronics.de CZECHIA bestron.service.cz@sertronics.de SLOVENSKO bestron.service.sk@sertronics.de ROMANIA bestron.service.ro@sertronics.de BULGARIA bestron.service.bg@sertronics.de
SERVICE HOTLINE: 00800 954 39 543


240724-02
| Hersteller / Fournisseur/Vyrobce/Proizvodač/Producător/Vyrobca/Пюпзворител Bestron Nederland BV, Moeskampweg 20, 5222 AW, 's-Hertogenbosch Niederlande, Pays-Bas, Nizozemi, Hollandia, Holandja, Olanda, Holandsko, Холандя | |||||||
| DCZHRPLROFIMDSKBG | |||||||
| Ursprungs- land China | Pays d'origine Chine Čína | Země původu Kina Chiny | Zemlje podrijetla China Čína | Wyprodu kowano w чу | Tara de origine | Krajina pôvodu | Сtrupa на пожихов |