
BEBLV300 - Leaf blower BLACK & DECKER - Free user manual and instructions
Find the device manual for free BEBLV300 BLACK & DECKER in PDF.
| Product type | Leaf blower/vacuum |
| Brand | Black & Decker |
| Model | BEBLV300 |
| Supply voltage | 230 V AC |
| Power consumption | 3000 W |
| Weight (blower) | 3.6 kg |
| Weight (vacuum with bag) | 4.4 kg |
| Collection bag capacity | 72 L |
| Sound pressure level (LpA) | 90.0 dB(A) (uncertainty 1.2 dB(A)) |
| Sound power level (LWA) | 102.5 dB(A) (uncertainty 1.1 dB(A)) |
| Vibrations (total value) | 2.5 m/s² (uncertainty 1.5 m/s²) |
| Main functions | Blowing and vacuuming |
| Intended use | Removing dead leaves, outdoor use only |
| Assembly required | Assembly of vacuum and blowing tubes before use |
| Protective equipment | Safety glasses, hearing protection, reinforced shoes, trousers |
| Safety precautions | Do not use in rain; unplug before maintenance; keep children away; do not place openings near eyes/ears |
| Maintenance and cleaning | Regularly clean air vents, tube, and bag; use mild soap and damp cloth; do not immerse |
| Spare parts available | Tubes, concentrator, collection bag, impellers (from BLACK+DECKER) |
| Warranty | 24 months from date of purchase |
Frequently Asked Questions - BEBLV300 BLACK & DECKER
User questions about BEBLV300 BLACK & DECKER
0 question about this device. Answer the ones you know or ask your own.
Ask a new question about this device
Download the instructions for your Leaf blower in PDF format for free! Find your manual BEBLV300 - BLACK & DECKER and take your electronic device back in hand. On this page are published all the documents necessary for the use of your device. BEBLV300 by BLACK & DECKER.
USER MANUAL BEBLV300 BLACK & DECKER
Your BLACK+DECKER™ BEBLV290, BEBLV300 blower vacs have been designed for leaf clearing. These appliances are intended for consumer and outdoor use only.
General appliance safety warnings
Warning! When using mains powered/cordless
appliances, basic safety precautions, including the following, should always be followed to reduce the risk of fire, electric shock, personal injury and material damage.
- Read all of this manual carefully before using the appliance, be familiar with the controls and the proper use of the appliance.
- The intended use is described in this manual. The use of any accessory or attachment or the performance of any operation with this appliance other than those recommended in this instruction manual may present a risk of personal injury.
The term "appliance" in all of the warnings listed below refers to your mains operated (corded) appliance or battery operated (cordless) appliance.
Save all warnings and instructions for future reference.
Save all warnings and instructions for future reference.
Using your appliance
Always take care when using the appliance.
- Keep work area clean and well lit. Cluttered or dark areas invite accidents.
- Only use the appliance in daylight or good artificial light.
Do not operate your appliance in explosive atmospheres, such as in the presence of flammable liquids, gases or dust.
- Never allow children or people unfamiliar with the instructions to use the appliance, local regulations may restrict the age of the operator.
Do not allow children or animals to come near the work area or touch the appliance supply cord.
- Keep children, bystanders and animals away while operating an appliance. Distractions can cause you to lose control.
- The appliance is not to be used as a toy.
- Do not immerse the appliance in water.
- Do not open body casing. There are no user serviceable parts inside.
Personal safety
Stay alert, watch what you are doing and use common sense when operating an appliance. Do not use an appliance while you are tired or under the influence of drugs, alcohol or medication. A moment of inattention while operating an appliance may result in serious personal injury.
- Where required, use personal protective equipment.
Protective equipment such as eye protection, dust mask, non-skid safety shoes, hard hat, or hearing protection used for appropriate conditions will reduce personal injuries.
Prevent unintentional starting. Make sure that the switch is in the off position before connecting to a power source and/or battery pack, picking up or carrying the appliance. Carrying appliances with your finger on the switch or energising appliances that have the switch on invites accidents.
- Do not overreach. Keep proper footing and balance at all times. This enables better control of the appliance in unexpected situations.
Dress properly. Do not wear loose clothing or jewellery. Keep your hair, clothing and gloves away from moving parts. Loose clothes, jewellery or long hair can be caught in moving parts.
Appliance use and care
Before use, check the appliance for damaged or defective parts. Check for breakage of parts, damage to switches and any other conditions that may affect its operation.
- Do not use the appliance if the switch does not turn it on and off. Any appliance that cannot be controlled with the switch is dangerous and must be repaired.
Disconnect the plug from the power source and/or the battery pack from the appliance before making any adjustments, changing accessories, or storing appliances. Such preventive safety measures reduce the risk of starting the appliance accidentally.
Where applicable, keep cutting tools sharp and clean. Properly maintained cutting tools with sharp cutting edges are less likely to bind and are easier to control.
- Do not use the appliance if any part is damaged or defective.
- Have any damaged or defective parts repaired or replaced by an authorised repair agent.
- Never attempt to remove or replace any parts other than those specified in this manual.
Electrical safety
- Appliance plugs must match the outlet. Never modify the plug in any way. Do not use any adapter plugs with earthed (grounded) appliance.
Unmodified plugs and matching outlets will reduce risk of electric shock.
- Do not expose appliance to rain or wet conditions. Water entering a appliance will increase the risk of electric shock.
- Do not abuse the cord. Never use the cord for carrying, pulling or unplugging the appliance. Keep cord away from heat, oil, sharp edges or moving parts. Damaged or entangled cords increase the risk of electric shock.
- When operating an appliance outdoors, use an extension cord suitable for outdoor use. Use of a cord suitable for outdoor use reduces the risk of electric shock.
- If operating an appliance in a damp location is unavoidable, use a Residual Current Device (RCD) protected supply. Use of an RCD reduces the risk of electric shock.
After Use
- When not in use, the appliance should be stored in a dry, well ventilated place out of the reach of children.
Children should not have access to stored appliances. - When the appliance is stored or transported in a vehicle it should be placed in the boot or restrained to prevent movement following sudden changes in speed or direction.
Service
- Have your appliance serviced by a qualified repair person using only identical replacement parts.
This will ensure that the safety of the appliance is maintained.
Additional Safety instructions for blow vacs
The intended use is described in this manual. The use of any accessory or attachment or performance of any operation with this appliance other than those recommended in this instruction manual can present a risk of personal injury and/or damage to property.
To protect your feet and legs while operating the appliance, always wear heavy duty footwear and long trousers.
- Do not use in vacuum mode without the vacuum tubes and collection bag in place.
Always switch off your product, allow the fan to stop and remove the plug from the socket when:
- Changing from blower to vacuum.
- The supply cable has become damaged or entangled.
- You leave your product unattended.
Clearing a blockage. - Checking, adjusting, cleaning or working on your product.
- If the appliance starts to vibrate abnormally.
- Do not place the inlet or outlet of the vacuum near eyes or ears when operating.
-
Never blow debris in the direction of bystanders.
Do not use in the rain or leave outdoors while it is raining. -
Do not cross gravel paths or roads whilst your product is switched on during blow/vac mode.
Walk, never run.
Do not place your unit down on gravel while it is switched on.
Always be sure of your footing, particularly on slopes.
Do not overreach and keep your balance at all times. - Do not pick up matter that may be contaminated with flammable or combustible liquids such as gasoline, or use in areas where they might be present.
- Do not place any objects into the openings. Never use if the openings are blocked - keep free of hair, lint, dust and anything that may reduce the airflow.
Warning! Always use your product in the manner outlined in this manual.
Your product is designed to be used in an upright mode and if it is used in any other way it may result in injury. Never run your product whilst lying on it's side or upside down.
- The operator or user is responsible for accidents or hazards occurring to other people or their property.
- Do not carry the appliance by the cable.
Always direct the cable to the rear away from the appliance.
Warning! If a cord becomes damaged during use, disconnect the supply cord from the mains supply immediately.
Do not touch the supply cord before disconnecting the supply.
Do not use solvents or cleaning fluids to clean your product. Use a blunt scraper to remove grass and dirt.
- Check the collection bag frequently for wear or deterioration.
Replacement fans are available from a BLACK+DECKER service agent. Use on BLACK+DECKER recommended spare parts and accessories.
- Keep all nuts bolts and screws tight to make sure that the appliance is in a safe working condition.
Safety of others
- This appliance can be used by children aged from 8 years and above and persons with reduced physical, sensory or mental capabilities or lack of experience and knowledge if they have been given supervision or instruction concerning use of the appliance in a safe way and understand the hazards involved. Children shall not play with the appliance. Cleaning and user maintenance shall not be made by children without supervision.
Children should be supervised to ensure that they do not play with the appliance.
Electrical safety
This appliance is double insulated; therefore no earth wire is required.
Always check that the power supply corresponds to the voltage on the rating plate.
- If the supply cord is damaged, it must be replaced by the manufacturer or an authorised BLACK+DECKER Service Centre in order to avoid a hazard.
- Electric safety can be further improved by using a highsensitivity 30mA Residual Current Device (RCD).
Using an extension cable
Always use an approved extension cable suitable for the power input of this tool (see technical data). The extension cable must be suitable for outdoor use and marked accordingly. Up to 30m of 1.5mm^2 HO5V V-F extension cable can be used without loss of product performance. Before use, inspect the extension cable for signs of damage, wear and ageing. Replace the extension cable if damaged or defective. When using a cable reel, always unwind the cable completely.
Residual risks
Additional residual risks may arise when using the tool which may not be included in the enclosed safety warnings.
These risks can arise from misuse, prolonged use etc. Even with the application of the relevant safety regulations and the implementation of safety devices, certain residual risks can not be avoided. These include:
Injuries caused by touching any rotating/ moving parts.
Injuries caused when changing any parts, blades or accessories.
Injuries caused by prolonged use of a tool. When using any tool for prolonged periods ensure you take regular breaks.
Impairment of hearing.
Health hazards caused by breathing dust developed when using your tool (example:- working with wood, especially oak, beech and MDF.).
Vibration
The declared vibration emission values stated in the technical data and the declaration of conformity have been measured in accordance with a standard test method provided by EN50636 and may be used for comparing one tool with another. The declared vibration emission value may also be used in a preliminary assessment of exposure.
Warning! The vibration emission value during actual use of the power tool can differ from the declared value depending on the ways in which the tool is used. The vibration level may increase above the level stated.
When assessing vibration exposure to determine safety measures required by 2002/44/EC to protect persons regularly using power tools in employment, an estimation of vibration exposure should consider, the actual conditions of use and the way the tool is used, including taking account of all parts of the operating
cycle such as the times when the tool is switched off and when it is running idle in addition to the trigger time.
Labels on Appliance
The following pictograms, along with the date code, are shown on the tool.

Warning! Read the manual prior to operation.

Wear safety glasses or goggles when operating this appliance.

Wear suitable ear protection when operating this appliance.

Do not expose the tool to rain or high humidity or leave outdoors while it is raining.
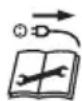
Switch off: remove plug from mains before cleaning or maintenance.
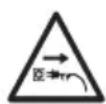
Disconnect the mains plug if the cord becomes damaged or entangled.

Beware of flying objects.

Keep bystanders away.

Directive 2000/14/EC guaranteed sound power.
Features
This appliance includes some or all of the following features.
- On/Off switch - speed control
- Front handle
- Back handle
- Power head
- Upper vacuum tube
- Lower vacuum tube
- Upper blower tube
- Lower blower tube
-
Concentrator
-
Collection bag
- Bag connector
Using your product
Warning! When using as a blower or vacuum, always wear safety glasses. If using in dusty conditions, wear a filter mask as well.
Warning! Switch off your product, allow the fan to stop and remove the plug from the socket before carrying out any adjustment, servicing or maintenance.
Assembly

Warning! Before assembly, make sure that the appliance is switched off and unplugged.

Warning! Always wear protective gloves when working with your blow vac.
Vacuum tube assembly (fig. A)
The vacuum tubes must be assembled together before use.
Warning! Do not operate the appliance with the vacuum tubes separated.
To ease assembly, apply a soapy water solution to the joint area.
Align the notches (5a) and the recesses (6a) on the upper (5) and lower (6) vacuum tubes.
Push the lower vacuum tube (6) firmly onto the upper vacuum tube (5) until they click into place.
Warning! Do not separate the tubes once assembled.
Vacuum mode (fig. B, C, D, E, F, G, H, I, J, K, L, M)
Rotate the fan guard assembly anti-clockwise as (fig. B).
Insert the rod (14) (supplied) into the fan guard release (13) and push upward to release the fan guard assembly (12) as shown in figure C.
Drop the fan guard assembly (12) forward as shown in figure D.
Insert the assembled vacuum tube (5) into the available recess in the power head (4) as shown in figure E.
Rotate the assembled vacuum tube clockwise so that the bayonet fixing locks into place as shown in figure E.
Insert the collection bag connector (11) onto the power head receptacle (11a) as shown in figure F.
Place the straps from the collection bag (10) over your shoulders (fig. G) this will support the additional weight as the back pack collection bag fills.
Position the vacuum tube slightly above the debris/leaves.
Switch on the appliance by pushing the On/Off switch (1) upwards (fig.H insert) and use a sweeping motion; the debris/leaves will be sucked up the tube, and thrown into the collection bag (10) (fig. H).
As the bag fills, the power of the suction will decrease, switch off the appliance and unplug from the mains power supply.
Unclip the the catch (10a) on the back pack collection bag (fig I).
Unfold the opening of the back pack collection pack (fig J).
Open the back pack collection pack (fig K) and proceed to empty its contents.
To seal the collection bag, hold the flexible bars together and roll 2-3 times (fig L).
Latch the retaining clip (10a) as shown in figure M.
Warning! Never remove the collection bag without first turning off and unplugging the appliance.
Note: If the suction decreases and the bag is not full, the vacuum tube is probably clogged with debris. Turn off and unplug the vacuum and clear the tube before continuing.
- When task is complete, rotate the assembled vacuum tube anticlockwise to release the bayonet fixing. Insert the rod (14) into the fan guard release (13) and push upwards to release the assembled vacuum tube. Remove the assembled vacuum tube from the powerhead as shown in figure N.
Replace the fan guard assembly as shown in figure O.
Rotate the fan guard assembly clockwise as shown in figure P.
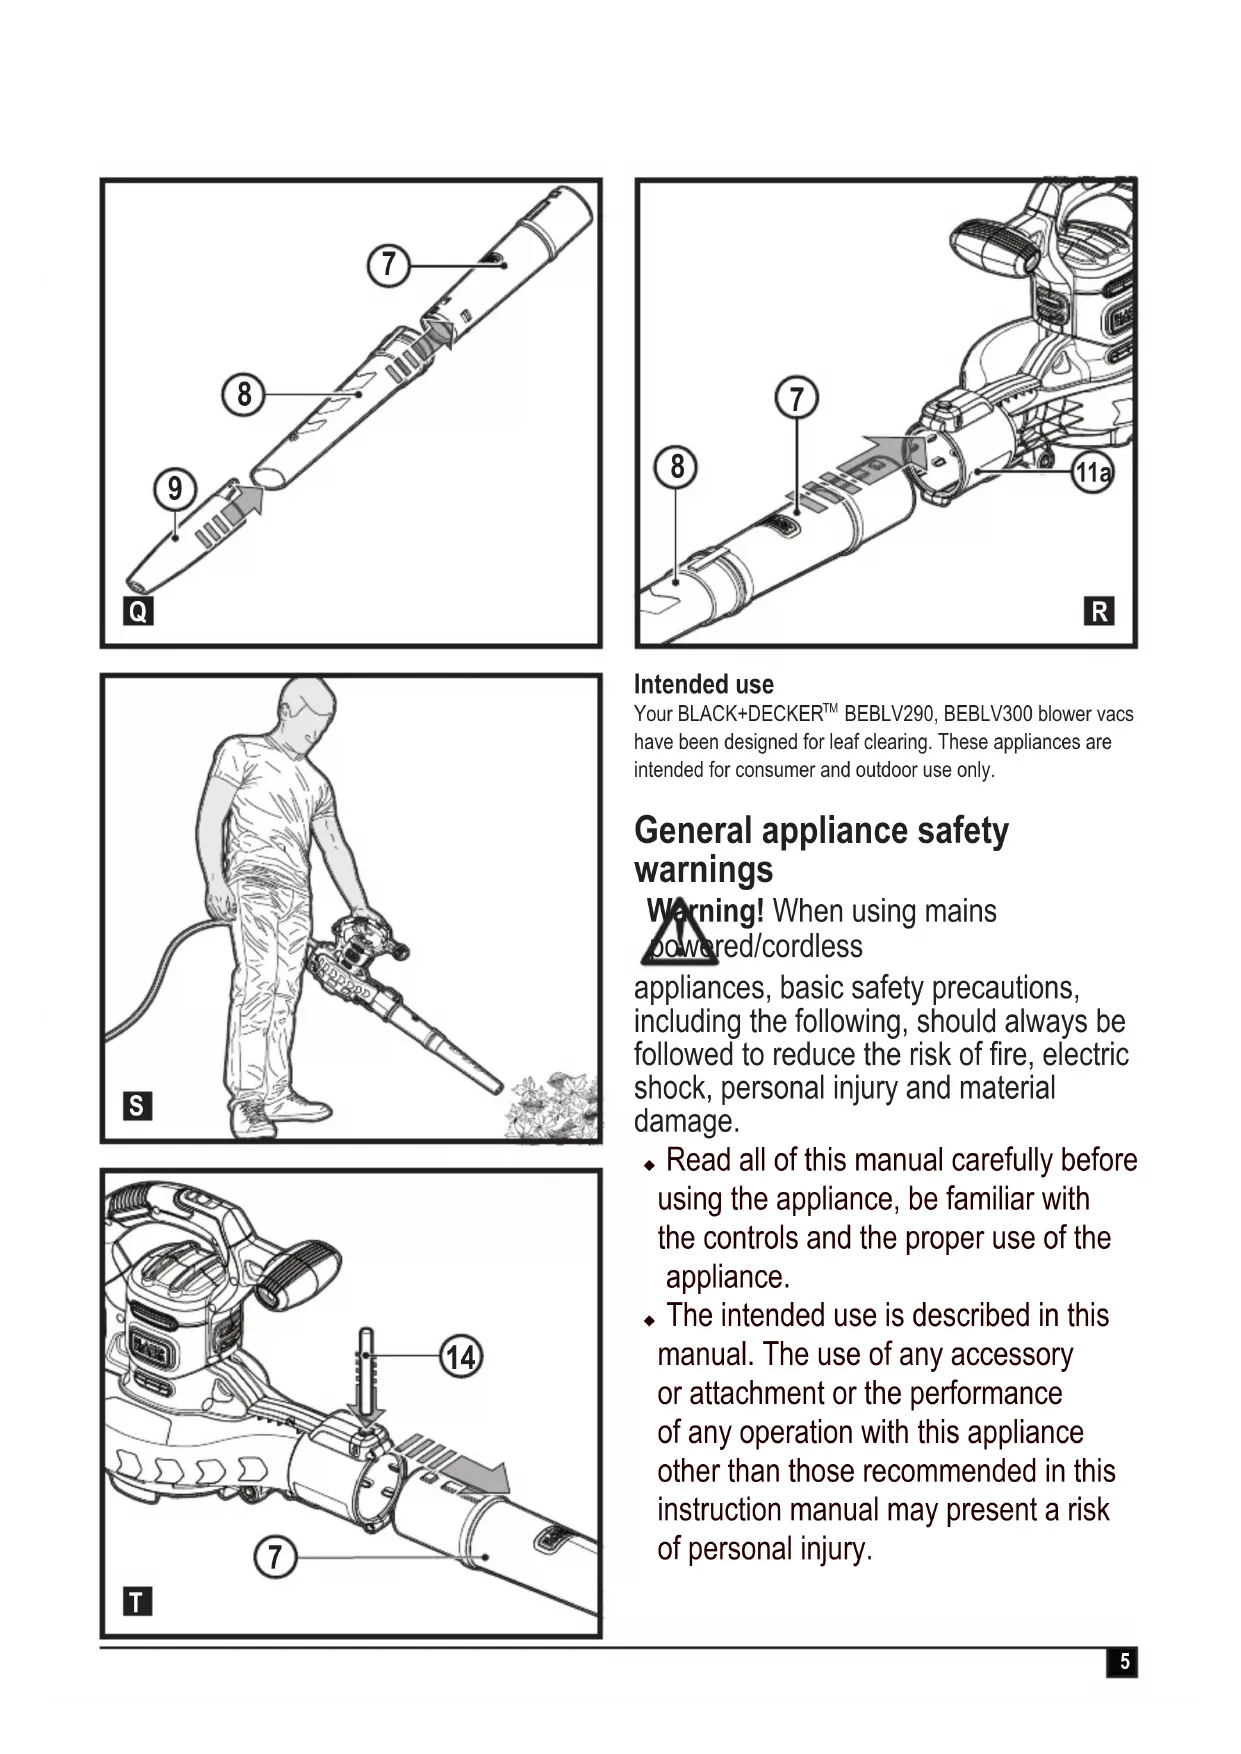
Blower mode (fig. Q, R, S, T)
Assemble the upper blow tube (7), the lower blow tube (8) and the optional concentrator (9) as shown in figure Q.
- Push the assembled blow tube onto the vacuum outlet (11a) until the lock engages tightly with the blow tube as shown in figure R.
Warning! Never operate in Blow mode without the blow tube firmly in place.
Hold the blow tube approximately 180~mm above the ground, switch on the appliance and using a sweeping motion from side to side, advance slowly keeping the accumulated debris/leaves in front of you (fig. S).
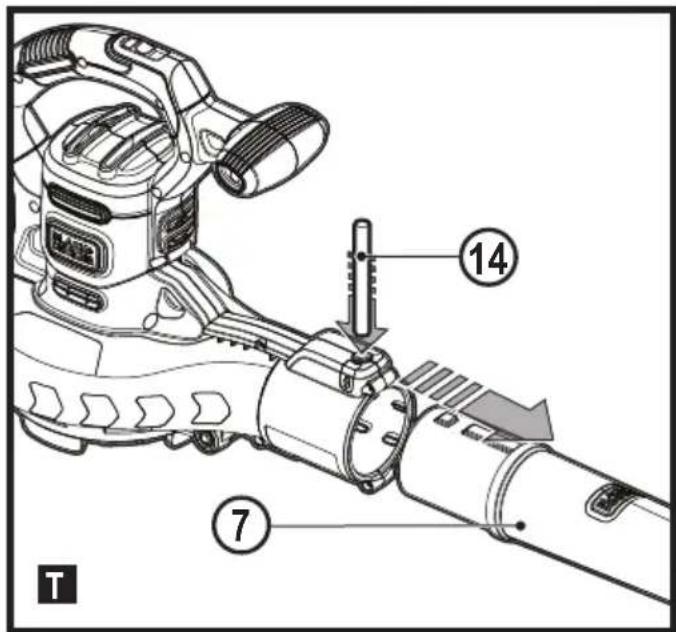
- Once you have blown the debris/leaves into a pile, you can remove the blow tube assembly by inserting the rod (14) into the aperture on the vacuum head and pushing down to release the lock as shown in figure T.
Now you can convert to vacuum mode and collect the debris.
Troubleshooting
| Problem Possible solution | |
| Failure to operate | Check the connection to the power supply |
| Check the fuse in the plug, if blown, replace (UK only). | |
| Check that the blow/vacuum tube assembly is correctly fitted to the powerhead. | |
| If the fuse continues to blow - immediately disconnect from the mains power supply and consult your local BLACK+DECKER authorisedrepair agent. | |
| Poor vacuum/high pitched whine | Switch off - disconnect from the mains power supply, debris should fall clear of the tube. |
| Remove and empty the collection bag. | |
| Check that both the inlet and exit ports on the vacuum tube are clear. | |
| Remove any debris from the fan area. | |
| If poor vacuuming continues - immediately disconnect from the mains power supply and consult your local BLACK+DECKER authorised repair agent | |
Maintenance
Your BLACK+DECKER appliance has been designed to operate over a long period of time with a minimum of maintenance.
Continuous satisfactory operation depends upon proper appliance care and regular cleaning.
Keep the appliance clean and dry.
Remove any leaves stuck to the inside of the vacuum tube.
Regularly clean the ventilation slots with a clean, dry paint brush.
Regularly clean the collection bag and ensure that it is clean and empty after each use.
To clean the appliance, use only mild soap and a damp cloth. Never let any liquid get inside the tool and never immerse any part of the tool into liquid. Do not use any abrasive or solvent-based cleaner.
Self lubricating bearings are used in your product, therefore lubrication is not required.
Mains plug replacement (U.K. & Ireland only)
If a new mains plug needs to be fitted:
Safely dispose of the old plug.
Connect the brown lead to the live terminal in the new plug.
Connect the blue lead to the neutral terminal.
Warning! No connection is to be made to the earth terminal. Follow the fitting instructions supplied with good quality plugs. Recommended fuse: 13 A.
Protecting the environment

Separate collection. Products and batteries marked with this symbol must not be disposed of with normal household waste.
Products and batteries contain materials that can be recovered or recycled reducing the demand for raw materials. Please recycle electrical products and batteries according to local provisions. Further information is available at www.2helpU.com
Technical data
| BEBLV290 BEBLV300 | |||
| Input voltage V | AC | 230 230 | |
| Power Input W 2900 | 3000 | ||
| Capacity L 55 72 | |||
| Weight (blower) kg | 3.6 3.6 | ||
| Weight (vaccum) | kg 4.4 4.4 | ||
| Level of sound pressure according to EN 50636-2-100 | |||
| Sound pressure level at the operator position: (LpA) 90.0 dB(A), uncertainty (K) 1.2 dB(A) | |||
| Sound power level (LWA) 102.5 dB(A), uncertainty (K) 1.1 dB(A) | |||
| Vibration total values (triax vector sum) according to EN 50636-2-100 | |||
| Vibration (a) 2.5 m/s2, uncertainty (K) 1.5 m/s2 | |||
EC declaration of conformity
MACHINERY DIRECTIVE OUTDOOR NOISE DIRECTIVE

BEBLV290, BEBLV300 - Blower Vac Black & Decker declares that these products described under
"technical data" are in compliance with: 2006/42/EC, EN60335-1:2012+A11:2014; EN50636-2-100:2014
2000/14/EC,Blow Vac,Annex V
DEKRA Quality B.V., Utrechtseweg 310, 6802 ED Arnhem, The Netherlands Notified Body ID No.: 0344 Level of acoustic power according to 2000/14/EC
(Article 13, Annex III):
Sound power level: LwA: 102,5 dB(A); K=1,1 dB(A)
The guarantee sound power level: LWA: 104 dB(A) These products also comply with Directive 2014/30/EU and 2011/65/EU. For more information, please contact Black & Decker at the following address or refer to the back of the manual.
ENGLISH
(Original instructions)
The undersigned is responsible for compilation of the technical file and makes this declaration on behalf of
Black & Decker.

R. Laverick
Director of Engineering
Black & Decker Europe, 210 Bath Road, Slough,
Berkshire, SL1 3YD
United Kingdom
16/10/2018
Guarantee
Black & Decker is confident of the quality of its products and offers consumers a 24 month guarantee from the date of purchase. This guarantee is in addition to and in no way prejudices your statutory rights. The guarantee is valid within the territories of the Member States of the European Union and the European Free Trade Area.
To claim on the guarantee, the claim must be in accordance with Black&Decker Terms and Conditions and you will need to submit proof of purchase to the seller or an authorised repair agent.
Terms and conditions of the Black&Decker 2 year guarantee and the location of your nearest authorised repair agent can be obtained on the Internet at www.2helpU.com, or by contacting your local Black & Decker office at the address indicated in this manual.
Please visit our website www.blackanddecker.co.uk to register your new Black & Decker product and receive updates on new products and special offers.
Director of Engineering
Black & Decker Europe, 210 Bath Road, Slough,
Berkshire, SL1 3YD
Black & Decker Europe, 210 Bath Road, Slough,
Berkshire, SL1 3YD
Royaume-Uni
16/10/2018
Garantie
Black&Decker Europe, 210 Bath Road, Slough,
Berkshire, SL1 3YD
Regno Unito
16/10/2018
Garanzia
Black & Decker Europe, 210 Bath Road, Slough,
Berkshire, SL1 3YD
Verenigd Koninkrijk
16/10/2018
Garantie
Black & Decker Europa, 210 Bath Road, Slough,
Berkshire, SL1 3YD
Reino Unido
16/10/2018
Garantía
Director de Engenharia
Black & Decker Europe, 210 Bath Road, Slough,
Berkshire, SL1 3YD
Reino Unido
16/10/2018
Garantia
Director of Engineering
Black & Decker Europe, 210 Bath Road, Slough,
Berkshire, SL1 3YD
Storbritannien
16/10/2018
Garanti
Director of Engineering
Black & Decker Europe, 210 Bath Road, Slough,
Berkshire, SL1 3YD
Storbritannia
16/10/2018
Garanti
Black & Decker er trygg pa kvaliteten av produitene sine og tilbyr en 24 maneders garanti fra kjopsdato. Denne garantierklaringenkommen i tillegg til dine lovbestemte rettigheter og er ikke i konflikt medppe. Garantien er gyldig innen omrändene tilhorende medlemslandene i den Europeiske Union (EU) og det Europeiske Frihandelsomraret (EFTA).
For à ta garantien i bruk mä kravet vare i samsvar med kjopsbetingelsene fra Black&Decker og du ma vise kjopskvittering til forhandleren ell er til et autorisert serviceverksted.
Betingelsene for Black&Deckers 2 Års garanti og adressen til dinærneste autoriserte serviceverksted kan du finne på internett under www.2helpU.com, eller ved Å kontakte ditt lokaleBlack & Decker kontor, adressen er angitt i denen braksanvisningen.
Black & Decker Europe, 210 Bath Road, Slough,
Berkshire, SL1 3YD
Storbritannien
16/10/2018
Garanti
Black & Decker Europe, 210 Bath Road, Slough,
Berkshire, SL1 3YD
Iso-Britannia
16/10/2018
Takuu
Black & Decker Europe, 210 Bath Road, Slough,
Berkshire, SL1 3YD


- General appliance safety warnings
- Using your appliance
- Personal safety
- Appliance use and care
- Electrical safety
- After Use
- Service
- Additional Safety instructions for blow vacs
- Safety of others
- Using an extension cable
- Residual risks
- Vibration
- Labels on Appliance
- Features
- Using your product
- Assembly
- Vacuum tube assembly (fig. A)
- Vacuum mode (fig. B, C, D, E, F, G, H, I, J, K, L, M)
- Blower mode (fig. Q, R, S, T)
- Maintenance
- Mains plug replacement (U.K. & Ireland only)
- Protecting the environment
- EC declaration of conformity
- ENGLISH
- Guarantee
- Garantie
- Garanzia
- Garantía
- Garantia
- Garanti
- Takuu
Brand : BLACK & DECKER
Model : BEBLV300
Category : Leaf blower