
Turbine WG546 - Blower WORX - Free user manual and instructions
Find the device manual for free Turbine WG546 WORX in PDF.
| Product type | Robotic lawnmower |
| Brand | Worx |
| Model | Turbine WG546 (Landroid M) |
| Power supply | Rechargeable battery via charging station (15 m power adapter) |
| Maximum slope | 35% (20°) for mowing |
| Maximum working area | 350 m of perimeter wire |
| Minimum corridor width | 1 meter |
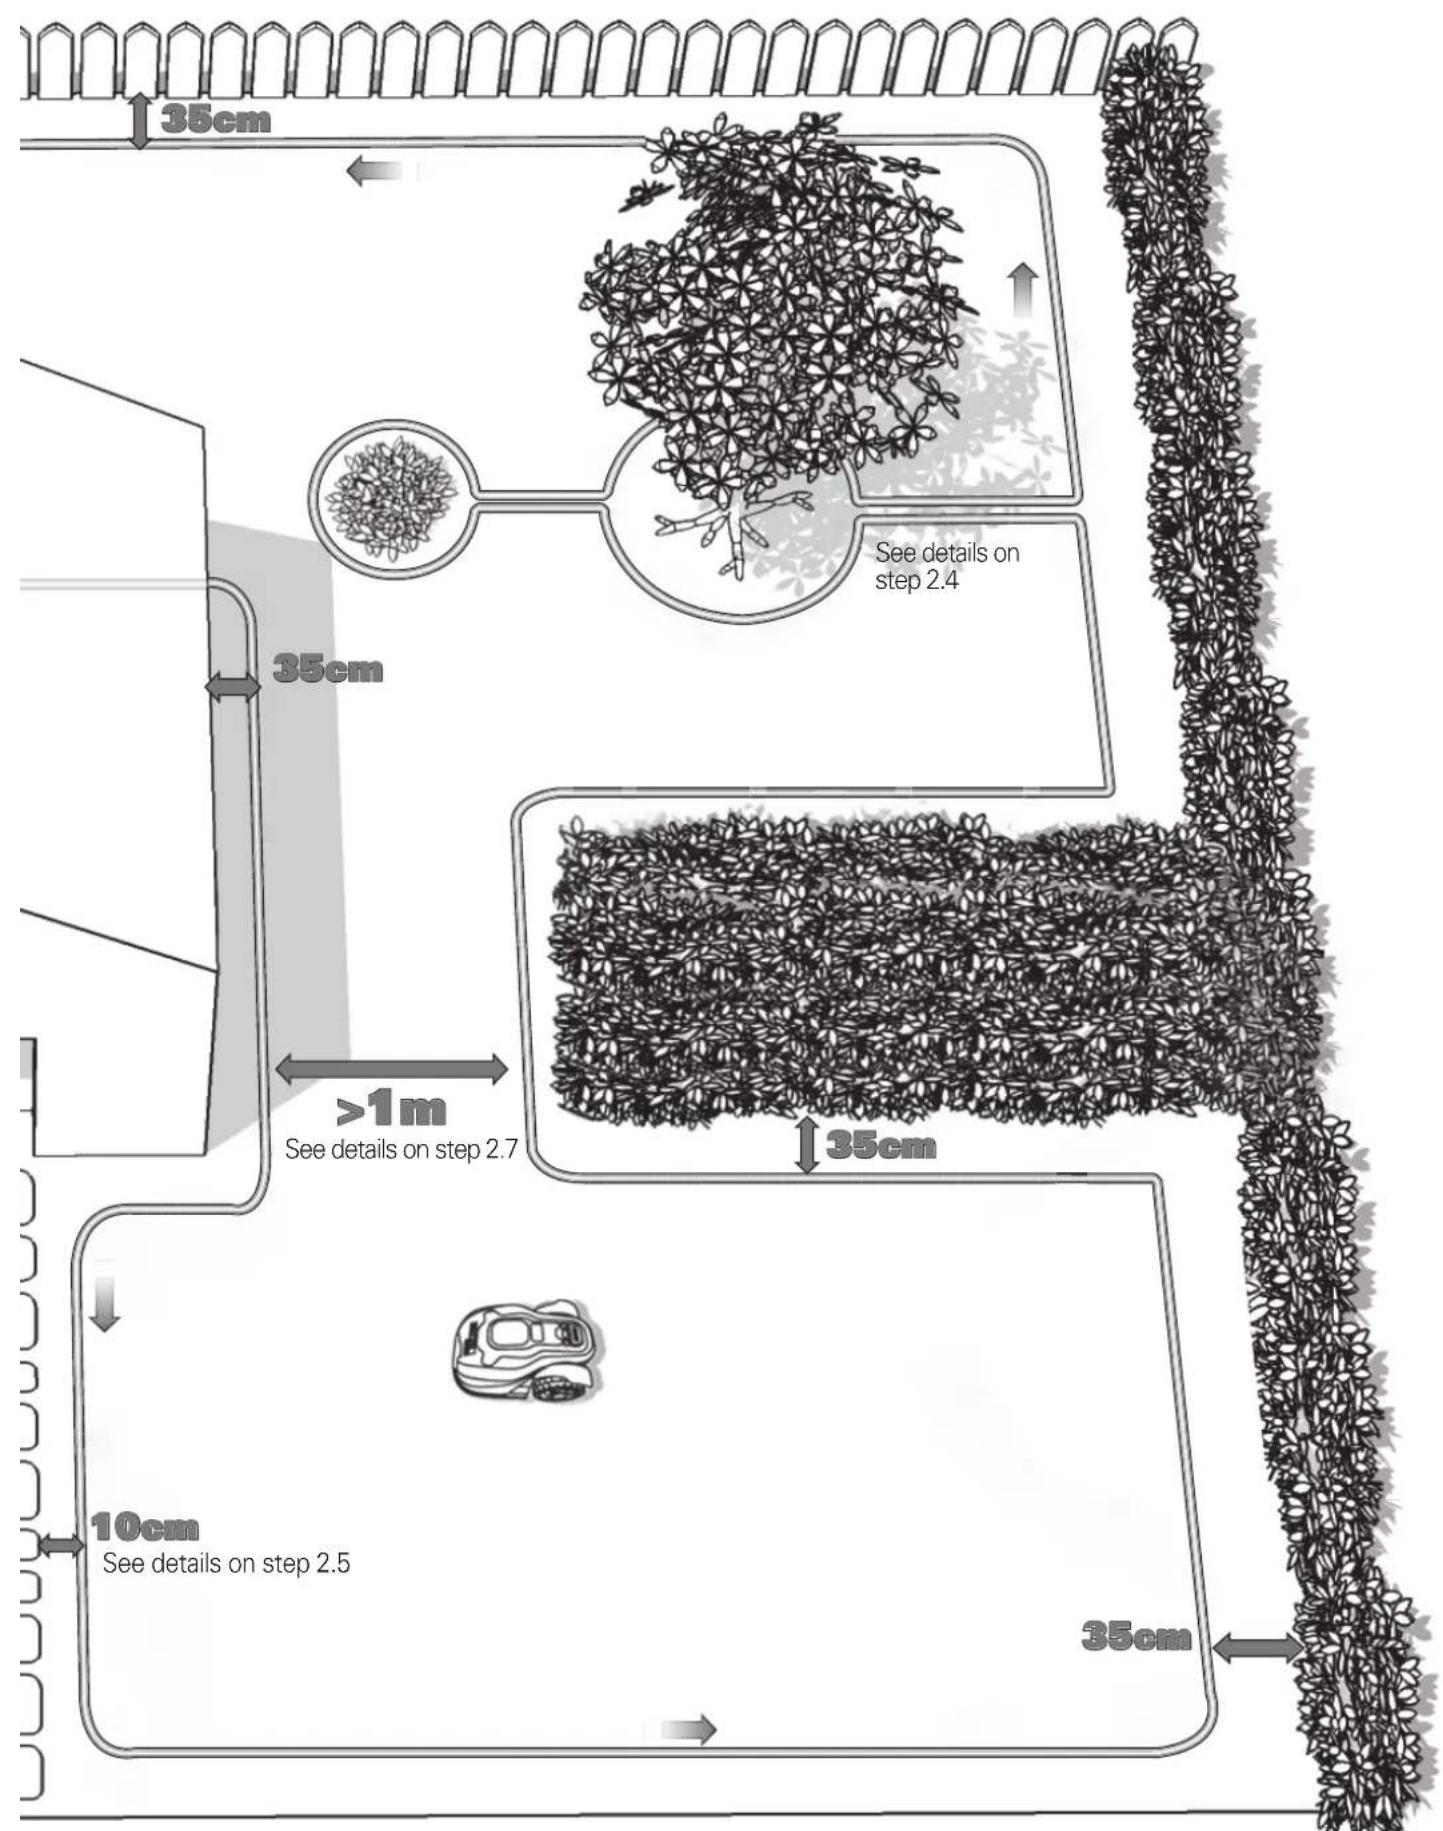
| Distance from boundary wire to edge | 35 cm (standard), 10 cm (safe obstacles) |
| Distance from boundary wire for gravel path | 35 cm |
| Number of blades | 2 cutting edges per blade, bidirectional rotating blades |
| Blade flipping frequency | Every month (if mowing daily) |
| Lifespan of a blade | Up to 2 months with daily use |
| PIN code | Customizable PIN code protection (default 0000) |
| Safety sensors | Tilt sensors stopping blades when lifted |
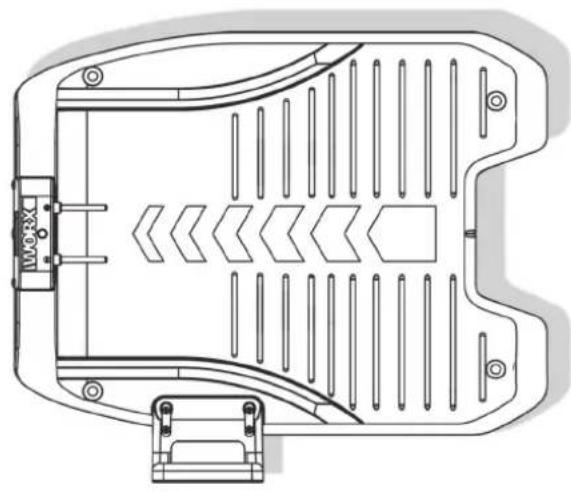
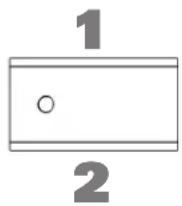
| Charging station | Base with IN/OUT terminals, fixing pegs |
| Package contents | Landroid M, charging station, pegs, spare blades, wire spool, stakes, adapter, hex key, installation guide, distance gauge |
| Maintenance | Regular cleaning of grass deposits, blade sharpening, winter storage with charged battery |
| Warranty | Warranty terms included in the package |
Frequently Asked Questions - Turbine WG546 WORX
User questions about Turbine WG546 WORX
0 question about this device. Answer the ones you know or ask your own.
Ask a new question about this device
Download the instructions for your Blower in PDF format for free! Find your manual Turbine WG546 - WORX and take your electronic device back in hand. On this page are published all the documents necessary for the use of your device. Turbine WG546 by WORX.
USER MANUAL Turbine WG546 WORX
How to install your Android®M
4
EN
The installation of the Android®M is easy. Depending on the size of your garden, the entire process only takes a short amount of time. If you are like us, you hate wasting your time to mow your lawn. The Android®M will prove to be a great investment, providing you with years of lawn care. You can watch the installation demo video at www.worxAndroid.com.
The Android®M loves to mow
It is designed to mow often, maintaining a healthier and better looking lawn than ever before. Depending on the size of your lawn, the Android ^®M may be programmed to operate at any time or frequency with no restrictions. It is here to work for you.
Preparation
In the box
Landroid®MCharging base
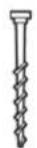
Base fixing nails

Spare blades
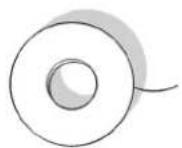
Boundary wire reel
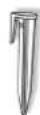
Wire pegs
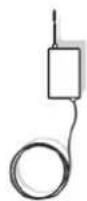
Power Adaptor

Owner's manual

Installation guide

Hex key

Distance gauge

Programming and trouble shooting guide

Warranty statement
From your shed
Scissors Hammer
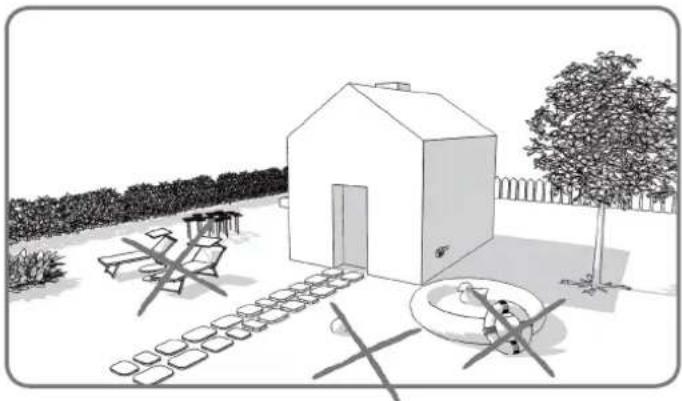
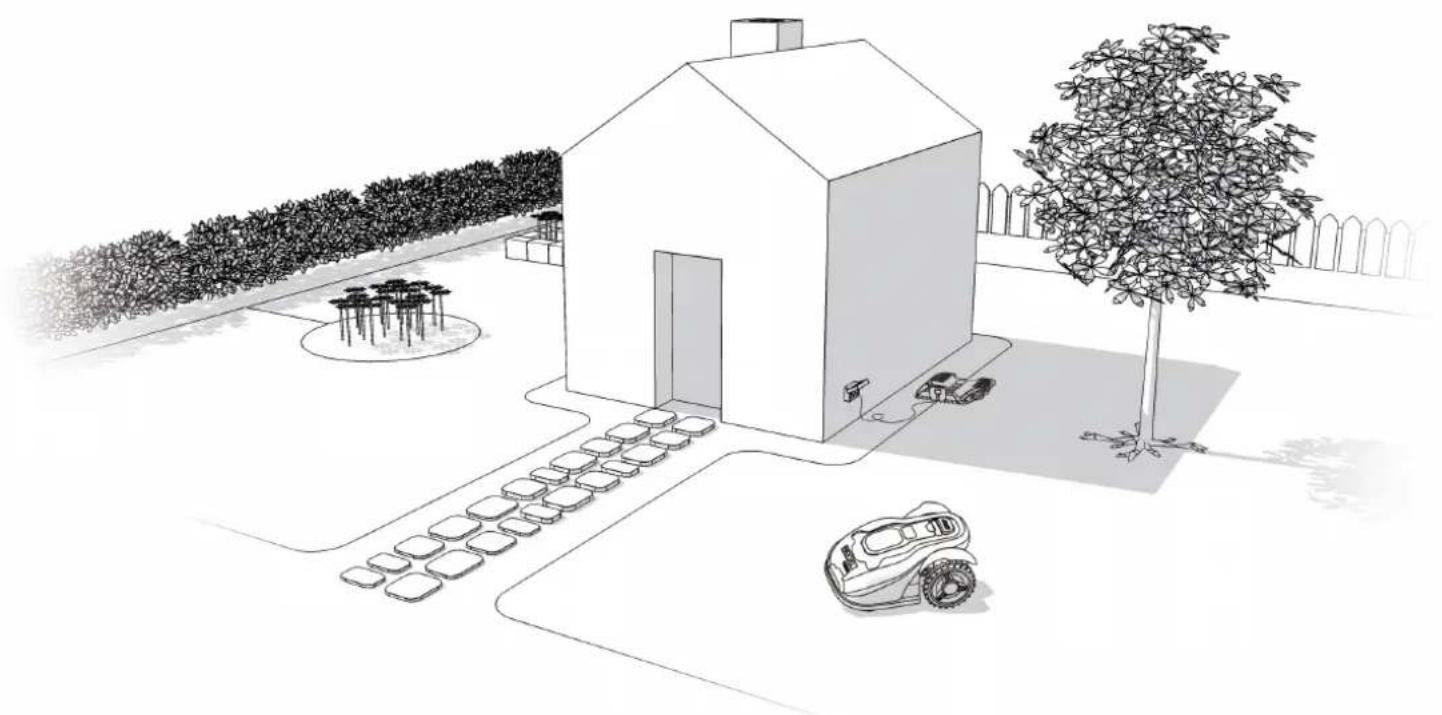
Android®M's new home-your garden
Let's start by having a closer look at Android®M's new home—your lawn—highlighting the areas where it can safely go and areas it's best for Android®M to avoid.
Obstacles that can be hit
When hitting any obstacle that's rigid, stable and taller than 15cm—such as a wall or a fence—your Landroid®M will simply stop and re-direct away from the obstacle.
Stones
Stones that are heavy enough not to be moved by your Landroid®M can be safely hit. However, if any stone has an inclined surface that your Landroid®M can climb, you should either remove it or exclude it from the working area.
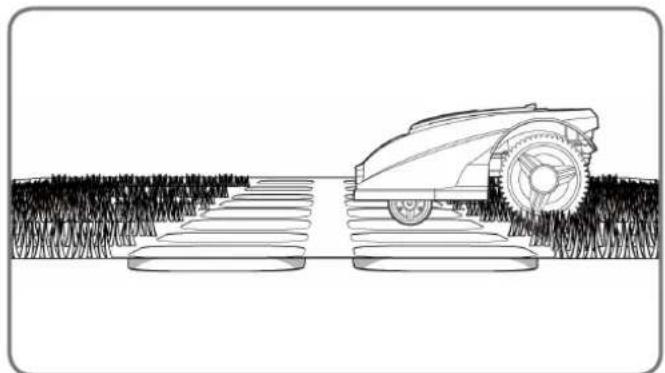
Driveways
If your driveway is level with your lawn, without any protruding surface, the Landroid®M can freely run over it. If you'd like the Landroid®M to avoid it, then only a 10cm* space between the Boundary Wire and the driveway is needed.
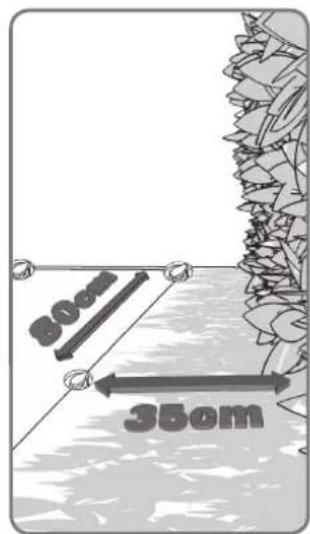
If it's covered with gravel, you should not allow the LandroidM to travel over it, using the distance gauge for spacing in this case, keeping a 35cm^* space between the boundary wire and the driveway.
- This is the recommended distance. Use the provided distance gauge to ensure proper installation.

Flowerbeds, ponds, pools...
You certainly don't want your Android to mow your flowers, or fall into the water. These areas should be avoided.
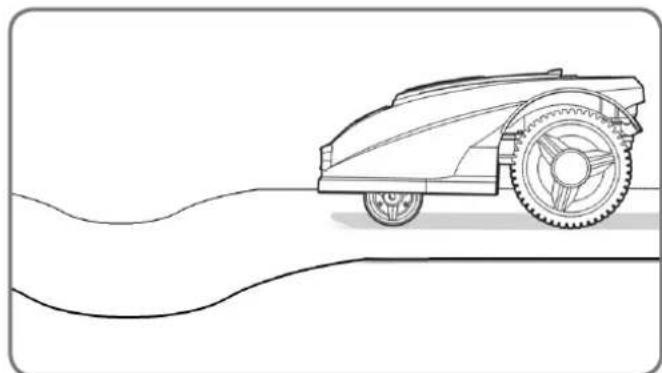
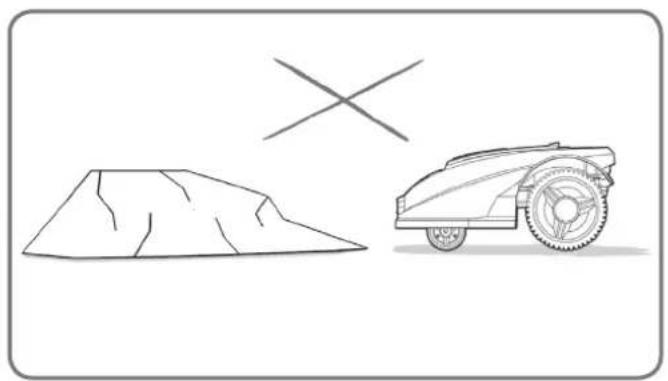
Depressions and bumps
In the case of large bumps or dips, please consider if the blades could touch the ground; if this is the case, either make the inclines smoother or exclude those areas from your Android®M's operation.
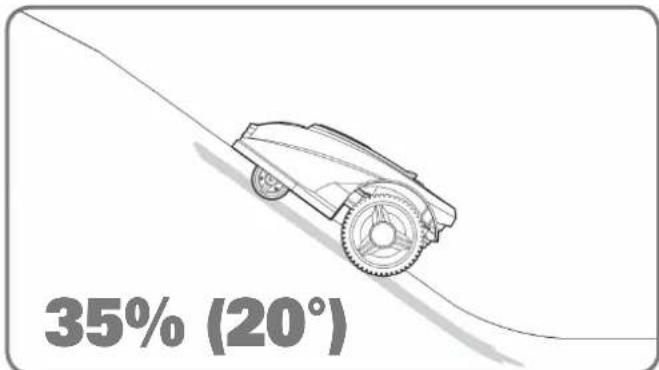
Slopes
Your Android®M has the ability to safely climb slopes up to 35% (20^) , so just avoid anything steeper than this.
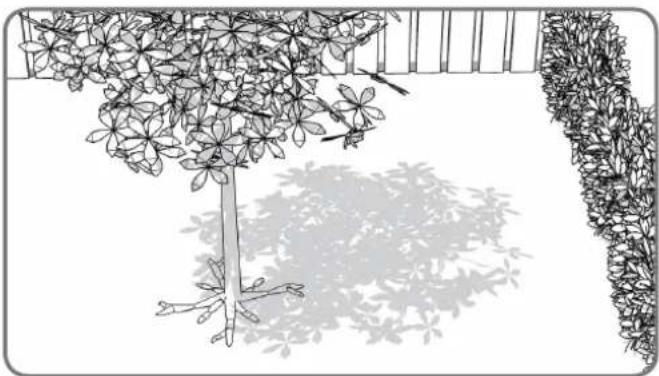
Trees
If there are roots emerging from the ground, these areas should be avoided in order not to damage the roots.
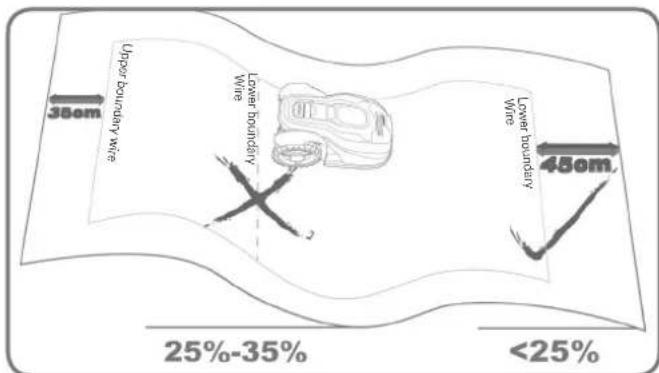
Placement of Boundary Wire on slopes
The Upper Boundary Wire should NOT be placed on slopes steeper than 35% (20^) . The Upper Boundary Wire should have a distance of at least 35cm between any obstacles. The Lower Boundary Wire should NOT be placed on slopes steeper than 25% (15^) . The Lower Boundary Wire should have a distance of at least 45cm between any obstacles when it is positioned on a slope that is 25% .
Installation
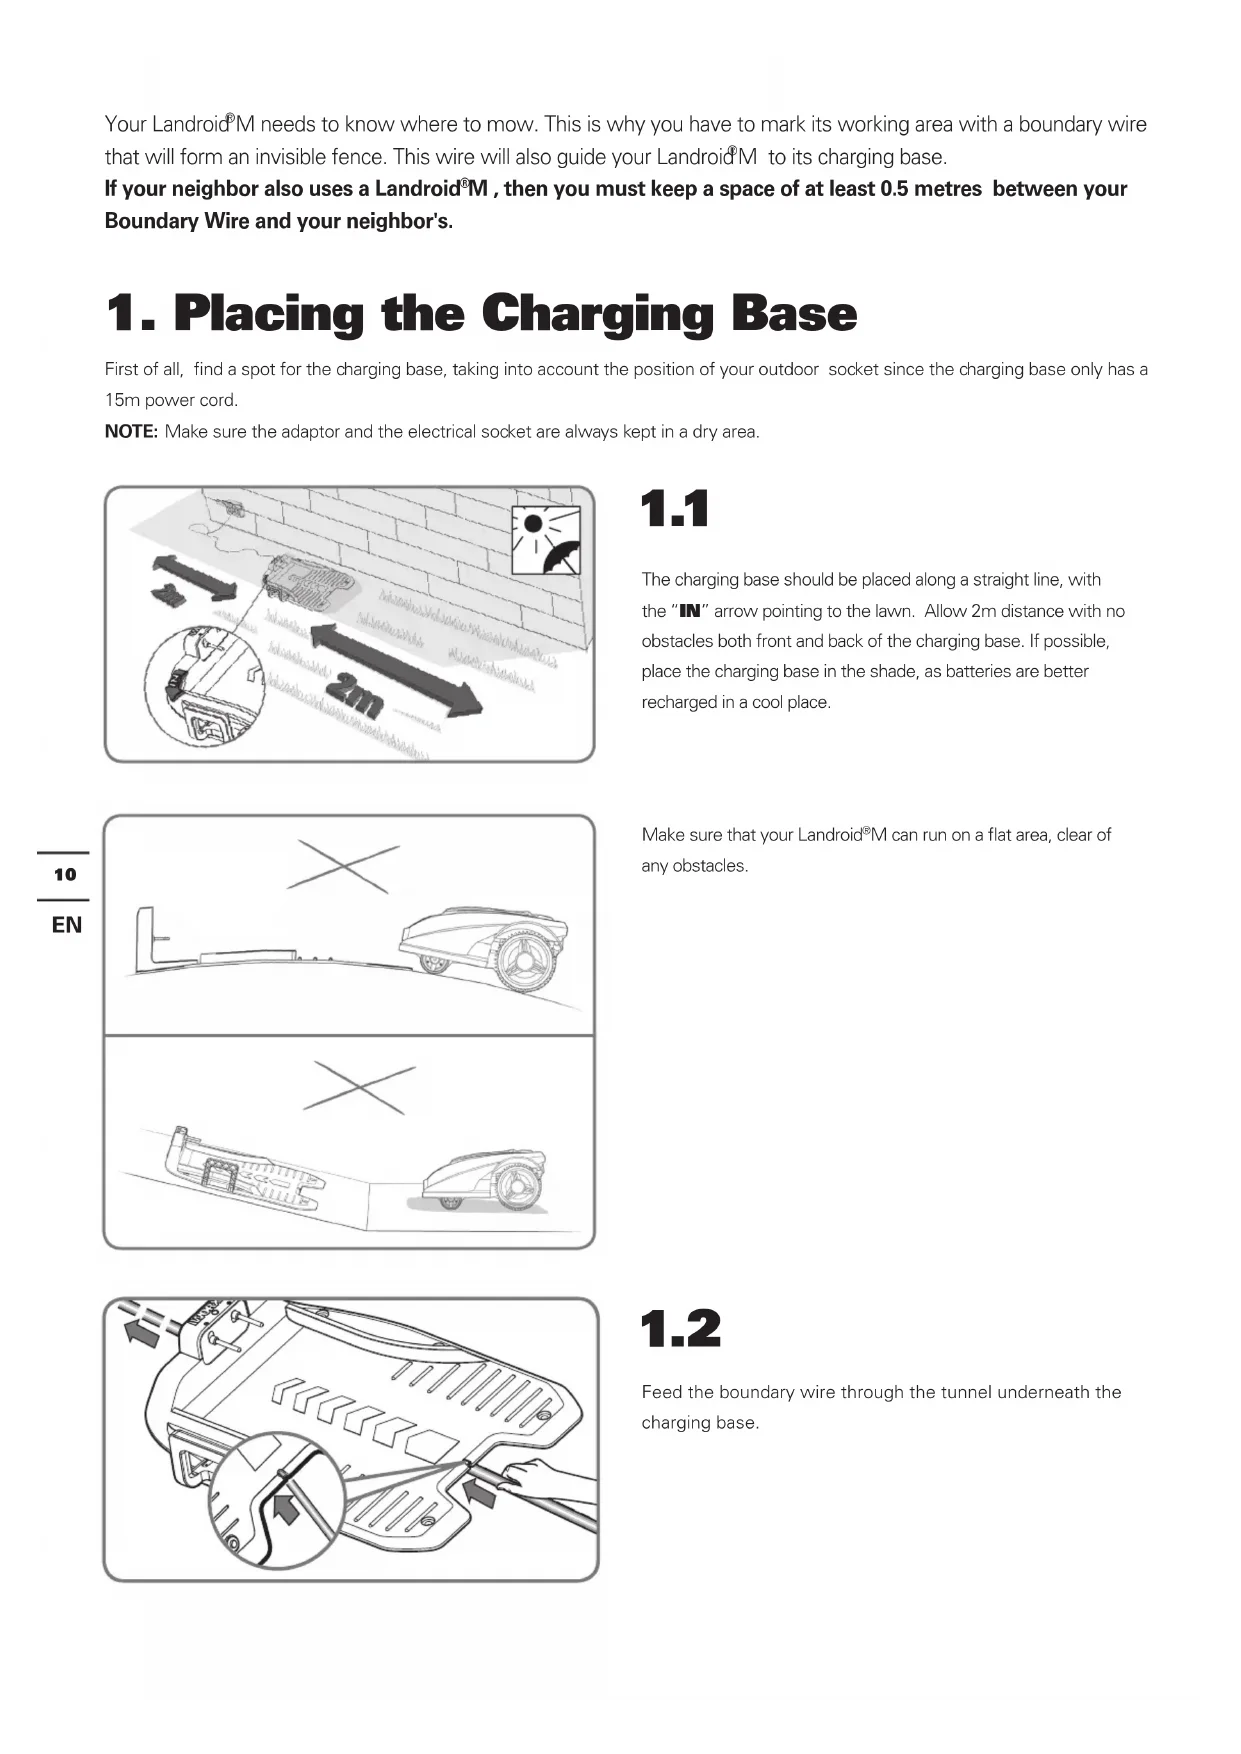
Your LandroidM needs to know where to mow. This is why you have to mark its working area with a boundary wire that will form an invisible fence. This wire will also guide your LandroidM to its charging base.
If your neighbor also uses a Android M, then you must keep a space of at least 0.5 metres between your Boundary Wire and your neighbor's.
1. Placing the Charging Base
First of all, find a spot for the charging base, taking into account the position of your outdoor socket since the charging base only has a 15m power cord.
NOTE: Make sure the adaptor and the electrical socket are always kept in a dry area.
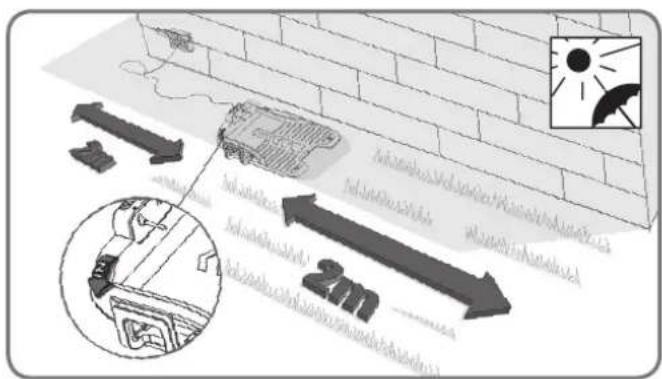
1.1
The charging base should be placed along a straight line, with the "IN" arrow pointing to the lawn. Allow 2m distance with no obstacles both front and back of the charging base. If possible, place the charging base in the shade, as batteries are better recharged in a cool place.
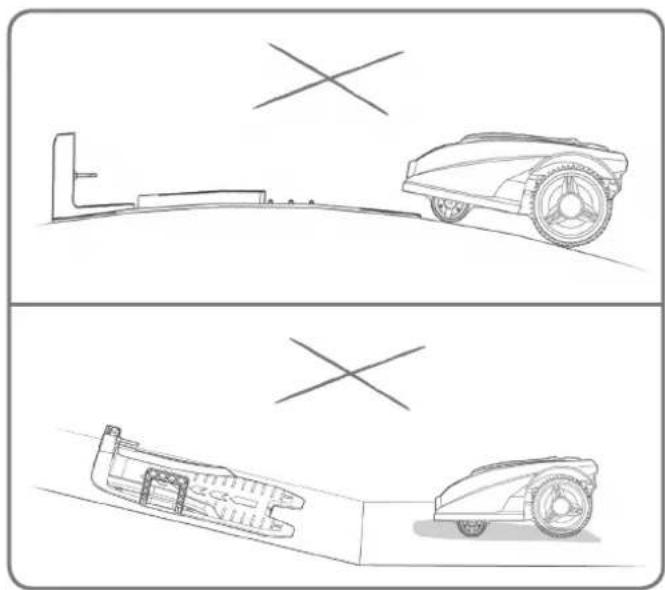
Make sure that your Android®M can run on a flat area, clear of any obstacles.
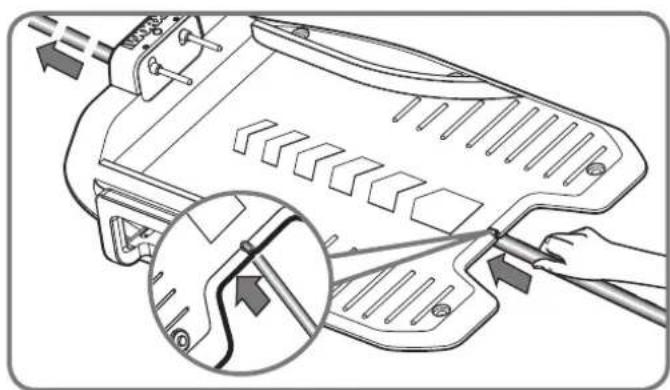
1.2
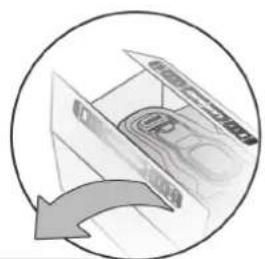
Feed the boundary wire through the tunnel underneath the charging base.
2. Pegging your boundary wire
When pegging the boundary wire for the first time, it is recommended to use a normal lawn mower or a grass trimmer to cut the grass along the boundary. Then the wire can be laid as close as possible to the ground to prevent the Android®M accidentally cutting the wire. The boundary wire is powered with a very low voltage so that it is totally safe to people beings and pets.

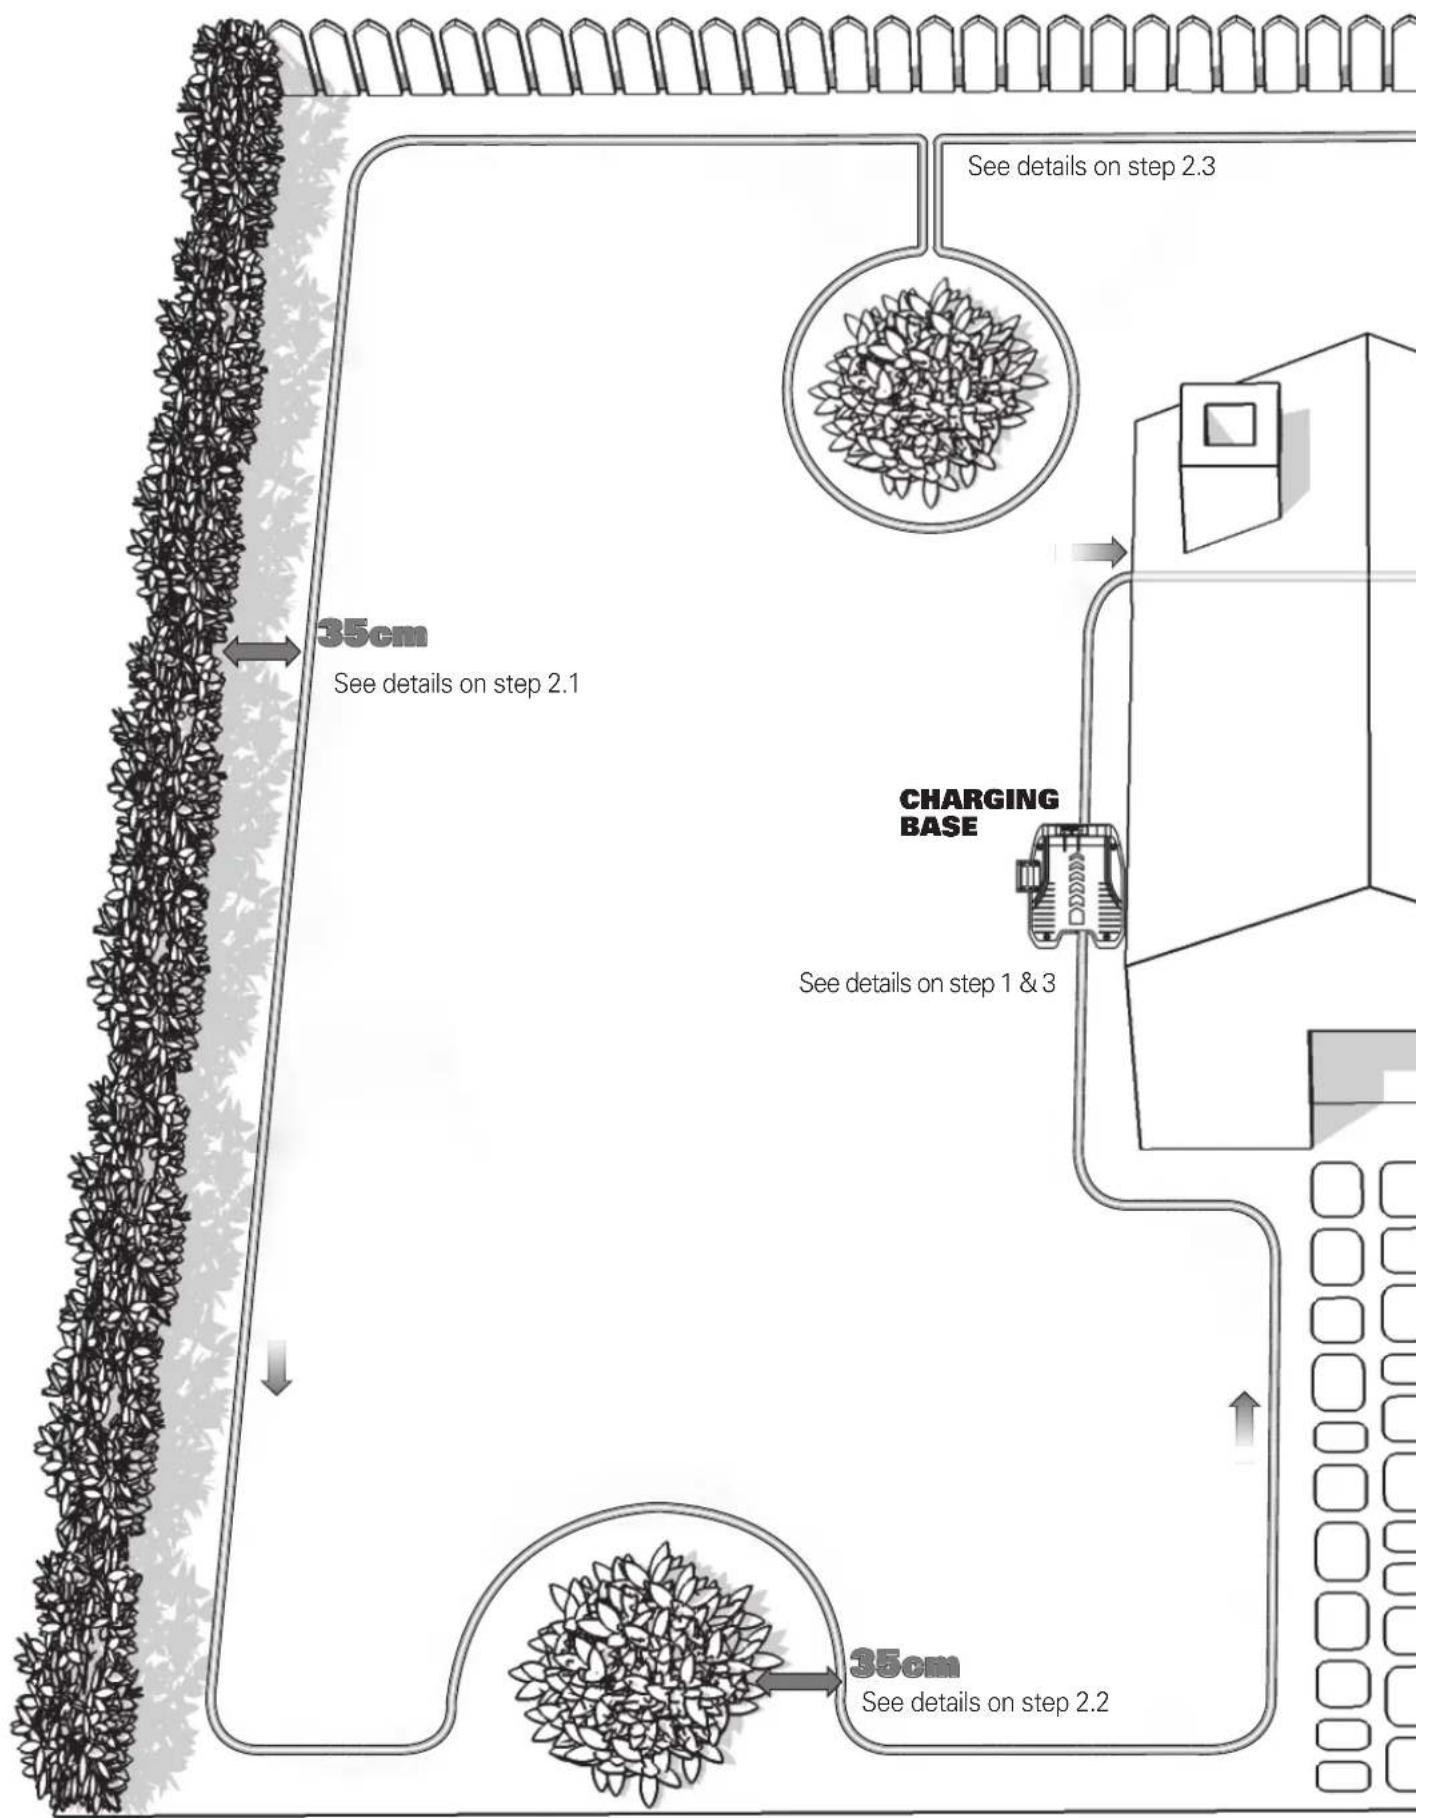
2.1
When laying the boundary wire, use the distance gauge to keep a 35cm^* space between the wire and the boundary. Each wire peg should be placed around 80cm apart. Use the provided distance gauge to ensure proper installation.
NOTE: The maximum permitted length for the boundary wire is 350m.
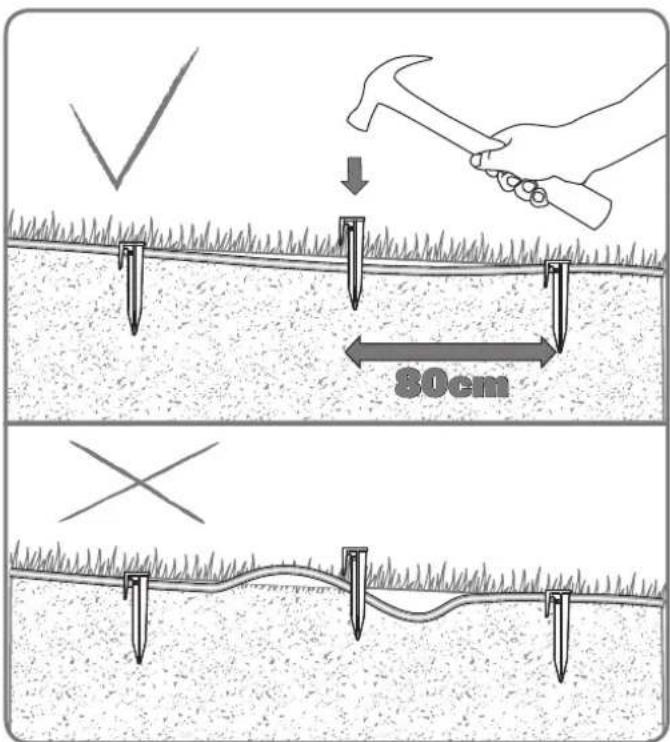
NOTE: Keep the boundary wire straight and tight between the pegs, there should be no slack wire between the pegs.
2.2
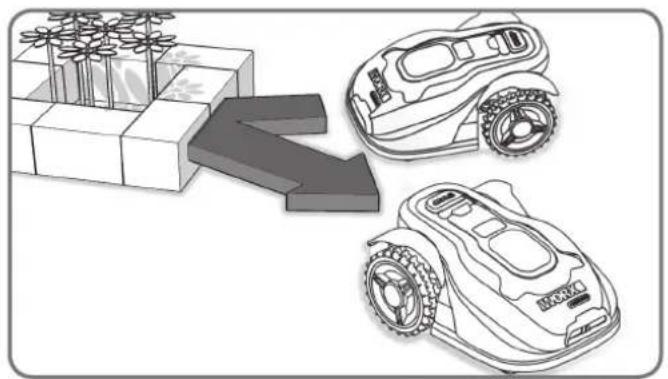
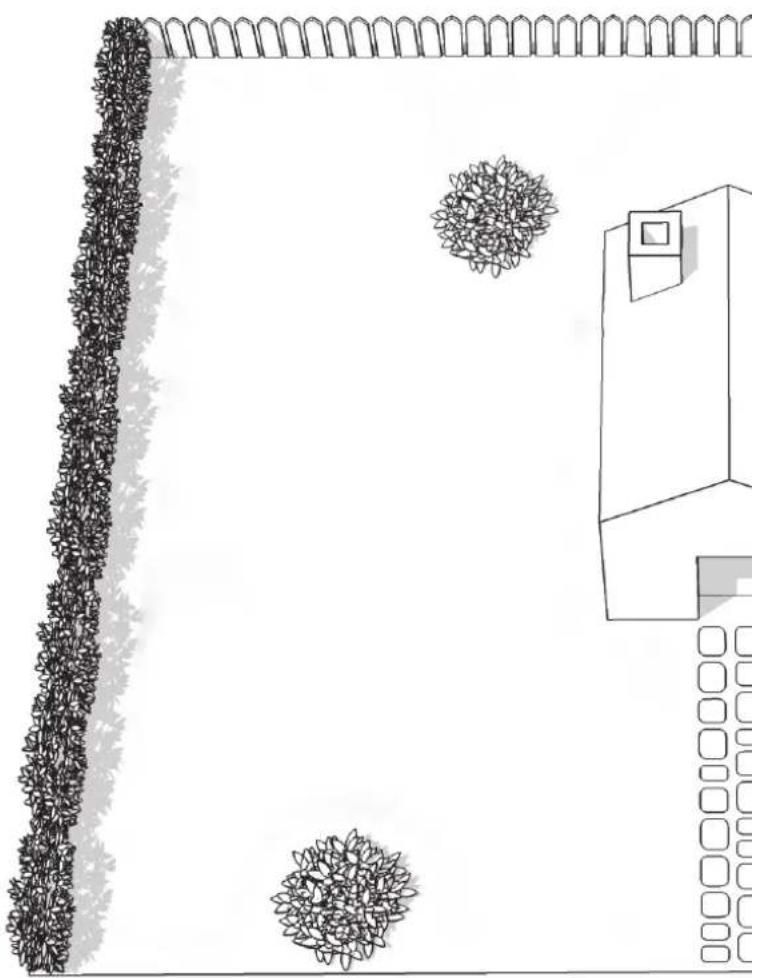
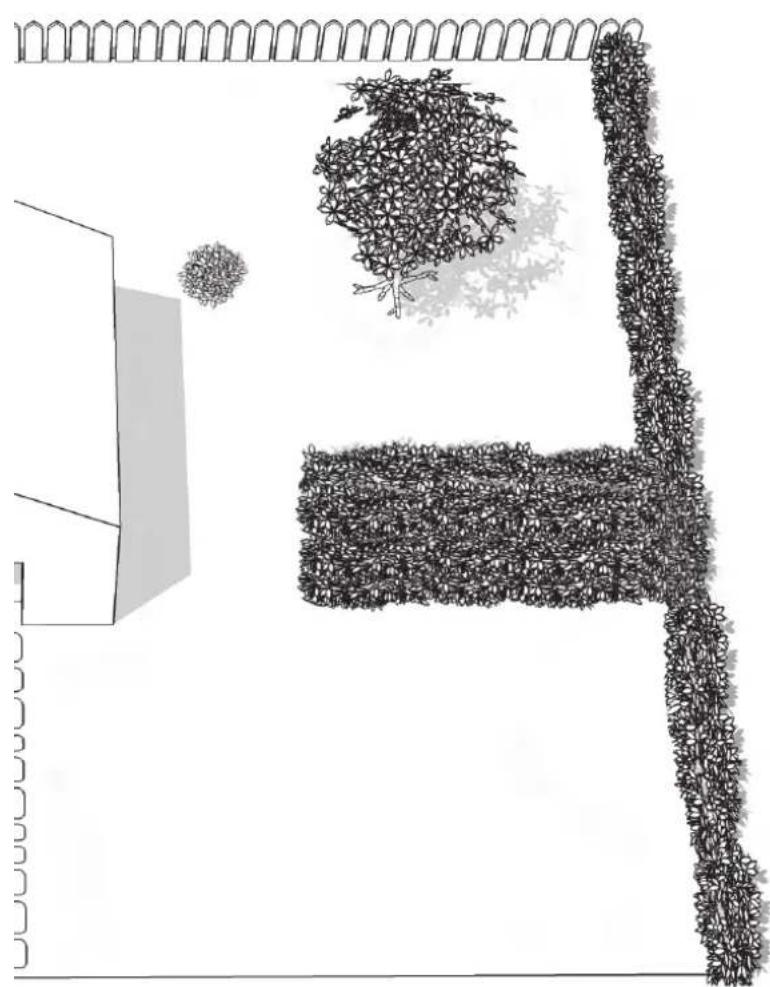
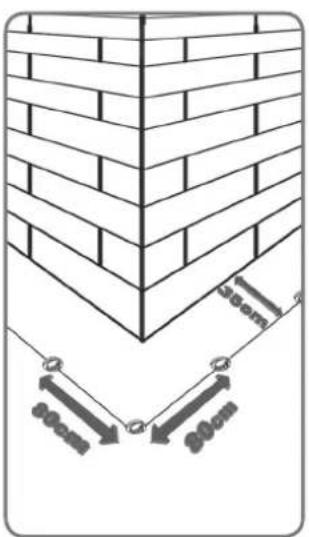
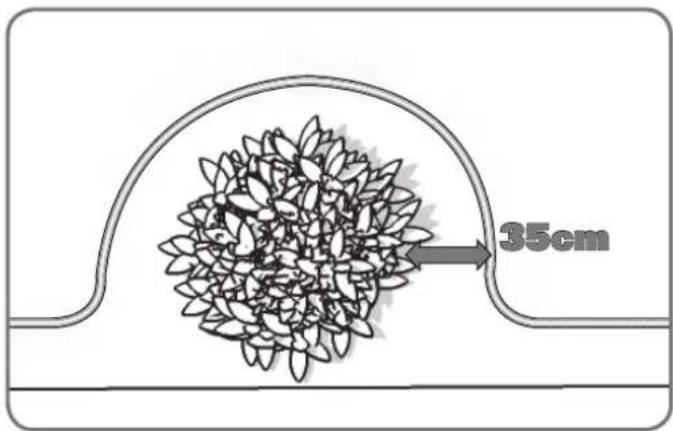
A feature, such as flowers or shrubs that are close to the mowing boundary, should be part of the boundary as shown in the picture.
2.3
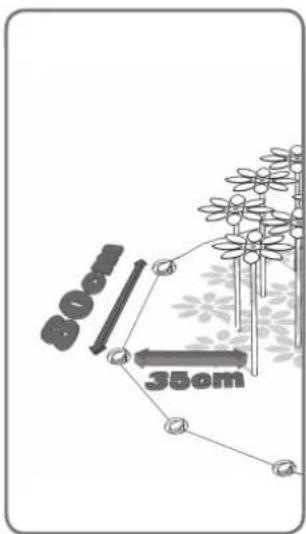
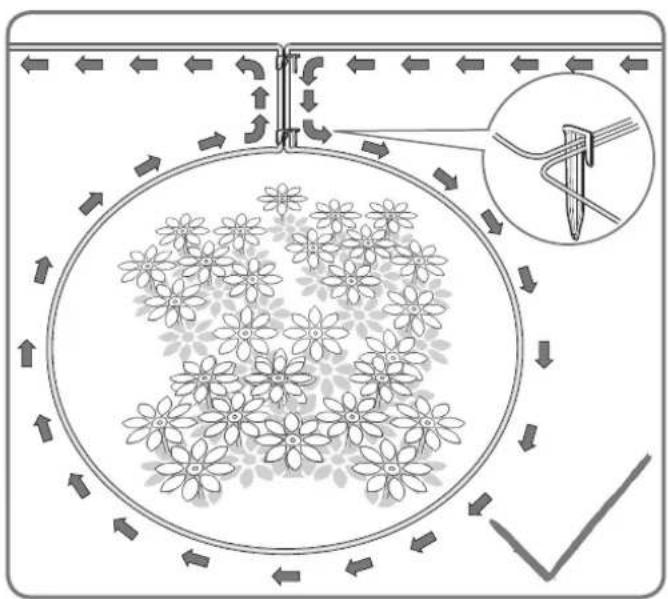
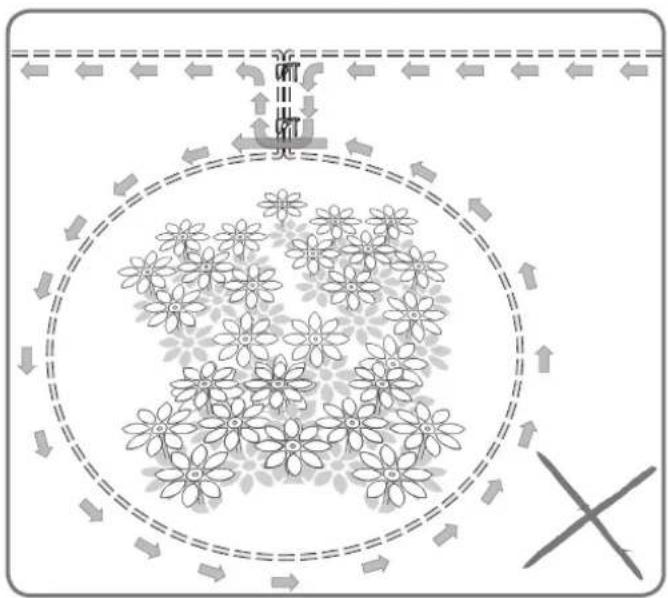
If there is an island that sits inside your lawn where you don't want Landroid®M to go, please follow the path as shown in the picture to peg your wire.
The wire should run from the perimeter to outline the defined island and then return back to the perimeter. The boundary wire between the island and perimeter should be laid close together and held in place by the same wire peg. During operation, the Landroid®M will be able to freely pass over this part of the wire.

2.4
In the case of two islands that are close to each other, it would be convenient to lay out the wire as illustrated in the picture. The Android®M can travel freely over the boundary wire in between the islands and the mowing boundary.
2.5
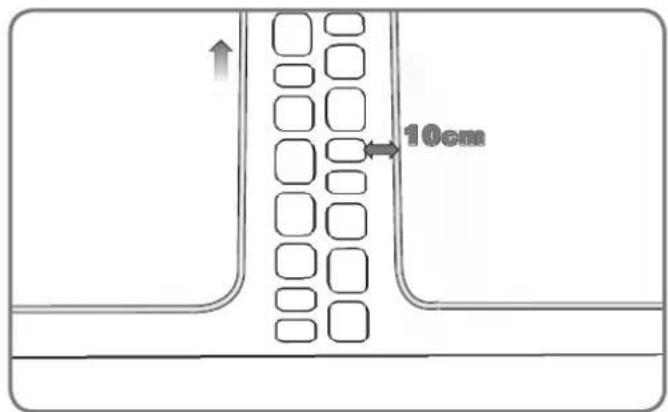
In the case of an obstacle that is level with ground and safe for the Android®M to run over, such as a driveway or path, then only a 10cm^* space is needed.
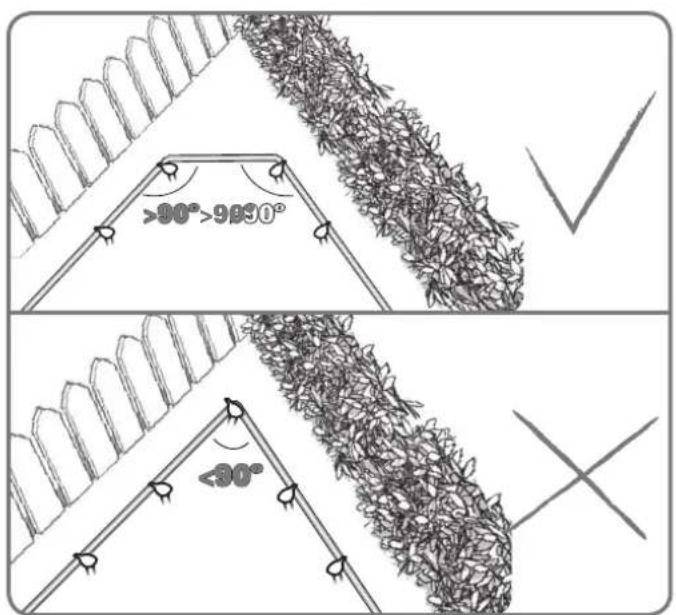
2.6
Ensure the Boundary Wire is perfectly straight in each corner, and the angle of boundary wire is bigger than 90^ .
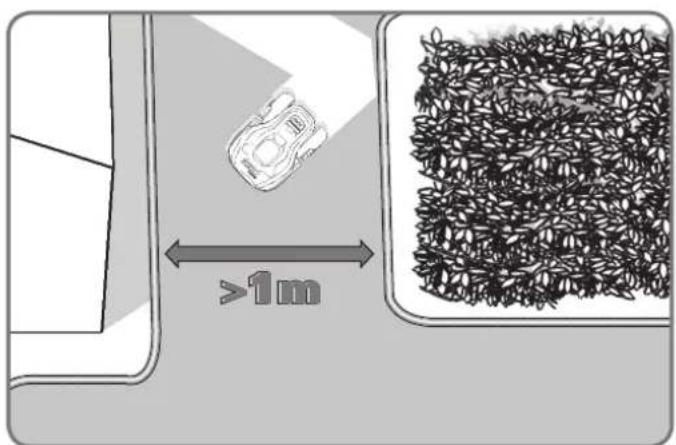
2.7
If your lawn has two or more separate areas connected to each other by a corridor, it should be at least 1 metre wide. If the corridor is too narrow, please pick your Landroid®M up and bring it to the other lawn. Landroid®M will mow this lawn without problem, but you have to bring it back to the charging base when the battery runs out.
3. Connect the base to the boundary wire
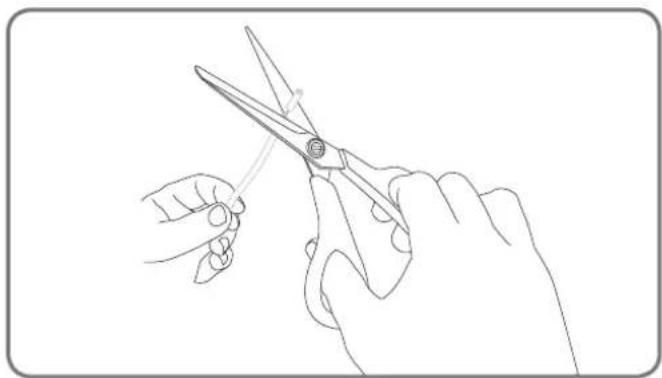
3.1
Cut the end of the wire to a length that's appropriate convenient for reaching the clamps.

NOTE: Too long redundant wire may cause the signal problem. Strip the two ends of the wire.
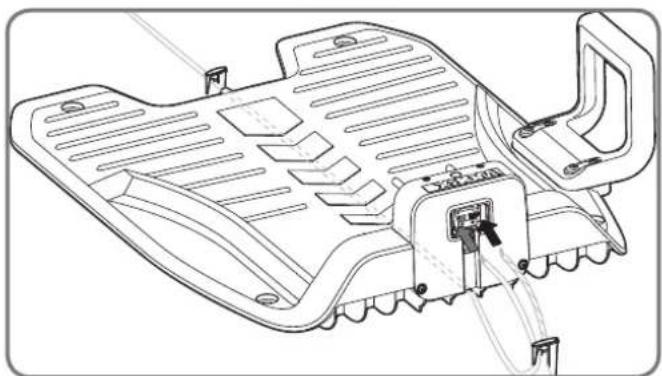
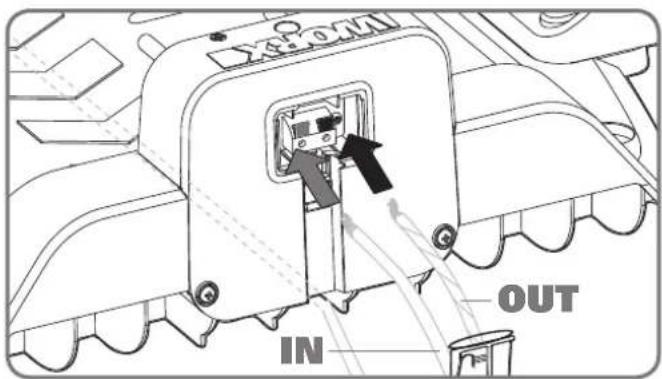
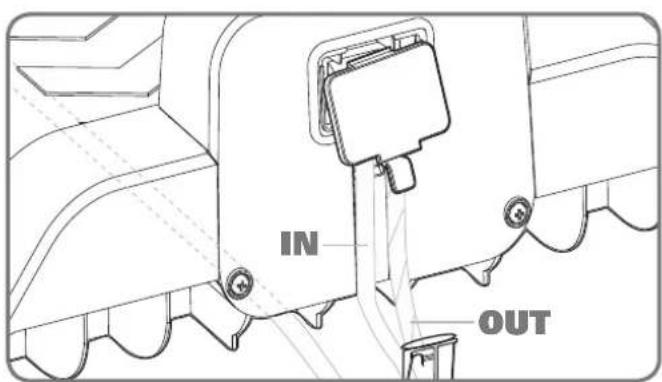
3.2
When connecting to the charging base there is an IN wire and an OUT wire, as shown. Connect the IN-wire to the red clamp of the charging base and the OUT-wire to the black clamp. Then close the cover.
NOTE: Please fix the boundary wire around the charging base firmly with the wire pegs.
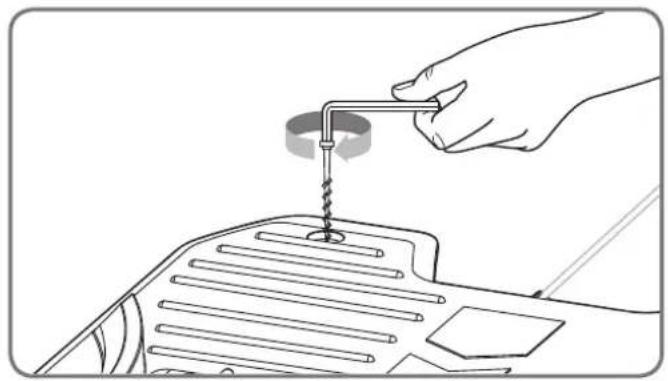

3.3
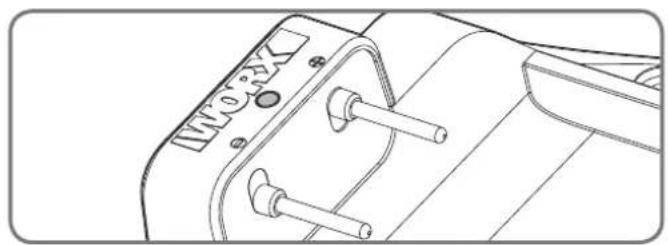
You can now permanently fix the charging base on the ground by pressing the supplied Base Retention Pegs with the supplied Hex key.
NOTE: Make sure the IN-wire is running straight underneath the center of the charging base.
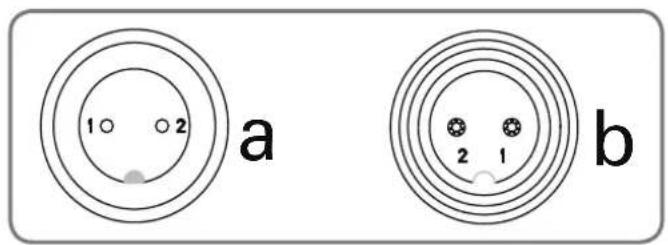
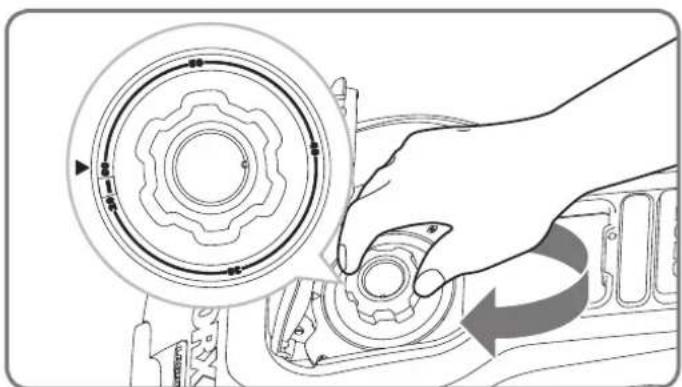
3.4
Connect the power cord to the adaptor and then to the AC electrical socket, the LED on the charging base will turn on. When connecting, align the notch on the power cord connector (a) with the groove on the adaptor connector (b). In case the power cord is within the working area, you may bury it as needed.
Check the LED status to make sure the connection is OK.
| LED light display Status Action | ||
| Green light on Boundary wire is connected successfully; fully charged | Boundary wire is connected in wrong direction. | / |
| Green light on, while "outside working area" shown in the screen at the same time | Check and reverse two ends of boundary wire. | |
| Green light flashing Power supply is connected successfully, while the wire is connected unsuccessfully | Check and connect the wire again. | |
| Red light on Charging / |
4. Turn on and test the installation
This is the exciting part where you can turn your Android M on for the first time.
4.1
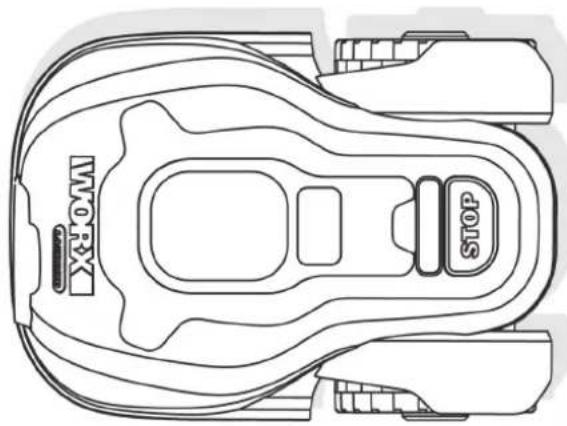
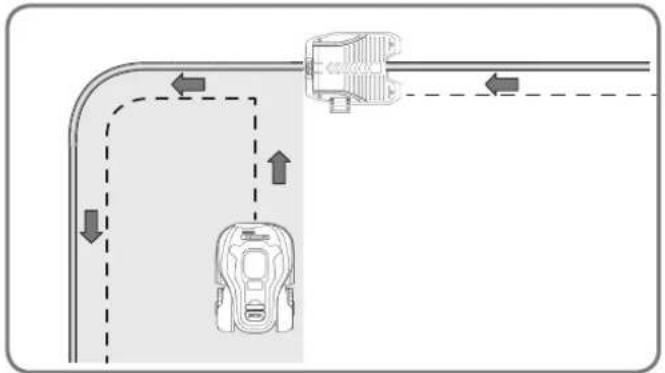
Place your Android M inside the working area, a few meters from the back of the charging base.
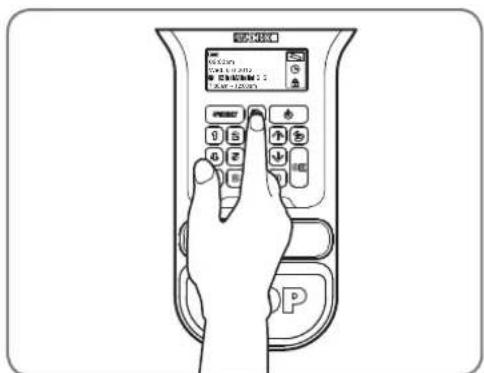
4.2
Open the panel cover, press power button, then input the default PIN 0000.
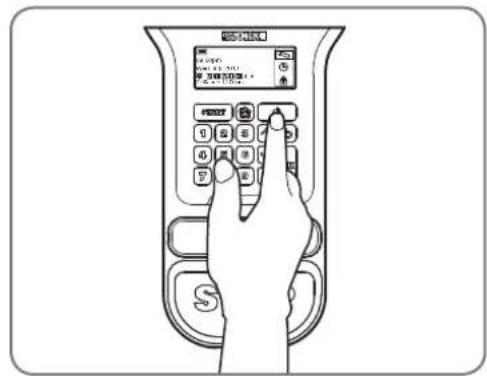
Press the key and close the control panel cover: your Android®M will now find its way to the charging base. Watch the Android®M as it returns to the charging base and modify the positioning of the boundary wire if necessary. When the Android®M successfully returns to the charging base, this means the installation has been successfully completed! Now your Android®M will start to fully charge.

If your LandroidM is outside its territory, it will not move and the display will indicate "outside working area" error. Just move it inside its territory and repeat step 4.2
If your Landroid M is inside its territory but the display says "outside working area" and the LED is on, it means you clamped the boundary wire ends incorrectly. Just reverse them.
-
Your AndroidM should always remain switched on. If you ever need to turn it off, then make sure you place it within its boundary area before you switch it back on again.
-
Should your Android®M stop operating unexpectedly, just press its ON/OFF key to ON, correct the problems, press Start button and close the cover.
Programming
Having the installation finished, please refer to the Programming and Troubleshooting Guide included in the packaging to program the Android®M.
Ready to go?
The Landroid®M is designed for maintaining your grass at a perfect length during the season, but is not designed for deforesting a jungle. Before starting it for the first time,
- You should mow your lawn to the desired height.
- Make sure the operating area is clear of objects such as toys and branches...
- Adjust the cutting height to its maximum level for the first mow and then adjust to your preferred lawn grass height.
Next Spring, let your Landroid®M start mowing early, when the grass is still short, so that you can avoid a preliminary grass cut.
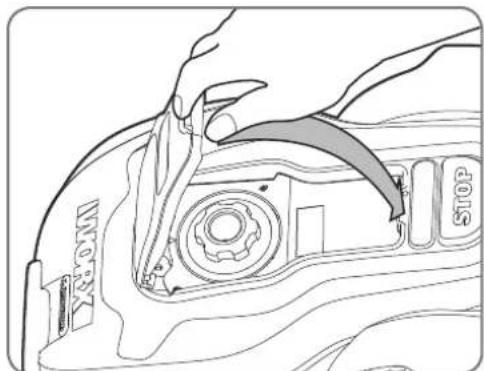
Keep it sharp

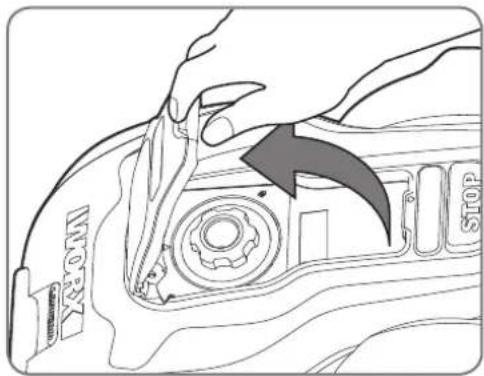
Always wear gloves when adjusting the blades.
The Android®M does not cut grass like other mowers. Its Blades are razor sharp on edges and spin in both directions for maximum cutting capacity. Each blade of your Android®M has 2 cutting edges. Depending on the frequency the Android®M mows your lawn, the cutting blades will need to be rotated periodically for a new cutting edge. If your Android®M is programmed to mow the lawn every day then the cutting blades will need to be rotated monthly for the best mowing results. Each cutting blade will last up to 2 months when it is programmed to mow every day. When the cutting blades are dull and worn out, they should be replaced with the spare blades provided with your Android®M. Spare blades are also available at your nearest WORKX retailer.
Maintenance
Your Android®M is engineered and built to stay outdoors regardless of adverse conditions. Just periodically clean its deck from grass clipping build ups and your Android®M will mow for you trouble-free, year after year, season after season. Don't wash Android®M or Android®M charger or charging station with high pressure water washers. This may cause damage to the machine, battery or charger.
Winter storage
Even though it is tough, we would recommend that you store your Android®M in your shed or garage during the Winter. Before storing it, give your Android®M a full recharge that will preserve its battery from damage. You can then disconnect the plug of the charging base. A good tip to prolong the life of the battery is to periodically re-charge it during the Winter. We'd also suggest that you cover the base with a nylon sheet in winter time.
Safety
Your Landroid®M is safe to people beings and pets. First of all, there's a large clearance between the outer border of the machine and the blades. Moreover, the tilt sensors will instantly stop the blades if the unit is lifted from the ground.
Security
Your Android®M is protected by a PIN code. This PIN code prevents unauthorized people from being able to use it. Once it's taken outside its territory, it will not be possible to re-start it by anyone who does not know the PIN code. This also means that you will not be able to start your Android®M if you forget your PIN code! We strongly recommend that you write your PIN code here for future reference. Even better, register your Android®M online at www.worxAndroid.com and record your PIN code there. You'll be able to access your PIN code online any time.
Write your PIN code here:
3 years 1mbed's warranty

3 years 1mbed's warranty

Garantía
Del cobertizo

Tijeras Martillo
3 years 1mbed's warranty

Prohlasei o zaruce
Z vašić dīlny

Nuzky Kladivo

117
CZ
Pred prvym zapnutim by ste mali,
3 years 1mbed's warranty

- How to install your Android®M
- The Android®M loves to mow
- Preparation
- In the box
- From your shed
- Android®M's new home-your garden
- Obstacles that can be hit
- Stones
- Driveways
- Flowerbeds, ponds, pools...
- Depressions and bumps
- Slopes
- Trees
- Placement of Boundary Wire on slopes
- Installation
- Placing the Charging Base
- 1.1
- 1.2
- Pegging your boundary wire
- 2.1
- 2.2
- 2.3
- 2.4
- 2.5
- 2.6
- 2.7
- Connect the base to the boundary wire
- 3.1
- 3.2
- 3.3
- 3.4
- Turn on and test the installation
- 4.1
- 4.2
- Programming
- Ready to go?
- Keep it sharp
- Maintenance
- Winter storage
- Safety
- Security
- Write your PIN code here:
- Del cobertizo
- Z vašić dīlny
Brand : WORX
Model : Turbine WG546
Category : Blower