300791 - Smart Home CSL - Free user manual and instructions
Find the device manual for free 300791 CSL in PDF.
| Brand | CSL |
| Model | 300791 |
| Product type | Remote-controlled power socket kit |
| Delivery contents | 3 remote-controlled sockets, 1 remote control, 1 instruction manual |
| Supply voltage | 230 V AC, 50 Hz |
| Maximum current | 16 (2) A |
| Maximum power | 3680 W |
| Frequency range | 433.050 - 434.790 MHz |
| Transmission power | -12.9 dBm |
| Range of remote control | Up to 30 m |
| Remote control power supply | 1 12 V battery type A23 (included) |
| Number of channels | 4 (1 to 4) |
| Status display | LED on each socket |
| Manual control | Yes, via ON/OFF button on the socket |
| Operating temperature | 0°C to 35°C |
| Usage | Indoor use only, dry rooms |
| Maximum altitude | 2000 m |
| Max relative humidity | 80% at 30°C, 50% at 40°C |
| Overvoltage category | CAT II |
| Pollution degree | 2 |
| Warranty | 2 years |
| Standards | Compliant with directives 2014/53/EU, WEEE 2012/19/EU |
Frequently Asked Questions - 300791 CSL
User questions about 300791 CSL
0 question about this device. Answer the ones you know or ask your own.
Ask a new question about this device
Download the instructions for your Smart Home in PDF format for free! Find your manual 300791 - CSL and take your electronic device back in hand. On this page are published all the documents necessary for the use of your device. 300791 by CSL.
USER MANUAL 300791 CSL
ENG: Latest information, drivers, user manuals and data sheets can be found at www.ganzeinfach.de in our download area.
Thank you for choosing a BEARWARE product. Please read the following user manual carefully so as to get the most from the product you have purchased.
1. Scope of delivery
- 3 wireless sockets
Remote control - User manual
2. Technical data
| Electric voltage 230V AC 50Hz | |
| Maximum current 16 (2)A | |
| Maximum power 3680 W | |
| Remote control • requires a 12V battery | of type A23 (included with the supply) • up to 30m range |
| Frequency range 433.050 - 434.790 MHz | |
| Transmitting power -12.9 dBm | |
| Operating temperature 0-35° Celsius | |
| Features • programmable channels | • several wireless sockets possible per channel • LED status indicators • all the wireless sockets can be switched on / off simultaneously |
3. Functions
The BEARWARE wireless switch set allows you switch your electronic devices on and off from a distance using the remote control. This not only saves time, effort and energy costs, but also reduces the risk of fire due to electronics items that are switched on constantly. The various channels of the remote control can be customised to your requirements as described below.
4. Initial use
Remove the wireless sockets and the remote control from the packaging. Insert the batteries into the battery compartment at the back of the remote control.
Now plug the first wireless socket in a properly installed earthed socket at your home and wait till the LED starts flashing.
Note: If the LED does not start flashing, press the "ON-OFF" button on the wireless socket for 3 seconds until the display starts flashing.
A channel can now be assigned to the wireless socket. To do this, press one of the "ON" buttons on the channels 1-4 on the remote control. Then the LED of the wireless socket starts flashing at brief intervals and subsequently goes out. The wireless socket has now been assigned to that channel, whose "ON" button you are using on your remote control.
Repeat the procedure with the two other wireless sockets of the set. The devices are then ready.
5. Switching the wireless sockets on and off
You can choose to control the wireless sockets of one channel or all the devices together.
Press the "ON" button on the remote control of one of the channels 1-4 to activate the wireless sockets of the corresponding channel. The associated devices are switched off by pressing the "OFF" button.
If the LED on a wireless socket is glowing continuously it means that it is switched on. If the LED is continuously inactive, then the same applies to the socket.
To control all the wireless sockets at the same time, you can use the "ALL" buttons on the remote control.
6. Re-assigning the channels
To assign a new channel to a wireless socket, please press the "ON-OFF" button of the desired socket for 3 seconds. Then, the LED starts to flash.
A channel can now be assigned to the wireless socket. To do this, press one of the "ON" buttons on the channels 1-4 on the remote control. Then the LED of the wireless socket starts flashing at brief intervals and subsequently goes out. The wireless socket has now been assigned to that channel, whose "ON" button you are using on your remote control.
Note: If you want to assign the channels for all the sockets, press and hold the "ALL OFF" button on the remote control for 3 seconds. All the LEDs of the wireless sockets start to flash.
7. Ambient conditions
| Altitude up to 2000 m | |
| Temperature 0°C to 35°C | |
| Relative humidity | • up to 30°C: maximum 80% • 30°C - 40°C: maximum 50% |
| Transient power surge CAT II | |
| Degree of soiling 2 |
There are no special ventilation requirements for this product. For safety reasons, ensure that the product is not covered by a blanket etc. once it is being used.
8. Warranty
The manufacturer provides a warranty of two years for this product with regards to workmanship and material. Repairs should only be carried out by an authorized customer service centre. The original sales document should be enclosed as proof.
The following are excluded from warranty: normal wear and tear, modifications, reworks, damage caused by carelessness, external influences, applications for which the product was not designed or products dismantled completely or partially.
9. Important tips
- Only suitable for indoor use
- Disconnected only when the plug is removed
- Do not connect in series
- Only for use in dry rooms
- The socket has to be installed near the device and should be easily accessible.
- Do not exceed the maximum specified electric power
- CAUTION! Not suitable for children under the age of 3, due to risk of suffocation caused by swallowing small parts.
10. Safety instructions and disclaimer
Please do not try to open the device to carry out repairs or modifications. Avoid contact with the mains voltage. Do not short-circuit the product. The device is not waterproof, hence please use it only in dry surroundings. Protect it from high humidity, water and snow. Do not expose the device to high temperatures.
Do not expose the device to sudden changes in temperature or strong vibrations, as this could damage the electronic components. Check the device for any damage before using it. The device should not be used if it was subject to impact or has been damaged in some other manner. Please comply with the local regulations and restrictions. Do not use the device for purposes other than those described in the user manual. This product is not a toy. Keep it out of the reach of children or mentally disabled persons.
Any repair or modifications to the device, which is not carried out by the original supplier will void any warranty and guarantee claims. The device should only be used by those who have read and understood this user manual. The specifications of the device may be changed without special prior notice.
11. Correct disposal of this product
In line with the European WEEE directive, electrical and electronic devices should not be disposed of along with domestic waste. According to the electrical and electronic equipment act (ElektroG), you are obliged (as a consumer) to return (free of charge) electrical and electronic devices to the manufacturer, the point of sale or public collection points at the end of their service life. The relevant local laws regulate the details in this regard.
12. Instructions for battery disposal
Within the EU, this symbol indicates that this product should not be disposed of with household waste. Used devices contain valuable materials that should be recycled to prevent harm to the environment or human health caused by uncontrolled disposal of waste. Please dispose your old devices via appropriate collection centres or send the device for disposal back to the place where you bought it. It will then be sent for recycling.
In conjunction with the sale of batteries along with the supply of devices that include batteries, the supplier is obliged to point out the following to the customer: The customer is legally obliged to return used batteries. He can return used batteries which the supplier offers or has offered as new batteries in his assortment free of charge to the supplier's dispatch warehouse (shipping address). The symbols shown on the batteries indicate the following: Pb = battery contains more than 0.004 percent lead by weight, Cd = battery contains more than 0.002 percent cadmium by weight, Hg = battery contains more than 0.0005 percent mercury by weight.
The symbol of the crossed-out dustbin means that the battery may not be disposed of in household waste.
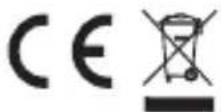
WEEE directive 2012/19/EU
WEEE Register no.: DE 67896761
The company WD Plus GmbH hereby certifies that the device 300791/20200312NB001 complies with the fundamental requirements and all other relevant stipulations of the directive 2014/53/EU. A complete conformity statement can be obtained from: WD Plus GmbH, Wohlenbergstraße 16, 30179 Hannover, Germany, https://www.ganzeinfach.de/