
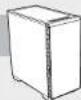
Carbide 400C - Desktop Computer CORSAIR - Free user manual and instructions
Find the device manual for free Carbide 400C CORSAIR in PDF.
| Product Type | ATX Mid-Tower Case |
| Brand | Corsair |
| Model | Carbide Series 400C |
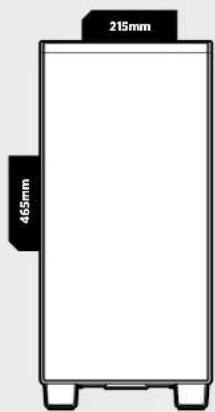
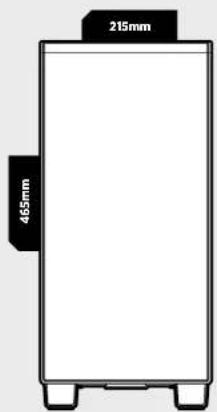
| Dimensions (L × l × h) | 425 × 215 × 465 mm |
| Weight | 7 kg |
| Material | Steel, acrylic side window |
| Supported Motherboard Form Factors | ATX, Micro-ATX, Mini-ITX |
| Fan Mounts | Front: 3x120 mm or 2x140 mm (1x140 mm included); Top: 2x120/140 mm; Rear: 1x120 mm (included) |
| Radiator Compatibility | Front: 280/360 mm; Top: 240 mm |
| Maximum Graphics Card Length | 370 mm |
| Maximum CPU Cooler Height | 170 mm |
| Maximum Power Supply Length | 200 mm |
| Front I/O Connectors | 2x USB 3.0, headphone jack, microphone jack, power and reset buttons |
| Storage Bays | 2x 3.5\" (with modular rails), 2x 2.5\" (tray-mounted) |
| Dust Filters | Yes, front and under the power supply |
| Side Panel | Acrylic window (400C) |
| PSU/HDD Cover | Modular removable in two parts |
| Maintenance and Cleaning | Regularly dust the filters and interior with a soft cloth. Use compressed air for hard-to-reach areas. |
| Safety | Rolled edges to prevent cuts. Fans protected by grilles. |
| Spare Parts and Repairability | Standard parts (fans, filters, screws). RMA via the Corsair website. |
| General Information | Direct Airflow Path design for efficient cooling. Ships with AF140L (front) and AF120L (rear) fans. |
Frequently Asked Questions - Carbide 400C CORSAIR
User questions about Carbide 400C CORSAIR
0 question about this device. Answer the ones you know or ask your own.
Ask a new question about this device
Download the instructions for your Desktop Computer in PDF format for free! Find your manual Carbide 400C - CORSAIR and take your electronic device back in hand. On this page are published all the documents necessary for the use of your device. Carbide 400C by CORSAIR.
USER MANUAL Carbide 400C CORSAIR
© 2015 Corsair Components, Inc.
All rights reserved. Corsair, the sails logo, and Carbide Series are registered trademarks of Corsair in the United States and/or other countries. All other trademarks are the property of their respective owners. Product may vary slightly from those pictured.
PN:49-001435 rev AC


CORSAIR
CARBIDE
SERIES
400
INSTALLATION GUIDEGUIDED INSTALLATION
Table of Contents Case Specifications
Congratulations: 5
Case specifications: 6
Accessory kit contents: 7
Case features: 8
Removing the Slide Panels: 9
Installing the Motherboard: 10
Installing HDDs: 10
Installing SSDs: 11
Installing the Power Supply: 11
Installing PCI-E/PCI Card(s): 12
Removing the Front Fascia: 12
Instaing the Front I/O Connectors: 13
Frequently Asked Questions: 14
Congratulations!
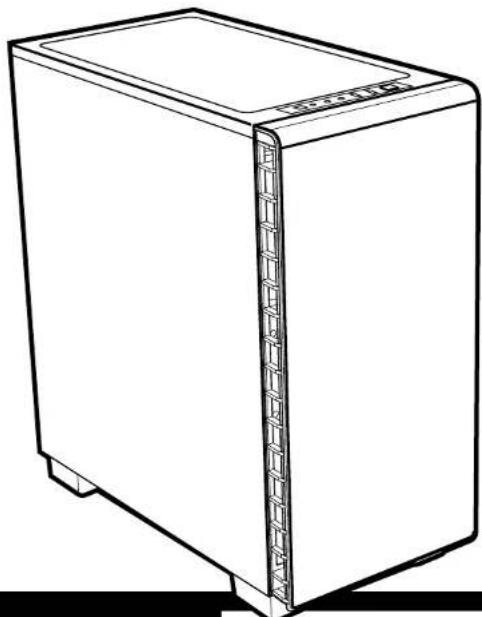
Thank you for purchasing the Carbide Series 400
Compact-ATX Mid-Tower PC Case.
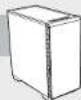
Carbide Series Clear 400C
With its sleek steel exterior and full side panel window, the 400C looks like nothing else. And that carries over to the inside of the case, too. A removable two-piece PSU and HDD cover conceals cables and wires to keep the interior neat and clean, and numerous tie downs and cutouts provide excellent cable routing. But it's not all about great looks - the Direct Airflow Path design of the 400C provides excellent cooling for your CPU and GPU, too. The 400C doesn't just look cool... it is cool.
Carbide Series Quiet 400Q
With its multi-layer fully sound damped panels and a streamlined interior, the Corsair Carbide Series 400Q is a compact and quiet ATX case with great cooling potential. Wires and drives are stowed away under a removable two-piece PSU and HDD cover. The Direct Airflow Path design ensures that fans don't have to work to get air through unused drive cages, but can gently direct air to your hottest components and keep things quiet and still cool.
Length: 425mm
Width: 215mm
Height: 465mm
Weight 7kg
Maximum GPU length: 370mm
Maximum CPU cooler height: 170mm
Maximum PSU length: 200mm
Fan locations:
Front: 2×140/3×120mm
Rcar: 120mm
Radiator compatibility:
Front: 280mm/360mm
Top: 240mm
CARBIDE SERIES 400
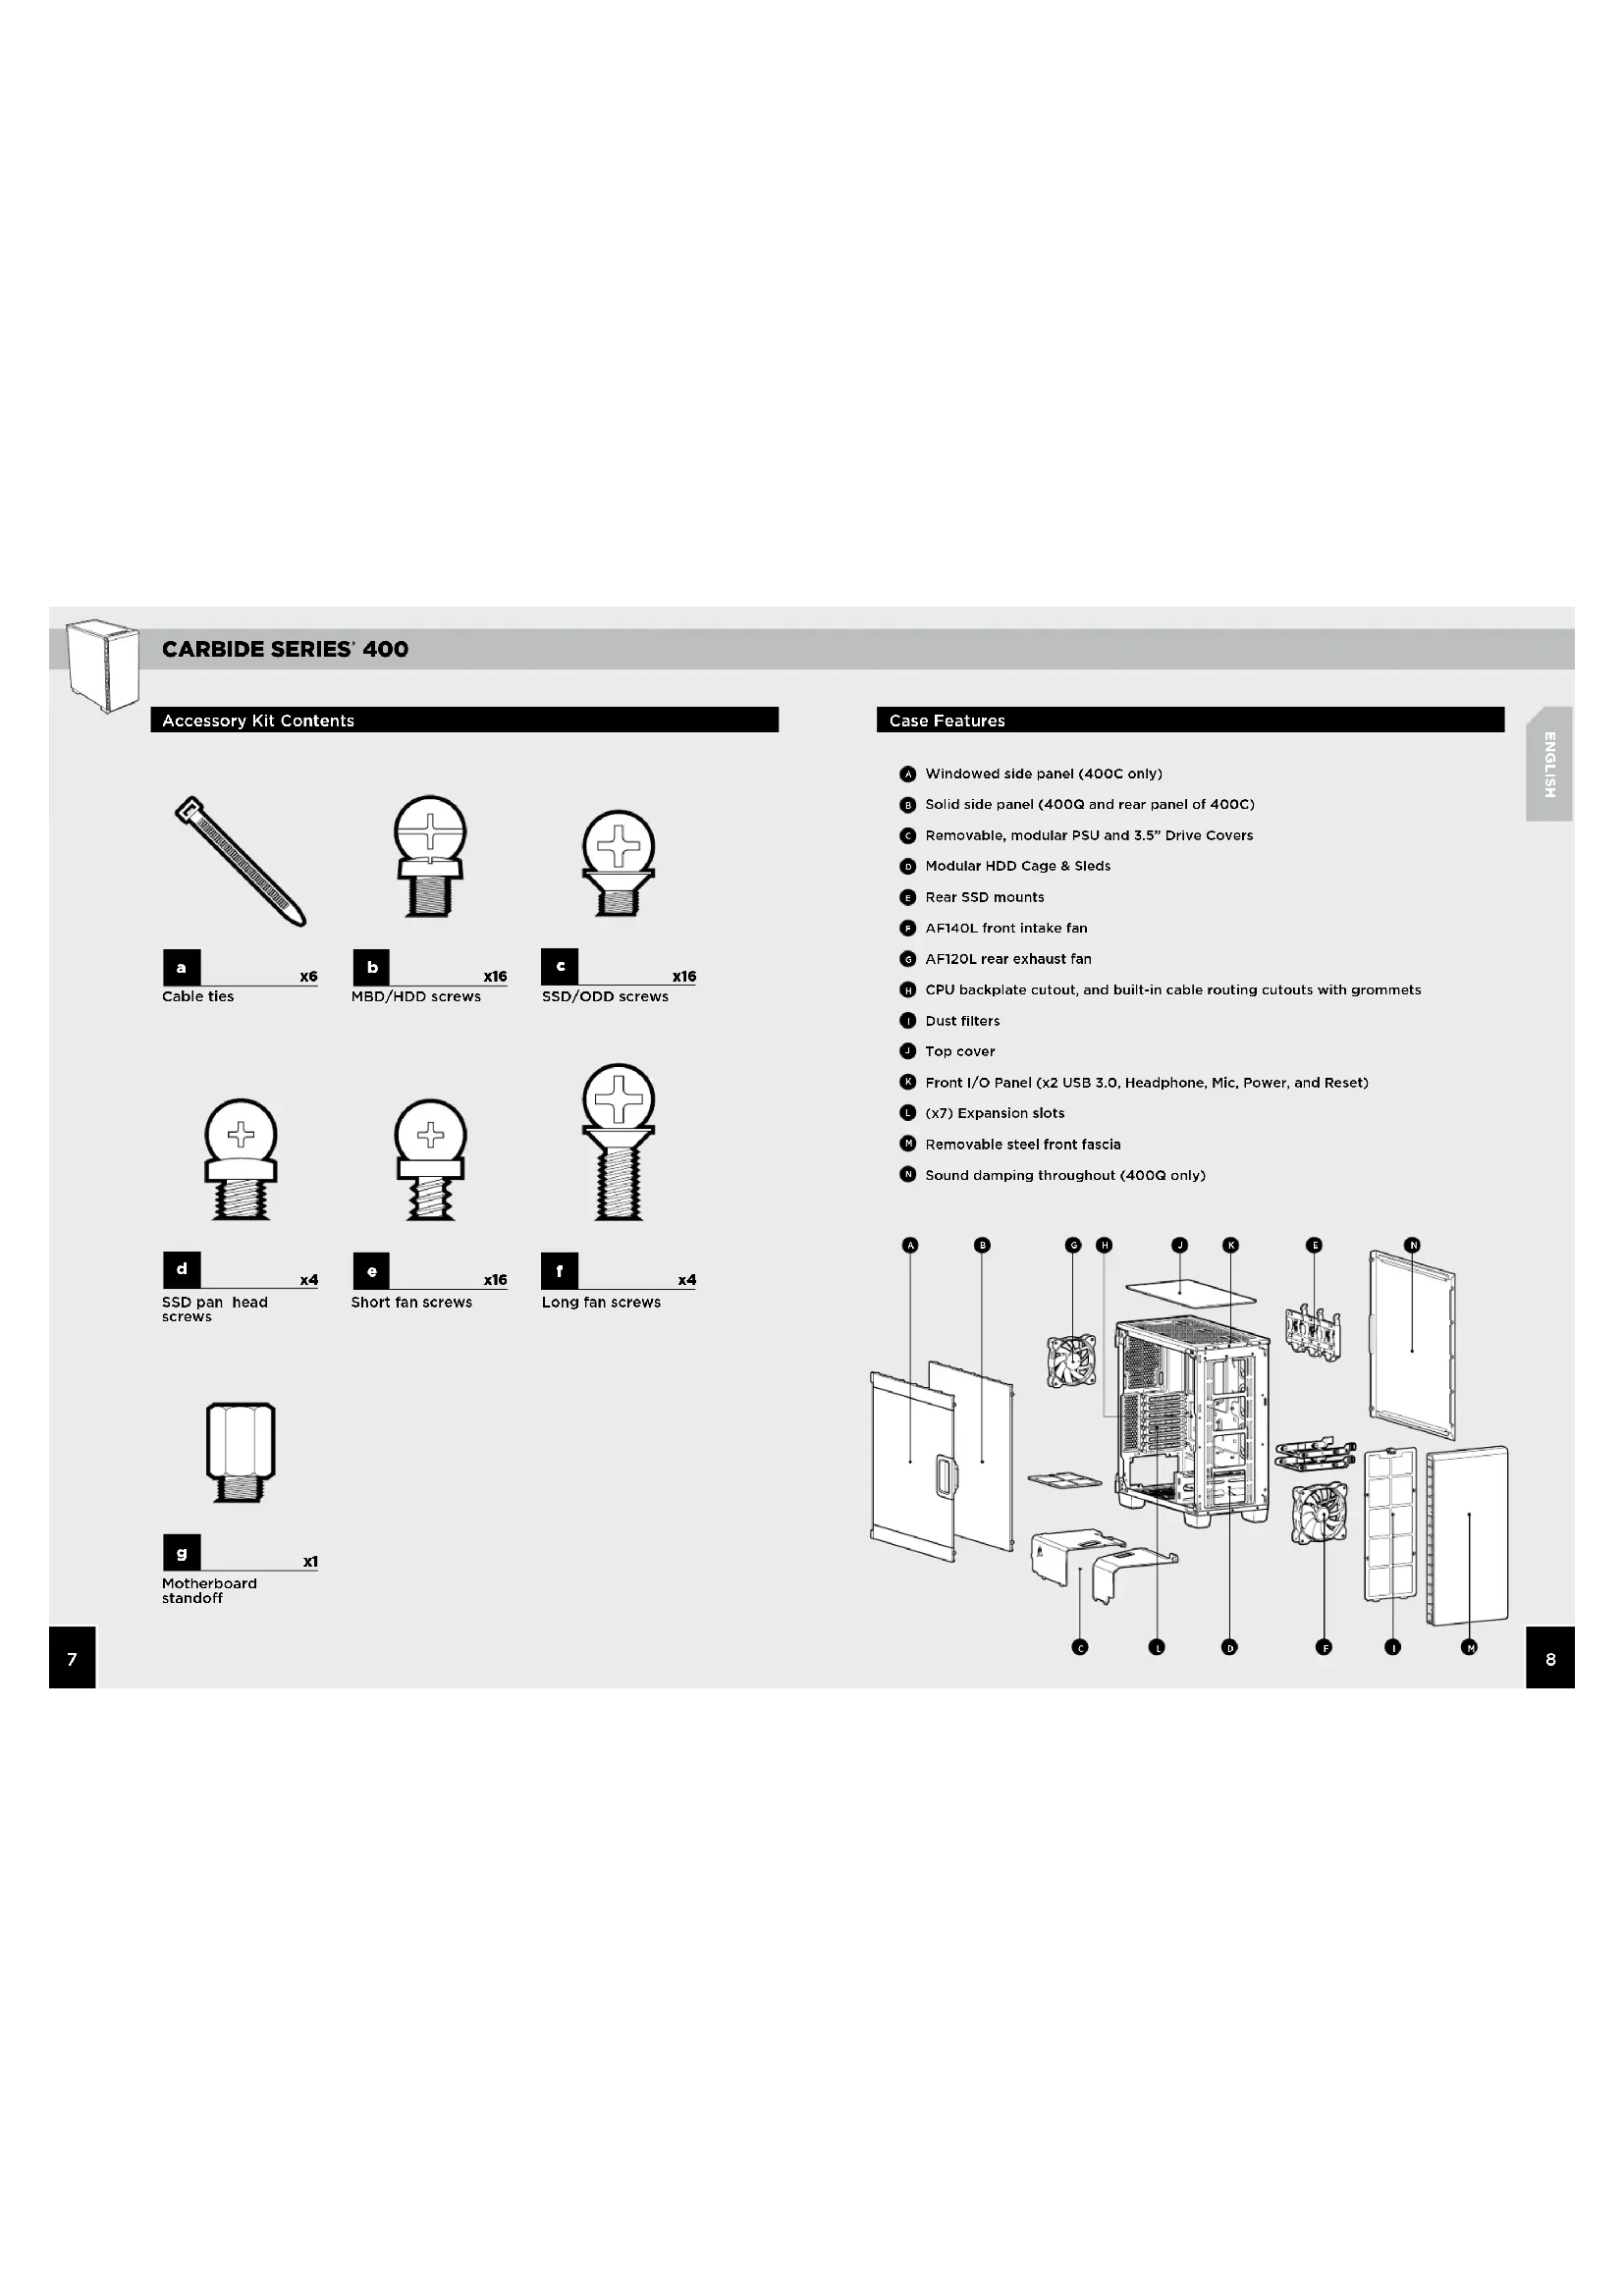
Accessory Kit Contents


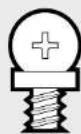

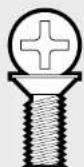


Motherboard standoff
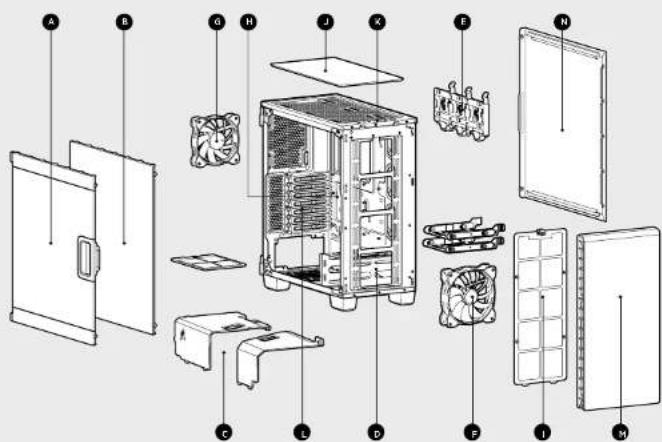
Case Features
Windowed side panel (400C only)
Solid side panel (400Q and rear panel of 400C)
Removable, modular PSU and 3.5^ Drive Covers
Modular HDD Cage & Sleds
Rear SSD mounts
AF140L front intake fan
6 AF120L rear exhaust fan
CPU backplate cutout, and built-in cable routing cutouts with grommets
Dust filters
Top cover
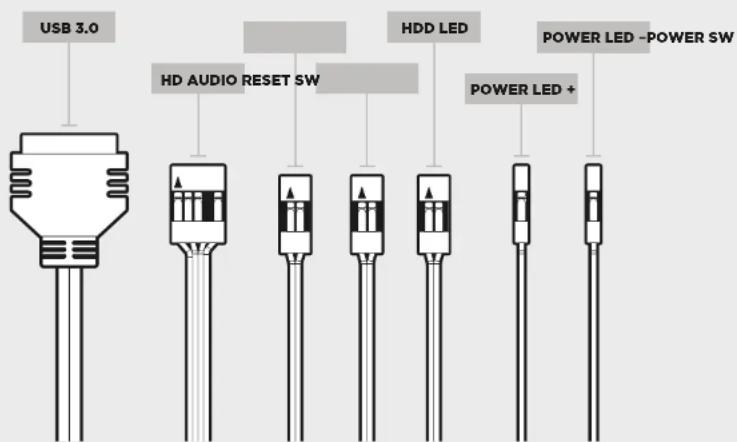
Front I/O Panel (x2 USB 3.0, Headphone, Mic, Power, and Reset)
(x7) Expansion slots
Removable steel front fascia
Sound damping throughout (400G only)
CARBIDE SERIES 400
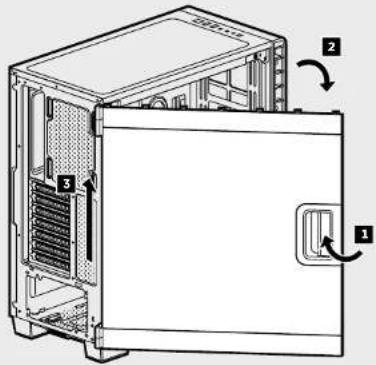
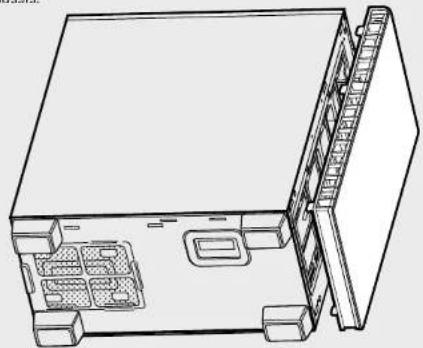
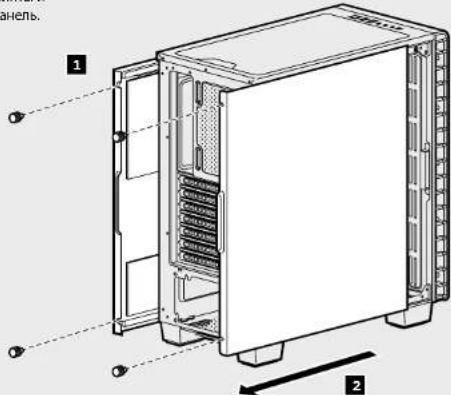
1. Removing the Side Panels (400C)
Pull the latch to release the acrylic side panel, then lift the panel off of the hinge.
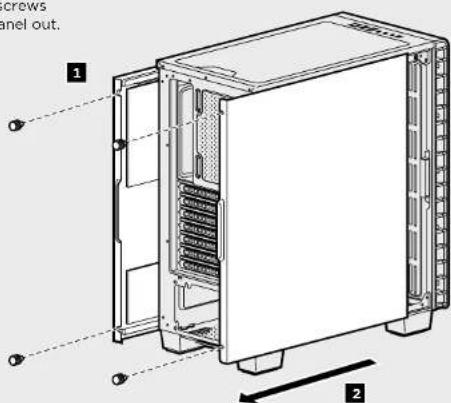
1. Removing the Side Panels (400Q)
Remove the thumbscreas and slide the side panel out.
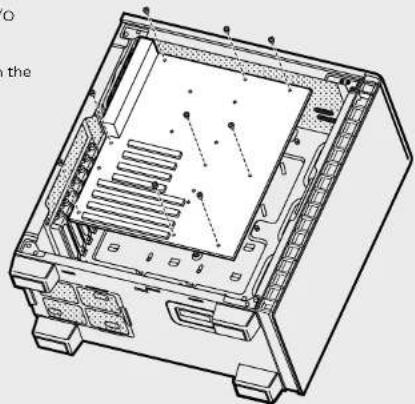
2. Installing the Motherboard
Snap your motherboard's I/O shield into the cutout.
Align the motherboard with the standoffs in the case.
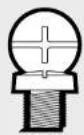
Secure with the included screws. b
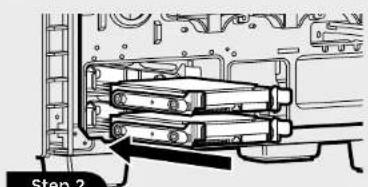
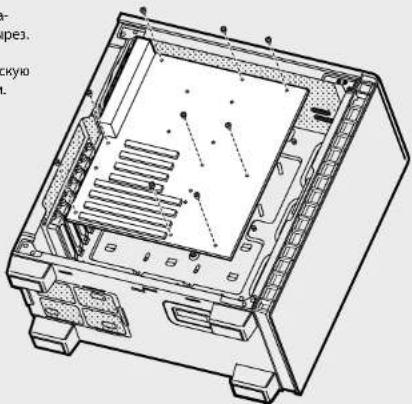
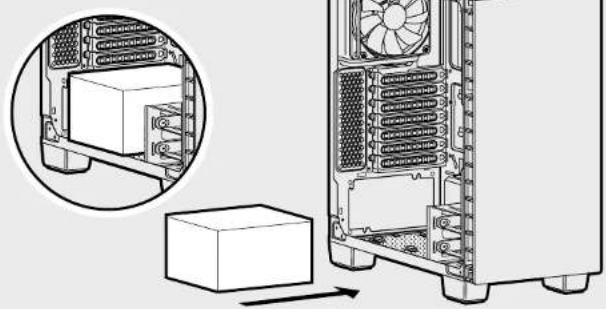
3. Installing HDDs
Step 1 - Place the drive into the 3.5^ drive tray.
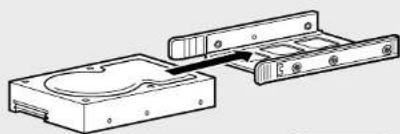
Step 2 - Slide the drive and rail assembly into the HDD cage from behind the motherboard as shown.
CARBIDE SERIES 400
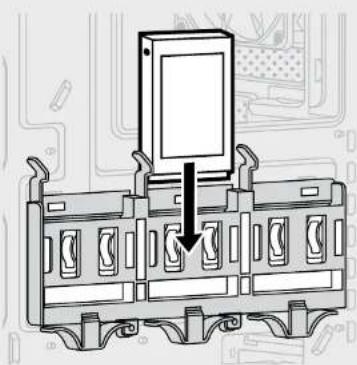
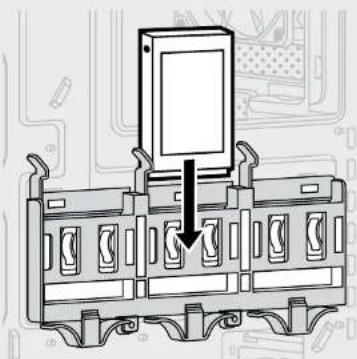
4. Installing SSDs
Slide the 2.5" drive into the tray until it snaps into place.
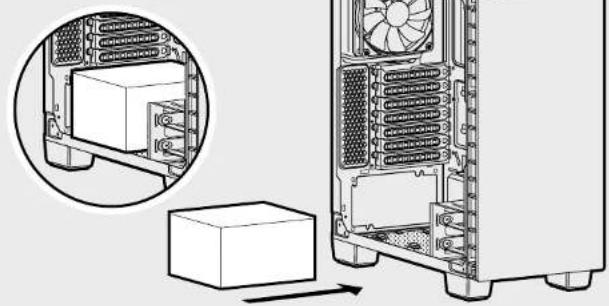
5. Installing the Power Supply
Install the PSU into the lower chamber of the case, and secure with four screws from behind.
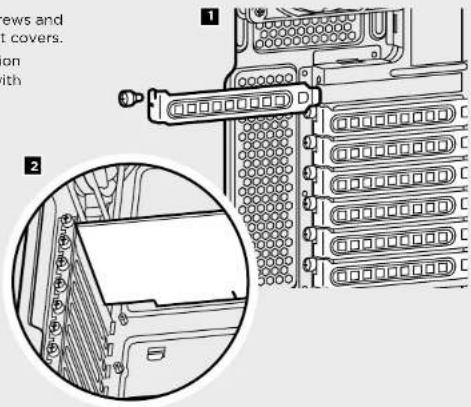
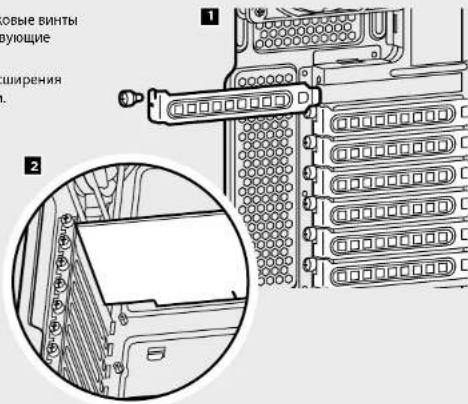
6. Installing PCI-E/PCI Card(s)
- Remove thumbscrews and corresponding slot covers.
- Install the expansion card and secure with thumbscrews.
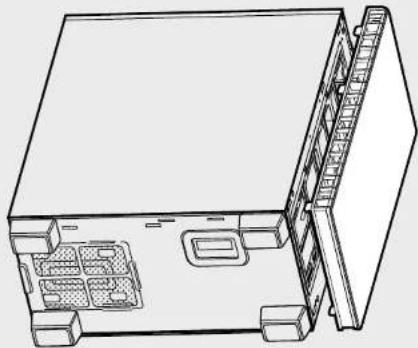
7. Removing the Front Fascia
Grasp the front panel from underneath, then gently but firmly pull away from the chassis.
CARBIDE SERIES 400
See your motherboard's
manual for front panel header
locations and pin-outs.
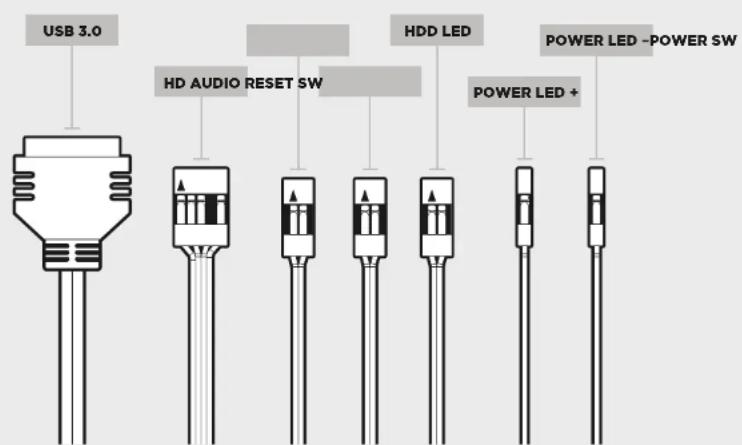
Frequently Asked Questions8. Installing the Front I/O Connectors
- Does the polarity matter with the I/O panel's power and reset header?
No, only the LED headers.
- Who should I contact if I received my case damaged or one of the fans is no longer working?
Please go to corsair.force.com and request an RMA so that we can replace the damaged part(s).
- Where can I mount a fan?
| Fan Mount Locations | |
| Front 3x120mm, 2x140mm (1x140mm included) | |
| Top 2x140mm/120mm | |
| Rear 120mm (included) | |
| Bottom x | |
| Side x | |
| Mid x | |
To learn more about this case visit the product page atcorsair.com
CARBIDE SERIES 400
Carbide Series Quiet 400Q
Carbide Series Quiet 400Q
Motherboards in die dafur
Carbide Series Quiet 400Q
Carbide Series Quiet 400Q
BnapnM HnOcNOHb BvKoNtIOuAouHM naneHm HynOpDooEHOMy copeKMOMy Carbide Series 400Q OT Corsn npctdantmco bom KMAHTbH Nbeuchmmk Kopnyc FopmaT ATX C npekpckhMMB O3MOKHOCTMB ONxAnkeHHN. Pnpoda BnKnCn pntahb NOD cbEMHO dBxKOMnoEHTHOH KpbHKO bNOKa nTAHNA JKeCTKOrO dNcKa. Bnapdaex TEXONORI Direct Airflow Path BEHTANTOB Mory HE oxnaqtaBHeCNPOB3ycmbl DEpKaTeIN Dn daNDCOB, AKKPAtho HApNABNTb NOTOK BDOyxa HcMaBle ROPnue KMOHENTb, OXankaed Xn o6eCNueB hceUWMYpoaboty.
Ammn: 425mm
UmpnHa: 215mm
BbcoTa: 465mm
Bec: 7kg
MaKcMmAbHaHrpaFwueckoro npoueccopa: 370mm
Maxcunmabha bocato oxnndtena qentpanbhoro npouecoppa 170mm
MaKcMmBnHbAaNnHa 6nKa nHTaHnR: 200mm
PacnonoxeHne BHTMnTOpoe:
Cnepen: 2x140/3x120mm
Cepy: 2x140/120mm
CoBMeCTMmOCTb paMaTOpOB:
Cnepea: 280mm/360mm
Cbepy: 240mm


CARBIDE SERIES 400
Copexmoe KOMnKTe aKceccyapOB
a X6 Kaebnhie cTAAKK
BnntbIaN MaTeepinckOINnblnKnn KecTkXnDcKOB

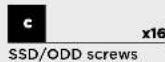
C X16 BnntbIra TbePtoBbIX HAKONITENIEH MII ONTVECKHX DOK
d Bmthcokpytnenho ronokkoJra TbeDtoBbXb HAKONITEN

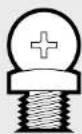
e KopotKne BnHTb dnn BEHNTNtopa
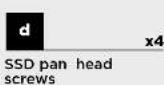
f x4 DInHHbIe BHTbl dBENTNTRTOPa
g 103nKpyuouyue BnHTbI DnMATEpHnCKoN PnTbI
Oc6eHHocnKopnyca
6okobie naHenn cokoukamn (Tonbko Ha 400C)
CnnnoHaa 60KOBa naHenb (Ha 4OOQ n3aHne naHn 4OOC)
CbemHbeMoDyIbHeKpBikn6Doka nTahmN 3,5-douMOBOrO duCKa
MoodybHbIe depKAten H cana3Kn dNn JckTcKx dNCKOB
3aHHe Kpennnne Hnn TbePtoBbHex hakonnte
Ppeepn npuoyh bentunnp AF14OL
3aHmBBBbTAAHOBBeHTNATOPAF12OL
BmEaHnHOeAeHnHNOIeaeHbAeHNOIeaeCoppaI BcTeepHHe HBepe3eOCTePrrnHnnrFpNkOaKnKaeB
1 NbneBbe qnIbtpb
BepxHkPbUka
Pepednna nanehBbOa-BbOda (x2 p3aema USB 3.0, pa3bem nod Hauynnnk, p3aem nod MmKPOoH, nepeknoTneNtTHAINu nepe3arp3Xs)
(x7)cnoTobpaunpeHH
CbEMHcTaNbHa nepeHnnaHb
Nonhoe nornoueHne 3Byka (ToIbKO Ha 4COQ)

CARBIDE SERIES 400
1.CHATne 60KOBbIX naHenei (400C)
Notnntne fikcatop,HTobb Ocbobodt akpimnoyio bokobyo nanei,batem noDHHMITE naHnib cNETNI.

YdaNTe 6apaaKOBBe BNHTbN
OTOdBINbTe 60KOByIO naHEnb.
2.YCTAHOBKa MaTePnHCKoN nJaTb
BCTaBe 3AUYNtOPOW BDOA-BBbOBA MATepnHcK0nPbTa B BuPe.
B Kopriye HC BYBIOHREAT MATEKHYKOHNATy C naOHNIPOUOMM BHNHTAMN.
3AkpeniteNtAlyBxOABDMMB KOMKTEK BHTAMM. b
3.YcTaHOBkaXeCTKIMXINCKOB
War1-1OMOTETHE DIKK BTOCTCKDn3,5-DIOHOBMOBxDIKCOK.
War2-3aBnHbTe nckn6nok HapnabnauoNxDepkataeIbn JXKCTKOTO NCKA 3a MaTePHCKOINATNOKAKNOKA3HaHO PNCHK.


CARBIDE SERIES 400
4. YcTaHOBKa TBepDoTeNbHbIX HakONITeNei
3AaBraIaR 2.5-IOIOMObI NDCB O TcECK Do IHCACUH Na MeCte.
5. yctahOBka 6noka nntaHm
YCTAHOBHTE 6NOK NITAHINB HIKHKH KAMPEKOPNYCA INAKPENITE CHM3Y YETBIPMK BHNTAM.
6.YcTaHOBKa KapT PCI-E/PCI
- OTEBPHTE GAPAUINOBBE BHTNH I CHAMITE COOTBETCTBYOUHE KPNKU P43eOBM.
2.YctahOBIOteIaNTy pauciaHApENHnA 3KapOHTe ee BHNTAM.
7. Chatne nepedne nae
BozMme nepeJHIO NaHeb cnHcy, 3aTeM octopOKHO uYbepeHNO notHnTE ee Ha c6eN noaCC.
CARBIDE SERIES 400
8.YctahOBKa nepeaHnX pa3bEMOB BBOda-BBBOda
PacnoOnoKeHne paaBemO N KOHTaKbDnPa nepeHne naHEn CM. B pyKOBODcE no MATEPHCKN nIate.
Yacto 3a4aBaemble Bonpocbl
- IMeETI 3NaUHHe NPOJROCTb np IcNIOB3OBAHN pa3bema nITAHnI nepea3rpyKn H aHEni BBOda-BbIBoDA? Het, OHa BAHKa TOnbKO JnI CBeTOIOHQbIXpa3bEMoB.
- K komy cneyuot o6paTnBcR,ecmKopnyc nOnyueHnOBpeHHbIMnn OHN m3 BEHTNATOPOB 60blhe pa6oTaer?Ipeeynte Ha Be6-caIT corsair force.com nZanpocuTe pa3peHneHa BO3BpaMaTePnAnOB (RMA), TTO6blMb CMOrn 3aMeHNTbNOBpeXeHbIe Detann.
3.Гдe мохну yctaHOBNTb BEHTnIATop?
| Расноожени Meçд Ду монтуку вентлиаров | |
| Спесу | 3x120mm, 2x140mm (1x140mm ду мочени) |
| Сася | 2x140mm/120mm |
| Саду | 120mm (санду) (балочу) |
| Саму | х |
| Сбoly | х |
| Поседиne | х |
DOnonHnTeIbHyIO HnΦopMaIIO 06 TOM KOpNyCe CM. HA CTpaHnue npOyKaHa Be6-caItecorsair.com

CARBIDE SERIES 400
Carbide Series Quiet 400Q
Carbide Series Quiet 400Q
Muller-1完全音不和动化了的ATX一之。Corsair Carbide Series 400H,便的力能在备费的二元卡前音型的ATX一之。FV-上取

- Table of Contents Case Specifications
- Congratulations!
- Thank you for purchasing the Carbide Series 400
- Compact-ATX Mid-Tower PC Case.
- Carbide Series Clear 400C
- Carbide Series Quiet 400Q
- CARBIDE SERIES 400
- Accessory Kit Contents
- Case Features
- Removing the Side Panels (400C)
- Removing the Side Panels (400Q)
- Installing the Motherboard
- Installing HDDs
- Installing SSDs
- Installing the Power Supply
- Installing PCI-E/PCI Card(s)
- Removing the Front Fascia
- Frequently Asked Questions8. Installing the Front I/O Connectors
- Copexmoe KOMnKTe aKceccyapOB
- Oc6eHHocnKopnyca
- 1.CHATne 60KOBbIX naHenei (400C)
- 2.YCTAHOBKa MaTePnHCKoN nJaTb
- 3.YcTaHOBkaXeCTKIMXINCKOB
- YcTaHOBKa TBepDoTeNbHbIX HakONITeNei
- yctahOBka 6noka nntaHm
- 6.YcTaHOBKa KapT PCI-E/PCI
- Chatne nepedne nae
- 8.YctahOBKa nepeaHnX pa3bEMOB BBOda-BBBOda
- Yacto 3a4aBaemble Bonpocbl
Brand : CORSAIR
Model : Carbide 400C
Category : Desktop Computer