Dabman D10 - Radio Imperial - Free user manual and instructions
Find the device manual for free Dabman D10 Imperial in PDF.

| Title | Description |
|---|---|
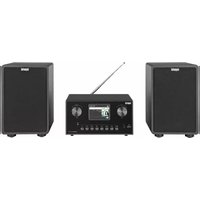
| Product type | Digital radio |
| Features | DAB/DAB+/FM reception, Bluetooth, USB port |
| Dimensions | Compact dimensions for home use |
| Power supply | Mains power with battery option |
| Usage | Easy to use with an LCD screen and intuitive control buttons |
| Maintenance | Clean regularly with a soft cloth, avoid moisture |
| Safety | Do not expose to water, use only with the supplied adapter |
| Warranty | Limited warranty, check conditions with the seller |
| Included accessories | Power cable, user manual |
Frequently Asked Questions - Dabman D10 Imperial
User questions about Dabman D10 Imperial
0 question about this device. Answer the ones you know or ask your own.
Ask a new question about this device
Download the instructions for your Radio in PDF format for free! Find your manual Dabman D10 - Imperial and take your electronic device back in hand. On this page are published all the documents necessary for the use of your device. Dabman D10 by Imperial.
USER MANUAL Dabman D10 Imperial
DAB/DAB+/FM RDS receive
Support DAB+ broadcasting
Sleep timer
IR remote controller
DAB sensitivity to -100dBm
DAB+ sensitivity to -100 dBm
FM sensitivity to -108dBm
Frequenzbereich:
DAB Band III 174 MHz-240MHz
FM 87.5 MHz - 108.0MHz
Display
TFT Color Display 2,4 Zoll LCD 240 x 320 Pixel
SOUND
Audio AMPLIFIER 4W
Speakers: 4 OHM,4W
multi sound effect EQ to set IC.
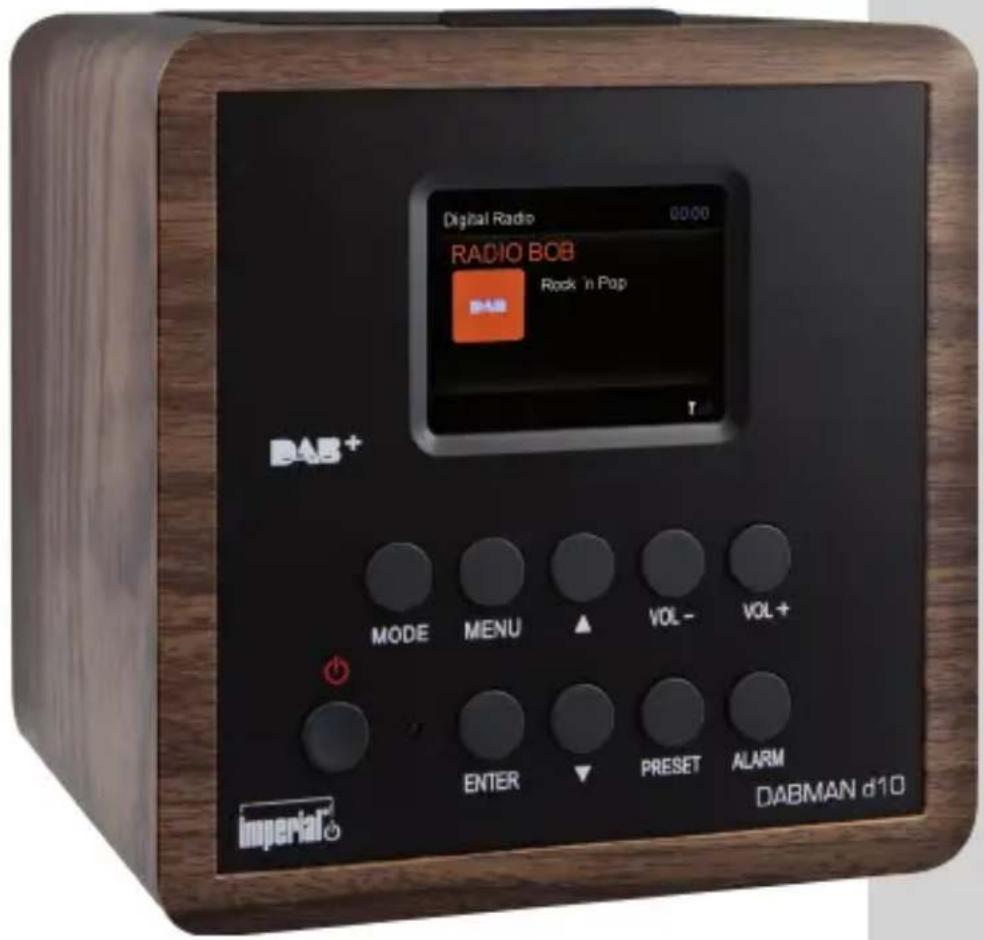
Thank you for choosing the
IMPERIAL DABMAN d10.
If you are using the IMPERIAL for the first time, please read these instructions carefully and keep them for future reference.
Only by following these instructions can you enjoy the full functionality of the device.
E
This user manual will help you with the
- intended
- safe
- advantageous
use of the device
We assume that the operator of the IMPERIAL DABMAN d10 has a general understanding of entertainment electronics and their use.
Any person who
- assemblies
- connects
- operates
- cleans
- disposes of
this device must have knowledge of the entire content of this operating manual.
You should always keep this operating manual close to the device.
2. SAFETY INSTRUCTIONS
Read the safety instructions carefully before using the device.
Observe all warnings and instructions on the device and in the operating manual.
2.1 Basic safety instructions
- In the event of a malfunction, disconnect the radio from the power source.
- To avoid fire hazards and the risk of electrical shock, do not expose the radio to rain or moisture.
- Never open the casing.
Otherwise, you run the risk of an electric shock.
- Only connect the radio to a properly installed 220-240 V\~, 50-60 Hz mains socket.
- Disconnect the power supply unit from the mains socket when not using the device for an extended period.
When disconnecting the power supply unit, only pull at the adapter, not the cord.
- In the event of a thunderstorm, unplug the radio power supply unit from the mains socket.
- If foreign bodies or liquids enter the radio, immediately disconnect the power supply unit from the mains socket.
Have the device inspected by qualified personnel before using it again.
Otherwise, you run the risk of an electric shock.
- Make sure that the power source (mains socket) is easily accessible.
- Do not bend or squeeze the cable connections.
2. SAFETY INSTRUCTIONS
- If the power cord is damaged, you will have to get the radio repaired by a professional before using it again.
Otherwise, you run the risk of an electric shock.
- Do not allow children to use the radio unattended.
- Always leave the maintenance work to qualified personnel.
Otherwise, you are putting yourself and others at risk.
E
- In the event of a malfunction, disconnect the radio from the power source.
- Modifications to the device will result in the expiration of the manufacturer's responsibility.
- Remove the protective foils.
- This device should only be cleaned with a dry cloth.
Caution!
Notice regarding disconnection from the mains.
The device also consumes electricity in standby mode.
To completely disconnect the device from the mains, the power supply unit must be disconnected from the mains socket or the power switch on the back of the device must be switched off.
2. SAFETY INSTRUCTIONS
Proper location
- Place the radio on a firm, level surface.
- Avoid proximity to heat sources, such as
radiators, open flames, for example
candles, devices with strong magnetic fields, such as speakers.
- Do not place any vessels filled with liquid (e.g. vases) on the radio.
- Avoid direct sunlight and places with excessive dust.
- Never cover the ventilation slots.
Ensure that the radio is adequately ventilated.
- Do not place heavy objects on the radio.
- If you move the radio from a cold environment to a warm environment, moisture may develop inside the radio.
In this case, wait for about an hour before you use the radio.
- Install the power cable in a way that no one can step on or trip over it.
2. SAFETY INSTRUCTIONS
Proper handling of batteries
- Batteries may contain toxic substances.
Keep batteries out of the reach of children.
Children may put the batteries in their mouths and swallow them.
If a battery is swallowed, seek medical help immediately.
- Leaking batteries can damage the remote control.
- Batteries may contain toxic substances.
Dispose of the batteries in accordance with the applicable regulatory requirements / in an environmentally friendly manner.
The batteries must be disposed of separately from normal household waste.
- Never expose the batteries to open flames or excessive heat, as they may explode.
- Always replace the batteries with batteries of the same type.
2.2. Explanation of safety instructions
In this manual you will find the following categories of safety instructions:
Danger!
Instructions with the word DANGER warn of possible personal injury. Caution!
Instructions with the word CAUTION warn of possible property or environmental damage.
These instructions contain special information on the economic use of this receiver.
3. Scope of supply
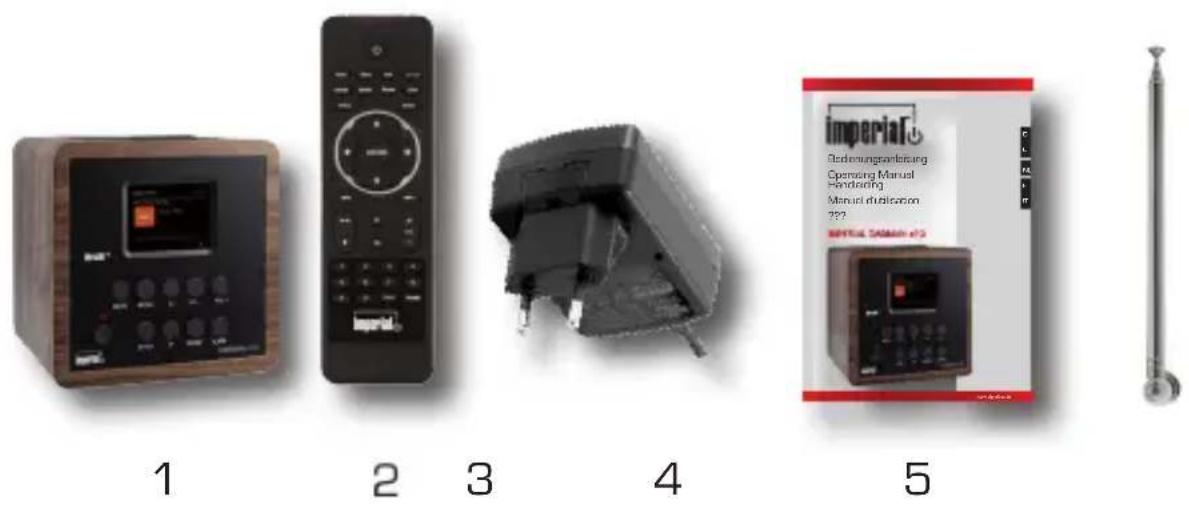
No. Quantity Name
1 1 IMPERIAL DABMAN d10
2 1 Remote control
3.1 External power supply unit [sim. to the Fig.]
41 User Manual
5 1 Telescopic antenna
6 1 Wire antenna (not shown)
4. ImAgES


4. IMAGES
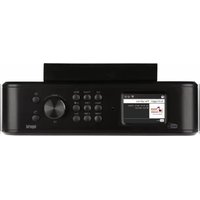
1. Power on / off button
Use this button to turn on the device or to switch it to standby mode.
2. Menu button
Toggle the device between digital DAB+ and analogue FM
4. ENTER
Use the enter button to confirm an entry
5. Navigation / Station selection
Navigate through the menu using these buttons or choose the next station from the station list.
6. Preset
Turns on one of the individually stored favourite stations.
7. Alarm
Use this button to set an alarm for the desired time.
8. Volume Up / Down buttons
9. Display
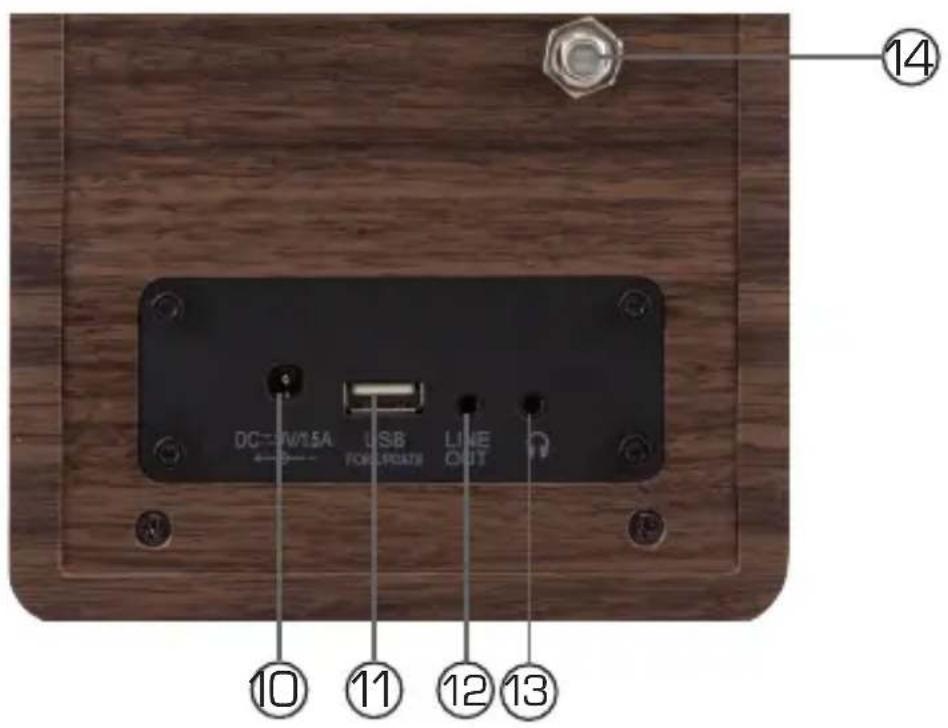
10. Power supply connection
Connect the device to the power supply unit using this socket (included)
11. USB port
This connector is for service purposes only.
12. LINE OUT
This is used to connect the radio to a Hi-Fi amplifier or to active speakers in order to direct music received by the radio to a sound system.
4. IMAGES
13. Headphone jack
Headphones can be connected to the headphone jack to listen to the music played by the radio via headphones.
If headphones are connected to the device, music playback through the speakers will stop.
14. Antenna port
E
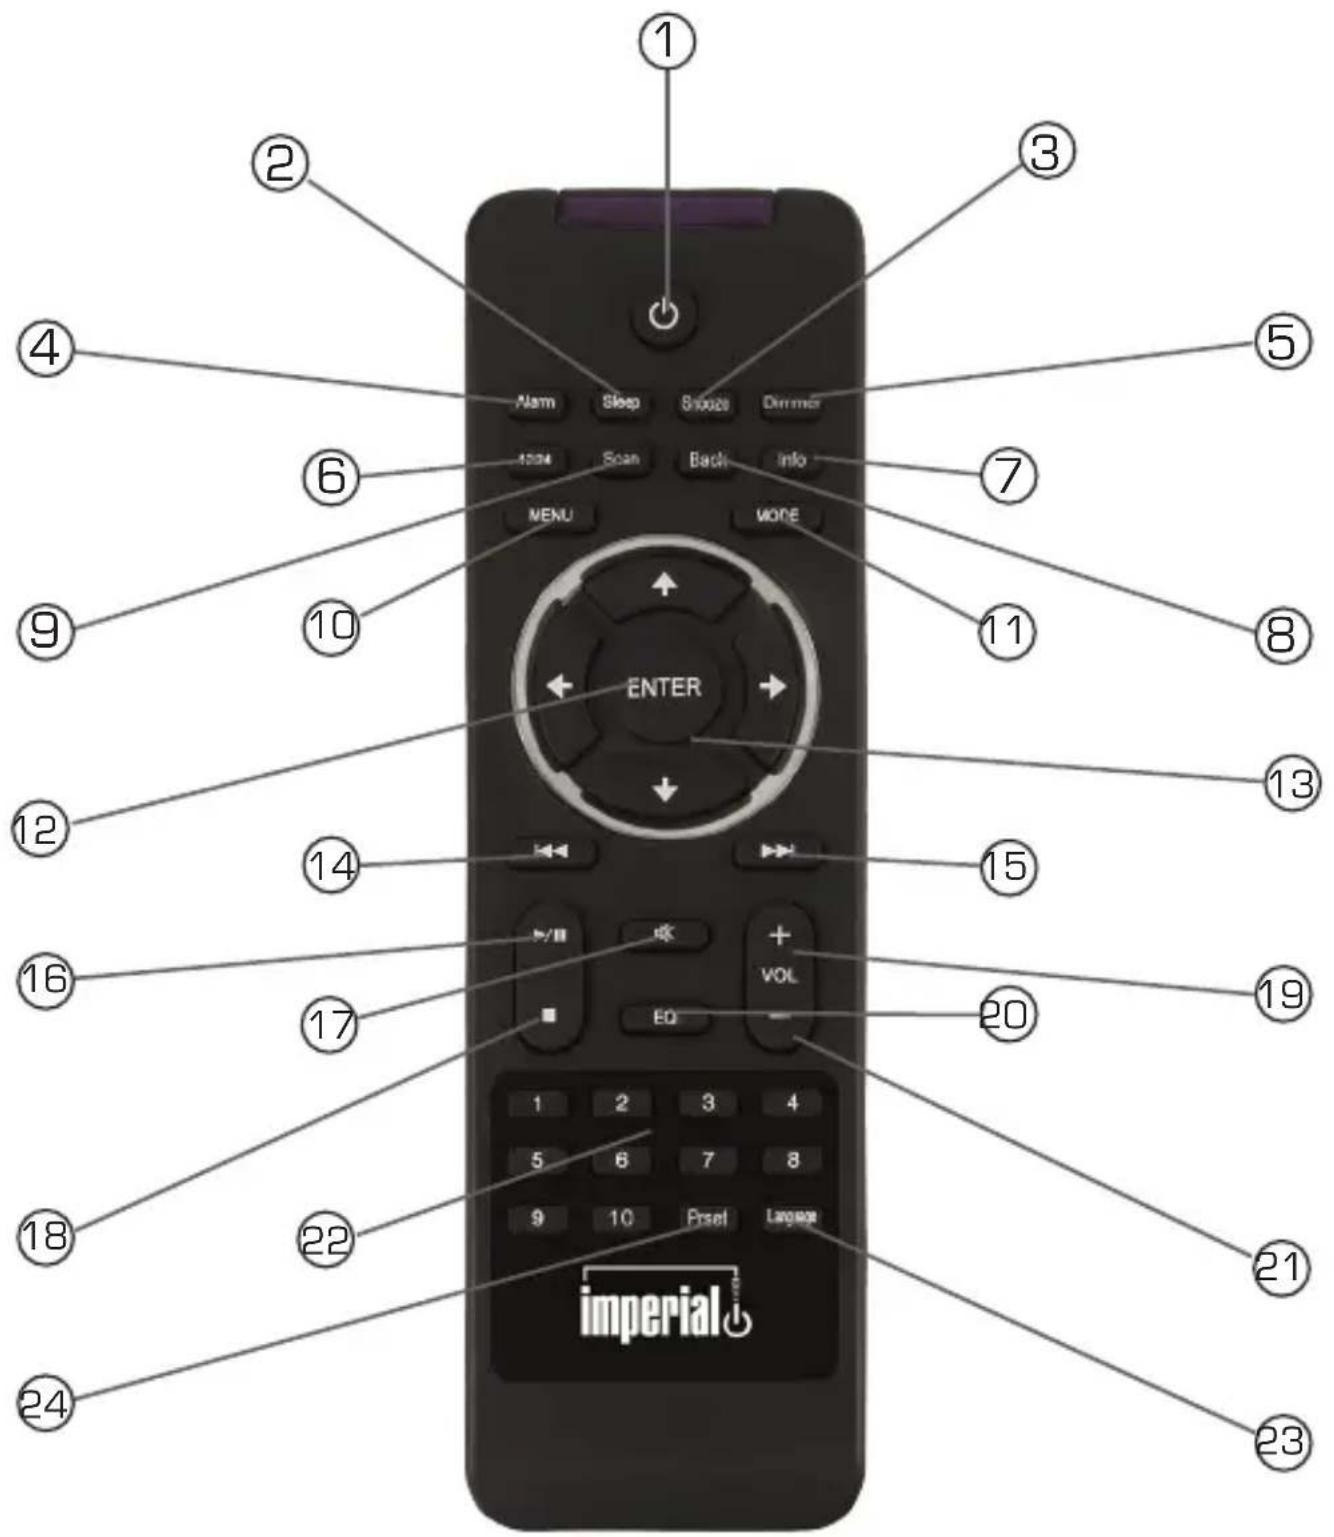
5. REMOTE CONTROL
1. Standby button
Use this button to turn the device on or off.
2. Sleep
Use this button to turn the device's sleep timer on or off.
3. WPS button
With this button you can set up a W-LAN connection with your home network.
Please also refer to section 8.
4. Alarm
Use this button to activate the alarm clock function
5. Display Dimmer
6. 12/24
Use this button to toggle between a 12 hour or 24 hour time display.
7. INFO
Press this button to show more information about the current station on the display.
8. Back
Use this button to leave the selected menu item or to exit the menu and return to normal operation.
5. REMOTE CONTROL

5. REMOTE CONTROL
9. Scan
This button is used to activate the station scan.
10. Menu
This button is used to activate the menu on the device.
11.Mode
This button is used to toggle the device between digital DAB+ and analogue FM.
12. ENTER
This button is used to confirm an entry.
13. Navigation up/down - left/right
Use these buttons to navigate the menu
14. No function
15. No function
16. No function
17. Mute
Mutes the device's volume to silent.
- No function
- V+ volume
Increases the volume
20. Numerical keypad
21. V-volume
Decreases the volume
22. EQ equaliser function
This button is used to activate the equalizer function and configure individual sound settings.
23. Language
This button allows you to change the menu language.
24. Preset
Turns on one of the individually stored favourite stations.
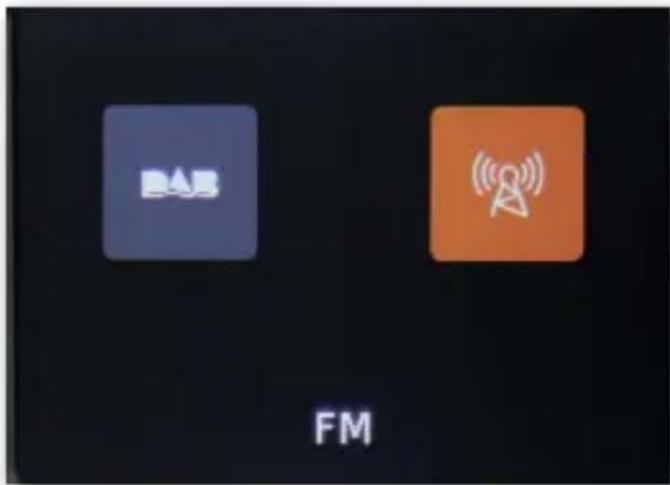
6. gGENERAL
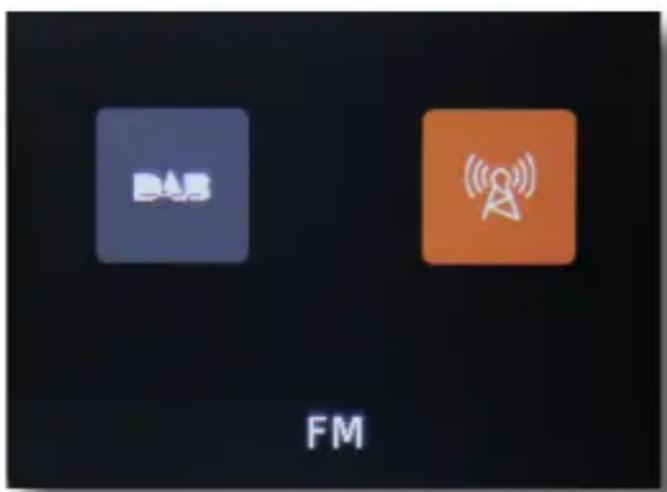
The DABMAN d10 has 2 different operating modes which in turn support different functions.
The Mode button can be used to toggle between the following operating modes:
DAB [Digital Radio, section 8.1]
FM (FM radio, section 8.2)
7. FIRST uSE
Please take care when removing the parts from the packaging.
Check that all parts have been supplied.
Note:
The radio can be controlled both with the device buttons and the remote control.
It is easier and more convenient to operate the IMPERIAL DABMAN d10 using the remote control.
Remove the protective film from the remote control which is located on the battery cover.
7.1. Power connection
First, connect the included power supply unit to the corresponding socket on the back of IMPERIAL DABMAN d10.
Now, plug the power supply unit into a 230V mains socket.
7. FIRST uSE
7.2. Antenna
Connect the supplied antenna to the antenna port.
7.3. DAB scan

Turn on the device using the standby switch on the front panel of the device.
The radio will turn on and will scan for DAB + radio reception.
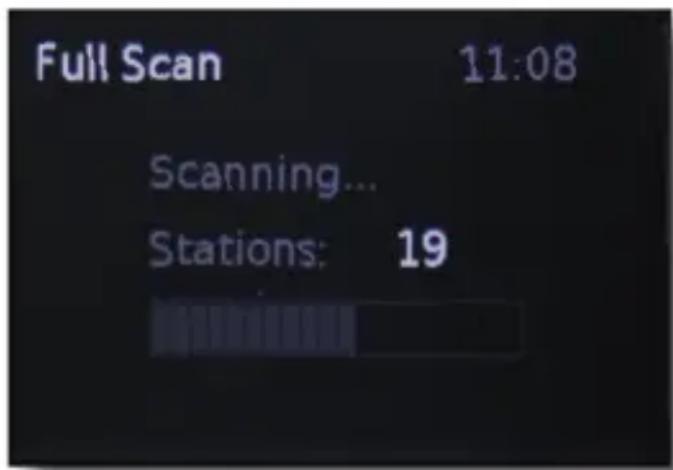
Once this is completed and the radio has received a signal, it will start to play back the first DAB station it found..
All DAB + stations which have been found are automatically saved and stored in a DAB station list.
The radio is now ready for operation.
To customise the DABMAN d10 to suit your preferences, you can configure the radio via the menu.
To perform an analogue FM scan, please follow these steps:
7. FIRST uSE
7.4. FM scan
Press the Mode button on either the remote control or the device. The device will switch to FM (FM) mode.


Press the SCAN on the remote control or press and hold the up arrow key on the unit for approximately 2 seconds to start a scan. The radio will search for the next available station.
Once the radio has found an available station, the scan will stop automatically.
8. OPERATION
8.1. DAB reception
To ensure the best possible reception, extend the telescopic antenna to its maximum length before you turn on the radio.
Press the Mode button on the device or on the remote control to switch to DAB+ mode.
E
Press the Up / Down buttons on the remote control or on the device.
The DAB station list will appear which contains all of the stations which were found during the scan.

8. OPERATION
Using the Up / Down buttons on the remote control or on the device, you can select a desired station.
Confirm your selection by pressing the ENTER button,
The radio now will now switch to this station.
You can perform a new scan in DAB + radio mode at any time.
This is required, for example, if you operate the radio in another location or new DAB + stations are available in your location.
Please also refer to section 7.3.
8.2. FM reception
In FM mode, the IMPERIAL DABMAN d10 can receive analog FM radio signals from the FM band (87.5 to 108 MHz) as well as RDS signals when they are broadcast.
To ensure the best possible reception, extend the telescopic antenna to its maximum length before you turn on the radio.
Press the MODE on the remote control or the unit while in operation.
8. OPERATION
Playback will start with the last station that was selected.
When switching to FM mode for the first time, you may hear a noise and the received frequency (87.5 MHz) will appear on the display.
To receive the radio stations, first perform a scan.
Please also refer to section 7.4.
E
8.3. Volume
By pressing the VOL- / VOL+ buttons on the unit or on the remote control you can adjust the playback volume (+ will increase the volume, - will decrease the volume).

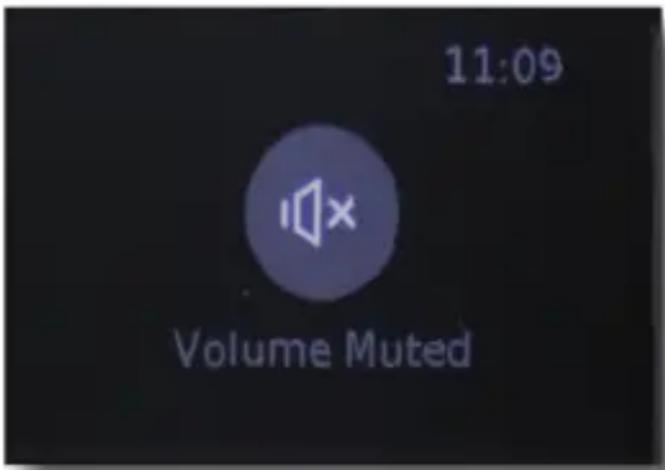
By pressing the MUTE button you can switch the radio loudspeaker on and off.
When the mute function is active, „Volume Muted“ will appear on the display.
8. OPERATION
E
8.4. Storing a favorite station (PRESET)
The radio can store up to 10 favourite stations.
To save a station, switch to the station you would like to save in either DAB or FM mode.
Press and hold the PRESET button on the remote control or on the device for approximately 2 seconds.
The favourites list will appear.

Use the Up / Down buttons to select a position to store the station.
8. OPERATION
Confirm with ENTER.
The station is now stored in the desired position. You can save up to ten stations in DAB mode and up to 10 stations FM mode.
8.5. Selecting a favorite station (PRESET)
E
Selecting a favorite station (PRESET)
To select a stored favorite station, please follow these steps:
Using the remote control:
Use the numeric keypad on the remote control by selecting a number which corresponds to the position of the desired stored station.
The device will switch to the desired favourite station.
Alternatively:
Press the PRESET button.
The list of all stored favorite stations will appear.
Use the Up / Down buttons to select a station and press ENTER to confirm.
On the device:
Press the PRESET button.
The list of all stored favorite stations will appear.
Use the Up / Down buttons to select a station and press ENTER to confirm.
8. OPERATION
8.6. Display Dimmer
You can adjust the display brightness in 2 stages.
Press the DIMMER button on the remote control to reduce the brightness.
Press the button again to dim the brightness further.
The device can be configured to display the time either in 12 hour or 24 hour format.
To configure the time display, press the 12/24 button. on the remote control of the radio.
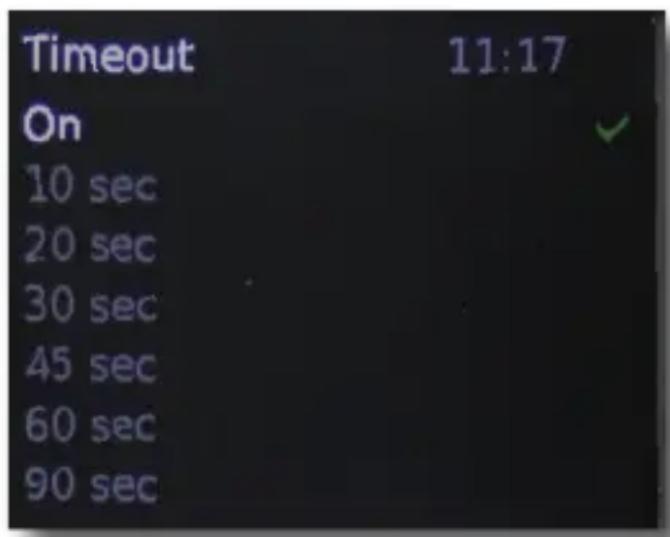
8.8. Sleep timer
With the sleep timer, you can set a time after which the radio turns off automatically.
The following options are available: _off" [no automatic shutdown], 15 minutes, 30 minutes, 45 minutes, 60 minutes and 90 minutes.
8. OPERATION
To set the sleep timer, please follow these steps:
Press the Sleep button on the remote repeatedly until the desired sleep time for the device appears.


Wait approximately
5 seconds or press the Enter button. The sleep timer is now set. The sleep timer icon will now appear in the lower right-hand corner of the display next to the time.
The radio will automatically enter standby mode after the set time.
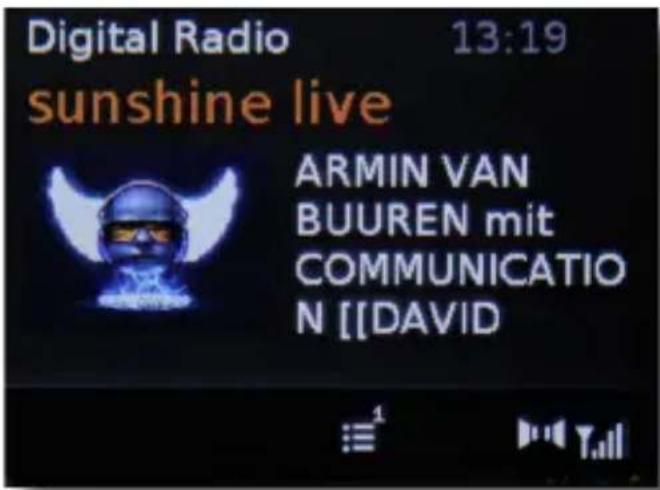
8.9. Info
By pressing the INFO button on the remote control, you will be able to view background information on the current radio station (e.g. title name, artist), as well as other information (e.g. signal strength, transmission quality, etc.), which will appear on the display.
8. OPERATION
You can press the INFO button several times to cycle through the information.
Please keep in mind that the information will depend on the radio station you are tuned into.
The information may vary between FM mode and DAB+ mode.
8.10. Equalizer sound settings
The sound of DABMAN d10 can be customised using the equalizer.
Here you can choose from predefined sound profiles or create a custom sound profile.
To enter the equalizer menu, please follow these steps:
Using the remote control:
Press the EQ button on the remote control.
Using the device:
Press the MENU button on the device.
Navigate to the System Settings menu using the Up / Down buttons and confirm by pressing ENTER.
Navigate to the equalizer menu using the Up / Down buttons and confirm by pressing OK.
The equalizer menu will appear.
8. OPERATION

Use the Up / Down buttons to select a preset sound profile and confirm by pressing ENTER.
To create a custom sound profile, navigate to My EQ settings and confirm by pressing ENTER.


Use the Up / Down buttons to change the settings for treble, bass and loudness and confirm each entry by pressing ENTER.
8.11. Setting the alarm clock
The DABMAN d10 has an alarm function that can be easily controlled via the remote control or the buttons on the device.
This option is only available if the time has been set correctly.
8. OPERATION
For this, the DABMAN d10 should be operated at least once in DAB+ mode, as it automatically sets the time.
You can also set the time manually.
Please also refer to section 9.1.6.2.
To set the alarm, please follow these steps:
Two alarms are available which can be set independently from one another. While the radio is on, press the Alarm button on the remote control or on the device.
The alarm menu will appear.
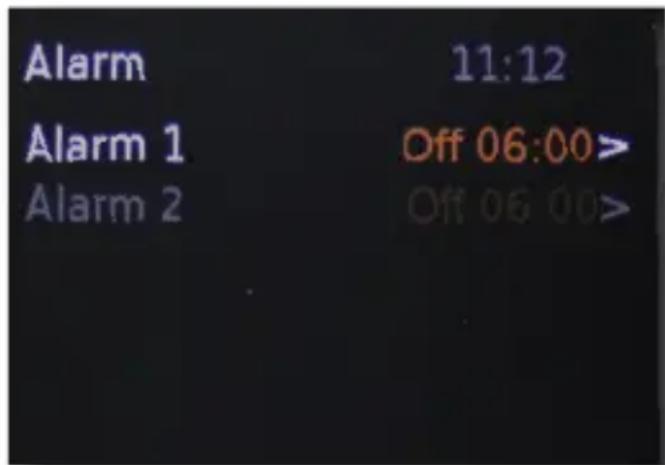
Use the Up / Down buttons to navigate between Alarm 1 or Alarm 2. To set the alarm time for the selected alarm, press ENTER.
Use the Up / Down buttons to select the desired function and confirm by pressing ENTER.
8. OPERATION
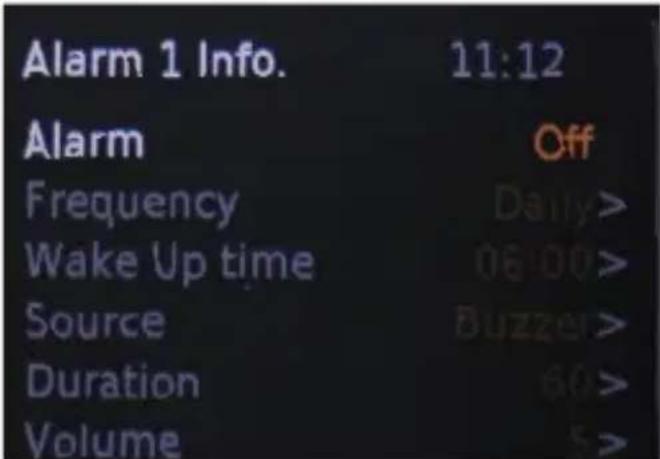
Alarm: Switch the alarm function on or off.
Frequency: Here you can choose to repeat the alarm, daily, on weekends, work days or not at all.
Wake Up time: Set the alarm time.
The alarm time can be changed using the Up /
Down buttons.
First, select the hour and confirm by pressing ENTER.
Then, select the minutes and confirm by pressing ENTER.
Source: Here you can choose whether the alarm wakes you up with a buzzer sound or a radio station.
Duration: Set the duration of the alarm in seconds.
You have a choice of six options between 15 and
120 seconds.
The alarm will go off automatically at the
selected time.
Volume: Select the volume for the alarm.
8. OPERATION
Once you have configured all the necessary settings, the alarm time will be displayed in the bottom left corner when the device is in standby mode.
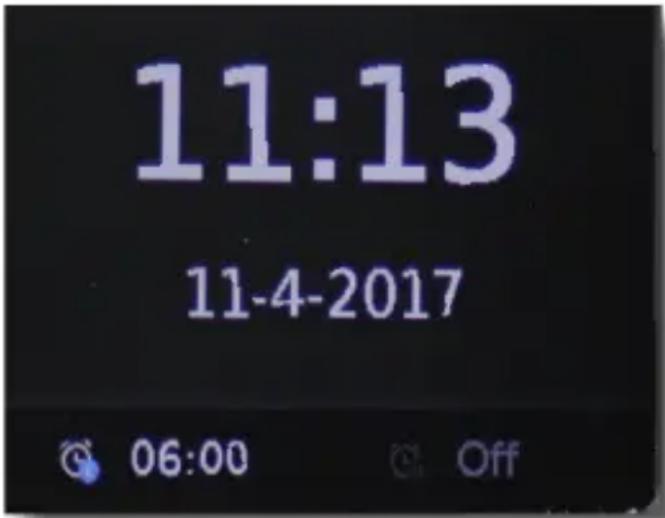

If you have set a second alarm time, it will be displayed in the bottom right corner when the device is in standby mode.
8.11.1. Snooze function
If you have set an alarm time, the alarm will be activated at the selected time.
To mute the alarm for 5 minutes, press the SNOOZE button on the device.
The alarm will stop for 5 minutes.
The time remaining until the alarm will flash.
You can extend the time until the next alarm by pressing the SNOOZE button repeatedly.
The time can be changed in the following increments.
5 minutes, 10 minutes, 15 minutes, 30 minutes.
9. mENU
The time will be shown on the display accordingly.
To switch off the alarm, press the Standby button on the device.
The alarm will be deactivated and will not go off again until the next selected time.
A wide range of functions can be set and customised via the menu of the device.
E
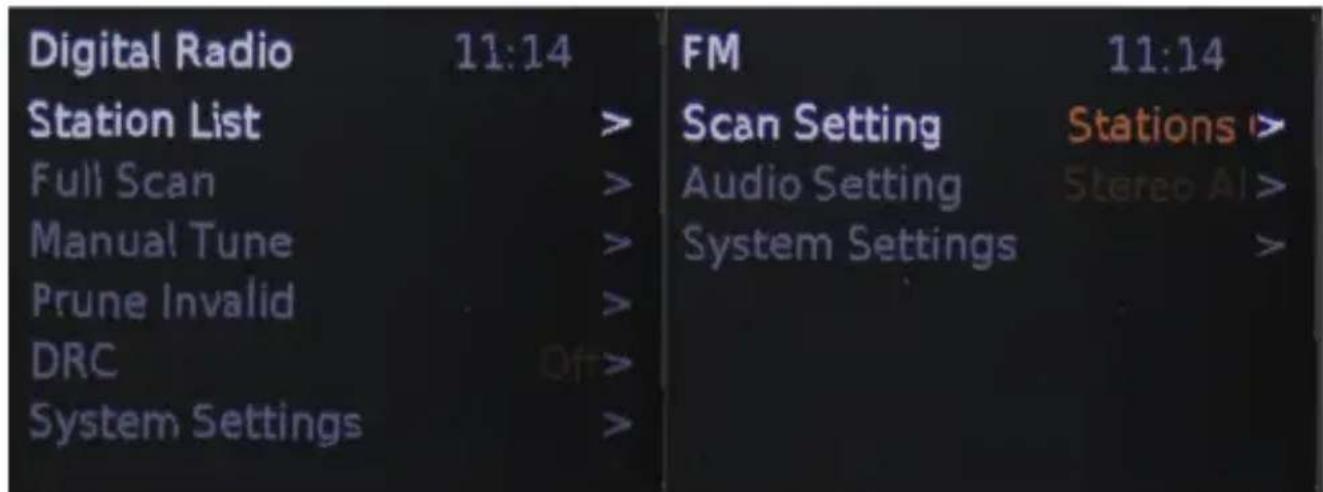
To access the menu, press the MENU button on the remote control or device.
The menu will differ depending on whether the device is operating in digital radio (DAB) or analogue radio (FM) mode.
All the settings can configured using the Up / Down / Left / Right navigation buttons on the remote control or the Up / Down buttons on the device.
Digital Radio
FM Radio
9. mENu
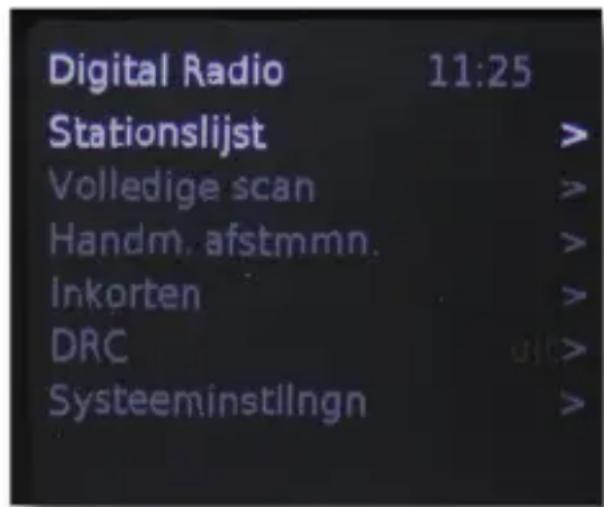
9.1. Digital Radio MENU
9.1.1.List of stations
Here you can select the list of DAB radio stations.
This list contains all the stations that the radio found and stored during the last DAB scan. Choose a station that you want to listen to and confirm by pressing the ENTER button.

9.1.2. Automatic scan
You can perform a new scan in DAB + radio mode at any time.
This is required, for example, if you operate the radio in another location or new DAB + stations are available in your location.
Select the menu item Automatic scan and confirm by pressing ENTER. The device will then perform an automatic scan.
9. mENU
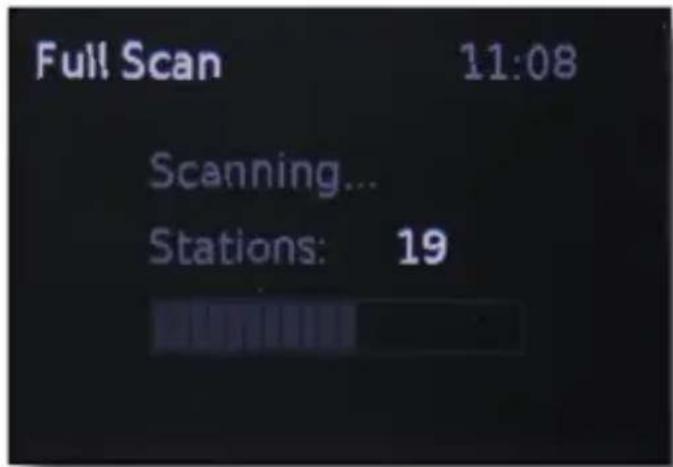
Once the scan has completed and the radio has received a signal, it will start to play back the first DAB station it found..
All DAB + stations which have been found are automatically saved and stored in a DAB station list.
9.1.3. Manual scan
9.1.4. Deleting stations
You can delete the entire list of radio stations. All stored stations will be removed.
To receive radio stations in DAB mode again, a new scan must be performed after the stations have been deleted.
Please also refer to section 9.1.2.
Select the menu item Delete stations and confirm with ENTER.
A confirmation prompt will appear.
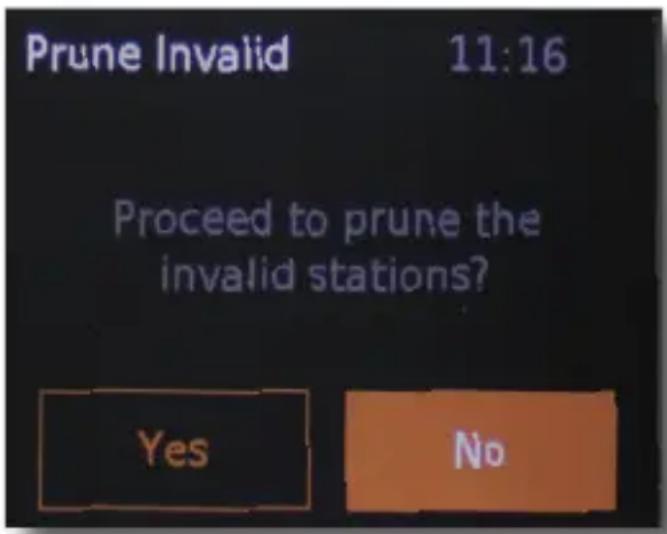
Use the Up / Down buttons on the device or remote control to select Yes if you want to delete the stations.
Then press the ENTER button.
9. mENu
9.1.5. DRC Dynamic Range Compression
DRC Dynamic Range Compression. With this function, you can change the sound of the received radio stations.
With DRC, large volume differences between loud and quiet music passages can be adjusted and reduced.

You can choose between low, high and off.
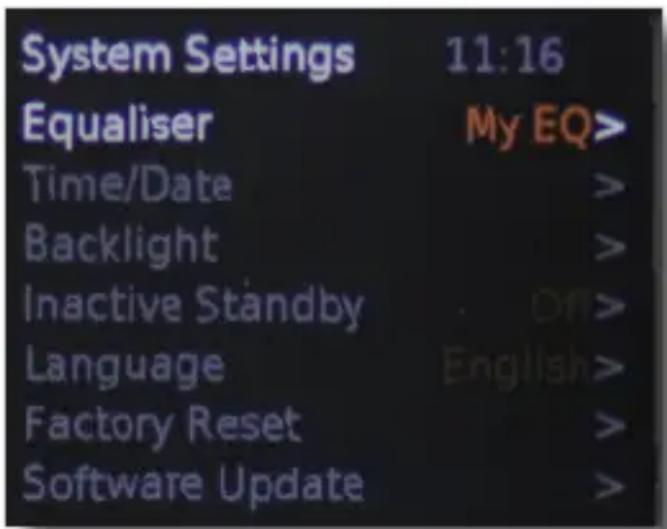
9.1.6. System settings
In System Settings, you can configure different settings to optimise the device.
To access the System Settings, press the MENU button.
Select the item System Settings and confirm with ENTER.
9. mENu
9.1.6.1. Equalizer
The sound of DABMAN d10 can be customised using the equalizer. Here you can choose from predefined sound profiles or create a custom sound profile.
Please also refer to section 8.10.
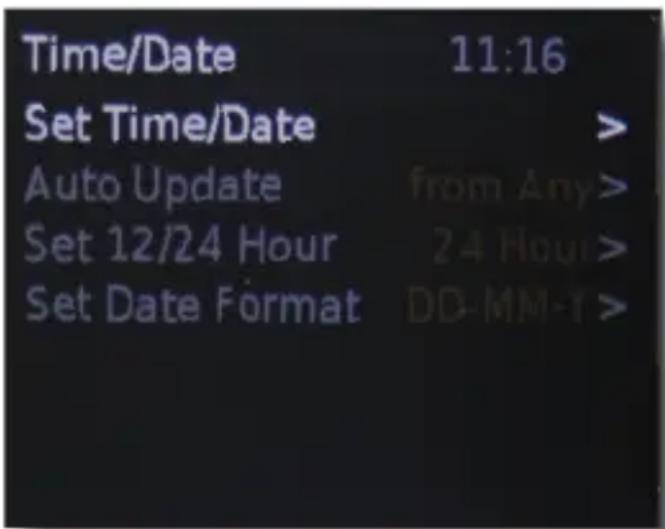
9.1.6.2. Setting the time
In this menu, the time of the device can be set.
Please note that the device usually automatically displays the correct time and date.
This is always the case when a DAB or FM scan has been performed and the device is receiving radio stations, as the time signal is also sent via DAB and FM.
Therefore, manual adjustment of the time usually is not needed.
In the System Settings menu, select the menu item Time using the Up / Down buttons and confirm with ENTER.
9. MENU
Set time / date
In this menu item you can enter both the time and date manually.
Autom. Update
Here you can choose whether the radio should set the time automatically as well as whether the radio should receive the time signal from DAB or FM. You can also chose both receive paths. This gives you greater assurance that the radio always has the correct time.
12/24 hrs
The device can be configured to display the time either in 12 hour or 24 hour format. In this menu you can choose the appropriate setting.
Date format
Here you can adjust the date format to your preferences.
You have the choice between
DD-MM-YYYY day-month-year
MM-DD-YYYY month-day-year
9.1.6.3. Backlight
In this menu you can configure various settings for the display of the device.
OSD Timeout
In this setting, you can change the time after which the display changes back to the selected brightness.
After the set time, the selected menu function switches back to the preset brightness.
9. mENu
Select Backlight in the System Settings menu and confirm with ENTER.
Select OSD backlight and confirm with ENTER.
Here you can select a time between 20 and 180 seconds.
In operation
Here you can set the brightness for the display during operation.
Standby:
Here you set the brightness for the display in standby mode.
The radio can automatically switch from normal operation to standby mode after a set time if no operating functions such as station selection, volume, etc. have been performed during this period.
You can set the length of time in this menu.
Select Auto Standby in the System Settings menu and confirm with ENTER.
9. mENu
Here you can choose to disable the automatic shutdown function or select one of the predefined times.
Confirm with ENTER.
9.1.6.5. Language

You can change the menu language of the radio.
You can choose from the following languages:
German, French, English, Italian
Select Language in the System Settings menu and confirm with ENTER.
Use the Up / Down buttons to select a language and confirm with ENTER.
9. mENu
9.1.6.6. Factory settings
In this menu item you can reset the DABMAN d10 to its factory settings.
This may be necessary if individual changes were made which have resulted in a non-optimal functioning of the radio.
To do this, please follow these steps:
Select Factory Settings in the System Settings menu and confirm with ENTER.

Confirm the query with YES if you want to perform the factory reset.
To do so, use the Up / Down buttons to select Yes and confirm with ENTER.
Note:
When you perform a reset, all personalised stored data (DAB+ and FM favorites lists, alarms) will be erased and must be reconfigured.
9. mENU
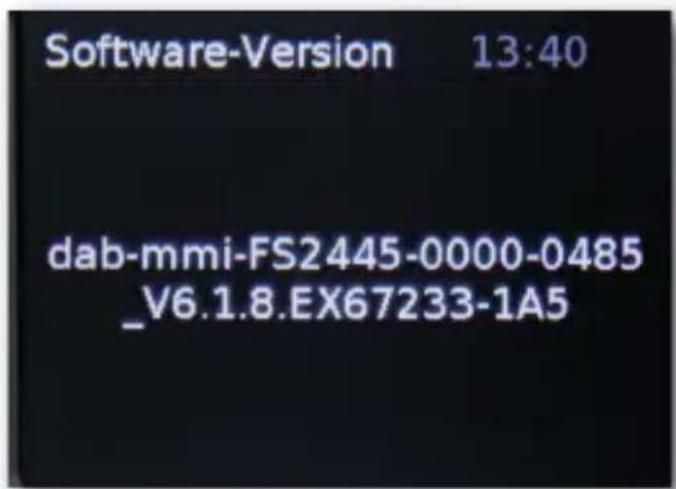
9.1.6.7. Software Version
In this menu item, you can view the current software version of your DABMAN d10.
To do this, please follow these steps: Select Software Version in the System settings menu and confirm with ENTER.
E
9.2. FM Radio Menu
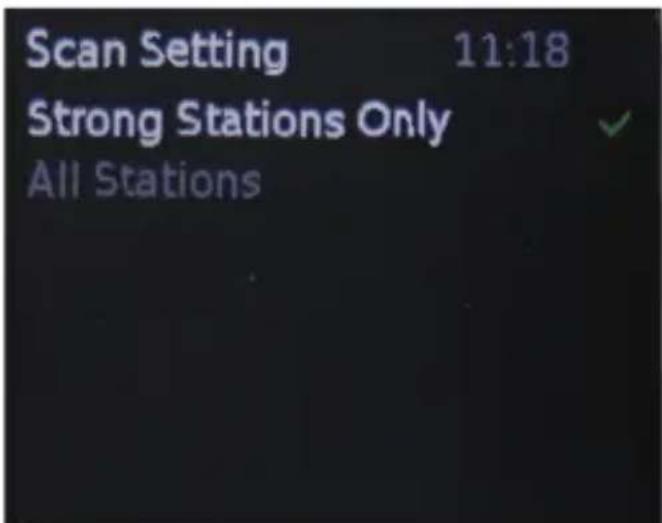
9.2.1. FM Analog Radio Scan Settings
You can perform a new scan in FM radio mode at any time.
This is
required if you operate the radio in another location.
In this menu you can specify which FM stations to detect and store in the scan.
9. mENu
To do this, press the MODE button on the device or on the remote control.

Press the MENU button and select the menu item scan and confirm by pressing OK.
You can choose to only detect stations with a high signal strength or to play back FM stations which have a low signal strength and reduced sound quality from the radio.
If you want the radio to also play back stations which have a low signal strength, select All stations. Otherwise, select Only strong stations.
9. mENu
9.2.2. FM Audio Settings
With this setting, you can choose whether FM stations are received in stereo where possible or whether stations are received in mono.
Press the MENU button and select the menu item Audio Settings and confirm by pressing OK.

Select stereo or mono.
10. TROuBLESHOOTING
| Fault | Possible cause and solution |
| No display, radio does not respond to commands | Connect the device to the mains using the power supply unit which is supplied with the radio. |
| Operation via remote control is not possible | Batteries empty or positioned incorrectly. Please check if the battery is installed in the correct direction. Check that the protective film has been removed from the battery compartment. Replace the battery of the remote control (3V button cell); Please note that when inserting the battery, the positive terminal of the battery should be facing the back of the remote control) |
| Poor DAB+ reception Perform a scan (see section 9.1.2) Antenna is not fully extended Poor location Change the location of the radio (if necessary, move it closer to the window), perform another scan | |
| Poor FM reception Antenna is not fully extended Drag the FM antenna to the full length of Alarm clock does not work properly | |
| Alarm clock does not work properly | Please also refer to section 9.1.6.2. |
11. DISPOSAL INSTRUCTIONS
The packaging for your device consists entirely of recyclable materials.
Please dispose of these appropriately in accordance with the „ Dual
System".
At the end of its service life, this product must not be disposed of as normal household waste but must be disposed of at a recycling collection point for electric and electronic equipment.


The symbol on the product, instruction manual or packaging indicates this.
The materials are recyclable according to their labeling.
The reuse and recycling of old materials and devices makes an important contribution to protecting the environment.
Please ask your municipal administration for the location of a suitable disposal point.
Please ensure that electronic waste and empty batteries are disposed of properly and are not disposed of as household waste.

12. fEATuRES & TECHNICAL SPECIFICATIONS
Hauptfunktionen
Chipsatz Solution: Frontier Silicon Verona 2
DAB/DAB+/FM RDS receive
Support DAB+ broadcasting
Sleep timer
IR remote controller
DAB sensitivity to -100dBm
DAB+ sensitivity to -100 dBm
FM sensitivity to -108dBm
Frequenzbereich:
DAB Band III 174 MHz-240MHz
FM 87.5 MHz - 108.0MHz
Display
TFT Color Display 2,4 Zoll LCD 240 x 320 Pixel
SOUND
Audio AMPLIFIER 4W
Speakers: 4 OHM,4W
multi sound effect EQ to set IC.
Thank you for choosing a product from our company.
Our product meets legal requirements and was manufactured under constant quality control.
The technical specifications are the most recent at the time of printing.
Subject to change.
The warranty period for the IMPERIAL DABMAN d10 meets the legal requirements at the time of purchase.
We also offer our telephone HOTLINE service with professional help.
Our service area provides professional specialists to answer queries. Here you can ask any questions you have regarding IMPERIAL products and receive tips for locating a possible fault.
Our technicians are available Monday - Friday 8:00 to 16:45 at the following telephone number:
02676/9520101
or by e-mail at: service@telestar.de
If the Service Hotline is unable to help you, send your IMPERIAL DABMAN d10, preferably in its original packaging, or at least packed securely for transport, to the following address:
13. SERVICE uND SuPPORT
TELESTAR - DIGITAL GmbH
Service Center
Your device bears the CE marking and complies with all relevant EU standards.
TELESTAR DIGITAL GmbH hereby declares that this IMPERIAL DAB-MAN d10 complies with the essential requirements and other relevant provisions of EMC Directive 2014/30/EU, RoHS Directive 2011/65/EC, the Low Voltage Directive 2014/35/EU, the R&TTE Directive 1999/5/EC and the ErP Directive 1275/2008/EC.
The declaration of conformity for this product can be found at:
All technical specifications and functions described in these operating instructions are valid at the time of printing and are subject to change without notice.
We assume no liability for misprints and errors.
Copy and reproduction permitted only with the express permission of TELESTAR-DIGITAL GmbH.
As of January 2017

imperial
Handleiding
IMPERIAL DABMAN d10
INHOUDSOPgAVE
1.VoorWOORD 104
2.VEILIgHEIDSAANWIJZINg. 105
3.LEVERING 109
4. AfBEELDINgEN 110
5. AfSTANDBEDIENing 112
6.ALgEmEEN. 115
7.EERSTE gEBRulK 115
7.1.Voeding. 115
NL
7.2.Antenne 116
7.3.DAB scanner 116
7.4.FM scanner 117
8.BEDIENING. 118
8.1.DAB-ontvangst 118
8.2.FM-ontvangst 119
8.3. Volume 120
8.4. Favoriete zender (PRESET) opslaan 121
8.5. Favoriten Sender (PRESET) aufrufen 122
8.6.Display Dimmer 123
8.7.Tijdsaanduiding 12/24 123
8.8.Sleeptimer 123
8.9. Info 124
8.10. Equalizer geluidsinstallingen 125
8.11. Welkner instellen 127
8.11.1. Sluimerfunctie/snooze 129
INHOUDSOPGAVE
9.MENU 130
9.1. Digital Radio MENU. 131
9.1.1.Senderliste 131
9.1.2.Automatisch zoeken 131
9.1.3. Handmatig zoeken 132
9.1.4.Zenderwissen. 133
9.1.5. Dynamic Range Compression. 134
9.1.6. Systeminstallingen 134
9.1.6.1. Equalizer 135
9.1.6.2. Tijd instellen 135
9.1.6.3.Achtergrundverlichting 136
9.1.6.4.Automatischestandby. 137
9.1.6.5.Taal 138
9.1.6.6.Fabrieksinstallingen 139
9.1.6.7.Softwareversie 140
9.2.FMRadiomenu 140
9.2.1. Scaninstallingen analogue FM-radio. 140
9.2.2.FM audio-installingen. 142
10.ProbleemMogelijkeoplossingenhulp. 143
11.AFVOERINSTRUCTIES 144
12. EIGENSCHAPPEN EN TECHNISCHE SPECIFICATIES 145
13. Service en ondersteuning 147
14. CE-markering. 148
1. VOORWOORD
Digital Radio
FM Radio

9. mENu
9.1. Digital Radio MENU
9.1.1.Senderliste
DAB/DAB+/FM RDS receive
Support DAB+ broadcasting
Sleep timer
IR remote controller
DAB sensitivity to -100dBm
DAB+ sensitivity to -100 dBm
FM sensitivity to -108dBm
Frequenzbereich:
DAB Band III 174 MHz-240MHz
FM 87.5 MHz - 108.0MHz
Display
TFT Color Display 2,4 Zoll LCD 240 x 320 Pixel
SOUND
Audio AMPLIFIER 4W
Speakers: 4 OHM,4W
multi sound effect EQ to set IC.
2. INDICATIONS DE SECURITÉ
2. INDICATIONS DE SECURITÉ
FM (radio FM, section 8.2)
7. PREMIÈRE mISE EN SERVICE
11. INDICATIONS D'ELIMINATION
DAB/DAB+/FM RDS receive
Support DAB+ broadcasting
Sleep timer
IR remote controller
DAB sensitivity to -100dBm
DAB+ sensitivity to -100 dBm
FM sensitivity to -108dBm
FM 87.5 MHz - 108.0MHz
Display
TFT Color Display 2,4 Zoll LCD 240 x 320 Pixel
SOUND
Audio AMPLIFIER 4W
Speakers: 4 OHM,4W
multi sound effect EQ to set IC.
USB [Type A]subsection
Chere cliente, cher client!