Reference Premiere RP6000F - Speaker KLIPSCH - Free user manual and instructions
Find the device manual for free Reference Premiere RP6000F KLIPSCH in PDF.
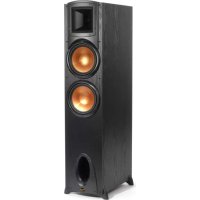
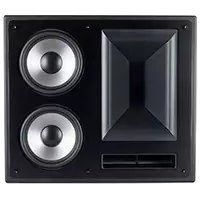
| Technical Features | Column speaker with Tractrix technology, 6.5-inch woofer, 1-inch titanium tweeter, frequency response from 32 Hz to 25 kHz. |
|---|---|
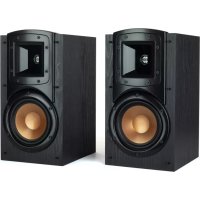
| Usage | Ideal for home theater and high-fidelity audio systems, compatible with amplifiers and AV receivers. |
| Maintenance and Repair | Clean with a soft cloth, avoid abrasive chemicals. In case of issues, contact an authorized Klipsch service center. |
| Safety | Avoid exposure to moisture, do not overload the device with overly powerful amplifiers. |
| General Information | 5-year limited warranty, weight 20.4 kg, dimensions 101.6 x 24.1 x 38.1 cm. |
Frequently Asked Questions - Reference Premiere RP6000F KLIPSCH
User questions about Reference Premiere RP6000F KLIPSCH
0 question about this device. Answer the ones you know or ask your own.
Ask a new question about this device
Download the instructions for your Speaker in PDF format for free! Find your manual Reference Premiere RP6000F - KLIPSCH and take your electronic device back in hand. On this page are published all the documents necessary for the use of your device. Reference Premiere RP6000F by KLIPSCH.
USER MANUAL Reference Premiere RP6000F KLIPSCH
text_image
P K EST. 1946 HOPE, ARUSER MANUAL
Klipsch®
REFERENCE
PREMIERE
|
一
1
[Non-Text]
[Non-Text]
[Non-Text]
[Non-Text]
[Non-Text]
[Non-Text]
[Non-Text]
[Non-Text]
[Non-Text]
[Non-Text]
[Non-Text]
[Non-Text]
|
一
[Non-Text]
[Non-Text]
[Non-Text]
[Non-Text]
[Non-Text]
[Non-Text]
[Non-Text]
[Non-Text]
[Non-Text]
[Non-Text]
[Non-Text]
[Non-Text]
[Non-Text]
[Non-Text]
[Non-Text]
[Non-Text]
—
|
[Non-Text]
[Non-Text]
[Non-Text]
[Non-Text]
[Non-Text]
[Non-Text]
[Non-Text]
[Non-Text]
[Non-Text]
[Non-Text]
[Non-Text]
[Non-Text]
REFERENCE (n):
1) the standard, the benchmark, the point used for comparison
2) the embodiment of the legendary Klipsch sound
LOUD AND PROUD SINCE 1946
In 1946, Paul W. Klipsch revolutionized the audio industry by creating our proprietary horn technology and the acoustic principles that are the driving force behind our highly acclaimed signature sound. Today, we remain true to PWK's vision and pack the better part of a century's worth of sweat and genius into every product we make. These speakers are the result of our obsession with that aural perfection. Experience the power, detail and emotion of Klipsch Reference Series.
We are the Keepers of the Sound ^® .
ENGLISH

natural_image
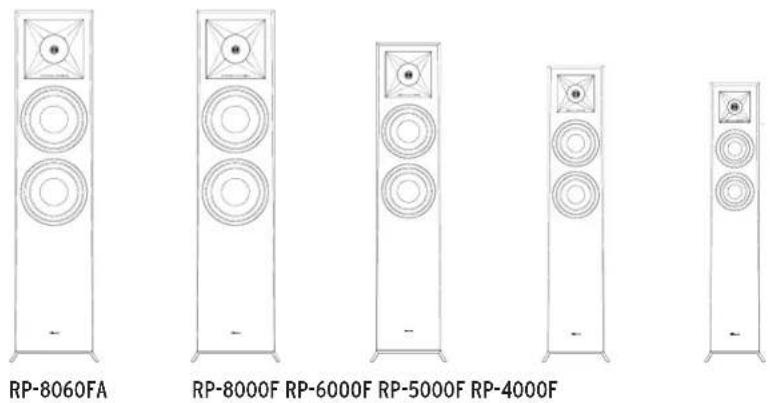
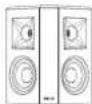
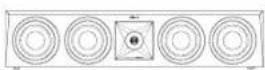
Line drawing of five different speaker units in a row, each with two circular speakers and a central screen (no text or symbols present)REFERENCE PREMIERE SPEAKERS

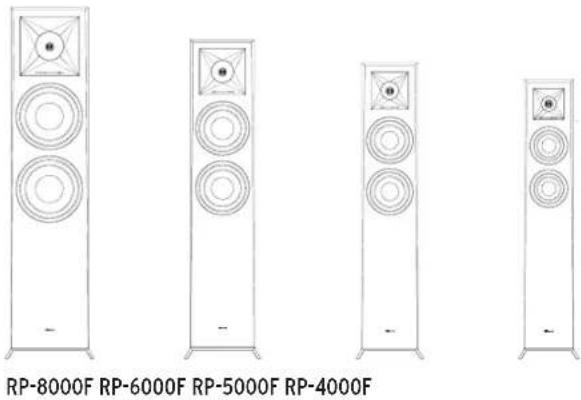

RP-600M
RP-500M RP-400M RP-502S RP-402S RP-500SA


RP-504C RP-404C RP-600C RP-500C RP-400C
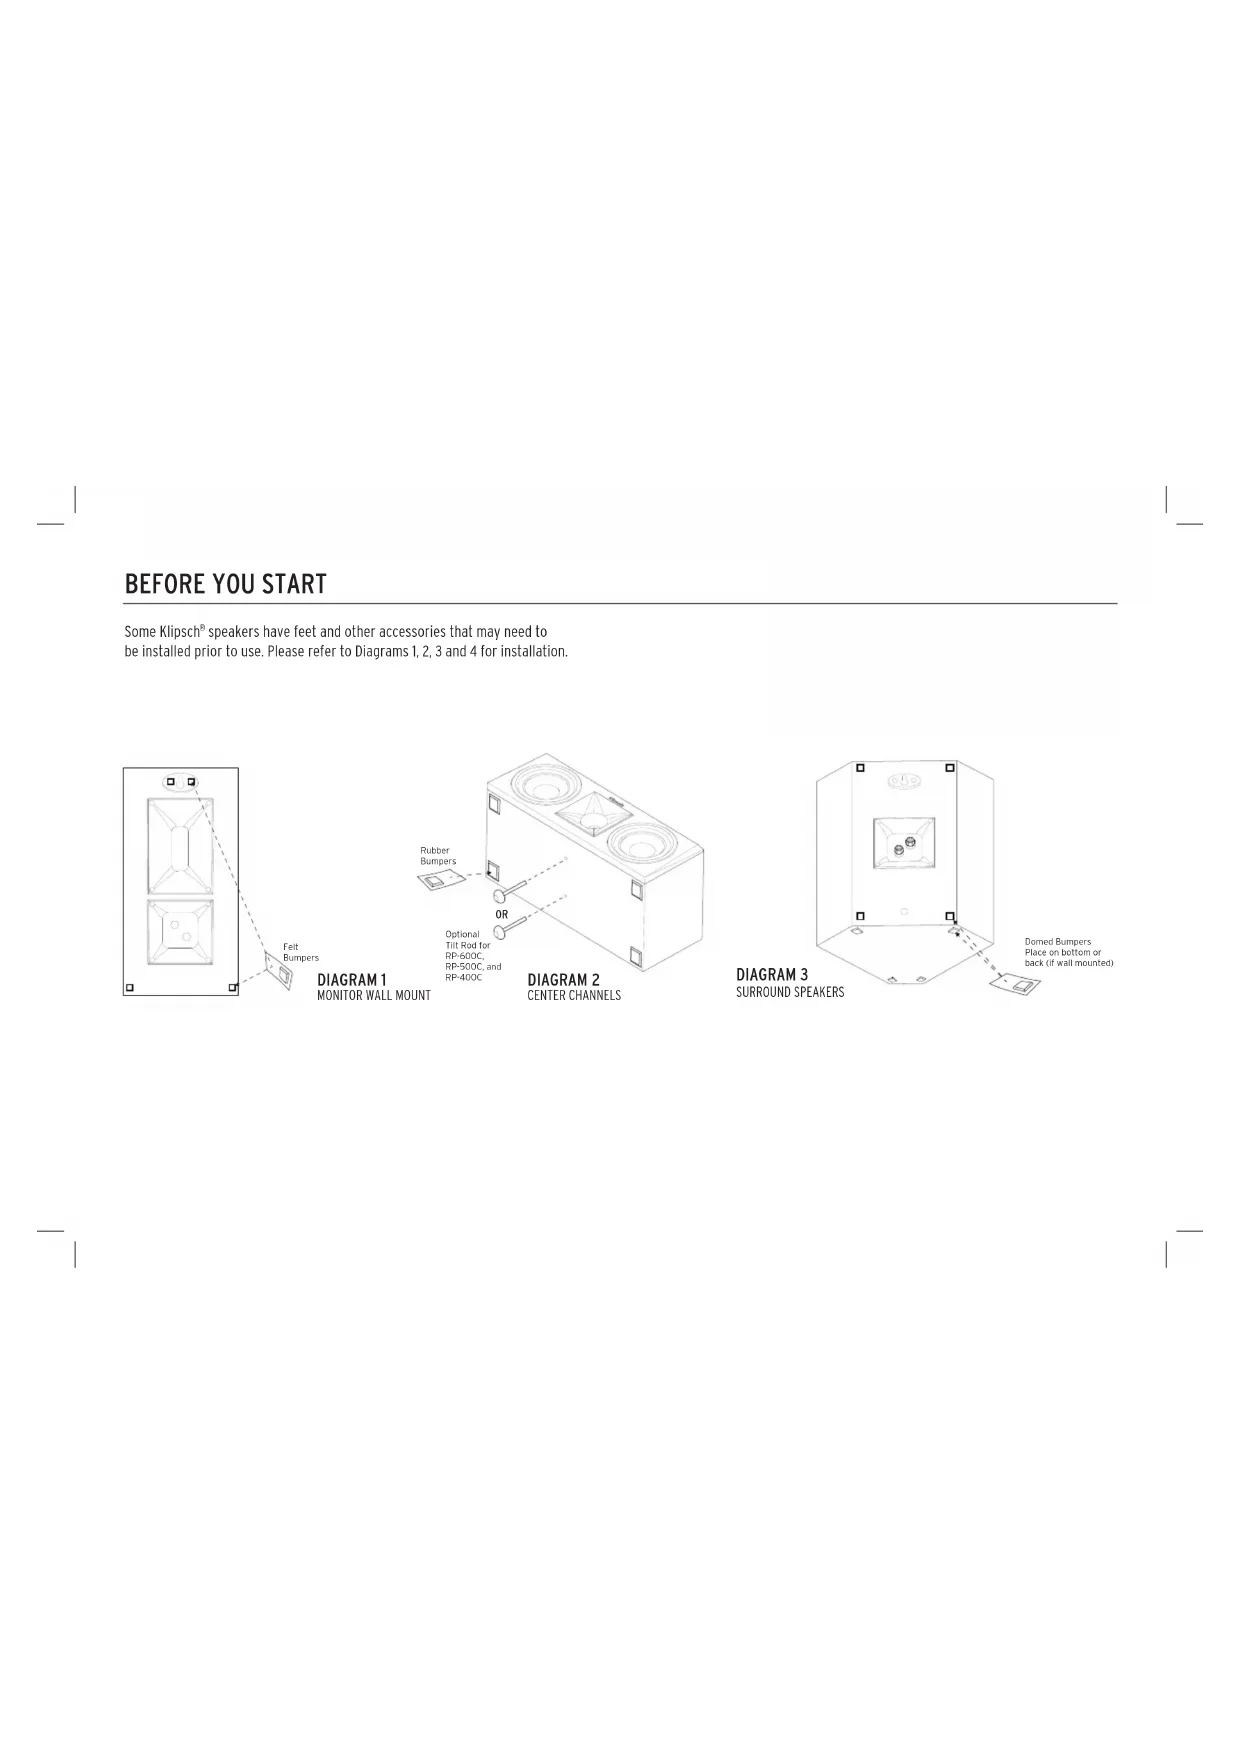
BEFORE YOU START
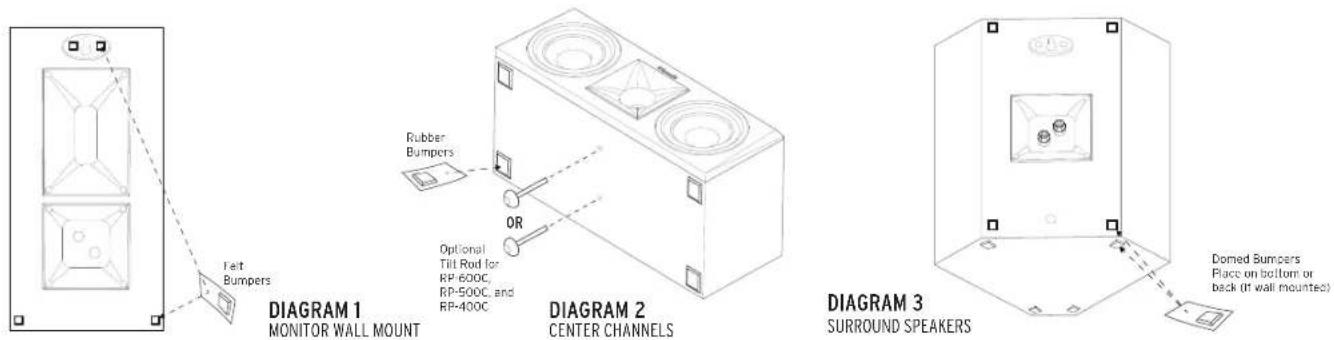
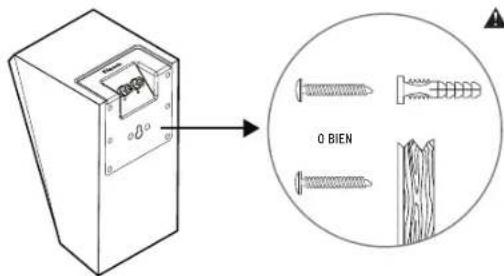
Some Klipsch ^® speakers have feet and other accessories that may need to be installed prior to use. Please refer to Diagrams 1, 2, 3 and 4 for installation.
ROOM PLACEMENT
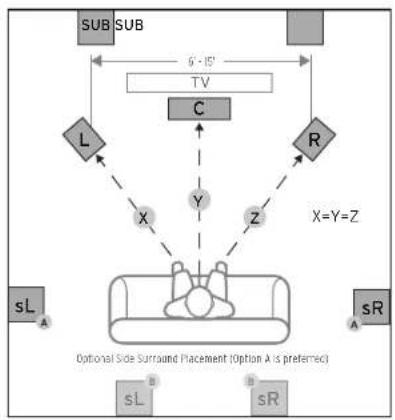
Left and Right Main Channel Speakers – For optimum performance, Klipsch Group, Inc. (KGI) suggests placing your speakers 6 to 15 feet (1.8 to 4.6m) apart. They may also be toed-in slightly for better stereo imaging. The listening position should be about 1 to 1.5 times the distance separating the speakers. Refer to Figures 1 and 3 for connection and placement.
Center Channel Speakers – Center channel speakers are designed to place dialogue and primary sounds so that they appear to come from the video screen. The speakers should therefore be placed as close to the screen as possible, preferably directly on top of or below the screen. Refer to Figures 1, 2 and 3 for connection and placement.
Rear Surround Channel Speakers – Klipsch WDST surround speakers should be placed approximately 2 feet above the listening position. Typically this will be about 5-7 feet above the floor. The surrounds should be placed on the walls directly adjacent to the listening position. Another option would be on the wall behind the listening position. The final surround speaker placement depends on your room's characteristics. They are designed to recreate the sense of space and ambience that many of today's surround sound technologies provide. Refer to Figures 1, 3 and 4 for connection and placement.
CONNECTION
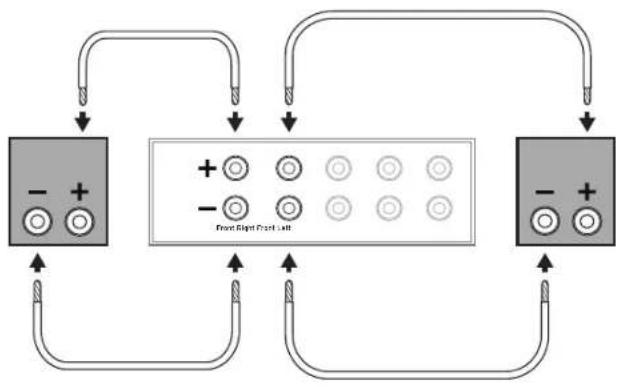
Conventional Connection – Using 16-12 gauge speaker wire, connect the RED "positive" (+) terminal of the LEFT speaker to the RED "positive" (+) terminal of your amplifier's LEFT channel. Connect the BLACK "negative" (-) terminal of the LEFT speaker to the BLACK "negative" (-) terminal of your amplifier's LEFT channel. Repeat this procedure for connecting all remaining speakers to the appropriate amplifier channels. Refer to Figure 3. Make sure that no bare wires from any of the connections touch any other terminals as this could cause a short and damage your equipment.
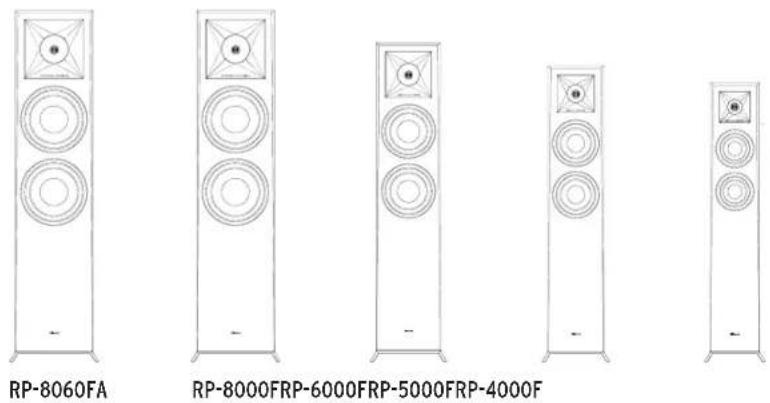
Reference Premiere models RP-8060FA, RP-8000F, RP-6000F, RP-5000F, RP-4000F and RP-160M are equipped with dual binding posts. If single wire connection is used, the terminal connecting bar should remain in place. If Bi-wire or Bi-amp connection is used, the terminal connecting bar must be removed. Please see your receiver's manual for further instructions.
Amplifier Requirements – Klipsch speakers are highly efficient and will operate easily on a wide variety of amplifiers. All Klipsch speakers are 8-ohm compatible and can be driven to very high levels with low distortion. Due to the high output levels, Klipsch speakers are capable of reproducing, exercise caution with the volume control. Excessive volume over long periods can permanently damage your hearing. Overdriving your amplifier could also damage your speakers. Check with your dealer or amplifier manual to make sure your particular amplifier is best suited to your application. We want you listening for a lifetime.
FIGURE 1
SPEAKER PLACEMENT IN LISTENING AREA
flowchart
graph TD
    A["SUB"] --> B["L"]
    C["SUB"] --> D["C"]
    E["R"] --> F["Y"]
    G["sL"] --> H["X"]
    I["sR"] --> J["Z"]
    K["X=Y=Z"] --> L["Optional Side Surround Placement (Option A is preferred)"]
    style A fill:#f9f,stroke:#333
    style C fill:#f9f,stroke:#333
    style E fill:#f9f,stroke:#333
    style G fill:#ccf,stroke:#333
    style I fill:#ccf,stroke:#333
    style K fill:#cff,stroke:#333
    style L fill:#ffc,stroke:#333
    style_M["sL"] fill:#cfc,stroke:#333
    style_N["sR"] fill:#cfc,stroke:#333
FIGURE 3 STANDARD CONNECTIONS
flowchart
graph TD
    A["Terminal Block 1"] -->|+| B["Central Display Panel"]
    A -->|-| C["Terminal Block 2"]
    B -->|+| D["Front Right Front Left"]
    B -->|-| E["Front Right Front Left"]
    C -->|+| D
    C -->|-| E
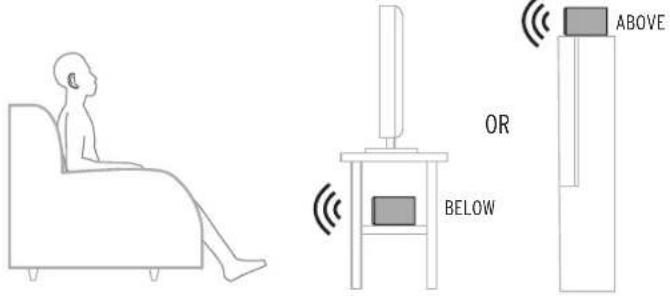
FIGURE 2 CENTER CHANNEL
text_image
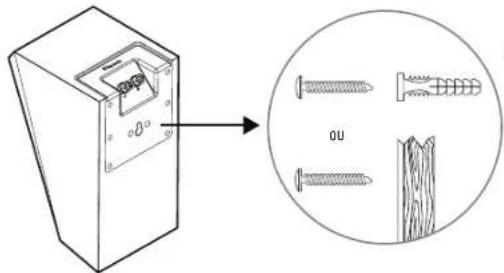
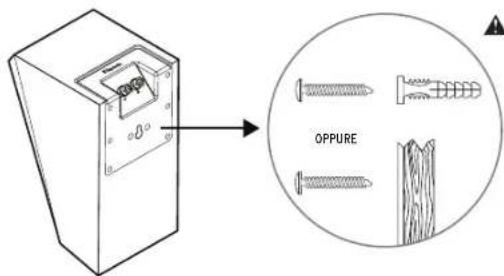
ABOVE OR BELOWFIGURE 4 WALL MOUNTING
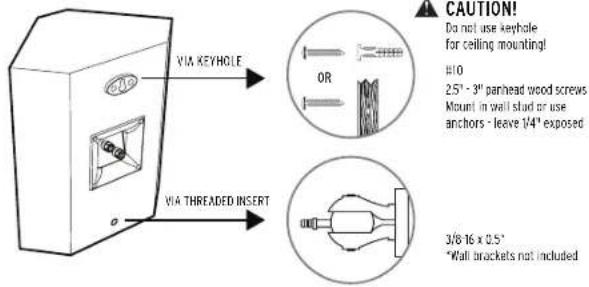
text_image
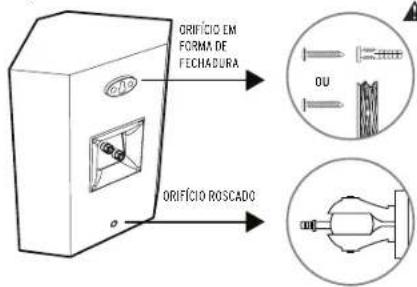
VIA KEYHOLE VIA THREADED INSERT OR CAUTION! Do not use keyhole for ceiling mounting! H10 2.5" - 3" parhead wood screws Mount in wall stud or use anchors - leave 1/4" exposed 3/8 16 x 0.5" "Wall brackets not includedREFERENCE PREMIERE WITH DOLBY ATMOS® TECHNOLOGY
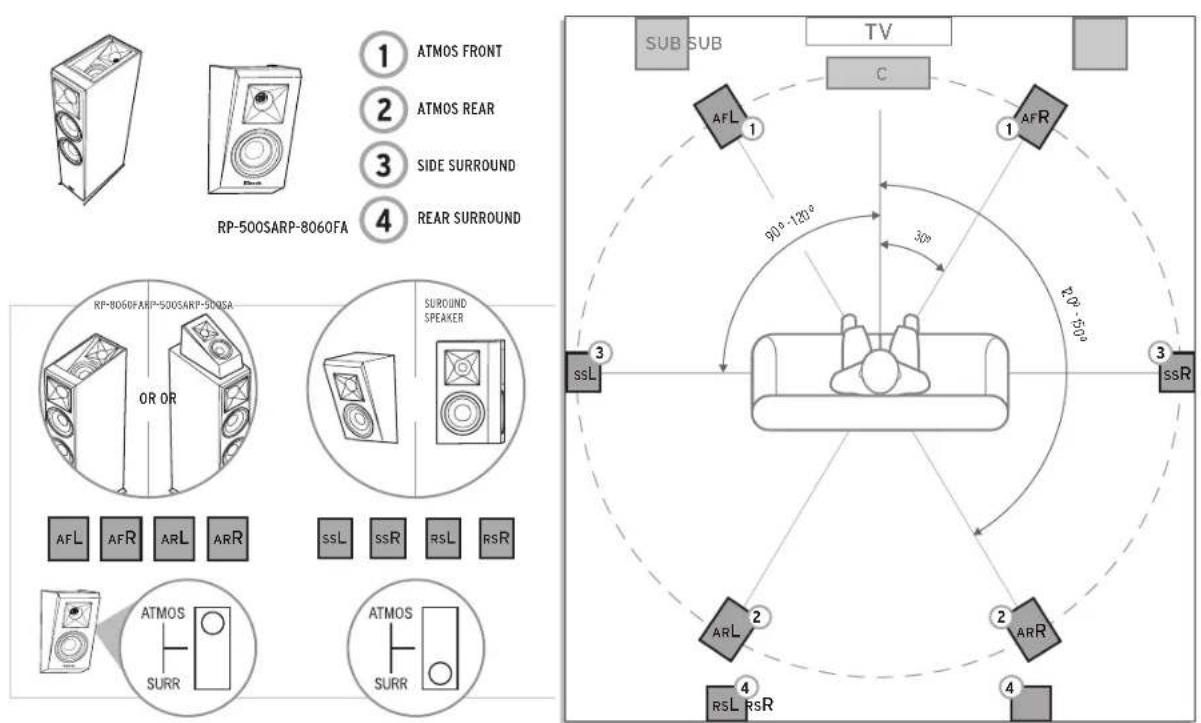
text_image
1 ATMOS FRONT 2 ATMOS REAR 3 SIDE SURROUND 4 REAR SURROUND RP-500SARP-8060FA 1 2 3 4 RF-8060FARP-500SARP-500SA OR OR SUROUND SPEAKER AFL AFR ARL ARR ssL ssR RsL RsR ATMOS SURR ATMOS SURR 3 ssL 1 2 3 4 Sub SUB TV C AFL 1 AFR 1 90°-120° 30° 20°-50° SSR 3 SSR 2 ARR 2 ARL 2 RSL RsR 4SPEAKER PLACEMENT IN LISTENING AREA
REFERENCE PREMIERE WITH DOLBY ATMOS® TECHNOLOGY

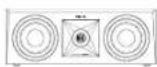
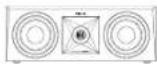
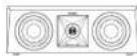
RP-500SAFLOORSTANDING SPEAKER
The RP-500SA can be added to any passive loudspeaker setup.
natural_image
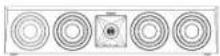
Line drawing of a speaker with two circular components on top (no text or symbols)text_image
Diagram showing a screw holder with an arrow pointing to its internal structure, alongside a magnified view of the screw assembly.
CAUTION!
Do not use keyhole for ceiling mounting
10
2.5" - 3" panhead wood screws Mount in wall stud or use anchors - leave 1/4" exposed
CARE AND CLEANING
The only thing you should ever need to do to your speakers is dust them occasionally. Never apply any abrasive or solvent-based cleaner or any harsh detergent. You can clean the grilles with the brush attachment of a vacuum cleaner.
PRODUCT REGISTRATION
Register your product online at www.klipsch.com/register
- Keep up-to-date on new products and promotions.
- Your personal information will never be resold.
• This registration information is not used for warranty purposes.
Please retain your receipt for warranty claims.
REFERENCE
natural_image
Line drawing of five different speaker units in a row, each with two circular speakers and a central screen (no text or symbols present)ENCEINTES REFERENCE PREMIERE

RP-600M

RP-500M RP-400M RP-502S RP-402S RP-500SA


RP-504C RP-404C RP-600C RP-500C RP-400C
AVANT DE COMMENCER
natural_image
Line drawing of a speaker with two circular components and a star-shaped top panel (no text or symbols)MONTAGE MURAL DES ENCEINTES SURROUNDECIENTE D'ÉLÉVATION
text_image
Technical diagram showing a component with a screw and its magnified view of two screws (OU) on a wooden surface.ATTENTION!
We are the Keepers of the Sound ^® .
DEUTSCH

natural_image
Line drawing of five different speaker units in a row, each with two circular speakers and a central screen (no text or symbols present)REFERENCE PREMIERE-LAUTSPRECHER


RP-600M

RP-500M RP-400M RP-502S RP-402S RP-500SA


RP-504C RP-404C RP-600C RP-500C RP-400C
ERSTE SCHRITTE
natural_image
Line drawing of a speaker with two circular components and a square aperture (no text or symbols)text_image
Diagram showing a device with screw and a circular inset showing two screws labeled ODER, illustrating electrical or mechanical assembly.VORSICHT!
natural_image
Line drawing of five different speaker units in a row, each with two circular speakers and a central screen (no text or symbols present)ALTAVOCES REFERENCE PREMIERE

RP-600M

RP-500M RP-400M RP-502S RP-402S RP-500SA


RP-504C RP-404C RP-600C RP-500C RP-400C
ANTES DE EMPEZAR
natural_image
Line drawing of a speaker with two circular components and a star-shaped top panel (no text or symbols)MONTAJE DE LOS ALTAVOCES SURROUND EN LA PAREDALTAVOZ DE ALTURA
text_image
O BIENPRECAUCIÓN
Somos os Keepers of the Sound ^8 .
PORTUGUÊS

natural_image
Line drawing of five different speaker units in a row, each with two circular speakers and a central screen (no text or symbols present)CAIXAS ACÚSTICAS REFERENCE PREMIERE


RP-600M

RP-500M RP-400M RP-502S RP-402S RP-500SA


RP-504C RP-404C RP-600C RP-500C RP-400C
ANTES DE COMEÇAR
DIAGRAMA 2 CANAL CENTRAL
text_image
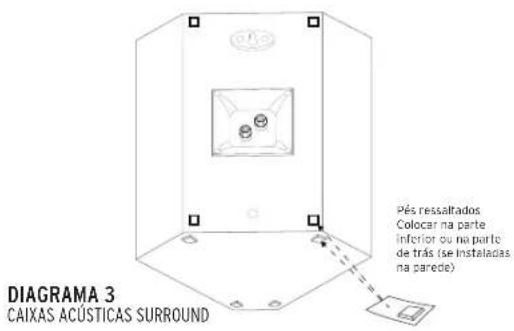
Pés ressaltados Colocar na parte inferior ou na parte de trás (se instaladas, na parede) DIAGRAMA 3 CAIXAS ACÚSTICAS SURROUNDtext_image
FIGURA 2 CANAL CENTRAL OU ABAIXO ACIMAFIGURA 4
INSTALAÇÃO DAS CAIXAS ACÚSTICAS SURROUND EM PAREDE
text_image
ORIFÍCIO EM FORMA DE FECHADURA ORIFÍCIO ROSCADO
natural_image
Line drawing of a speaker with two circular components and a star-shaped top (no text or symbols)text_image
Diagram showing a component with screw holes and a magnified view of two screws (0u) on a surface.CUIDADO!
natural_image
Line drawing of five different speaker units in a row, each with two circular speakers and a central screen (no text or symbols present)ALTOPARLANTI REFERENCE PREMIERE


RP-600M
RP-500M RP-400M RP-502S RP-402S RP-500SA


RP-504C RP-404C RP-600C RP-500C RP-400C
OPERAZIONI PRELIMINARI
natural_image
Line drawing of a speaker with two circular components and a star symbol on top (no text or labels)FISSAGGIO A PARETE DEGLI ALTOPARLANTI SURROUNDALTOPARLANTI ELEVATO
text_image
OPPUREATTENZIONE
natural_image
Line drawing of five different speaker units in a row, each with two circular speakers and a central screen (no text or symbols present)参考系列扬声器

RP-600M

RP-500MRP-400MRP-502SRP-402SRP-500SA


RP-504CRP-404CRP-600CRP-500CRP-400C
开始使用之前
natural_image
Pure technical line drawing of a 3D mechanical part with no text, numbers, or symbolsnatural_image
Line drawing of five different speaker units in a row, each with two circular speakers and a central screen (no text or symbols present)natural_image
Line drawing of a speaker with two circular speakers and a triangular top panel (no text or symbols)التركيب بالحانط

natural_image
Illustration of a wall-mounted electrical switch with screw holes and a magnified inset showing two screws (no text or symbols present)text_image
P CW EST 1946 HOPE, ARKlipsch®
KEEPERS OF THE SOUND
3502 WOODVIEW TRACE, INDIANAPOLIS, IN, USA
KLIPSCH.COM
DOLBY ATMOS
Manufactured under license from Dolby Laboratories. Dolby, Dolby Atmos and the double-D symbol are registered trademarks of Dolby Laboratories
V03-180507
1-800-KLIPSCH ©2015 KLIPSCH GROUP, INC. ALL RIGHTS RESERVED. KLIPSCH AND KEEPERS OF THE SOUND ARE REGISTERED TRADEMARKS OF KLIPSCH GROUP, INC. IN THE USA AND OTHER COUNTRIES: A WHOLLY-OWNED SUBSIDIARY OF VOXX INTERNATIONAL CORPORATION. MANUFACTURED UNDER LICENSE FROM DOLBY LABORATORIES. DOLBY ATMOS IS A REGISTERED TRADEMARK OF DOLBY LABORATORIES.