TG504 - Weather Station ThinkGizmos - Free user manual and instructions
Find the device manual for free TG504 ThinkGizmos in PDF.
| Technical Features | Details |
|---|---|
| Product Type | Weather Station |
| Display | LCD screen with backlight |
| Measurements | Indoor and outdoor temperature, humidity, atmospheric pressure |
| Connectivity | Wireless (external sensors) |
| Power Supply | Power adapter and/or batteries |
| Dimensions | Compact, ideal for home use |
| Usage | Real-time weather condition monitoring |
| Maintenance | Regular cleaning of the screen and sensors, battery replacement if necessary |
| Safety | Do not expose to water, avoid shocks |
| General Information | Ideal for weather enthusiasts and households wishing to monitor climate conditions |
Frequently Asked Questions - TG504 ThinkGizmos
User questions about TG504 ThinkGizmos
0 question about this device. Answer the ones you know or ask your own.
Ask a new question about this device
Download the instructions for your Weather Station in PDF format for free! Find your manual TG504 - ThinkGizmos and take your electronic device back in hand. On this page are published all the documents necessary for the use of your device. TG504 by ThinkGizmos.
USER MANUAL TG504 ThinkGizmos
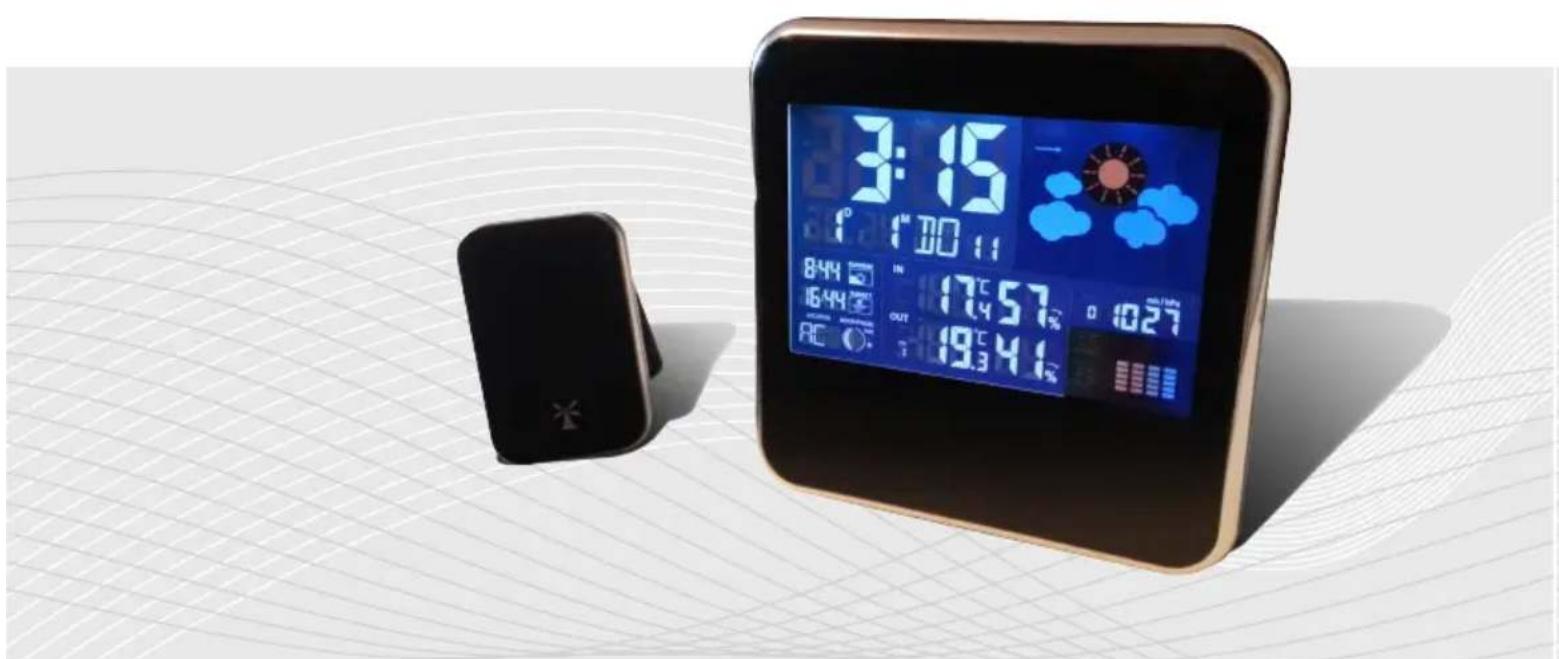
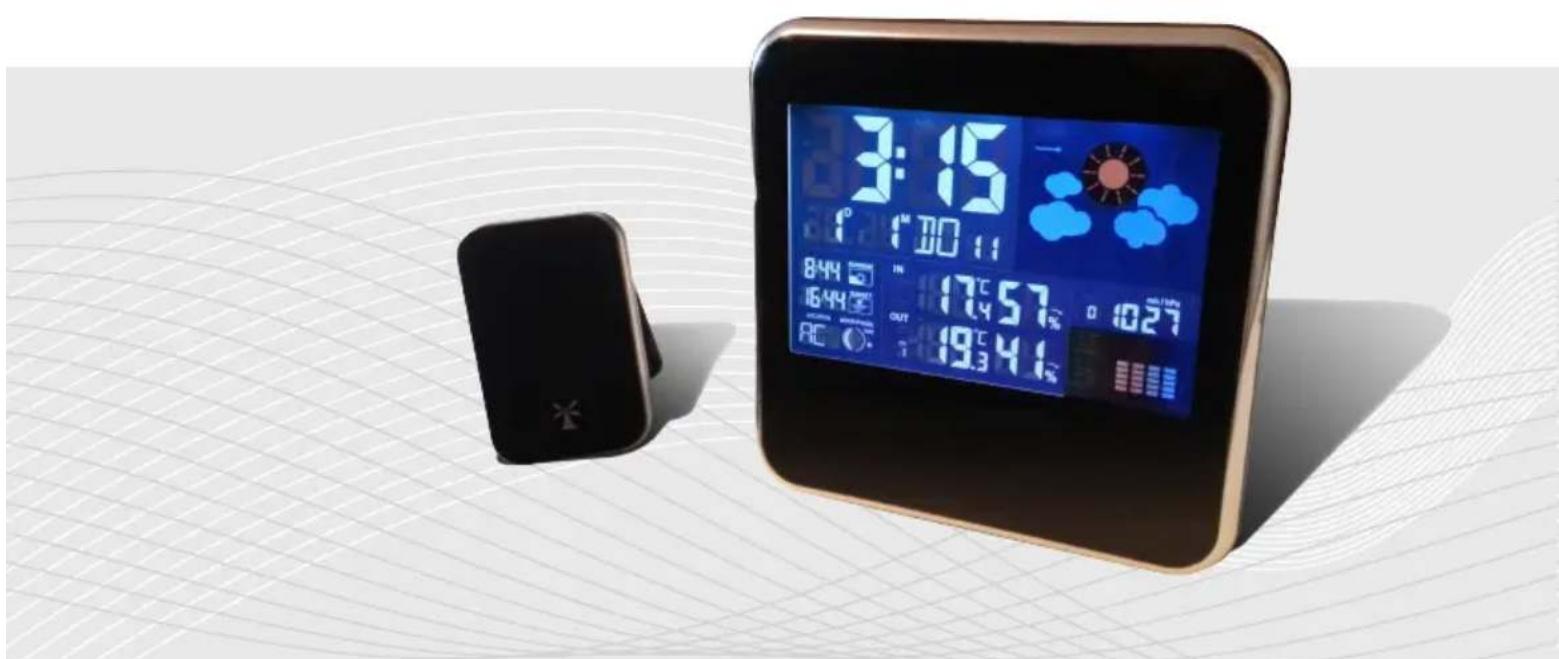
TG504 WEATHER STATION WITH REMOTE SENSOR
User Manual
CONGRATULATIONS ON PURCHASING THE THINK GIZMOS WIRELESS WEATHER STATION.
BY FOLLOWING THESE INSTRUCTIONS CAREFULLY IT WILL BE A GREAT ASSET IN YOUR LOCAL WEATHER FORCASTING NEEDS.
English p 2
Deutsch p 12
Francais p 23
Italiano p 34
Espanol p 45
ENGLISH MANUAL - CONTENTS
1.
WEATHER STATION FEATURES
1.1 Weather Station Features 3
1.2 Remote Sensor (Transmitter) Features 3
1.3 Backlight 3
2.
IMPORTANT INFORMATION
2.1 Important Information 4
2.2 Connecting the Weather Station and Sensor 4
3.
TIME AND LOCATION SETTINGS
3.1 Manual Time / Date Setting 5
3.2 Location Settings, Sunrise and Sunset 5
4.
ALARM SETTING
4.1 Setting the Daily Alarms 6
4.2 Activating and Deactivating the Alarms 6
4.3 Alarm Information 6
4.4 Automatic Snooze Function 6
5.
TEMPERATURE INFORMATION
5.1 ^ C / ^ Temperature Display 7
5.2 Temperature Trend Display 7
5.3 Temperature Alert Setting 7
5.4 Maximum/Minimum Temperature 7
6.
HUMIDITY AND AIR PRESSURE INFORMATION
6.1 Relative Humidity Trend Display 8
6.2 Maximum/Minimum Relative Humidity 8
6.3 Air Pressure Display 8
6.4 Relative Air Pressure History 8
7.
WEATHER FORECAST / MOON AND TIDE INDICATOR
7.1 Weather Forecast 9
7.2 Weather Forecasting Icon Settings 9
7.3 The Moon Phase and Tide Indicator 9
8.
LOCATIONS
8.1 City and Abbreviation 10
WARRANTY
8.1 Warranty Information 11
1. WEATHER STATION FEATURES
1.1 Weather Station Features
Time in optional 12/24 hour format.
- Date and weekday display.
Continuous calendar up to 2099.
- Two daily alarms.
Automatic snooze function.
- Barometer: Graphic display to show the air pressure, display either in mb/hPa or inHg, air pressure trend display.
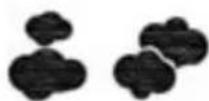
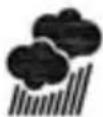
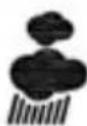
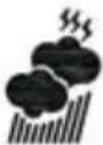
- Weather forecast using five icons: sunny, light cloud cover, cloudy, rain and stormy.
Temperature display in ^ C or ^
- Thermometer: Indoor measurement ranges: 0^ (32^) - 50^ (122^) (calibration time - 30 seconds), outdoor measurement ranges: -50^ (-58^) - 70^ (158^) (calibration time - 30 seconds). Temperature trend display either in ^ or ^ .
Hygrometer: Measurement range: 20% -95% RH, air humidity for indoor measurement.
Minimum / maximum displaya for air humidity and temperature.
- Temperature Alert.
-
LED back light display (auto off after 5 seconds if batteries are being used as the power source).
-
Batteries: 3xAA (not included).
DC power supply: 4.5VDC (Included).
1.2 Remote Sensor (Transmitter) Features
- Transmitter frequency: 433MHz.
- Range of transmission is up to 30m (Open Space)
- Batteries: 2xAAA (not included).
1.3 Backlight
Briefly press the 'LIGHT' button to activate the display light for 5 seconds. (when on battery power)
2. IMPORTANT INFORMATION
2.1 Important Information
In order to get the full screen brightness and easy visibility of all numbers and symbols, we recommend you use the included mains adaptor rather than batteries for the main unit.
The remote sensor will work better if the main unit is powered by the included mains adaptor rather than batteries.
Regarding the wireless remote sensor (which can be positioned indoors or outdoors), if it is used outside particularly in cold conditions we recommend the use of Lithium AAA (requires 2) batteries as this will result in a more powerful signal and ensure no signal loss. This is only precautionary advice and the remote sensor does work fine with normal Alkaline batteries.
If the main unit does not connect with the remote sensor, press and hold the CH button for 2 seconds and it will rescan in order to find the remote sensor.
The weather station needs to be powered for 12 hours before an accurate predition will display.
2.2 Connecting the Weather Station and Sensor
Weather Station:
- Open the battery compartment on the rear side of the weather station and insert the batteries, taking care to observe the correct polarity. Close the battery compartment.
- When you insert the batteries, all the symbols on the display will briefly ligh up and you will hear a signal tone.
Wireless Sensor:
- Insert the 2 batteries in to the transmitter, pay attention to observe the correct polarity. One sensor is supplied with your weather station and is set by default to channel 1.
- Press and hold down the 'CH' button for 2 seconds to search for the outside sensor (this will erase the current temperature data inside the clock).
3. TIME AND LOCATION SETTINGS
3.1 Manual Time / Date Setting
- Press and hold down the 'SET' button for 2 seconds.
- The year display '2007' will start to flash. Press the 'UP' and 'DOWN' keys to set the correct year.
- Press 'SET' to confirm the settings.
- The month display will start to flash. Press the 'UP' and 'DOWN' keys to set the correct month.
- Press 'SET' to confirm the settings.
- The date display will start to flash. Press the 'UP' and 'DOWN' keys to set the correct date.
- Press 'SET' to confirm the settings.
- There are 7 languages of Weekday: English, Italian, French, Dutch, Spanish, Danish and German, press the 'UP' and 'DOWN' keys to select.
- Press 'SET' to confirm the settings.
- The time is displayed either in 12 or 24 hour format. Briefly pressing the 'UP' and 'DOWN' button allows you to switch between the individual modes. The symbol AM (before midday) or PM (after midday) appears after the time.
- Press 'SET' to confirm the settings.
The hour display will start to flash. Press the 'UP' and 'DOWN' keys to set the correct hour. - Press 'SET' to confirm the settings.
- The minute display will start to flash. Press the 'UP' and 'DOWN' keys to set the correct minute.
- Press 'SET' to confirm the settings.
- The time zones will start to flash. Press the 'UP' and 'DOWN' keys to set the correct time zone (-12 to +12).
3.2 Location Settings, Sunrise and Sunset
- The Sun Clock will automatically calculate the sunrise, sunset time based on the city location.
- Press and hold the 'LOC' button for 2 seconds, the short form of city name will start flashing. Using the 'UP' and 'DOWN' buttons select the city location, press the 'LOC' button again to confirm the city code.
160 E.U cities can be chosen from and every city is displayed in short form. The cities are shown in the table at the back of the manual.
4. ALARM SETTING
4.1 Setting the Daily Alarms
The weather station has 2 daily alarms. To view the set alarm times, press the 'ALARM' button briefly. The display switches from the clock to Alarm 1 and, if you press the button again, to Alarm 2. (In 8 seconds, the weather station automatically returns to the normal time display).
Proceed as follows to set the alarms:
- Press and hold down the 'ALARM' button for 3 seconds until alarm time 1 is displayed and the hour number is flashing.
- Press the 'UP' and 'DOWN' keys to set the correct hour.
- Press 'ALARM' to confirm the settings.
- The minute display will start to flash. Press the 'UP' and 'DOWN' keys to set the correct minute.
-
Press 'ALARM' to confirm the settings and move onto Alarm 2.
-
Follow the settings again to set the time for Alarm 2.
4.2 Activating and Deactivating the Alarms
To activate or deactivate the daily alarms, briefly press the 'DOWN' button:
Press 1x: Alarm 1 activated.
Press 2x: Alarm 2 activated.
Press 3x: Both alarms activated.
Press 4x: Both alarms deactivated.
4.3 Alarm Information
- After 8 seconds without a button being pressed, the clock switches automatically from settings mode to normal clock mode.
- The alarm will sound for 2 minutes if you do not deactivate it by pressing any button. In this case, the alarm will be repeated automatically after 24 hours.
- Rising Alarm (length: 2 minutes) changes the volume four times whilst the alarm signal is heard.
- Press the 'LIGHT' button to activate the automatic snooze function.
4.4 Automatic Snooze Function
Proceed as follows to activate the automatic snooze function:
While the alarm is sounding, press the 'LIGHT' button to activate the snooze function.
While the snooze function is active, the 'Zz' symbol appears in the display.
This operation moves the alarm back by 5 minutes and the alarm will restart at this time.
- The snooze function can be interrupted by pressing any button or repeated up to 7 times.
5. TEMPERATURE INFORMATION
5.1 °C/°F Temperature Display
The temperature is displayed either in ^ C / ^ F . Briefly pressing the ^ C / ^ F' button allows you to switch between the individual modes.
5.2 Temperature Trend Display
After you insert the batteries, the weather station measures the current temperature. The trend display shows a neutral temperature course (horizontal arrow). The further course of the trend display is determined as follows:
- If, after an hour, the temperature is more than 1^ higher than the value measured first, then a positive course is displayed (arrow pointing upwards).
- If, after an hour, the temperature is more than 1^ C lower than the value measured first, then a negative course is displayed (arrow pointing downwards).
- If the temperature does not change within an hour, the upward or downward pointing arrow becomes a horizontal arrow. The measured temperature is then taken as the neutral value from which further prognoses are made.
5.3 Temperature Alert Setting
- Press and hold down the 'ALERT' button for 2 seconds until the con for Temperature Alert starts to flash.
- The icon of Upper limit of the alarm will flash. Use the 'MPA/INHG' and "°C/°F' buttons to set the required maximum temperature. Press the 'ALERT' button to confirm the settings.
- The icon of Lower limit of the alarm will flash. Use the 'MPA/INHG' and ^ C / F buttons to set the required minimum temperature. Press the 'ALERT' button to confirm the settings and to end the settings procedure.
- When Temperature Alert is On Alert: there are 3 beep sounds per second, the alarm will sound for 1 minute if you do not deactivate it with any button.
5.4 Maximum/Minimum Temperature
To toggle indoor/outdoor maximum, minimum temperature press the 'MEM' button:
- Once to show the maximum temperature values.
- Twice to show the minimum temperature values.
-
Three times to return to the current temperature levels.
-
To reset the maximum and minimum temperature, press and hold down the 'MEM' button for about 2 seconds. This will reset all minimum and maximum data recorded to the current displayed values.
6. HUMIDITY AND AIR PRESSURE INFORMATION
6.1 Relative Humidity Trend Display
After you insert the batteries, the weather station measures the current relative humidity. The trend display shows a neutral relative humidity course (horizontal arrow). The further course of the trend display is determined as follows:
- If, after an hour, the relative humidity is more than 5% higher than the value measured first, then a positive course is displayed (arrow pointing upwards).
- If, after an hour, the relative humidity is more than 5% lower than the value measured first, then a negative course is displayed (arrow pointing downwards).
- If the relative humidity does not change within an hour, the upward or downward pointing arrow becomes a horizontal arrow. The measured relative humidity is then taken as the neutral value from which further prognoses are made.
6.2 Maximum/Minimum Relative Humidity
To toggle indoor/outdoor maximum, minimum humidity data press the 'MEM' button:
- Once to show the maximum humidity data values.
- Twice to show the minimum humidity data values.
-
Three times to return to the current humidity data levels.
-
To reset the maximum and minimum humidity data, press and hold down the 'MEM' button for about 2 seconds. This will reset all minimum and maximum data recorded to the current displayed values.
6.3 Air Pressure Display
The course of the air pressure is displayed on the display in the form of a histogram. You have the options of displaying the air pressure in mb/hPa or in Hg. To switch between these displays, briefly press the 'MPA/INHG' button.
6.3 Relative Air Pressure History
The relative air pressure history can be displayed numerically to view the air pressure changes over the last 0-12 hours.
Press the 'HISTORY' button to display the recorded air pressure changes during the last 0-12 full hours. The numeric recorded air pressure will be displayed according to the hour.
The relative air pressure is displayed either in hPa or in Hg. Briefly pressing the 'MPA/INHG' button allows you to switch between the individual modes.
7. WEATHER FORECAST / MOON AND TIDE INDICATOR
7.1 Weather Forecast
The weather station use the air pressure data of the last 4 hours to create a weather forecast for the next 12 to 24 hours.
It must be taken into account that the data within the first 12 hours after inserting the batteries will not be correct, as the weather station has to get used to the environmental circumstances after the restart.
The forecast can be given for a radius of up to 12-20km.
When forecasting the weather, the station uses 5 icons: sunny, light cloud cover, cloudy, rain and stormy.
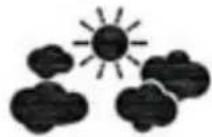
Light Cloud Cover

Sunny Cloudy Rainy Stormy

7.2 Weather Forecasting Icon Settings
Press and hold down the 'HISTORY' button for 2 seconds until the weather forecasting icon flashes. Use the 'MPA/INHG' button to modify the 5 icons: sunny, light cloud cover, cloudy, rain and stormy. Press the 'HISTORY' button again to confirm your settings and to end the setting procedure.
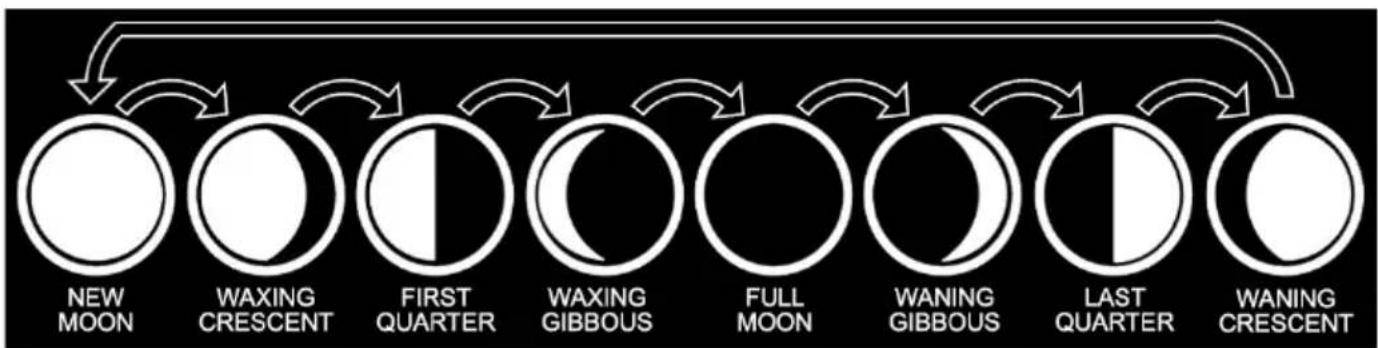
7.3 The Moon Phase and Tide Indicator
The moon icon and tide indicator of the weather station will display 8 different moon phases shown below and 3 kinds of tide phase according to the set calendar.
8. LOCATIONS
8.1 City and Abbreviation
| City Abbreviation City Abbreviation City Abbreviation | |||||||
| Germany Lyon LYO Luxembourg Charleroi CHA | |||||||
| Aachen | AC | Marseille | MAR | Luxembourg | LUX | Liege | LIE |
| Berlin | B Monaco MCO | ||||||
| Düsseldorf | D | Metz | MET | Norway | Switzerland | ||
| Dresden | DD | Nantes | NAN | Bergen | BGN | Basel | BAS |
| Erfurt | EF | Nice | NIC | Oslo | OSL | Bern | BER |
| Frankfurt | F | Orleans | ORL | Stavanger | STA | Chur | CHR |
| Flensburg | FL | Paris | PAR | Geneva | GNV | ||
| Freiburg | FR | Perpignan | PER | Netherlands | Locarno | LOC | |
| Hannover | H | Lille | LIL | Amsterdam | AMS | Lucerne | LUC |
| Bremen | HB | Rouen | ROU | Armheim | ARN | St Moritz | MOR |
| Hamburg | HH | Strasbourg | STR | Einhoven | EIN | St Gallen | SGL |
| Rostock | HRO | Toulouse | TOU | Wnschede | ENS | Sion | SIO |
| Stralsund | HST | Grogingen | GRO | Vaduz | VDZ | ||
| Köeln | K | Finland | Den Haag | HAA | Zuerich | ZUR | |
| Kiel | KI | Helsinki | HEL | Rotterdam | ROT | ||
| Kassel | KS | Czech Republic | |||||
| Leipzig | L | Great Britain | Portugal | Praque | PRG | ||
| Muenchen | M | Aberdeen | ABD | Evora | AVO | ||
| Magdeburg | MD | Belfast | BEL | Coimbra | COI | ||
| Nuremberg | N | Birmingham | BIR | Faro | FAR | ||
| Regensburg | R | Bristol | BRI | Leiria | LEI | ||
| Stuttgart S | Edinburgh EDH Lisbon | US | |||||
| Saarbruecken | SB | Glasgow | GLW | Porto | POR | ||
| Schwerin | SN | London | LON | ||||
| Manchester | MAN | Poland | |||||
| Denmark | Plymouth | PLY Gdansk GDZ | |||||
| Alborg | ALB | Krakow | KKW | ||||
| Arhus ARH | Hungary | Poznan POZ | |||||
| Copenhagen | CPH | Budapest | BUD | Szegcin | SZC | ||
| Odense ODE | Warsaw | WAW | |||||
| Croatia | |||||||
| Spain | Zagreb | ZAG | Russia | ||||
| Alicante | ALI | St Petersburg | PET | ||||
| Andorra | AND | Italy | |||||
| Badajoz BAD Aiona | ANC | Sweden | |||||
| Barcelona | BAR | Bari | BAI | Gothenburg | GOT | ||
| Bilbao | BIL | Bologna | BOL Malmo MLO | ||||
| Cadix | CAD Cagliari | CAG Stockholm | STO | ||||
| Cordoba | COR Catarle (catania) CAT | ||||||
| Ibizza | IBZ | Firenze | FIR | Slovakia | |||
| La Corogna | LCO | Foggia | FOG | Bratislava | BRV | ||
| Leon | LEO Genova | GEN | Slovema | ||||
| Las Palmas | LPA | Leccce | LEC | Ljubljana | LJU | ||
| Madrid | MAD | Messina | MES | ||||
| Malaga | MAL | Milano | MIL | Jugoslavia | |||
| Palma De Mall Orca | LPM | Napoli | NAP | Berigrade | BEO | ||
| Salamanca SAL | Palerino PAL | ||||||
| Seville | SEV | Parma | PAR | Austria | |||
| Valencia | VAL | Perrugia(perugia) | PER | Graz | GRZ | ||
| Zaragossa | ZAR | Rome | ROM | Innsbruck | INN | ||
| Torino | TOR | Linz LNZ | |||||
| France | Trieste | TRI | Salzburg | SLZ | |||
| Bescancon BES | Venezia | VEN Vienna | VIE | ||||
| Biarritz | BIA Ventilnia VIGIA VER | ||||||
| Bordeaux | BOR | Verona VTG | Belgium | ||||
| Brest | BRE | Antwerp | ANT | ||||
| Cherbourg | CHE | Ireland | Bruges | BRG | |||
| Clermferrand | CMF | Dublin | DUB | Bruxellesk | BRU | ||
9. WARRANTY
9.1 Warranty Information
What is Covered:
This warranty covers any defects in materials or workmanship, with the exceptions stated below.
How Long Coverage Lasts:
This warranty runs for 1 Year from the date your Weather Station is delivered.
What is not covered:
Any problem that is caused by abuse, misuse, or an act of God (such as a flood) are not covered.
What We Will Do:
If the Product proves defective during the warranty period, we will provide you with the instructions for the return, and we will take one of the following actions: (i) replace the Product with a product that is the same or equivalent to the Product you purchased; (ii) repair the Product; or (iii) refund to you the whole of or part of the purchase price of the Product.
How To Get Service:
To obtain instructions on how to obtain service under this warranty, contact our customer service by phone or email. You will find the contact details of our customer service below. Customer service may ask you questions to determine your eligibility under this warranty, and if you are eligible you'll be given instructions for returning the defective Product. If we send you a replacement or repair your Product, we will pay the cost of delivering the replacement or repaired Product to you.
Do not return the item to the original place of purchase, please contact Think Gizmos direct.

Think Gizmos, Unit 19, Lawson Hunt Industrial Park,
Broadbridge Heath, West Sussex, RH12 3JR
Tel.: +44/(0)203 384 8304
help@thinkgizmos.com • www.thinkgizmos.com
TG504 WETTERSTATION MIT FERNUHLER
Bedienungsanleitung
HERZLICHEN GLUCKWUNSCH ZUM KAUF DES THINK GIZMOS WETTERSTATION.
DIESE ANWEISUNGEN SORGFALTIG BEFOLGEN WIRD ES EIN GROBER VORTEIL IN IHR LOKALES WETTER FORCASTING MULLS SEIN.
English p 2
Deutsch p 12
Francais p 23
Italiano p 34
Espanol p 45
Think Gizmos, Unit 19, Lawson Hunt Industrial Park,
Broadbridge Heath, West Sussex, RH12 3JR
Tel.: +44/(0)203 384 8304
help@thinkgizmos.com • www.thinkgizmos.com
TG504 STATION MÉTÉO AVEC CAPTEUR DE LA TÉLECOMMANDE
Think Gizmos, Unit 19, Lawson Hunt Industrial Park,
Broadbridge Heath, West Sussex, RH12 3JR
Tel.: +44/(0)203 384 8304
help@thinkgizmos.com • www.thinkgizmos.com
TG504 STAZIONE METEO CON SENSORE REMOTO
Think Gizmos, Unit 19, Lawson Hunt Industrial Park,
Broadbridge Heath, West Sussex, RH12 3JR
Tel.: +44/(0)203 384 8304
help@thinkgizmos.com • www.thinkgizmos.com
TG504 ESTACION METEOROLOGICAL CON SENSOR REMOTO
MANUAL DE USUARIO

FELICITACIONES POR ADQUIRIR EL THINK GIZMOS ESTACION METEORLOGICAL.
Think Gizmos, Unit 19, Lawson Hunt Industrial Park,
Broadbridge Heath, West Sussex, RH12 3JR
Tel.: +44/(0)203 384 8304
help@thinkgizmos.com • www.thinkgizmos.com

Meaning of the 'Dustbin' Symbol:
To protect our environment, do not dispose of electrical equipment in with domestic waste.
Please return any electrical equipment that you will no longer use to the collection points provided for their disposal.
This helps to avoid the potential effects of incorrect disposal on the environment and human health.
This will contribute to the recycling and other forms of reutilisation of electrical and electronic equipment.
Information concerning where the equipment can be disposed of can be obtained from your local authority.
C E

"CE" marking states that the product is compliant to European Directives 2014J35/EU Low Voltage Directive (LVD)
2004/108/EC EMC Directive
It is possible to request a full copy of Declaration of compliance from the Distributor:
This product complies with the rules of RoHS Directive(2011/651EU)
This product complies with the rules of Eup Directive(2009/125/EC)
Thinkgizmos is a registered trademark of Paramount Zone Ltd