
TG20 - Ice Maker ThinkGizmos - Free user manual and instructions
Find the device manual for free TG20 ThinkGizmos in PDF.

| Product type | Ice maker |
| Brand | ThinkGizmos |
| Model | TG20 |
| Dimensions (L x W x H) | 36.8 x 31.3 x 38.1 cm (height with lid open: 58.8 cm) |
| Weight | 11.8 kg |
| Power supply | 220-240 V, 50 Hz, 120 W |
| Ice production | 12 to 15 kg per 24 hours |
| Production cycle | 6 to 15 minutes depending on selected size |
| Water tank capacity | 3 liters |
| Ice basket capacity | Approximately 1 kg |
| Refrigerant | R600a / 29 g |
| Noise level | 30 dB |
| Maximum ambient temperature | 30 °C |
| Main features | Ice cube size selection (small, medium, large), automatic shutdown when basket is full, water shortage indicator, cleaning cycle |
| Maintenance and cleaning | Clean interior regularly with mild detergent and hot water; empty and dry after prolonged use |
| Safety | Overload protection, automatic shutdown in case of water shortage, grounded power cord |
| Spare parts and repairability | Contact ThinkGizmos customer service; the manual provides an electrical diagram for diagnostics |
| Warranty | 1 year (covers defects in materials and workmanship) |
Frequently Asked Questions - TG20 ThinkGizmos
User questions about TG20 ThinkGizmos
0 question about this device. Answer the ones you know or ask your own.
Ask a new question about this device
Download the instructions for your Ice Maker in PDF format for free! Find your manual TG20 - ThinkGizmos and take your electronic device back in hand. On this page are published all the documents necessary for the use of your device. TG20 by ThinkGizmos.
USER MANUAL TG20 ThinkGizmos
natural_image
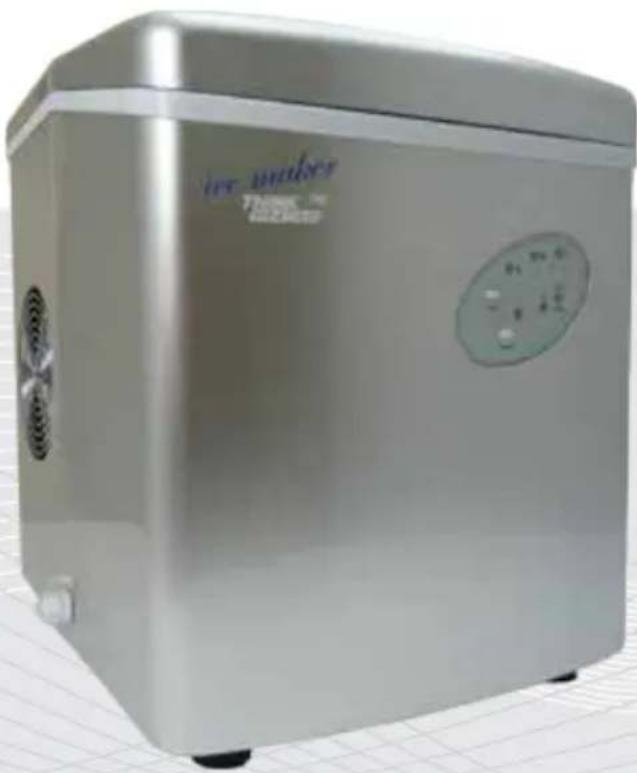
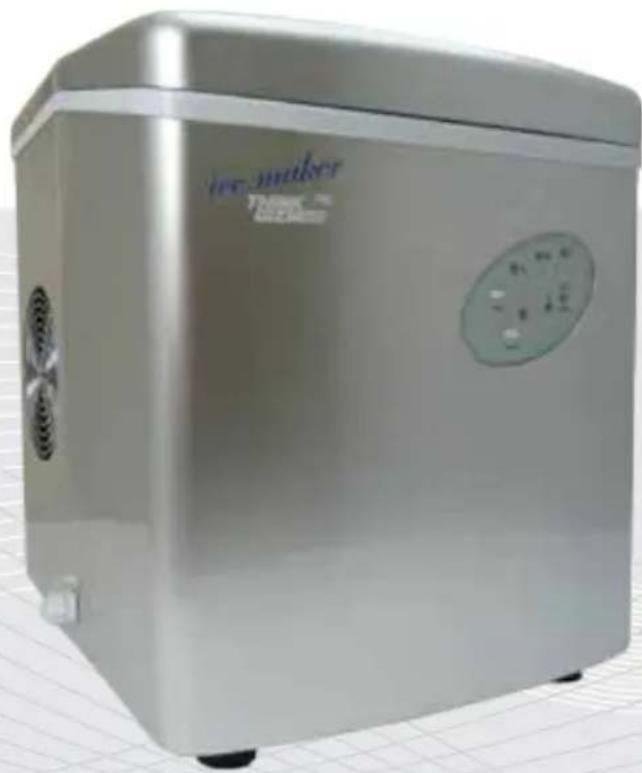
Exterior view of a modern stainless steel water heater with control panel (no visible text or symbols)CONGRATULATIONS ON OWNING THIS TG20 ICE MAKER
PLEASE READ THIS MANUAL BEFORE USE & SAVE FOR FUTURE REFERENCE AS IT INCLUDES IMPORTANT SAFETY ADVICE
English p 2
Deutsch p 12
Francais p 23
Italiano p 34
Español p 45
ENGLISH MANUAL - CONTENTS
IMPORTANT SAFETY INSTRUCTIONS
1.1 Important Safety Instructions ....4
PREPARING YOUR ICE MAKER
2.1 Important Safety Tips .... 5
GETTING TO KNOW YOUR ICE MAKER
3.1 Knowing Your Ice Maker 6
3.2 The Control Panel 6
GETTING YOUR ICE MAKER READY FOR USE
4.1 Unpacking Your Ice Maker 7
4.2 Electrical Shock Hazards....7
5.1 Cleaning And Maintaining Your Ice Maker 8
5.2 How To Operate Your Ice Maker 8
TROUBLESHOOTING
6.1 Problems, Possible Causes And Solutions 9
TECHNICAL SPECIFICATIONS
7.1 Technical Features ...... 10
7.2 Electrical Diagram 10
WARRANTY
8.1 Warranty Information 11
QUICK START GUIDE
natural_image
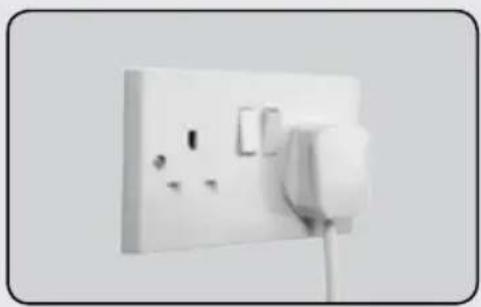
White electrical socket with power plug and socket socket (no text or symbols visible)1. Plug in the Ice Maker
Plug your appliance into an exclusive, properly installed, grounded wall outlet
natural_image
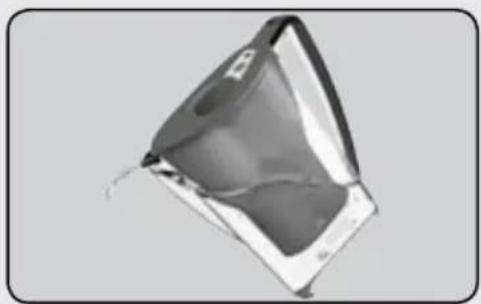
3D rendered object resembling a folded paper or plastic sheet, with no visible text or symbols2. Fill with water
Fill the water reservoir up to the fill line.
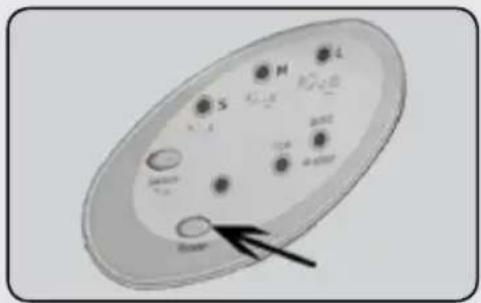
3. Turn on machine
Press the Power Button to turn the machine on.
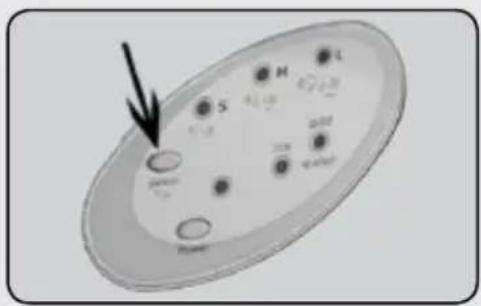
4. Select size of Ice
Using the Ice Select Button, select the required size of ice.
natural_image
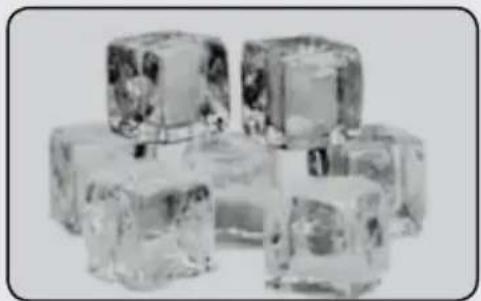
Stack of transparent ice cubes with visible internal patterns (no text or symbols)5. Enjoy
After approx 6-15 minutes depending on Ice Size your first batch of Ice will be ready to enjoy.
1. IMPORTANT SAFETY INSTRUCTIONS
1.1 Important Safety Instructions
Your safety and the safety of others are very important.
We have provided many important safety messages in this manual and on your appliance. Always read and obey all safety messages.

This is the safety alert symbol.
All safety messages will follow the safety alert symbol and either the word 'DANGER' or 'WARNING'.

DANGER

WARNING
These words mean:
You can be killed or seriously injured if you don't immediately follow instructions
All safety messages will tell you what the potential hazard is, tell you how to reduce the chance of injury, and tell you what can happen if the instructions are not followed.
2. PREPARING YOUR ICE MAKER FOR USE
2.1 Important Safety Tips
When using electrical appliances, basic safety precautions should be followed to reduce the risk of fire, electric shock, and injury to persons or property.
Read all instructions before using any appliance.
- Do not operate this, or any other appliance with a damaged cord.
- Connect to properly polarized outlets only.
- No other appliance should be plugged into the same outlet. Make sure that the plug is fully inserted into the socket.
- Do not run the power cord over carpeting or other heat insulators. Do not cover the cord. Keep cord away from traffic areas, and do not submerge in water.
- We do not recommend the use of an extension cord, as it may overheat and become a risk of fire. If you must use an extension cord, use No.14 AWG minimum size and rated no less than 1875 watts.
- Unplug the ice maker before cleaning or making any repairs or servicing.
• Exercise caution and use reasonable supervision when appliance is used near children.
- Do not use your ice-maker outdoors. Place the ice-maker away from direct sunlight and make sure that there is at least 4 inches of space between the back of your unit and wall. Keep a minimum distance of 4 inches on each side of your unit free.
- Do not use other liquid to make the ice-cube other than water.
- Do not clean your ice maker with flammable fluids. The fumes can create a fire hazard or explosion.
- Do not tip over.
- If the ice maker is brought in from outside in wintertime, give it a few hours to warm up to room temperature before plugging it in.

WARNING: This appliance must be earthed.
IMPORTANT: The wires in this mains lead are colored in accordance with the following code:
Green or Green with a yellow strip: Grounding
White: Neutral
Black: Live
To avoid a hazard due to instability of the appliance, it must be placed on an even or flat surface.
3. GETTING TO KNOW YOUR ICE MAKER
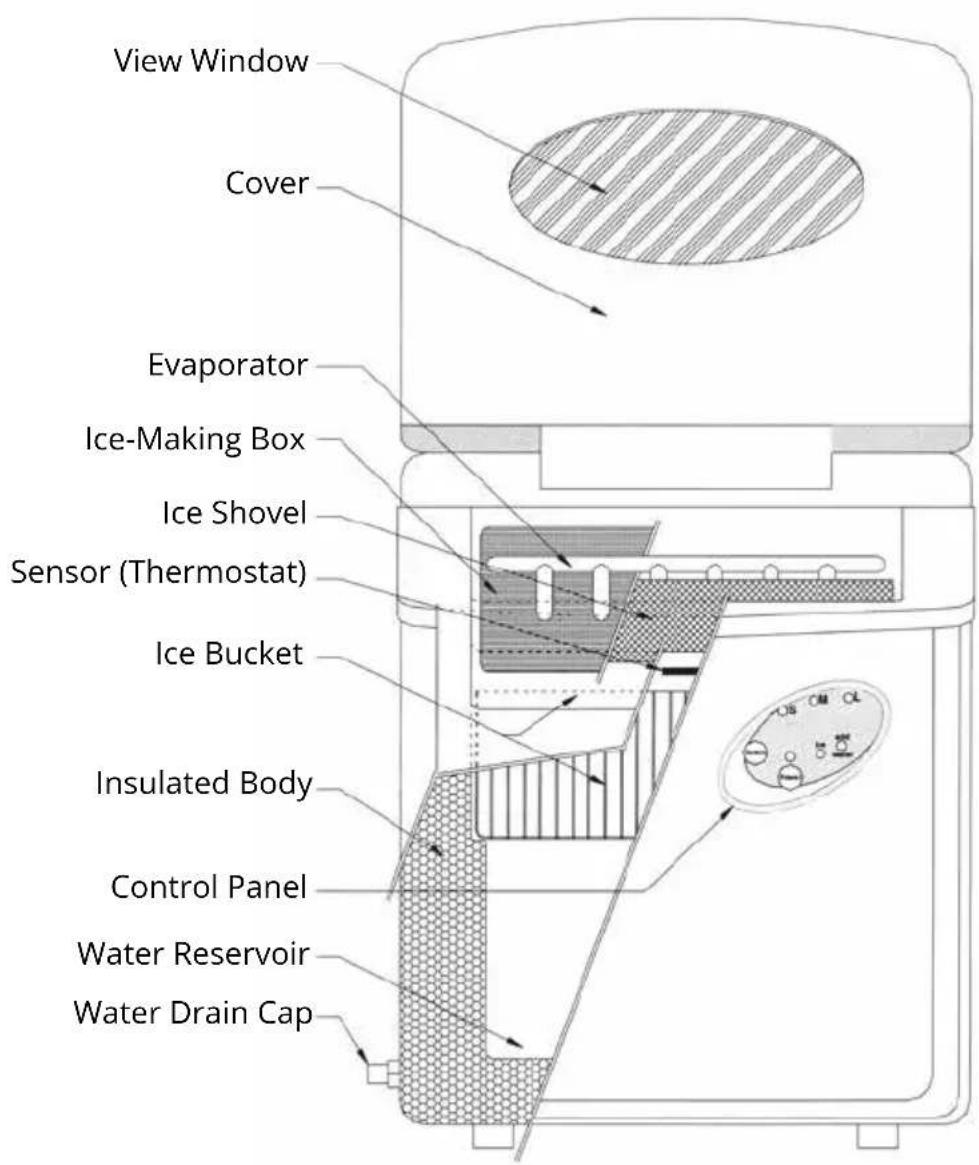
3.1 Knowing Your Ice Maker
The diagram below shows you the parts of your Ice Maker.
3.2 The Control Panel
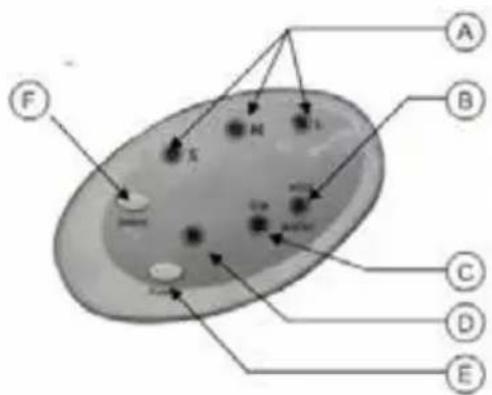
| A Ice Size Shows Selected Ice Size | |
| B Add Water Indicates water reservoir empty | |
| C Ice Indicates Ice Bucket Full | |
| D Power Light Indicates unit is turned on | |
| E Power Button Turns On / Turns Off Unit | |
| F Ice Select Button Selects Ice Size (S/M/L) |
4. GETTING YOUR ICE MAKER READY FOR USE
4.1 Unpacking Your Ice Maker
- Remove the Ice Maker from the box. Throw away the plastic bag. Do not throw away the box as this may be required for future storage.
- Check all the parts are included. There should be 3 parts in total: Ice Maker, Ice Basket and Ice Scoop.
- Remove all the tape in the unit.
- Use lukewarm water and a soft cloth to clean the interior of the Ice Maker, the ice basket and the ice scoop.
- Find a location for your ice maker that is protected from direct sunlight and other sources of heat (i.e.: stove, furnace, radiator). Place the ice maker on a level surface. Make sure that there is at least 4 inches of space between the back and sides of your ice maker and the wall.
- Allow one hour for the refrigerant fluid to settle before plugging ice maker in.
- The appliance must be positioned so that the plug is accessible.
4.2 Electrical Shock Hazards

WARNING
Electrical Shock Hazard

Plug Into a grounded outlet.
Do not use an extension cord.
Failure to follow these instructions can result in death, fire, or electrical shock.
This unit should be properly grounded for your safety. The power cord of this appliance is equipped with a three-prong plug which mates with standard three prong wall outlets to minimize the possibility of electric shock.
Plug your appliance into an exclusive, properly installed, grounded wall outlet. Do not under any circumstances, cut or remove the third (ground) prong from the power cord. Any questions concerning power and/or grounding should be directed toward a certified electrician.
This appliance requires a standard 220-240volt, 50Hz electrical outlet with three-prong ground.
5.1 Cleaning and Maintaining your Ice Maker
Before using your ice maker, it is strongly recommended to clean it thoroughly.
- Take out the ice basket.
- Clean the interior with diluted detergent, warm water and a soft cloth.
- Then use the water to rinse the inside parts, and drain out the water by unplugging the drain cap on the side.
- The outside of the ice maker should be cleaned regularly with a mild detergent solution and warm water.
- Dry the interior and exterior with a soft cloth.
- When the machine is not in use for a long time, open water drain cap to drain water completely from water reservoir.
5.2 How to operate your Ice Maker
- Open the cover, remove the ice basket and pour water into tank. Keep water level below the max water level mark.
- Select the size of the ice cube by pressing the "Select" button. If the room temperature is lower than 15^ C, it is recommended to select the small or medium ice size in order to avoid ice sticking together.
- Press "Power" button on the control panel to begin the ice making cycle.
- The ice making cycle lasts 6 to 15 minutes, depending on the size of the ice cube selection and the ambient temperature. On a very hot day or in a hot room, ice-making time may vary.
- While the icemaker is on, check water level periodically. If the water pump can't pump water, the ice maker will stop automatically, and the "Add Water" indicator will be lit. Press "Power" button to turn off the machine, fill water up to the level mark and press "Power" button again to turn on the machine. Allow the refrigerant liquid inside the compressor at least 3 minutes to settle before restarting.
- The ice maker automatically stops working when the ice basket is full and the "Ice" indicator will be lit.
- Change water in the water reservoir every 24 hours to ensure a reasonable hygiene level.
- If the Ice Maker isn't in use, drain all water left in the water reservoir.
6. TROUBLESHOOTING
6.1 Problems, Possible Causes and Solutions
| PROBLEM POSSIBLE CAUSE SOLUTION | ||
| ‘Add Water’ Indicator is on. | Lack of Water | Stop the ice maker, fill water, and press “Power” button again to restart the unit. |
| ‘Ice’ Indicator is on. There is too much ice. Remove ice from ice basket. | ||
| Ice cubes stick together. The ice cycle is too long. Stop the ice maker, and restart it when the ice blocks melt. Select the small size ice cube selection. | ||
| Ice making cycle is normal but no ice is made. | Ambient temperature or water temperature in inner tank is too high. | Please run the ice maker below 30°C and pour colder water into tank. |
| Refrigerant liquid leakage. Verify by a qualified technician. | ||
| Pipe in the cooling system is blocked. | Verify by a qualified technician. | |
7. TECHNICAL SPECIFICATIONS
7.1 Technical Features
| Dimensions L/W/H 36.8m / 3 | 1.3cm / 38.1cm (Height is 58.8cm with cover open) |
| Air Flow Allow 4 inches around | d the machine for air to flow correctly. |
| Weight 11.8 kg | |
| Power 220-240 V / 50Hz, 120 W | |
| Daily Ice Production 12 - 15 kg / 24 h | |
| Ice Production Time Depending on ice size selected:-S (small): 6-12 Mins-M (medium): 7-13 Mins-L (large): 8-15 Mins | |
| Certification CE + RoHS | |
| Noise Level 30 dB | |
| Max Ambient Temperature 30 °C | |
| Water Reservoir Capacity 3 Litres | |
| Ice Basket Capacity | Approx 1kg |
7.2 Electrical Diagram
| www.thinkgizmos.com | 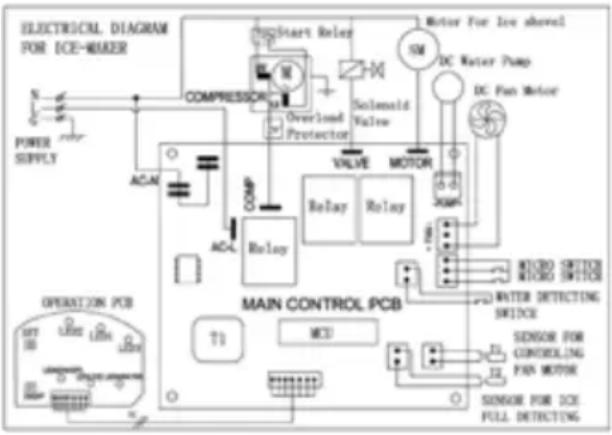 | |
| Model TG20 | ||
| Certificates CE + RoHS | ||
| Refrigerant Liquid/Quantity R600a / 29g | ||
| Voltage 220-240V | -50Hz | |
| Power Consumption 0.9A | ||
| Power / Standby 120W / 0.5W | ||
8. WARRANTY
8. Warranty Information
What is Covered:
This warranty covers any defects in materials or workmanship, with the exceptions stated below.
How Long Coverage Lasts:
This warranty runs for 1 Year from the date your Ice Maker is delivered.
What is not covered:
Any problem that is caused by abuse, misuse, or an act of God (such as a flood) are not covered.
What We Will Do:
If the Product proves defective during the warranty period, we will provide you with the instructions for the return, and we will take one of the following actions: (i) replace the Product with a product that is the same or equivalent to the Product you purchased; (ii) repair the Product; or (iii) refund to you the whole of or part of the purchase price of the Product.
How To Get Service:
To obtain instructions on how to obtain service under this warranty, contact our customer service by phone or email. You will find the contact details of our customer service below. Customer service may ask you questions to determine your eligibility under this warranty, and if you are eligible you'll be given instructions for returning the defective Product. If we send you a replacement or repair your Product, we will pay the cost of delivering the replacement or repaired Product to you.
Do not return the item to the original place of purchase, please contact Think Gizmos direct.

Think Gizmos, Unit 19, Lawson Hunt Industrial Park, Broadbridge Heath, West Sussex, RH12 3JR
Tel.: +44/(0)203 384 8304
help@thinkgizmos.com • www.thinkgizmos.com
TG20 EIS-HERSTELLER
Bedienungsanleitung

natural_image
Exterior view of a modern stainless steel water heater with control panel (no visible text or symbols)WIR GRATULIEREN ZUM KAUF DIESES TG20 EIS-HERSTELLER.
natural_image
White electrical outlet with two circular cutouts and a connecting wire (no text or symbols visible)natural_image
3D rendered object resembling a folded paper or plastic sheet, with no visible text or symbolsnatural_image
Stacked transparent ice cubes with visible internal patterns (no text or symbols)5. Genießen
Think Gizmos, Unit 19, Lawson Hunt Industrial Park, Broadbridge Heath, West Sussex, RH12 3JR
Tel.: +44/(0)203 384 8304
help@thinkgizmos.com • www.thinkgizmos.com
natural_image
Exterior view of a modern stainless steel water heater with control panel (no visible text or symbols)FÉLICITATIONS POUR L'ACHAT DE CETTE MACHINE À GLAÇONS TG20.
VEUILLEZ LIRE ATTENTIVEMENT CE MANUEL AVANT UTILISATION ET GARDEZ LE EN LIEU SÛR POUR LE CONSULTER EN CAS DE BESOIN. IL CONTIENT DES INFORMATIONS IMPORTANTES POUR VOTRE SÉCURITÉ.
English p 2
Deutsch p 12
Francais p 23
Italiano p 34
Español p 45
MANUEL FRANÇAIS - INDEX
INFORMATIONS IMPORTANTES POUR LA SÉCURITÉ
natural_image
Close-up of a white electrical outlet with two circular cutouts and a connecting wire (no text or symbols visible)natural_image
3D rendered object resembling a folded paper or plastic sheet, with no visible text or symbols3. Mettre en marche la machine
natural_image
Stacked transparent ice cubes with embedded circular patterns (no text or symbols visible)5. Profitez de
Ces mots signifient:
Think Gizmos, Unit 19, Lawson Hunt Industrial Park, Broadbridge Heath, West Sussex, RH12 3JR
Tel.: +44/(0)203 384 8304
help@thinkgizmos.com • www.thinkgizmos.com
TG20 FABBRICATORE DI GHIACCIO
Manuale dell'Uso
natural_image
Exterior view of a modern stainless steel water heater with control panel (no visible text or symbols)CONGRATULAZIONI PER AVER SCELTO TG20 FABBRICATORE DI GHIACCIO.
TI PREGHIAMO DI LEGGERE QUESTO MANUALE PRIMA ELL'USO DI CONSERVARLO PER POTERLO CONSULTARE NUOVAMENTE IN FUTURO.
English p 2
Deutsch p 12
Francais p 23
Italiano p 34
Español p 45
natural_image
Close-up of a white electrical outlet with two circular cutouts and a connecting wire (no text or symbols visible)natural_image
3D rendered image of a metallic object with reflective surfaces, no visible text or symbolsnatural_image
Stack of transparent ice cubes with visible internal patterns (no text or symbols)5. Gustatelo
Think Gizmos, Unit 19, Lawson Hunt Industrial Park, Broadbridge Heath, West Sussex, RH12 3JR
Tel.: +44/(0)203 384 8304
help@thinkgizmos.com • www.thinkgizmos.com
TG20 MÁQUINA DE HIELO
Manual de usuario
natural_image
Exterior view of a modern stainless steel water heater with control panel (no visible text or symbols)ENHORABUENA POR POSEER ESTE TG20 MÁQUINA DE HIELO.
POR FAVOR LEA ESTE MANUAL ANTES DE USAR Y GUARDELO PARA FUTURAS REFERENCIAS YA QUE SE INCLUYEN CONSEJOS IMPORTANTES DE SEGURIDAD.
English p 2
Deutsch p 12
Francais p 23
Italiano p 34
Español p 45
MANUAL ESPAÑOL - CONTENIDO
natural_image
Close-up of a white electrical outlet with two circular switches and a connecting wire (no text or symbols visible)1. Conecte la máquina de hielo
natural_image
3D rendered object resembling a folded paper or plastic sheet, with no visible text or symbols2. Llener con agua
natural_image
Stack of transparent ice cubes with visible internal patterns (no text or symbols)5. Disfrute
Think Gizmos, Unit 19, Lawson Hunt Industrial Park, Broadbridge Heath, West Sussex, RH12 3JR
Tel.: +44/(0)203 384 8304
help@thinkgizmos.com • www.thinkgizmos.com

"CE" marking states that the product is compliant to European Directives 2014J35/EU Low Voltage Directive (LVD) 2004/108/EC EMC Directive
It is possible to request a full copy of Declaration of compliance from the Distributor.
This product complies with the rules of RoHS Directive(2011/651EU) This product complies with the rules of Eup Directive(2009/125/EC)
Thinkgizmos is a registered trademark of Paramountzone Ltd