
AGM1098P - Electric grinder Ferm - Free user manual and instructions
Find the device manual for free AGM1098P Ferm in PDF.
| Product Type | Angle Grinder |
| Brand | Ferm |
| Model | AGM1098P |
| Rated Power Input | 2400 W |
| Supply Voltage | 220-240 V~ |
| Frequency | 50/60 Hz |
| No-Load Speed | 6500 rpm |
| Max. Disc Diameter | 230 mm |
| Disc Bore | 22.2 mm |
| Grinding Disc Thickness | 6 mm |
| Cutting Disc Thickness | 3 mm |
| Spindle Thread | M14 |
| Weight | 6.7 kg |
| Sound Pressure Level (LpA) | 96.1 dB(A) |
| Sound Power Level (LwA) | 107.1 dB(A) |
| Vibration (Surface Grinding) | 7.86 m/s² |
| Protection Class | Double Insulation (Class II) |
| Intended Use | Grinding and cutting of stone, concrete, steel |
| Side Handle | Yes, 3 adjustable positions |
| Spindle Lock | Yes, for disc change |
| Carbon Brushes | Replaceable |
Frequently Asked Questions - AGM1098P Ferm
User questions about AGM1098P Ferm
0 question about this device. Answer the ones you know or ask your own.
Ask a new question about this device
Download the instructions for your Electric grinder in PDF format for free! Find your manual AGM1098P - Ferm and take your electronic device back in hand. On this page are published all the documents necessary for the use of your device. AGM1098P by Ferm.
USER MANUAL AGM1098P Ferm
Thank you for buying this FERM product. By doing so you now have an excellent product, delivered by one of Europe's leading suppliers. All products delivered to you by Ferm are manufactured according to the highest standards of performance and safety. As part of our philosophy we also provide an excellent customer service, backed by our comprehensive warranty. We hope you will enjoy using this product for many years to come.
1. SAFETY INSTRUCTIONS

Read the enclosed safety warnings, the additional safety warnings and the instructions. Failure to follow the safety
warnings and the instructions may result in electric shock, fire and/or serious injury. Save the safety warnings and the instructions for future reference.
The following symbols are used in the user manual or on the product:

Read the user manual.

Denotes risk of personal injury, loss of life or damage to the tool in case of non-observation of the instructions in this manual.

Risk of electric shock

Immediately remove the mains plug from the mains if the mains cable becomes damaged and during cleaning and maintenance.
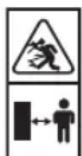
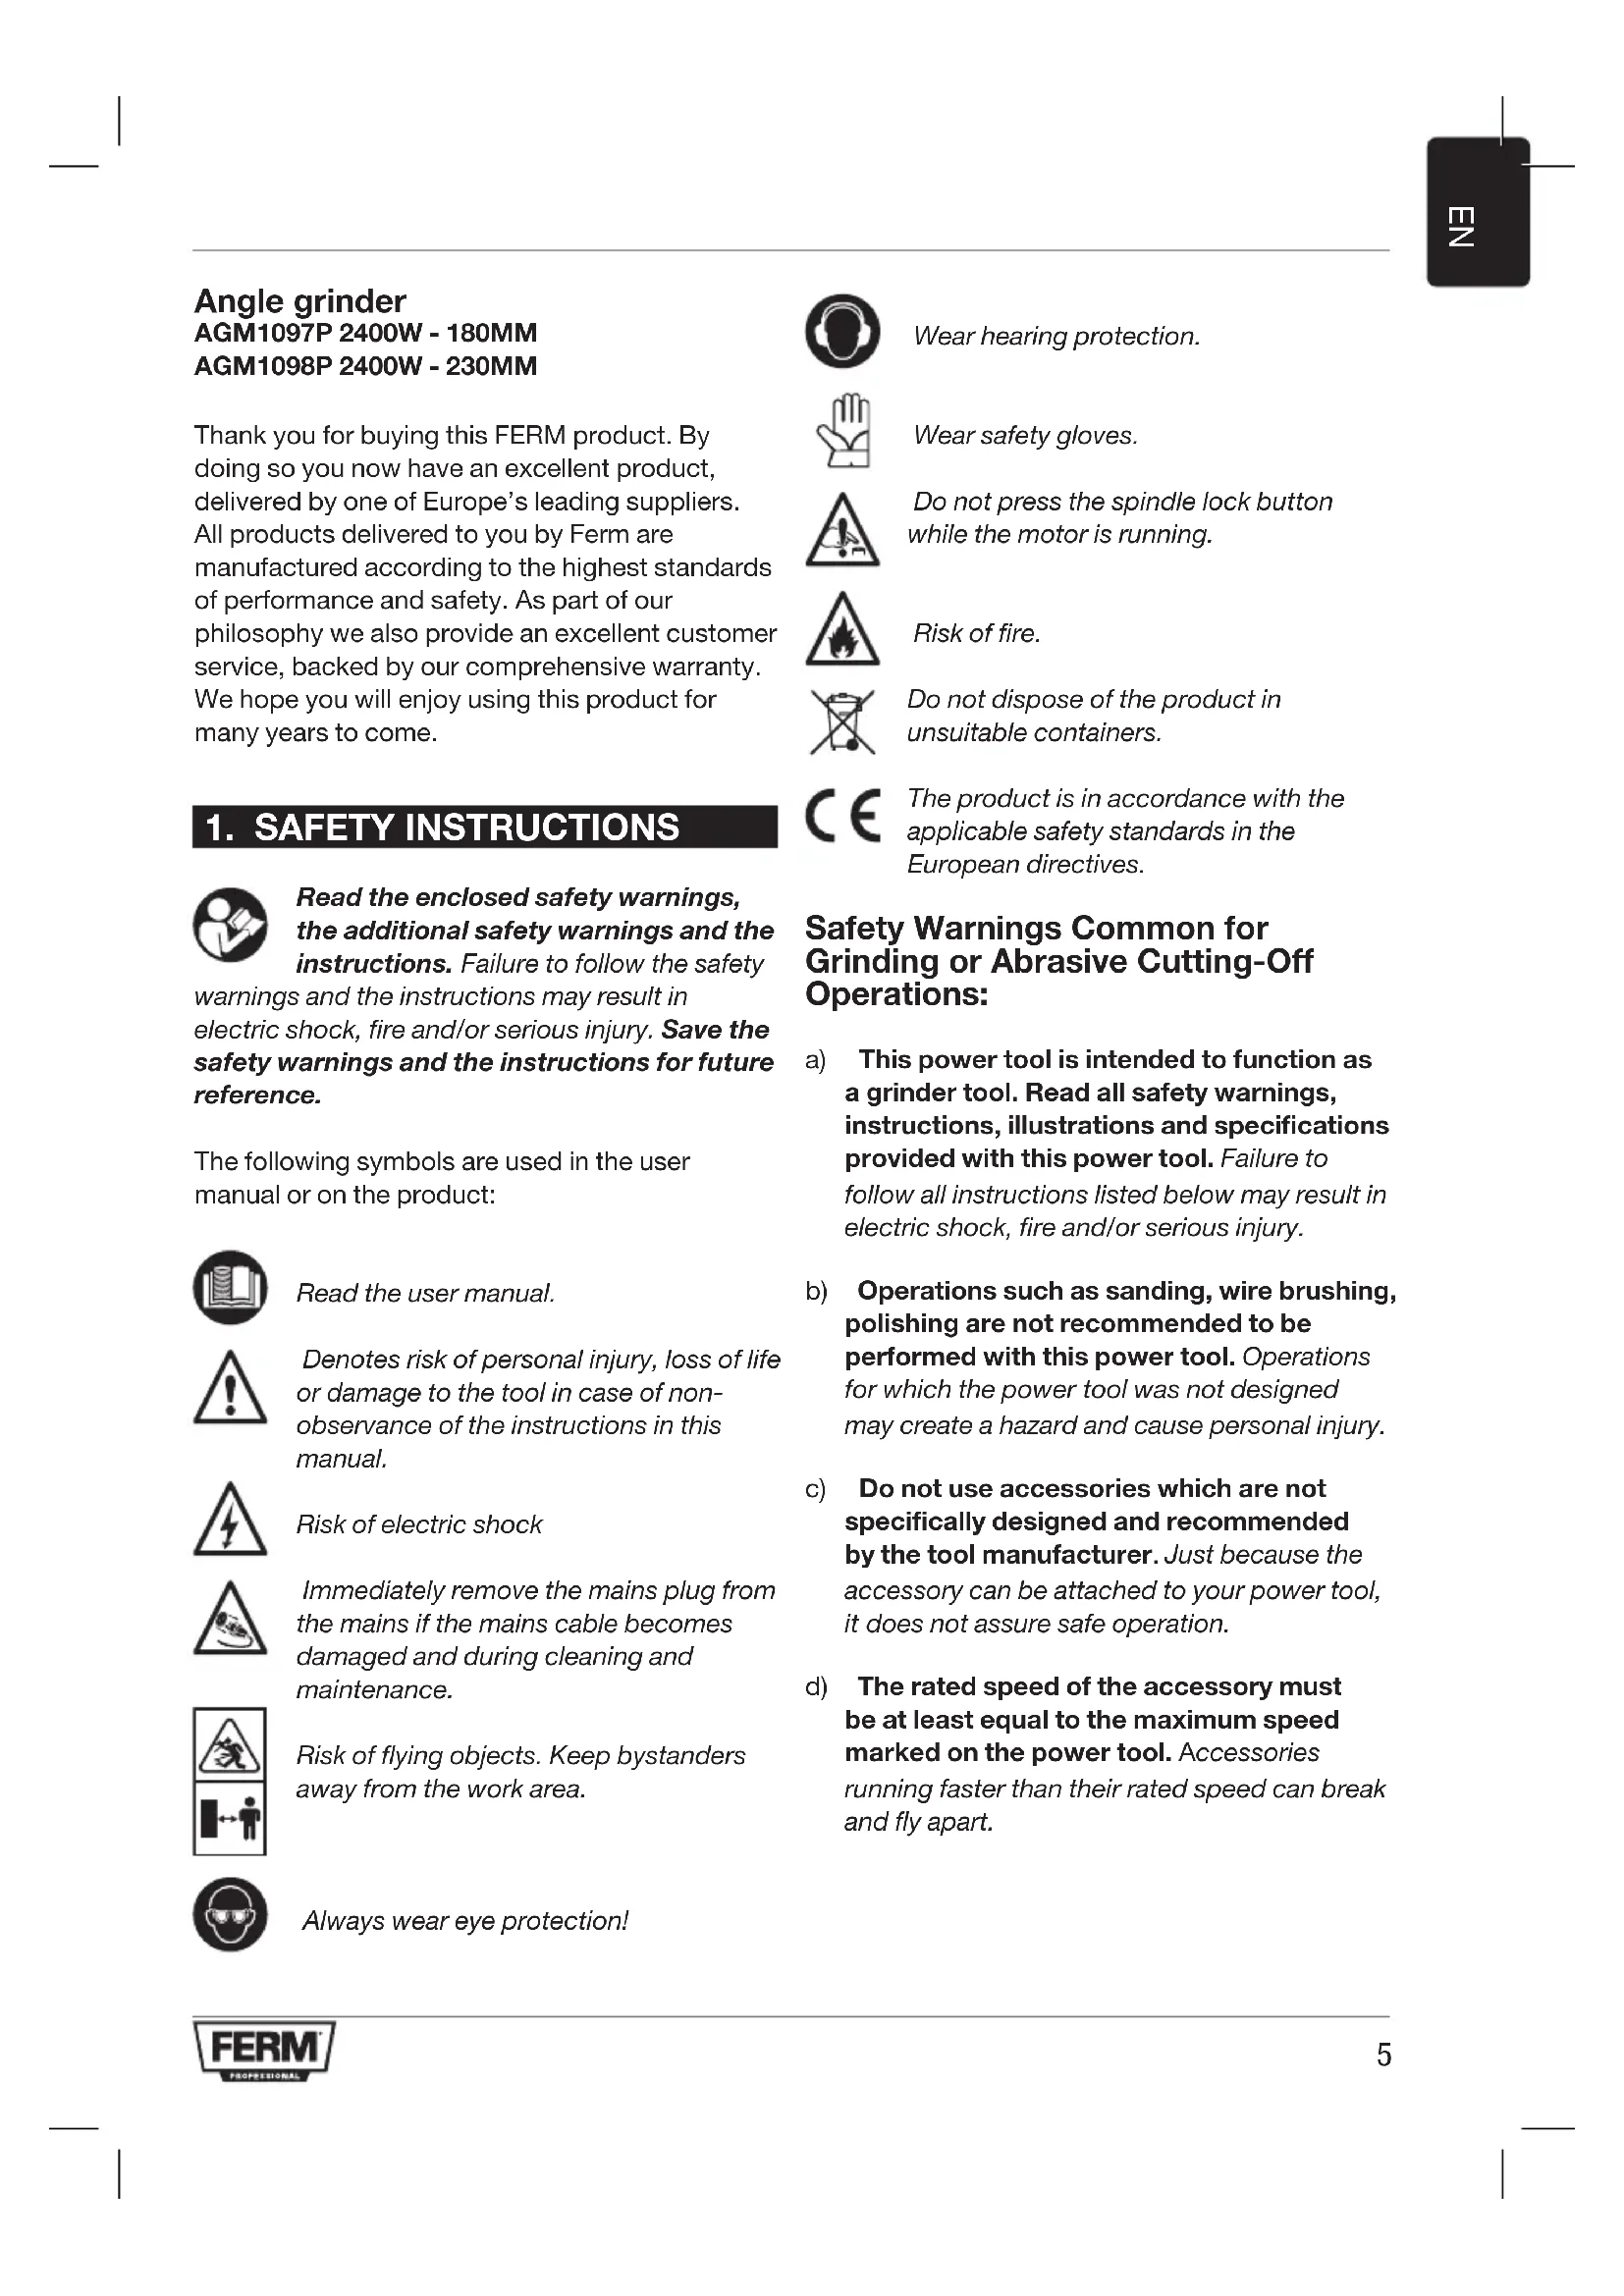
Risk of flying objects. Keep bystanders away from the work area.

Always wear eye protection!

Wear hearing protection.

Wear safety gloves.

Do not press the spindle lock button while the motor is running.

Risk of fire.

Do not dispose of the product in unsuitable containers.

The product is in accordance with the applicable safety standards in the European directives.
SafetyWarnings Common for Grinding or Abrasive Cutting-Off Operations:
a) This power tool is intended to function as a grinder tool. Read all safety warnings, instructions, illustrations and specifications provided with this power tool. Failure to follow all instructions listed below may result in electric shock, fire and/or serious injury.
b) Operations such as sanding, wire brushing, polishing are not recommended to be performed with this power tool. Operations for which the power tool was not designed may create a hazard and cause personal injury.
c) Do not use accessories which are not specifically designed and recommended by the tool manufacturer. Just because the accessory can be attached to your power tool, it does not assure safe operation.
d) The rated speed of the accessory must be at least equal to the maximum speed marked on the power tool. Accessories running faster than their rated speed can break and fly apart.
e) The outside diameter and the thickness of your accessory must be within the capacity rating of your power tool. Incorrectly sized accessories cannot be adequately guarded or controlled.
f) Threaded mounting of accessories must match the grinder spindle thread. For accessories mounted by flanges, the arbour hole of the accessory must fit the locating diameter of the flange. Accessories that do not match the mounting hardware of the power tool will run out of balance, vibrate excessively and may cause loss of control.
9) Do not use a damaged accessory. Before each use inspect the accessory such as abrasive wheels for chips and cracks, backing pad for cracks, tear or excess wear, wire brush for loose or cracked wires. If power tool or accessory is dropped, inspect for damage or install an undamaged accessory. After inspecting and installing an accessory, position yourself and bystanders away from the plane of the rotating accessory and run the power tool at maximum no-load speed for one minute. Damaged accessories will normally break apart during this test time.
h) Wear personal protective equipment. Depending on application, use face shield, safety goggles or safety glasses. As appropriate, wear dust mask, hearing protectors, gloves and workshop apron capable of stopping small abrasive or workpiece fragments. The eye protection must be capable of stopping flying debris generated by various operations. The dust mask or respirator must be capable of filtrating particles generated by your operation. Prolonged exposure to high intensity noise may cause hearing loss.
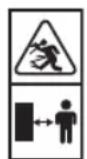
i) Keep bystanders a safe distance away from work area. Anyone entering the work area must wear personal protective equipment. Fragments of workpiece or of a broken accessory may fly away and cause injury beyond immediate area of operation.
j) Hold the power tool by insulated gripping surfaces only, when performing an operation where the cutting accessory may contact hidden wiring or its own cord.
Cutting accessory contacting a "live" wire may make exposed metal parts of the power tool "live" and could give the operator an electric shock.
k) Position the cord clear of the spinning accessory. If you lose control, the cord may be cut or snagged and your hand or arm may be pulled into the spinning accessory.
1) Never lay the power tool down until the accessory has come to a complete stop. The spinning accessory may grab the surface and pull the power tool out of your control.
m) Do not run the power tool while carrying it at your side. Accidental contact with the spinning accessory could snag your clothing, pulling the accessory into your body.
n) Regularly clean the power tool's air vents. The motor's fan will draw the dust inside the housing and excessive accumulation of powdered metal may cause electrical hazards.
o) Do not operate the power tool near flammable materials. Sparks could ignite these materials.
p) Do not use accessories that require liquid coolants. Using water or other liquid coolants may result in electrocution or shock.
Kickback and RelatedWarnings
Kickback is a sudden reaction to a pinched or snagged rotating wheel, backing pad, brush or any other accessory. Pinching or snagging causes rapid stalling of the rotating accessory which in turn causes the uncontrolled power tool to be forced in the direction opposite of the accessory's rotation at the point of the binding.
For example, if an abrasive wheel is snagged or pinched by the workpiece, the edge of the wheel that is entering into the pinch point can dig into the surface of the material causing the wheel to climb out or kick out. The wheel may either jump toward or away from the operator, depending on
direction of the wheel's movement at the point of pinching. Abrasive wheels may also break under these conditions. Kickback is the result of power tool misuse and/or incorrect operating procedures or conditions and can be avoided by taking proper precautions as given below.
a) Maintain a firm grip on the power tool and position your body and arm to allow you to resist kickback forces. Always use auxiliary handle, if provided, for maximum control over kickback or torque reaction during start-up. The operator can control torque reactions or kickback forces, if proper precautions are taken.
b) Never place your hand near the rotating accessory. Accessory may kickback over your hand.
c) Do not position your body in the area where power tool will move if kickback occurs. Kickback will propel the tool in direction opposite to the wheel's movement at the point of snagging.
d) Use special care when working corners, sharp edges etc. Avoid bouncing and snagging the accessory. Corners, sharp edges or bouncing have a tendency to snag the rotating accessory and cause loss of control or kickback.
e) Do not attach a saw chain woodcarving blade or toothed saw blade. Such blades create frequent kickback and loss of control.
SafetyWarnings Specific for Grinding and Abrasive Cutting-Off Operations:
a) Use only wheel types that are recommended for your power tool and the specific guard designed for the selected wheel. Wheels for which the power tool was not designed cannot be adequately guarded and are unsafe.
b) The grinding surface of centre depressed wheels must be mounted below the plane of the guard lip. An improperly mounted wheel that projects through the plane of the guard lip cannot be adequately protected.
c) The guard must be securely attached to the power tool and positioned for maximum
safety, so the least amount of wheel is exposed towards the operator. The guard helps to protect the operator from broken wheel fragments, accidental contact with wheel and sparks that could ignite clothing.
d) Wheels must be used only for recommended applications. For example: do not grind with the side of cut-off wheel. Abrasive cut-off wheels are intended for peripheral grinding, side forces applied to these wheels may cause them to shatter.
e) Always use undamaged wheel flanges that are of correct size and shape for your selected wheel. Proper wheel flanges support the wheel thus reducing the possibility of wheel breakage. Flanges for cut-off wheels may be different from grinding wheel flanges.
f) Do not use worn down wheels from larger power tools. Wheel intended for larger power tool is not suitable for the higher speed of a smaller tool and may burst.
Additional SafetyWarnings Specific for Abrasive Cutting-Off Operations:

Cut-off operations are only suitable with a special protection guard (not included) fig. C2 - D2
a) Do not "jam" the cut-off wheel or apply excessive pressure. Do not attempt to make an excessive depth of cut. Overstressing the wheel increases the loading and susceptibility to twisting or binding of the wheel in the cut and the possibility of kickback or wheel breakage.
b) Do not position your body in line with and behind the rotating wheel. When the wheel, at the point of operation, is moving away from your body, the possible kickback may propel the spinning wheel and the power tool directly at you.
c) When wheel is binding or when interrupting a cut for any reason, switch off the power tool and hold the power tool motionless until the wheel comes to a complete stop.
Never attempt to remove the cut-off wheel from the cut while the wheel is in motion otherwise kickback may occur. Investigate and take corrective action to eliminate the cause of wheel binding.
d) Do not restart the cutting operation in the workpiece. Let the wheel reach full speed and carefully re-enter the cut. The wheel may bind, walk up or kickback if the power tool is restarted in the workpiece.
e) Support panels or any oversized workpiece to minimize the risk of wheel pinching and kickback. Large workpieces tend to sag under their own weight. Supports must be placed under the workpiece near the line of cut and near the edge of the workpiece on both sides of the wheel.
f) Use extra caution when making a "pocket cut" into existing walls or other blind areas. The protruding wheel may cut gas or water pipes, electrical wiring or objects that can cause kickback.
Electrical safety
When using electric machines always observe the safety regulations applicable in your country to reduce the risk of fire, electric shock and personal injury. Read the following safety instructions and also the enclosed safety instructions.

Always check that the voltage of the power supply corresponds to the voltage on the rating plate label.

Class II machine - Double insulation - You don't need any earthed plug.
If operating a power tool in a damp location is unavoidable, use a residual current device (RCD) protected supply. Use of an RCD reduces the risk of electric shock.
2. MACHINE INFORMATION
Intended use
Your angle grinder has been designed for grinding masonry and steel materials without the use of water. For cutting, a special protection guard must be used (not included) Fig. D2.
Technical specifications
| AGM1097P | AGM1098P | |
| Mains voltage 220-240 V~ | ||
| Mains frequency 50/60 Hz | ||
| Power input 2400W | ||
| Rated speed 8.500 /min 6.500 /min | ||
| Wheel disc for grinding | ||
| Diameter 180 mm 230 mm | ||
| Bore 22.2 mm | ||
| Thickness 6 mm | ||
| Wheel disc for cutting | ||
| Diameter 180 mm 230 mm | ||
| Bore 22.2 mm | ||
| Thickness 3 mm | ||
| Spindle thread | M14 | |
| Weight | 6.6 kg | 6.7 kg |
| Sound pressure (LPW) | 96.1 + 3 dB(A) | |
| Acoustic power (LWA) | 107.1 + 3 dB(A) | |
| Vibration "Surface grinding" aT,AG | 7.86 + 1.5 m/s2 | |
Vibration level
The vibration emission level stated in this instruction manual has been measured in accordance with a standardised test given in EN 60745; it may be used to compare one tool with another and as a preliminary assessment of exposure to vibration when using the tool for the applications mentioned
- using the tool for different applications, or with different or poorly maintained accessories, may significantly increase the exposure level
- the times when the tool is switched off or when it is running but not actually doing the job, may significantly reduce the exposure level
Protect yourself against the effects of vibration by maintaining the tool and its accessories, keeping your hands warm, and organizing your work patterns.
Description
The numbers in the text refer to the diagrams on pages 2-4
Fig. A
- Spindle lock button
- Allen screw
- Protection guard (Fig. D1+D2)
- Carbon brush cover
- On/Off switch
- Side handle connection point
- Side handle
- Allen key
Fig. B
- Spindle
- Mounting flange
- Wheel disc (not included)
- Clamping nut
- Spanner
Fig.C1 & D1
Protection guard for grinding
Fig.C2&D2
Protection guard for cutting (not included)
Fig. G
- Screw
- Spring
- Carbon brush
- Brush wire
Assembly

Before assembly, always switch off the machine and remove the mains plug from the mains.
Assembling the protection guard (Fig. C and D)
- Place the machine on a table with the spindle (8) facing upwards.
-
Place the protection guard (3) over the machine head as shown in Figure C making sure the ridges on the protection guard fall into the notches of the machine head.
-
Turn the protection guard counter clockwise as shown in Figure D
Fix the the allen screw (2) on the guard with the allen key (18) - You can adjust the position of the protection guard by releasing the allen screw (2), adjust the guard to the desired position and fixing the allen screw again.

Never attempt to remove the guard.
Mounting and removing the disc (Fig. B)
Always use suitable wheel disc for this machine with diameter AGM1097P 180mm / AGM1098P 230mm and a bore from 22.2 mm the thickness of the wheel disc should be 6mm for wheel disc for grinding and 3mm for wheel disc for cutting, the mounting wheel disc may not touch the safety guard.
Mounting
- Place the machine on a table with the protection guard (3) facing upwards.
- Mount the flange (9) onto the spindle (8).
- Place the wheel disc (10) onto the spindle (8).
- Keep the spindle lock button (1) pressed and firmly tighten the clamping nut (11) onto the spindle (8) by using the spanner (12).
Removing
- Place the machine on a table with the protection guard (3) facing upwards.
- Keep the spindle lock button (1) pressed and loosen the clamping nut (11) using the spanner (12).
- Remove the wheel disc (10) from the spindle (8).
- Keep the spindle lock button (1) pressed and firmly tighten the clamping nut (11) using the spanner (12).
Mounting the side handle (Fig. A and B)
- The side handle (7) can be screwed into one of the three side handle connection point (6).
3. OPERATING

Make sure that the work piece is properly supported or fixed and keep the supply cord routing away from the work area.
Switching on and off (Fig. A)
- To switch the machine on, push the switch forward and press the On/off switch (5).
- To switch the machine off, release the On/off switch (5).
Hold the machine away from the work piece when turning it on and off because the wheel disc could damage the work piece.
- Clamp the work piece firmly or use another method to ensure that it cannot move while working.
- Check the discs regularly. Worn wheel discs have a negative effect on the machine's efficiency. Change to a new wheel disc in good time.
Always first turn the machine off after use before removing the plug from the socket.
Deburring (Fig. E)
An angle of inclination of 30^ to 40^ will give the best results when deburring. Move the machine back and forth using light pressure. This will prevent the work piece from discolouring or becoming too hot and will avoid making groves.

Never use abrasive cutting discs for deburring work!
Cutting (Fig. F)
For cutting, a special closed protection guard (Fig. D2) must be used (not included).
Maintain firm contact with the work piece to prevent vibration and do not tilt or apply pressure and when cutting. Use moderate pressure when working, appropriate to the material that is being worked on. Do not slow down wheel discs by applying sideways counter pressure. The direction in which you want to cut is important.
The machine must always work against the direction of the cut; so never move the machine in the other direction! There is the risk that the machine will catch in the cut causing kickback and that you will lose control.
Hints for optimum use
- Clamp the work piece. Use a clamping device for small work pieces.
- Hold the machine with both hands.
- Switch on the machine.
- Wait until the machine has reached full speed.
- Place the wheel disc on the work piece.
- Slowly move the machine along the work piece, firmly pressing the wheel disc against the work piece.
- Do not apply too much pressure on the machine. Let the machine do the work.
- Switch off the machine and wait for the machine to come to a complete standstill before putting the machine down.
4. MAINTENANCE

Before cleaning and maintenance, always switch off the machine and remove the mains plug from the mains.
Clean the machine casings regularly with a soft cloth, preferably after each use. Make sure that the ventilation openings are free of dust and dirt. Remove very persistent dirt using a soft cloth moistened with soapsuds. Do not use any solvents such as gasoline, alcohol, ammonia, etc. Chemicals such as these will damage the synthetic components.
Replace power cords
If the supply cord is damaged, it must be replaced by the manufacturer, its service agent or similarly qualified persons in order to avoid a hazard.
Mains plug replacement (UK only)
If the moulded 3-pin plug attached to the unit is damaged and needs replacing, it is important that it is correctly destroyed and replaced by an approved BS 1363/13A fused plug and that the following wiring instructions are followed. The wires in the mains cable are coloured in accordance with the following code:
- blue neutral
brown live
As the colours of the wires in the mains cable of the unit may not correspond to the coloured markings identifying the terminals in the plug, proceed as follows:
- The wire which is coloured blue must be connected to the terminal which is marked with the letter N or coloured black.
- The wire which is coloured brown must be connected to the terminal which is marked with the letter L or coloured red.
Checking and replacing the carbon brushes (Fig. A & G)
If the carbon brushes are worn, the carbon brushes must be replaced by the customer service department of the manufacturer or a similarly qualified person.

Only use the correct orginial type of carbon brushes.
- Remove the carbon brush covers (4) by untightening the screw, open the cover by lifting it out of the machine.
- Release the spring (14) from the carbon brush and hold the spring (14) by a screwdriver. Remove the carbon brush (15) from its holder (keep the copper wire (16) attached to the machine).
- While holding the spring (14), place the new carbon brush inside the holder.
- Release the spring (14) back into place making sure it holds the brush (as shown in Fig. G).
- Disconnect the copper wire of the old carbon brush and connect the new one. Make sure the wire does not get jammed.
- Place the cover (4) back into place, make sure no wiring gets jammed and tighten the screw.
Always make sure to replace both carbon brushes at the same time.
After mounting the new carbon brushes, let the machine run at no load for 15 minutes.
WARRANTY
The warranty conditions can be found on the separately enclosed warranty card.
ENVIRONMENT

Faulty and/or discarded electrical or electronic apparatus have to be collected at the appropriate recycling locations.
Only for EC countries
Do not dispose of power tools into domestic waste. According to the European Guideline 2012/19/EU for Waste Electrical and Electronic Equipment and its implementation into national right, power tools that are no longer usable must be collected separately and disposed of in an environmentally friendly way.
The product and the user manual are subject to change. Specifications can be changed without further notice.
Winkelschleifer
AGM1097P 2400W - 180MM
AGM1098P 2400W - 230MM
Specifications techniques
Beskytelse for sliping
Fig.C2 & D2
2. INFORMACE O NARADI
Urcené pouziti
Vase uhlova bruska je urcena pro brouseni stavebnich a ocelovych materialu bez pouziti vody. Provadite-li rezani, musite pouzt specialni ochranny kryt (neni dodavan) obr. D2.
Technické udaje
jai jaii jaii jaii jaii jaii

a 1
ai = a1 + a2 且 ai a_j


aaii aaii aiiaai iiaai jy jay 10000000000000000000000000000000000000000000000000

1 1
1
.


gabll 1
1 1 1 1 1 1 1 1 1 1 1 1 1 1 1 1 1 1 1 1 1 1 1 1 1 1 1 1 1 1 1 1 1 1 1 1 1 1 1 1 1 1 1
aaii 1000000000000000000000000000000000000000000000000000000000
gaiy gaiy gai y 111111111111111111111111111
a aal 1e gall s jai all aasll jai (2)
i l lall s i d. Ail yjgsl 1s 1e o jai all
la Jusl all o jai ll ie jn jn jn jn jn jn jn jn jn jn jn jn jn jn jn jn jn jn jn jn jn jn jn jn jn jn jn jn jn jn jn jn jn jn jn jn jn jn jn jn jn jn jn jn jn jn jn jn jn jn j
aiiia 1000000000000000000000000000000000000000000000000000000000
aalal alal alal aal alal alal alal alal alal alal alal alal alal alal alal alal alal alal alal alal alal alal alal alal alal alal alal alal alal alal alal alal alal alal alal
aaii i 1
aallll lllllll
a 1 a 1 a 1 a 1 a 1 a 1 a 1 a 1 a 1 a 1 a 1 a 1 a 1 a 1 a 1 a 1 a 1 a 1 a 1 a 1 a 1 a 1 a 1 a 1 a 1 a 1 a 1 a 1 a 1 a 1 a 1 a 1 a 1 a 1 a
1 1 1 1 1 1 1 1 1 1 1 1 1 1 1 1 1 1 1 1 1 1 1 1 1 1 1 1 1 1 1 1 1 1 1 1 1 1 1 1 1 1
1e galall 2y. jglall galtlln yally ddy ezi (
a aagaaal yaiy jayy ayaiy jayy jayy (2 0 0 0 0 0 0 0 0 0 0 0 0 0 0 0 0 0 0 0 0 0 0 0 0 0 0 0 0 0 0 0 0 0 0 0 0 0 0 0 0
14y gall clll y 11 sll plalnai y 12
11s. 5y 11y 11y 11y
11y 11y 11y 11y
11y 11y 11y
Jg 1000000000000000000000000000000000000000000000000000000000000000000000
sJl j. 154 154 154 154 154 154 154 154 154 154 154 154 154 154 154 154
aaii iiaaiiaaiiaaiiaai
aLg gaiy 1 auiia gai Lao y 2

Jgai Jjia jie jie jie jie jie jie jie jie jie jie jie jie jie jie jie jie jie jie jie jie jie jie jie jie jie jie jie jie jie jie jie jie jie jie jie jie jie jie jie jie jie jie jie jie jie jie jie jie jie jie jies
aal g aal lal jaaal g aal jaaal al
y-2jzjlljj 1

a 1 (RCD) 888888888888888888888888
4541 cloglan .9
gaaal 1
jaiall gall glll algo gul jgl jol slal pao ai jie) 1aia gial plasil i y bail aill ayall plasil
aaii iiaai gai
laal, 1eaiiaol ayy jay yjay jay slipal
Clll 100
1.
jrrsall 2000
2
( 2,4 + 1 : 5,35)
111111114
Jaiil /jaii / jiai 5
jai jai jai jai 6
jil 7
18
J
S APQ = S AQP + S_ PQQ
9
(juaa yie) 10
11
12
1.25
4.5
(juaa y) 1
jsc
a^2b^2( a^2b^2 + 2b^2) = ^2b^22 + ^2b^24
1.2
S_ ACD = 12 · AD · CD = 12 × CD × 3
11
a 1111 1111 1111 1111 11
(20 )
()1j24g 1
J 151 151 151 151 151 151 151 151 151 151 151 151 151 151 151 151 151 151 151 151 151 151 151 151 151 15
(1)j 2 ()
glll jn nn nnnn nnnn nnnn

()
y 100 100 100 100 100 100 100 100 100 100 100 100 100 100 100 100 100 100 100 100 100 100 100 100 100 10
()4
A
(A)Jgall 20c(1·)
salliee jaiy jaiy jaiy
Jaae aie 0
e 1
Jaaal aabb 0jll
aaiia aaiy aaii jaiia aai bai yai iaiy ai yaiy iaiy iaiy iaiy iaiy iaiy iaiy iaiy iaiy iaiy iaiy iaiy iaiy iaiy iaiy iaiy iaiy iaiy iaiy iaiy iaiy iaiy iaiy iaiy iaiy iaiy iaiy iaiy iaiy iaiy iaiy iaiy iaiy iaiy i
aalai j
aaiaaal 5 aaii jn nn ananen nnnnne nnnnne nnnnne nnnnne nnnnne nnnnne nnnnne nnnnne nnnnne nnnnne nnnnne nnnnne nnnnne nnnnne nnnnne nnnnne nnnnne nnnnne nnnnne nnnnne nnnnne nnnnne nnnnne nnnnne nnnnne nnnnnee
(bab adal alal) gai jil ai bll iia jil
Ce HaneBaMe IeKa Ke yKuBaTe KopncTejkn rO OBOJ npOn3BoM MHOry HapeDNH rOHN.
1. B6E3BEdHOCHN yIATCTBA

Ipoumajme zu npunoKeHume, donoHumeHume 6e36edHocHu npedynpedyba u ynamcmbama.
NoapeuHOMo cnebe Ha 6e36edHochume npeynpedyba u ynamcmeama moke da doede do cmpyen yap, nokap u/Unu meuku noepedu. CyeaJme zu 6e36edHocHume npeynpedyba u ynamcmeama 3a da moxeme noepomno da zu npouumame.
CneHnTe CmboJIe KOpNCtAT BO yNaTcBAtA nnHa npOn3BOoT:

Ppouumaj 20 ynamcmeomo.

O3nauyba pu3uk od noepeda, aybeHa kusom unu owmemybahe Ha anamom 80 cnuyaj Ha Henoumybahe Ha ynamcmeama.

Pu3uk oO cmpyeH ydap

Bednau 3eademe ja npuknyhucama od cmpyja ako kaabenom e owmemekako u 3a epeme Ha yucmehe u oddjkyeahe.
Pu3uk od pa3nemahu objekmu.
Ppucymhme nuza da ce nodaeneky od
paobomhama obnacm

Cekozau Hoceme 3awmuma 3a oume!

Hoceme 3aumuma 3a cnyxom.

Hoceme 3auummu paka6u.

He 20 npumuckajme 3a6pa8nukom 3a epemeho dodeka Momopom pa6omu.

Pu3uk oD noXap.

He 20 denohupajme npou3eodom eo hecoo8emHu cao6u.

Pou3bodom e 80 coaNaacHocm co
8aKeukme cmaHapdu 3a 6e36edHocm
8o Eeponckume cmepHuu.
Бe36eHocn npedynpedyBaHa 3aednukn 3a 6pyceHe nIa6pa3NBn ceYeHa:
a) OBoj eNeKtpnueH aIaTe hAmehET 3a 6pyceHe. IpouHTajTe rI cIte 6e36eHocHn npEdupeDyBaHa, yNaTCTBaTa, nIyctpaunn I TexHnUKN IOdaTOCuN 3a OBOJ eNeKtpnueH aIaT. Ako He ce npuDpKByBate KOH daJeHnte yNaTCTBa, KOn e Ce HabeDeHN INoOJy, NocToN onaCHOCT Da npEdu3BnKaTe CTPyeH yIap, noXap n/IIIN TeuKn NOBpeDi.
b) Onpaun KaO To Ce neckapehe, pa6oTa co KnUaHa YetKa, POnIpaHe He ce npenopayBaat Da Ce N3BeyBaat Co OBOJ eKeTpueH aNat. OnpaunTe KOH He ce npedBnDcHn 3a OBOJ aNat ppeN3BnKyBaat onacHOCT OD NOBPeHN.
c) He kopncTe Te np6op KoJ He e npOn3BeDen H npenOpauH od cTpaHa Ha npOn3BoDHTeNToH aAnaToT. Dypu N Kora np6opot Ke 6nne npucBpTeH Ha anaTOT He noctOn rapaHunja 3a 6e36eNo pa6oTeHe.
d) HOMHaJIHATA 6p3nHa Ha npIbOpOT mopa Da oIroBapa Ha max. 6p3nHa O3NaYeHa ha anatot. Pnp6op KoJ pa60tn no6p3o od
HOMHaJIHNOT 6poj Ha BpTeKn, MoKe Da ce CKpUu N da ce pacnpcka BO OKOnHaTa.
e) HaBOpEshHnot npeuHn K de6eHHaT ha npb6opot Mopa da 6nDaT BO paMKte Ha KanauTeTOT Ha aJatOT. HecooDbetHa roJIemHa Ha np6opot HEmOKe aDeKBaTHO da ce 3aHTtN I da CE KOHTpOJIpa.
f) HABOJOT Ha MOHTAXHNOt npnbop Mopa Da ODROBAPA Ha HABOJOT Ha BpeTeHOTo Ha 6pycunkata. 3a npnbop KOj ce MOHTnpa co npupa6nuc, OTbOpT Ha hacaTOp Mopa da ODROBAPA Ha npeuHKOT Ha npupa6nucata. Pnp60p Koj He ce cobnaRa co MOHTXHaTa reometpuja Ha aIaNot Ke 6nnde HebaIahCnpaH, INHTeH3NBHO Ke Bn6pnpa N MoKe da npedeIN3Bnka rYbeHe Ha KOHTPOna.
g) He kopncTeTe OwtetEn np6op. PpeCekoe KopncTeHe npOBepTe ro np6opot, kako Hnp., 6pychata nloa da Hema nyKhatnH, NOdnoxHOTo nepnue da Hema nyKhatnH nn Da He e n3a6eHO, XnuHaHATA qETKa da He e NCKybaHa Hn Da Hema NCKpseHN BnaKha.Ako eIeKtpuHnO t anat nnn np6opot NaHa, npOBepTe rMOXHtE OwTeYBaHa a nn CTabeTe HeoWTeH np6op. Pocne npOBepkata n CTabaBeTo Ha np6opot, paKyBaOH T dpyrnte npncTyTHn Da He CTOjat BO pAMHHATA Ha potnpaBeto Ha np6opot n eIeKtpuHnO anat da ce NyTuTa pa60tn 6e3 ONTepetyBaBe oKOny 1 min. OwtetEn np6op Ke ce pacnadhe 3a OBA BpeMe.
h) Hocete onpema 3a JnUHa 3aWHTHa. CnopeBnOt Ha pa6oTaT, KopncTeTe 3aWTnTa 3aJNcTeO, pakaBnI Nn 3aWHTH OuHa. Hocete Macka 3a npaunHa, 3aWHTa 3aCnyXOT, pakaBnI N obNeKa Koja WHTn Od MaIN OTnAOU ON 6pyceHe nIN Ond CTpyka.3aWHTiTata 3a OHTe Mopa Da 6nDE Bo coCToJbA da IN COPe pa3neTahNTe DeIOBn HactaHATn npi pa6oTa. Mackata 3a npaunHa Mopa da 6nDE BO COCToJbA da WHTn Od npaunHa HactaHATA npi pa6oTa. Kora CTE n3IoKeHN HaDOInroTpajHa 6yaba Hocete 3aWHTTa 3a CnyXOT.
i) PnncyTHnTe Da 6nDat OndaJeHn OD pa6oTHnOT npocTOp. Cekoj KoJ BneryBa BO pa6oTHnOT npocTOp Mopa Da Hocn 3aHTHa
onpema. OtnaOnuTe oJ pa6oTHTo napye nnO ndckpweHnot np6op moKe da ce pa3JeTaAT n da npEIN3BnKaat NOBpeN.
j)Држete ro eNeKtpnHnot anat 3a n3OJnpaHn dpiKn, aKO ce n3BeyBaat pa6OTn kAJ kon pe3HNOt anat MOKe da Dojde BO KOHTaKT CO cKpneHN JNcN HIN CO conCTBeH Ka6eN. Co npceKyuBaHe Ha ,XuBa" KNuca u MeTaJIHnTe DeIOBn Od eNeKTPnuHnOT anat CTAHyBaat ,KuBu" N Ke npedeN3BnKaaT CTpyeh yIap KaKyBaYOT.
k) Ka6eIOT da e noaIeKy od BpTnBnOt np6Op. Ako ja n3ry6nte KOHTpONaTa Bp3 aIaNtOT, MoKeTe da ro npceCte He nn da ro 3aΦaTIte Ka6eIOT n paTe Da BN 6nDat 3aΦaTeHN OD BpTnBnOt np6Op.
I) Anatot Da He ro odnoxyBaTe DoKea np6opot He npeTaHe da Ce BPTN. BptnBnot np6op Moke da dojde BO KOHTAKT co NOBpsiHa Ta Ha Koja ce odnoxyBa N Ke ce 3ry6n KOHTpOJa Bp3 anaTOT.
m) Anatot He cMee da pa6oTu Kora ce npeneCyBa. Co cnyuaeH donnp co npn6opot Ke Bn ce 3a4pTu O6NeKaTa n Ke ce NOBpeDInTe.
n) PeIOBHO YIcTeTe rN OTBOpTe 3a BeHTnlaunja. BeHTnIaTOpOT BOJIeKyBa npaUNHa I npi rOJIeMn HacJaH Ha MeTaHn npaUNHa MoKe Da DoJde Do Kyca Bpcka.
o) He pa6oTe co anaTOT BO 6n3nHa Ha 3ananBn Maepnajn. NckpTe MoKAT da n 3anaat Obne Maepnajn.
p) HekopncTeTe np6op 3a koj tpe6a pa3naHocpeDCBo.KopncTeHe Ha BOda nIpa3naHocpeDCBo Ke npedn3Bnka ctpyeH yap.
PpHnH 3a noBpaTeH yAp npeDynpeyBaHa
NobpaTeH yIap e MOMeHTHa peakunJa Ha 3aKInHeTa potnpaKa 6pycha nloya, noDIOXHO nepnue, yeTkata nn dpyr npnbop. Pn3 3aKInHyBaHe Doar a do 6p3o coNPaBe Ha potnpaKnOT npnbop n Ha ToJ HauHH eNEkTpUHNOT anat Ce 3aDbuKyBa BO CnpOTNBHa Hacoka od potnpaHbTo, BO TOUYkata Ha DOINPOT.
Ha npimep, ako 6pycHnOT dNCK ce 3aknnn BO pa60THo napye, pa60T od nckot koj Habnerol BO TOOKATA Ha 3aknHyBaHeTo MOKe da ja ka Kona NOBpunHaTA OD MaTepnjAOT wTO ppeIN3BnKyBa DNCKOT da CE KaUNIa OTCKOKHe. ToJ MOKe da OTCKOKHe KOH IIN Od paKyBaOTo, BO 3aBnCHoCT OJ HAcOKATA Ha DnIXeHbETo BO TOUkata Ha 3aknHyBaHeTo. NsCKOT MOKe da CE cKPNI BO OBaa cocTo6a. NobpaTHnOT yap e pezytat Ha NorpeSho paKyBaHe co eNEKtpuHnOT anat N/ INI npi He npabInHa pa60Tha NoCTanka INI COctO6a, a MOKe da CE n36erHe CO npDpxyBaHe KOH NOJny ONnAnHTe MEPKn.
a) LbpcTo dpKTe ja paKaTa oAnatot n TeNoTo n paTe Da Bn 6NdT Bo nooK6a Da ro od6nja TOBpaTHnoYdap.CekoraW KopnstTe ja DoonHnTeHa paKa, ako ja IMa, 3a MaKcImaHa KOHTpOJa npi NOBpaTeH ydap Hn Top3nOHa peakuJa 3a BpeMe Ha cTApTyBaHeTo.PakyBaOT MoKe Da ro KOHTpOInpa IOBpaTHnoYdap aKO ce PpeB3emHn COoDbETn MEPKn.
b) He ng nocTaByBaJTe paueTe BO 6n3nHa ha potnpaayKnot np6op. Pnp6oPoT MoKe da OTCKOKHe BO BaWnte paue.
c) He cTOnTe BO o6NaCTa BO Koja aNaTOT 6n OTCKOKHa npu noBpaTeH yAp. NobpaTHnoT yAp rTo TpyKa aNaTOT BO HAcoka o6paTaHa OD DnKHebTo Ha dNcKOT BO ToKaTa Ha 3aKnHyBaHbTeO.
d)БиTe BnMaTeJHn Kora pa6oTne KoUHa,octpn pa6OBu nTH.N36erHyBaJte cKOKaHe u 3akNHyBaHe Ha onpeMaTa. KoUHaTa u ocptne pa6OBu nMaat TeHdeHcIJa Da ro 3akNHaT BPtINBnot np6Op n Da npedeN3BnKaat NobpaTeH yap.
e) He nocTaByBajTe BepnXn JnCTOBu nn Ha3a6eHn JnCTOBu 3a nnJa. Tne co3daBaat YecTN NObPATHN yapn n ry6be H a KOHTpOJa.
PpeynpeyBaHa 3a 6e36eHocT KapakTepcntuHn 3a 6pyceHe nOTcekyBaHe:
a) KopncTeTe rN dNcKOBnTe KOn ce npenopayBaat 3a BaHnot eNeKtpuYeH aIAT nOce6No KOHCTpyUnpaHnTe 6paHn
3a H36paHnTe DnCKOBu, DnCKOBu KOn He ce HameHeTn 3a OBOJ aIaNt Hema Da MoKaat aEKBaTHO da ce 3aWHTnTa co 6paHnK n Ce He6e36eHN.
b)Бpychata NOBpuHa HaДИСКOBuTe co npecobah ueHap Mopa da 6nde MOHTnpaHa nCnoD paMHHaTa Ha 6paHKnOT. HenpaBnHNo MOHTnpaHДNcK, Koj ja NaIMHyBa paMHHaTa Ha 6paHKnOT, HEMOKe da 6nide COODBeTHo 3aWHTteH.
c)БpaHnKOT Mopa Da 6nDe cnrypHo NOBp3aH 6e36eHNO nocTaBen Ha eNeKTpnuHnOt aHaT, Taka HajmAnot Deo DNCKOT Da 6nDe n3JIOxEH KOpaKyBaOH. BpaHnKOT NOMaBo 3aHTtHa paKyBaOH Od CKPWeHn DeIOBn OD INCKOT, Cnyaeh KOHTaKT CO INCKOT N OD INCKPn KOn MoKaT Da ja 3anaJaT o6neKaTa
d)ДИСКOT Da ce npIMeHyBa cAmO 3a cooDbetHa pa6ota.Ha npIMep:He 6pyceTe co CTpaHaT a OD INsKOT.INsKOBnTe 3a OTCEkyBaHBe Ce HameHEn 3a nepupepeHo 6pyceHbe,CTpaHnUHnTe CnIn MoXaT da n INCKPsaT OBne INsKOBn.
e) Cekoraш Да Кориспге Heoштeteиnpирабни Н дскот, co корет ha rolemna H obnK 3a n36paHnot dnck. Coobetni npipa6hiu Ha dNcKOT FO NOДржуВаAT dNcKOT co wTO ce HamaIyBa moXHocTa dNcKOT da ce ckpU. Ppipa6HnCITe 3a DnCKOBITE 3a OTcekyBaHe Moxat Da ce pa3nyBaaT od npipa6HnCITe 3a DnCKOBITE 3a 6pyceHe.
f) He KopucTeHe nCTpoWeHn DnCKOBn OndnorOJIeMn eIeKtpuHn aHaTn. NcKOBn KOn Ce HameHEn 3a NorOJIeMn eIeKtpuHn aHaTn He Ce NoOrdHn 3a NorOJIeMn 6p3HHn Kaj NOMaJIte eIeKtpuHn aHaTn.
DOnonHnTeHNn npedynpedyBaHa 3a6e36eHocT kapaKTePncTnHn 3a a6pa3NBn OTceKyBaHa

Omckyaaba ca npumehnueb camo co nocbeh 6paHk (He e eknyeH) cn. C2 - D2
a) HemojTe Da ro „3arNaBvBaTe" DnCKOT 3a OTcekyBaHe Nn Da npImeHyBaTe rOJem npHTncok. He ce obuLyBajTe da npabnte Ina6oKn pe3oBN.PpeontepetyBaHbeto Ha DNCKOT Ro 3rOJIeMyBa HaperaHbeto N YyBCTBNTENHOCTa Ha OCUNIpaHbe Nn N3BnBAHe Ha DNCKOT, a CO ToA n MOxHOCTa 3a NOBpATEH yDAP Nn KpSeHBe Ha DNCKOT.
b) HemojTe Da CTOnTE BO JINHnJaTHa DNCKOT KOJ potnpa.Kora DNCKOT,BO TOUkata Ha CeueHe,Ce DnKmOgBaWteTO TeNo,MOXHNOT NOBpaTeH yap Ke ro HAcOu HpTINBnOT DNCK dIpeKTHO KOH Bac.
c) KoraДиCKOT ce Jelen Илп paBn Исп配电нatoceyebe,od 6nlo Koja npuHa, ncknyeTe ro eNeKtpnHnot anat n dpxKeTe ro 6e3 DBNXeBe,doEka TpkaIATO ueNoCHO Hececonpe.He ce obdybajTe da ro n3BaNITeДИСКOT od 3aФATdoEka e BO dBIXeHe,3aHTOMOKe Da DoJde Do nobpaTe h yap.NCnITajTe INPpeB3eMeTe COODBeTHm MEPKn 3a OTKNOHyBaBeHa pInpUHaTa 3a JelenHe Ha DnCKOT.
d) He ja noBtopyBajTe onepaunjaTa co nCK noCTaBeH BO pa6oTHo napue. NocKOT Da ja noCTurHe max. 6p3nHa N BHIMaTeJHo NOBTOpeTo pe3OT. NcKOT MOKe Da JIeN, Da ce KaCyBa Harope nn Da npEiIN3BnKa NoBpaTeH yap aKO anaTOT ce cTapTyBa BO pa6oTHo napue.
e) NotnpTe rH nIIOUHTe Hn IROJEMNTe napuHb a 3a Da rO HaMaJIte pN3IKOT od 3aKJIHyBaBe Hn OD NOBpaTeH yDap. TOnemTPe napuHb a maaT TeHdEhCuJa da ce BNTkaat Od conCTBeHa TeXHa. Notnpnte Mopa Da ce NoCTaBat NOD napyeTo, BO 6JIINHa Ha JInHjata Ha CeueHeTo pa60t Od napyeTo, Od DBeTe CTpaHn OD INCKOT.
f)БиTe NOce6HOBHIMaTeJHIN npn "HyBaHe" BO sIOOBN Nn dpyrN NOBpUHH. INCKOT MOKe Na InceYe UeBKn 3a BODa, rac, eNEKtpuHa NHCTanaunja Nn object, mTO MOKe Da npeDn3BnKa noBpaTeH ydap.
EJIeKTpUHa 6e36eHnOCT
Pn KOpncTeHe Ha eNeKtpnHm MaunHn
NoHTyBaJTe r6e36eHNOCHNte npaBnla BO
BaWata 3emja, 3a da ro HamaNte pN3IKOT od
noXap, cTpyeH yIap n NobpeDi. PpOHTajTe r
CneHNTE 6e36eHOCn yNaTCTBa n npuNoKeHNTe
6e36eHOCn yNaTCTBa.

Cekozau npoepybjme danu HanoHom Ha Hanojyehaemo odoeapa Ha HabeDeHuom HANOHnloykama.

KnacaHaMaWuHaII-DeoJHa u3OauJa - He bu e nompe6eH npuknyok 3a 3a3emjyeahe.
Ako He MoKe Da Ce 36eHrpe pa6oTeHe co eNeKtpnHnot aIaT Bo BnaXHa cpeiHa, KopcTeTe pe3uDyaneH MOMeHtEn ypeI (RCD) co 3aHTteH HanoH. KopcTeHe Ha RCD ro HamaNyBa pN3IKOT oD cTpyeH yap.
2. INHΦOPMALUJIA 3A MALINHATA
HameHa
BaWata aorHa 6pycunka e KOHCTpynpaHa 3a 6pyceHe Ha 6eToH uYeIuHn MaTepnjaN, 6e3 KopncTeHe Ha BOda. 3a ceYeHe, Mpa Da ce KopncTn noc6eHbpaHk (He e BKnyuH) cn. D2
Texnuk noaTOU
| AGM1097P AGM1098P | |
| Мржениханон | 220-240 V~ |
| Номинална Фразковецima | 50/60 Hz |
| Влесна мokhoeст | 2400W |
| Номинална брзINA | 8.500 /min 6.500 /min |
| Брusesн диск | |
| Диjsаметар | 180 mm 230 mm |
| Насаден OTВор | 22.2 mm |
| ДебелINA | 6 mm |
| Брusesн диск за сеvelе | |
| Диjsаметар | 180 mm 230 mm |
| Насадen OTВор | 22.2 mm |
| ДебелINA | 3 mm |
| Haboj ha BpeTeHOTo | M14 |
| TekiHa | 6.6 kg 6.7 kg |
| Звун却不псок (LpA) | 96.1 + 3 dB(A) |
| Аксточа мо́ност (LwA) | 107.1 + 3 dB(A) |
| Вибрацни „Брусане на постени" an,AG | 7.86 + 1.5 m/s2 |
HnboHaBn6paun
HnBOTO Ha emncjata Ha Bn6paunite, HabeDeHO BO yNATCTBOBO, e n3MepeHO BO cOrnaCHOCT CO CTaHapnn3npaH TeCT daen HO EN 60745; Toj MOKe Da ce KopnCTn 3a CnopeDyBaHe Ha eEHa aNat CO npr KaO N 3a npelmmnHapHa npoceHa Ha n3IOXeHOCT Ha Bn6paunn pnp KOpNCteHe Ha aNATOT BO CNOMeHaTne anNkauin
KopncTeHbetoHa aIaNToT 3a pa3nUHN anNkaunu co pa3nUHN nCna6o oDpKyBaH np6Op,MOKe 3NaHTeHNO da ro 3rOJIemn HNBOTO Ha N3IOKeHOCT
BpeMeTO KOra aIaTOT e NCKJIyueH INIIN KOra pa6oTN Ho He ja BpUn pa6oTaTa, MoKe 3NaHTeJHo Da rO HAmJIu HNBOTO Ha n3IOKeHOCT.
3aunTeCe od efeKnTe Ha Bn6paunTe co OdpXyBaHe Ha anatot n npbOpot, paute Da BN 6ndat tonnn n opraHn3npajTe gn pa6oTHnTe HABNK.
Onnc
Epoebnte BO TEKCTOT ce OndecyBaat Ha nnjarpamnte Ha ctp. 2-4.
Cπ.A
- Konue 3a 3a6paBvBaHe Ha BpeTeHo
2.ИмбусзаRTka
3.BpaHnK(Cn.D1+D2) - Kanak ha jarileha YetknuKa
- On/Off npeknHybau
- Touka Ha cnojyBaHbe Ha cTpaHnUHa dpWka
7.CtpaHmHa dpWka
18.ИмбусКnyu
Cn.B
8.BpeTeHo
9. MoThaXHa npupa6Hnua
10.БусенДиСК(HeeBknyuEN)
11. CTe3Ha HApTka
12. Knyu
Cn.C1uD1
Бранкзабухсень.
Cπ.C2uD2

- SAFETY INSTRUCTIONS
- SafetyWarnings Common for Grinding or Abrasive Cutting-Off Operations:
- Kickback and RelatedWarnings
- SafetyWarnings Specific for Grinding and Abrasive Cutting-Off Operations:
- Additional SafetyWarnings Specific for Abrasive Cutting-Off Operations:
- Electrical safety
- MACHINE INFORMATION
- Intended use
- Vibration level
- Description
- Fig. A
- Fig. B
- Fig.C1 & D1
- Fig.C2&D2
- Fig. G
- Assembly
- Assembling the protection guard (Fig. C and D)
- Mounting and removing the disc (Fig. B)
- Mounting
- Removing
- Mounting the side handle (Fig. A and B)
- OPERATING
- Switching on and off (Fig. A)
- Deburring (Fig. E)
- Cutting (Fig. F)
- Hints for optimum use
- MAINTENANCE
- Replace power cords
- Mains plug replacement (UK only)
- Checking and replacing the carbon brushes (Fig. A & G)
- WARRANTY
- ENVIRONMENT
- Only for EC countries
- Winkelschleifer
- Fig.C2 & D2
- INFORMACE O NARADI
- Urcené pouziti
- gabll 1
- cloglan .9
- aalai j
- (bab adal alal) gai jil ai bll iia jil
- B6E3BEdHOCHN yIATCTBA
- Бe36eHocn npedynpedyBaHa 3aednukn 3a 6pyceHe nIa6pa3NBn ceYeHa:
- PpHnH 3a noBpaTeH yAp npeDynpeyBaHa
- DOnonHnTeHNn npedynpedyBaHa 3a6e36eHocT kapaKTePncTnHn 3a a6pa3NBn OTceKyBaHa
- EJIeKTpUHa 6e36eHnOCT
- INHΦOPMALUJIA 3A MALINHATA
- HameHa
- HnboHaBn6paun
- Onnc
- Cπ.A
- Cn.B
- Cn.C1uD1
- Cπ.C2uD2
Brand : Ferm
Model : AGM1098P
Category : Electric grinder