
HG00734A - Pedometer CRIVIT - Free user manual and instructions
Find the device manual for free HG00734A CRIVIT in PDF.
| Product type | Wireless bike computer |
| Brand | Crivit |
| Model | HG00734A |
| Power supply | CR2032 button cell, 3 V |
| Frequency band | 125 kHz ±10 kHz |
| Max transmitted power | 125 kHz <6.58 dBm |
| Operating temperature | 0 to 50 °C |
| Main functions | Clock, stopwatch, thermometer, speed (current, average, max), speed comparison and trend, total and daily odometer, total and trip time, timer, calorie counter, fat burn, CO2 savings, fuel savings, estimated arrival time, backlight, Scan mode |
| Menu languages | GB, DE, FR, NL, IT, ES |
| Display | LCD screen with primary, secondary, and function displays |
| Display modes | Advanced, Easy, Custom |
| Package contents | Computer, mount with shock absorber, sensor, magnet, 6 cable ties, 2 CR2032 batteries, 2 spare sealing rings, instruction manual |
| Dimensions (approx.) | Not specified, but designed for bicycle handlebar |
| Weight | Not specified, lightweight |
| Maintenance and cleaning | Clean the exterior with a soft dry cloth; remove the battery if not used for a long time |
| Safety | Safety instructions for batteries: do not recharge, short-circuit, open, or expose to heat; keep out of reach of children |
| Spare parts and repairability | Batteries and sealing rings supplied as spares; no other spare parts mentioned; 3-year warranty |
| General information | Do not use on e-bike; requires distance <70 cm between computer and sensor; mounting angle 30° |
Frequently Asked Questions - HG00734A CRIVIT
User questions about HG00734A CRIVIT
0 question about this device. Answer the ones you know or ask your own.
Ask a new question about this device
Download the instructions for your Pedometer in PDF format for free! Find your manual HG00734A - CRIVIT and take your electronic device back in hand. On this page are published all the documents necessary for the use of your device. HG00734A by CRIVIT.
USER MANUAL HG00734A CRIVIT
Operation and safety notes
NL BE
FIETSCOMPUTER
GB/IEOperation and safety notesPage 52
SK Pokyny pre obsluhu a
Scope of delivery.. Page 57
General safety instructions... Page 58
Safety instructions for batteries / rechargeable batteries... Page 61
Before use... Page 68
Inserting the battery.. Page 68
Attaching the bicycle computer.....Page 69
Initial use.. 69
Changing basic settings 69
Connecting the bicycle computer to the sensor.. Page 72
Using the bicycle computer......Page 72
CUSTOMIZE mode 78
Using the backlight... Page 79
Resetting the bicycle computer.....Page 79
Replacing the battery......Page 80
Removing the bicycle computer from the bicycle......Page 81
Troubleshooting......Page 81
Cleaning and care.. 84
Maintenance.. Page 84
Disposal Page 84
Simplified EU declaration of conformity. Page 86
Warranty 87
Bike Computer
Introduction
We congratulate you on the purchase of your new product. You have chosen a high quality product. The instructions for use are part of the product. They contain important information concerning safety, use and disposal. Before using the product, please familiarise yourself with all of the safety information and instructions for use. Only use the product as described and for the specified applications. If you pass the product on to anyone else, please ensure that you also pass on all the documentation with it.
Intendeduse
The product is intended to be used as a bicycle computer. Not for commercial use.
Functions
- Menu languages: GB, DE, FR, NL, IT, ES
- Clock
-
Stopwatch
-
Temperature display ^ C / ^ F
- Memory function for min. and max. temperature
- Bike speed display (0-99.9 km / h)
- Average speed display (0 - 99.9km / h)
- Maximum speed display (0 - 99.9 km / h)
- Speed comparator
- Speed trend
- Trip timer (max. 9:59:59) (Countdown or forward-counting)
- Odometer (Countdown or forward-counting)
- Total kilometer and total trip time display
- Calorie counter
- Fat burning display
- CO2 saved
- Scan display (functions are interconnected)
- Automatic start function
- ETA (Estimated time of arrival)-Distance
- ETA time
- Fuel Saving
- Back light ON / OFF

Parts description

Magnet
Cable ties
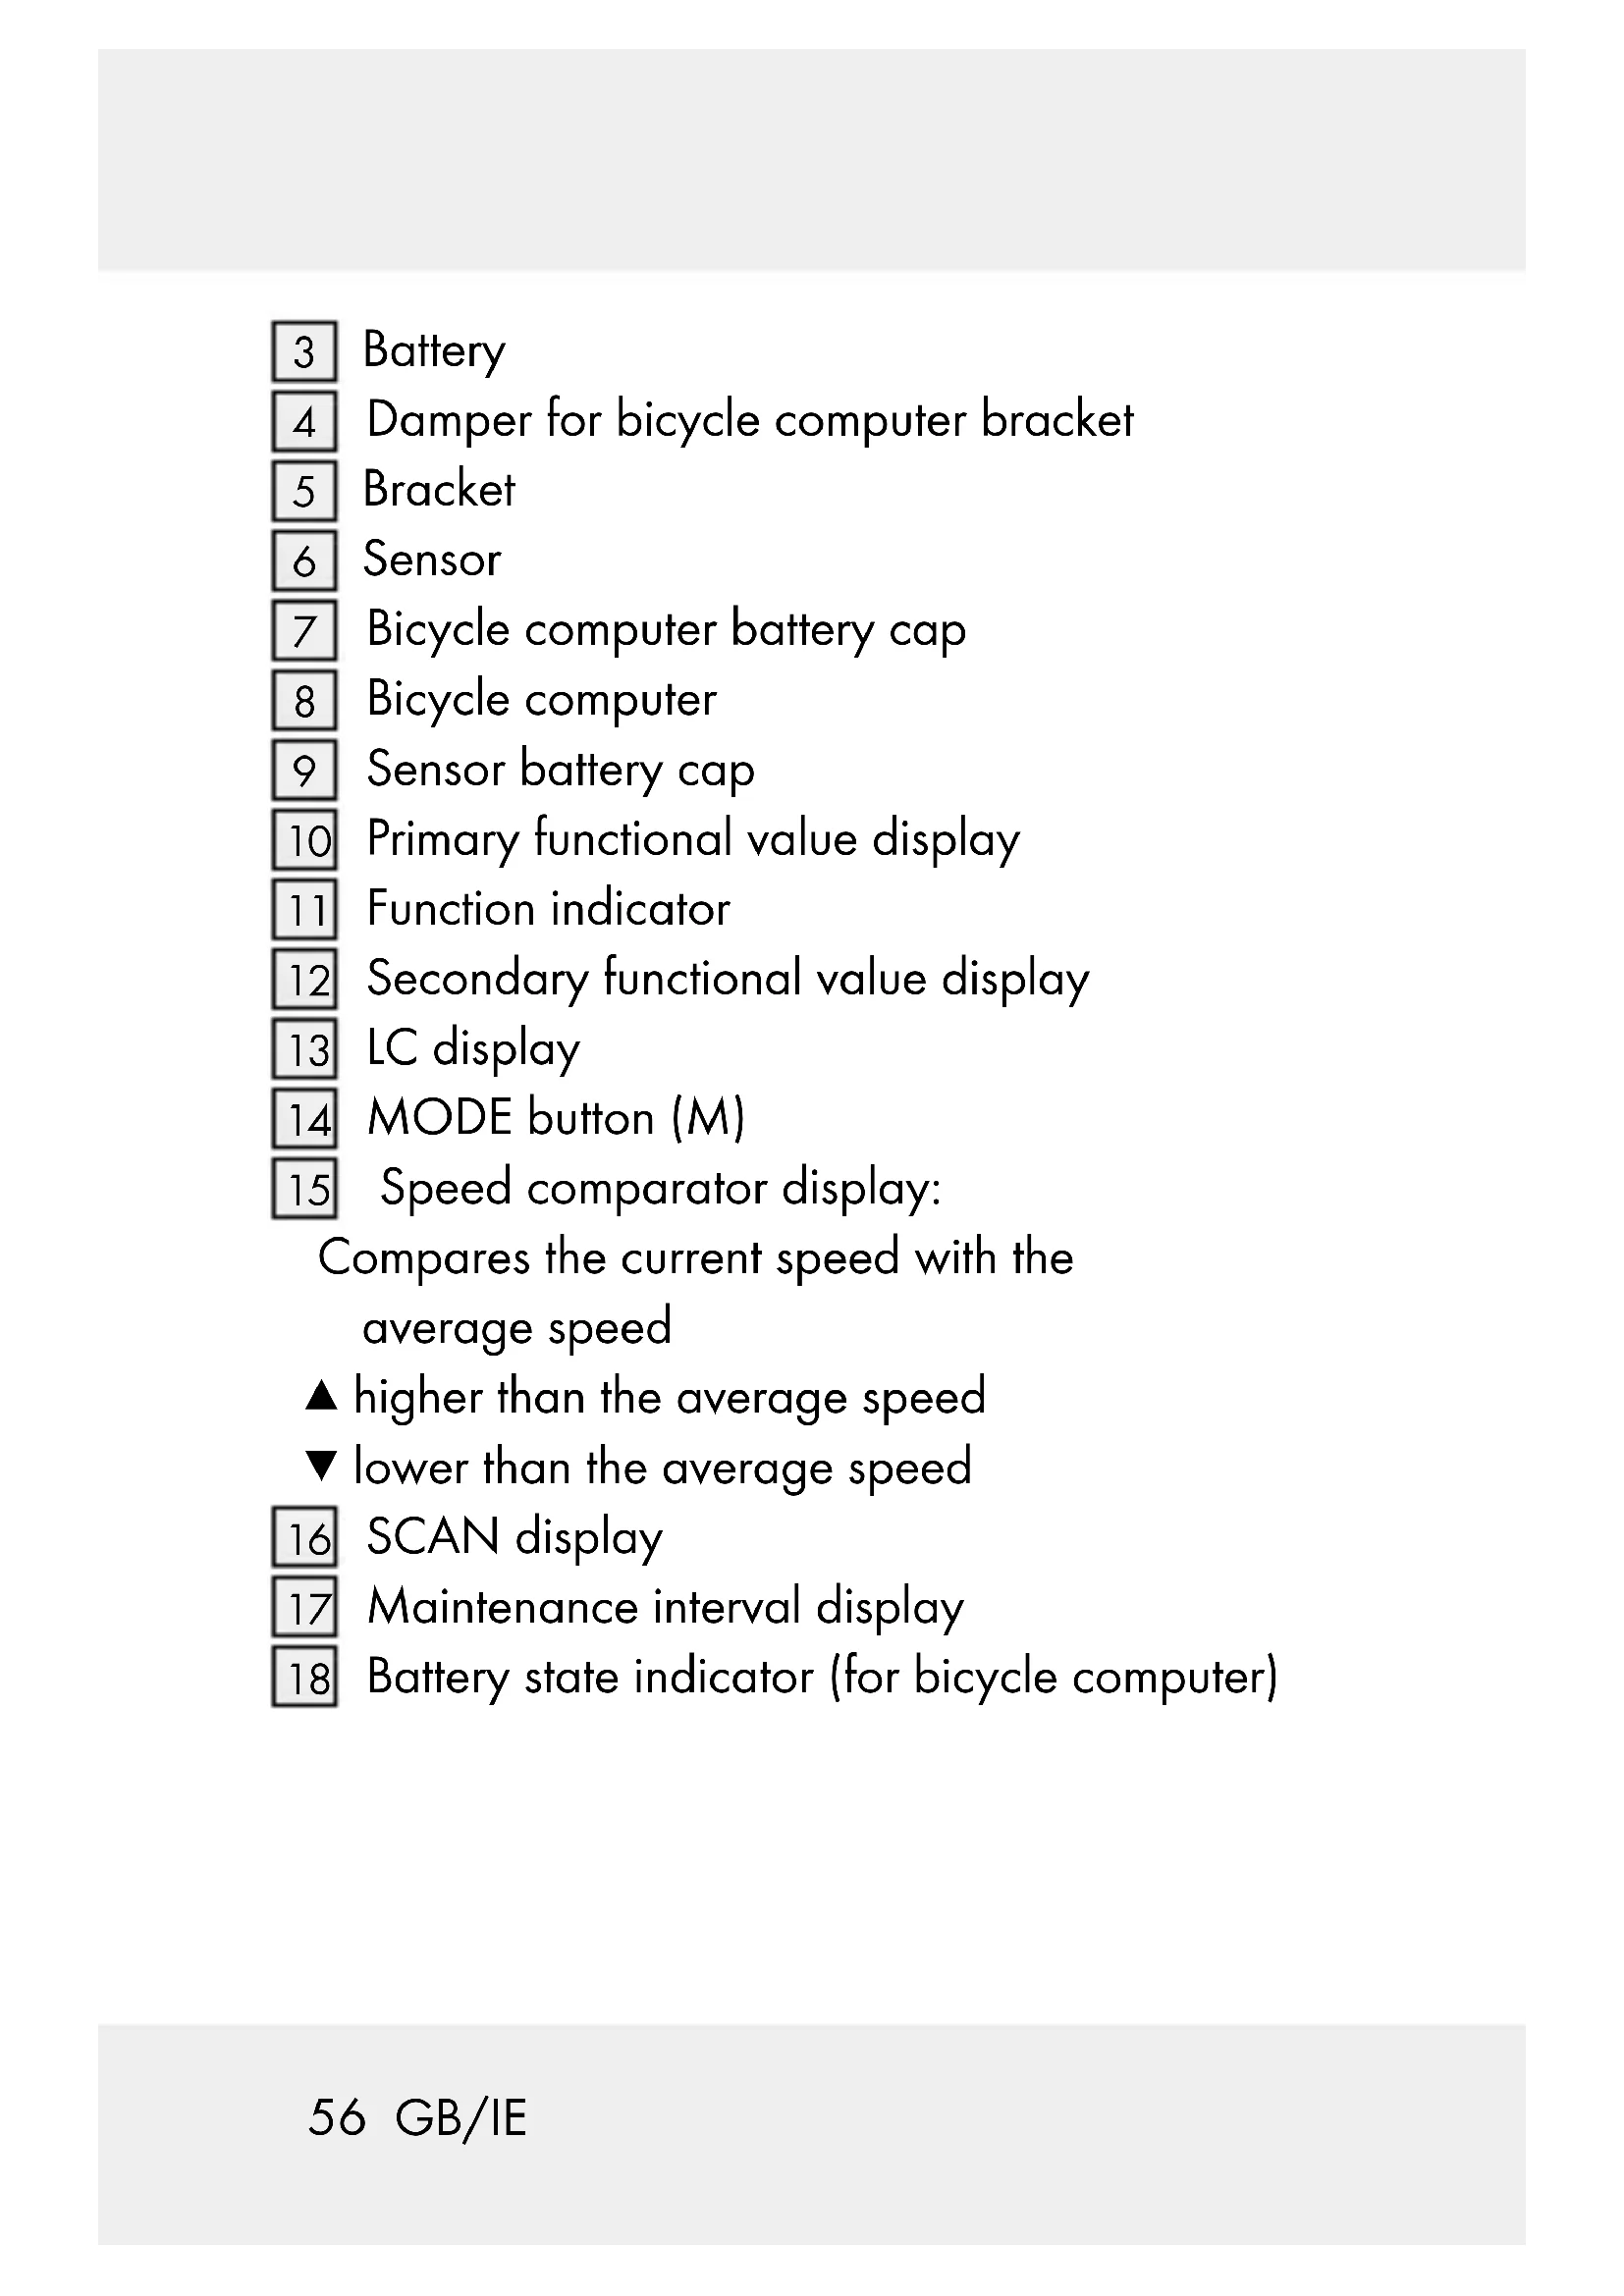
3 Battery
4 Damper for bicycle computer bracket
5 Bracket
6 Sensor
7 Bicycle computer battery cap
8 Bicycle computer
9 Sensor battery cap
10 Primary functional value display
11 Function indicator
12 Secondary functional value display
13 LC display
14 MODE button (M)
15 Speed comparator display:
Compares the current speed with the average speed
higher than the average speed
lower than the average speed
16 SCAN display
17 Maintenance interval display
18 Battery state indicator (for bicycle computer)
19 Speedtendency:
This displays the trend in terms of whether the speed is increasing (large bar, right) or decreasing (small bar, left).
20 SET button (S)
Technical data
Battery:3V (direct current)
(CR2032 button cell battery)
Operating temperature: 0 - 50^ C Frequency Band: 125 kHz + / - 10 kHz Max. Transmitted power: 125 kHz < 6.58 dBm
Scope of delivery
1 Wireless bike computer
1 Bracket for bicycle computer
1 Damper for bicycle computer bracket
1 Bracket with sensor
1 Magnet
6 Cable ties
2 Batteries, 3 V= (direct current), Model CR2032 button cell battery
2 Replacement O-rings for bicycle computer and sensor
1 Instructions for use

General safety instructions
KEEP ALL SAFETY NOTICES AND INSTRUCTIONS FOR FUTURE REFERENCE!
This product may be used by children 8 years and up as well as persons with physical, sensory or
mental impairments or lacking experience and knowledge, when supervised or instructed in the safe use of the product and understand the associated risks. Do not allow children to play with the product. Cleaning and user maintenance must not be performed by children without supervision.
Please note that the guarantee does not cover damages caused by incorrect handling, non-compliance with the safety instructions or use by unauthorised persons.

Safety instructions for batteries/ rechargeable batteries
DANGER TO LIFE!
Keep batteries / rechargeable batteries out of reach of children. If accidentally swallowed seek immediate medical attention.

DANGER OF EXPLOSION!
Never recharge nonrechargeable batteries. Do not short-circuit batteries / rechargeable batteries and / or open them. Overheating, fire or bursting can be the result.
Never throw batteries / rechargeable batteries into fire or water.
Do not exert mechanical loads to batteries / rechargeable batteries.
Risk of leakage of batteries/rechargeable batteries
Avoid extreme environmental conditions and temperatures, which could affect batteries / rechargeable batteries, e.g. radiators / direct sunlight.
Avoid contact with the skin, eyes and mucous membranes. In the event of contact with battery acid, thoroughly flush the affected area with plenty of clean water and seek immediate medical attention.

WEAR PROTECTIVE
GLOVES!
Leaked or damaged batteries / rechargeable
batteries can cause burns on contact with the skin.
Wear suitable protective gloves at all times if such an event occurs.
In the event of a leakage of batteries / rechargeable batteries, immediately remove them from the product to prevent damage.
Only use the same type of batteries/rechargeable batteries.Do not
mix used and new batteries / rechargeable batteries.
Removebatteries/ rechargeable batteries if the product will not be used for a longer period.
Risk of damage of the product
Only use the specified type of battery / rechargeable battery!
Insert batteries / rechargeable batteries according to polarity marks (+) and (-) on the battery / rechargeable battery and the product.
Clean the contacts on the battery / rechargeable battery and in the battery compartment before inserting!
Removeexhausted batteries / rechargeable
batteries from the product immediately.
- Beforeuse
Remove the protective film from the LC display 13 before you use the device for the first time.
Note: Do not use this product on electric bikes. The motor could cause the product to malfunction.
- Inserting the battery
To insert the battery proceed as depicted in Fig. A.
Use a coin to open the battery compartment. Use this to turn the battery cap count-clockwise. Ensure that you insert the battery correctly into the battery compartment (polarity). This is shown in the battery compartment. Ensure that the O-ring is attached correctly before inserting the battery.
Note: We also provide 2 replacement O-ring for bicycle computer and sensor.
Turn the battery cap clockwise onto the battery compartment using the coin to close it.
Attaching the bicycle computer
To attach the product, proceed as depicted in Fig. B to I.
Trim the protruding ends of the cable tie using a suitable tool such as a side cutter.
Note: Ensure that the bicycle computer 8 is attached less than 70~cm from the sensor 6. Attach the bicycle computer 8 to the sensor 6 within a 30^ angle, see Fig. B.
Initialuse
- Changing basic settings
Basic settings: Language > Application profile > Tyre size > Unit of length > Age > Unit of weight > Weight > Time format > Time > Date format > Date > CO2 emission rate > Maintenance interval >Back light ON / OFF > ETA distance > ETA mode > Fuel format > Fuel cons > Unit of temperature
Important functions:
MODE button 14 to configure values / SET button
20 to edit and adopt settings
- Language: 6 language can be select.
- Application profile: ADVANCE or EASY can be select.
- Tyre size: Enter the circumference for your tyres size in mm, 4 digit number can be input.
Note: You can calculate your tyre circumference (U) by multiplying the tyre diameter (D) by 3.1416 (Fig. L). The list (Fig. M) features the tyre circumferences (U) of conventional tyre diameters (D).
- Unit of length: KM / KMH or MILE / MPH can be select.
- Age: 2 digit number can be input.
- Unit of weight: KG or LB can be select.
- Weight: 3 digit number can be input in unit of KG or LB per select.
- Time format: 12 or 24hrs can be select.
- Time: hour and min can be input.
- Date format: DD-MM-YY or MM-DD-YY can be select.
-
Date: Year, month and day can be input.
-
CO2 emission rate: 3 digit number can be input in unit of G / KM.
- Maintenance interval: 3 digit number can be input in unit of KM or MILE per select.
Note: If the maintenance interval input "000" will switch off the service indicator.
- Back light ON / OFF: Switch ON or OFF the back light function. When switch ON, you can input the LIGHT ON and LIGHT OFF time. The back light can be activated during the input time.
- ETA distance: 5 digit number can be input in unit of KM or MILE per select.
- ETA mode: CLOCK or TIME for select.
- Fuel format: LITER or GALLON can be select.
- Fuel cons: 3 digit number can be input in unit of L/100 KM (LITER) or mpg (GALLON) per select.
- Unit of temperature: ^ C or ^ F can be select.
Confirm your choice using the SET button 20.
Press the MODE button 14 to exit settings. You have now successfully configured the basic settings.
If you wish to change the basic settings, please follow the steps outlined in the chapter "Resetting the bicycle computer" and reset all basic settings.
- Connecting the bicycle computer to the sensor
Use the magnet 1 to trigger the sensor 6, the speed tendency 19 shows a curve to confirm successful connection. The bicycle computer 8 is now ready to use. If the connection breaks, please follow the steps in the chapter "Troubleshooting" and reset all basic settings. You will then have to reestablish the connection between the bicycle computer 8 and the sensor 6.
Using the bicycle computer
Note: The bicycle computer will automatically switch to standby mode when it has not been used for over 5 minutes. Pressing any button or vibrations will reactivate the computer. The function indicator will show the current mode
Press the MODE button 14 repeatedly to scroll through the different functions. Press and hold the SET button 20 to request or reset the saved values.
The bicycle computer features the following functions:
ADVANCE mode: By pressing the MODE button 14 you can select the following function displays: CLOCK > TOTALODO > TOTAL-TM > TRIPDIST > MAXSPEED > AVGSPEED > TRIPTIME > TEMP > STPWATCH > CAL RATE > CALORIE > FAT-BURN > CO2 KG > FUELSAVE > ETASTART > KM+ / - > TIME+ / - > SCAN
EASY mode:
By pressing the MODE button [14] you can select the following function displays:
TRIPDIST > MAXSPEED > AVGSPEED > TRIPTIME
Note: You can also apply your own settings to turn on the remaining function displays. See "CUSTOMIZE mode" chapter.
CLOCK: Displays the time.
Press and hold the SET button 20 for 3 seconds and press the SET button 20 again to request the time and date settings.
Note: Press SET button 20 to can be switch display of the time / date.
TOTALODO: Total mileage counter.
Press and hold the SET button 20 for 3 seconds and press the SET button 20 again to change the tyre size, ODO and maintenance interval settings.
TOTAL-TM: Total trip time.
Press and hold the SET button 20 for 3 seconds and press the SET button 20 again to change the saved total trip time.
TRIPDIST: Trip distance.
Press and hold the SET button 20 for 3 seconds to set the trip distance, maximum speed, average speed and trip time to 0.
MAXSPEED: Maximum speed.
Press and hold the SET button 20 for 3 seconds to set the maximum speed to 0.
AVGSPEED: Average speed.
Press and hold the SET button 20 for 3 seconds to set the average speed to 0.
TRIPTIME: Trip time.
TEMP: Thermometer.
Press the SET button 20 to display the maximum temperature value reached (HI). Press the SET button 20 again to display the lowest temperature value reached (LO). Press the SET button 20 and keep it pressed while the highest or lowest temperature is displayed to return to the current temperature and delete the saved information. Press and hold the SET button 20 for 3 seconds and press the SET button 20 again to request temperature unit setting.
STPWATCH: Stopwatch.
Press the SET button 20 to start the stopwatch. Press the SET button 20 again to stop the stopwatch. Press and hold the SET button 20 for 3 seconds to set the stopwatch to 0.
CAL RATE: Current calorie consumption.
CALORIE: Calorie counter.
Press and hold the SET button 20 for 3 seconds to set the calorie counter to 0.
FAT-BURN: Fat-burning in grams.
Press and hold the SET button 20 for 3 seconds to set the fat-burning value to 0.
CO2 KG: CO2 saved.
Press and hold the SET button 20 for 3 seconds and press the SET button 20 again to request the reference value for CO2 setting.
FUELSAVE: Fuel save comparison with a car.
Press and hold the SET button 20 for 3 seconds and press the SET button 20 again to request the fuel unit and fuel consumption setting.
ETASTART: Estimated time of arrival.
ETASTART will be displayed. Press the SET button 20 and MODE button 14 to activate the ETA function.
Press and hold the SET button 20 for 3 seconds to change the ETA distance and the ETA mode.
KM + / -: Kilometer counter.
Press and hold the SET button 20 for 3 seconds and press the SET button again to request the kilometer counter settings. The LC display will show the symbol for increasing or decreasing the number (+ or -) and distance counter value.
TIME + / - : T i m e r
Press and hold the SET button 20 for 3 seconds to change the timer settings. The LC display will show the symbol for increasing or decreasing the number (+ or -) and timer counter value.
SCAN: Scan
Note: In scan mode, the display switches automatically between the trip distance, maximum speed, average speed and trip time.
Note: Refer to the "Changing basic settings" chapter to configure the settings.
Note: To deactivate scan mode press the MODE button 14 to return to ADVANCE mode.
-CUSTOMIZEmode
Alongside ADVANCE and EASY mode, you can also apply your own settings in CUSTOMIZE mode.
Press and hold the MODE button 14 for 3 seconds and press the SET button 20 to enter the application profile setting.
Press MODE button 14 to select EASY mode.
EASY will be flashing on display. Press and hold the SET button 20 to enter CUSTOMIZE mode setting.
Press the SET button 20 again. Press the MODE button 14 to activate or deactivate individual settings (i.e. CLOCK).
- Select "ON" to add the selected function to EASY mode. Select "OFF" if you do not wish to add the selected function to EASY mode.
Press the SET button 20 to confirm your entry. Press the MODE button 14 to proceed to the next function and repeat the steps as described above.
Press the MODE button 14 to exit settings.
Using the backlight
Press the SET button 20 to temporarily activate the backlight. The backlight will switch off automatically after a short amount of time.
Resetting the bicycle computer
Press and hold the SET button 20 first and hold the MODE button 14 to proceed to setting mode. SETTING OPEN or SETTING RESET will be displayed. Press the MODE 14 button until SETTING RESET displayed, Confirm reset the product by press the SET button 20.
Now you can adjust the previously configured basic settings (language, age, weight, time). Other saved information will be deleted.
Note: You can select SETTING OPEN to request for changing settings but not to delete the saved information. Refer to the "Changing basic settings" chapter to configure the settings.
Replacing the battery
Note: The bicycle computer battery must be replaced when the battery state indicator 18 is shown on the LC display. Press and hold the MODE button 14 first and hold the SET button 20 at the same time and keep them pressed until the battery symbol and — are shown on the LC display. To replace the battery, proceed as shown in figure A. Open the battery compartment by turning the battery cap anticlockwise towards to the icon using a coin. Remove the old battery and replace this with a new battery. Please note the polarity when inserting the battery. This is shown in the battery compartment. Ensure that the O-ring is attached correctly before inserting the battery. Turn the battery cap clockwise towards to the icon onto the battery compartment using a coin to close it. Press and hold any button to return to normal operating mode.
Note: When the battery has been removed, all information will be deleted after approx. 20 seconds.
Removing the bicycle computer from the bicycle
Turn the bicycle computer counter-clockwise to remove it (Fig. K).
To remove the cable ties 2 using a suitable tool such as a side cutter.
Troubleshooting
Note: This product contains delicate electronic components. Therefore, interference may occur when it is near products which transmit radio signals.
- If error messages appear in the display, remove these products from the proximity of the product. If the device fails to work, remove the batteries for a short while and then replace them.
Problem Solution
Empty LC display or no response after putting the battery in again
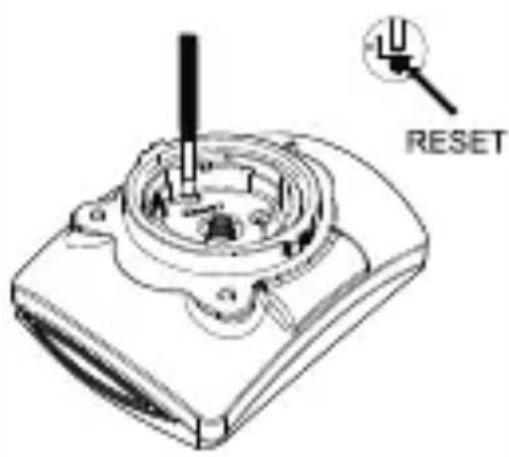
Remove battery. If required, guide a sharp instrument (e.g. a screwdriver) into the hole labelled "RESET". Insert a 3 V battery into the battery compartment in such a way that the + terminal points upwards. Replace the battery cap on the battery compartment. The microprocessor is reset and restarted.
Speed or distance are not displayed
Adjust magnet and sensor correctly. Check that the battery is inserted with the poles arranged the right way round.
| Problem Solution | |
| Display is black The ambient temperature is too high or the bicycle computer was exposed to direct sunlight for too long. Remove product from direct sunlight and let it cool off for a while. | |
| The LC display shows irregular symbols. | Remove battery and replace it again. |
- Cleaning and care
Do not use any liquids or cleaning agents for cleaning. Otherwise there is a risk of damaging the product.
Clean the product on the outside only with a soft, dry cloth.
- Maintenance
Remove the battery from the product if the product is not going to be used for a prolonged period.
Regularly examine the product i.e. check its components for damage and ensure that they are positioned correctly.
Disposal
The packaging is made entirely of recyclable materials, which you may dispose of at local recycling facilities.
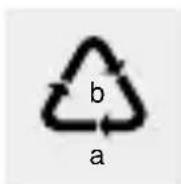
Observe the marking of the packaging materials for waste separation, which are marked with abbreviations (a) and numbers (b) with following meaning: 1-7: plastics / 20-22: paper and fibreboard / 80-98: composite materials.

The product and packaging materials are recyclable, dispose of it separately for better waste treatment. The Triman logo is valid in France only.

Contact your local refuse disposal authority for more details of how to dispose of your worn-out product.
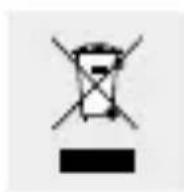
To help protect the environment, please dispose of the product properly when it has reached the end of its useful life and not in the household waste. Information on collection points and their opening hours can be obtained from your local authority.
Faulty or used batteries / rechargeable batteries must be recycled in accordance with Directive 2006/66/EC and its amendments. Please return the batteries / rechargeable batteries and / or the product to the available collection points.
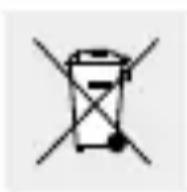
Environmental damage through incorrect disposal of the batteries/rechargeable batteries!
Batteries / rechargeable batteries may not be disposed of with the usual domestic waste. They may contain toxic heavy metals and are subject to hazardous waste treatment rules and regulations. The chemical symbols for heavy metals are as follows: Cd = cadmium, Hg = mercury, Pb = lead. That is why you should dispose of used batteries / rechargeable batteries at a local collection point.
- Simplified EU declaration of conformity
declares that the product (Bike Computer,
HG00734A) is in compliance with Directive
2014/53/EU and 2011/65/EU.
The full text of the EU declaration of conformity is
available at the following internet address:
www.owim.com
Warranty
The product has been manufactured to strict quality guidelines and meticulously examined before delivery. In the event of product defects you have legal rights against the retailer of this product. Your legal rights are not limited in any way by our warranty detailed below.
The warranty for this product is 3 years from the date of purchase. Should this product show any
fault in materials or manufacture within 3 years
from the date of purchase, we will repair or replace
it - at our choice - free of charge to you.
The warranty period begins on the date of purchase.
Please keep the original sales receipt in a safe
location. This document is required as your proof
of purchase. This warranty becomes void if the
product has been damaged, or used or maintained improperly.
The warranty applies to defects in material or manufacture. This warranty does not cover product parts subject to normal wear, thus possibly considered consumables (e.g. batteries) or for damage to fragile parts, e.g. switches, rechargeable batteries or glass parts.
CEIP45
Introduction 91
Mode CUSTOMIZE (adaptation)...Page 117
ModeCUSTOMIZE (adaptation)
STPWATCH: stopwatch.
VET: vetverbranding in gram.


- FIETSCOMPUTER
- General safety instructions... Page 58
- Before use... Page 68
- Initial use.. 69
- Bike Computer
- Introduction
- Intendeduse
- Functions
- Parts description
- Technical data
- Battery:3V (direct current)
- Scope of delivery
- General safety instructions
- KEEP ALL SAFETY NOTICES AND INSTRUCTIONS FOR FUTURE REFERENCE!
- Safety instructions for batteries/ rechargeable batteries
- DANGER TO LIFE!
- DANGER OF EXPLOSION!
- Risk of leakage of batteries/rechargeable batteries
- WEAR PROTECTIVE
- GLOVES!
- Risk of damage of the product
- batteries from the product immediately.
- - Beforeuse
- - Inserting the battery
- Attaching the bicycle computer
- Initialuse
- - Changing basic settings
- Important functions:
- - Connecting the bicycle computer to the sensor
- Using the bicycle computer
- The bicycle computer features the following functions:
- EASY mode:
- -CUSTOMIZEmode
- Using the backlight
- Resetting the bicycle computer
- Replacing the battery
- Removing the bicycle computer from the bicycle
- Troubleshooting
- Problem Solution
- - Cleaning and care
- - Maintenance
- Disposal
- Environmental damage through incorrect disposal of the batteries/rechargeable batteries!
- - Simplified EU declaration of conformity
- Warranty
- CEIP45
- Introduction 91
- ModeCUSTOMIZE (adaptation)
Brand : CRIVIT
Model : HG00734A
Category : Pedometer