SmartCam HD - Surveillance Camera Kerbl - Free user manual and instructions
Find the device manual for free SmartCam HD Kerbl in PDF.
Frequently Asked Questions - SmartCam HD Kerbl
User questions about SmartCam HD Kerbl
0 question about this device. Answer the ones you know or ask your own.
Ask a new question about this device
Download the instructions for your Surveillance Camera in PDF format for free! Find your manual SmartCam HD - Kerbl and take your electronic device back in hand. On this page are published all the documents necessary for the use of your device. SmartCam HD by Kerbl.
USER MANUAL SmartCam HD Kerbl
High Definition: 1280x720
Standard Definition: VGA 640x480
VGA (640x480 pixels)
Compression de l'image: H.264 / MJPEG
Taux de rafraîchissement : 25 FpS (VGA), 15 FpS (720p)
Angle:100°
Please read these instructions carefully in their entirety before using the product, and keep them handy for future reference.
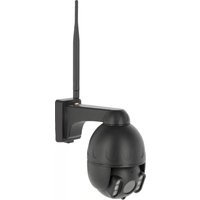
Thank you for your interest in our product and for ordering the SmartCam. It can be controlled using any PC/laptop via the Intranet or Internet via a common web browser (recommended: Internet Explorer or Safari), via smartphone (iPhone, iPad, Android phone and pad) or via the client software installed on the PC. It can be easily integrated into your LAN or WLAN environment via a user-friendly installation process and intuitive interface. We are certain that you will value the quality and features of this product.
Note
This product can interfere with other wireless devices that use the 2.4 GHz ISM band. Please turn off these devices to avoid interference.
Product safety
This product transmits electromagnetic waves just like other wireless products. Its signal power, however, is less than other wireless devices, for example, mobile phones. During operation, SmartCam meets the safety standards for radio frequencies and the recommended indices.
Restrictions
- Do NOT use this product to violate the privacy rights of others. Monitoring the activities of other people without their consent is unlawful. This product was not designed or manufactured for this purpose.
- Do NOT place this product in proximity to medical devices. Radio waves can cause the malfunction of electronic medical devices.
- This product should be kept at least 30~cm away from all pacemakers. Radio waves can interfere with pacemakers.
- Do NOT use this product for unlawful activities. The user must ensure that the camera is only used in accordance with the law.
Care and maintenance
- Make sure that the camera and its power supply has sufficient ventilation;
- Do not shake, hit or allow the product to fall to the ground;
- Make sure that the camera remains dry and dust-free, and is not exposed to direct sunlight;
- Do not place this product in proximity to magnetic objects;
- Do not place the product in locations that have constant temperature or humidity fluctuations;
- Keep the product away from heat sources;
- Do not use this product in proximity to aggressive chemicals;
- Do not use this product in proximity to water;
- Do not place this product in rooms that are surrounded by metal. The surrounding metal can shield electromagnetic waves so that no signal is received;
- Please note the local environmental protection regulations of your area;
- Please turn the device off when not in use;
- Do not take the product apart and do not attempt to repair it. This can damage the product.
Main features
Easy installation
The camera comes with an integrated wireless capability (IEEE802.11b/g/n) and web server function. Therefore, driver installation is not necessary. Thanks to P2P technology (peer-to-peer), the user can view the SmartCam stream easily via a PC/smarhtphone/ client software. The router and firewall do not need to be configured. The camera can automatically speak to the router via the WLAN. You can see images picked up by the camera in the remote stall as soon as the connection is made.
STA/APmode
The SmartCam can be used both integrated into an existing wireless network (STA mode) as well as so-called HotSpot Camera (AP mode). In AP mode, the camera communicates directly with e.g. Smartphones. In this case, the smart phone serves as a monitor and therefore replaces classic radio monitors to watch animals in the trailer while driving.
802.11 b/g/n WLAN connection available
The camera was designed to work with your existing network as well as with standard 802.11 b/g/n wireless devices, allowing you to use the product wirelessly. The camera has SSD filtering, powerful 64/128 bit encryption and the latest security standard for WPA encryption in order to protect against illegal access.
3GPP mobile surveillance
The camera allows you to view images on your mobile phone as a live video stream. It supports the telecommunication standard for the 3GPP streaming format. All 3G-capable mobile devices and most 2G mobile phones that support the 3GPP standard are compatible. This means that the images can be viewed via your mobile phone's browser.
Simultaneous high-speed MPEG-4 and Motion JPEG
The camera enables the simultaneous live streaming of MPEG-4 and Motion JPEG. The camera has H.264/MPEG4 compression that compresses the video to make the transmission faster and more efficient. The H.264/MPEG4 and MPEG image can be transmitted at 30 frames per second.
Simultaneous HTTP and RTSP streaming
The camera supports the HTTP and RTSP/RTP/RTCP protocol and supplies several HTTP and RTSP streams simultaneously.
Snapshot and record function
You can take a snapshot from the images sent to your PC by the camera and then save the image in JPG or BMP format. In addition, you can also record the video and audio stream sent from the camera to your PC and save it in ASF format.
OSD function
The OSD function (on screen display) can show the system name, date and time, and user-defined info on the screen.
Authentication
You must enter your user ID and password in the authentication window. The password prevents unregistered users access to your camera. Users can select between the basic authentication method or the direct access authentication method.
Infrared night vision
The camera uses infrared LEDs. When the environment is dark, the LEDs activate automatically via a light sensor. The video switches from colour to black & white. The range is approx. 5m
Adapter
When using the power adapter, make sure that the nominal voltage matches that of the device to avoid damage due to incorrect use of the power supply.
PC system requirements
The PC and network must meet the following technological specifications in order for the camera to function.
Processor:
Intel Pentium III, 1GHz or higher (Pentium IV, 2 GHz or higher recommended)
RAM:
256 MB or more
Colour monitor:
We recommend at least 800 × 600 and the latest driver for the display adapter
Operating system:
Microsoft Windows 98 / Windows ME / Windows 2000 /Windows XP / Windows Vista / Windows 7 / Windows 8
Web browser:
Internet Explorer Version 5.0 or higher, DirectX 9.0c or higher, Safari, Firefox (requires QuickTime), Google Chrome (requires QuickTime)
Network protocol:
TCP/IP network protocol installed
Interface:
10/100 Mbps Ethernet connection or wireless network connection (WLAN)
Technical data:
WLAN
Function types: P2P/AP/STA
Transmission standard: Wi-Fi (IEEE 802.11b/g/n)
Transmission frequency: 2.4 GHz
Modulations: OFDM/DBPSK/DQPSK/CCK
Transmission range: 50m (without obstacles)
Transmission strength: 17 dBm (max.)
Antenna: 2 dBi / External connecting
Video
Image sensor: 1/4'' CMOS
Screen resolution: HD (1280x720 pixels) /
VGA (640x480 pixels)
Image compression: H.264 / MJPEG
Frame rate: 25 FpS (VGA), 15 FpS (720p)
Viewing angle: 100^
Minimum luminosity: 2.0 Lux/F2.0, 0 Lux (IR ON)
Power supply
Input voltage: DC +5 V
Battery: Lithium polymer battery, 3.7 V, 3000 mAh
Power consumption: 330mA or 550mA (IR ON)
Current consumption: 550mA
Charging time: up to 5 hours
Operating time: 8 hours (IR OFF) / 5 hours (IR ON)
Night vision
Number of LEDs: 14
Luminous efficacy: 5m / 60^
Miscellaneous
Protection type: IP 66
Magnetic force: 8kg (vertical)
Weight: 360 g
Dimensions: 85.5 × 59.5 × 50 ~mm
Accessories: mains adapter, antenna, user manual
Storage temperature: -40^ 85^/
-40°F~185°F
Operating temperature: -10^ 50^
14^ F 122^ F
Ambient humidity during operation: 0 90%
Warranty card
Based on our General Terms and Conditions of Business, we offer a 1 YEAR WARRANTY for this device covering damage caused by material or manufacturing defects. This warranty begins on the date of purchase. The warranty does not cover:
-
damaged caused by natural wear and tear (wear parts, sliding parts), excessive strain and incorrect use (non-compliance with operating instructions).
-
Damage caused by force majeure or sustained during transport.
-
Damage to rubber parts, e.g. on connecting lines. Warranty repairs are only carried out by the manufacturing plant or an authorised contracted workshop. The manufacturer reserves the right to reject any warranty claims in the event of non-compliance. The device must for this purpose be returned to the point of sale, at the risk of the device owner, complete, packaged and with sufficient postage, including the original invoice and the warranty card. (address see dealer stamp). Please provide as much information as possible on the nature of the problem. Costs incurred as a result of unjustified defect claims will be invoiced to the device's owner.

CE Mark / CE Declaration of Conformity
Albert Kerbl GmbH hereby declares that the SmartCam 10812 complies with the 2014/53/EU Directive. The full text of the EU Declaration of
Conformity can be found on the following website:
http://www.kerbl.com/doc

Electrical waste
It is up to the operator to dispose of the SmartCam responsibly in accordance with local regulations. Consult the relevant regulations for your country. The device must not be disposed of in household waste. Under the terms of the EU Directive on the disposal of old electrical and electronic
equipment, the device can be taken to local authority-run refuse sites or recycling plants free of charge, or returned to dealers who offer a returns service. Correct disposal protects the environment and prevents any possible harmful impacts on humans and the environment.
Use simply with smart phone (without wireless router)
Note: Please note that the user interface depending on the operating system and version of the application from the images shown can be different.
- Download "UCCAM" app to smartphone. (Google play for Android phone, Apple store for iPhone)
- Power on the Wifi camera by press power button on the back of camera, Green light will be on.
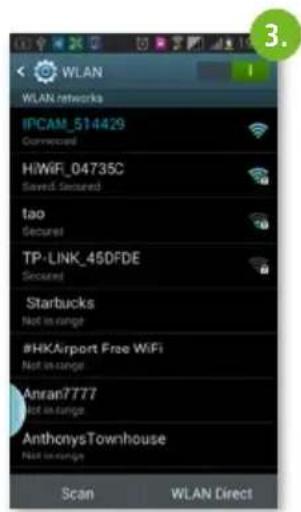
- Chose the Wifi named "IPCAM_xxx" on smartphone wifi setting
- Enter Wifi password: 88888888
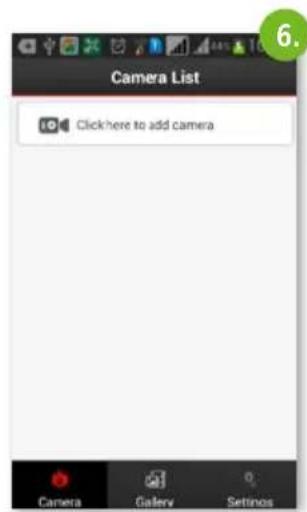
- Run "UCCAM" app on smartphone
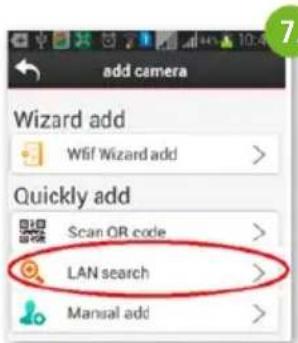
- Click camera icon to add the camera as above
- Search camera by click quickly add "LAN Search" as below
- Camera will display with UID code .The camera with bright blue point and Wifi signal icon show that the camera has connected to your smartphone.
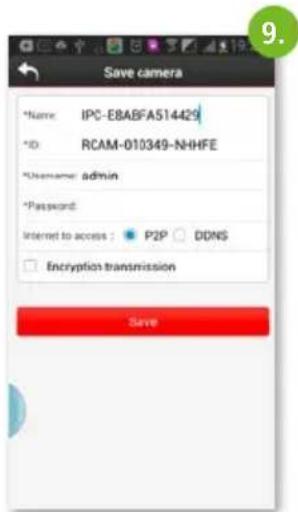
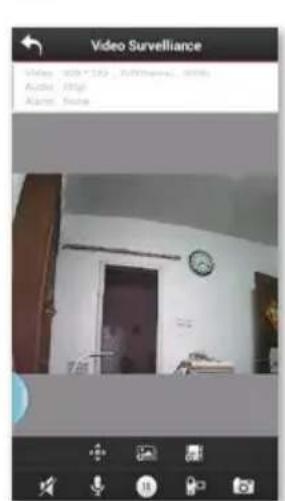
- Then click the camera icon which you want to see, you will see the below interface:
- Just click "save" (no password) and you will see the video from camera
Main features
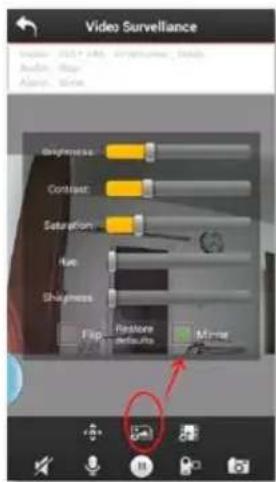
Picture adjustment:
Image can be Reversed by click the icon and choose check box "Mirror": Use this function to exchange the left and right of the image when you put your camera facing to the tail of your Car/Truck/RV so you can see the video as normal direction. Video can also upset down by choose check box "Flip": Exchange the Up side and Down side.


You can record video by click and store in smart phone SD card.
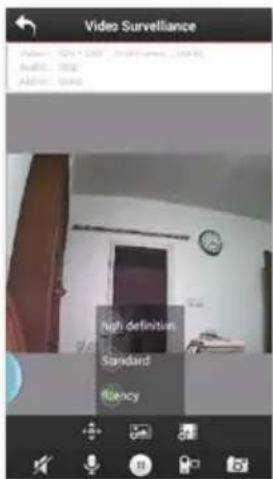
Choose video quality:
You can change the video quality by choose your
prefer quality level by click icon High definition: 1280x720 resolution Standard definition: VGA 640x480 resolution Fluency: keep the video steam faster and fluent (less delay)
Video picture recorder Play
Review and play the picture and video you have taken and stored in SD card of your smart phone. Click on "Gallery" symbol and you will see the files list( video and picture). Click the files you want to see so you can see the video or photo. You can share these video/photo to your friends on Facebook/Twitter.
Use with wireless router (optional)
If you have a wireless router around the place where the camera installed, you can hook your camera to the wifi network of this wireless router, so you can view the camera through this wireless router's wifi network. This can extend the wireless transmission distance of the camera. Because in this way, where ever your smart phone connect to the wifi network of this wireless router, you can see the video from camera. If your wireless router connected to the internet, you can view the video on smart phone or PC at any place where have a internet access.
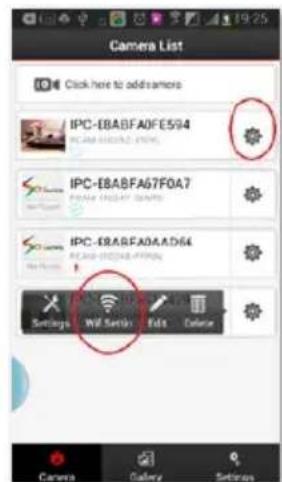
- Enter the main menu of the camera list. Click on icon

of the camera which you want to set.
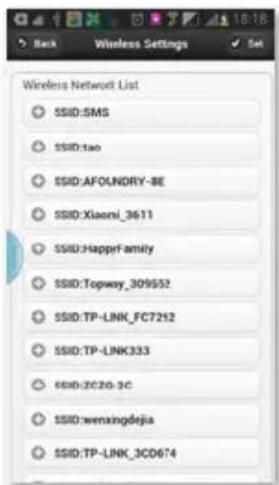
- You will see a Setting menu pop up, click on "wifi setting" on this pop up menu, you will see a list of Wifi name around you:
- Choose the wifi name of your wireless router, input the password of the Wifi as above pic
- Your camera will be hooked to the Wifi of your wireless router ( now the camera is in STA mode). Now You can see your camera's video on any place as long as your smart phone connect to your wifi network of your wireless router or connected to internet with this app.
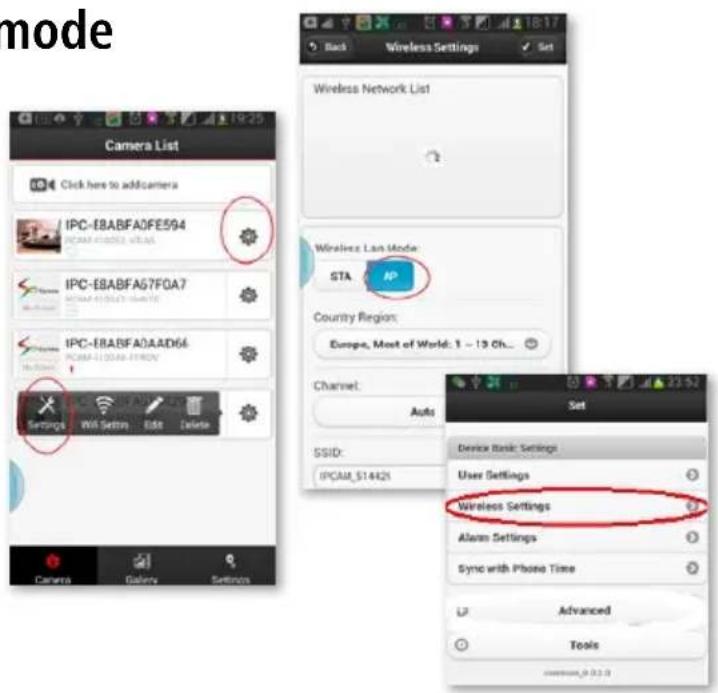
Switch between STA mode to AP mode
If you want the camera disconnect with wireless Router, you can switch the camera mode from STA mode to AP mode again. Click setting gear of the camera you want to set on camera list, then a Pop up menu appear on the
bottom, click the "settings" icon and then "wireless settings". You will see wireless LAN Mode setting button, click on "AP" mode, the camera will disconnect from the Wifi network of your wireless router and back to the AP mode which can view video directly by smart phone.
Advance function
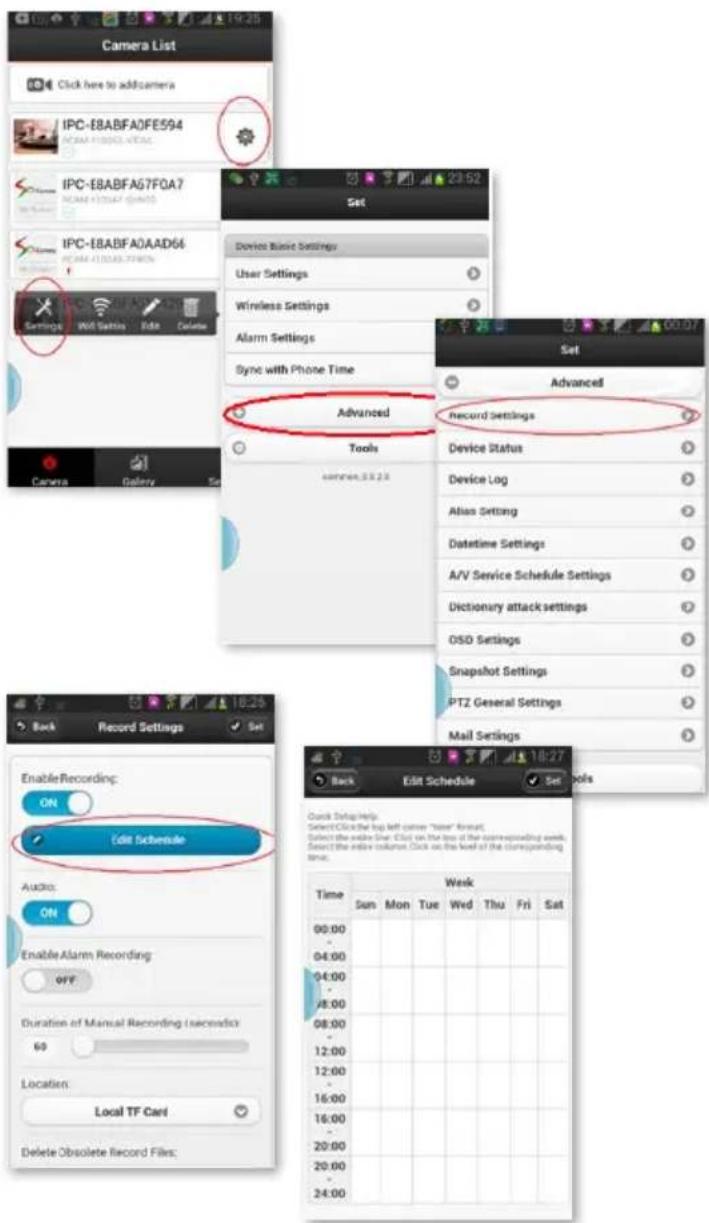
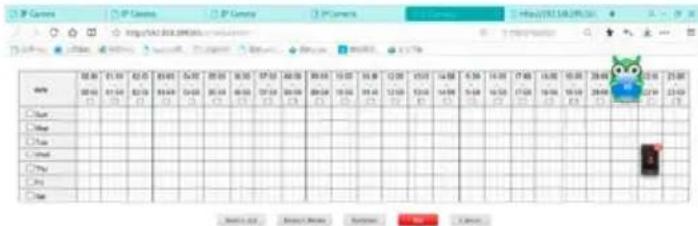
1. Scheduled Recording function
When you use the camera for home security, you may want to record video on the SD card of the camera or network disk.
You can set as follow:
- In the camera list click setting gear icon

of the camera which you want to set.

- Then click Settings icon on the Pop UP menu on the bottom.
- You will see the setting list, click on "Advanced" Tab
- You will see the sub-setting menu, click on "record setting" as below
- You will enter record schedule setting sub menu. Click "Edit Schedule", select the specify date and time you want to record, then click "set".
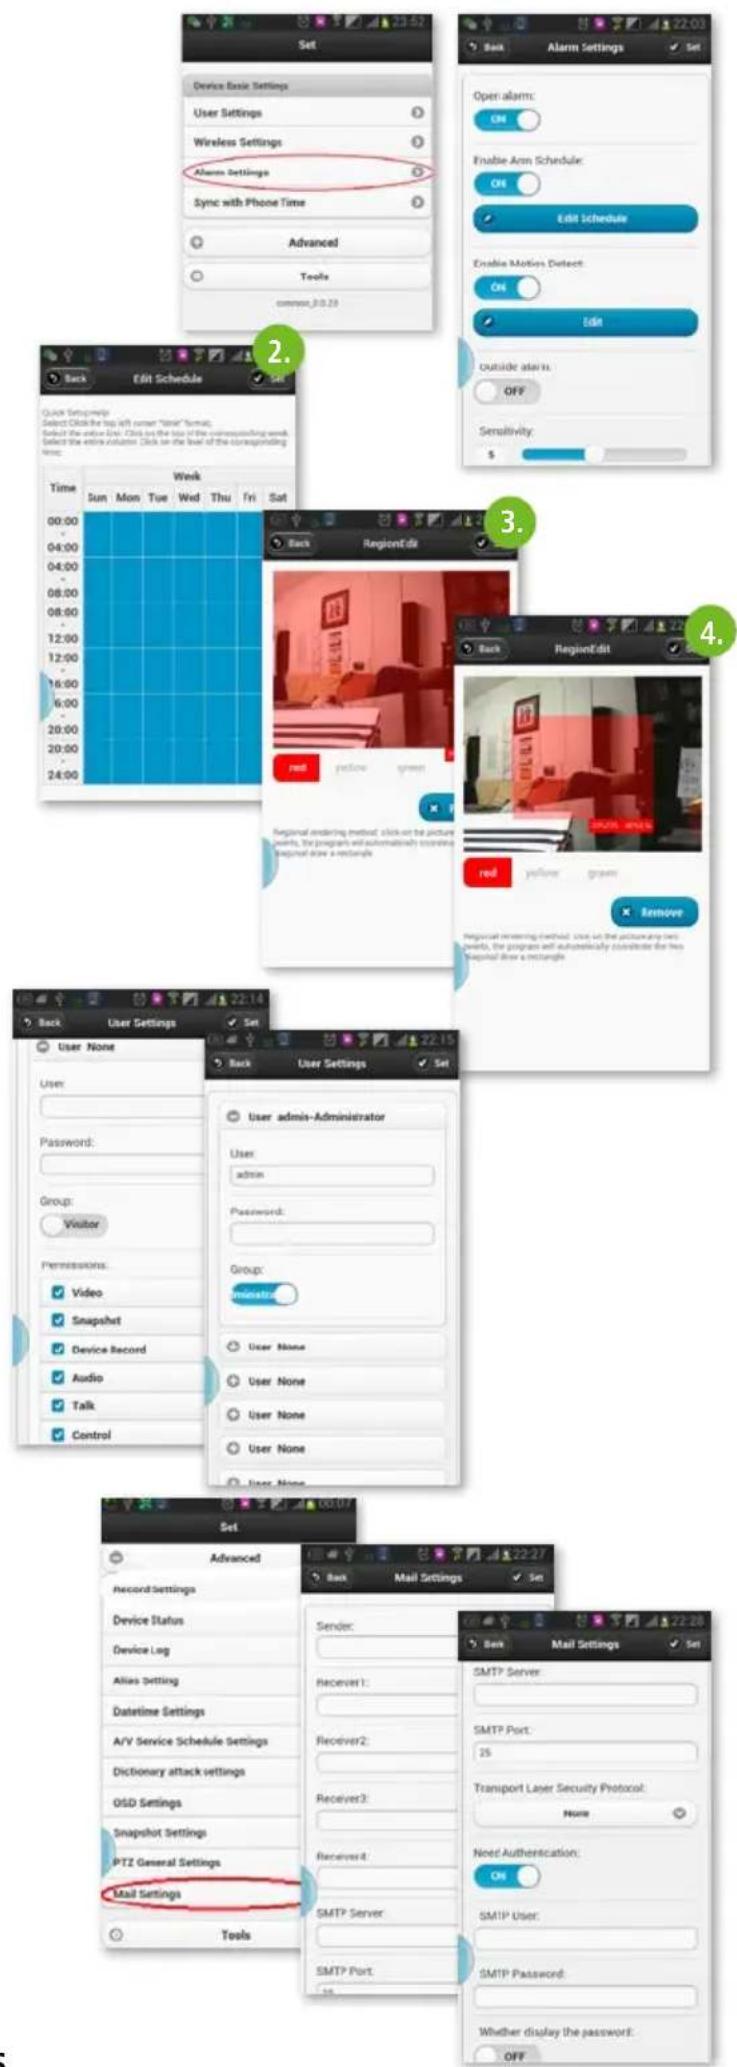
2. Alarm function
Enter „setting menu", choose „alarm settings".
On the setting menu, set "open alarm" button "on" to let you can get alarm when the alarm condition happens such as motion detection, object missing.
The action after get alarm could be:
- take picture
or recording, - sending email.
Alarm edit:
-
You can choose the condition which can trigger the alarm.
-
Schedule edit for alarm. You can specify the time which alarm can be triggered.
-
Motion detect alarm area set: You can choose the area which you want to monitoring and trigger the alarm when motion is detected in this area. Choose 2 corner to define the area:
3. User name and right setting
You can set the user name of the account to manage the camera, different user can have different rights to control the camera, alias of the camera could also be set.
Go under "Settings" to "User Settings".
E-Mail setting
E-mail address for receiving the alarm could be set on the "mail settings" in the "advance" Tab of Setting menu: Alarm can be sent to 4 mail boxes
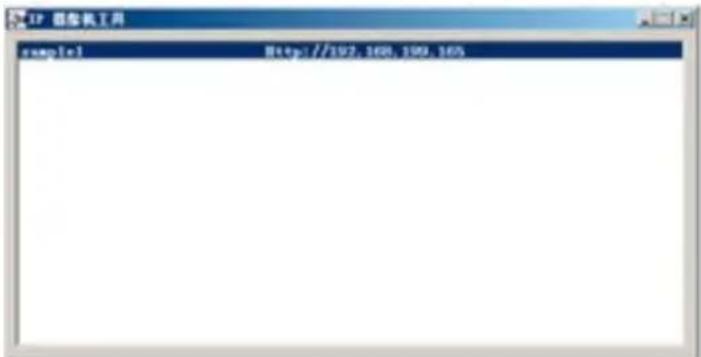
Manage cameras on PC (optional)
You also can manage total 9 cameras on PC by the wireless network after install the PC software "IPCamera tools".
Install the IPcamera tools.exe program on your Notebook PC. Run the "IPCamera" program, If your notebook is in the same network with the camera, (Wifi or the cabled Internet), the camera will show with its IP address.
Note:
If your camera is in AP mode, your notebook PC should choose the same Wifi name as camera: IPCAM_xxxx.
If your camera is in STA mode (It has been hooked to the wifi of your wireless router), your notebook PC should choose the same wifi name of your wireless router.
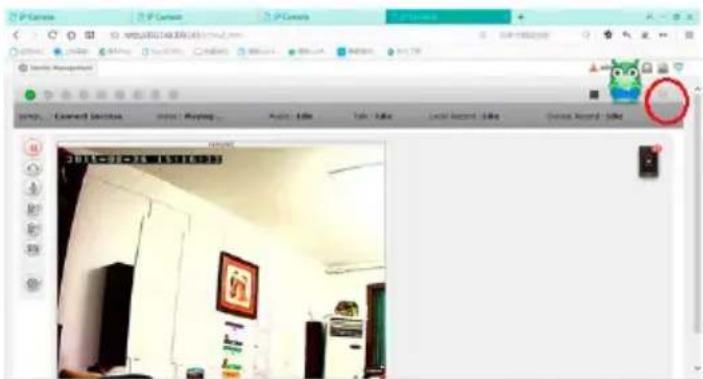
Click the line of camera's IP address, then you will enter the log interface of camera
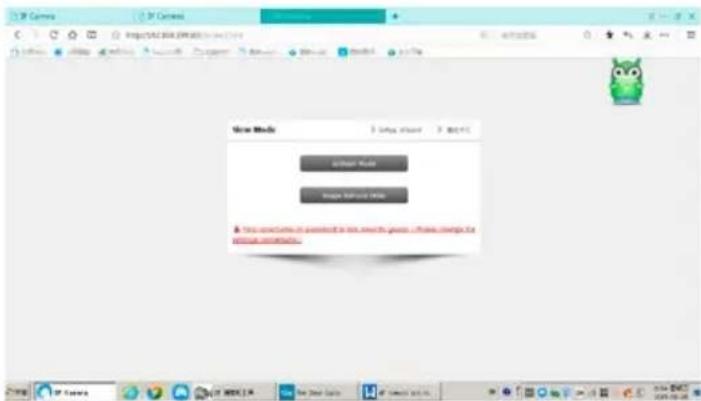
Log in the camera with user name admin (no password), click confirm.
Choose "Image refresh mode", you will see the video from camera
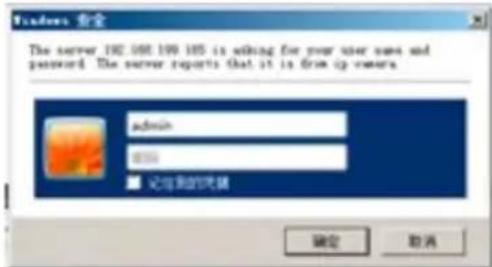


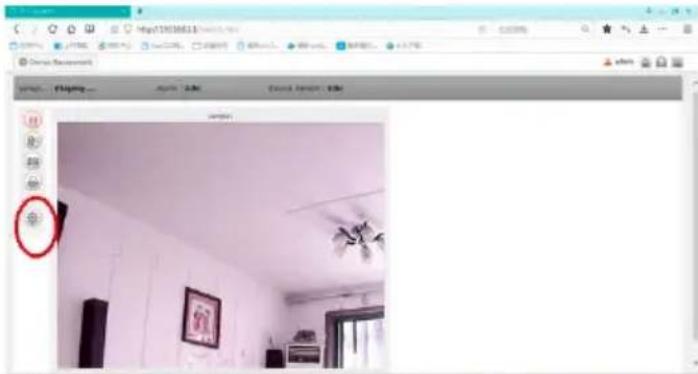
Choose ActiveX" mode, you will enter the setting menu
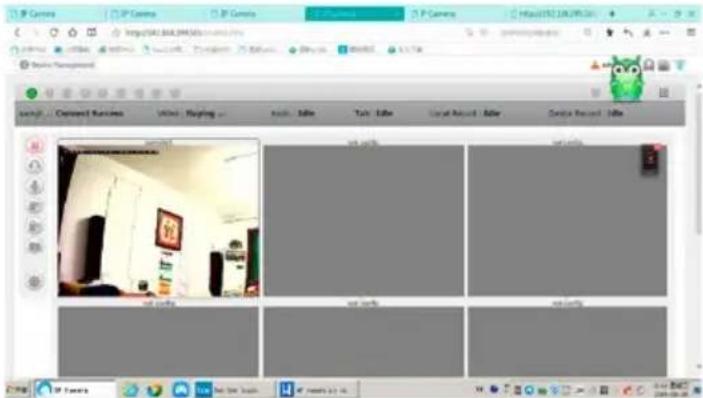
Choose "multi-view" button on the up-right corner of the video window, you will see total 9 cameras video in the 9 windows at same time
Set the other function of camera by setting Gear
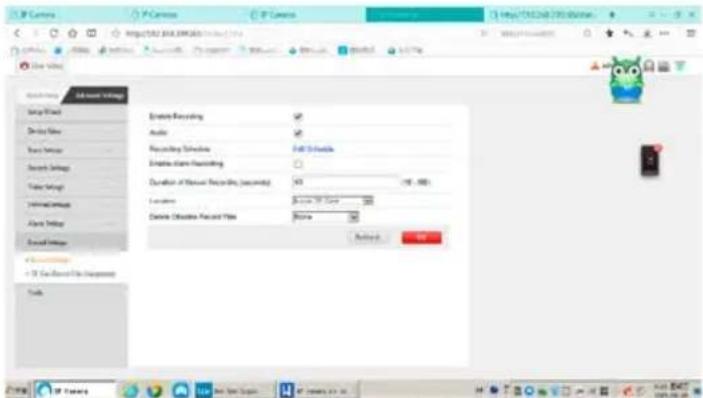
Recording setting
Edit recording schedule
The other settings such as alarm, WLAN, users, email must be carried out similarly to the above-described smartphone settings.

Introduzione
Lettore video (Videoplayer)

VGA (640 x 480 pixels)
Beeldcompressie: H.264 / MJPEG
High Definition: 1280 × 720
Standard Definition: VGA 640 x 480
Selecteer "Image Refresh Mode":


Antenn: 2 dBi / External Connecting
Video
Bildsensor: 1/4" CMOS
Bildupplösning: HD (1280x720 pixlar) / VGA (640x480 pixlar)
High Definition: 1280 × 720
Standard Definition: VGA 640 x 480