FX3930 - Phone Fysic - Free user manual and instructions
Find the device manual for free FX3930 Fysic in PDF.
| Product Type | Analog Corded Phone |
| Network Compatibility | Public Switched Telephone Networks (analog line) in the EU |
| Power | Via telephone line (no batteries required) |
| Number Memory | 10 direct numbers (6 with photo slot, 4 memory buttons) |
| Maximum number length in memory | 16 digits |
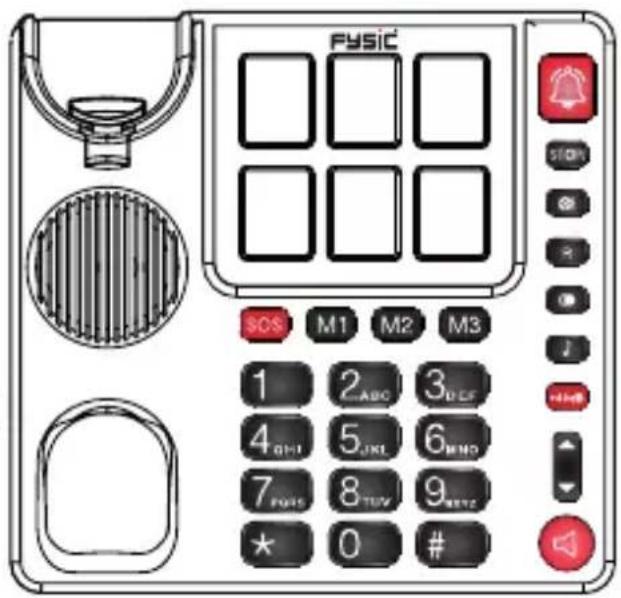
| Main Functions | Photo dialing, hands-free speaker, +40 dB amplifier, adjustable volume, microphone mute, last number redial, R button (FLASH) |
| Photo Dimensions | 25 mm (h) x 19.5 mm (w) |
| Installation | Table stand or wall mounting (distance between holes 8.4 cm) |
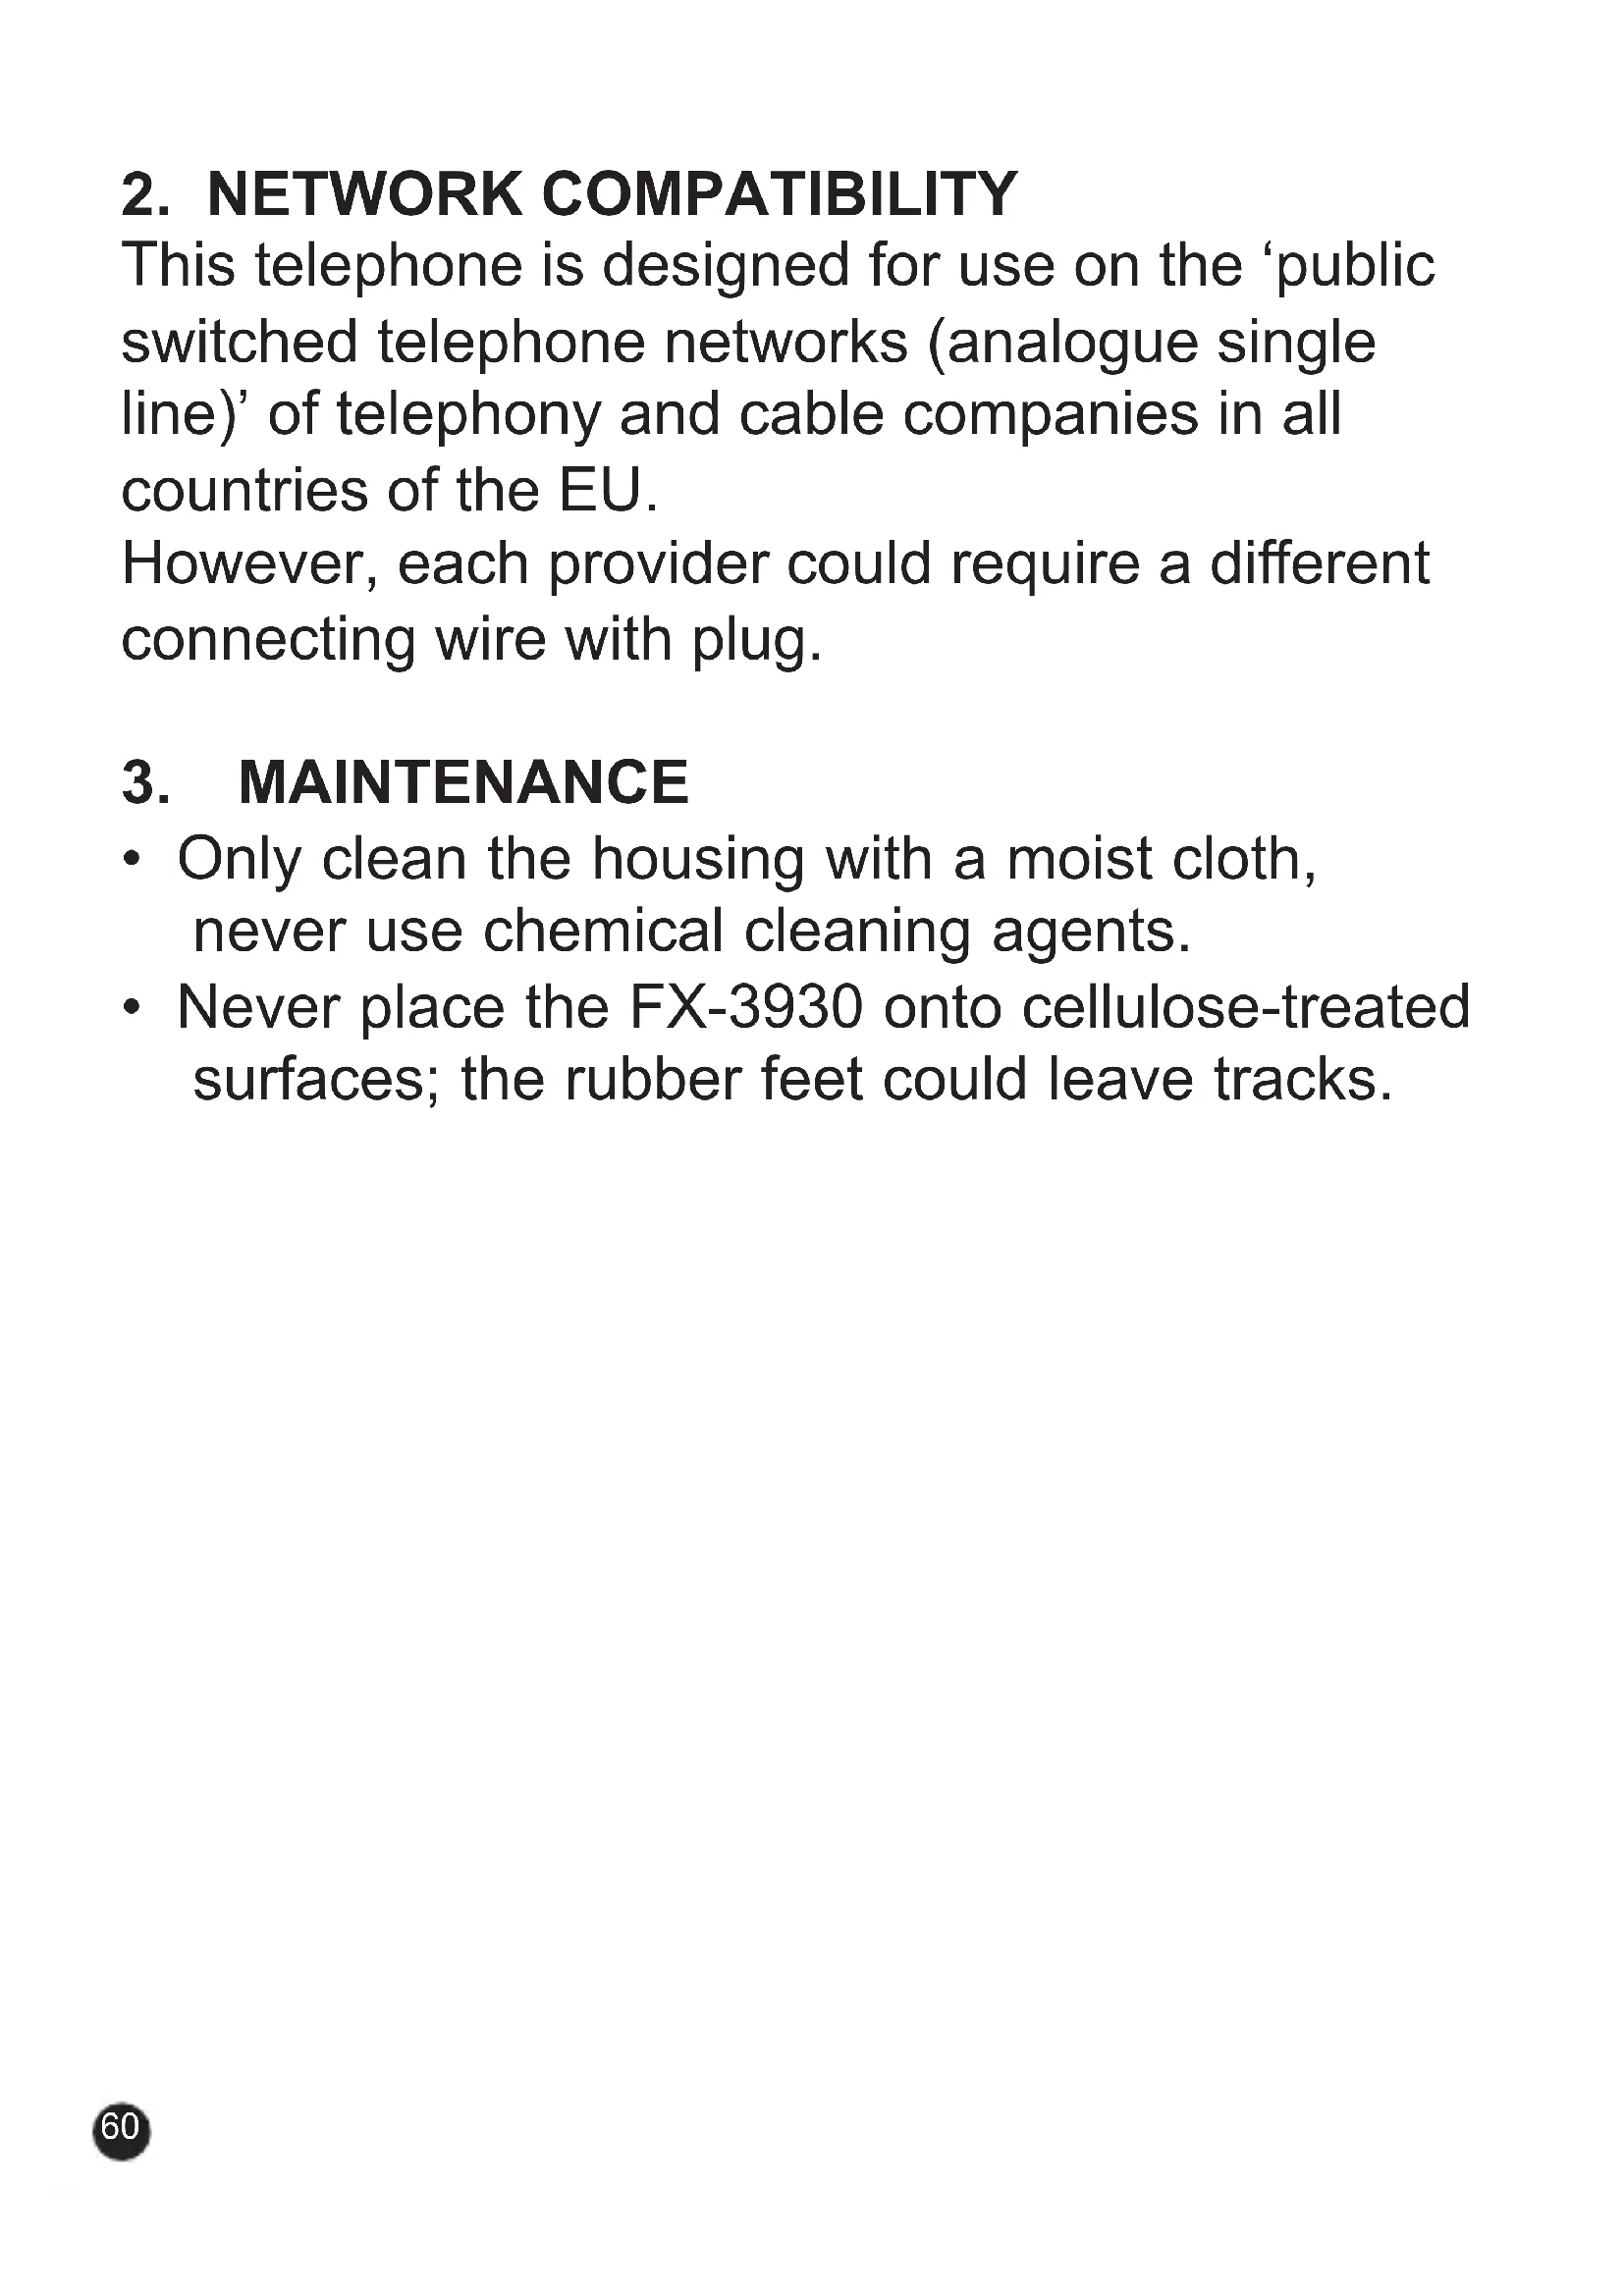
| Ringer Volume | Adjustable via switch on the bottom of the phone (high, low, mute) |
| Amplifier | +40 dB, can be turned on/off (only with the handset) |
| Tone Adjustment | Available with amplifier activated and handset |
| R Button (FLASH) | Interruption time adjustable: 0.1 s (100) or 0.3 s (300) |
| Maintenance and Cleaning | Clean the housing with a damp cloth, do not use chemical products |
| Safety | Do not install in a humid environment, do not disassemble the device, unplug before cleaning |
| Warranty | 24 months from date of purchase, subject to proper use |
| Customer Service | Contact Commaxx: service@commaxxgroup.com |
Frequently Asked Questions - FX3930 Fysic
User questions about FX3930 Fysic
0 question about this device. Answer the ones you know or ask your own.
Ask a new question about this device
Download the instructions for your Phone in PDF format for free! Find your manual FX3930 - Fysic and take your electronic device back in hand. On this page are published all the documents necessary for the use of your device. FX3930 by Fysic.
USER MANUAL FX3930 Fysic
5.1 Appels restraints:
5.2 Réponses aux appeals:

4.1 Table stand 61
4.2 Wall-mounting 62
4.3 Receiver 63
4.4 Telephone 63
4.5 Photo buttons 64
5. USING THE TELEPHONE
5.1 Incoming calls 64
5.2 Answering calls 65
5.3 Ending calls 65
5.4 Dialling numbers 65
5.5 Redialling the last number 66
5.6 Dialling photo or memory numbers 66
5.7 Call volume and tone 67
5.8 Muting the microphone 68
5.9 * and # buttons 68
5.10 R button 69
6. NUMBER MEMORY
6.1 Introduction 70
6.2 Programming 70
6.3 Dialling 72
6.4 Changing or erasing 72
7. WARNINGS AND USER TIPS
7.1 General 73
7.2 Installation 73
7.3 Environment 74
8. PROOF OF WARRANTY 75
2. NETWORK COMPATIBILITY
This telephone is designed for use on the 'public switched telephone networks (analogue single line)' of telephony and cable companies in all countries of the EU.
However, each provider could require a different connecting wire with plug.
3. MAINTENANCE
- Only clean the housing with a moist cloth, never use chemical cleaning agents.
- Never place the FX-3930 onto cellulose-treated surfaces; the rubber feet could leave tracks.
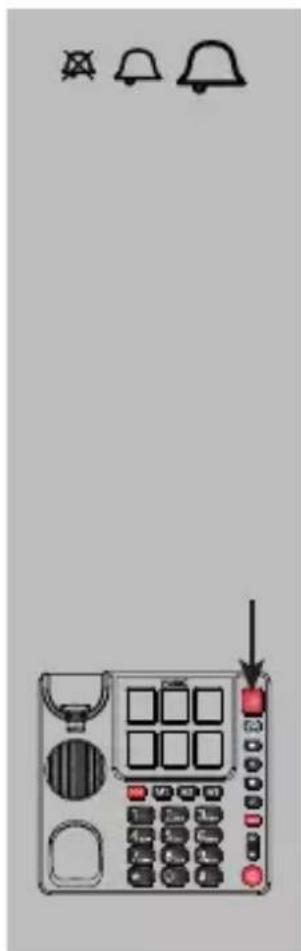
4. INSTALLATION
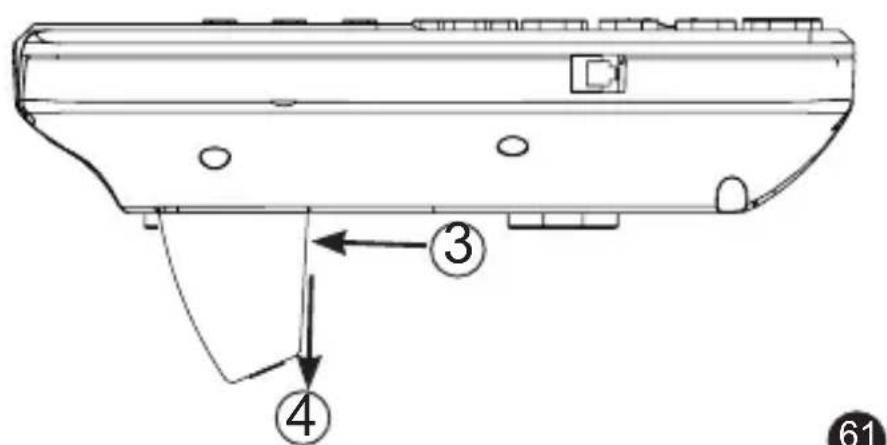
4.1 Table stand:
When using the telephone on a table or desk, you should first attach the table stand to the bottom of the telephone.
- first, hook this side of the stand into the bottom of the telephone (see 1)
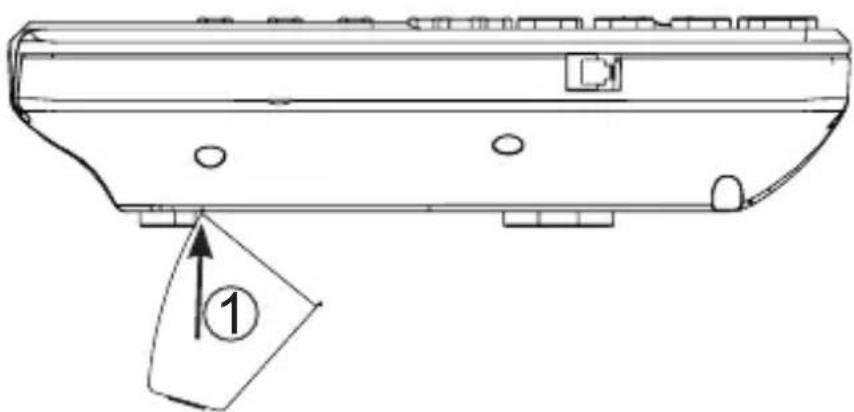
- now push the other side of the stand into the
bottom until the 2 clips lock (see 2), if necessary depress these clips somewhat (see 3)
When you want to detach the stand again, press at 3 and remove in the direction of 4.
4.2 Wall-mounting:
-
in a vertical line, drill 2 holes at a distance of 8.4~cm from each other and insert plugs and screws; let the head of the screws protrude for 5mm
-
slide the receiver clamp out of the telephone, turn it 180^ and place it back onto the telephone; this clamp will hold the receiver in case of wall-mounting
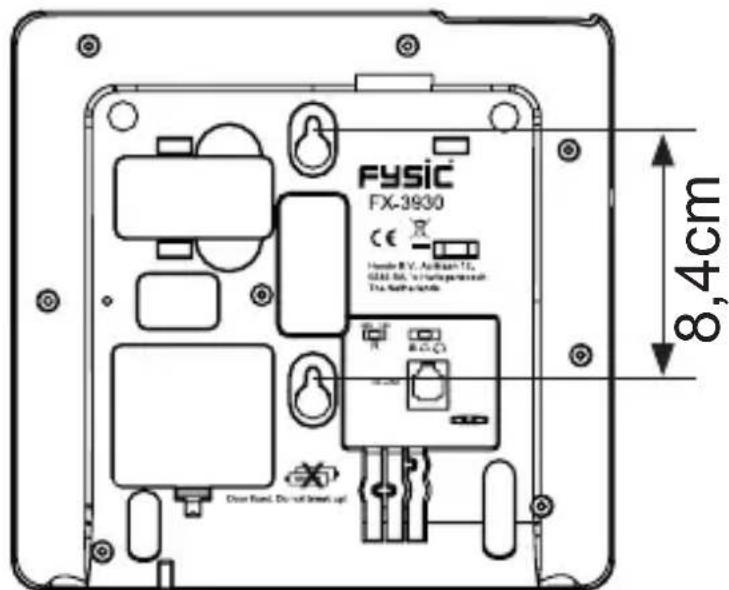

- hook the telephone with the screw holes over the screws and press it downward
- fix the telephone wire to the wall using the cable clips
In case of wall-mounting, the table stand is NOT used.
4.3 Receiver:
- connect the receiver with the telephone by attaching one side of the spiral cable to the bottom of the
receiver and the other side to the left side of the telephone
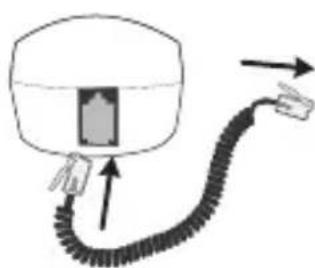
- push in the plugs until they're securely connected
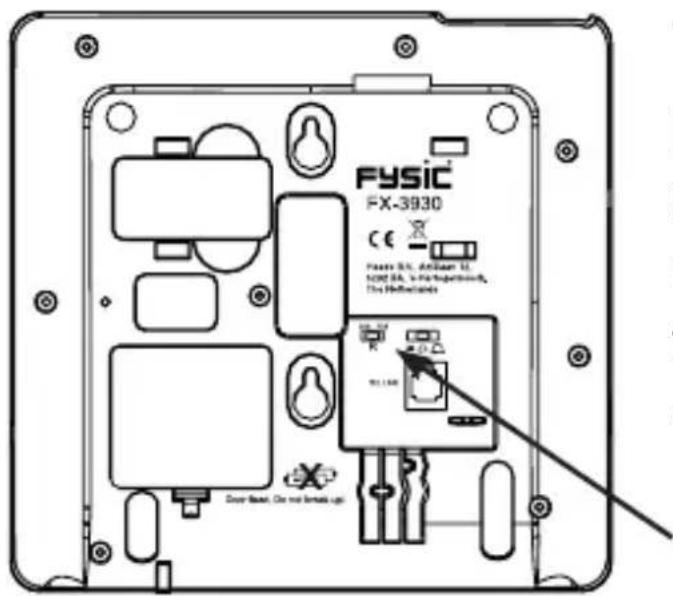
4.4 Telephone:
- plug the telephone wire into the bottom of the telephone
- insert the telephone plug into a telephone wall socket
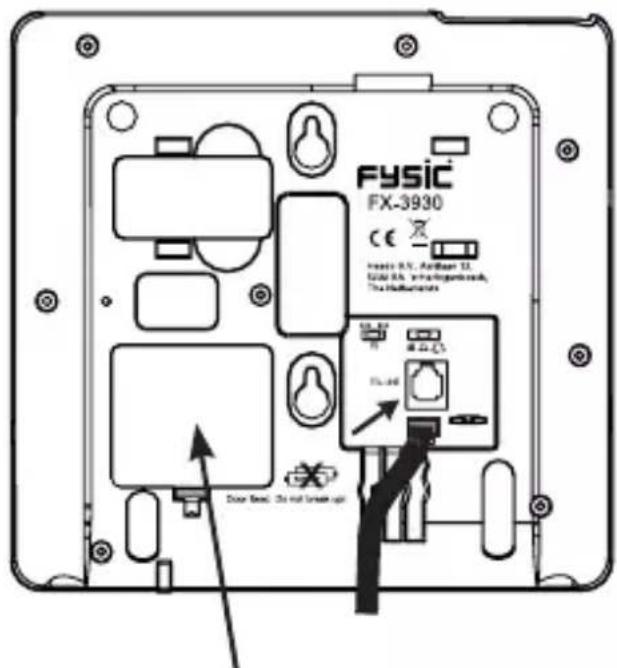

The FX-3930 requires NO batteries
4.5 Photo buttons:
By pulling the cover of the photo buttons straight up, you can place your own photos.
Photo dimensions: 25 ~mm(h) × 19.5 ~mm(w) .
Pay attention to the shape of the cover when replacing. When exaggerated, the whole will look as follows:
5. USING THE TELEPHONE
5.1 Incoming calls:
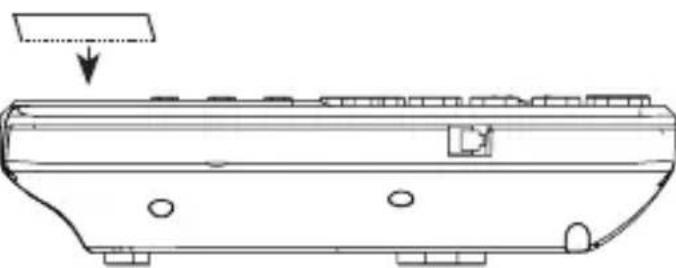
adjust the call volume using the call volume switch at the bottom of the telephone:
: high call volume
: low call volume
A: mute
the call indicator with also light up when you receive an incoming call; attention: this indicator is NO button
5.2 Answering calls:

pick up the receiver to have your conversation through the receiver
or
briefly press the speaker button to answer the call in hands-free mode
5.3 Ending calls:

put the receiver back onto the cradle if using the receiver for the current call
or
press the speaker button again to end the call if using the speaker for the current call
5.4 Dialling numbers:

pick up the receiver or turn on the speaker function
enter the desired phone number
the number will be dialled directly
5.5 Redialling the last number:

pick up the receiver or turn on the speaker function
press the button to redial the last dialled number
5.6 Dialling photo or memory numbers (*):
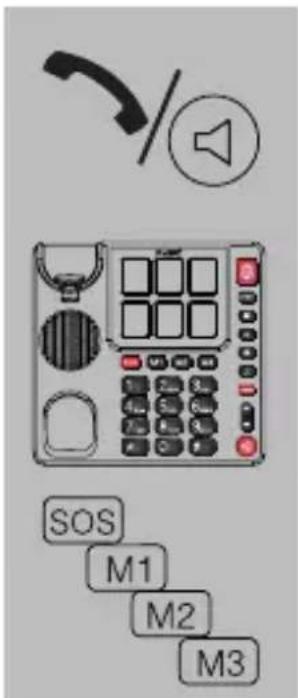
pick up the receiver or turn on the speaker function
press the desired photo button or
press the SOS or M1 or M2 or M3 button and the corresponding number will be dialled
*: for programming the memories, see paragraph 6.2
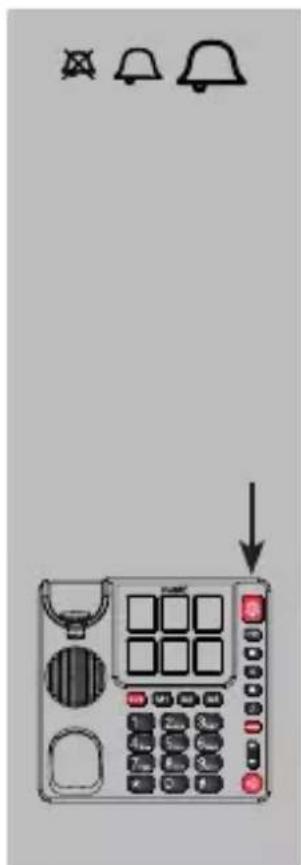
5.7 Call volume and tone:

ATTENTION: EXCESSIVE VOLUMES CAN LEAD TO HEARING LOSS. IF MULTIPLE USERS ARE USING THE TELEPHONE,
ALWAYS SET THE VOLUME TO NEUTRAL AFTER EACH CALL.

volume
press to increase the volume or press to decrease the volume, these volume buttons control the volume of both the receiver and the speaker
+40dB
amplifier:
press the +40dB button to switch on the amplifier, press again to turn off the amplifier,
this function is only available in combination with the receiver

ATTENTION: DANGER DUE TO THE PRESENCE OF EXTREMELY HIGH MAXIMUM VOLUME

tone adjustment:
press the button the increase the high tones
attention: this function is only available in combination with an activated amplifier and the receiver
5.8 Muting the microphone:

press and hold this button during a call to turn off the microphone
as soon as you release this button, the microphone will be switched on again
5.9 * and # buttons:

the and are buttons mainly used for tele-banking:
- press the button when requested to press the ASTERISK button
- press the # button when requested to press the POUND button
5.10 R button:

the R button (also called FLASH) is used to briefly interrupt the telephone connection; this brief interruption is used by some home or office switchboards for call forwarding; public switchboards use this button for telecom functions, such call waiting.
The bottom of the telephone is provided with a small switch for setting the duration of the interruption.
• 100 = 0.1 sec , this is the most common setting in the Benelux
- 300 = 0.3 sec , this setting is often used by company switchboards
For more information regarding this function, please contact your telephone service provider.
6. NUMBER MEMORY
6.1 Introduction:
The FX-3930 offers a memory capacity of 10 direct telephone numbers, 6 of which that can be provided with a photo of the subscriber. The maximum length of each memory is 16 digits.
In addition to regular phone numbers, you can also program numbers of mobile phones.
The telephone uses the voltage of the telephone connection to store the memories, eliminating the need for batteries. However, always make sure to keep the telephone connected. A short interruption is allowed, e.g. to quickly move the device, without losing any memories.
6.2 Programming:

place the receiver next to the telephone
press 1x the STOR button
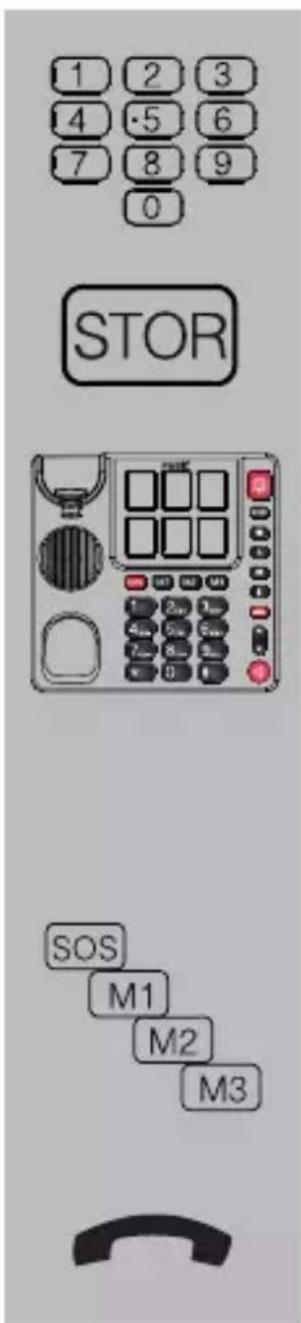
enter the number using the keypad
press 1x the STOR button
press one of the 6 photo buttons to store the number as a photo button memory
or
press one of the 4 direct memory buttons to store the number as a speed-dial number
put down the receiver
if you want to add a dial pause to the number, e.g. because the phone is connected through a home or office switchboard and 0 must be pressed first to get an outside line, then press the button at that position in the phone number; while dialling, the telephone will pause for at least 2.5 seconds
6.3 Dialling:

pick up the receiver or switch on the speaker function
press the SOS or M1 or M2 or M3 button
or
press the desired photo button
the number will be dialled
6.4 Changing or erasing:
You can change a number by programming the new number in the place of the old number. The old number will be overwritten.
You can erase a number by programming a nonexisting number (e.g. 000) in the place of the old number. The old number will be erased.
7. WARNINGS AND USER TIPS
7.1 General:
- Carefully read the user's manual and follow all directions.
- Always remove the telephone plug from the telephone wall socket before cleaning the device.
- Never install or use the telephone in wet or moist rooms or environments.
- Ensure adequate heat dissipation; never cover the telephone nor place it directly next to a heat source.
- Make sure not to damage the telephone wire and ensure nobody can fall or trip over it.
- Never disassemble the telephone, only qualified personnel are allowed to do so.
7.2 Installation:
- Only connect/disconnect the telephone wire with/from the telephone when the telephone plug is removed from the wall socket.
- Never install the telephone during thunder storms.
-
Never install telephone connecting terminals in wet or moist environments.
-
Never touch non-insulated telephone wires unless disconnected from the telephone network
7.3 Environment:

The packaging of this telephone can be collected as old paper. However, we recommend you to save it, to adequately protect the phone during transport. When
replacing this telephone, please return it to the supplier to ensure environment-friendly processing.
8. PROOF OF WARRANTY
For the FYSIC FX-3930 telephone you have a warranty of 24 months from the date of purchase. During this period, we guarantee the free repair of defects caused by material and workmanship errors. All this subjected to the final assessment of the importer.
HOW TO HANDLE: If you notice any defect, first refer to the user's manual. Please contact the supplier of this telephone or contact customer service of Commaxx; servicegroup.com
THE WARRANTY BECOMES NULL AND VOID: In case of improper use, incorrect connections, leaking and/or incorrectly installed batteries, use of unoriginal parts or accessories, negligence and in case of defects caused by moisture, fire, flooding, lightning and natural disasters.
In case of unauthorised modifications and/or repairs performed by third parties. In case of incorrect transportation of the device without adequate packaging and when the device is not accompanied by this warranty card and proof of purchase. The warranty does not cover connecting cables, plugs and batteries. All further liability, especially concerning any consequential damages, is excluded.
- INDHOLD 76
- NETVAERKSKOMPATIBILITET....78
- VEDLIGEHOLDELS78
- INSTALLATION 79
4.1 Placering på bord: 79
4.2 Ophaengning pa væg: 80
4.3 Telefonr: 81
4.4 Telefon: 81
4.5 Billedtaster: 82