AE355M - Talkie Walkie ALBRECHT - Free user manual and instructions
Find the device manual for free AE355M ALBRECHT in PDF.
| Product type | Scanning receiver |
| Brand | Albrecht |
| Model | AE355M |
| Dimensions (L x W x H) | 142 x 132 x 42 mm |
| Weight | 640 g |
| Power supply | 13.8 V DC (10.8-15.6 V DC) via 230 V AC mains adapter or 12 V car cigarette lighter adapter |
| Frequency range | 25-960 MHz (23 bands) |
| Number of channels | Up to 300 user-programmable channels in 8 banks |
| Preprogrammed banks | EMG (emergency), Freenet, PMR446, Air, Marine, CB AM, 10 m amateur band FM |
| Operating modes | Scanning, search, quick search, Close Call |
| Close Call function | Detection of strong nearby signals (priority, do not disturb, alone) |
| Channel lockout | Temporary or permanent (up to 100 locked frequencies) |
| Squelch adjustment | Rotary control for noise threshold |
| Display | Backlit LCD with frequency, bank, mode |
| Audio output | 0.65 W max, 3.5 mm external earphone jack |
| Antenna connector | BNC 50 ohms |
| Operating temperature | -20°C to +60°C |
| Included accessories | Telescopic antenna, mains adapter, cigarette lighter adapter, 12 V bare wire cable, mobile mounting bracket, screws, user guide |
| Maintenance | Clean with soft cloth, avoid abrasives and solvents, disconnect before cleaning |
| Safety | Not waterproof, do not expose to rain or moisture; legal use according to local legislation |
| Repairability | Spare parts not listed; contact technical service or an authorized center |
Frequently Asked Questions - AE355M ALBRECHT
User questions about AE355M ALBRECHT
0 question about this device. Answer the ones you know or ask your own.
Ask a new question about this device
Download the instructions for your Talkie Walkie in PDF format for free! Find your manual AE355M - ALBRECHT and take your electronic device back in hand. On this page are published all the documents necessary for the use of your device. AE355M by ALBRECHT.
USER MANUAL AE355M ALBRECHT
natural_image
Abstract maroon globe logo with swirling lines, no text or symbols presentALBRECHT®
AE355M Scanner
text_image
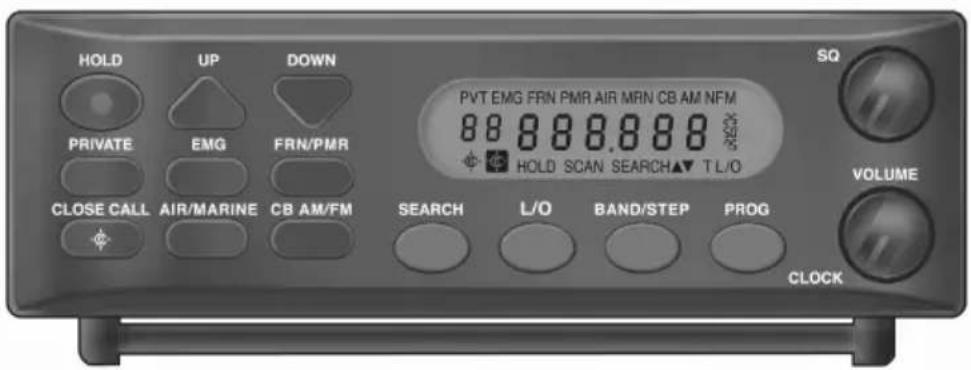
HOLD UP DOWN PRIVATE EMG FRN/PMR CLOSE CALL AIR/MARINE CB AM/FM PVT EMG FRN PMR AIR MRN CB AM NFM 88 88 88 88 88 20 HOLD SCAN SEARCH▲▼ T L/O VOLUME CLOCK SEARCH L/O BAND/STEP PROGBedienungsanleitung
Deutsch / English / Français
Wichtige Hinweise
Sicherheitshinweise
Suche (Search)....18
Pfeifen (Birdies) 35
Bandplan ändern....36
text_image
HOLD UP DOWN PRIVATE EMG FRN/PMR CLOSE CALL AIR/MARINE CB AM/FM SQ PVT EMG FRN PMR AIR MRN CB AM NFM 88 88 88.88 88 HOLD SCAN SEARCH▲▼ TL/O VOLUME SEARCH L/O BAND/STEP PROG CLOCKtext_image
ANT EXT SP DC13.8Vtext_image
EMG FRN PMR AIR MRN CB AM FM SCAN SCAN
text_image
FRN 149.025 HOLD SCANtext_image
108:137 SEARCH
text_image
127.8 12 SO SEARCH▲EMG FRN PMR AIR MRN CB AM FM
149.025
SCAN
text_image
FRN 149.025 HOLDtext_image
FRN 6 149.025 HOLD SCANtext_image
CH 149.025 HOLDtext_image
CH000.000 HOLDtext_image
FRN 6 149.025 HOLDtext_image
FRN 6 149.025 HOLDtext_image
SP AIR 8.33 ▲▼natural_image
Abstract maroon globe logo with swirling lines and arrow elements (no text or symbols)ALBRECHT®
AE355M Scanner

text_image
HOLD UP DOWN PRIVATE EMG FRN/PMR CLOSE CALL AIR/MARINE CB AM/FM SQ PVT EMG FRN PMR AIR MRN CB AM NFM 88 888.888 25 HOLD SCAN SEARCH▲▼ TL/O VOLUME SEARCH L/O BAND/STEP PROG CLOCKOwner's Manual
English
Important Information
Precautions
Before you use this scanner, please observe the following:
Warning
Albrecht does not guarantee this unit to be waterproof. To reduce the risk of fire, electrical shocks or damage to the unit do not expose this unit to rain or moisture.
Legal use of a scanner
In most European countries it is allowed to use a scanning receiver for listening to radio services, which are free for public listening. Most countries allow weather services, amateur radio, CB radio and utility radio services to be monitored, but it is in some countries illegal to listen to Police or similar institutions via stored memory channels. In the German legislation it depends also on the transmitting station, for which person(s) the transmitting station may allow free monitoring or not. In any case, if you should hear radio traffic which is not intended for you, it is not allowed to register this traffic or inform any other person about the contents of such radio traffic.
Table of Contents
Precautions 42
Warning 42
Legal use of a scanner....42
About your new AE355M Scanner 45
Feature Summary 45
23 Search Bands - German Band Plan 2 47
Included in your Scanner Package 50
Optional Accessories 50
Installing the AE355M Scanner.... 51
Home Use (Desktop Installation) 51
Mobile Use 51
Temporary Mobile Installation 51
Permanent Installation....52
Permanently Mounting the AE355M scanner 52
Permanently Connecting the Mobile Power Supply 52
Scanner Operation Overview 54
AE355M Front Panel 54
AE355M Rear Panel 57
Using your AE355M Scanner 58
Set up 58
Adjusting Squelch....58
Operating Modes 59
Scan....59
Search 59
Special Notes for Scanning Banks 59
Scanning Service Bank Tips 61
Searching Band Tips 62
Scanning Banks 63
Special features 64
Lock Out Channels / Frequencies 64
Types of Lock Out 64
Temporary Lock Out 64
Lock Out Limits....64
Lock Out Tips 65
Close Call ® 67
Close Call Priority 67
Close Call Do Not Disturb 67
Close Call Only 67
Setting Up Close Call Modes 67
Setting Close Call (C-C) band Options.... 68
Setting Close Call (C-C) alert - Options 68
Close Call Tips 69
Private Bank 69
Programming Frequencies and Channels 69
Programming a Channel....70
Program Lock Feature 73
Select Step Frequency....74
Clock Mode 74
Troubleshooting Guide....75
General Product Care 76
Location 76
Cleaning....76
Birdies 76
Changing Band Plan....76
Memory Reset....77
Technical Specifications....78
Other useful information 78
Service Address & Download 78
Recycling of Electronic Items 79
SIMPLIFIED EU DECLARATION OF CONFORMITY 80
About your new AE355M Scanner
The AE355M comes with 7 service banks for monitoring radio communication services like EMG (rescue, fire brigade, police and other emergency organizations, Freenet & PMR446, Commercial VHF & UHF Radio, Air Band, Marine Radio, CB & 10 m Band AM and FM frequencies. These service banks contain already factory pre-programmed often used frequencies. In addition the AE355M has 23 separate band searches.
You can also save up to 300 frequencies that are scanned along with the preset frequencies. So whenever you encounter a newly activated local frequency for any service category, you can add it to the bank for that category. This gives you quick access to the frequencies you want to hear.
Feature Summary
The AE355M is a compact mobile/base scanner and one of the most user-friendly communication products available today. The AE355M features include:
- Turbo search – Allows your AE355M to search 180 steps per second. (5 kHz step band only)
- Eight Banks – 7 preprogrammed Service banks and one standard, programmable Private bank. These banks include:
» Rescue, emergency, fire & public safety utilities (EMG): typical 4 m band BOS frequency band frequencies (German Band Plan 2), 24 factory-programmed Mosque or church frequencies (UK & International Band Plan 1) with 100 open channels, allowing you to program additional other frequencies into this bank.
» Freenet (FRN): 6 factory-programmed “Freenet” (VHF communication for general use) frequencies plus an additional 100 open channels for you to program other frequencies into this bank.
» PMR: 8 Factory-programmed “PMR 446” frequencies (European UHF PMR 446 band for general communication without individual license).
Note: The Freenet and PMR banks share a single key - FRN/PMR. Pressing this key will toggle between the banks. Additional information is provided in later sections.
» AIR: 3,480 factory-programmed frequencies which covers the complete AIR band. 108.000 to 136.9916 MHz.
» MARINE: 57 factory-programmed frequencies which cover the complete International VHF Marine band.
Note: The Air and Marine banks share a single key – AIR/MARINE.
Pressing this key will toggle between the banks. Additional information is provided in later sections.
» CB AM: 600 Factory-programmed CB AM frequencies between 25.000 and 27.995 MHz.
» Amateur Band (Display: CB FM): 400 Factory-programmed FM 10m band amateur frequencies between 28.000 and 29.995 MHz.
Note: The CB AM and Amateur Band (CB FM) banks share a single key – CB AM/FM. Pressing this key will toggle between the banks. Additional information is provided in later sections.
» PRIVATE: 100-channel, fully user-programmable bank.
23 Search Bands - German Band Plan 2
Press BAND/STEP to select one of the 23 bands to search (German Band Plan as factory setting):
| Band | Range (MHz) | Step (kHz) | Mode |
| 25 - 30 | 25.00000 - 29.99500 | 5 | AM |
| 30 - 50 | 30.00000 - 49.99500 | 5 | FM |
| 50 - 80 | 50.00000 - 79.99500 | 5 | FM |
| 80 - 83 | 80.00000 - 82.99500 | 5 | FM |
| 83 - 84 | 83.00000 - 84.01000 | 5 | FM |
| 84 - 87 | 84.01500 - 87.29500 | 20 kHz with 15kHz offset | FM |
| 108 - 137 | 108,00000 - 136,99166 | 8.33 | AM |
| 137 - 138 | 137,00000 - 137,99500 | 5 | FM |
| 138 - 144 | 138,00000 - 143,99500 | 5 | FM |
| 144 - 146 | 144,00000 - 145,98750 | 12.5 | FM |
| 146 - 156 | 146,00000 - 155,99000 | 10 | FM |
| 156 - 157 | 156,00000 - 157,42500 | 12.5 | FM |
| 157 - 158 | 157,43750 - 157,98750 | 12.5 | FM |
| 158 - 160 | 158,00000 - 160,58750 | 12.5 | FM |
| 160 - 162 | 160,60000 - 162,02500 | 12.5 | FM |
| 162 - 162 | 162,03000 - 162,59000 | 10 | FM |
| 162 - 174 | 162,60000 - 174,00000 | 10 | FM |
| 406 - 440 | 406,00000 - 439,99375 | 6.25 | FM |
| 440 - 450 | 440,00000 - 449,99375 | 6.25 | FM |
| 450 - 466 | 450,00000 - 465,99000 | 10 | FM |
| 466 - 470 | 466,00000 - 469,99000 | 10 | FM |
| 470 - 512 | 470,00000 - 512,00000 | 6.25 | FM |
| 806 - 960 | 806,00000 - 960,00000 | 12.5 | FM |
For use in other countries the UK / International Band Plan 2 may be as well interesting:
| Band | Range (MHz) | Step (kHz) | Mode |
| 25 - 30 | 25.00000 - 29.99500 | 5 | FM |
| 30 - 50 | 30.00000 - 49.99500 | 5 | FM |
| 50 - 80 | 50.00000 - 79.99500 | 5 | FM |
| 80 - 83 | 80.00000 - 82.99500 | 5 | FM |
| 83 - 84 | 83.00000 - 84.01000 | 5 | FM |
| 84 - 87 | 84.01500 - 87.29500 | 5 | FM |
| 108 - 137 | 108.00000 - 136.99166 | 8.33 | AM |
| 137 - 138 | 137.00000 - 137.99375 | 6.25 | FM |
| 138 - 144 | 138.00000 - 143.99375 | 6.25 | FM |
| 144 - 146 | 144.00000 - 145.99375 | 6.25 | FM |
| 146 - 156 | 146.00000 - 155.99375 | 6.25 | FM |
| 156 - 157 | 156.00000 - 157.43125 | 6.25 | FM |
| 157 - 158 | 157.43750 - 157.99375 | 6.25 | FM |
| 158 - 160 | 158.00000 - 160.59375 | 6.25 | FM |
| 160 - 162 | 160.60000 - 162.02500 | 6.25 | FM |
| 162 - 162 | 162.03125 - 162.59375 | 6.25 | FM |
| 162 - 174 | 162.60000 - 174.00000 | 6.25 | FM |
| 406 - 440 | 406.00000 - 439.99375 | 6.25 | FM |
| 440 - 450 | 440.00000 - 449.99375 | 6.25 | FM |
| 450 - 466 | 450.00000 - 465.99375 | 6.25 | FM |
| 466 - 470 | 466.00000 - 469.99375 | 6.25 | FM |
| 470 - 512 | 470.00000 - 512.00000 | 6.25 | FM |
| 806 - 960 | 806.00000 - 960.00000 | 12.5 | FM |
The Scanner has following receiving data
| Frequency Band | Sensitivity (Nominal) 12 dB SINAD |
| 25.000 - 27.995 | 0.4 μV |
| 28.000 - 69.9950 | 0.2 μV |
| 70.0000 - 87.2950 | 0.2 uV |
| 108.0000 - 136.9916 | 0.4 uV |
| 137.0000 - 147.9950 | 0.2 uV |
| 148.0000 - 174.0000 | 0.2 uV |
| 406.0000 - 512.0000 | 0.3 uV |
| 806.0000 - 960.0000 | 0.4uV |
| Frequency Band | Hum and Noise (Nominal) |
| 25.000 - 27.995 | 48 dB |
| 28.000 - 87.2950 | 43 dB |
| 108.0000 - 136.9916 | 48 dB |
| 137.0000 – 174.0000 | 43 dB |
| 400.0000 - 512.0000 | 42 dB |
| 806.000 - 960.0000 | 44 dB |
| Frequency Band | Close Call Sensitivity (Nominal) |
| 25.000 - 87.2950 | -54 dB |
| 108.0000 - 136.9916 | -61 dB |
| 137.0000 - 174.0000 | -63 dB |
| 406.0000 - 512.0000 | -65 dB |
| 806.0000 - 960.0000 | -55 dB |
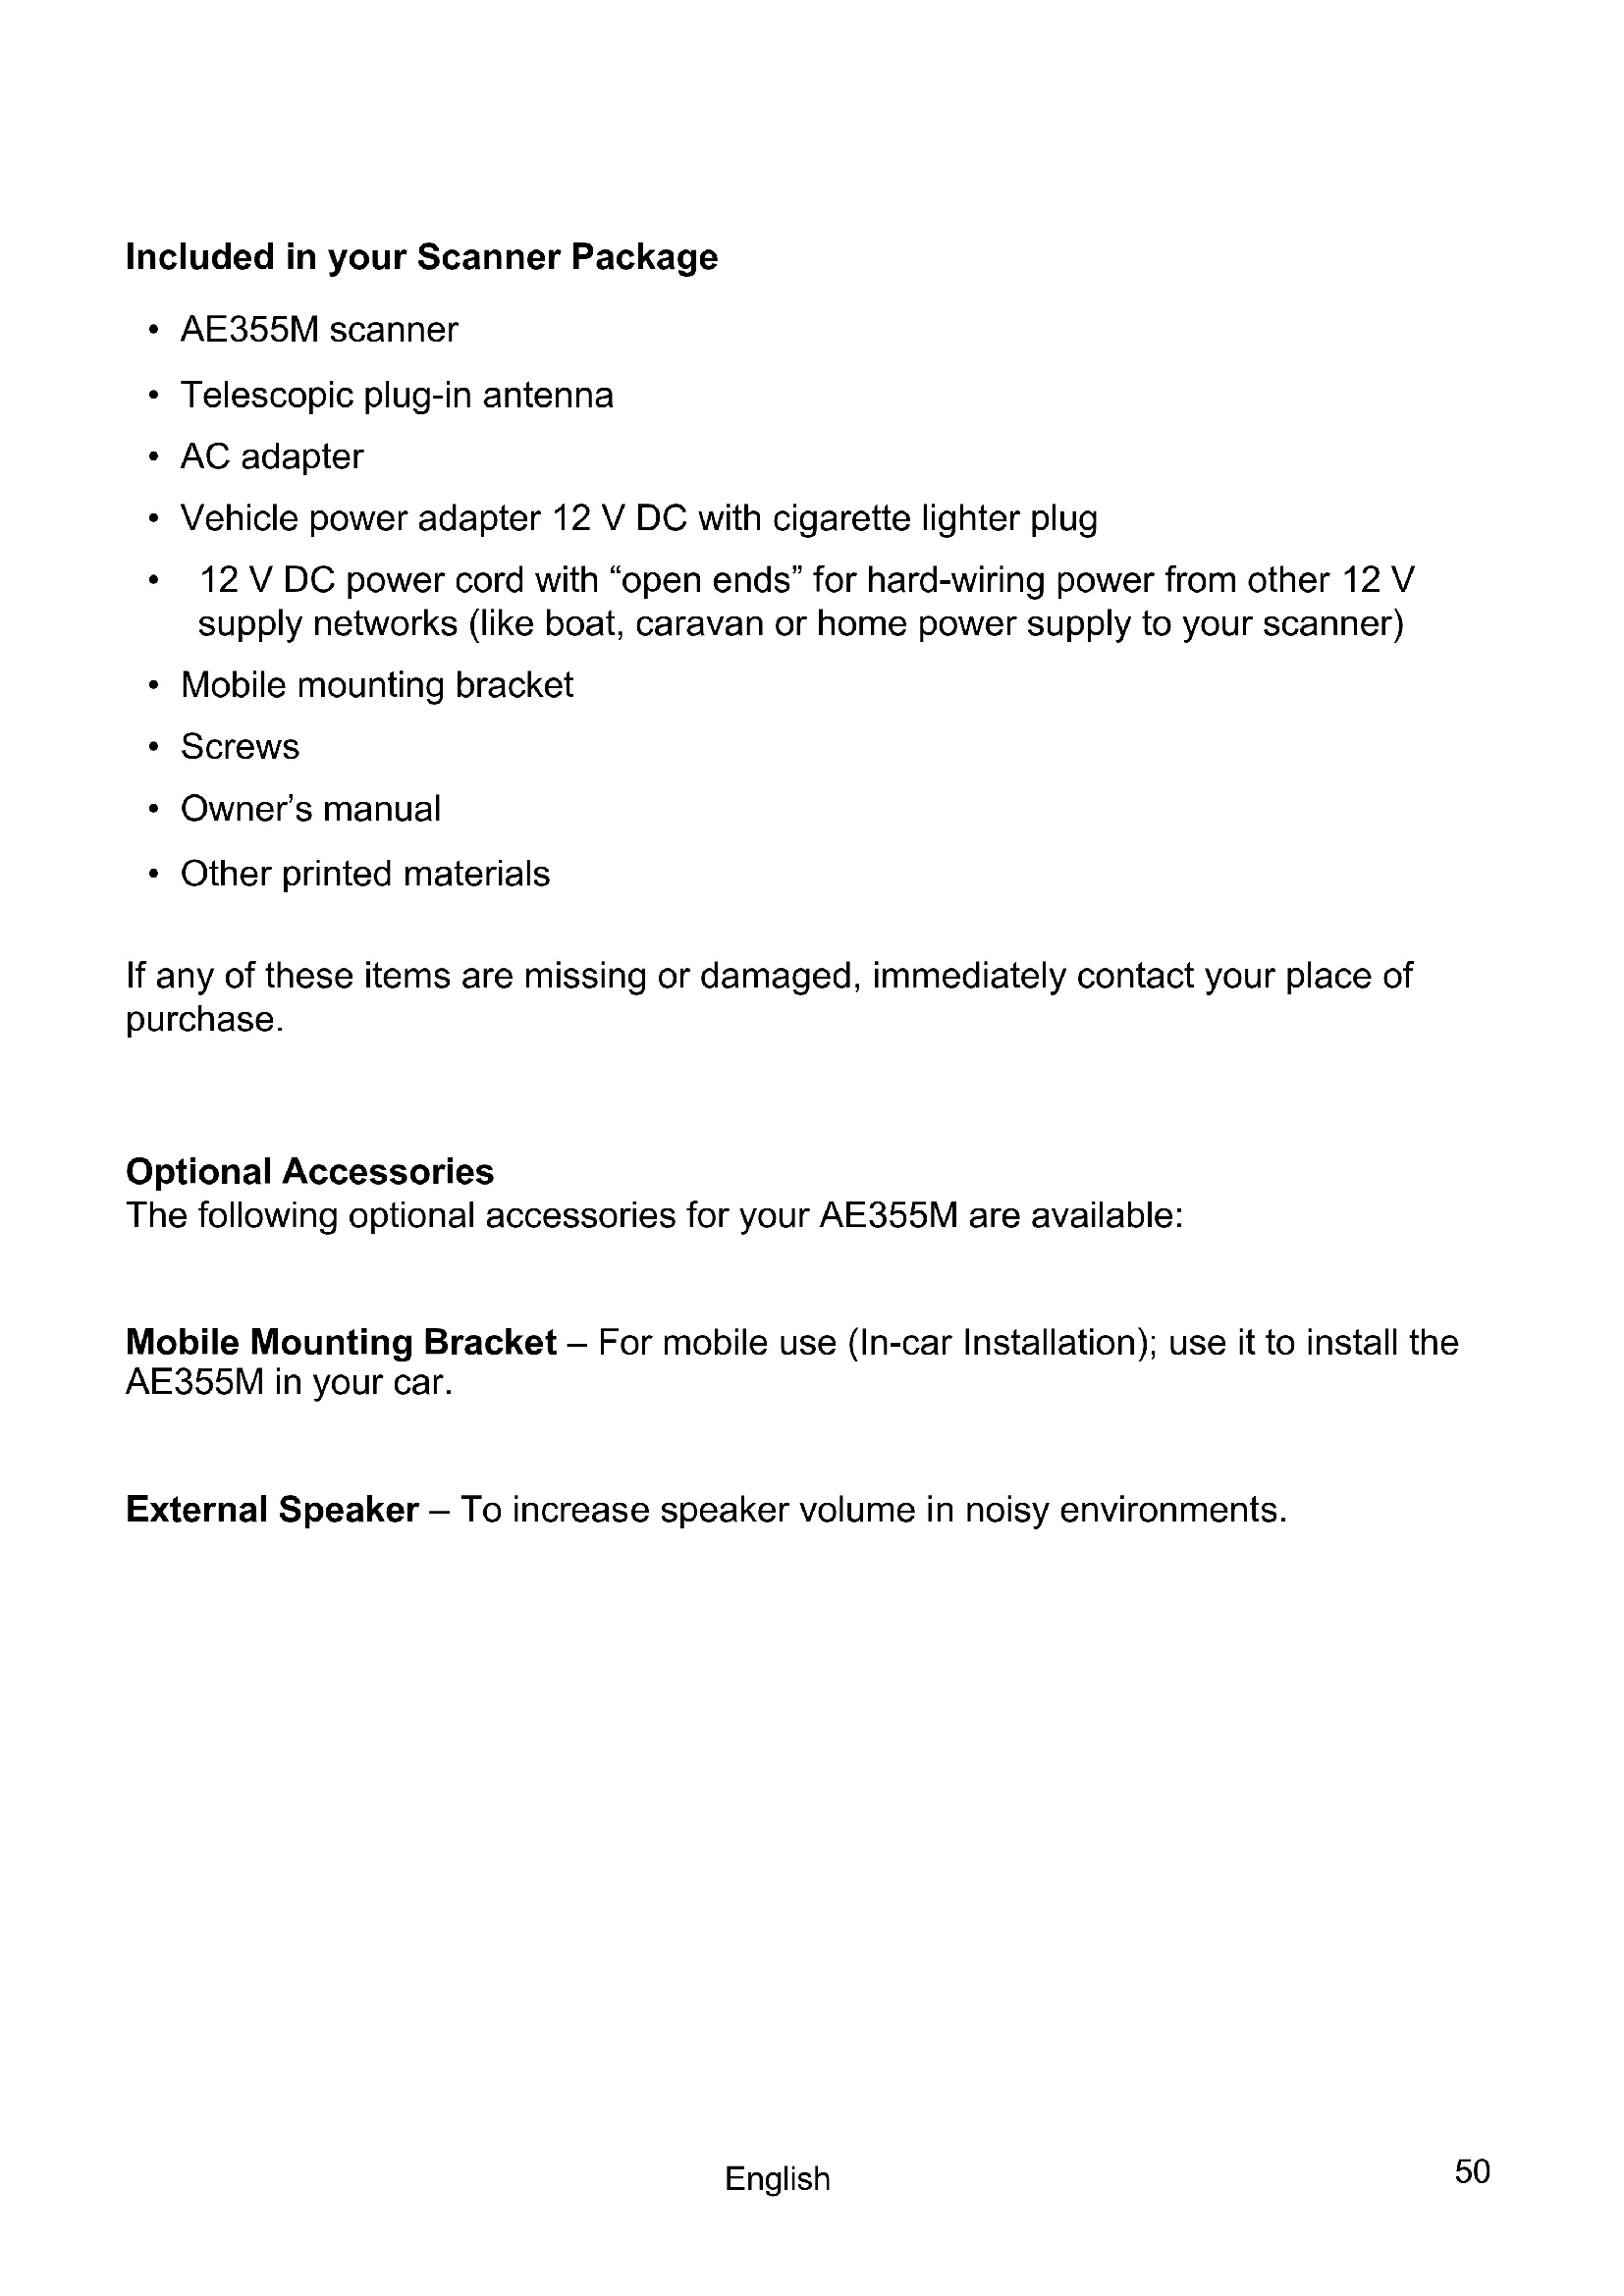
Included in your Scanner Package
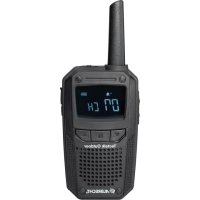
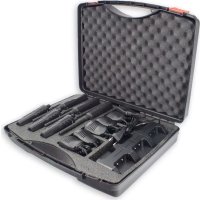
- AE355M scanner
- Telescopic plug-in antenna
- AC adapter
• Vehicle power adapter 12 V DC with cigarette lighter plug - 12 V DC power cord with “open ends” for hard-wiring power from other 12 V supply networks (like boat, caravan or home power supply to your scanner)
- Mobile mounting bracket
- Screws
- Owner's manual
- Other printed materials
If any of these items are missing or damaged, immediately contact your place of purchase.
Optional Accessories
The following optional accessories for your AE355M are available:
Mobile Mounting Bracket – For mobile use (In-car Installation); use it to install the AE355M in your car.
External Speaker – To increase speaker volume in noisy environments.
Installing the AE355M Scanner
Home Use (Desktop Installation)
- Insert the DC plug end of the AC Adapter into the DC 13.8V jack on the rear panel.
- Plug the AC Adapter into a standard 230V AC wall outlet.
- Plug the telescopic antenna into the ANT connector. Extend the antenna to its full height. For frequencies higher than 400 MHz, shortening the antenna may improve the reception.
Use the desktop stand (fold out from bottom of unit) for a better viewing and operating angle.
Helpful Hints:
- If strong interference or electrical noise is received, relocate the scanner or its antenna away from the source.
- If you are operating the scanner in a fringe area or need to improve reception, use an optional Albrecht scanner base station antenna designed for multi-band coverage. (You can purchase this type of antenna at our web shop or at a local electronics store.)
- If the optional antenna has no cable, use 50-70 ohm coaxial cable for lead-in. A mating plug adapter to BNC standard may be necessary for the optional antennas.
Mobile Use
(In-Car, Boat, Motor Home or other 12 V Installation)
Temporary Mobile Installation
A Vehicle Power Adapter is provided for an easy, temporary power supply.
Warning: Do not use the Vehicle Power Adapter in a positive ground vehicle (most new cars do not have such DC power supply systems any more).
- Plug one end of the Vehicle Power Adapter into the vehicle's accessory power jack and the other end into the DC 13.8V jack on the back of the scanner.
- Connect the mobile antenna plug into the ANT connector on the rear panel. For more information on antenna installation, please refer to the instruction guide that came with your mobile antenna.
Permanent Installation
Permanently installing the AE355M scanner into a vehicle may be a legal problem in cars, which are used in public traffic.
We recommend to use a permanent installation only in justified cases e.g. in caravans on fixed places, garden houses, boats etc. equipped with 12 V battery or solar power supply networks. Permanent installation involves two main steps - physically installing the scanner and physically connecting the power supply. It does not matter which is installed first; perform these procedures in an order that is most appropriate for your vehicle's configuration.
Permanently Mounting the AE355M scanner
- Select a location to mount the AE355M unit. Avoid any locations that could interfere with your driving. In a passenger car, the ideal location is underneath the dashboard on the passenger side.
- Use the mounting bracket (optional) as a template for marking the location of the mounting screws. Note: If there are screws already holding the dashboard, you may be able to use the same screw holes to mount the bracket.
- Drill the necessary holes and secure the mounting bracket in place using the screws provided.
CAUTION: Do not drill into air bags. Do not drill if what is behind the dashboard is unknown. - Mount the scanner to the bracket only after the wiring has been connected to the rear panel.
Permanently Connecting the Mobile Power Supply
CAUTION: If you are not experienced in connecting accessories to the vehicle fuse box, please see your automotive dealer for advice on proper installation. In any case, automotive regulations for cars do not allow any fixed wire 12 V installation. In cars, please use only the supplied cigarette lighter cable.
- Check the vehicle battery connections to determine which battery terminal (positive or negative) is grounded to the engine block or chassis. Most of today's vehicles, motor homes, boats, caravans use a negative ground. If your vehicle has a negative ground, follow Steps 2 and 3. Otherwise skip to the Caution in Step 3.
- Connect the RED wire of the DC power cord to the accessory contact in your vehicle's +13.8 VDC fuse box.
(13.8 V is the nominal DC voltage while engines are running and alternators or mobile home or solar chargers are in operation in a 12 V network. The scanner works fine under any voltage from appr. 10 V to 15.6 V in a standard 12 V environment). - Connect the BLACK wire of the DC power cord to the negative side of the
vehicle (usually the chassis).
Caution: In vehicles with a positive ground, the RED wire connects to the chassis and the BLACK wire connects to the accessory contact in the fuse box.
- Insert the DC plug into the DC 13.8V jack on the back panel.
Scanner Operation Overview
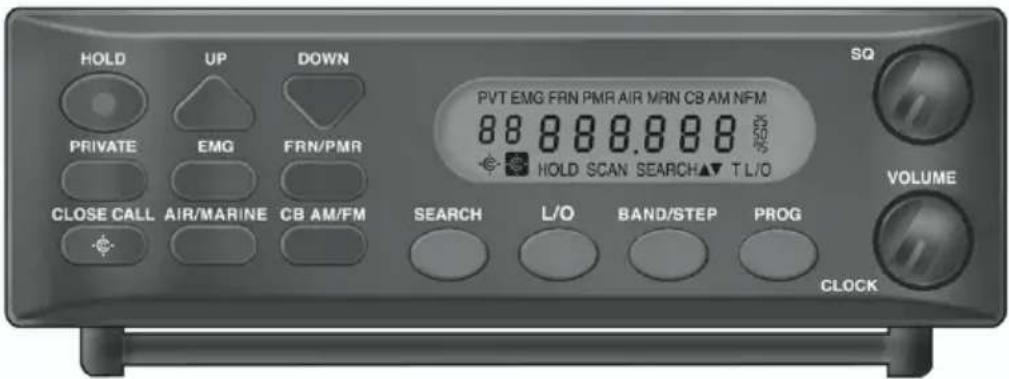
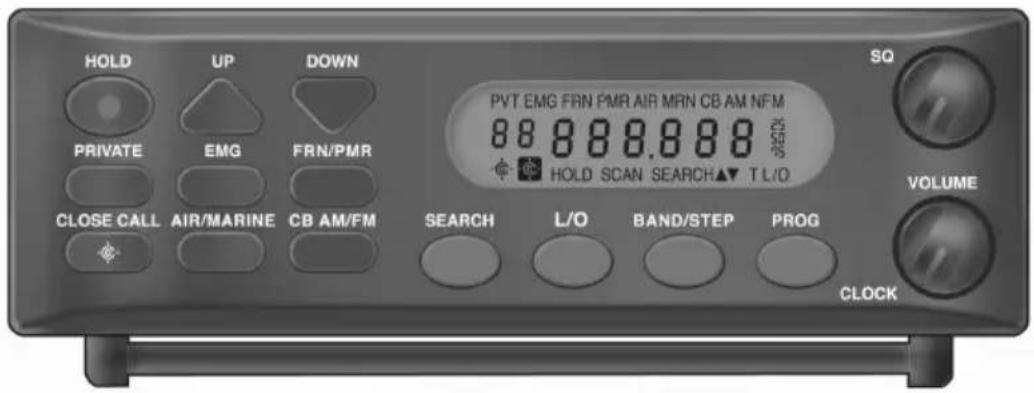
AE355M Front Panel
text_image
HOLD UP DOWN PRIVATE EMG FRN/PMR CLOSE CALL AIR/MARINE CB AM/FM SQ PVT EMG FRN PMR AIR MRN CB AM NFM 88 888.888 88 HOLD SCAN SEARCH▲▼ T L/O VOLUME SEARCH L/O BAND/STEP PROG CLOCK| KEY | PURPOSE |
| HOLD | Press this key to stop scanning or searching and to remain on the current frequency. “HOLD” displays on the screen.Press HOLD a second time to resume scanning. |
| UP ▲DOWN ▼ | Press these directional keys to:Manually search up or down for frequencies while in Hold mode.Change direction of a search during Search mode.Quickly search up or down for frequencies (hold ▲r for longer than 1 second) while in Hold mode. |
| PRIVATE | Scans user-programmed channels programmed into the PRIVATE bank. |
| EMG | Press this key to scan the EMG bands.NOTE: For Germany (Band Plan 2) EMG covers the 4 m Band for Safety and Emergency Organizations.For Band Plan 1, EMG covers the Mosque frequencies and EMG has 100 PRIVATE channels. These user programmed channels are scanned after the preprogrammed channels if the EMG is selected. |
| FRN/PMR | Press this key to scan the Freenet (FRN) andPMR bands. Pressing this key cycles through the frequencies in the following order:• Freenet (FRN)/PMR - both activated• Freenet (FRN) only (turn off PMR bank)• PMR only (turn off Freenet bank)• None active (turn off both Freenet and PMR banks)NOTE:The Freenet (FRN) bank has 100 PRIVATE channels. These user programmed channels are scanning after the preprogrammed channels if the Freenet is selected. |
| CLOSE CALL | Press this key to begin checking & monitoring the nearer environment for strong transmission signals from hand held and commercial radio stations nearby. Pressing this key cycles through the frequencies in the following order:• Close Call® PriorityCC checks for Close Call hits every 2 seconds while monitoring other frequencies. You will hear a slight break in reception while Close Call Priority is on.• Close Call Do Not DisturbChecks for Close Call hits every 2 seconds unless the scanner is already receiving a transmission. This prevents the breaks in audio, but can check less often.• Close Call Only - Press the Close Call key for longer than 2.5 seconds. The Close Call Priority icon flashes to indicate this mode. |
| AIR/MARINE | Press this key to scan the Air and Marine bands. Pressing this key cycles through the frequencies in the following order:• Air/Marine - both activated• Air only (turn off Marine bank)• Marine only (turn off Air bank)• None active (turn off both Air and Marine banks) |
| CB AM/FM | Press this key to scan the CB AM and Amateur Band (CB FM) bands. Pressing this key cyclesthrough the frequencies in the following order:CB AM / Amateur Band (CB FM) bands - both activatedCB AM only (turn off Amateur Band (CB FM) bank)Amateur Band (CB FM) only (turn off CB AM bank)None active (turn off both CB AM / Amateur Band (CB FM) banks) |
| SEARCH | Press the SEARCH key to search for active frequencies within a selected band range. |
| L/O | Press this key to temporarily or permanently lock out frequencies or channels from being searched or scanned. (L/O is explained in more detail in a later section.) |
| BAND/STEP | You can change the steps of each band. To change steps, press and hold BAND/STEP key while band search.Pressing this key displays the upper/lower limits of a band range for 3 seconds (i.e., 406:440) and then begins searching that band range. Note, on the display the band upper/lower limits are separated by the colon. Continue pressing the BAND/STEP key for other searchable bands. |
| PROG | Press this key to initiate and complete programming a channel or frequency (further detail is provided in a later section). |
| ITEM | PURPOSE |
| Volume/Clock Volume Control/Clock Switch | Turn this control clockwise to turn the AE355M unit on. Continue turning this control clockwise to adjust the volume. |
| SQ Squelch Control | Adjust SQ to set the scan threshold.When you are monitoring a single channel in Scan Hold Mode, adjust SQ to eliminate the background noise heard in the absence of an incoming signal. |
| LCD | The Liquid Crystal Display (LCD) shows the current channel or its frequency. It also displays mode, status, and bank indicators. It utilizes a 7-segment LCD pattern for character display. (Go to “SCREENS” on page 23 for more details.) |
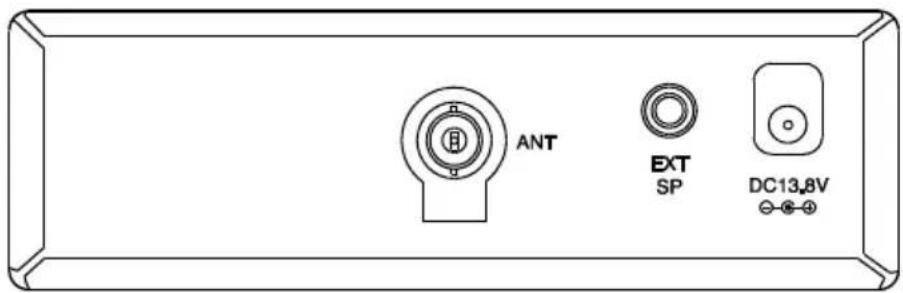
AE355M Rear Panel
text_image
ANT EXT SP DC13.8V| ITEM | PURPOSE |
| ANT | BNC Antenna Connector. Insert the antenna plug here. |
| EXT SP | External Speaker. Insert optional external speaker plug here (3.5 mm mono plug). |
| DC 13.8V | Power Connection. Connect the specified AC Adapter or DC power cord here (center pin is +). |
Using your AE355M Scanner
Set up
Adjusting Squelch
| To Adjust Squelch - | |
 | 1. Turn SQ completely counterclockwise. You should hear open squelch noise. |
 | 2. Turn SQ clockwise slowly until the sound disappears. This is the threshold point at which the incoming signal is just slightly stronger than the noise which will open the squelch. |
| 3. Adjust the volume to a comfortable listening level. | |
Operating Modes
The AE355M comes ready pre-configured to receive typical radio communication services in Germany. For this purpose, the radio has 2 different factory installed "Band Plans 1 or 2" which let you receive the radio communication services with the optimized country specific channel spacings and other preference settings. We strictly recommend not to change the band plan settings unless you are in other European countries.
Like all scanners, the AE355M operates in two modes - Scan and Search:
Scan
Scanning allows you to scan through already user programmed or pre-programmed channels in various service banks.
Press a service bank key (EMG, FRN/PMR, AIR/MARINE, CB AM/FM or PRIVATE) to find an active frequency within that bank. All activated banks plus their “private” channels are scanned. Press other bank keys to add banks to scan.
The Bank label/icon for the scanned frequency flashes while that bank is scanned. When an active frequency is found the scanner stops on that frequency. When transmission ends the scanner pauses 2 seconds for a new transmission. If no new transmission is found scanning resumes. Press UP to manually continue scanning. Multiple active banks are scanned in order.
Note: Before you can scan the Private bank you must program frequencies into the channels. Refer to chapter "PRIVATE BANK".
Search
Search mode is used in case if you do not yet have any programmed frequencies stored in your scanner and if you want to explore certain frequency ranges in order to find any activity.
For this purpose, the AE 355 M offers 23 different pre-grouped frequency ranges and lets you search these ranges in order to find locally active frequencies.
Press BAND/STEP key to select 1 of 23 separate frequency bands to search. Press the SEARCH key to begin searching. The scanner displays frequencies as it searches and stops on active frequencies until that transmission ends.
If the found frequency may be interesting for you, you can note this frequency for later checks or store (program) this frequency into one of the channel memory locations. How this can be done, will be explained later.
If no transmission resumes after 2 seconds the search automatically continues through the rest of the band. Use ▲ or ▼ to change the direction of the search or press the BAND/STEP key again to change bands.
Special Notes for Scanning Banks
The bank keys (except the EMG and Private banks) are home to multiple banks.
NOTE: The EMG (Mosque bank in UK) has 100 PRIVATE channels.
These user-programmed channels are scanned after pre-programmed channels.
Pressing FRN/PMR more than once will cycle through the banks in this order:
- Freenet (FRN)/PMR
- Freenet (FRN)
- PMR
- None
NOTE: The Freenet bank has 100 PRIVATE channels. These user-programmed channels are scanned after pre-programmed channels.
Pressing AIR/MARINE more than once will cycle through the banks in this order:
- Air/Marine
- Air
- Marine
- None
Pressing CB AM/FM more than once will cycle through the banks in this order:
- CB AM and 10 m Amateur Band (CB FM)
- CB AM
- 10 m Amateur Band (CB FM)
- None
| If You Want to do This - | Here's How - |
| Begin scanning | Press any service bank key; the bank label flashes and the “SCAN” message moves across the display screen. Scanning automatically stops on an active channel and displays that frequency (except for locked-out channels which will be covered later in this guide). It will stay on that channel until the transmission ends.Note:You must program channels into the PRIVATE bank before you can later scan it. |
| Set up multiple service banks to scan | Press a desired service bank’s key until it displays. Continue pressing other banks’ keys until all desired banks are displayed (activated). |
| Stop scanning | PressHOLD. The scanner stays on the displayed channel until scanning is resumed. The bank’s screen label remains steady and does not flash. |
| Resume scanning | Press one of the following keys to continue scanning:HOLD– Press this key to release the Scan Hold and continue scanning. The bank’s screen label resumes flashing.▲– Press this key to resume scanning.Any bank key - If you press a different bank key you will start scanning in that new bank and the bank label will resume flashing.L/O key - Press this key to lock out this frequency and step to the next frequency. |
| Keep scanning after the AE355M has stopped on an active channel | If the AE355M stops on an active channel that you do not want to monitor but you do not want to lock out, press ▲ . You will scan to the next frequency. |
| Select a different | Use one of the following two methods: |
| bank to scan | Use the key to move through frequencies and banks.Deactivate the bank(s) you do not want to listen to, leaving only the desired band active. |
Searching Band Tips
| If You Want to Do This | Here's How - |
| Begin searching | Press the BAND/STEP key. The screen displays the last known searched band and then begins searching for an active frequency in that band. |
| Continue after the AE355M has stopped on an active frequency | If the AE355M stops on an active frequency that you do not want to monitor but you do not want to lock out, press the SEARCH key or the UP/DOWN keys. |
| Stop searching | Press HOLD. The scanner stays on the displayed frequency until searching is resumed. Press HOLD again to resume searching. |
| Select a different band to search | Press the BAND/STEP key multiple times to search through the available bands. |
Screens
This section shows typical screen displays:
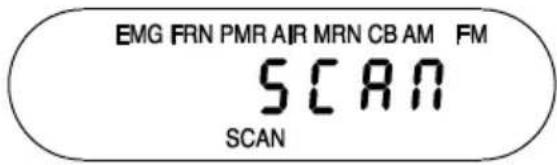
Scanning Banks
text_image
EMG FRN PMR AIR MRN CB AM FM SCAN SCANThis screen shows AE355M is actively scanning a displayed bank. "SCAN" scrolls from right to left across the screen and the scanned bank will flash.

text_image
FRN 149.025 HOLD SCANThis screen shows that the scanner has been put on HOLD to monitor frequency 149.025 on the "Freenet" bank.
Searching Bands

text_image
108:137 SEARCHWhen BAND/STEP is pressed this screen displays the band range to be searched. Press BAND/STEP again (or UP/DOWN within 3 seconds) to see other band ranges.

text_image
127.8 12 SO SEARCH▲This SEARCH screen shows that frequency 127.81250 has been found through an upward search. Pointers (▲or )▼indicate the direction of the search - up or down.
Special features
The AE355M scanner boasts of several special features:
- Lock Out Channels/Frequencies
- Close Call
- Private Bank
• Program Frequencies into Programmable Banks - Program Lock
- Select Step Frequency
- Clock Mode
Lock Out Channels / Frequencies
Sometimes the scanner may stop on a particular channel or frequency because of noise or other unwanted transmissions. This feature lets you lock out channels and frequencies you don't want to scan. The Lock Out feature skips these channels and frequencies during scanning.
Types of Lock Out
Temporary Lock Out
Pressing L/O once temporarily locks out the current frequency or channel. The scanner displays “T L/O” for that frequency or channel and continues scanning. All “T L/O” frequencies/channels are restored when the scanner is powered off and later switched on again.
Permanent Lock Out
Pressing L/O twice permanently locks out the current frequency or channel. The scanner displays “L/O” for that frequency or channel and continues scanning. “L/O” frequencies/channels can be manually restored; the procedure is provided in this section.
Lock Out Limits
Any of the 300 user-programmed channels can be locked out; however there is a limit to the number of frequencies that can be locked out of a preprogrammed bank or band search. Up to 100 frequencies can be permanently locked out and up to 100 frequencies can be temporarily locked out.
If you try to permanently or temporarily lock out 101 frequencies the scanner releases the first locked out frequency when you lock out the 101st frequency.
Locking out a frequency in any service bank or search band locks it out in all other service banks or search bands.
However it will not affect the frequency if you have saved it in a channel.
You can only lock out all the channels or frequencies in the Private, EMG, Freenet (FRN), PMR and Marine banks. If you lock out all the channels or frequencies in one of these banks pressing that bank key will make the scanner emit an error tone and the scanner will not scan.
Lock Out Tips
| If You Want to Do This | Here's How - |
| Temporary Lock Out | While on a channel or frequency press L/O once. The scanner beeps and temporarily locks out that channel and displays “T L/O.” If the scanner was not in Hold mode it then resumes scanning. If the scanner was in Hold mode it does not resume scanning until one of the following actions is taken:Press HOLD again to release the Scan Hold function. Scanning resumes on that bank.Press the bank you were scanning to resume scanning in that bank.Press a different bank key to begin scanning that new bank. |
| Permanent Lock Out | While on a channel or frequency quickly press L/O key twice.The scanner locks out that channel or frequency, displays “T L/O” and then “L/O” and then resumes scanning. |
| Search for Permanently Locked-Out Channels or Frequencies | The scanner does not stop on locked out channels or frequencies while scanning; to search for and display locked out channels or frequencies press HOLD then use UP or DOWN to search manually through the bank. “L/O” appears on the screen to indicate the lock out. |
| Restoring a Single Locked-Out Channel or Frequency | 1 Press the appropriate bank key (PRIVATE, EMG, FRN/PMR, AIR/MARINE and CB AM/FM) to start scanning the bank that has the channel or frequency you want to unlock.2 Press HOLD to stop scanning. ("HOLD" must appear on the screen.)3 Use UP or DOWN keys to find the specific locked out channel or frequency (in this example Channel 12, which displays "L/O").Press L/O.4 "L/O" disappears to indicate that Channel 12 is now unlocked and restored for scanning.Note: For the factory preprogrammed channels the earliest channel will be unlocked when you lock out more than 100 channels. |
| Restoring All Permanently Locked Out Channels or Frequencies | 1 You can unlock all locked out programmable channels and search skip frequencies in any bank at one time. Press a bank key to start scanning.2 Press HOLD to stop scanning.3 Press and hold L/O for more than 2.5 seconds until you hear two beeps.4 All locked out channels/frequencies in that bank are now unlocked and restored for scanning.Note: When that bank is the Private bank all locked out channels of the Private bank are restored. |
Close Call ®
The Close Call feature enables you to search for strong signals close to your location.
These signals could be from a nearby police car or fire engine or other radio source.
Pressing the Ⓧ key activates the Close Call functions in the following order:
- Close Call Do Not Disturb
- Close Call Priority
- Close Call Off
Pressing and holding the ⚙ key activates Close Call Only mode.
Close Call Priority
Repeatedly press 🔒 until the Close Call Priority icon 🔒 displays. The scanner checks every 2 second for a nearby transmission. You may hear a slight break in audio during this time. If you want to monitor only Close Call hits hold the 🔒 key for longer than 2.5 seconds. The Close Call Priority icon flashes.
Close Call Do Not Disturb
Repeatedly press 🔒 until the Do Not Disturb 🔒 icon displays. The scanner will periodically make Close Call checks whenever it is not receiving audio in another mode.
Close Call Only
Press and hold 🔗 until the scanner displays a line of dashes and the icon flashes. The scanner is now in Close Call Only mode. It will only try to find Close Call transmissions. This is also the first step to accessing the Close Call Setup modes.
Setting Up Close Call Modes
- Press and hold 🔒 to enter the Close Call Only mode. The screen displays a line of dashes.
- Press 📍 again to display the Close Call menu selections:
- C-C.bnd - Select which bands Close Call will check.
- Select alerts on/off.
- Use the ▲ or ▼ keys to scroll through the menu selections.
- Press PROG to select a menu and then scroll up or down to view the menu options. When you have selected a menu option press PROG to set it.
- Press BAND/STEP key to return to the previous option or press 🔍 to exit from the Close Call mode selection options.
Setting Close Call (C-C) band Options
Use this menu to select which bands get Close Call checks:
| Band | Name | Frequency (MHz) |
| b1 Lo | VHF Low Band | 25.0000 - 87.2950 |
| b2 Air | AIR Band | 108.0000 - 136.9916 |
| b3 Hi | VHF High Band | 137.0000 - 174.0000 |
| b4 UHF | UHF Band | 406.0000 - 512.0000 |
| b5 800 | 800MHz Band | 806.0000 - 960.0000 |
- From Step 4 previously select C-C band. The first band selection displays:

text_image
bilo- Scroll up or down to select bands for Close Call to monitor. Press PROG. The screen displays that selection and "On".

text_image
bilo.0nYou cannot turn off all bands. If you turn off all bands b1 Lo (VHF Low Band) is automatically set to ON.
Setting Close Call (C-C) alert - Options
This menu controls whether the scanner will send an alert tone when a Close Call signal is detected. The options are:
- ALt.Dn - Scanner beeps when a Close Call signal is found.
- ALE.OFF - Scanner does not beep when a Close Call signal is found
Close Call Tips
| If You Want To - | Here's How - |
| Scan for Close Call Transmissions while Scanning other Banks/Bands | Press the 🔒 key. The Close Call icon displays. Every two seconds there will be a break in the scanner audio as it searches for a nearby transmission. |
| Save a Frequency Found Through Close Call | 1. The scanner finds a nearby signal through Close Call it jumps to that frequency but does not display it. It does however display the band number and flashes “Found” 2. Press any key to confirm the frequency. 2. Press any key to confirm the frequency. 3. Follow the steps for “Programming a Channel” in next chapter. 3. Follow the steps for “Programming a Channel” in next chapter. |
Private Bank
The AE355M also provides 3 separate banks to hold favorite frequencies. When you find a frequency that you would like to listen to again you can program it into either the EMG or Freenet (FRN) service bank or into the Private bank. The advantage to programming frequencies into the Private bank is that you can scan that bank with other service banks turned off.
Programming Frequencies and Channels
Up to 100 frequencies (1 frequency per channel) can be programmed into each of the following banks (300 frequencies combined):
• EMG
- Freenet (FRN)
- Private
Any displayed frequency for these banks can be programmed into the scanner and
frequencies not currently displayed can be located through the Search mode and through manually scanning the preprogrammed banks. In addition websites and magazines (e.g. Siebel-Verlag / Germany) publish listings of local radio station frequencies.
NOTE: The Air/Marine and CB AM/Amateur Band (CB FM) banks are not programmable. "Error" displays if you try to program a frequency into either of these two banks.
Programming a Channel
The following steps detail how to program a frequency into a channel for a specific bank when the frequency was found while scanning or searching. In this example the frequency was found while scannir the Freenet (FRN) bank.
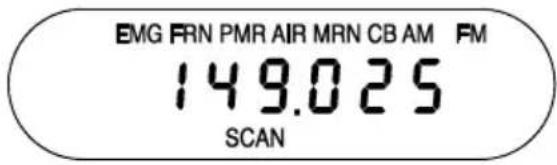
text_image
EMG FRN PMR AIR MRN CB AM FM 149.025 SCANThis SCAN screen shows that frequency 149.025 has been found through a search of the active (flashing) Freenet (FRN) bank.

text_image
FRN 149.025 HOLD SCANPress HOLD. HOLD displays.

text_image
CH 149.025 HOLDPress PROG. CH displays and flashes.
text_image
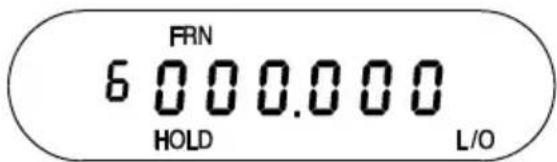
FRN 6 000.000 HOLD L/OPress the key for the bank you want to program. In this example FRN/PMR was pressed.

text_image
FRN 149.025 HOLDThe screen cycles between two displays. The first screen shows that channel 6 is the lowest available channel on the
Freenet (FRN) bank (press ▲ or ▼ to select a different channel) and the second screen shows that frequency 149.025 is available to be programmed.

text_image
FRN 6 149.025 HOLD SCANPress PROG. The scanner programs the frequency into the indicated channel and then goes into SCAN HOLD mode. Press HOLD to release the Hold and continue scanning the rest of the programmed channels starting with the channel you just programmed.
Deleting a Programmed Frequency (programming "000.0000")
The easiest method of deleting a frequency you have programmed is to overwrite it with a null frequency (000.0000).

text_image
CH 149.025 HOLDPress HOLD to stop the scanning and press PROG. HOLD displays and CH displays and flashes. Press and hold L/O for 2.5 seconds.

text_image
CH000.000 HOLDFrequency changes to 000.0000 and CH continues flashing.

text_image
FRN 6 149.025 HOLDPress the bank containing the channel you wish to clear.
The screen displays the first programmable channel for that bank. If that channel displays 000.0000, press ▲or ▶util the channel/ frequency you wish to clear appears.

text_image
FRN 6 149.025 HOLD(In this example channel 6 contains frequency 149.025 MHz.)
The screen cycles between two displays. The first screen shows that channel 6 on the Freenet (FRN) bank (149.025) is selected.

text_image
FRN 000.000 HOLDThe second screen shows that the null frequency (000.0000) is ready to be programmed.
text_image
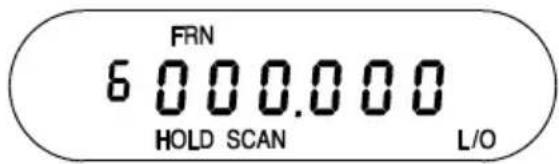
FRN 6 000.000 HOLD SCAN L/OPress PROG. The screen displays a null frequency in that channel. Press the bank key again to resume scanning in that bank.
Program Lock Feature
The AE355M has a Program Lock feature to prevent accidentally programming entries or unauthorized programming. Press and hold the PROG key for longer than 2.5 seconds to toggle Program Lock on and off. Program Lock is available in the following modes:
- Scan/Scan Hold
• Band Search/Band Search Hold - Programming
- Close Call
When Program Lock is turned on the scanner displays “ON Prg.Loc” and then returns to previous mode. Attempts to program on a bank with Program Lock activated will display “Prg.Loc” as a reminder. When Program Lock is turned off (press and hold PROG for longer than 2.5 seconds) the scanner displays “OF Prg.Loc” and returns to the previous mode.
Select Step Frequency
You can change the frequency steps (channel spacing). Selected step affects both band search and Close Call. For air band selected step affects more air service bank. If the scanner displays for 3 seconds while selecting step frequency mode the scanner returns to Band Search.
- Press SEARCH or BAND/STEP key to start Band Search.
- Press and hold BAND/STEP key until the scanner displays the current steps and the confirmation tone is generated.

text_image
SP 12.5- Use ▲ or ▼ to select steps from Auto, 5kHz, 6.25kHz, 10kHz, 12.5kHz (When Auto is selected, the scanner searches from 84.015 MHz to 87.295 MHz with 20 kHz spacing in the German 4 m Band).
- Press BAND/STEP key to change the steps for air band, the scanner displays the current step for air band.

text_image
5P AIR 8.33 ▲▼- Use ▲ or ▼ to select steps for air band from 8.33kHz and 12.5kHz. And then press PROG key to exit and then the scanner returns to Band Search.
Clock Mode
Your scanner's Clock displays whenever you turn off the radio functions. The time indicates 24 hours. When the scanner is in Clock Mode no beep is generated. After 3 seconds when turning off the scanner the backlight is turned off.
To set the current time:
- Rotate VOLUME/CLOCK knob counterclockwise to turn off the AE355M unit.
- Press and hold PROG to enter the clock setting mode. The Band Plan number is displayed for 1 second and the backlight is turned on. Then the clock time will flash.

text_image
1:31- Press ▲ or ▼ to change the time. Press and hold ▲ or ▼ over 2 seconds to step up or down 15 minutes steps repeatedly. To cancel the setting, press BAND/STEP.
- Press PROG to store the current time. The scanner displays the clock. After 3 seconds the backlight is turned off.
After you press any key the scanner exits Clock Setting Mode 3 minutes later.
Troubleshooting Guide
| PROBLEM | SOLUTION |
| Scanner won't work | Try one of these options:Check the connections at both ends of the AC adapter. Check whether the 230 V power distribution socket is turned on. If not, use another AC wall outlet.Check the connections at both ends of the DC cord or Vehicle Power Adapter.Check to see if the fuse is blown. Make sure the car DC socket is powered.Make sure the power switch is turned on. |
| Bad Reception | Try one of these options:Check the antenna and its connection.Move the scanner.You may be in a poor reception area. This may require an external multi-band antenna. Check with your dealer or local electronics store. |
| Scan won't stop | Try one of these options:Check and adjust Squelch.Check the antenna connection. |
| Scan won't start | Try one of these options:Press the bank key again.Adjust the Squelch Control.Program frequencies into the bank before using (for PRIVATE bank).Check to see if all channels are locked out. It is possible that none of the programmed frequencies are active at the time. Try the band search. |
| Search won't start (cont.) | Adjust the Squelch Control. |
| • Check the antenna connection. | |
| PROG key won’t work | Stop scan or search. |
General Product Care
Turn the scanner off before disconnecting the power.
Always press each keypad button firmly until you hear the entry tone for that key entry.
Location
If strong interference or electrical noise is received relocate the scanner or its antenna away from the source of the noise. A higher elevation, if possible, may provide better reception. You might also try changing the height or angle of the telescoping antenna.
Do not use the scanner in high-moisture environments such as the kitchen or bathroom.
Avoid placing the unit in direct sunlight or near heating elements or vents.
Cleaning
Disconnect the power to the unit before cleaning.
Clean the outside of the scanner with a soft cloth. To prevent scratches do not use abrasive cleaners or solvents. Be careful not to rub the LCD window. Do not use excessive amounts of water.
Birdies
All radios may receive undesired signals or birdies. If your scanner stops during Search Mode and no sound is heard it may be receiving a birdie. Birdies are internally-generated signals inherent in the receiver's electronics. If the interference is not severe you might be able to turn SQ clockwise to cut out the birdie. You can also press SEARCH to resume searching.
Changing Band Plan
Only in cases where you use the scanner in other countries we recommend to change the band plan from the factory preset “Band Plan 2” (for Germany) to “Band Plan 1” (for UK and international use).
To change the Band Plan setting:
- Switch the scanner off and disconnect scanner from power cable
- Press HOLD and ▼ buttons, keep them pressed and re-connect the power cable again.
- Release buttons - the present Band Plan number appears
bAnd-2
- Select the desired band plan with
- Press PROG to store the band plan
• The Scanner will display the clock and can be switched on as normal.


Please note that any Band Plan change will modify the factory preset channel steps settings of all bands and the memory contents of the EMG band between (German) Band Plan 2 and UK / International settings of Band Plan 1.
Memory Reset
For the case that it should be necessary to initialize the memory channels to factory setting:
- switch scanner off and disconnect DC cable from power
- press and hold L/O and PROG, keep them pressed and re-connect the power cable again.
•
Scanner will show "Clear" while resetting the memories.
CLEAR
Note: This reset will keep the Band Plan as selected.
Technical Specifications
Size: 132mm (W) x 142mm (D) x 42mm (H)
Weight: 640g
Operating Temperature: -20^ to +60^
Power Requirements: DC 13.8V (10.8...15.6 VDC)
• Banks: 8 banks total (7 Service banks / 1 Private bank)
- Depending on Band plan: Preprogrammed EMG band (4 m Band with 20 kHz spacing incl. 15 kHz offset in German Band Plan 2) or 24 Preprogrammed Mosque frequencies (UK + International Band Plan 1) plus 100 programmable channels.
• Freenet (FRN): 6 Preprogrammed plus 100 programmable channels
• PMR: 8 Preprogrammed European PMR 446 channels.
• AIR : 3840 Preprogrammed world-wide air channels.
• Marine (MARINE): 57 Preprogrammed international Marine radio channels.
• CB AM: 600 programmed CB channels in AM (from 25.000 MHz to 27.995 MHz)
- 10 m Amateur Band (CB FM): 400 programmed 10 m Band channels in FM (from 28.000 MHz to 29.995 MHz).
- PRIVATE: 100 channels fully user-programmable.
Search Band: 23 searchable bands:
Scan Rate: 50 channels/second
Search Rate: 60 steps/second
180 steps/second (5kHz steps band only)
Scan Delay: 2 seconds
Audio Output: Max. 0.65 W
Antenna: 50 ohms (Impedance) BNC socket
Features, specifications and availability of optional accessories are all subject to change without notice.
Other useful information
Service Address & Download
Here you find the details where to download our collection of service hints and documentation. Our technical documentation is updated regularly. You can download the latest versions of user manuals, technical documents and also the dual language original Declaration of Conformity, as well as service hints or FAQ's from:
http://service.alan-electronics.de
Technical enquiries and repair matters:
Contact our service hotline by phone +49 (0) 6103 9481 66 (regular costs for German fixed network) or e-mail at service@albrecht-midland.de
In any case we recommend contacting the hotline before returning any scanner. In many cases problems can already cleared by a simple phone call. In special cases, our hotline can as well tell you the nearest or fastest repair possibility for your scanner, or issue a repair number by phone.
Customers in other countries contact their local distributor for any service matter.
Recycling of Electronic Items

European regulations request that electronic items must be recycled at the end of their life cycle.
Please no not dispose this scanner into normal household trash. If you should once do not need your scanner any more, please give it to the local
electronics waste collection stations. The recycling organizations are financed by the industry- so please accept this convenient and environment-friendly way of recycling electronics items.
European Warranty regulations
The European Warranty regulations are valid for all sales in Europe. The warranty covers hard- and software functions under the restrictions of the European directives. The distributor, dealer or retail shop warrants to the original retail purchaser of this product that should this product or any part of it, under normal use and conditions, be proven defective in material or workmanship within 2 years from the date of original purchase, such defects will be repaired or replaced with a new or reconditioned product (at the company's option) without charges for parts and repair labour. To obtain repair or replacement within terms of European warranty rules, the product is to be delivered with proof of warranty coverage (e.g. a copy of your bill of sale), specification of defect(s), to the distributor, dealer or our authorized repair partner. The warranty is not valid for products or parts which have suffered or been damaged through alteration, improper installation, not intended use, mishandling, misuse, neglect or accident. Not covered by this warranty are wrong or not approved accessory items like external power supplies, broken antennas, or damaged acrylic glass windows and cabinet parts.
Damages through lightning or over-voltage situations via antenna and power connectors are not covered by this warranty.
SIMPLIFIED EU DECLARATION OF CONFORMITY

Hereby, Alan Electronics GmbH declares that the radio equipment
type AE 355 M is in compliance with Directive 2014/53/EU.
The full text of the EU declaration of conformity is available at the following internet address:
http://service.alan-electronics.de/CE-Papiere
© 2020 Alan Electronics GmbH
Daimlerstr. 1g, 63303 Dreieich, Germany
www.alan-electronics.de
All rights reserved.

natural_image
Abstract maroon globe logo with swirling lines and leaf-like elements (no text or symbols)ALBRECHT®
Scanner AE355M