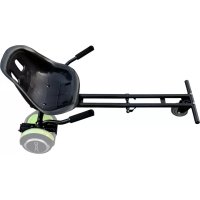
DOC KART - Electric kart NILOX - Free user manual and instructions
Find the device manual for free DOC KART NILOX in PDF.



Frequently Asked Questions - DOC KART NILOX
User questions about DOC KART NILOX
0 question about this device. Answer the ones you know or ask your own.
Ask a new question about this device
Download the instructions for your Electric kart in PDF format for free! Find your manual DOC KART - NILOX and take your electronic device back in hand. On this page are published all the documents necessary for the use of your device. DOC KART by NILOX.
USER MANUAL DOC KART NILOX
PRECAUTIONS FOR USE....2
DOC KART PARTS AND FRAME......4
ASSEMBLING DOC KART 4
ASSEMBLING THE SEAT FRAME AND CONTROL LEVERS.....4
POSITIONING THE SEAT ON THE SEAT FRAME......6
INSERTING THE BELTS IN THE SEAT FRAME....7
FIXING THE FRAME TO THE DOC 8
FIXING THE WHEEL FRAME....9
DRIVING INSTRUCTIONS....10
FORWARD, REVERSE AND BRAKE.... 10
STEERING....11
DOC RECALIBRATION....II
WARNINGS FOR USE AND SAFETY.... 13
USE AND TRAFFIC RULES.... 14
DOC KART MAINTENANCE AND MANAGEMENT...... 14
CLEANING....14
TECHNICAL SPECIFICATIONS.... 15
SYMBOLS AND PICTOGRAMS ON THE PACKAGING ..... 15
EN
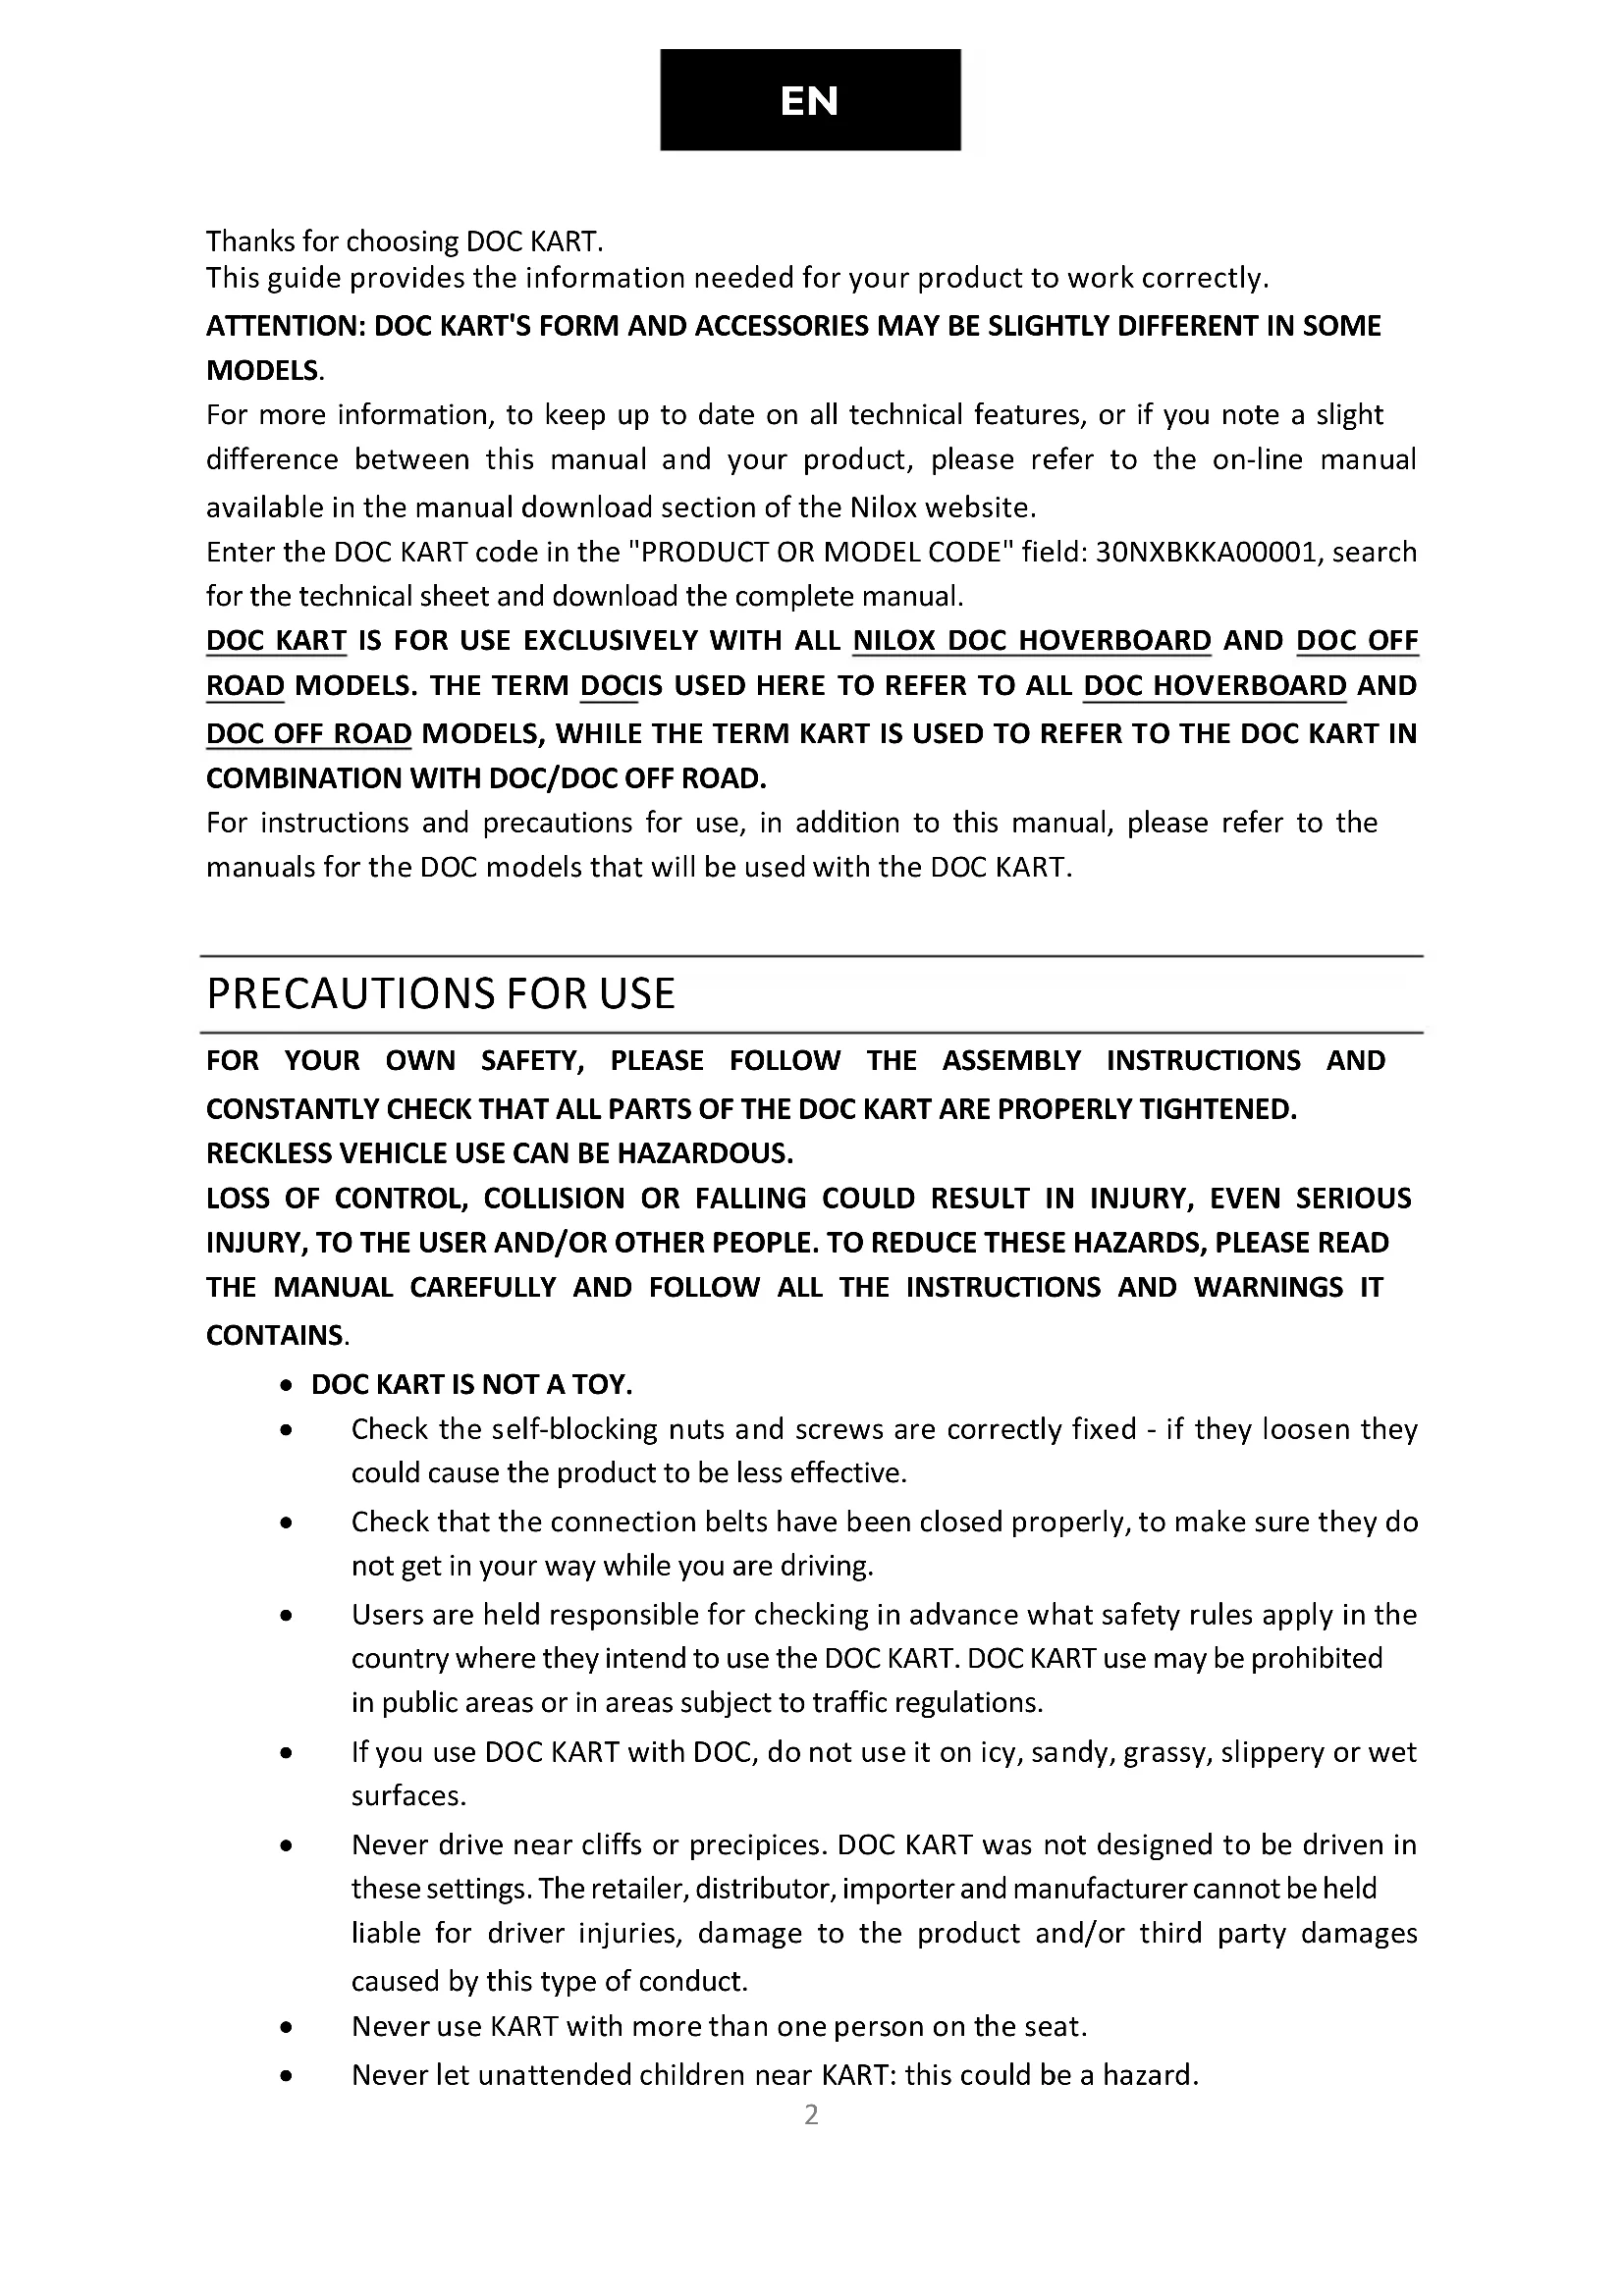
Thanks for choosing DOC KART.
This guide provides the information needed for your product to work correctly.
ATTENTION: DOC KART'S FORM AND ACCESSORIES MAY BE SLIGHTLY DIFFERENT IN SOME MODELS.
For more information, to keep up to date on all technical features, or if you note a slight difference between this manual and your product, please refer to the on-line manual available in the manual download section of the Nilox website.
Enter the DOC KART code in the "PRODUCT OR MODEL CODE" field: 30NXBKKA00001, search for the technical sheet and download the complete manual.
DOC KART IS FOR USE EXCLUSIVELY WITH ALL NILOX DOC HOVERBOARD AND DOC OFF ROAD MODELS. THE TERM DOCIS USED HERE TO REFER TO ALL DOC HOVERBOARD AND DOC OFF ROAD MODELS, WHILE THE TERM KART IS USED TO REFER TO THE DOC KART IN COMBINATION WITH DOC/DOC OFF ROAD.
For instructions and precautions for use, in addition to this manual, please refer to the manuals for the DOC models that will be used with the DOC KART.
PRECAUTIONS FOR USE
FOR YOUR OWN SAFETY, PLEASE FOLLOW THE ASSEMBLY INSTRUCTIONS AND CONSTANTLY CHECK THAT ALL PARTS OF THE DOC KART ARE PROPERLY TIGHTENED. RECKLESS VEHICLE USE CAN BE HAZARDOUS.
LOSS OF CONTROL, COLLISION OR FALLING COULD RESULT IN INJURY, EVEN SERIOUS INJURY, TO THE USER AND/OR OTHER PEOPLE. TO REDUCE THESE HAZARDS, PLEASE READ THE MANUAL CAREFULLY AND FOLLOW ALL THE INSTRUCTIONS AND WARNINGS IT CONTAINS.
• DOC KART IS NOT A TOY.
- Check the self-blocking nuts and screws are correctly fixed - if they loosen they could cause the product to be less effective.
- Check that the connection belts have been closed properly, to make sure they do not get in your way while you are driving.
- Users are held responsible for checking in advance what safety rules apply in the country where they intend to use the DOC KART. DOC KART use may be prohibited in public areas or in areas subject to traffic regulations.
- If you use DOC KART with DOC, do not use it on icy, sandy, grassy, slippery or wet surfaces.
- Never drive near cliffs or precipices. DOC KART was not designed to be driven in these settings. The retailer, distributor, importer and manufacturer cannot be held liable for driver injuries, damage to the product and/or third party damages caused by this type of conduct.
- Never use KART with more than one person on the seat.
• Never let unattended children near KART: this could be a hazard.
EN
• Never use KART if not in perfect conditions.
- Never use KART if you are not in perfect psycho-physical conditions. People who suffer from physical or mental disabilities should not, and should be prevented from using KART.
- We highly discourage use by anyone who cannot comfortably sit on the driver's seat.
- Always learn and observe local laws and regulations applicable where the KART is used.
- Always keep away from car and engine powered vehicle traffic and only use it where permitted and cautiously.
- Be careful of potential obstacles that could get caught in the wheels or force you to suddenly swerve or lose control.
- Do not drive in the rain or when the outdoor temperature risks freezing surfaces.
- Periodically check that the front wheel of DOC KART is working properly and lubricate it.
DOC KART PARTS AND FRAME
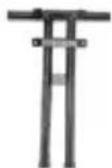
1 Seat frame part
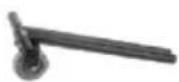
1 Wheel frame part
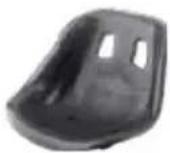
1 Seat
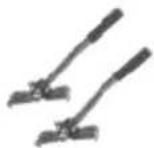
2 Control lever
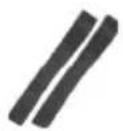
2 Fixing straps
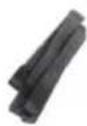
2 Velcro fixing
straps
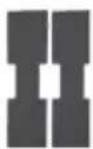
2 Suspension supports
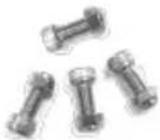
4 Fixing screws
2 Locking
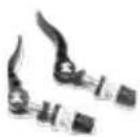
clamps
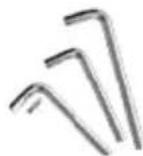
Various assembly
1 Manual
accessories
THESE PARTS MAY BE SUPPLIED SEPARATELY OR ALREADY ASSEMBLED WITH OTHER PARTS.
ASSEMBLING DOCKART
ASSEMBLING THE SEAT FRAME AND CONTROL LEVERS
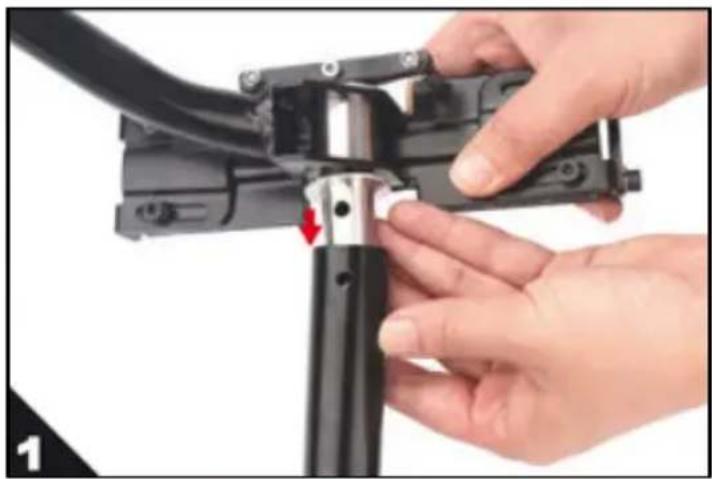
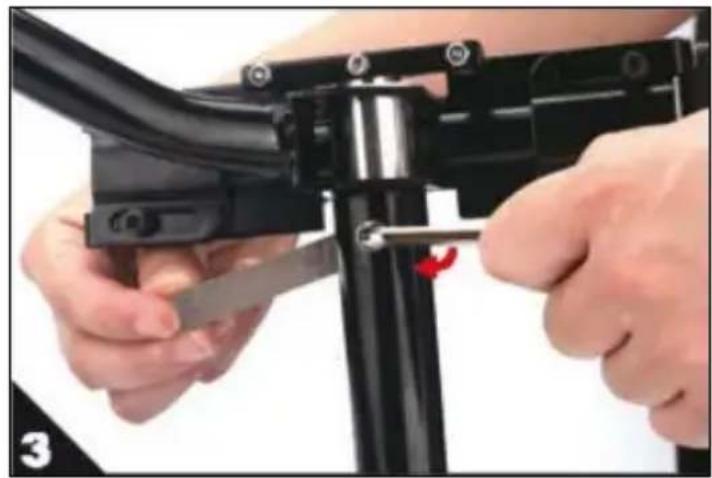
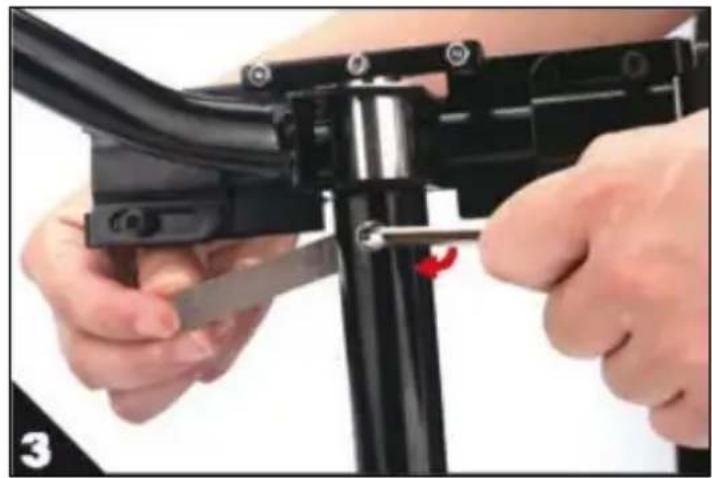
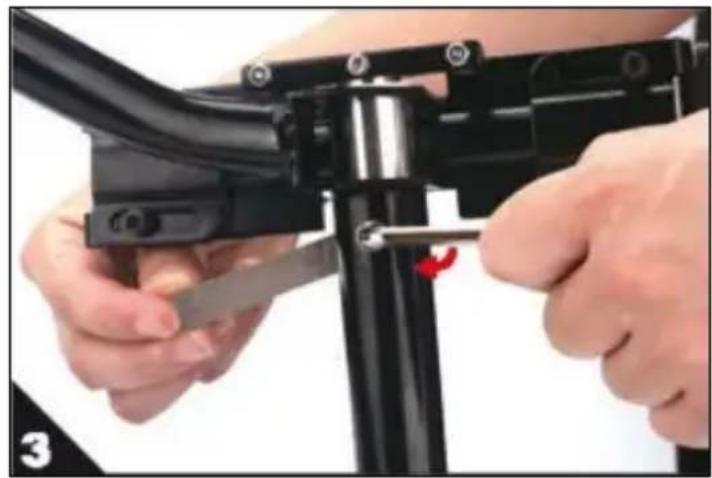
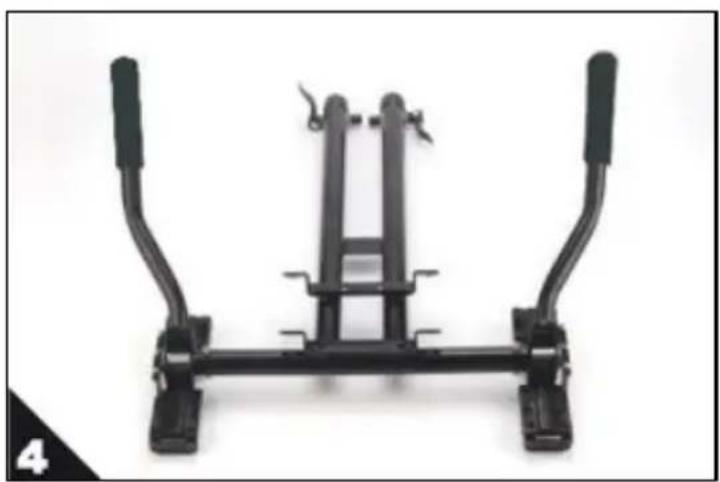
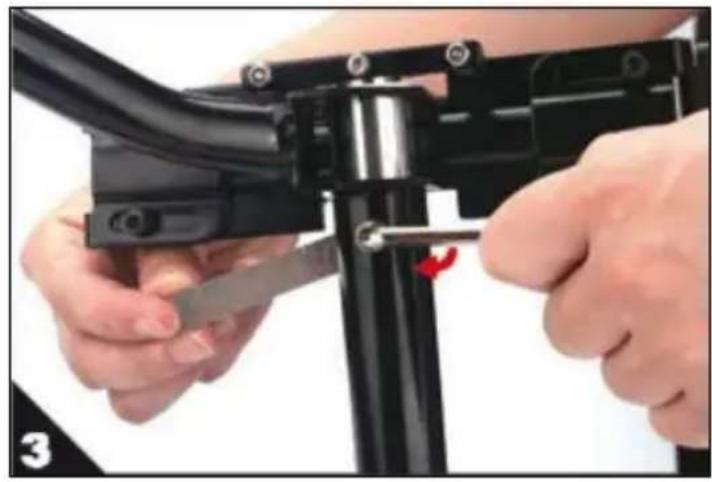
Join the seat frame to the 2 control levers and tighten the screws using the tools provided in the package.
natural_image
Close-up of hands assembling a black mechanical component with a red arrow indicating a specific part (no text or symbols visible)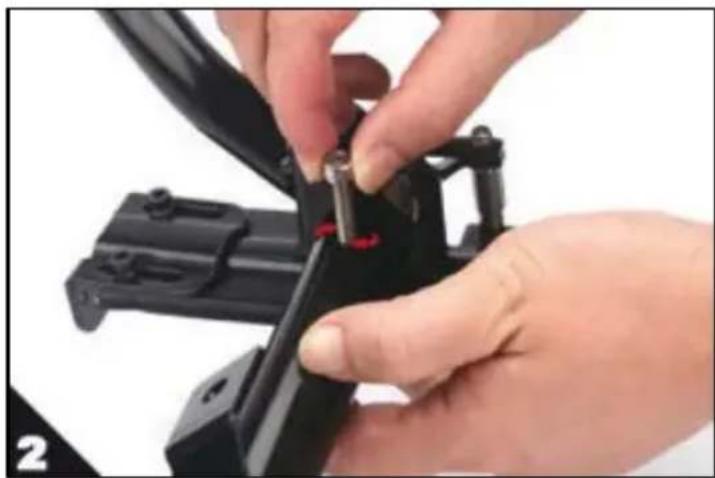
natural_image
Close-up of hands assembling a black mechanical component with a red bolt (no visible text or symbols)
natural_image
Close-up of hands assembling a black mechanical component with a tool, no visible text or symbols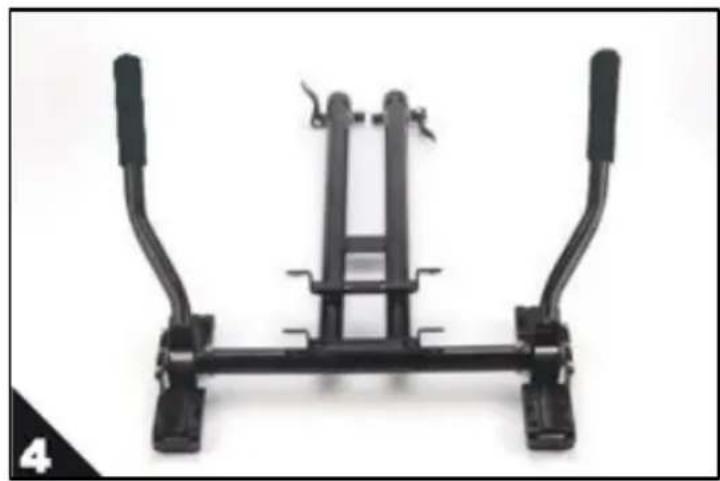
natural_image
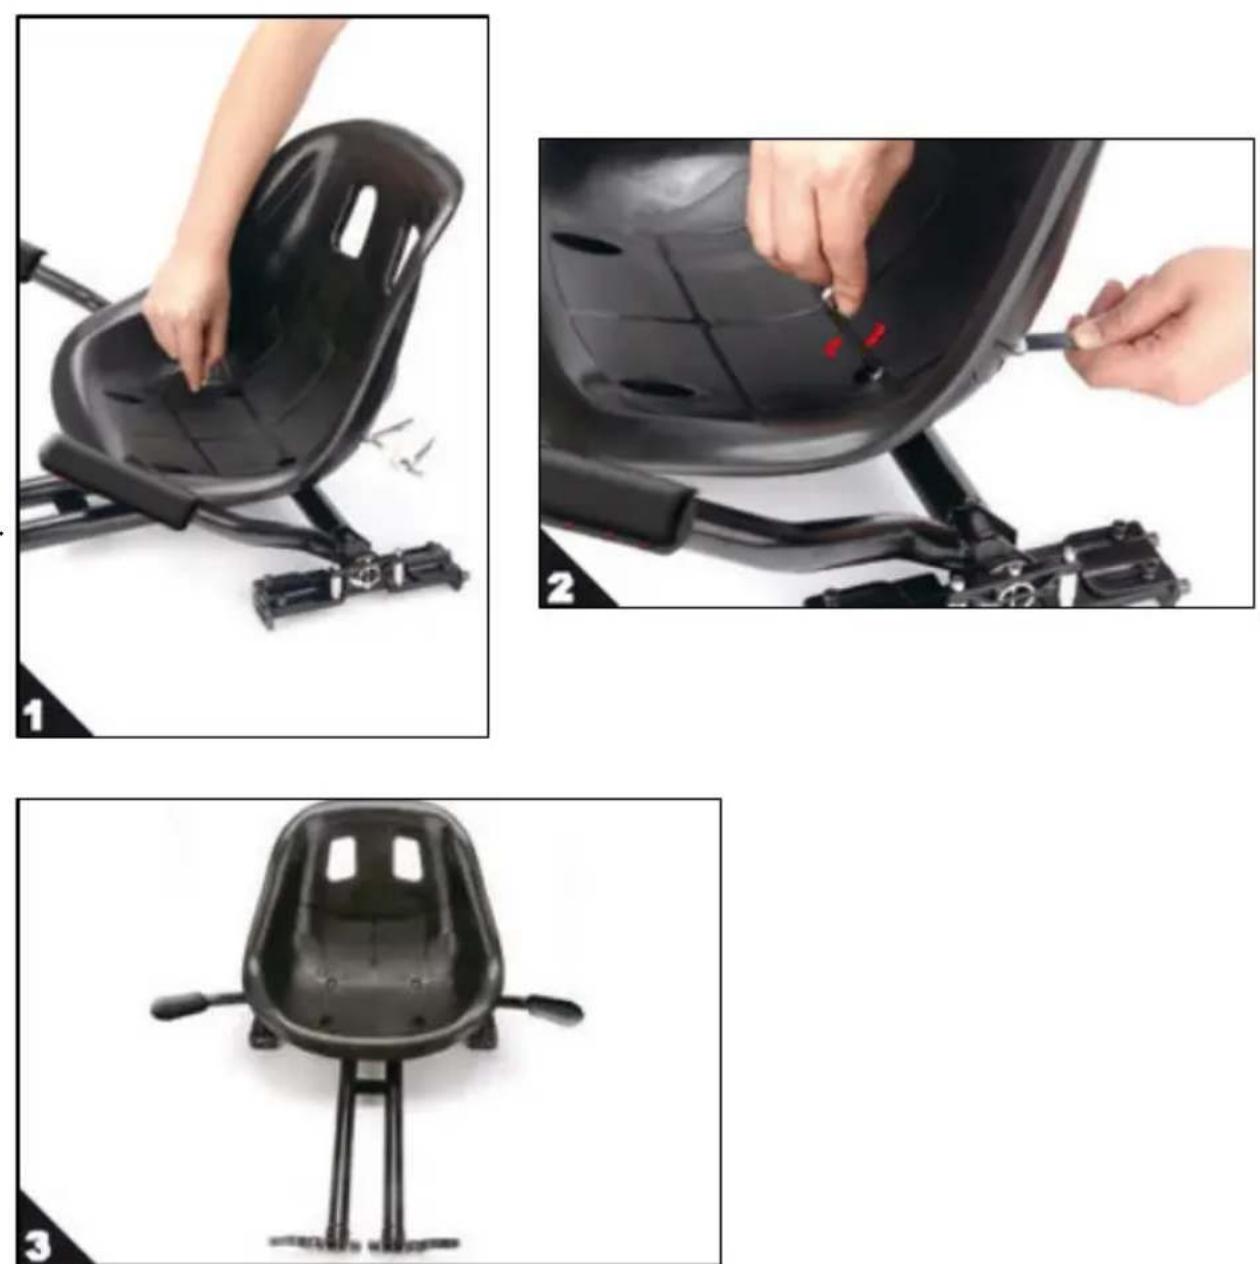
Mechanical support bracket with two vertical supports and a central frame (no text or symbols visible)When you have completed the first part of the assembly process, the product will appear as shown in fig.4

POSITIONING THE SEAT ON THE SEAT FRAME
Using the screws contained in the package, fix the seat to the frame assembled in the previous step.
The result will be as shown in figure 3
EN
INSERTING THE BELTS IN THE SEAT FRAME
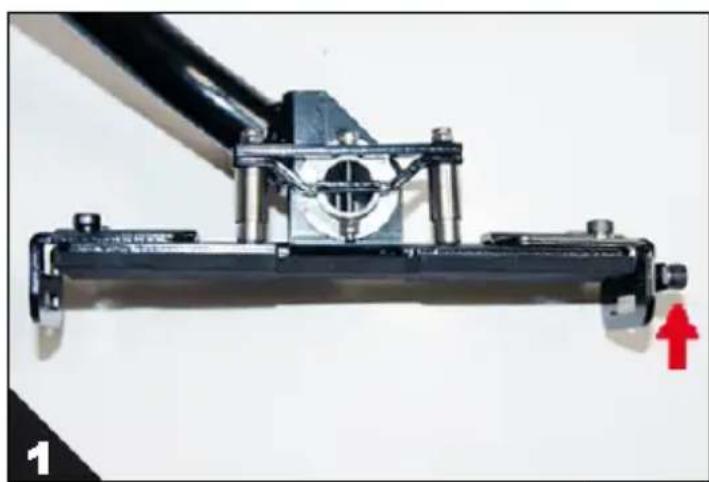
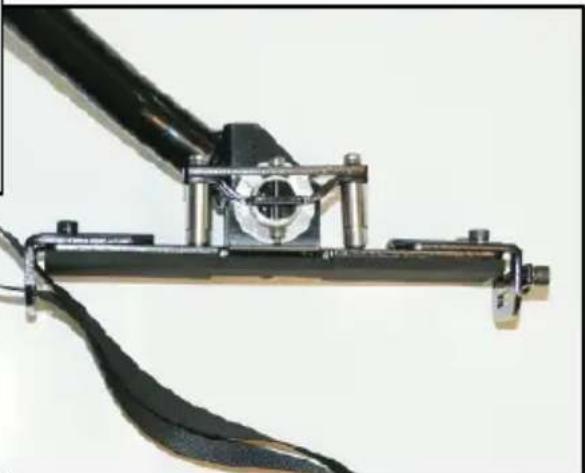
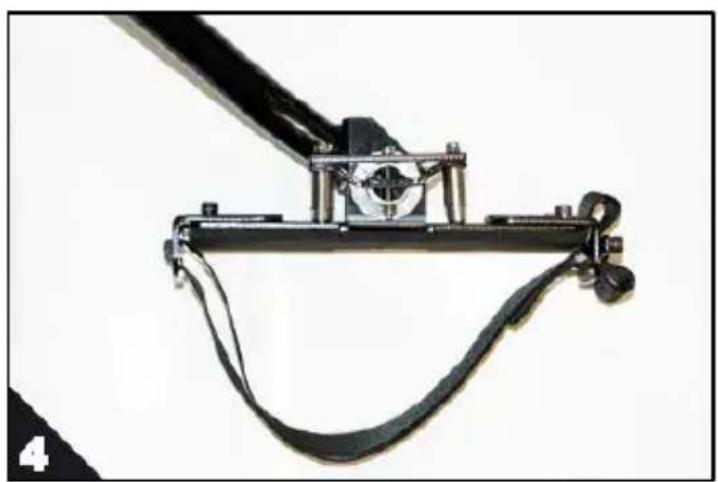
Having created the DOC KART semi-frame, you now need to pass the belts that will hold the structure thus obtained to DOC.
natural_image
Mechanical linkage device with metal components and a red arrow indicator (no text or symbols)Use the Allen wrench to slacken the retainer shown by the arrow in fig.1
natural_image
Close-up of a mechanical linkage or clamp device with metal components and connectors (no visible text or symbols)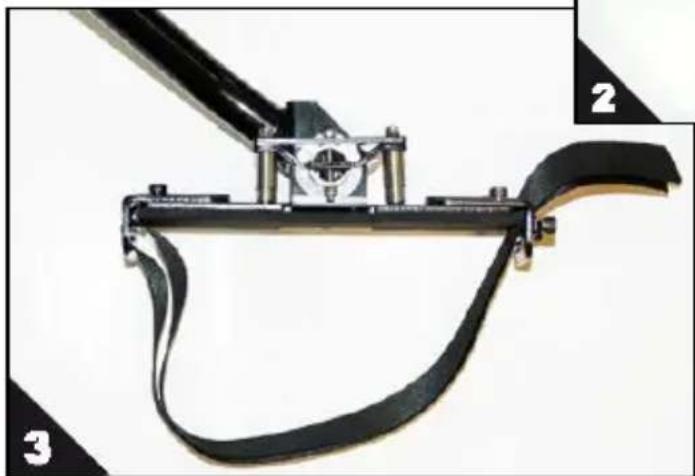
natural_image
Close-up of a mechanical device with black straps and a central hub, labeled 2 and 3 (no text or symbols on the device itself)Pass the belt through as shown in fig.2 and fig.3
natural_image
Close-up of a mechanical device with attached cable and lever mechanism (no visible text or symbols)Insert the end of the belt into the retainer and tighten with the Allen wrench
FIXING THE FRAME TO THE DOC
When you have inserted the belts in their housings, you may assemble the resulting unit with your DOC.
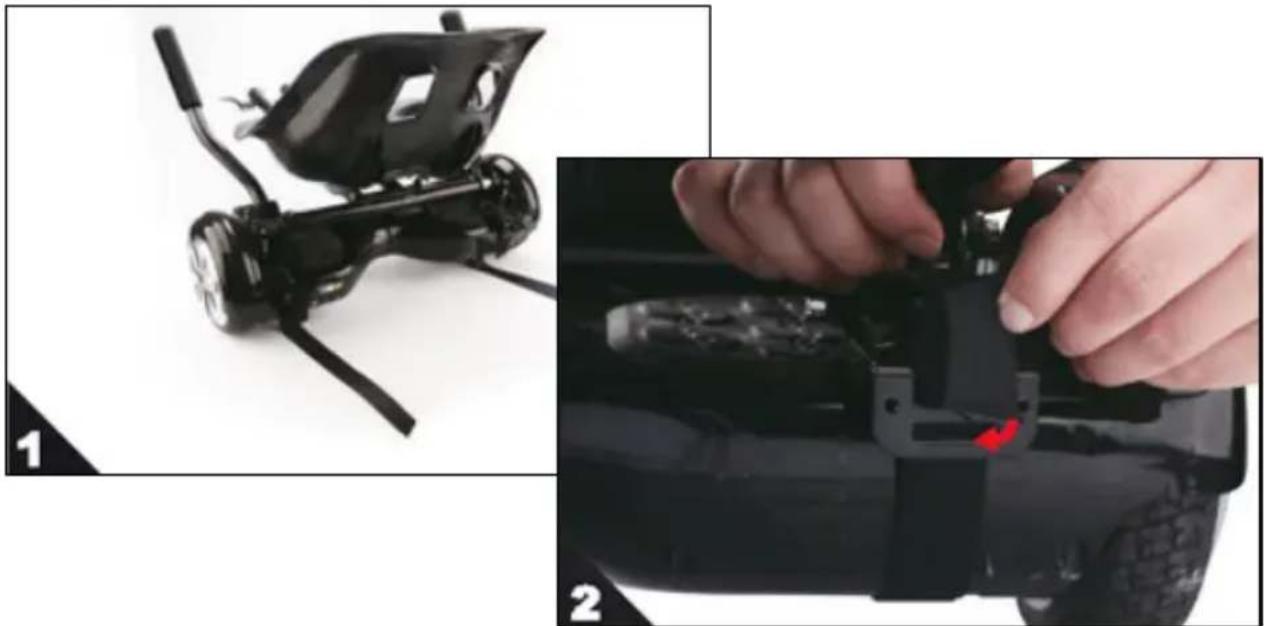
Rest the semi-frame on the DOC and pass the belts underneath it
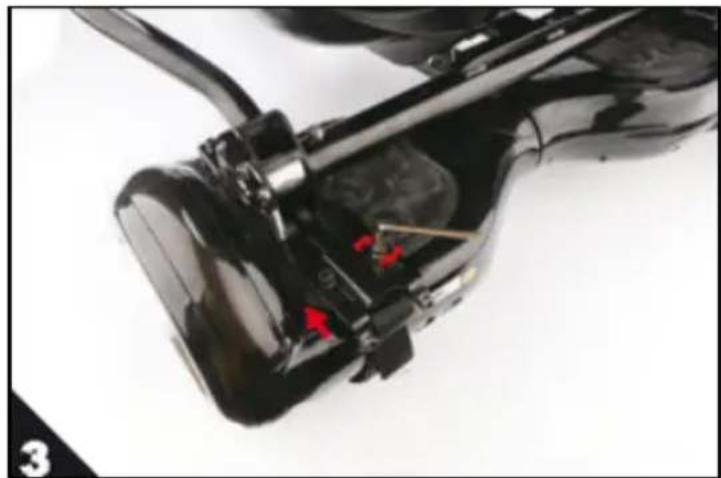
Use the Allen wrench supplied to adjust the width of the support to suit the DOC used.
Pass the belts so that they are tight and the DOC adheres perfectly to the structure.
To prevent the strap from dragging on the ground, we suggest you turn the extra part of the strap up and hold it in place with the clamp provided.
natural_image
Close-up of a black mechanical component with red arrows indicating features, no visible text or symbols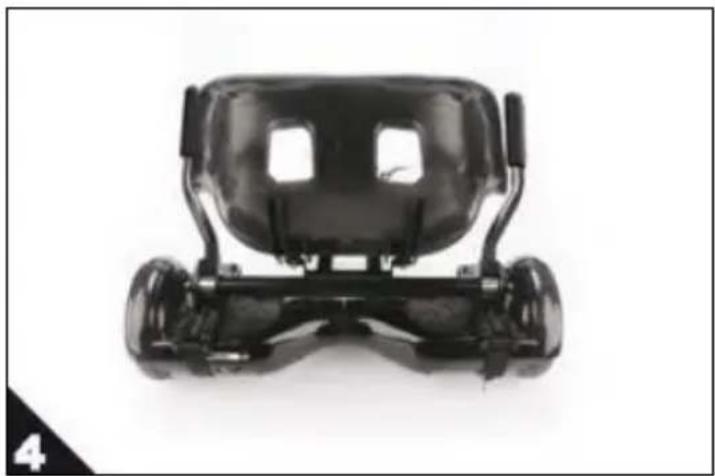
natural_image
Front view of a black and white toy car chassis (no visible text or symbols)If using velcro straps, simply thread the strap through the supports and stick it together..
CAUTION: ADJUST WIDTH SYMMETRICALLY AND CHECK THAT THE CONTROL LEVER PART IS IN THE MIDDLE OF THE PLATFORM
EN
FIXING THE WHEEL FRAME
The last step is to assemble the locking clamps and insert the second part of the frame with the front wheel, which will fit telescopically into the first part which you have already assembled.
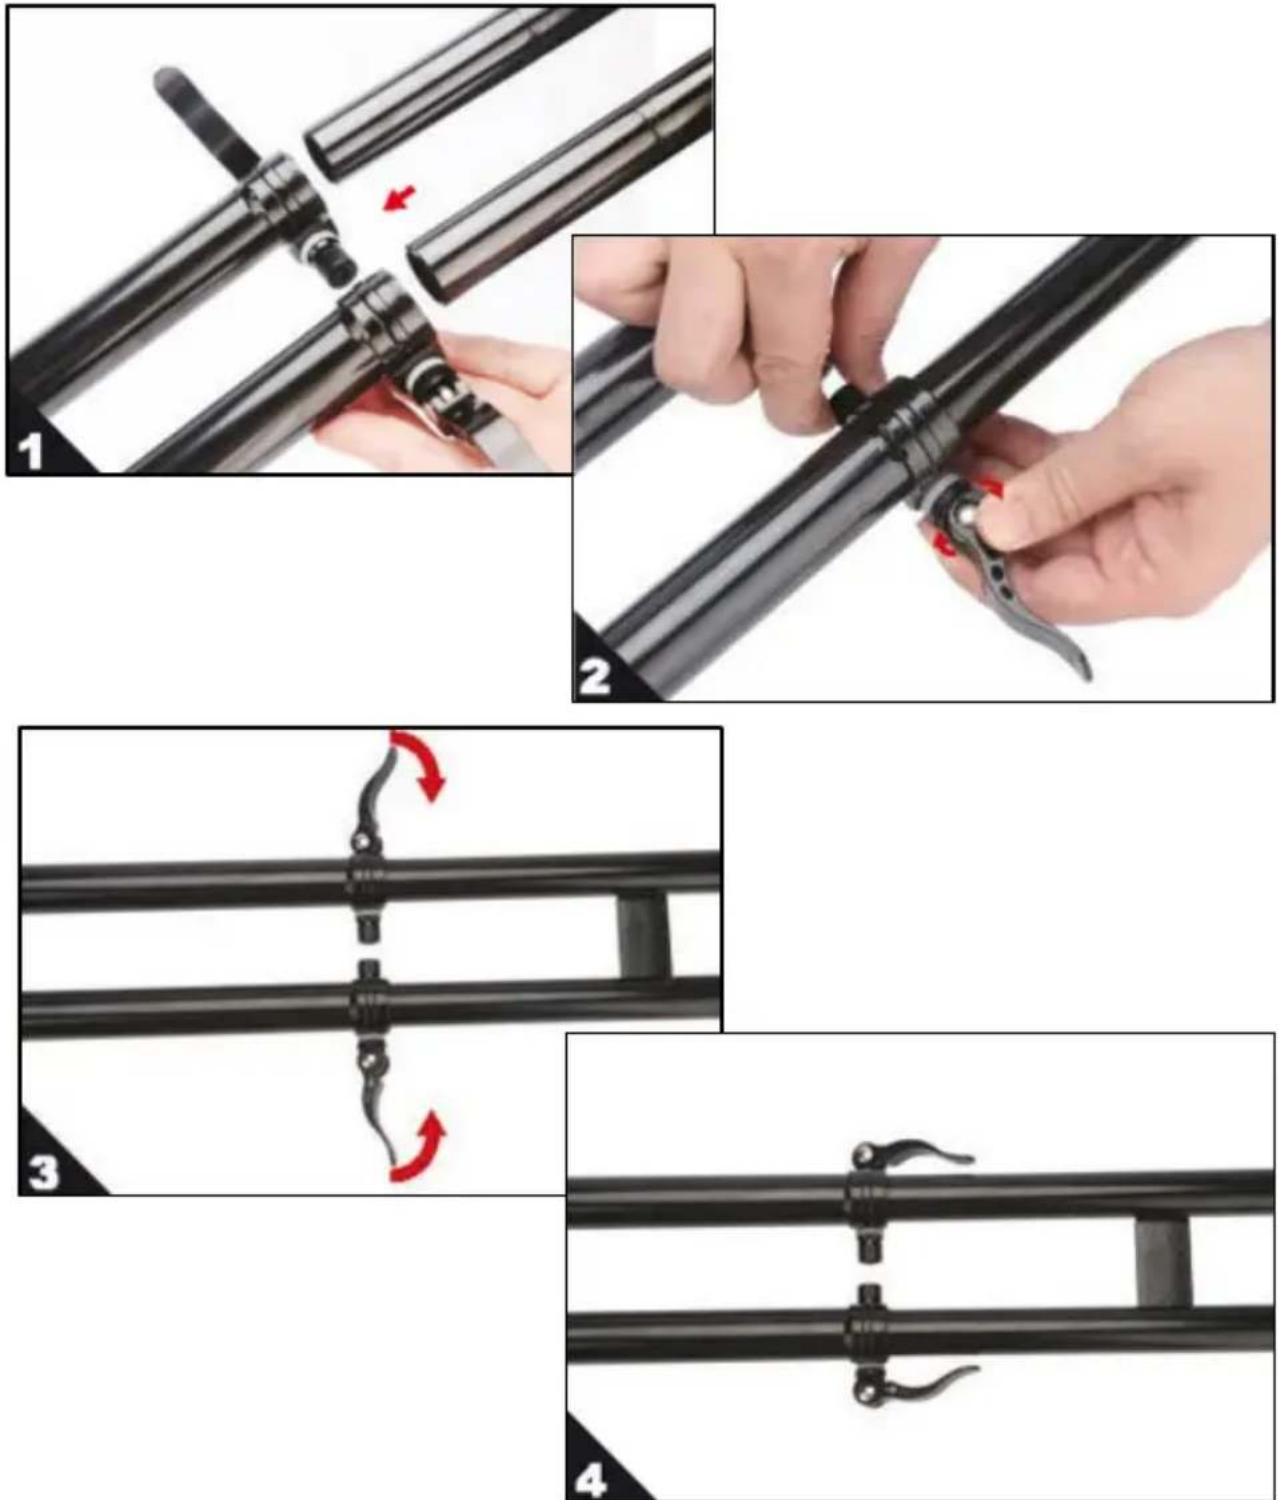
Adjust frame length as required and close the locking clamps. YOUR KART IS NOW READY.
DRIVING INSTRUCTIONS
Drive your KART like a bob sled.
The 2 control levers permit complete control.
FORWARD, REVERSE AND BRAKE
Move both levers down to accelerate.
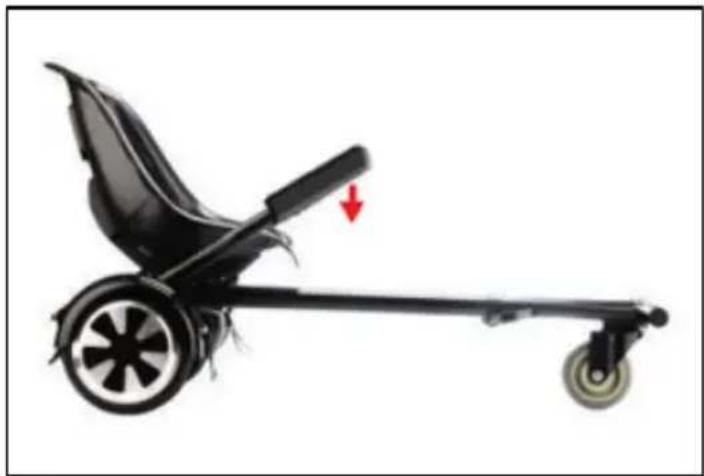
natural_image
Side view of a black stroller with wheels and a red arrow indicating motion (no text or symbols)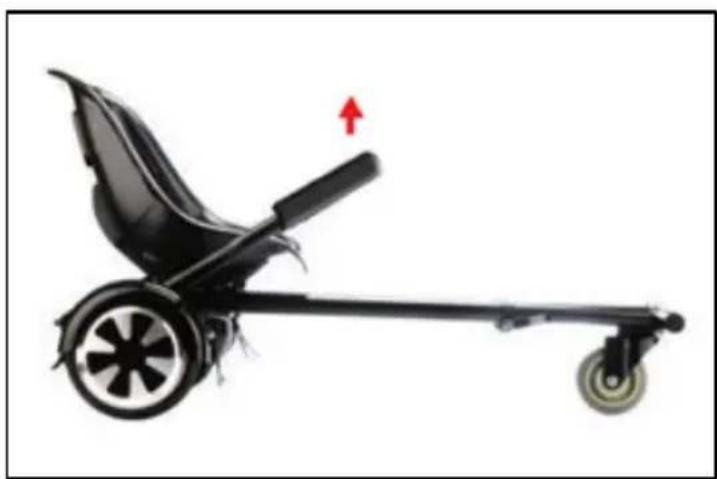
natural_image
Side view of a black stroller with wheels and a red arrow indicating motion (no text or symbols)Move them the opposite way to break the KART instantly and then go backwards.
STEERING
The KART is driven just like a bob sled.
The combined and contrary action of the 2 control levers permits easy steering.
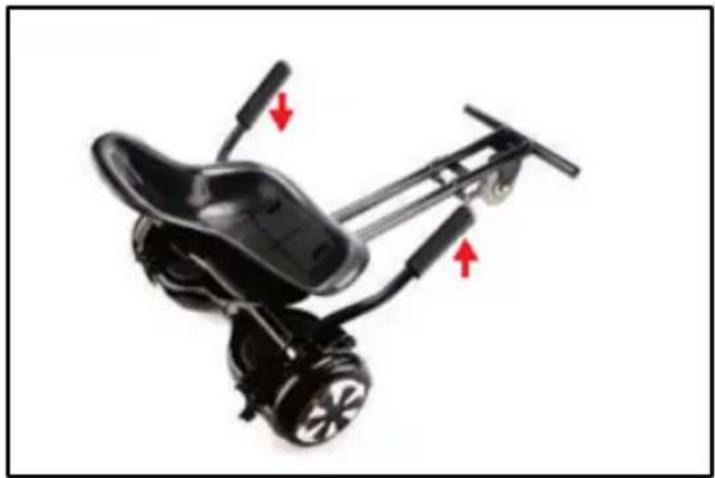
natural_image
Black electric scooter with wheels and red directional arrows indicating motion (no text or symbols)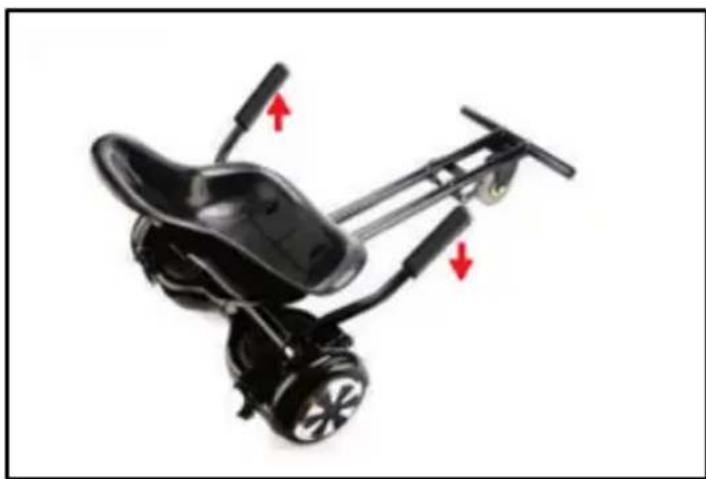
natural_image
Black electric scooter with wheels and red directional arrows indicating motion (no text or symbols)To turn right, lift the right lever and lower the left lever.
To turn left, lift the left lever and lower the right lever
WE RECOMMEND YOU FAMILIARISE YOURSELF WITH THE CONTROLS PRIOR TO PROLONGED USE.
DOC RECALIBRATION
When taking apart the frame of the KART, recalibrate the DOC before using it in the usual way again.
If your DOC or DOC+ seems to pull to the left or right, you may need to recalibrate its sensors. If your DOC or DOC+ has a charging problem, you many need to reset it.
Both processes require two bubble levels (many Smartphones have free "bubble level" apps as well):
- Start with DOC powered off.
- Place each bubble level parallel with the wheel touching the inside of the footpad.
EN
- Rotate DOC until both levels on each footpad are level. If you do not have a bubble level, make sure both footpads are equal with each other and level to the
- ground as best as possible.
- While keeping DOC level, hold the power button down. DOC will make the normal power on tone, wait 3 seconds and then you will hear a single
- beep. Front LEDs will begin flashing 5 times quickly. Release the power button. Front LEDs will continue flashing every 3 seconds. Power the DOC off.
- Power on again. DOC should now be calibrated, if DOC is still not calibrated correctly go to step 1 and begin making minor adjustments.
WARNINGS FOR USE AND SAFETY

In order to reduce any type of risk, we r commend you carefully heed the following warnings.
Use KART sensibly and responsibly.
KART is a hi-tech transport vehicle, but its incorrect and inappropriate use can cause injuries.
- Always wear shoes, a helmet and appropriate safety equipment such as knee pads, elbow pads and wrist bands. Using a firmly buckled skate helmet that provides cranial protection is recommended.
- Do not use without proper training; please read the manual before use. Otherwise, you could lose control of the vehicle and fall.
- Use by minors under 16 years of age is prohibited. Adult supervision is required for use by minors under 16.
• Pregnant women and people with disabilities should not use this vehicle. - Do not use KART under the influence of alcohol, drugs or other substances that could alter the user's reflexes.
• Do not transport objects during use. - Pay attention to surrounding objects when driving. Keeping a good view of the space used is essential to maintaining control.
• We recommend wearing comfortable clothes during use. - KART was designed to transport a single individual. Use by several individuals simultaneously is prohibited.
- We recommend you do not suddenly or abruptly accelerate or stop the vehicle; these behaviours could cause you to lose control.
- Inspect your KART before using it, checking that all screws and components have been tightened properly.
• Perform maintenance after use.
• Do not use in dark or dimly lit areas. - Make sure driving speed always permits safe stopping at any time and in any situation.
- We recommend you maintain a suitable safety distance from other vehicles when driving.
- Use with ice or snow, as well as on rocks, branches or other types of vegetation or with other objects on the ground that could jeopardise appropriate vehicle control is prohibited.
• Use in flammable environments is strictly prohibited. - Do not perform tricks or other hazardous manoeuvres.
• Do not rest any object on the seat. - Do not keep fingers near moving parts or control levers to avoid accidents.
- Do not clean DOC KART with a pressure cleaning or by submerging it in water; use a damp cloth to clean plastic parts.
EN
- Do not puncture, remove or tamper with any part of the DOC KART.
- Jumping on KART could be dangerous.
- Use in areas that allow to increase skill with the vehicle, not on paving or roads where users or other people have had severe accidents.
- Beginners should try with a friend or parent. The majority of severe accidents occur in the first month of use.
USE AND TRAFFIC RULES
IN SOME COUNTRIES KART MUST BE USED ON PRIVATE GROUNDS ONLY WHERE NORMAL ROAD SAFETY RULES DO NOT APPLY.
IN PARTICULAR, IN SOME COUNTRIES, NATIONS OR CITIES AND TOWNS, BOARDS AND OTHER POWERED SPORTS VEHICLES (SKATES, HOVERBOARDS, SCOOTERS, ETC.) CANNOT BE USED ON ROADS AND PAVEMENTS.
USERS ARE RESPONSIBLE FOR CHECKING THE SAFETY REGULATIONS APPLICABLE IN THE COUNTRY WHERE THEY INTEND TO USE THE KART BEFORE USING IT.
DOC KART MAINTENANCE AND MANAGEMENT
CLEANING
- Do not use thinners or other solvents to clean since they could damage surfaces.
• Use a damp cloth to clean plastic parts.
• Do not wash DOC KART with running water.
• To remove mud or dirt from underneath the vehicle use a plastic brush.
TECHNICAL SPECIFICATIONS
DOC KART weight
Approximately 6 kg
Dimensions after assembly
96x50x38 cm
Minimum weight of user
20 kg
Maximum weight of user
100 kg
SYMBOLS AND PICTOGRAMS ON THE PACKAGING
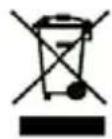



The product contains electric and electronic equipment. At the end of the product working life, it cannot be discarded with normal urban waste and must be sent to separate collection (see introduction).
Read the user's manual carefully.
Wear appropriate safety equipment such as knee pads, elbow pads and wrist bands. Use a well-buckled helmet that provides cranial protection.
Use by minors under 16 years of age is prohibited.
Adult supervision is required for use by minors under 16.
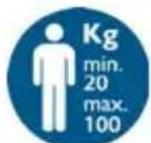
Minimum weight for use 20 kg, maximum weight 100 kg.
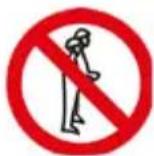
DOC KART was thought and designed to be used by one person at a time only. Never use it with one or more other people.
SOMMARIO
PRECAUZIONI PER L'USO 2
PARTI E STRUTTURA DI DOC KART 4
ASSEMBLAGGIO DOC KART 4
MONTAGGIO TELAIO-SEDILE E LEVE DI COMANDO .....4
natural_image
Close-up of hands assembling a black mechanical component with a red arrow indicating a specific part (no text or symbols visible)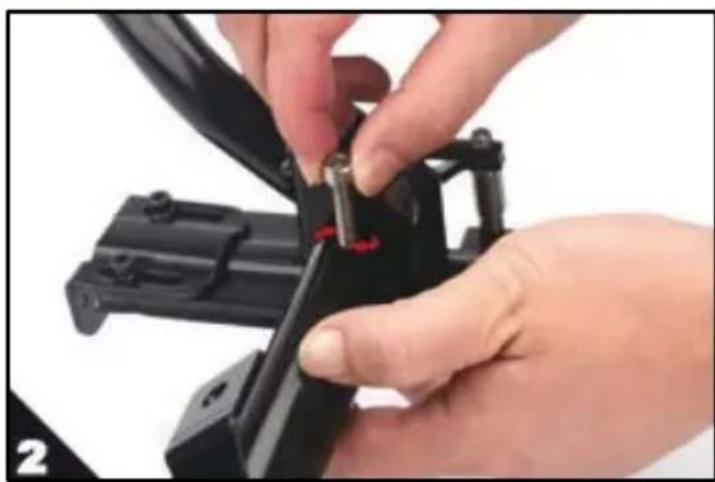
natural_image
Close-up of hands assembling a black mechanical component with red fasteners (no visible text or symbols)
natural_image
Close-up of hands assembling a black mechanical component with a tool, no visible text or symbols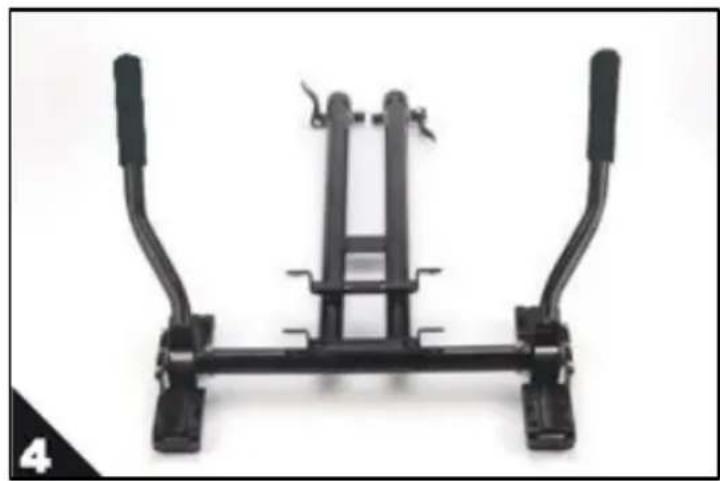
natural_image
Mechanical support bracket with two vertical supports and a central frame (no text or symbols visible)natural_image
Close-up of a mechanical device with attached wires and a central circular component (no visible text or symbols)natural_image
Two-step photo showing a black robotic device being adjusted for a hand, with no visible text or symbols.natural_image
Close-up of a black mechanical component with red arrows indicating features, no visible text or symbols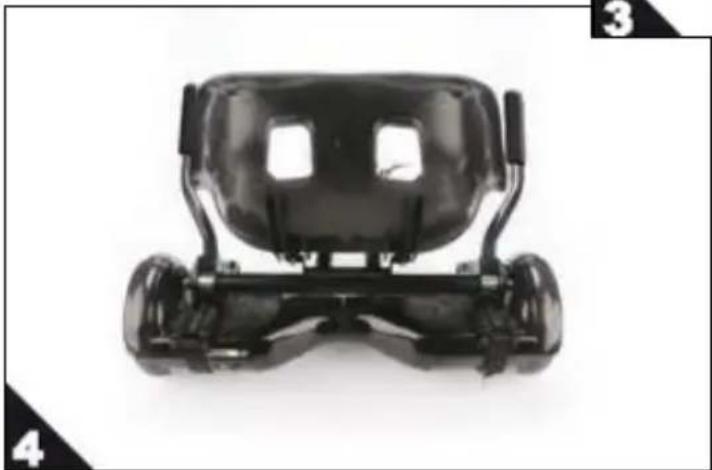
natural_image
Top-down view of a black toy car with front and rear wheels (no visible text or symbols)text_image
Step-by-step instructions for installing a mechanical component, showing step 1 to 4 with red arrows indicating motion.natural_image
Side view of a black stroller with wheels and a red arrow indicating motion (no text or symbols)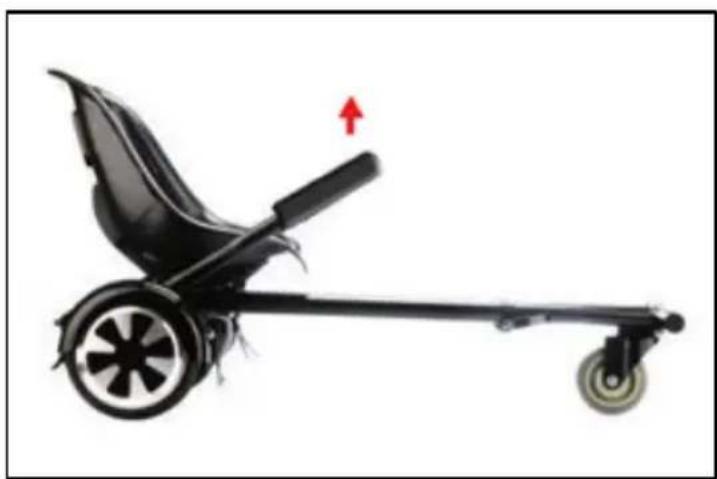
natural_image
Side view of a black stroller with wheels and a red arrow indicating motion (no text or symbols)natural_image
Black electric scooter with wheels and red directional arrows indicating motion (no text or symbols)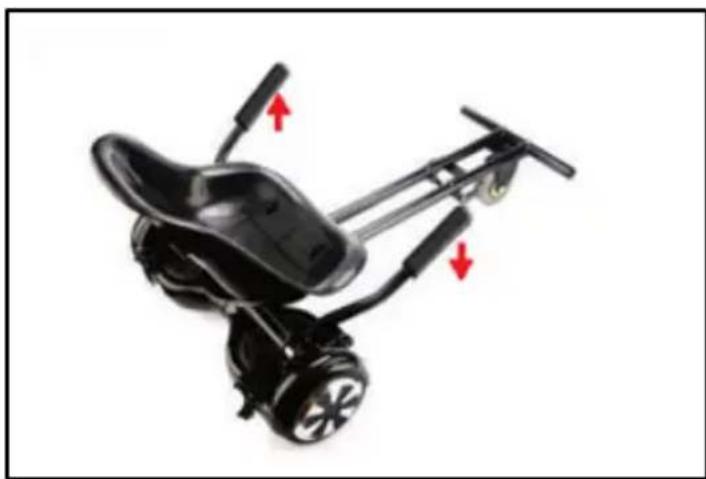
natural_image
Black electric scooter with attached power cord and wheels, showing red directional arrows indicating motion (no text or symbols)natural_image
Close-up of hands assembling a black mechanical component with a red arrow indicating a specific part (no text or symbols visible)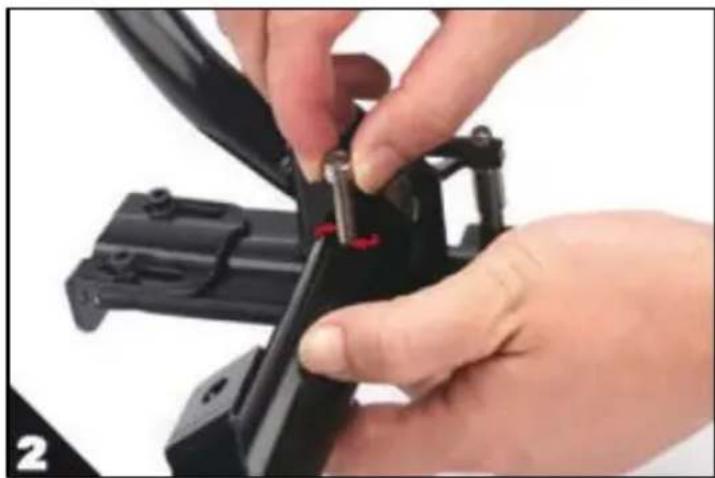
natural_image
Close-up of hands assembling a black mechanical component with a red bolt (no visible text or symbols)
natural_image
Close-up of hands assembling a black mechanical component with a tool, no visible text or symbols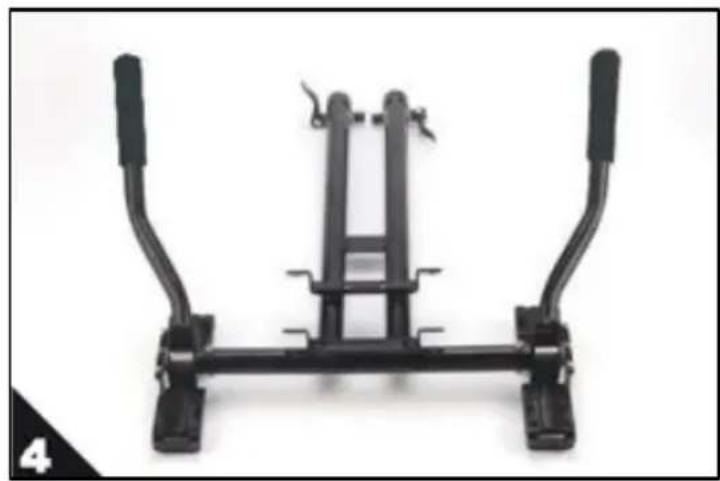
natural_image
Mechanical support bracket with two vertical supports and a central frame (no text or symbols visible)natural_image
Mechanical linkage device with metal components and a red arrow indicator (no text or symbols)natural_image
Close-up of a mechanical device with coiled wires and a central component (no visible text or symbols)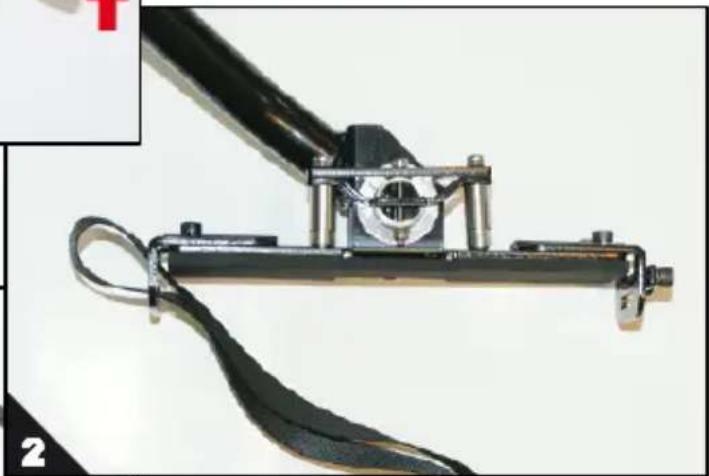
natural_image
Close-up of a mechanical device with attached black cable and metal components (no visible text or symbols)natural_image
Close-up of a mechanical device with attached black components and curved arms (no visible text or symbols)natural_image
Black and white photo of a small wheeled robot with visible wheels and a handle, next to a close-up of its cable (no text or symbols)natural_image
Close-up of hands installing or adjusting a black mechanical component with a red accent (no visible text or symbols)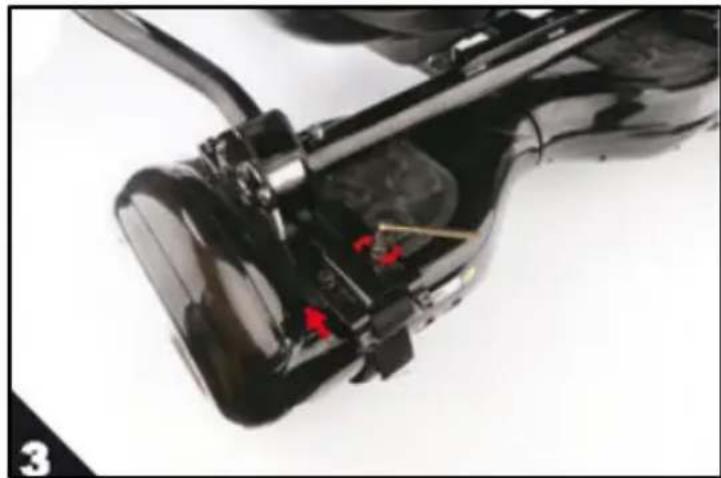
natural_image
Close-up of a black mechanical component with red arrows indicating features, no visible text or symbols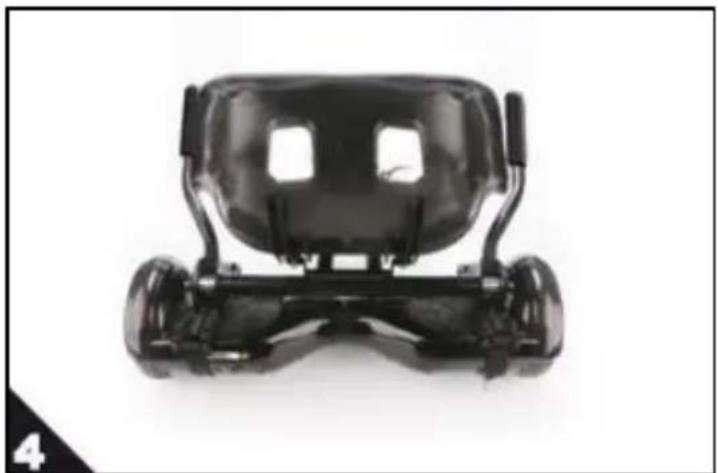
natural_image
Top-down view of a black automotive steering wheel (no text or symbols visible)text_image
Step-by-step instructions for installing a mechanical component, showing step 1 to 4 with red arrows indicating motion.natural_image
Side view of a black stroller with wheels and a red arrow indicating motion (no text or symbols)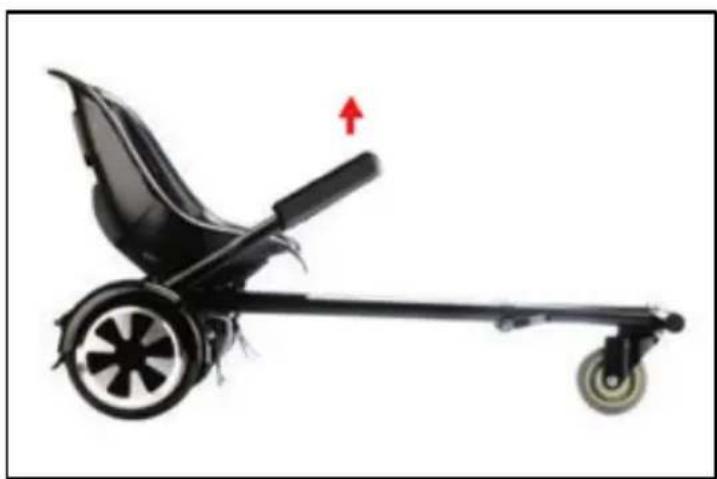
natural_image
Side view of a black stroller with wheels and a red arrow indicating motion (no text or symbols)natural_image
Black electric scooter with wheels and attached sensors, shown in a simple pose (no text or symbols visible)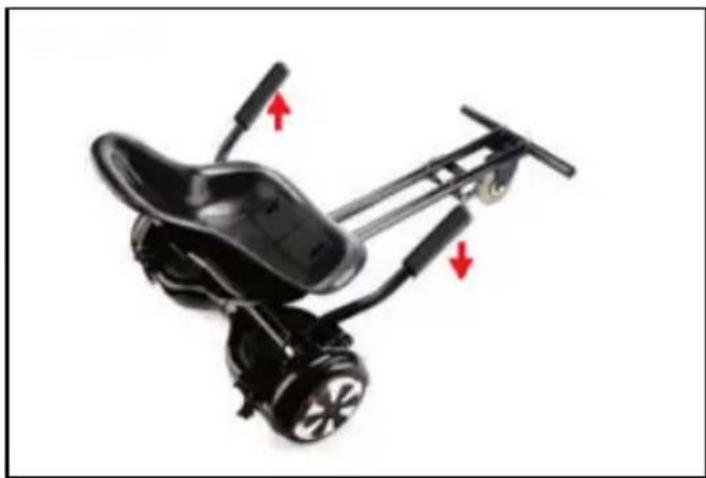
natural_image
Black electric scooter with wheels and red directional arrows indicating motion (no text or symbols)INTRODUÇÃO DAS CORREIAS AO CHASSIS- BANCO......7
FIXAÇÃO AO DOC....8
natural_image
Close-up of hands assembling a black mechanical component with a red arrow indicating a specific part (no text or symbols visible)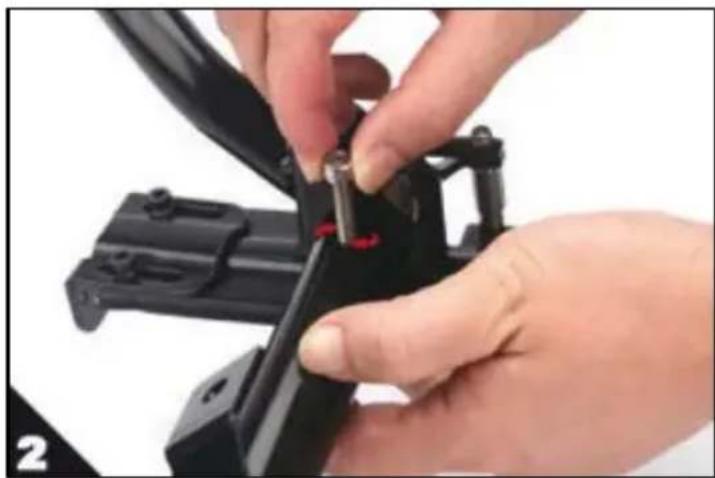
natural_image
Close-up of hands assembling a black mechanical component with a red bolt (no visible text or symbols)

natural_image
Close-up of hands assembling a black mechanical component with a tool, no visible text or symbols
natural_image
Mechanical support bracket with two vertical supports and a central frame (no text or symbols visible)natural_image
Mechanical device with articulated arm and clamped joints (no visible text or symbols)natural_image
Close-up of a black electric scooter with visible wheels and suspension components (no text or symbols)natural_image
Close-up of hands adjusting a black mechanical component with a red arrow indicator (no visible text or symbols)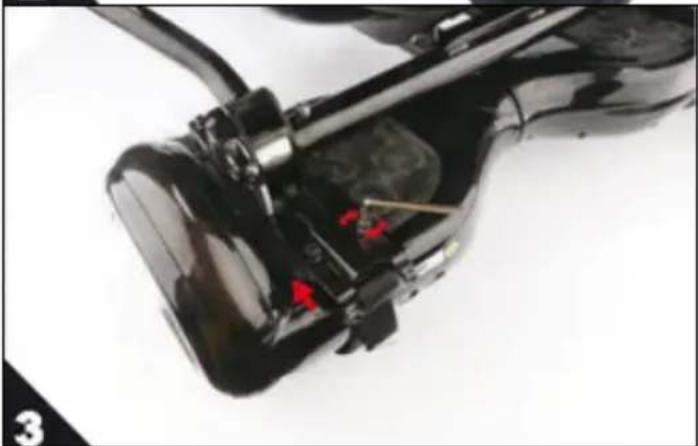
natural_image
Close-up of a black mechanical device with red arrows indicating a component or assembly (no visible text or symbols)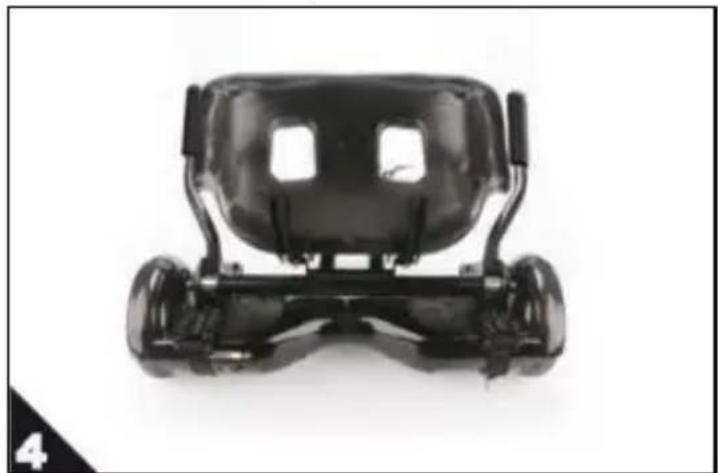
natural_image
Front view of a black automotive steering wheel (no text or symbols visible)SE UTILIZAR CORREIAS EM VELCRO, BASTA PASSAR AS MESMAS NOS SUPPORTES E ADERI-LAS
ATENÇÃO: REGULAR A LARGURA DE MODO SIMÉTRICO E VERIFICAR SE A PARTE DAS ALAVANCAS DE COMANDO SE ENCONTRA NO MEIO DA PLATAFORMA

natural_image
Side view of a black stroller with wheels and a red arrow indicating motion (no text or symbols)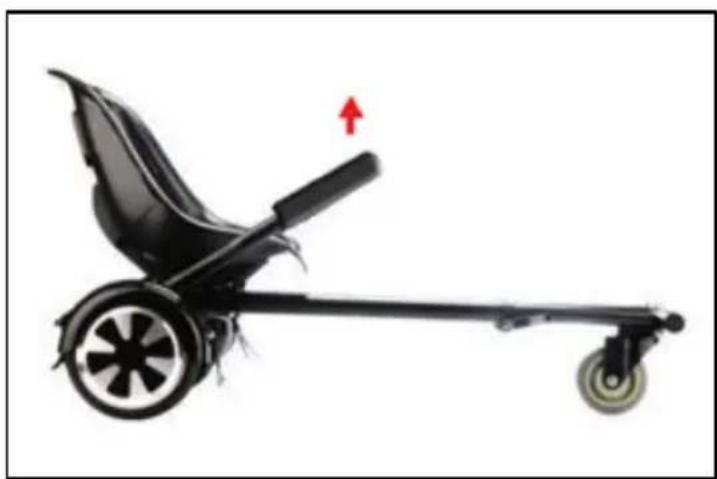
natural_image
Side view of a black stroller with wheels and a red arrow indicator (no text or symbols)natural_image
Black electric scooter with wheels and red directional arrows indicating motion (no text or symbols)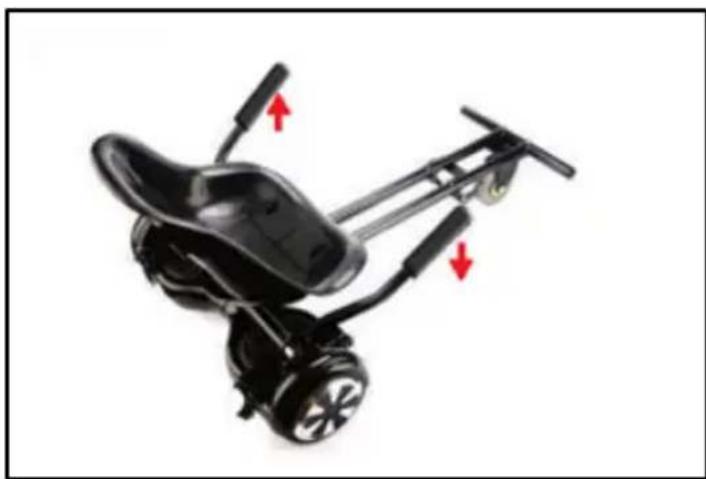
natural_image
Black electric scooter with wheels and attached sensors, shown in a simple pose (no text or symbols visible)natural_image
Close-up of hands assembling a black mechanical component with a red arrow indicating a specific part (no text or symbols visible)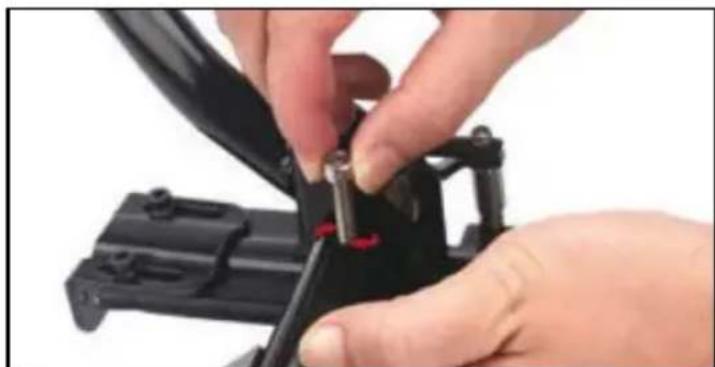
natural_image
Close-up of hands using a tool to adjust or install a black mechanical component (no visible text or symbols)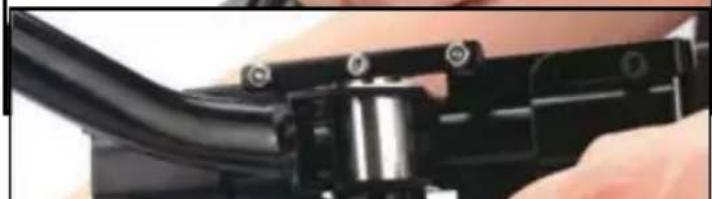
natural_image
Close-up of a hand holding a black mechanical component with mounting holes (no visible text or symbols)
natural_image
Mechanical support bracket with two vertical supports and a central frame (no text or symbols visible)natural_image
Mechanical device with articulated arm and attached cable (no visible text or symbols)natural_image
Close-up of a black toy car with visible wheels and a handle, next to a close-up of a small electronic device (no text or symbols visible)natural_image
Close-up of hands installing or adjusting a black mechanical component with a red accent (no visible text or symbols)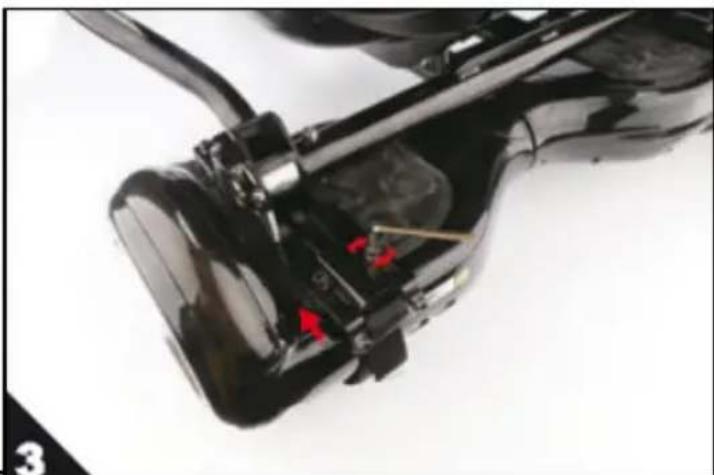
natural_image
Close-up of a black mechanical component with red arrows indicating features, no visible text or symbols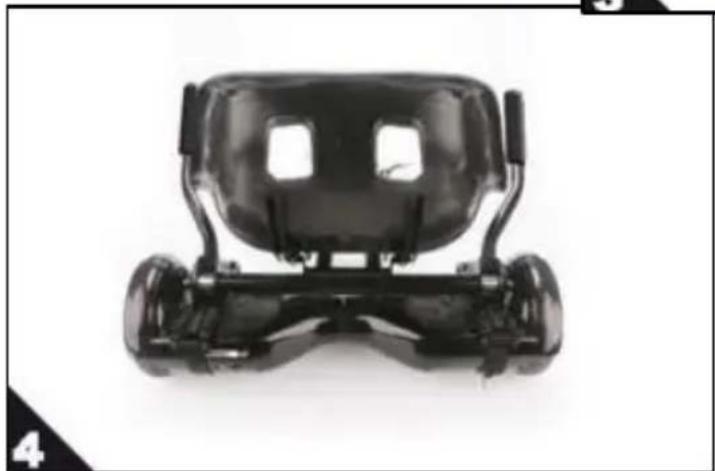
natural_image
Front view of a black automotive steering wheel (no text or symbols visible)SI VOUS UTILISEZ DES SANGLES EN VELCRO, IL SUFFIRA DE FAIRE PASSER LES SANGLES DANS LES SUPPORTS PUIS DE LE FAIRE ADHERER.
ATTENTION : RÉGLER LA LARGEUR DE MANIÈRE SYMÉTRIQUE ET VÉRIFIER QUE LA PARTIE DES LEVIERS DE COMMANDE RETOMBE AU MILIEU DE LA PLANCHE

FIXATION DU CHÂSSIS-ROUE
text_image
Step-by-step instructions for installing a mechanical component, showing step 1 to 4 with red arrows indicating motion.INSTRUCTIONS DE CONDUITE
natural_image
Side view of a black stroller with a red arrow pointing to the side wheel (no text or symbols visible)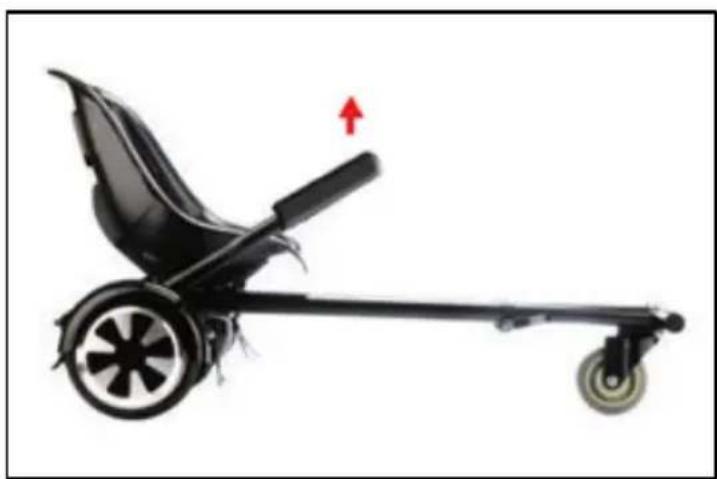
natural_image
Side view of a black stroller with wheels and a red arrow indicating motion (no text or symbols)natural_image
Black electric scooter with wheels and a side-mounted sensor, shown with red arrows indicating motion direction (no text or symbols)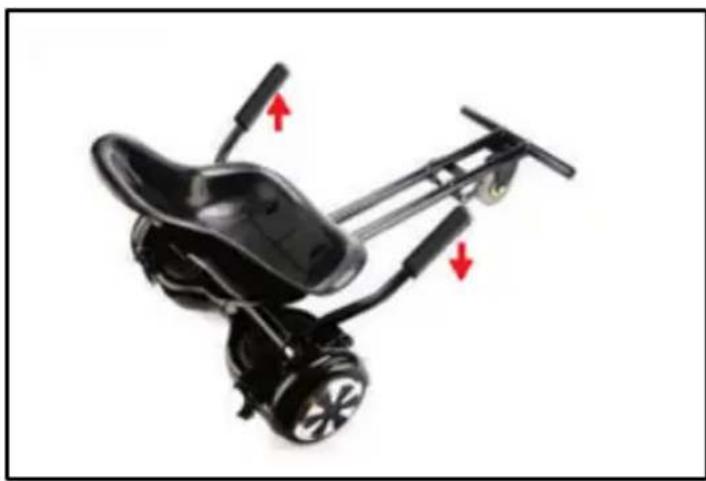
natural_image
Black electric scooter with attached power cord and wheels, showing red directional arrows (no text or symbols)natural_image
Close-up of hands assembling a black mechanical component with a red arrow indicating a detail (no text or symbols visible)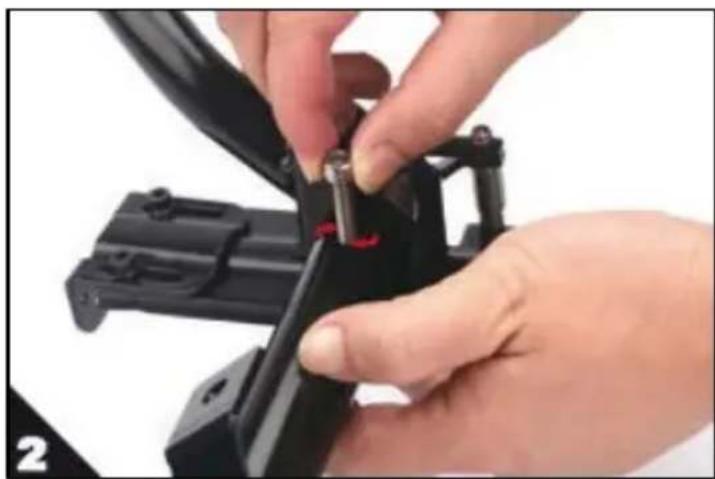
natural_image
Close-up of hands assembling a black mechanical component with red pins (no visible text or symbols)
natural_image
Close-up of hands assembling a black mechanical component with a tool, no visible text or symbols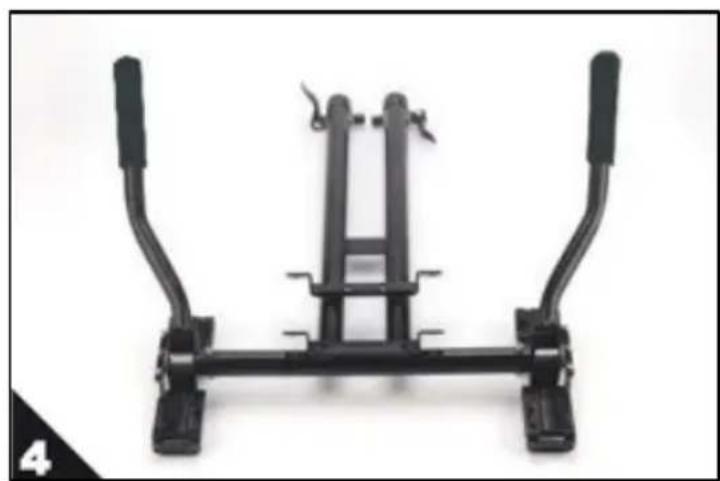
natural_image
Mechanical support bracket with two vertical supports and a central frame (no text or symbols visible)natural_image
Mechanical linkage device with metal components and a red arrow indicator (no text or symbols)natural_image
Mechanical device with black frame and metallic components, no visible text or symbols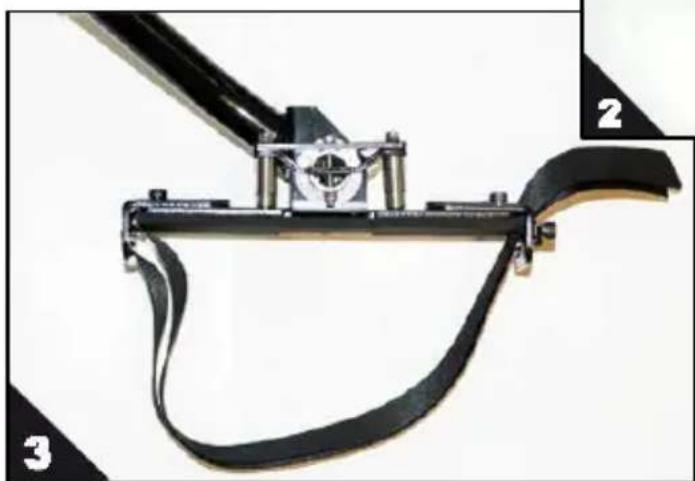
natural_image
Close-up of a mechanical device with black bands and a central hub, labeled 2 and 3 (no visible text or symbols on the device itself)natural_image
Close-up of a mechanical device with attached cable and lever mechanism (no visible text or symbols)natural_image
Black and white photo of a black electric scooter with visible wheels and a hood (no text or symbols)natural_image
Front view of a black automotive steering wheel (no text or symbols visible)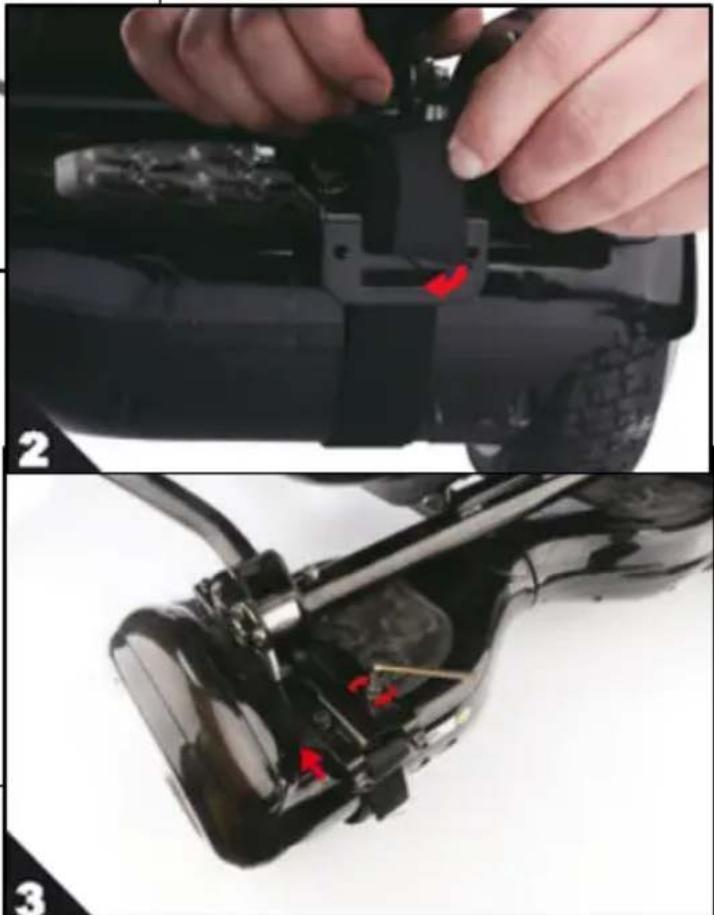
natural_image
Two-panel image showing a hand adjusting a black electronic device with red arrows indicating adjustment points (no text or symbols present)natural_image
Side view of a black stroller with a red arrow pointing to the side wheel (no text or symbols visible)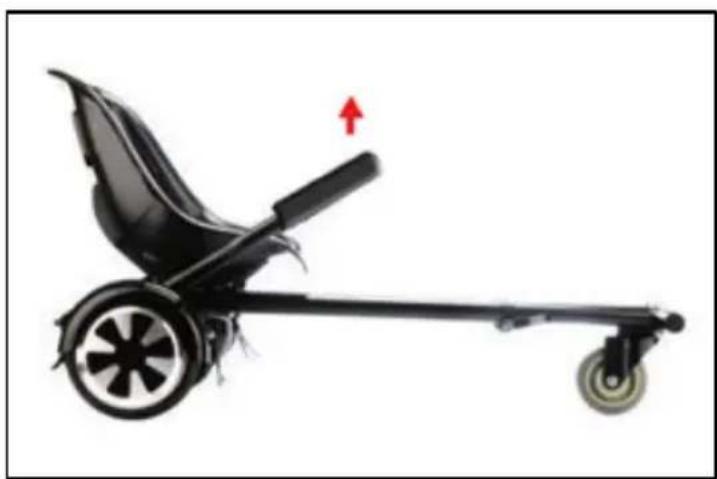
natural_image
Side view of a black stroller with wheels and a red arrow indicating motion (no text or symbols)natural_image
Black electric scooter with wheels and attached suspension, shown with red arrows indicating motion direction (no text or symbols)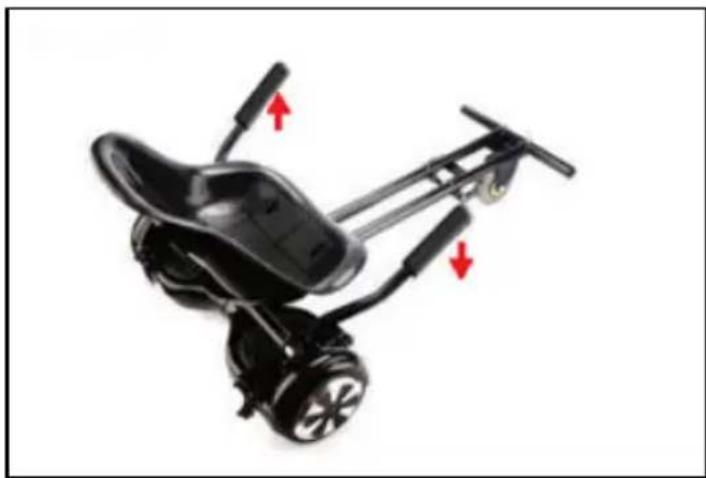
natural_image
Black electric scooter with wheels and red directional arrows indicating motion (no text or symbols)Produced and Imported by Hellatron S.p.A.
Legal: Via A. Mario, 65 - 20149 Milano - Italy