
7025035008 - Heating GRE - Free user manual and instructions
Find the device manual for free 7025035008 GRE in PDF.
| Product type | Solar pool heater |
| Brand | GRE |
| Model | 7025035008 |
| Panel dimensions | 0.6 m x 6.1 m (2 ft x 20 ft) |
| Panel weight | Approximately 5 kg |
| Power source | Solar (panels) |
| Main functions | Heat pool water by solar circulation |
| Heating capacity | Up to +6 °C depending on sunlight |
| Recommended number of panels | 1 to 4 depending on pool size |
| Recommended orientation | South, then West or East |
| Installation slope | 30° to 45° |
| Connection type | Flexible PVC hose (not included) and adapters |
| Panel material | Reinforced rubber (specified flexible after sun exposure) |
| Routine maintenance | Check for leaks and tighten clamps |
| Winterizing | Drain completely and store away from frost |
| Safety | Do not walk on panel; avoid shading |
| Included parts | Adapters, plugs, washers, clamps, connecting hose |
| Warranty | 2 years against conformity defects |
| Usage | With existing pool pump (minimum 1 HP recommended) |
| Operating temperature | Use in sunny weather only |
Frequently Asked Questions - 7025035008 GRE
User questions about 7025035008 GRE
0 question about this device. Answer the ones you know or ask your own.
Ask a new question about this device
Download the instructions for your Heating in PDF format for free! Find your manual 7025035008 - GRE and take your electronic device back in hand. On this page are published all the documents necessary for the use of your device. 7025035008 by GRE.
USER MANUAL 7025035008 GRE
We reserve to change all of part of the articles or contents of this document, without prior notice.
Read all the instructions before installing your solar heating system.
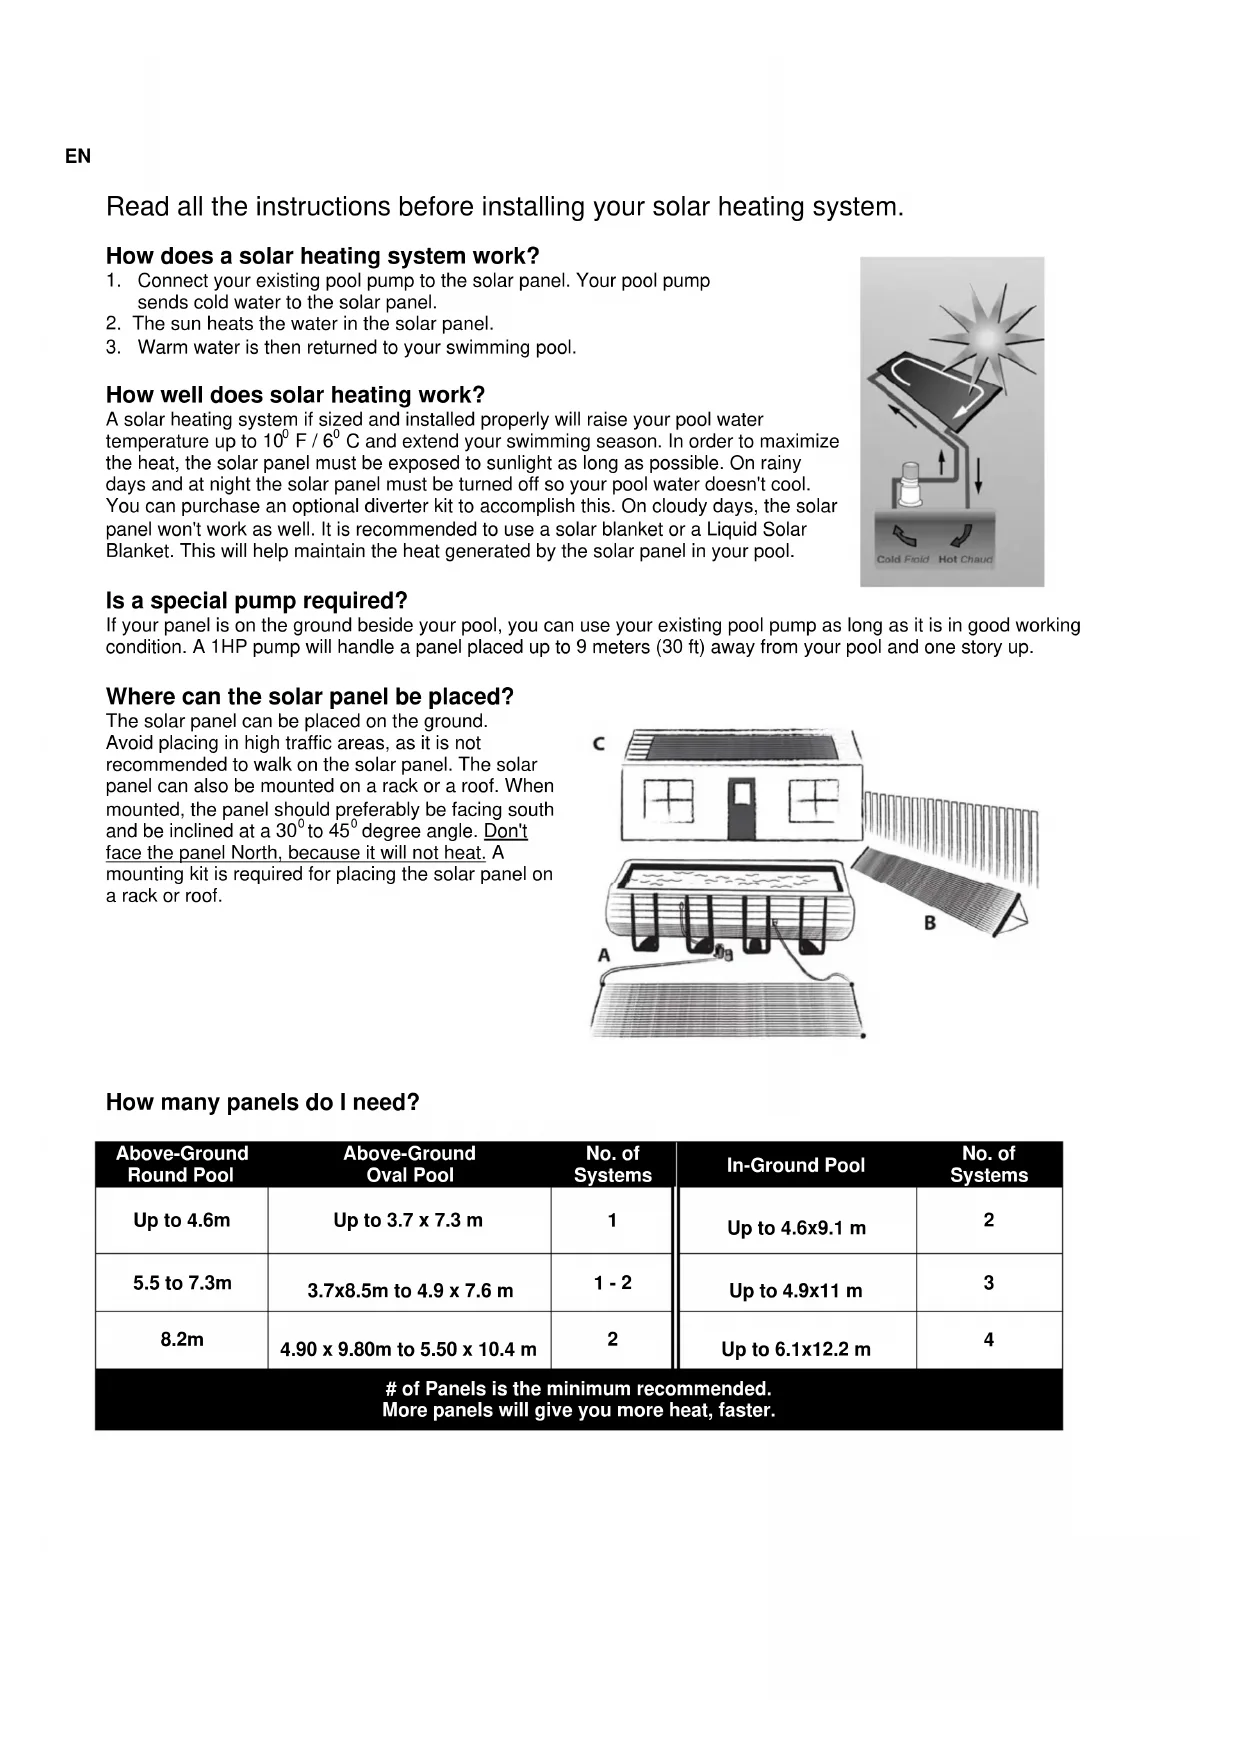
How does a solar heating system work?
- Connect your existing pool pump to the solar panel. Your pool pump sends cold water to the solar panel.
- The sun heats the water in the solar panel.
- Warm water is then returned to your swimming pool.
How well does solar heating work?
A solar heating system if sized and installed properly will raise your pool water temperature up to 10^0F / 6^0C and extend your swimming season. In order to maximize the heat, the solar panel must be exposed to sunlight as long as possible. On rainy days and at night the solar panel must be turned off so your pool water doesn't cool. You can purchase an optional diverter kit to accomplish this. On cloudy days, the solar panel won't work as well. It is recommended to use a solar blanket or a Liquid Solar Blanket. This will help maintain the heat generated by the solar panel in your pool.
Is a special pump required?
If your panel is on the ground beside your pool, you can use your existing pool pump as long as it is in good working condition. A 1HP pump will handle a panel placed up to 9 meters (30 ft) away from your pool and one story up.
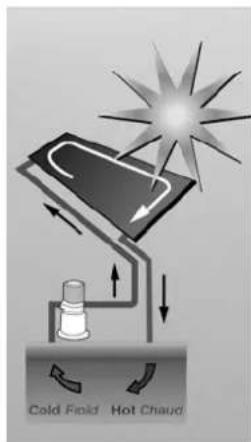
Where can the solar panel be placed?
The solar panel can be placed on the ground. Avoid placing in high traffic areas, as it is not recommended to walk on the solar panel. The solar panel can also be mounted on a rack or a roof. When mounted, the panel should preferably be facing south and be inclined at a 30^ to 45^ degree angle. Don't face the panel North, because it will not heat. A mounting kit is required for placing the solar panel on a rack or roof.
How many panels do I need?
| Above-Ground Round Pool | Above-Ground Oval Pool | No. of Systems | In-Ground Pool | No. of Systems |
| Up to 4.6m | Up to 3.7 x 7.3 m | 1 | Up to 4.6x9.1 m | 2 |
| 5.5 to 7.3m | 3.7x8.5m to 4.9 x 7.6 m | 1 - 2 | Up to 4.9x11 m | 3 |
| 8.2m | 4.90 x 9.80m to 5.50 x 10.4 m | 2 | Up to 6.1x12.2 m | 4 |
| # of Panels is the minimum recommended. More panels will give you more heat, faster. | ||||
Box Contents:
| Qty Part # Description | ||
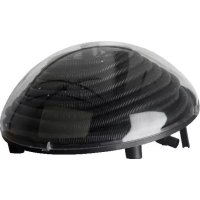
| 1 | SK-1220 | SunPirate solar panel 2ft x 20ft |
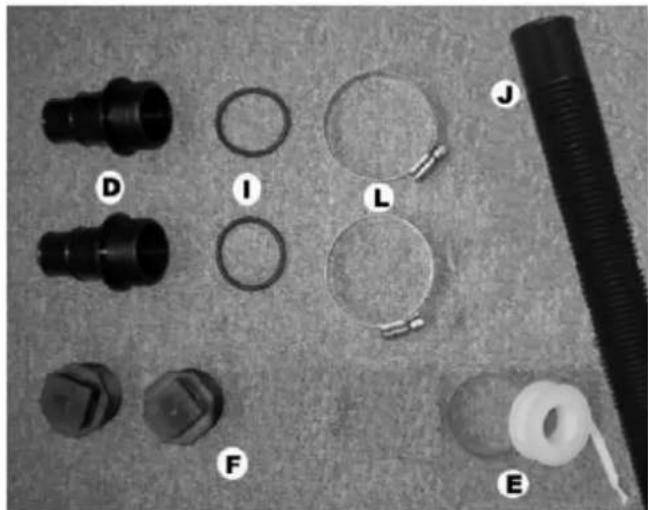
| Qty Part # Description | ||
| 2 SK-FTG-D Threaded combination hose adapter | ||
| 2 | SK-FTG-I | "O" rings |
| 2 | SK-FTG-F | Threaded cap |
| 1 | SK-FTG-J | Hose |
| 2 SK-FTG-L Metal collar (Hose clamp) | ||
| 1 SK-FTG-E Roll of Teflon tape | ||
INSTALLATION
Additional parts required
- Flexible pool hose or rigid PVC pipe. Length dependent on distance from pool pump to solar panels.
Metal collars (Hose clamps) - Quantity dependant on installation.
For rack or roof placement a mounting kit (part # SOL-RMK3) is required
Tools required
- Flat head screwdriver.
- For rack or roof placement: a utility knife, a power drill and silicone sealant.
PANEL ASSEMBLY
- Choose placement for your solar panel(s). Make sure that it will be in the sun for most of the day. The area should be clear of sharp objects.
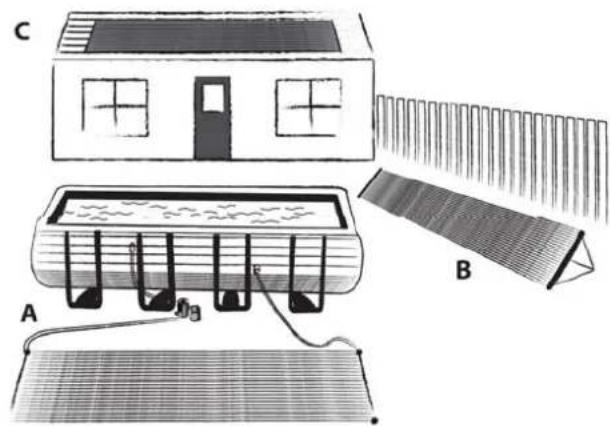
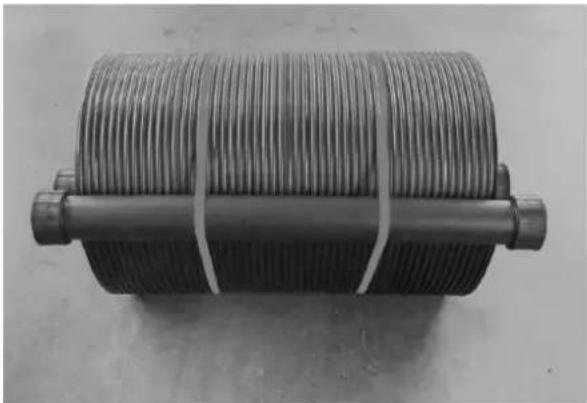
- Take the panel out of the box, remove the strap from panel and let the panel sit in the sun for approximately 30 minutes so it will become flexible.
- a) Installation: one system on ground.
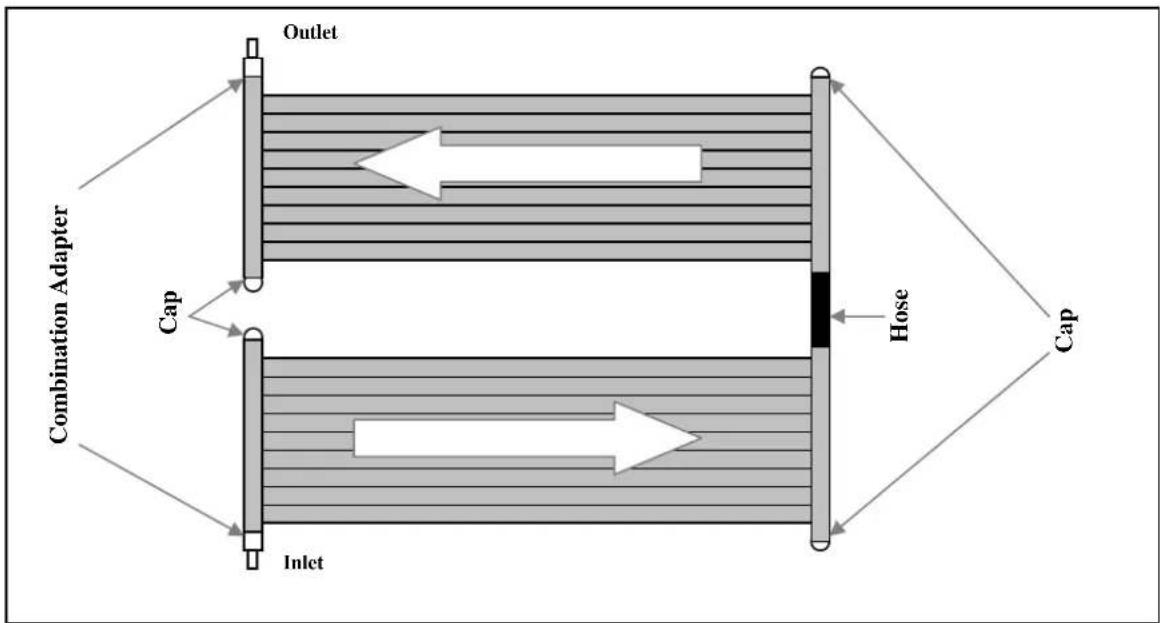
Diagram
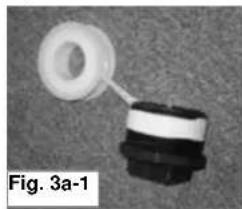
- Apply Teflon tape to threads of all 2 caps (SK-FTG-F) See Fig 3a-1
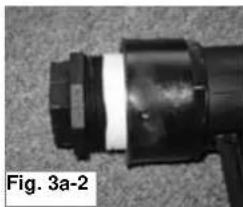
- Thread all 4 caps into the panels as per Diagram Step 3a. Do not over tighten. See Fig 3a-2
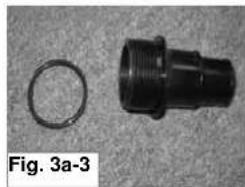
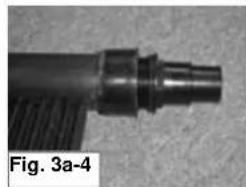
Put "O" rings (SK-FTG-I) on both combination adapters (SK-FTGD) See Fig 3a-3 - Thread both combination adapters into the panels as per Diagram Step 3a. Do not over tighten. See Fig 3a-4
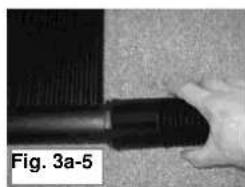
- Push the hose (SK-FTG-J) over the panel header as per Diagram Step 3a. Slide a metal collar (SK-FTG-L) onto the hose. Place metal collar 14 from edge and tighten collar with screwdriver. See Fig 3a-5.
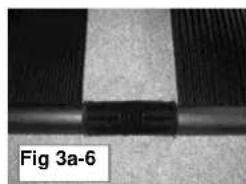
- Slide another metal collar onto the hose. Connect the 2 panels together by pushing the rubber hose over the second panel header. Tighten metal collar to secure assembly. See Fig 3a-6
Step
3a
CONNECTING TO POOL
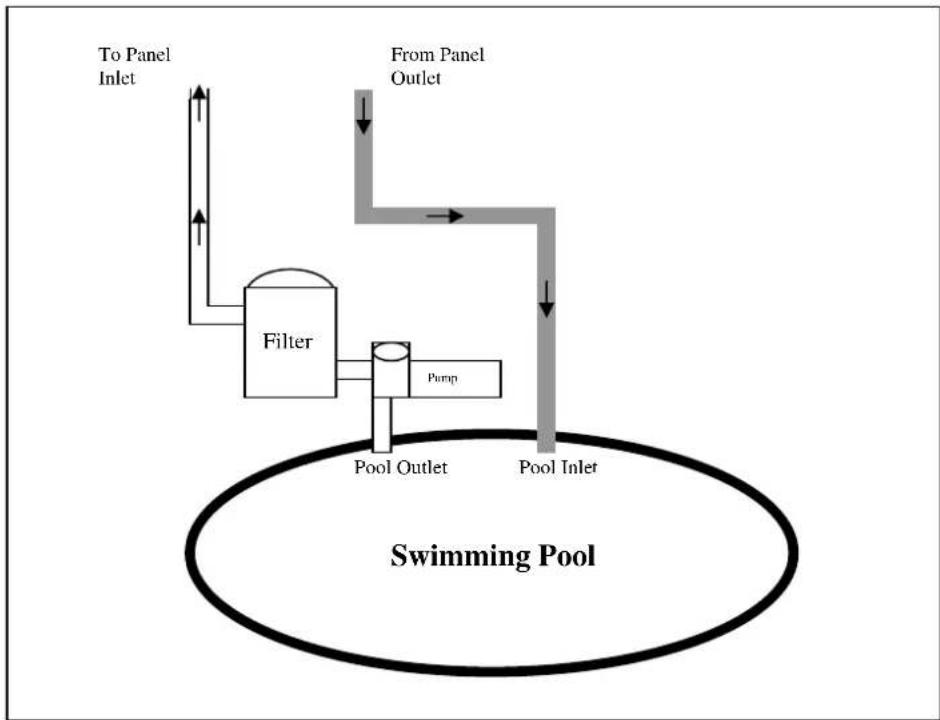
Diagram C-1
- Turn off your pool pump. Block the inlet and outlet of your pool so that the water won't empty when you are connecting your panel(s).
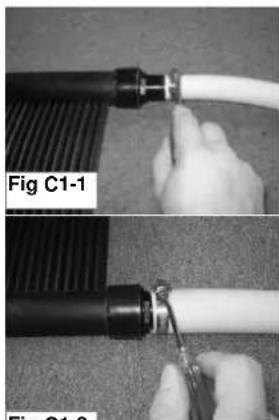
- Remove the hose from the pool inlet ( hose between the filter and the pool ) and connect the hose to the panel inlet. If hose is too short, you need to purchase a new one. Make sure you purchase the appropriate size that is compatible with your existing pool equipment. For 1^1 / 4 " hose, it will only slide over the small end of the combination adapter. See Fig C1-1. For 1^1 / 2 " hose, it will slide all the way to flange of combination adapter. See Fig C1-2. Place metal collar 14 " from edge and tighten collar with screwdriver. See Diagram C-1.
- Connect another hose (not supplied) from the panel outlet to the pool inlet. See Diagram C-1.
- Make sure that your hoses are all connected the correct way and that all the collars have been tightened. Unblock the inlet and outlet of your pool.
- Turn on your pool pump. Check for any leaks. If any of the threaded fittings leak, remove the fitting and apply more Teflon. If any of the hoses leak at the connection, loosen the collar and push the hose over the fitting and re-tighten the metal collar. You will see air bubbles coming from the pool inlet. This is normal and will stop once the air inside the panels has been purged.
Fig C1-2
Note: Without a diverter, your solar heating system is always ON. At night, your solar panels will cool your swimming pool. We recommend you close your pump at night to avoid this or purchase a diverter kit (SOL-DK)
Operation and Maintenance
Turn on your solar heating system whenever the panel(s) are in sunlight. You will know the panel is working by touching it, it should feel cool to the touch. That means the heat from the sun is being transferred to the water inside the panel. Turn off your solar heating system at night and whenever it is raining. Failing to do so will cool your pool. It is recommended to close your solar heating system whenever you do a backwash or whenever you manually vacuum your swimming pool. It is also recommended to use a solar blanket or a Liquid Solar Blanket. This will help keep more of the heat generated by the solar panel in your pool.
Winterizing
System(s) on ground
At the end of the season, your solar panels must be drained of all water.
- After your pool has been closed, disconnect the hoses from the panel.
- Manipulate the panel until the water is completely out.
- Roll the panel up.
- Store the panel in a heated place until next season.
System(s) mounted on a roof or a rack
At the end of the season, your solar panels must be drained of all water.
After your pool has been closed, turn your by-bass valve in such a way to allow the water from your panels to drain. Wait half an hour for panels to drain.
- Unscrew the Vacuum Relief Valve or the Threaded cap at the top of the solar system.
- Unscrew the Threaded cap at the bottom of the solar system and make sure all the water is drained out of the system. All your plumbing should be installed in such a way to allow full drainage of system. If you are not sure that all panels have been drained properly: disconnect each panel, raise them up and make sure that no water is present. Once completely drained, the panels can be left on the roof or rack. The SunPirate panels are designed to withstand the harshest winters.
- Apply Teflon to the Vacuum Relief Valve and Threaded Caps and re-screw them into the solar system. Do not over tighten.
Important : Unlike the pipes for your pool, blowing air in the panel will not drain it. The air will only empty a few tubes.
Internal Freeze damage is not covered by the warranty
1.1 In accordance with these provisions, the seller guarantees that the product corresponding to this guarantee ("the Product") is in perfect condition at the time of delivery.
1.2 The Guarantee Term for the Product is two (2) years from the time it is delivered to the purchaser.
1.3 In the event of any defect in the Product that is notified by the purchaser to the seller during the Guarantee Term, the seller will be obliged to repair or replace the Product, at his own cost and wherever he deems suitable, unless this is impossible or unreasonable.
1.4 If it is not possible to repair or replace the Product, the purchaser may ask for a proportional reduction in the price or, if the defect is sufficiently significant, the termination of the sales contract.
1.5 The replaced or repaired parts under this guarantee, will not extend the guarantee period of the original Product, but will have a separate guarantee.
1.6 In order for this guarantee to come into effect, the purchaser must provide proof of the date of purchase and delivery of the Product.
1.7 If, after six months from the delivery of the Product to the purchaser, he notifies a defect in the Product, the purchaser must provide proof of the origin and existence of the alleged defect.
1.8 This Guarantee Certificate is issued without prejudice to the rights corresponding to consumers under national regulations.
2 INDIVIDUAL TERMS
2.1 This guarantee covers the products referred to in this manual.
2.2 This Guarantee Certificate will only be applicable in European Union countries.
2.3 For this guarantee to be effective, the purchaser must strictly follow the Manufacturer's instructions included in the documentation provided with the Product, in cases where it is applicable according to the range and model of the Product.
2.4 When a time schedule is specified for the replacement, maintenance or cleaning of certain parts or components of the Product, the guarantee will only be valid if this time schedule has been followed.
3 LIMITATIONS
3.1 This guarantee will only be applicable to sales made to consumers, understanding by "consumer", a person who purchases the Product for purposes not related to his professional activities.
3.2 The normal wear resulting from using the product is not guaranteed. With respect to expendable or consumable parts, components and/or materials, such as batteries, light bulbs, etc. the stipulations in the documentation provided with the Product, will apply.
3.3 The guarantee does not cover those cases when the Product; (I) has been handled incorrectly; (II) has been repaired, serviced or handled by nonauthorised people or (III) has been repaired or serviced not using original parts. In cases where the defect of the Product is a result of incorrect installation or start-up, this guarantee will only apply when said installation or start-up is included in the sales contract of the Product and has been conducted by the seller or under his responsibility.
ES-CERTIFICADO DE GARANTÍA
MANUFACTURAS GRE. S.A.
ARITZ BIDEA N°57, BELAKO INDUSTRIALDEA
48100 MUNGIA (BIZKAIA) ESPANA
TEL. +34 946 74 11 16 FAX: 34 946 74 17 08
http://www.gre.es
N^o REG.IND.:48-06762
We reserve the right to change all or part of the articles or contents of this document, without prior notice
Nos reservamos el derecho decaeir total o parcialmente las caracterticas de nuestros articulos o el contentido de este documento sin previo aviso
- Nous nous réservons le droit de modifier totallyment ou en partie les caractéristiques de nos articles ou le contenu de ce document sans préavis
- Wir behalten uns das Recht vor, die technischen Daten unserer Artikel oder den Inhalt these Dokumentes ohne vorherigen Hinweis ganz oder teilweise zu ändern
- Ci riserviamo il diritto diambiare totalmente o parzialmente le caratteristiche tecniche dei nostri prodotti ed il contentuto di quello documento alla nessun preavviso
- Wij behouden ons hetrecht voor geheel of gedeeltek de kenmerken van onsze artikelen of de inhoud van deze handleiding zonder voorafgaand bericht te wijzigen
- How does a solar heating system work?
- How well does solar heating work?
- Is a special pump required?
- Where can the solar panel be placed?
- INSTALLATION
- Additional parts required
- Tools required
- PANEL ASSEMBLY
- CONNECTING TO POOL
- Operation and Maintenance
- Winterizing
- System(s) on ground
- System(s) mounted on a roof or a rack
- Internal Freeze damage is not covered by the warranty
- INDIVIDUAL TERMS
- LIMITATIONS
- ES-CERTIFICADO DE GARANTÍA
Brand : GRE
Model : 7025035008
Category : Heating