 — Heating — Mode d'emploi PDF")
90230 (CN) - Heating GRE - Free user manual and instructions
Find the device manual for free 90230 (CN) GRE in PDF.
| Product type | Solar heating for pool |
| Brand | GRE |
| Model | 90230 (CN) |
| Use | Heat pool water using solar energy |
| Minimum pump flow rate | 2000 l/h |
| Recommended tilt | 30° |
| Recommended orientation | South |
| Hose connections | 32 mm and 38 mm (with reduction included) |
| Delivery contents | Solar installation with transparent cover, retractable legs, long hoses (1.2 m), short hose, 2 adapters 32/38 mm, bag of hose clamps, rubber reduction 38/32 mm, white cover, assembly instructions |
| Assembly | Easy, requires a screwdriver |
| Maximum number in series | 4 installations maximum |
| Indicative capacity | 1 installation for a pool of 7500 L (depending on sunlight) |
| Winter protection | Completely drain the system and store away from frost |
| Main material | Plastic (transparent cover, spiral hose) |
| Maintenance | Clean the transparent cover from dirt and dust |
| Safety | Low pressure drop, can remain connected without solar radiation |
| Power supply | Passive solar (requires existing filter pump) |
| Colors | Transparent cover, white cover provided for very hot days |
| Repairability | Not specified, parts not detailed |
Frequently Asked Questions - 90230 (CN) GRE
User questions about 90230 (CN) GRE
0 question about this device. Answer the ones you know or ask your own.
Ask a new question about this device
Download the instructions for your Heating in PDF format for free! Find your manual 90230 (CN) - GRE and take your electronic device back in hand. On this page are published all the documents necessary for the use of your device. 90230 (CN) by GRE.
USER MANUAL 90230 (CN) GRE
We reserve to change all of part of the articles or contents of this document, without prior notice.
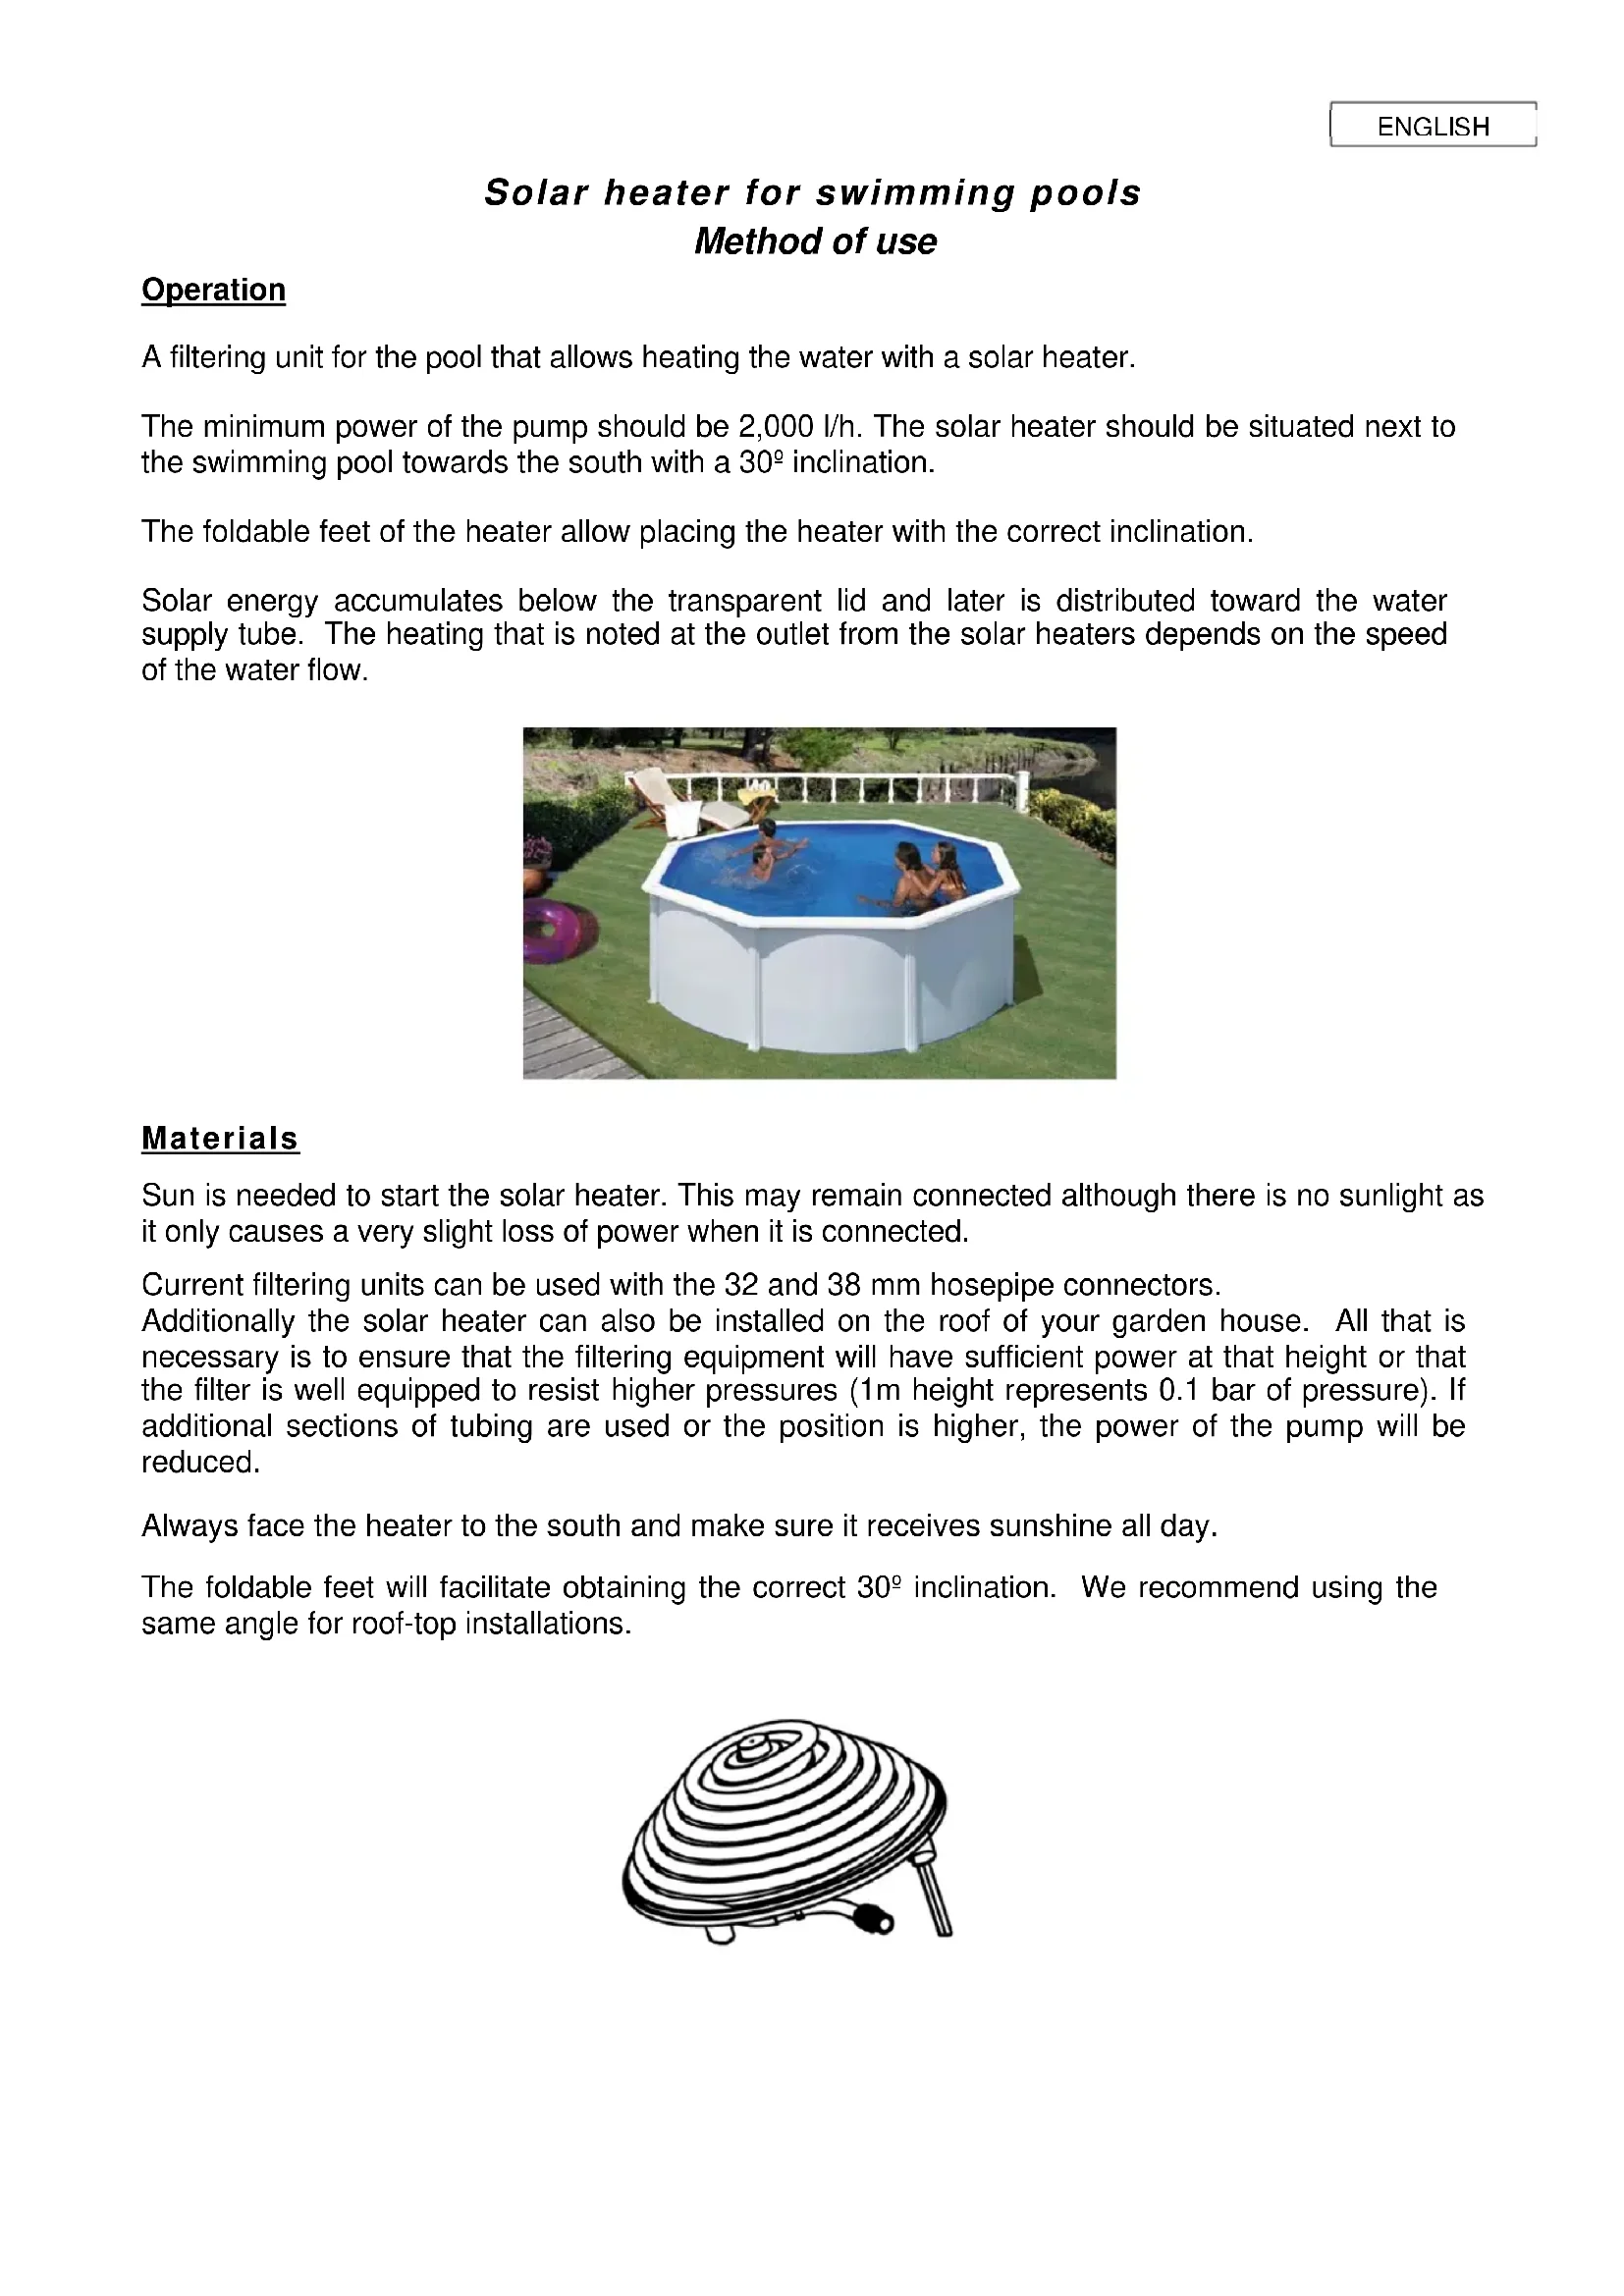
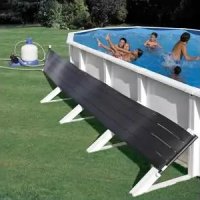
Solar heater for swimming pools Method of use
Operation
A filtering unit for the pool that allows heating the water with a solar heater.
The minimum power of the pump should be 2,000 l/h. The solar heater should be situated next to the swimming pool towards the south with a 30^ inclination.
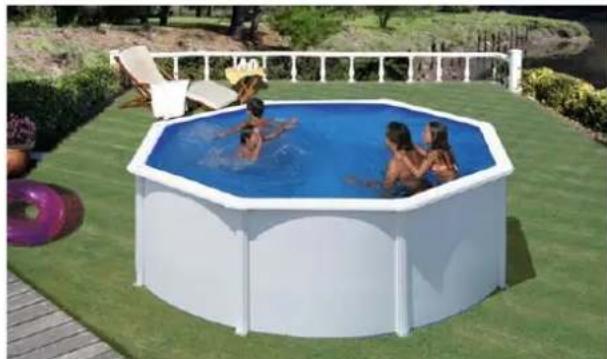
The foldable feet of the heater allow placing the heater with the correct inclination.
Solar energy accumulates below the transparent lid and later is distributed toward the water supply tube. The heating that is noted at the outlet from the solar heaters depends on the speed of the water flow.
Materials
Sun is needed to start the solar heater. This may remain connected although there is no sunlight as it only causes a very slight loss of power when it is connected.
Current filtering units can be used with the 32 and 38mm hosepipe connectors.
Additionally the solar heater can also be installed on the roof of your garden house. All that is necessary is to ensure that the filtering equipment will have sufficient power at that height or that the filter is well equipped to resist higher pressures (1m height represents 0.1 bar of pressure). If additional sections of tubing are used or the position is higher, the power of the pump will be reduced.
Always face the heater to the south and make sure it receives sunshine all day.
The foldable feet will facilitate obtaining the correct 30^ inclination. We recommend using the same angle for roof-top installations.
There is a white cover inside the box that is for use on extremely hot days to avoid the water overheating.
Easy assembly
The only tool you need is a screwdriver to fix the hosepipe to the solar heater. There are long hosepipes included for easy installation. If you need to connect more than one solar heater, the short piece of hosepipe can be used. We recommend not assembling more than 4 solar heaters in series. If more are needed, for a very large pool, we recommend assembling 2 or 3 series in parallel.
We recommend using one solar installation for pools up to 7.5 - 10m^3
(This is merely a suggested size as the result depends on exposition time and solar power).
Easy assembly
Open the box and check that all the elements are included according to the following list:
1- Solar heater with detachable transparent lid
2- Unfold the feet at the bottom part to obtain a 30^ inclination
3- Long tube (1.2m) for connecting the solar heater to the pool
4- Short tube for coupling 2 heaters at the same time
5- 2 adaptors for 32 / 38mm connection
6- Bag with metallic clamps
7- Rubber reduction pies 38/32 mm
8- White cover
9- Instruction manual
Find the correct position to locate the solar heater
Stop the pump and make sure there is no water in the circuit. Assemble the feet of lower part of the solar installation.

Assemble the 2 adaptors at the lower part of the solar heater
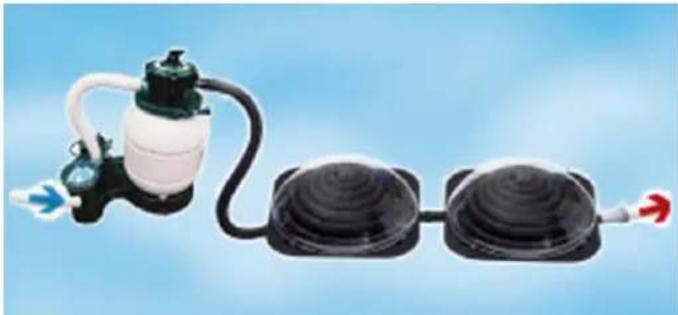
Install the hosepipes between the filtering unit, the solar heater and the swimming pool

32 mm hosepipe adaptor: Connect this directly to the adaptor and fix it with the metallic clamps.
38 mm hosepipe adaptor: First connect the 32/38 mm rubber reduction piece to the adaptor. Later connect the 38 mm hosepipe to the adaptor and fix it with the metallic clampRemove the dust and filth from the transparent cover
-
Start the filtering equipment with the water circuit open.
-
Check the water-tightness of the heater and of the hosepipes
Now, you can start saving money thanks to the solar heater by heating your pool free of charge
Installation of several systems
Identical assembly to that above except we use the short hoses to couple the heaters with each other
Protection for winter
To avoid icing problems, completely purge the system during the winter Store the heater in a dry spot and free from icing.
Brand : GRE
Model : 90230 (CN)
Category : Heating