Balance CG1S275 - Coffee grinder WILFA - Free user manual and instructions
Find the device manual for free Balance CG1S275 WILFA in PDF.
| Product type | Coffee grinder |
| Brand | Wilfa |
| Model | Uniform CG1S275 |
| Power supply | 220-240 V ~ 50/60 Hz |
| Grind levels | 31 levels (1 to 31) |
| Grind time adjustment | 2 to 50 seconds |
| Digital display | Yes |
| AutoStart function | Yes |
| Standby mode | After 10 minutes of inactivity |
| Burr type | Steel conical |
| Bean hopper capacity | Approximately 200 g |
| Ground coffee container | Included |
| Cleaning brush | Included |
| Material | Plastic and stainless steel |
| Warranty | 5 years |
| Safety | Improperly fixed hopper detection (E1), Overheating protection (E2) |
| Recycling | Compliant with WEEE |
Frequently Asked Questions - Balance CG1S275 WILFA
User questions about Balance CG1S275 WILFA
0 question about this device. Answer the ones you know or ask your own.
Ask a new question about this device
Download the instructions for your Coffee grinder in PDF format for free! Find your manual Balance CG1S275 - WILFA and take your electronic device back in hand. On this page are published all the documents necessary for the use of your device. Balance CG1S275 by WILFA.
USER MANUAL Balance CG1S275 WILFA
natural_image
Black and white photo of a modern kitchen blender with control buttons (no visible text or symbols on the device body)BALANCE
COFFEE GRINDER CG1X-275
EN · Instruction manual
NO · Bruksanvisning
SE · Bruksanvisning
4 IMPORTANT SAFETY INSTRUCTIONS
6 PRODUCT OVERVIEW
7 FUNCTIONS
8 USE
9 CLEANING AND MAINTENANCE
9 TROUBLESHOOTING
10 GUARANTEE
11 PRODUCT SPECIFICATIONS
11 SUPPORT AND SPARE PARTS
11 RECYCLABILITY
EN
IMPORTANT SAFETY INSTRUCTIONS
- Read this manual thoroughly before using and save it for future reference.
- Always disconnect the appliance from the supply if it is left unattended and before assembling, disassembling or cleaning.
- This appliance shall not be used by children. Keep the appliance and its cord out of reach of children.
- Appliances can be used by persons with reduced physical, sensory or mental capabilities or lack of experience and knowledge if they have been given supervision or instruction concerning use of the appliance in a safe way and if they understand the hazards involved.
• Children shall not play with the appliance. - This product is intended for indoor, non-industrial, non-commercial, household use only.
- Do not use the item outdoors or for any other purpose.
- If the supply cord is damaged, it must be replaced by the manufacturer, its service agent or similarly qualified persons in order to avoid a hazard.

EN
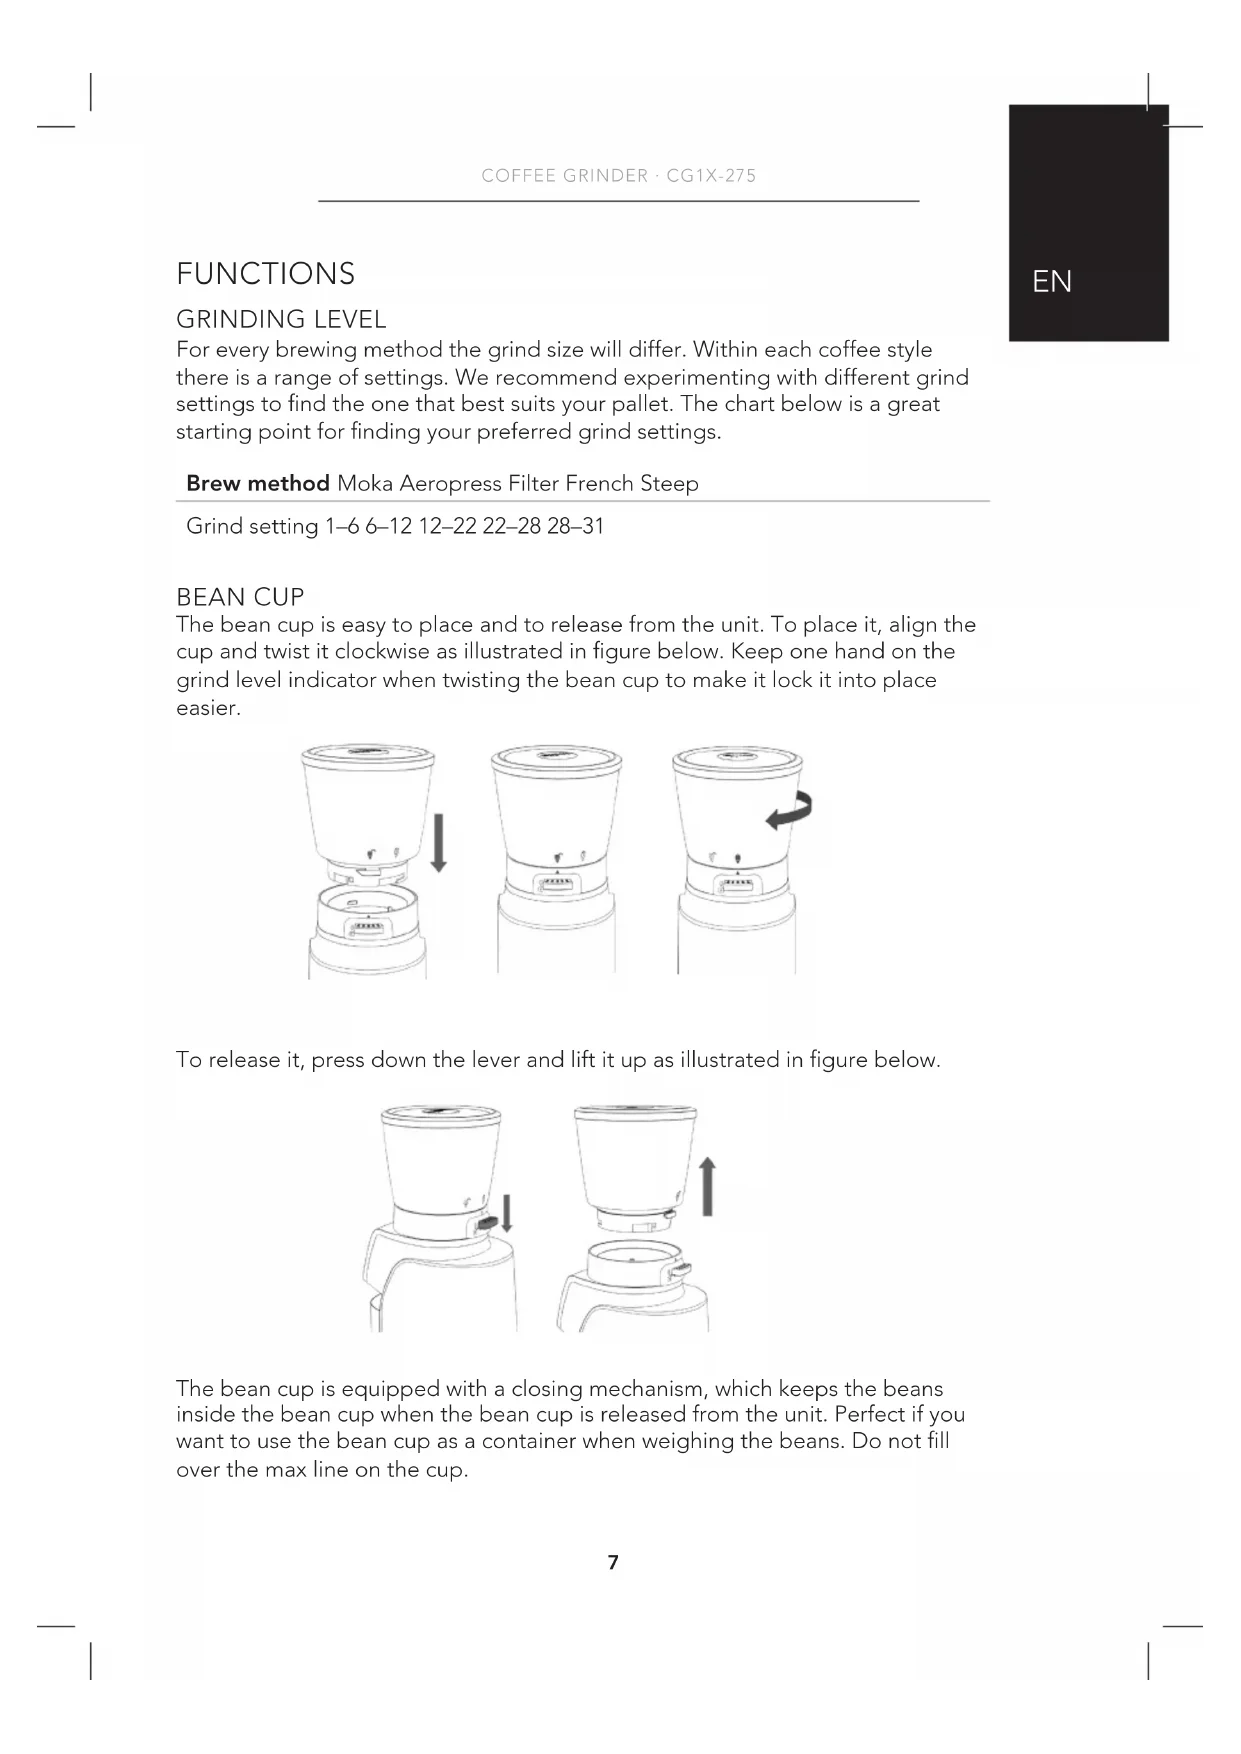
PRODUCT OVERVIEW
- Bean cup lid
- Bean cup
- Top burr
- Bean cup releaser
- Grinding level indicator
- Digital display
-
Grinder main body
-
Coffee container mat
- Coffee ground lid
- Cleaning brush
FUNCTIONS
GRINDING LEVEL
For every brewing method the grind size will differ. Within each coffee style there is a range of settings. We recommend experimenting with different grind settings to find the one that best suits your pallet. The chart below is a great starting point for finding your preferred grind settings.
Brew method Moka Aeropress Filter French Steep
Grind setting 1–6 6–12 12–22 22–28 28–31
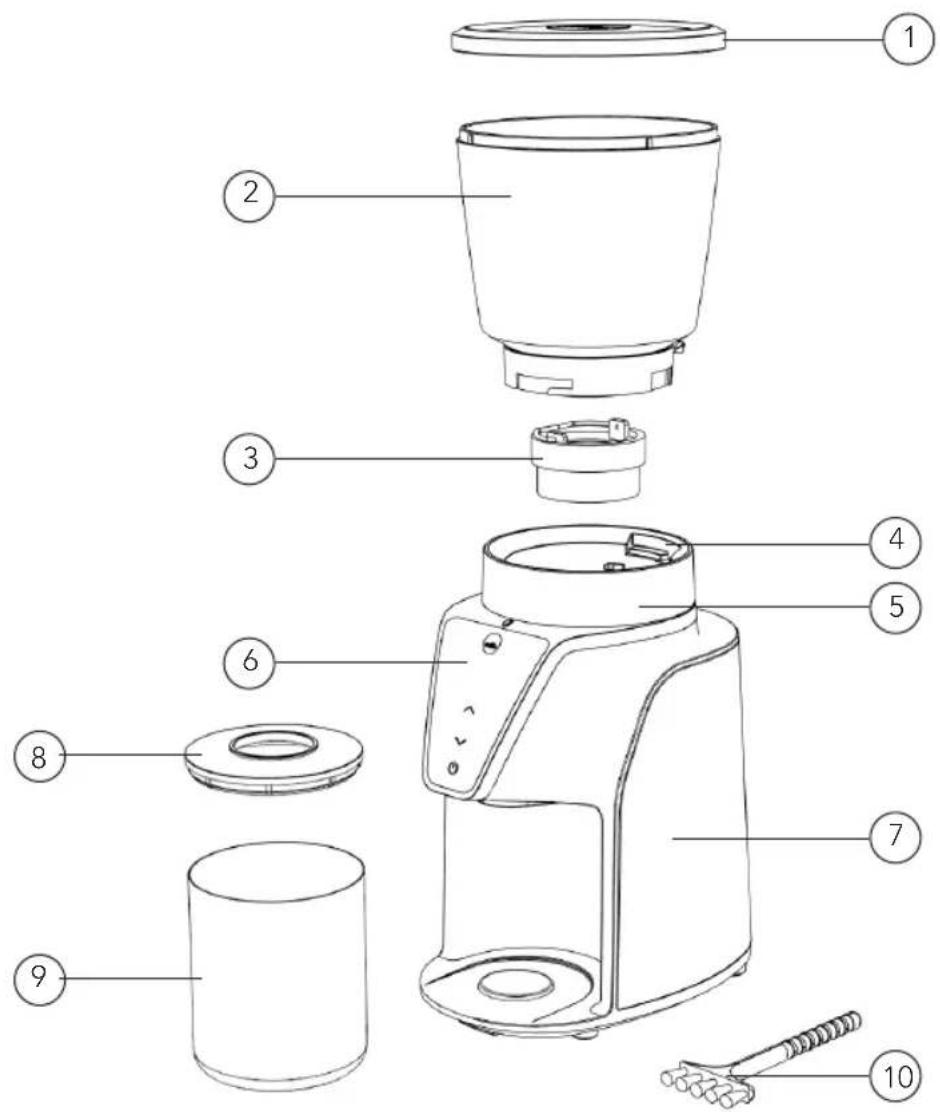
BEAN CUP
The bean cup is easy to place and to release from the unit. To place it, align the cup and twist it clockwise as illustrated in figure below. Keep one hand on the grind level indicator when twisting the bean cup to make it lock it into place easier.

natural_image
Three-step diagram showing a device with a lid and base, illustrating a process from opening to closing (no text or symbols present)To release it, press down the lever and lift it up as illustrated in figure below.
natural_image
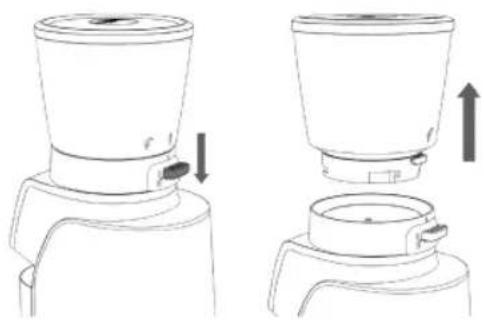
Line drawing of a blender with two views showing top and side views (no text or symbols)The bean cup is equipped with a closing mechanism, which keeps the beans inside the bean cup when the bean cup is released from the unit. Perfect if you want to use the bean cup as a container when weighing the beans. Do not fill over the max line on the cup.
EN
BURRS
- Remove the bean cup to access the burrs. Once the bean cup has been removed, pull up the handle on the top burr, and twist it anti-clockwise to release. Use the included brush to clean the burrs if needed.
- Place the top burr and twist it clockwise to lock it. Make sure to put the handle down before placing the bean cup.
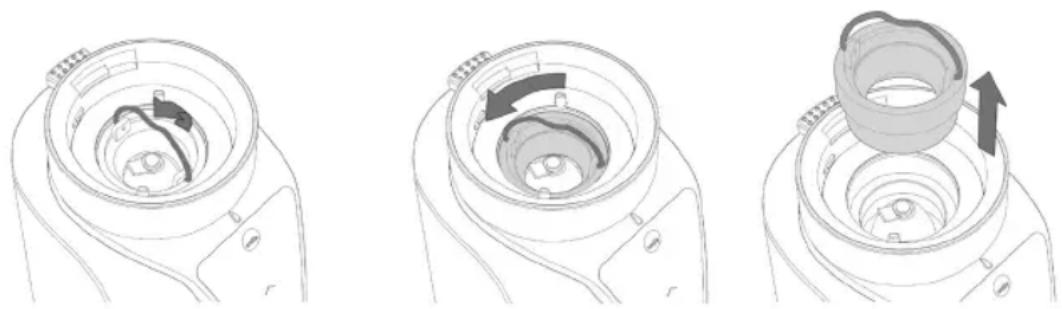
natural_image
Three-step diagram showing a mechanical component with internal structure and directional arrows (no text or symbols)DIGITAL DISPLAY
The digital display allows you to set desired grind time.
- Use the start/stop button to start and stop the coffee grinder. If you press the start button without selecting a time, the unit will start counting down from 50 seconds)
- Use the arrows up and down to choose the grinding time. By short pressing the arrows, the time goes up or down by 10 second intervals. By long pressing the time goes up or down by 2 second intervals.
- If display has been idle for more than 10 minutes, the coffee grinder goes into sleep mode. Press the start button to activate display.
USE
- Connect the appliance to a wall socket.
- Fill the coffee beans into the bean cup. Either pour them straight into the cup or place the bean cup on a coffee scale and weigh them for the best result.
- Choose your preferred grinding level.
- Make sure the coffee ground cup is placed correctly.
- Start the coffee grinder:
- Alt 1: AutoStart by pressing the start button. It will count down from 50 seconds.
- Alt 2: By using the arrows on the display, choose the grinding time (between 2-50 seconds) and press start.
- The grinding stops when the time is up. To cancel the grinding before the time is up press the stop button.
CLEANING AND MAINTENANCE
- Do not immerse the appliance into liquid or water.
- Do not clean any parts in a dishwasher.
- Clean it with a dry cloth. Never use a wet or heavy chemical cleaning agent.
- Remove the top burr as explained and use the included brush to clean.
- Use the included brush to clean the pipe between the burrs and the coffee ground cup.
- Never attempt to open the coffee grinder and tamper with its mechanism or circuitry.
- Store the unit in a dry place out of the reach of children.
TROUBLESHOOTING
Problem Possible reasons Solutions
| E1 Coffee bean cup is not assembled correctly. | Place the coffee bean cup correctly. | |
| E2 Motor overheated from grinding too many times in a row. | Let the appliance cool down for 30 minutes. | |
| The unit grinds the coffee beans, but nothing comes out. | The coffee grinder is clogged | Use the cleaning brush and clean the pipe between the burr and the coffee ground cup. |
| The unit is grinding too course. | The grind setting is wrong | Choose a lower grinding level. |
| The burr is not assembled correctly | Make sure that the burr is correctly assembled and locked into place. | |

GUARANTEE
Wilfa issues a 5 year guarantee on this product from the day of purchase is done. The guarantee covers production failure or defects that arise during the guarantee period. Your purchase receipt works as proof towards retailer if claiming your guarantee.
The guarantee is valid only for products that are bought and used in private households. The guarantee is not valid if the product is used commercially. The guarantee is not valid if the product is misused, used by negligence, if not following instructions given by Wilfa, if modified or if unauthorized reparation is done. The guarantee is also not valid for normal wear of the product, misuse, lack of maintenance, use of wrong electrical voltage or:
• Overloading of product
• Parts which are normally worn down
- Parts you can expect being replaced regularly (e.g. filter, battery etc.)
PRODUCT SPECIFICATIONS
220V\~240V\~50Hz
SUPPORT AND SPARE PARTS
For support please visit us at wilfa.com, and see our customer service/support page. Here you will find frequently asked questions, spare parts, tips and tricks and all our contact information.
RECYCLABILITY
This marking indicates that this product should not be disposed with other household wastes throughout the EU. To prevent possible harm to the environment or human health from uncontrolled waste disposal, recycle it responsibly to promote the sustainable reuse of material resources. To return your used device, please use the return and collection systems or contact the retailer where the product was purchased. They can take this product for environmentally safe recycling free of charge.
NO
NO
INNHOLD
14 VIKTIGE SIKKERHETSANVISNINGER
16 PRODUKTOVERSIKT
17 FUNKSJONER
18 BRUK
19 RENGJ∅RING OG VEDLIKEHOLD
19 FEILS∅KING
20 GARANTI
21 PRODUKTSPESIFIKASJONER
21 SUPPORT OG RESERVEDELER
21 GJENVINNING
NO
VIKTIGE SIKKERHETSANVISNINGER
Malingsgrad 1–6 6–12 12–22 22–28 28–31
B∅NNEKOPP
natural_image
Three-step diagram showing a device being processed, with arrows indicating the process (no text or symbols present)natural_image
Line drawing of a blender with two views showing top and side views (no text or symbols)natural_image
Three-step diagram showing a device being processed, with arrows indicating the process (no text or symbols present)natural_image
Diagram of a blender with two views showing the top and side views, no text or symbols present.- Bønnekop – låg
- Bønnekop
- Topskive
- Bønnekop - udløser
- Indikator for malegrad
- Digitalt display
-
Kabinet
-
Låg til beholder
- Beholder til kværnet kaffe
- Rensebørste
FUNKTIONER
MALEGRAD
Kværneindstilling 1–6 6–12 12–22 22–28 28–31
B∅NNEKOP
natural_image
Three-step diagram showing a device being processed, with arrows indicating the process (no text or symbols present)natural_image
Line drawing of a blender with two views showing top and side views (no text or symbols)natural_image
Technical line drawing of a mechanical component with no visible text or symbols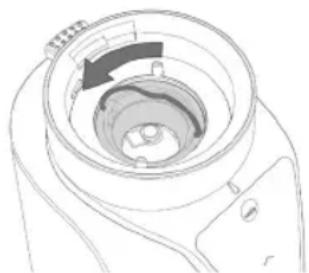
natural_image
Technical line drawing of a mechanical component with a circular opening and internal cavity (no text or symbols)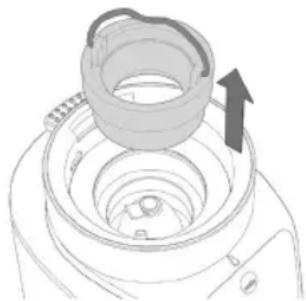
natural_image
Technical line drawing of a mechanical component with an arrow indicating direction (no text or symbols)DIGITALT DISPLAY
natural_image
Three-step diagram showing a device being processed, with no visible text or symbols.natural_image
Line drawing of a blender with two views showing top and side views (no text or symbols)natural_image
Three technical line drawings of a mechanical component with internal channels and arrows indicating motion (no text or symbols)FI
DIGITAALINEN NÄYTTÖ
natural_image
Three-step diagram showing a device being processed, with arrows indicating the process (no text or symbols present)natural_image
Line drawing of a blender with two views showing top and side views (no text or symbols)natural_image
Three-step diagram showing a mechanical component with internal components and directional arrows (no text or symbols)DIGITALANZEIGE
natural_image
Three-step diagram showing a blender with a handle, illustrating the process from opening to closing (no text or symbols present)natural_image
Diagram showing two views of a blender with an arrow indicating rotation (no text or symbols present)natural_image
Three-step diagram showing a mechanical component with internal rotation arrows, no text or symbols present.DIGITAAL SCHERM
natural_image
Three-step diagram showing a blender with a lid, showing the process from top to side (no text or symbols)natural_image
Line drawing of a blender with two views showing top and side views (no text or symbols)natural_image
Three technical line drawings of a mechanical component with internal channels and arrows indicating motion (no text or symbols)WYŚWIETLACZ CYFROWY
natural_image
Three-step diagram showing a device being processed, with arrows indicating the process (no text or symbols present)natural_image
Diagram of a blender with two views showing top and side views, no text or symbols presentnatural_image
Three-step diagram showing a mechanical component with internal structure and directional arrows (no text or symbols)ÉCRAN NUMÉRIQUE
CARACTÉRISTIQUES DU PRODUIT
220V\~240V\~50Hz
ASSISTANCE ET PIÈCES DÉTACHÉES
IT
natural_image
Three-step diagram showing a blender with a handle, illustrating the process from opening to closing (no text or symbols present)natural_image
Line drawing of a blender with two views showing top and side views (no text or symbols)natural_image
Three technical line drawings of a mechanical component with internal components and directional arrows (no text or symbols)DISPLAY DIGITALE
ES
natural_image
Three-step diagram showing a device being processed, with arrows indicating the process (no text or symbols present)natural_image
Line drawing of a blender with two views showing top and side views (no text or symbols)natural_image
Three-step diagram showing a mechanical component with internal structure and rotation arrows (no text or symbols)PANTALLA DIGITAL
natural_image
Three-step diagram showing a device being processed, with no visible text or symbols.natural_image
Line drawing of a blender with two views showing top and side views (no text or symbols)natural_image
Technical line drawing of a mechanical component with no visible text or symbols
natural_image
Technical line drawing of a mechanical component with a circular housing and internal structure (no text or symbols)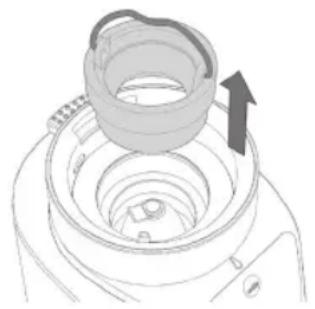
natural_image
Diagram of a mechanical component with an arrow indicating direction, no text or symbols presentЦИФРОВОЙ ДИСПЛЕЙ
CG1x-275_20_01