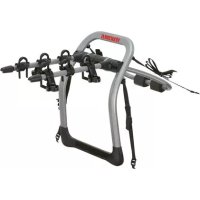
HalfBack 3 - Bike rack Yakima - Free user manual and instructions
Find the device manual for free HalfBack 3 Yakima in PDF.


| Product Type | Bike Rack |
| Brand | Yakima |
| Model | HalfBack 3 |
| Capacity | 3 bikes |
| Maximum load per bike | 13.6 kg (30 lb) |
| Maximum total load | 40.8 kg (90 lb) |
| Bike rack weight | 10.5 kg (23 lb) |
| Vehicle compatibility | Hatchback, trunk, rear door |
| Main materials | Plastic and metal |
| Attachment type | Straps with upper and lower hooks |
| Included accessories | 3 ZipStrip™ straps, safety strap, bottle openers |
| Safety | Safety straps, stabilizing cradles |
| Maintenance | Clean with a cloth, water, and mild soap |
| Spare parts | Straps, hooks, glass hatchback adapters (sold separately) |
| Repairability | Worn straps can be replaced |
| Features | Anti-sway cradles, TubeTop™ adapter for step-through frames |
Frequently Asked Questions - HalfBack 3 Yakima
User questions about HalfBack 3 Yakima
0 question about this device. Answer the ones you know or ask your own.
Ask a new question about this device
Download the instructions for your Bike rack in PDF format for free! Find your manual HalfBack 3 - Yakima and take your electronic device back in hand. On this page are published all the documents necessary for the use of your device. HalfBack 3 by Yakima.
USER MANUAL HalfBack 3 Yakima
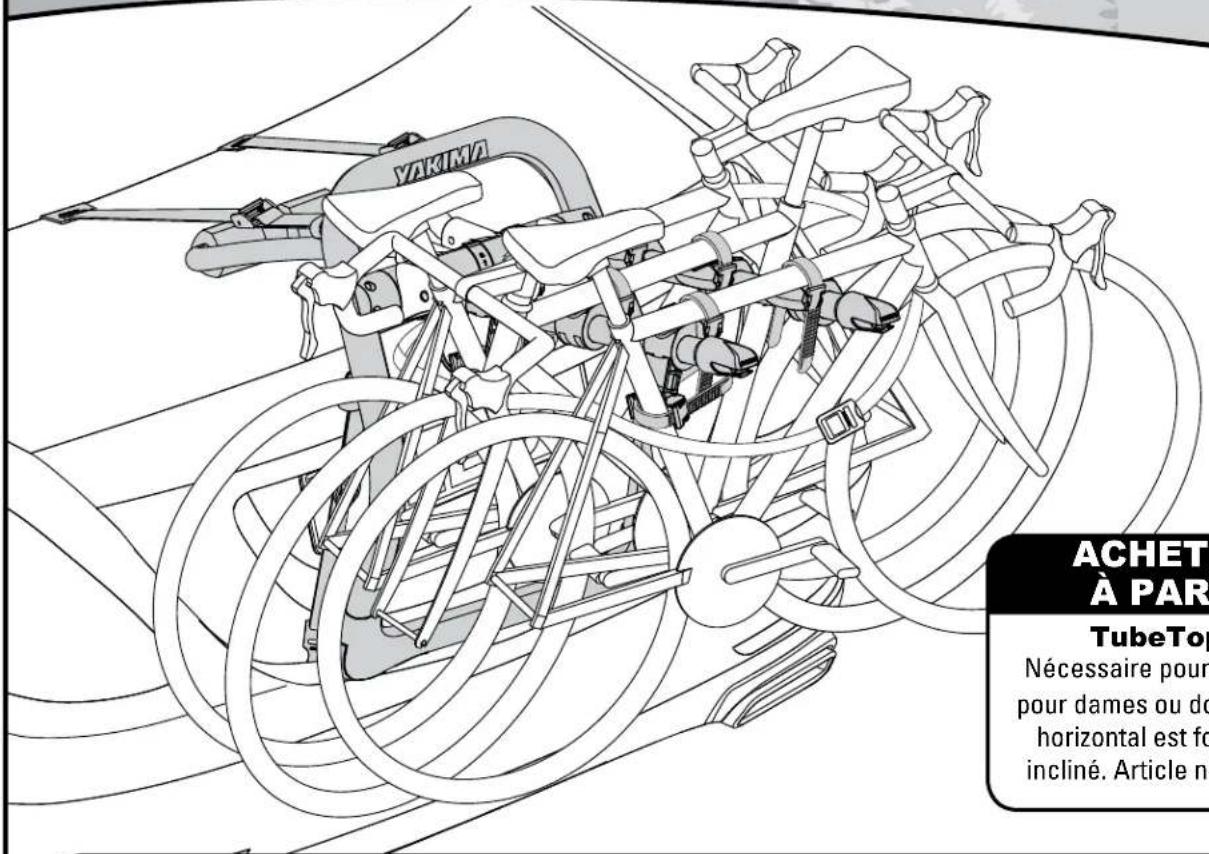
PURCHASE SEPARATELY:
TubeTop™
Required for bikes with stepthrough/Ladies frames or
bikes with slanted top tubes.
Part #8002531
CONTENTS • CONTENU • CONTENIDO
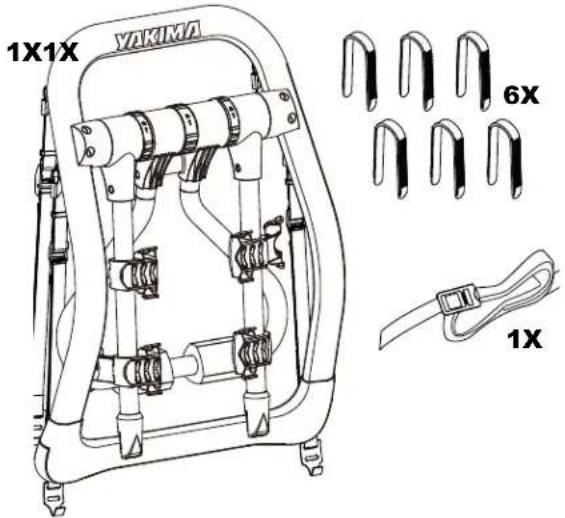
HalfBack (2 Bike)
35 lbs / 15.9 kg max per bike.
70 lbs / 31.75 kg total.
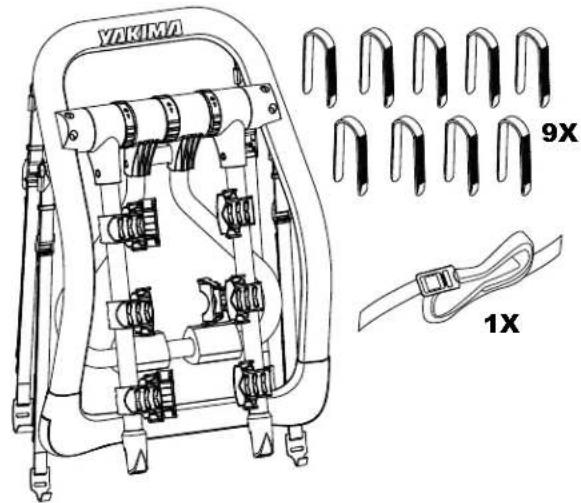

HalfBack (3 Bike)
30 lbs / 13.6 kg max per bike.
90 lbs / 40.8 kg total.
INSTALLATION • MONTAGE • INSTALLATION
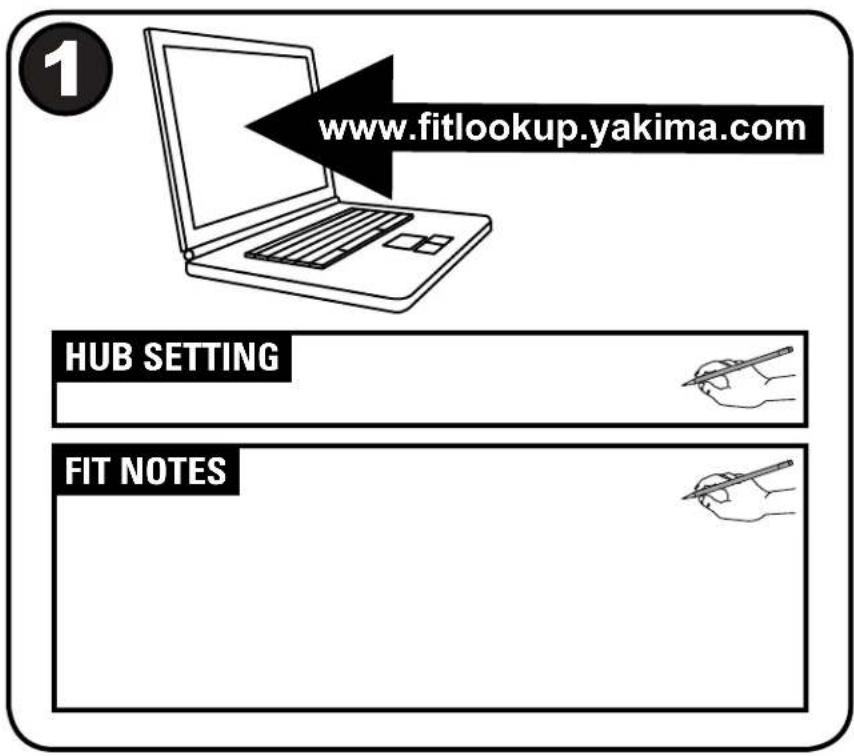
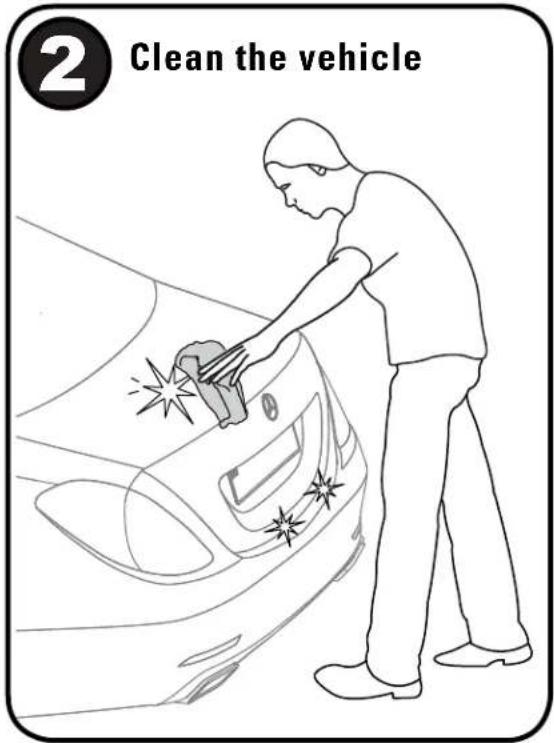
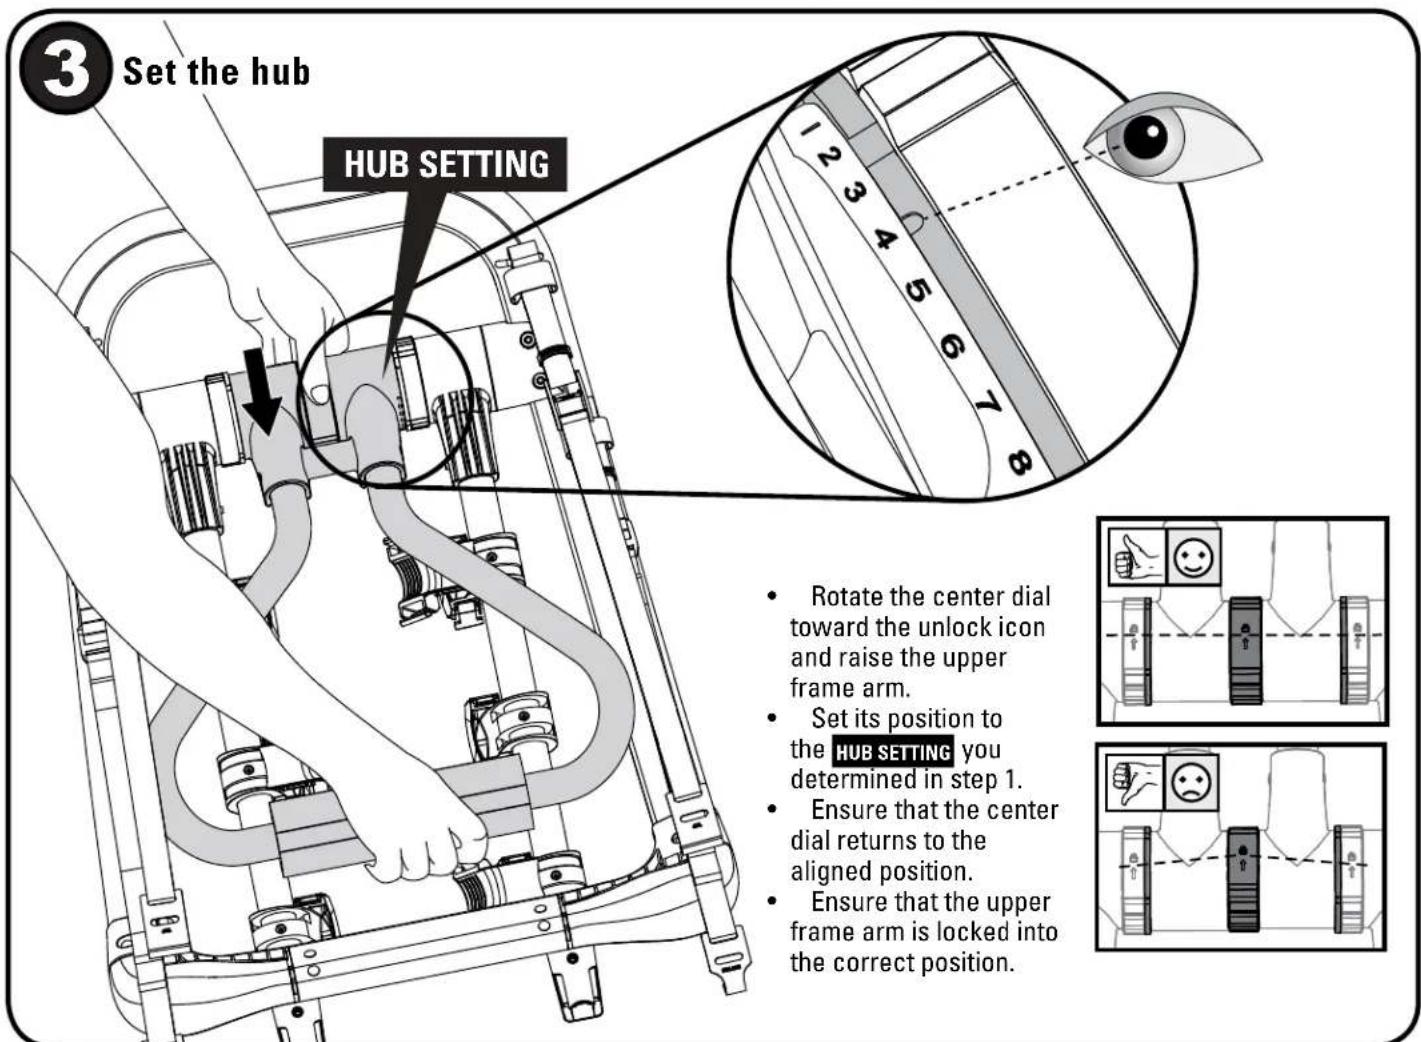
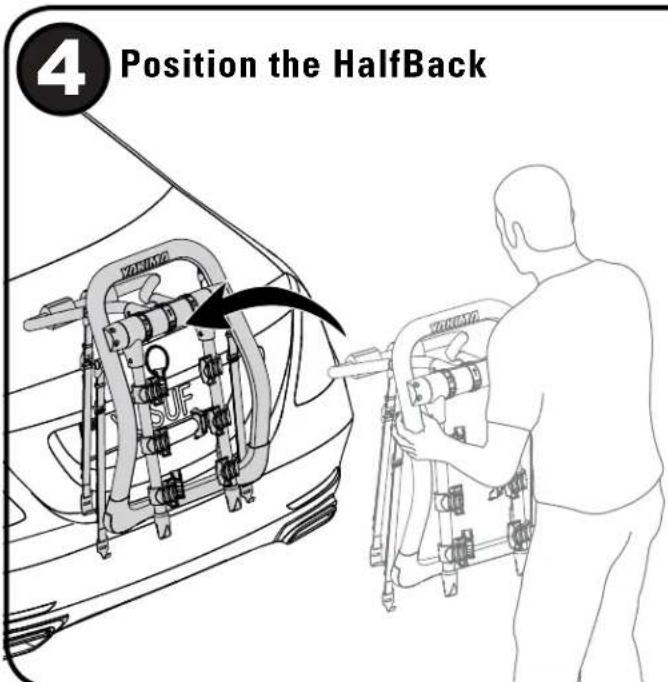
TO AVOID DAMAGE, ALWAYS POSITION HALFBACK WHERE DETERMINED BY YOUR VEHICLE SPECIFIC FIT NOTES.
Upper Frame:
- The position is relative to the lower frame and will depend on vehicle shape.
• Any contact with a spoiler is not acceptable
Lower Frame:
- LOWER SUPPORT FRAME LOCATION IS EXTREMELY IMPORTANT IN SUPPORTING THE LOAD!
- A common location is just above the bumper on the bottom edge of the trunk or hatch.
- Use area with the greatest support.
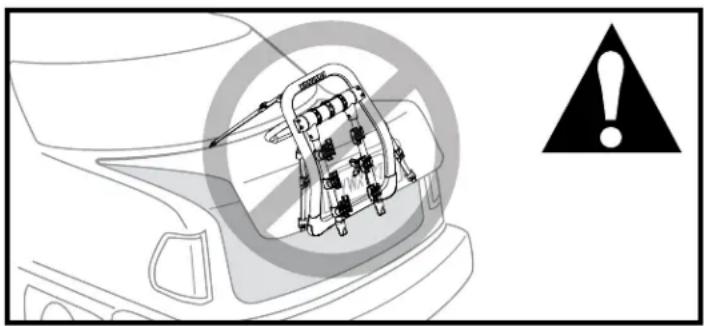
- Do not place the lower frame on glass, plastic, or thin metal.
- Many vehicle trunks and liftgates have a large section of poorly supported metal that will dent under weight.
- Do not place HalfBack on vehicle's emblem.
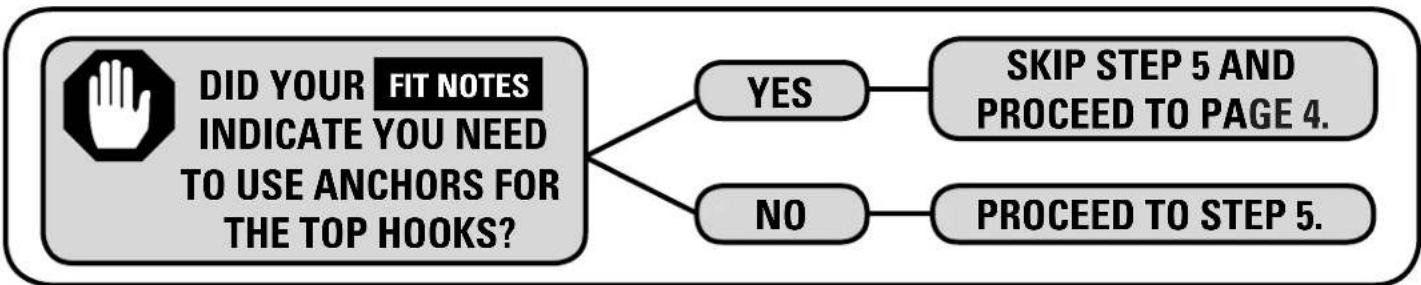
flowchart
graph TD
    A["DID YOUR FIT NOTES INDICATE YOU NEED TO USE ANCHORS FOR THE TOP HOOKS?"] --> B{YES}
    A --> C{NO}
    B --> D["SKIP STEP 5 AND PROCEED TO PAGE 4."]
    C --> E["PROCEED TO STEP 5."]
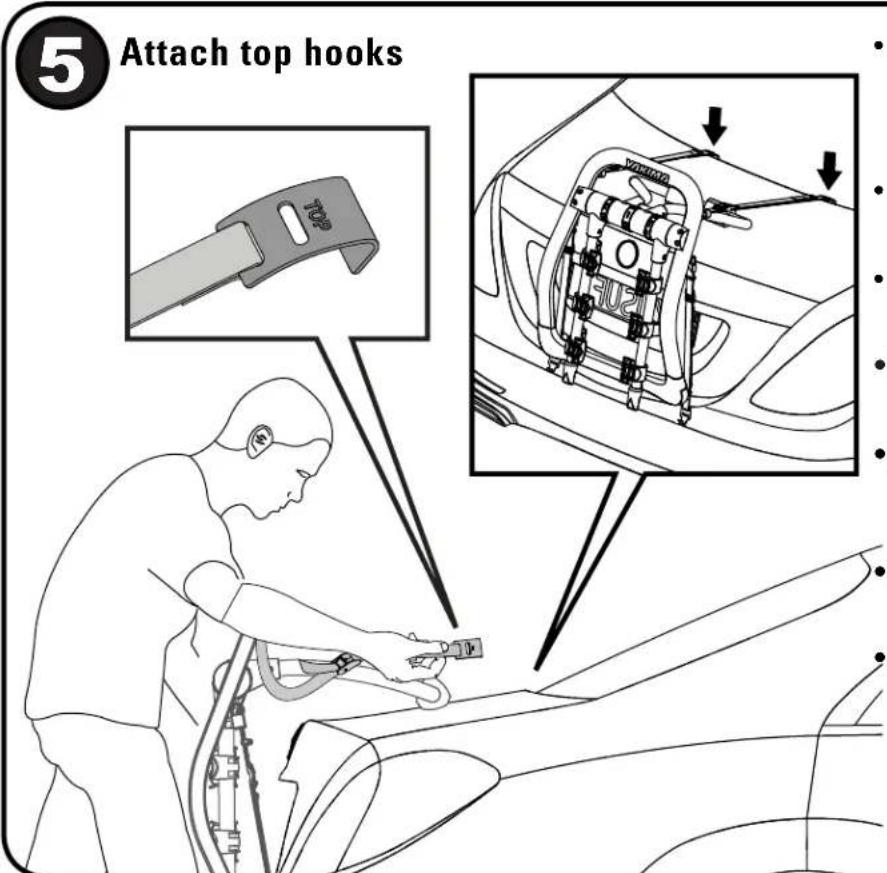
- Using your body to help support the HalfBack attach both top strap hooks around the top edge of the trunk lid, hatch lid or rear door. Tighten top straps until HalfBack is held in place.
- You may need to attach hooks at a wider section of the seam and then slide them into their recommended place on the vehicle.
- Straps should be parallel, and no wider than the body of the HalfBack. Route the straps over the HalfBack frame.
- Not able attach the top hook? Use the anchor configuration. Follow Anchor installation instructions on PAGE 4.
- DO NOT ATTACH THE TOP HOOKS TO PLASTIC OR TO A SPOILER. Use the Anchor configuration instead. Follow Anchor installation instructions on PAGE 4.
- DO NOT ATTACH THE TOP HOOKS TO GLASS. Use the Glass Hatch Hooks (sold separately - Yakima Part Number 8002612).
- REMOVE HOOKS BEFORE OPENING THE HATCH OR TRUNK! Opening the hatch or trunk with hooks installed could cause damage to the vehicle.
PROCEED TO PAGE 5.
TOP HOOKS: Anchor installation instructions
Confirmed your vehicle does not require Anchors? Skip this page.
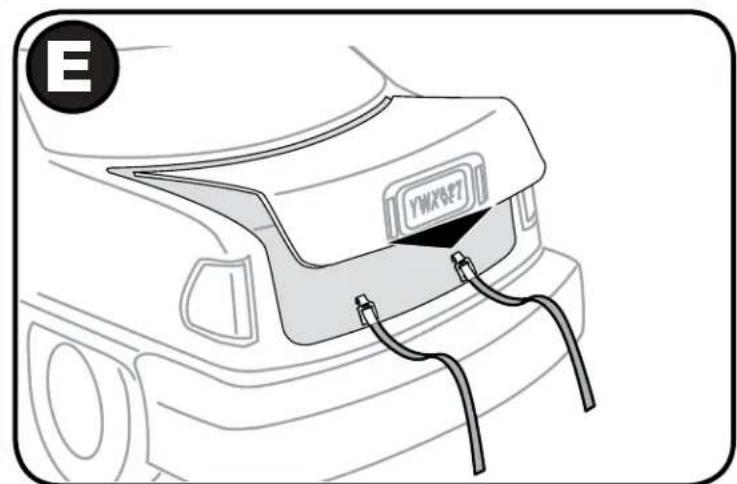
Make sure the anchor is free from contact between hatch door and vehicle's frame
WARNING: DO NOT REST THE ANCHORS AGAINST GLASS.
DID YOUR FIT NOTES INDICATE YOU NEED TO USE ANCHORS FOR THE BOTTOM HOOKS?
YES
SKIP STEP 6 AND PROCEED TO PAGE 6.
NO
PROCEED TO STEP 6.

Attach bottom hooks
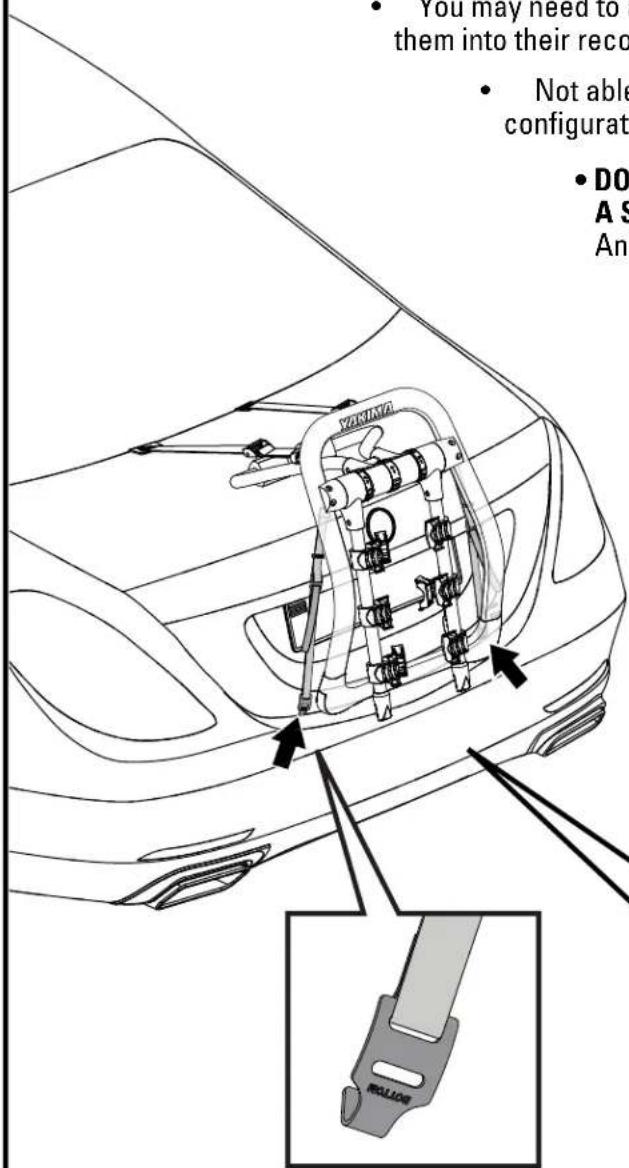
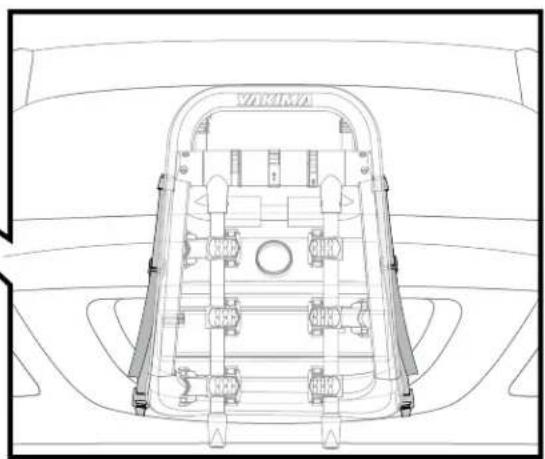
- Acceptable attachment points may include the bottom edge of the trunk, hatch lid or rear door. Additionally, the tie-down hooks underneath the vehicle or the metal ledge of the bumper are acceptable. Only attach hooks to areas with sufficient support.
- You may need to attach hooks at a wider section of the seam and then slide them into their recommended place on the vehicle.
- Not able to attach the bottom hooks? Use the Anchor configuration. Follow Anchor installation instructions on page 6.
- DO NOT ATTACH THE BOTTOM HOOKS TO PLASTIC OR TO A SPOILER. Use the Anchor configuration instead. Follow Anchor installation instructions on page 6.
- DO NOT ATTACH THE BOTTOM HOOKS TO GLASS. Use the Glass Hatch Hooks (sold separately - (Yakima Product Number 8002612).
- REMOVE HOOKS BEFORE OPENING THE HATCH OR TRUNK! Opening the hatch or trunk with hooks installed could cause damage to the vehicle.
natural_image
Top-down technical line drawing of a car interior frame with no visible text or symbolsPROCEED TO PAGE 7.
BOTTOM HOOKS: Anchor installation instructions

Confirmed your vehicle does not require Anchors? Skip this page.

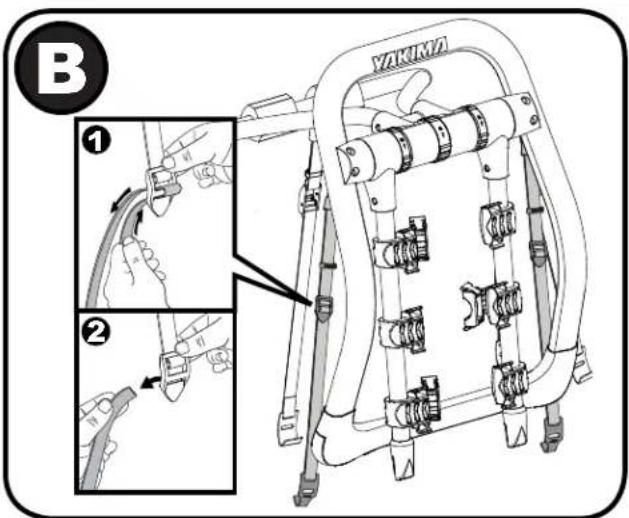
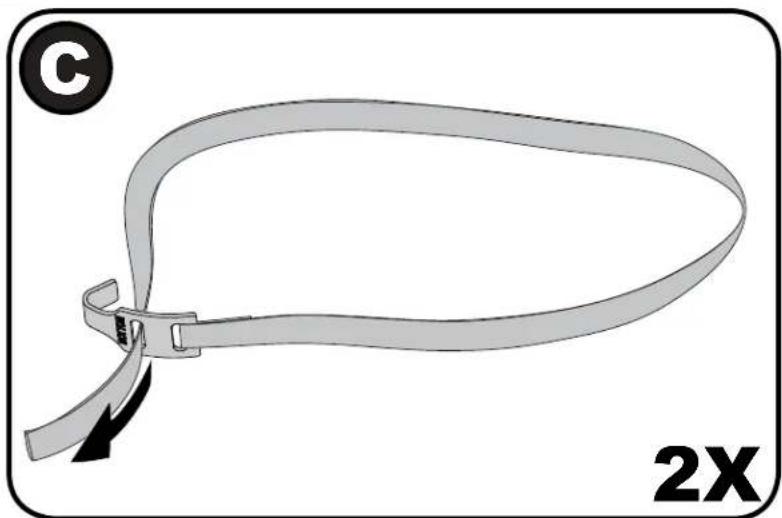
REMOVE THE CARRIER FROM THE CAR.
natural_image
Diagram of a ribbon or strap with a black arrow indicating direction, labeled '2X' at bottom (no text or symbols on the diagram itself)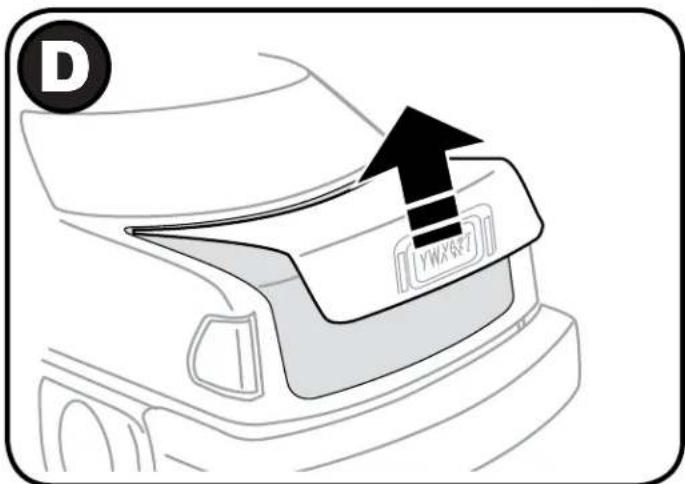
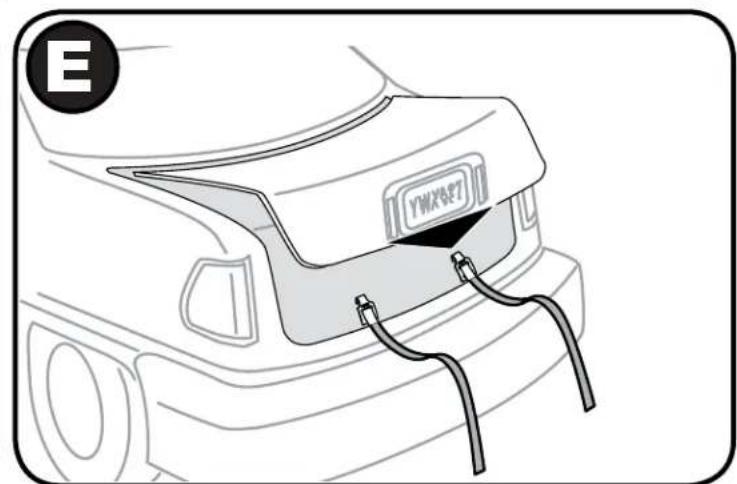
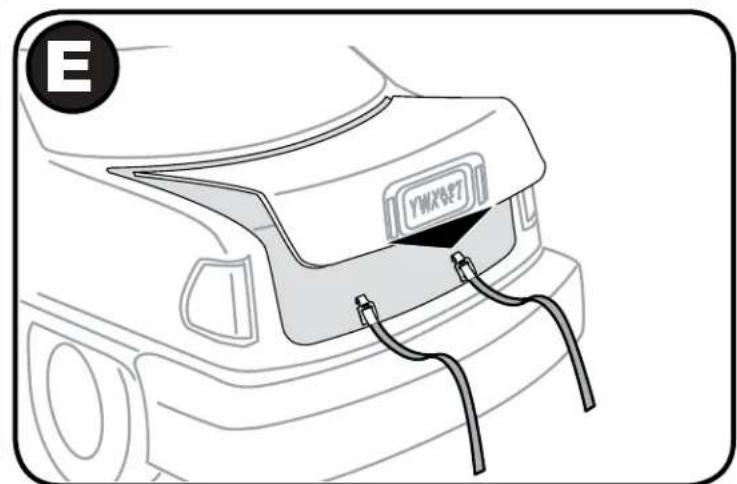
natural_image
Line drawing of a car rear bumper with attached cable and logo (no text or symbols)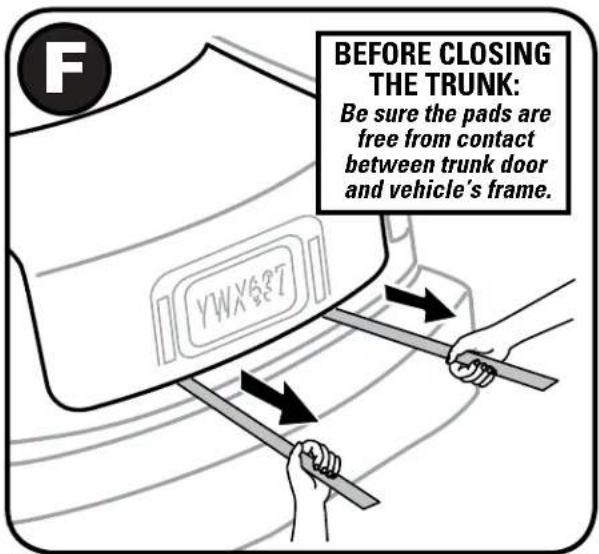
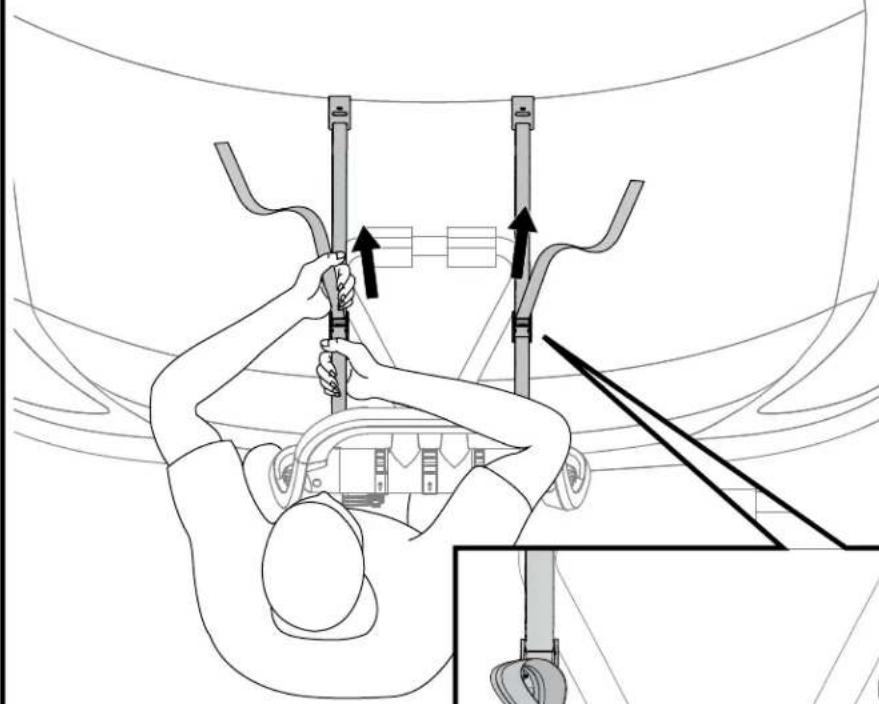
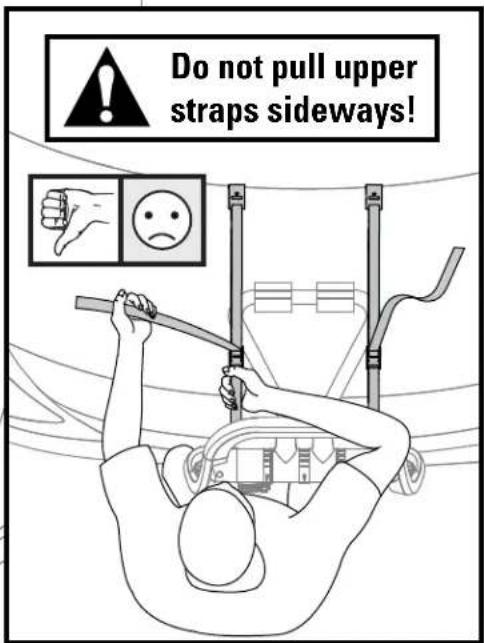
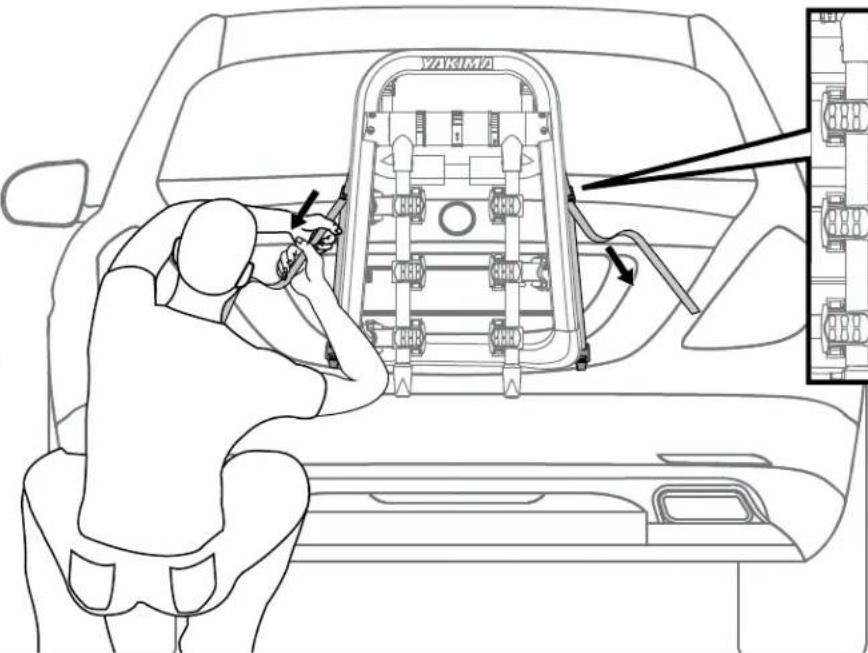
Fully Tighten top straps
• Using ample force pull both top straps toward the front of the vehicle to fully tighten the top straps.
natural_image
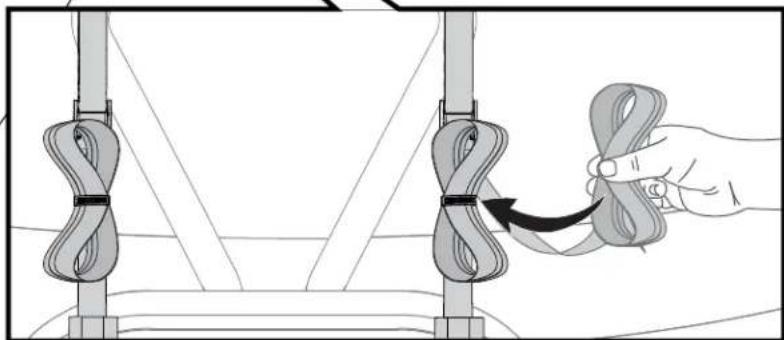
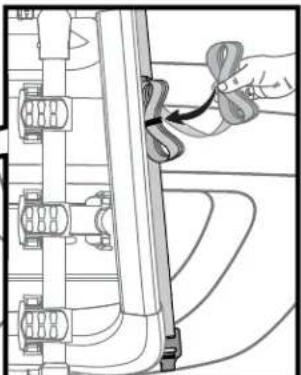
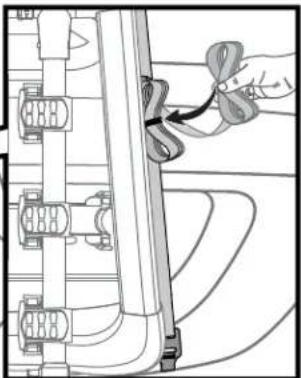
Line drawing of a person using a medical device with arrows indicating motion (no text or symbols)• Store the extra straps using the rubber strap storage bands.
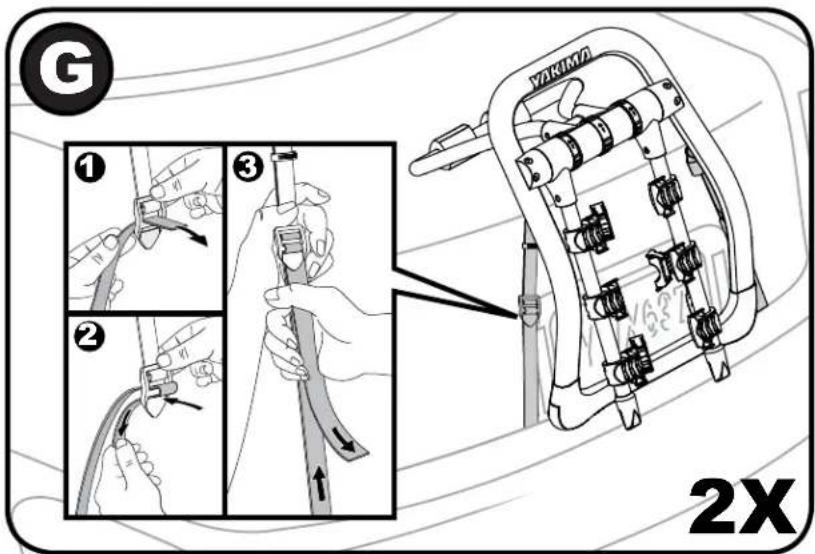
natural_image
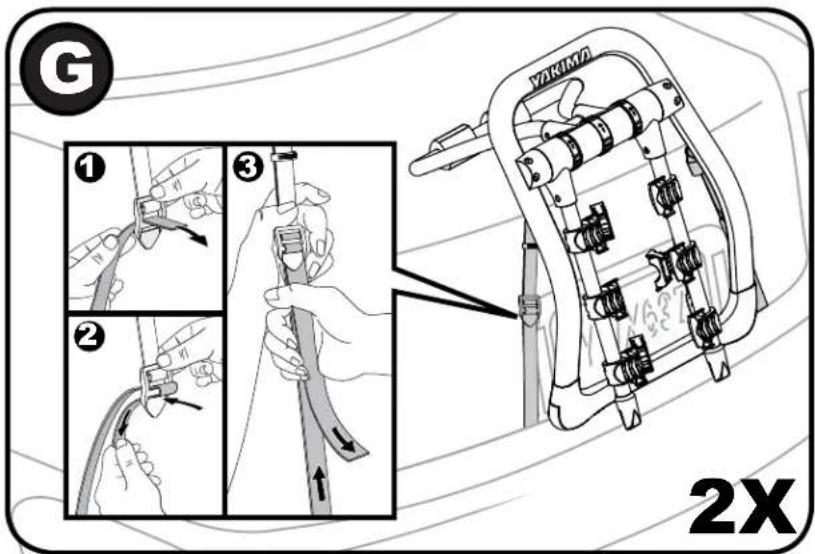
Illustration of two rope knots being twisted, with a hand adjusting the knot (no text or symbols)2X

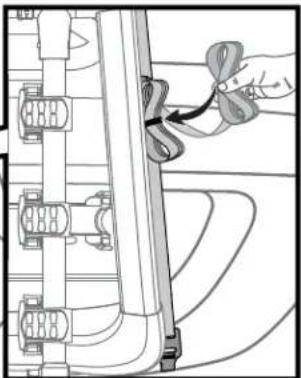
Fully Tighten bottom straps
• Using ample force pull both bottom straps down toward the ground to fully tighten the bottom straps.
• Store the extra straps using the rubber strap storage bands.
natural_image
Technical line drawing of a mechanical assembly with no visible text or symbols2X

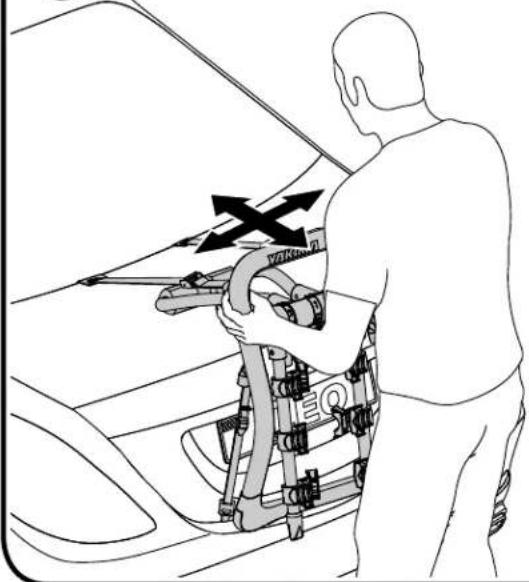
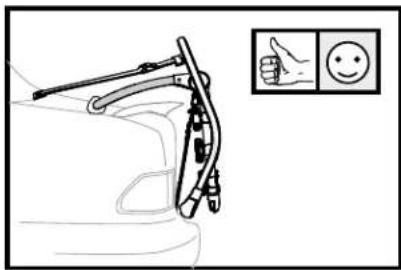
Test installation
natural_image
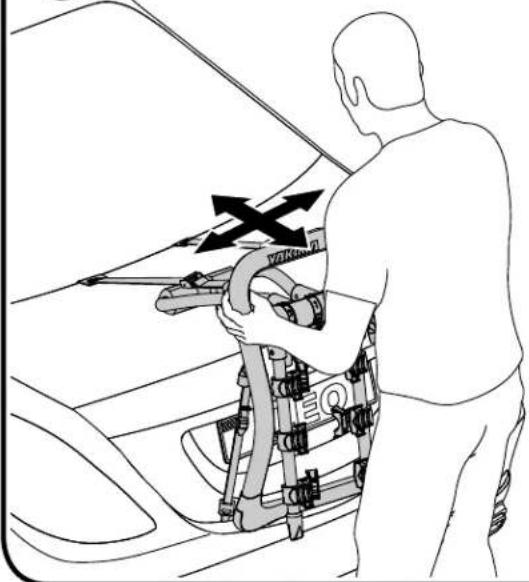
Line drawing of a person using a vehicle safety harness to adjust the seatbelt (no text or symbols present)- Grasp the HalfBack and test that it's securely fastened to the vehicle by trying to move it in all directions. HALFBACK SHOULD NOT MOVE!
• Any Contact with a spoiler is unacceptable.
natural_image
Diagram of a car interior showing hand positioning and two side-view smiley face indicators (no text or symbols)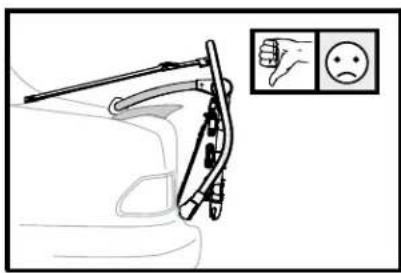
LOADING • CHARGEMENT • CARGA

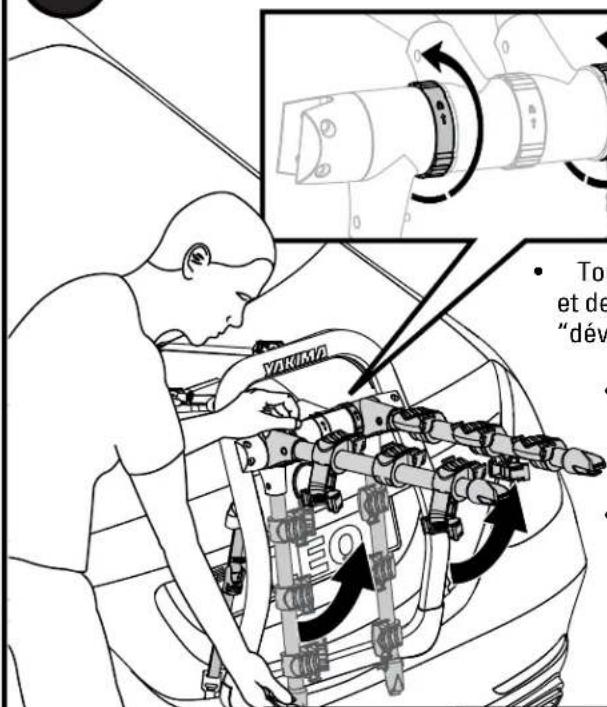
Raise the support arms
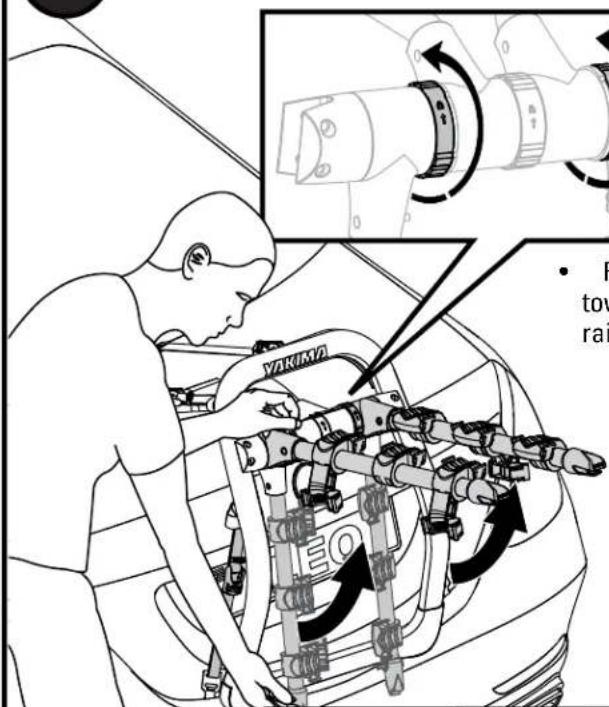
- Rotate the left and right dials toward the unlock icon and raise the support arms.
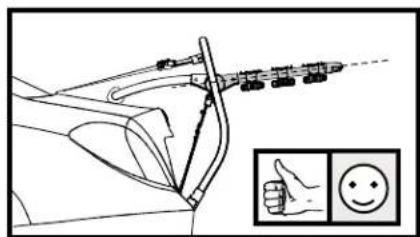
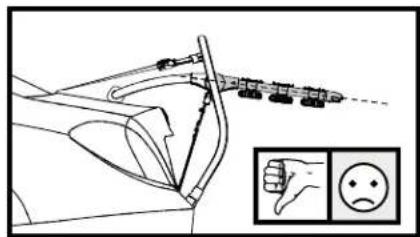
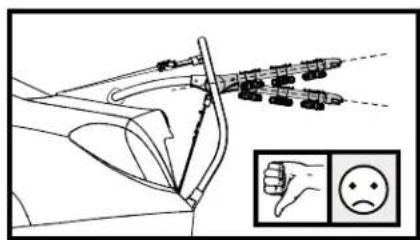
• Support arms must be parallel to one another, and angled slightly upward.
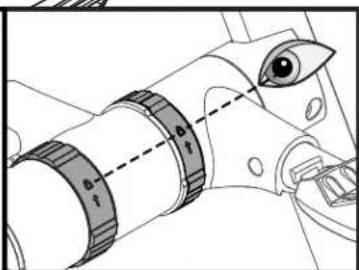
- Pull downward on both support arms to ensure they are locked into position. The lock icons will be aligned when locked.
Ensure that the left and right dials return to their locked positions.
natural_image
Diagram of a robotic arm with a hand gesture and two side-view smiley icons (no text or symbols)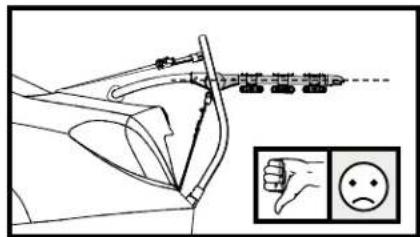
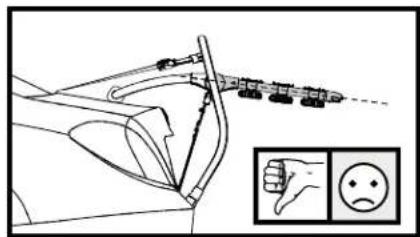
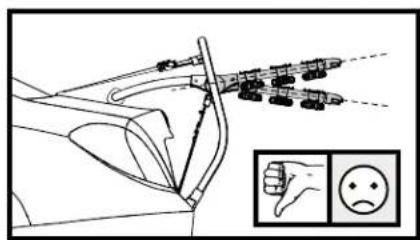
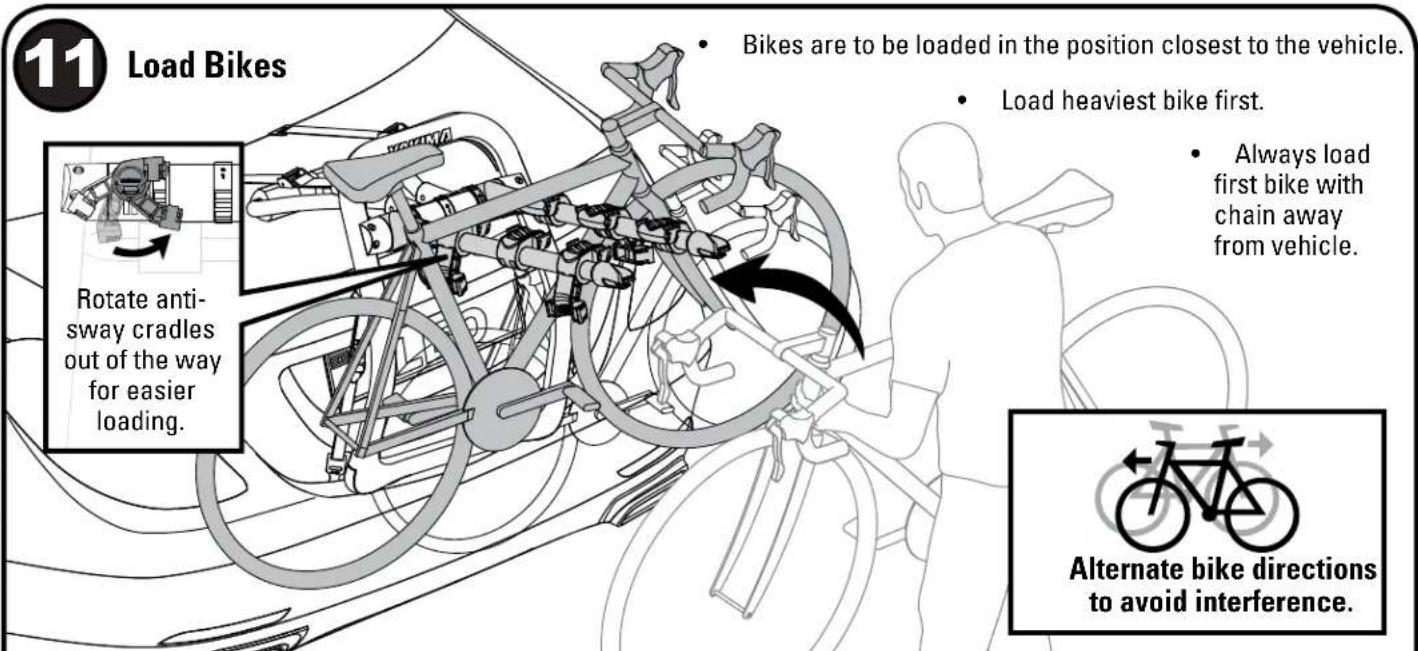
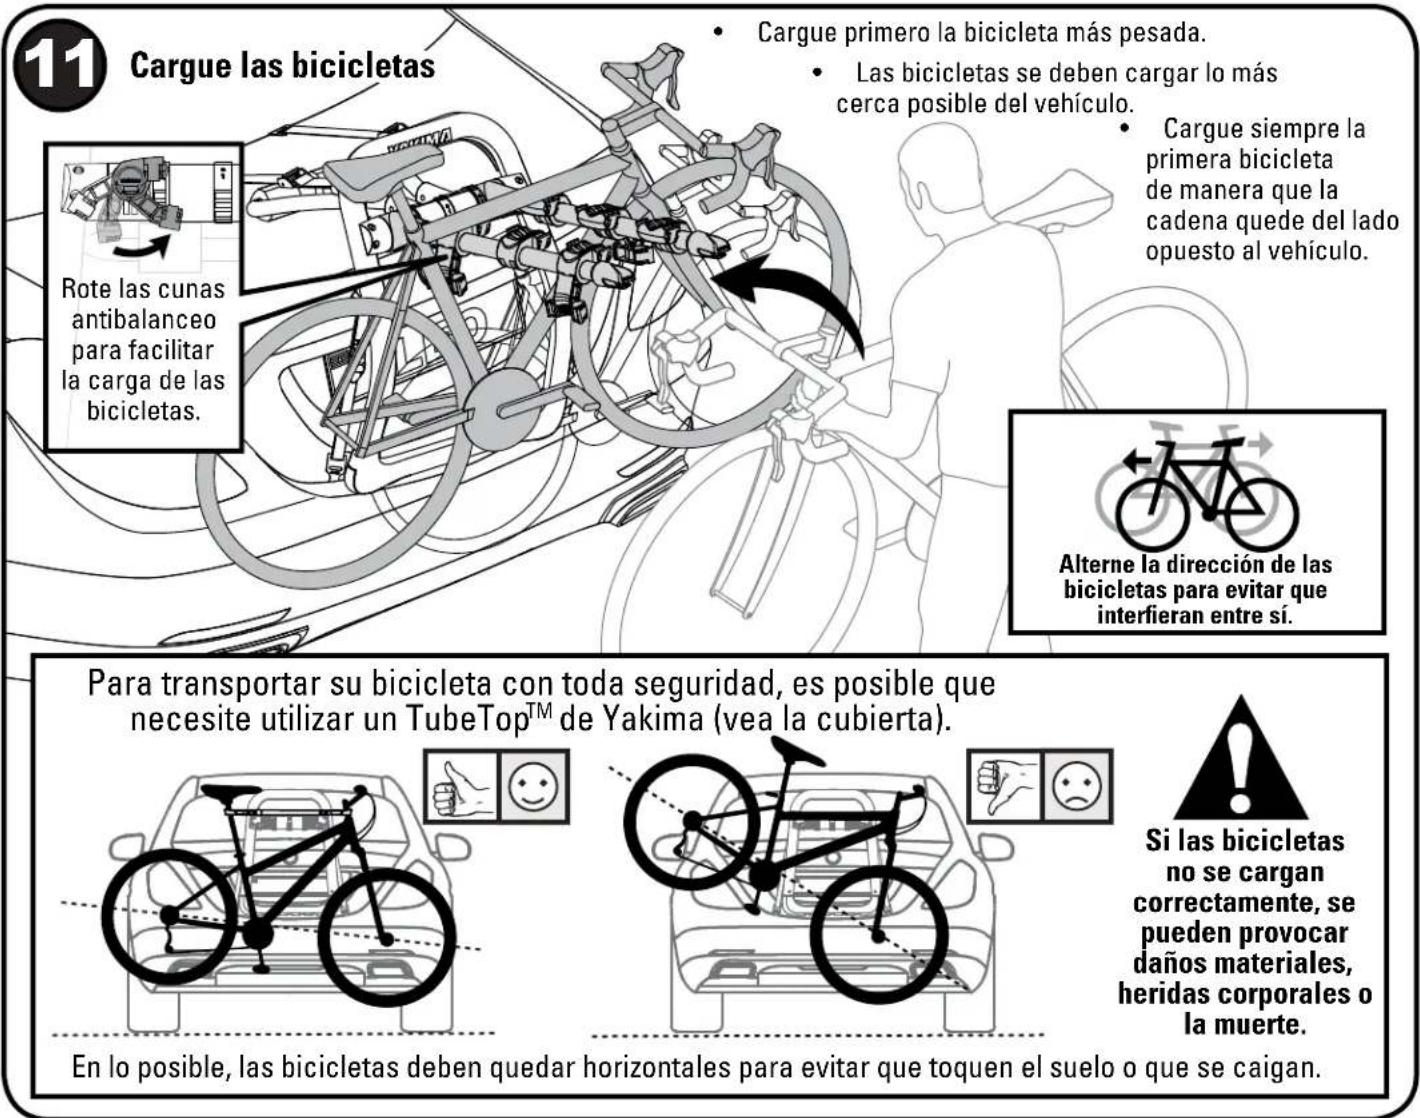
A Yakima TubeTop™ (see cover page) may be required to carry your bike safely.
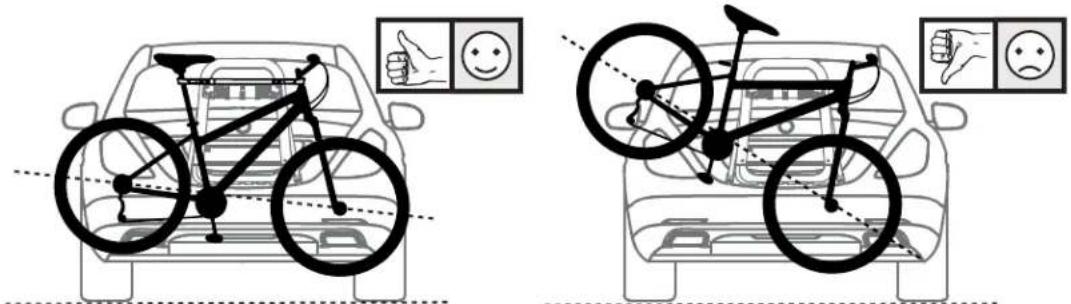
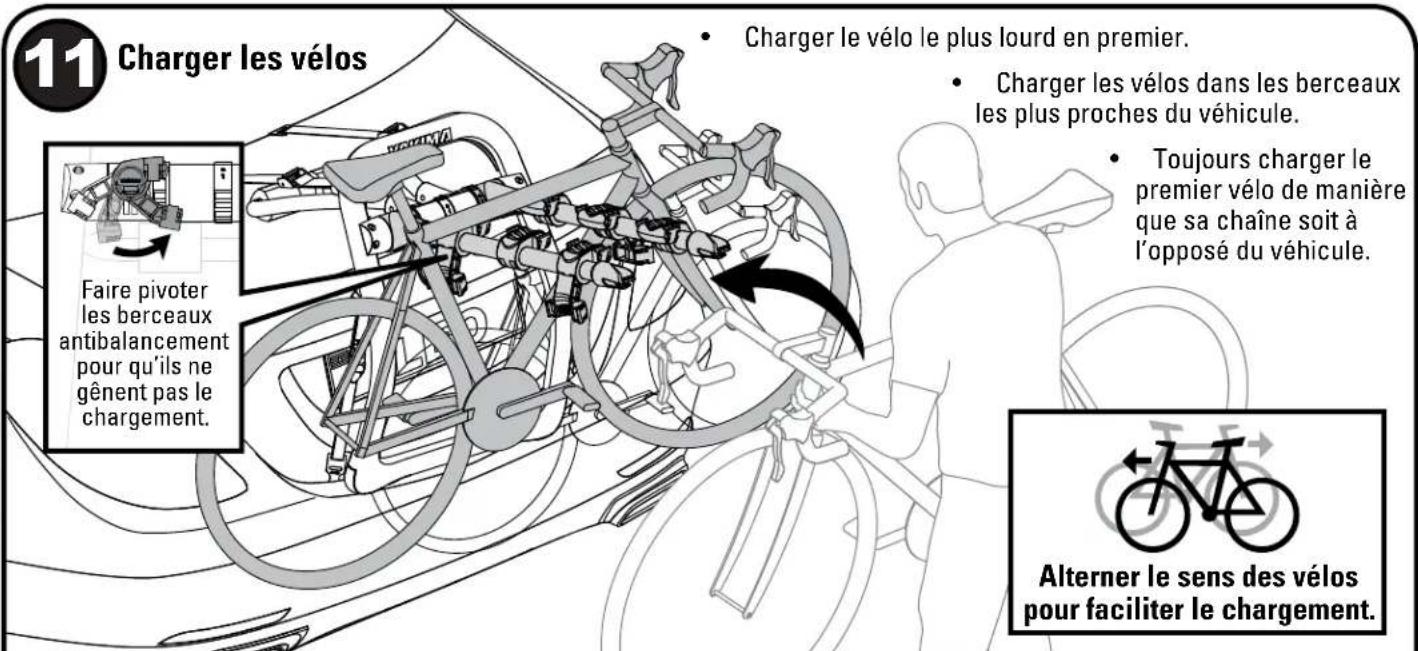
Failure to load bikes properly can result in property damage, personal injury, or death.
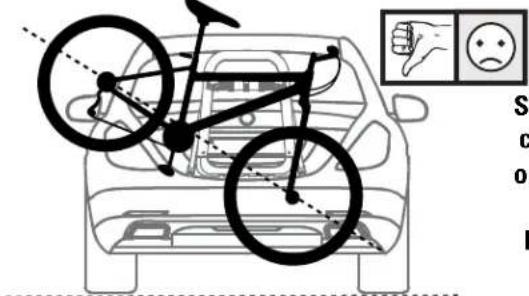
Bikes should be as level as possible to avoid ground clearance issues and possible ejections.
natural_image
Line drawing of a bicycle with wheels and suspension components, no text or symbols presentInstall safety strap
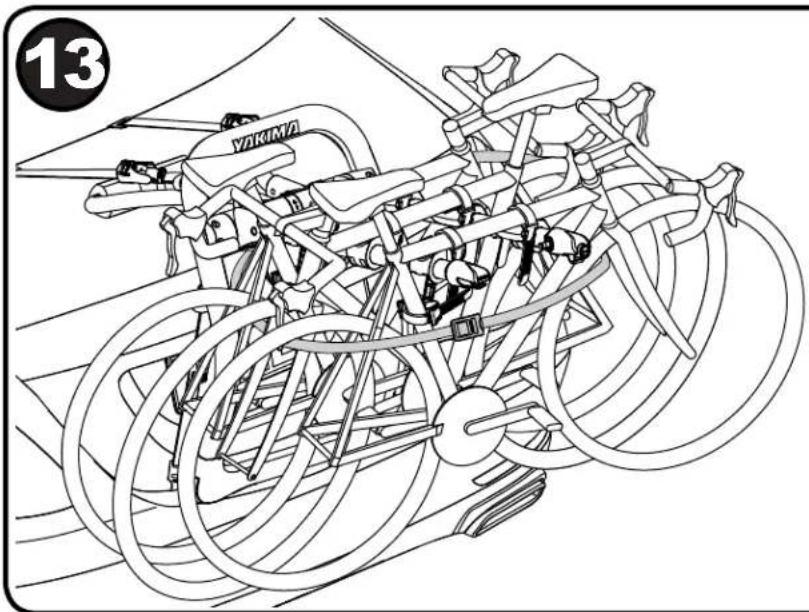
Use the included safety strap to secure your bikes to the carrier. Route the strap through each wheel, around the carrier. Feed the strap through the buckle, tighten it down, and secure the loose end.
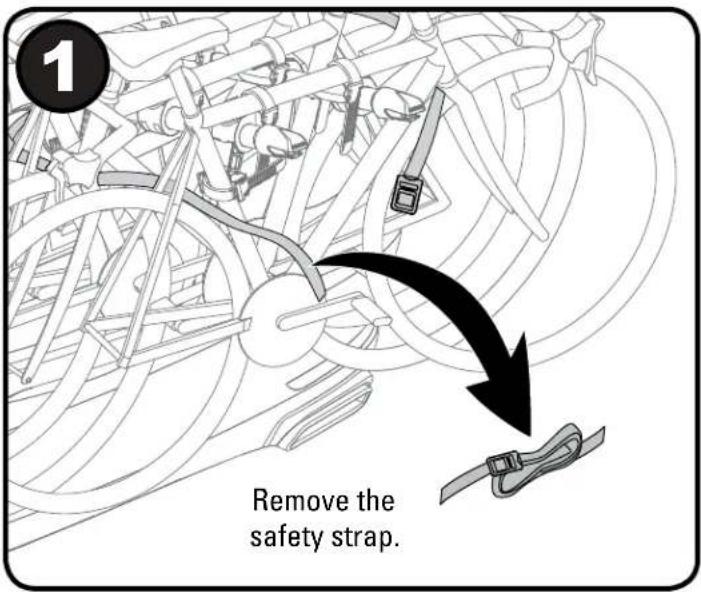
UNLOADING • DÉCHARGEMENT • DESCARGA
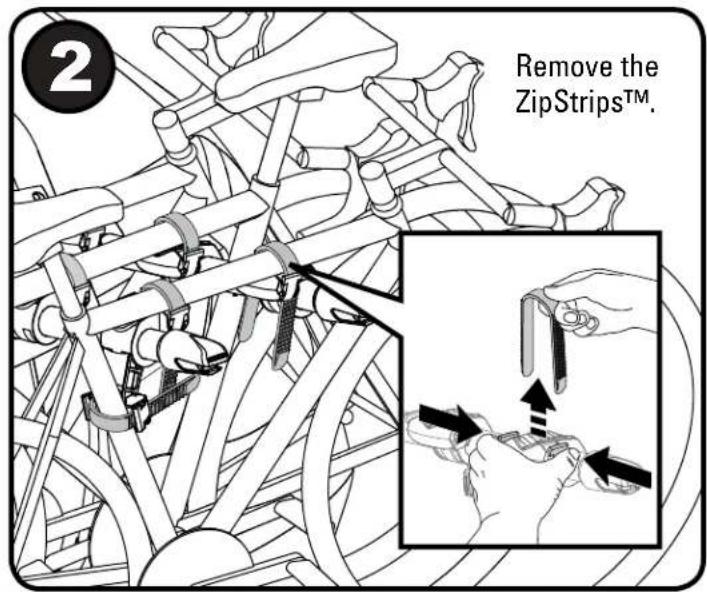
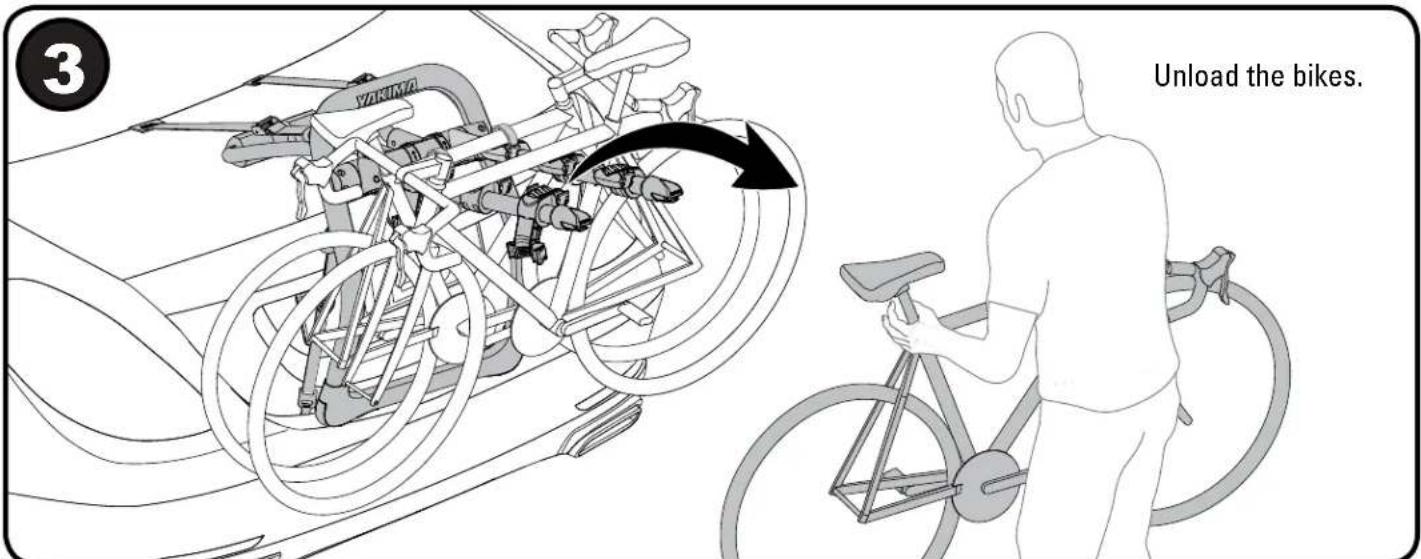
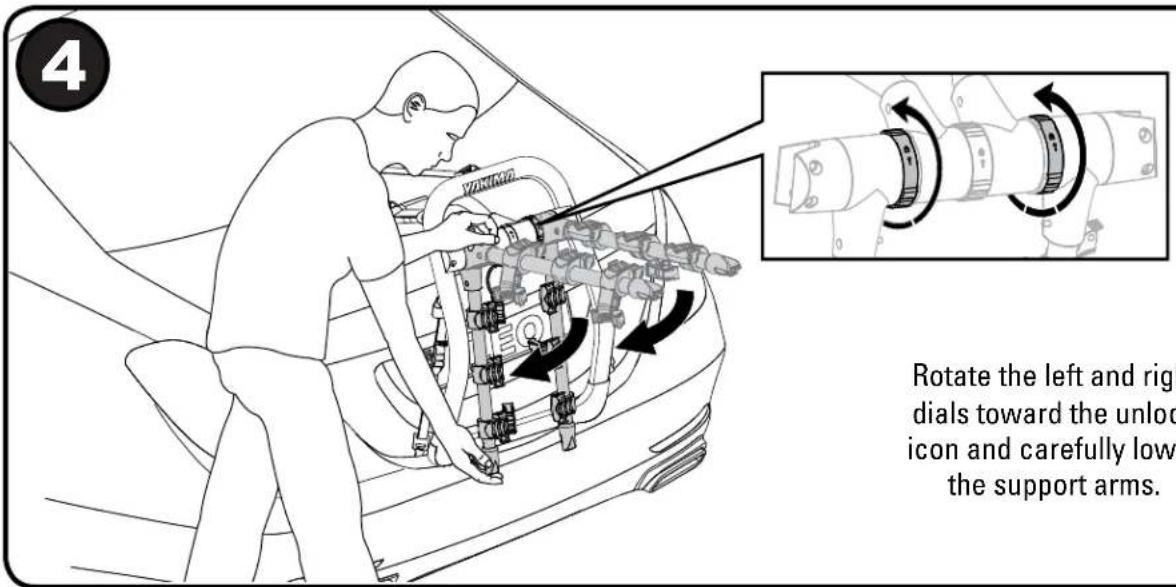
Rotate the left and right dials toward the unlock icon and carefully lower the support arms.
REMOVAL • DÉPOSE • DESMONTAJE

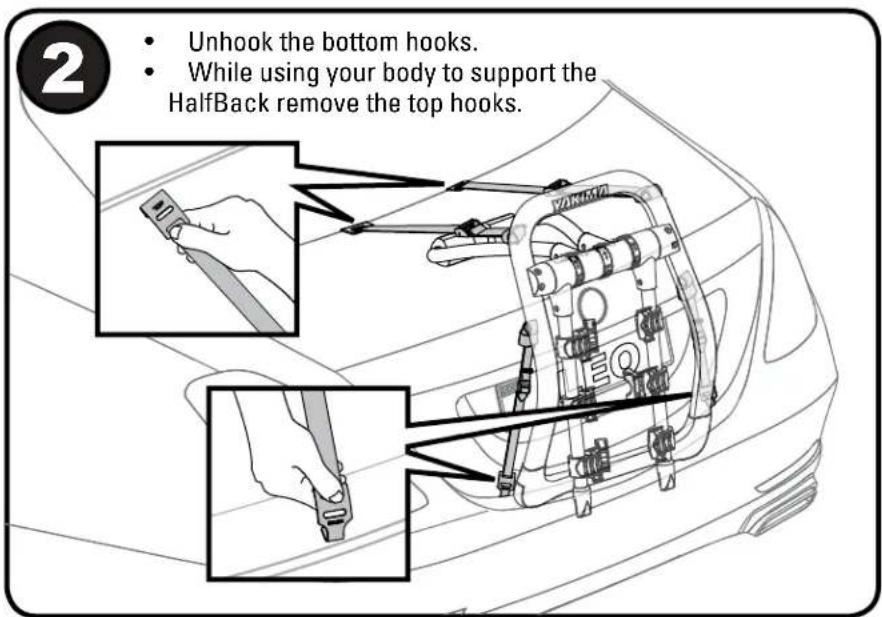
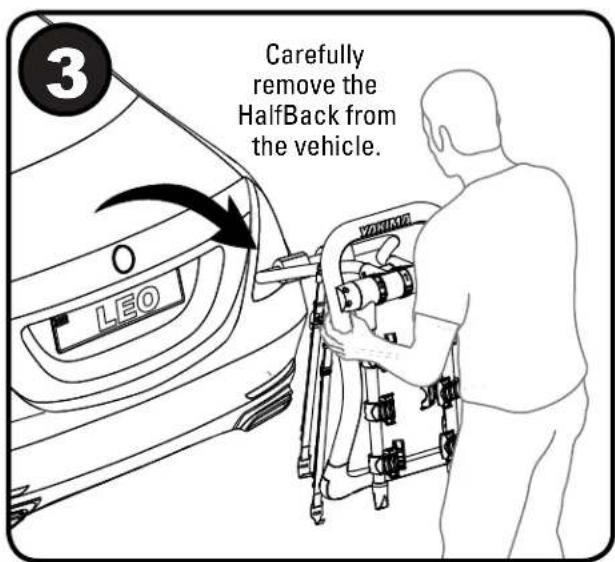
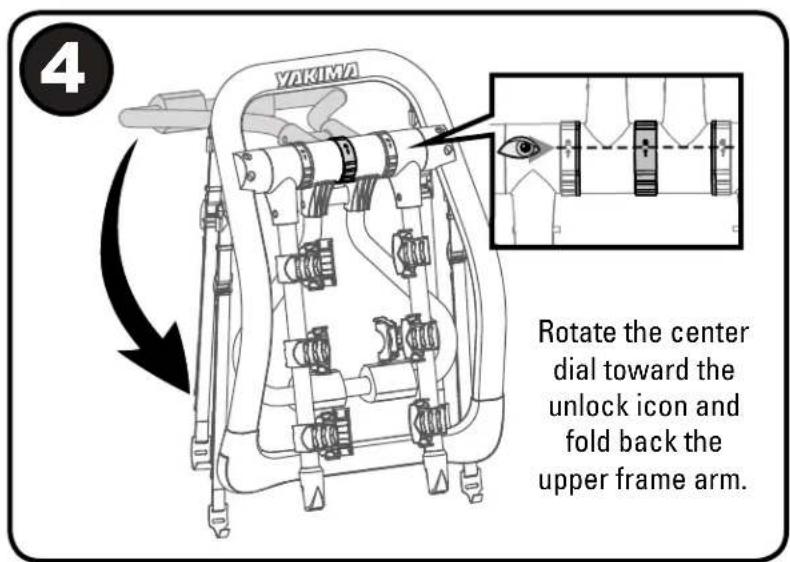
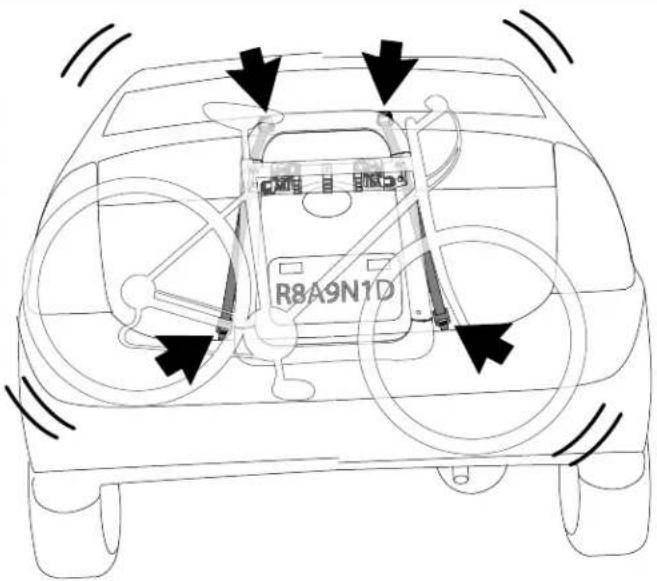
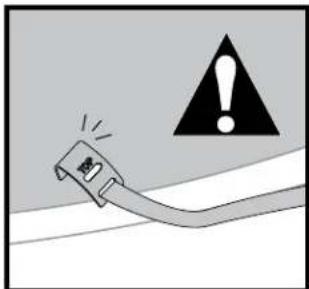
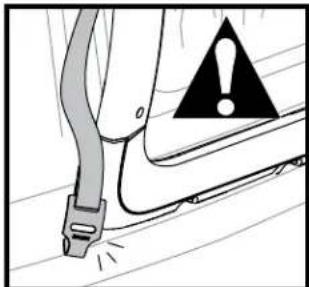
STRAP TENSION
Check strap tension before each use, and while in use check strap tension often, tighten with each new load.
IMPORTANT!
Be sure to read all the warnings and warranty information contained in the insert accompanying these instructions!
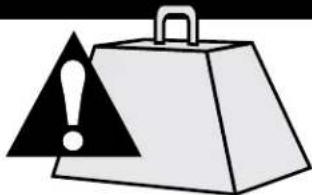
HALFBACK WEIGHT
2 Bike Rack = 21 lbs (9.5kg)
3 Bike Rack=23 lbs (10.5kg)
WEIGHT LIMITS
natural_image
Illustration of a hard hat with an exclamation mark symbol (no text or numbers present)HalfBack (2 Bike)
35 lbs / 15.9 kg max per bike.
70 lbs / 31.75 kg total.
HalfBack (3 Bike)
30 lbs / 13.6 kg max per bike.
90 lbs / 40.8 kg total.
IMPORTANT GUIDELINES:
- CERTAIN AUTOMOTIVE AFTERMARKET PRODUCTS SUCH AS SPOILERS, ANTENNAE, ETC. MAY PREVENT ATTACHMENT OF THE CARRIER.
- EXCESSIVE TIGHTENING OF THE STRAP MAY CAUSE DAMAGE TO SOFTER BODY MATERIALS.
• NOT APPROVED FOR TANDEMS OR RECUMBENTS.
• DO NOT INSTALL ONTO TRAILERS, CAMPERS, OR RVS. - NEVER OPEN TRUNK/HATCH WITH CARRIER INSTALLED. OPENING THE HATCH OR TRUNK WITH CARRIER INSTALLED COULD CAUSE DAMAGE TO THE VEHICLE.
- REPLACE ANY OF THE STRAPS THAT APPEAR WORN OR FRAYED (CONTACT YOUR DEALER).
- HALFBACK/ FULLBACK MAY NOT WORK ON VEHICLES WITH AUTOMATIC OR POWER LIFT GATES.
MAINTENANCE:
Use a soft cloth with water and mild detergent to clean plastic parts.
CAUTION
REMOVE HALFBACK/FULLBACK BEFORE ENTERING AN AUTOMATIC CAR WASH.
READ THE INSTALLATION CAUTIONS THAT APPLY TO YOUR VEHICLE
Rear Window Wiper
- Wiper may not be usable while carrier is installed. Do not allow wiper to contact any part of this carrier, at any time.
Vehicles with a Spoiler
- If any part of the carrier contacts the spoiler, do not use this product.
Spoiler Gap
- SUV's, vans, and wagons with a gap between the rear spoiler and rear window or hatch must route upper straps under the spoiler when possible. Do not allow straps to contact spoiler.
Glass Hatches
- If upper or lower hooks must attach to glass, follow instructions to use Glass Hatch Hooks (sold separately).
Convertibles
- Do not allow the upper frame of the carrier to rest on car convertible top.
- Do not raise or lower top while carrier is installed.
Tight Seams
- On some vehicles the trunk/hatch seams may be too tight to easily insert hooks. Slide hooks from outside edge of trunk/hatch to appropriate location. If still to tight, open trunk/hatch, insert hooks, and close very carefully to avoid damage. - Make sure trunk/hatch is securely closed before continuing installation
Soft Attachment Points
- Excessive tightening of the straps may cause damage to softer body materials.
natural_image
Diagram of a car interior showing a vehicle seatbelt with warning symbol (no text or labels)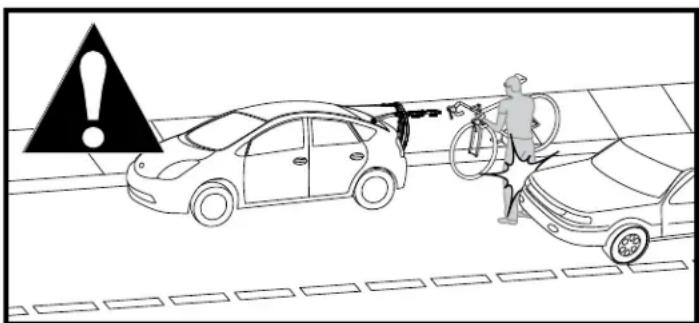
RECOMMENDED ACCESSORIES (SOLD SEPARATELY)
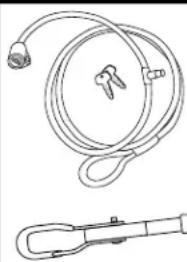
natural_image
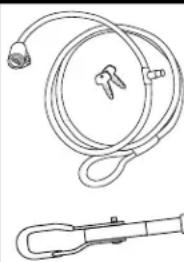
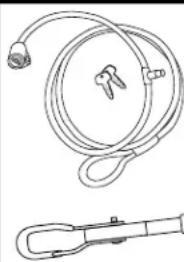
Technical line drawing of a coiled cable and a U-shaped clamp (no text or symbols)YAKIMA 9ft Security cable (YAKIMA PART NUMBER 8007233)
Secures your bikes to your carrier.
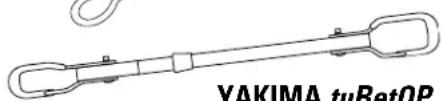
YAKIMA tuBetOP ^tM (YAKIMA PART NUMBER 8002531)
Recommended for bikes with slanted, or no bicycle top tubes.
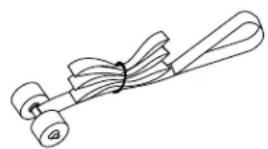
natural_image
Simple line drawing of a cable or wire with a looped end (no text or symbols)TRUNK SECURITY STRAP (YAKIMA PART NUMBER 8002623) Secures your carrier to your vehicle.
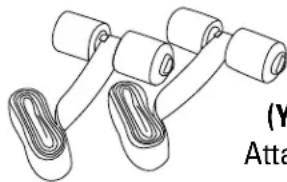
natural_image
Diagram of a mechanical assembly with multiple cylindrical components and coiled loops, labeled (Y) and Atta (no text or symbols on the diagram itself)GLASS HATCH HOOKS™ (YAKIMA PART NUMBER 8002612) Attaching Glass Hatch Hooks to upper strap will limit load to 2 bikes.
Go to www.yakima.com or contact your dealer to purchase.

www.yakima.com
YAKIMA PRODUCTS, INC.
4101 KRUSE WAY
LAKE OSWEGO, OR 97035-2541
USA
KEEP THESE INSTRUCTIONS!
YAKIMA
HalfBack™
FR
natural_image
Top-down technical line drawing of a car interior panel with no visible text or symbolsPASSER À LA PAGE 7.
natural_image
Diagram of a ribbon or strap with a black arrow indicating direction, labeled '2X' at bottom (no text or symbols on the diagram itself)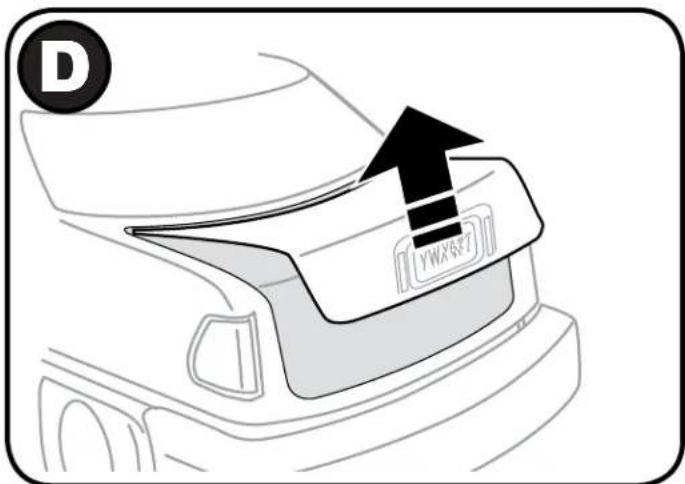
natural_image
Line drawing of a car rear bumper with attached cable and logo (no text or symbols)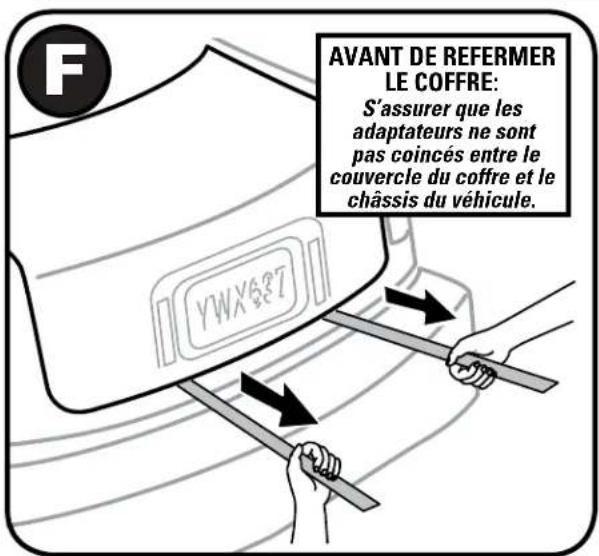
natural_image
Line drawing of a person using a medical or rehabilitation device with arrows indicating movement (no text or symbols)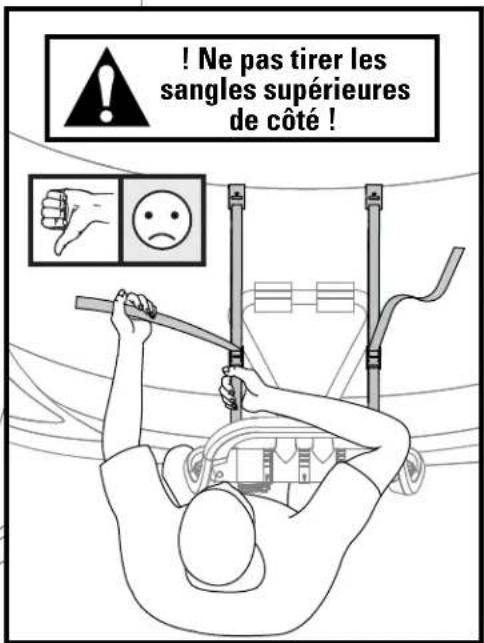
natural_image
Illustration of a hand tying a rope knot between two vertical poles (no text or symbols)2X

natural_image
Technical line drawing of a mechanical assembly with no visible text or symbols2X
9
Tester l'installation.
natural_image
Line drawing of a person using a vehicle safety harness to adjust the seatbelt (no text or symbols present)natural_image
Diagram of a car interior showing hand positioning and two side-view smiley face indicators (no text or symbols)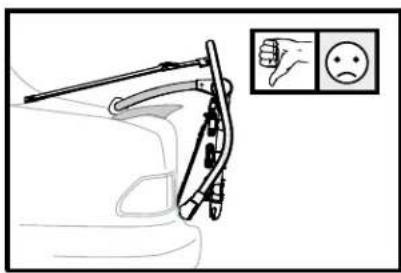
LOADING • CHARGEMENT • CARGA
10
Relever les bras.
natural_image
Technical line drawing of a mechanical component with labeled parts (no readable text or symbols)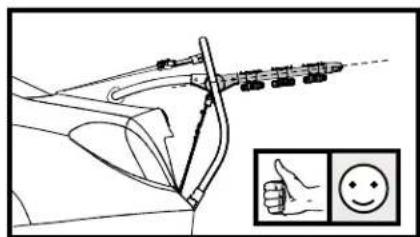
natural_image
Diagram of a robotic arm with a hand gesture and two side-view smiley icons (no text or symbols)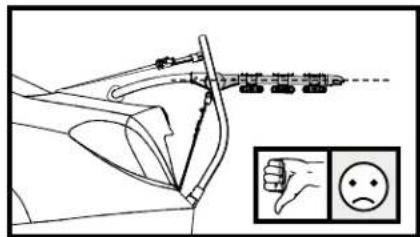
natural_image
Line drawing of a bicycle with wheels and suspension components, no text or symbols presentPoser la sangle longue
IMPORTANT!
natural_image
Illustration of a hard hat with an exclamation mark symbol (no text or numbers present)HalfBack (2 vélo)
natural_image
Diagram of a car interior showing internal components and a warning symbol (no text or labels present)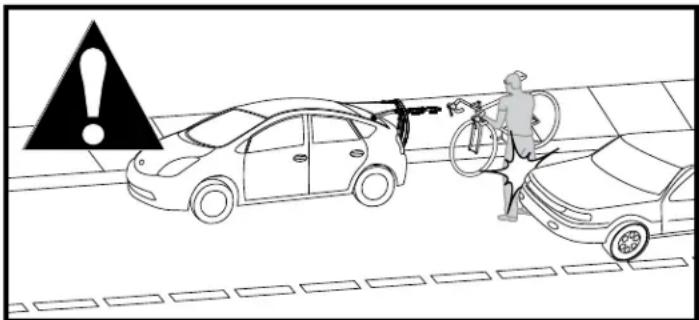
ACCESSOIRES RECOMMANDÉS (VENDUS À PART)
natural_image
Technical line drawing of a coiled cable and a U-shaped clamp (no text or symbols)CÂBLE VERROUILLABLE DE 3 M YAKIMA (ARTICLE YAKIMA N° 8007233)
natural_image
Simple line drawing of a cable or wire with a loop, no text or symbols present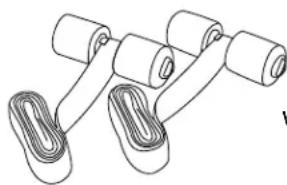
natural_image
Diagram of a mechanical assembly with multiple cylindrical components and coiled springs (no text or symbols)SANGLE D'ARRIMAGE AU COFFRE (ARTICLE YAKIMA N° 8002623)

PARA EVITAR DAÑOS, POSICIONE SIEMPRE EL PORTABICICLETAS DONDE LO INDICAN LAS NOTAS DE MONTAJE ESPECÍFICAS PARA SU VEHÍCULO.
Armazón superior:
natural_image
Top-down technical line drawing of a car interior panel with no visible text or symbolsVAYA A LA ETAPA 7.
natural_image
Diagram of a ribbon or strap with a black arrow indicating direction, labeled '2X' at bottom (no text or symbols on the diagram itself)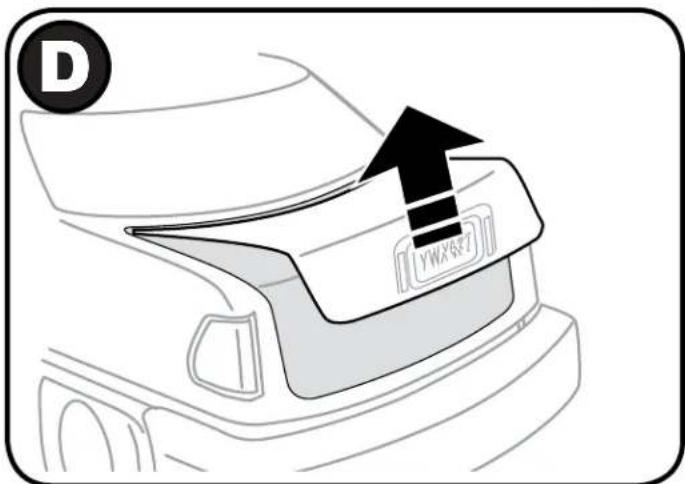
natural_image
Line drawing of a car rear bumper with attached cable and logo (no text or symbols)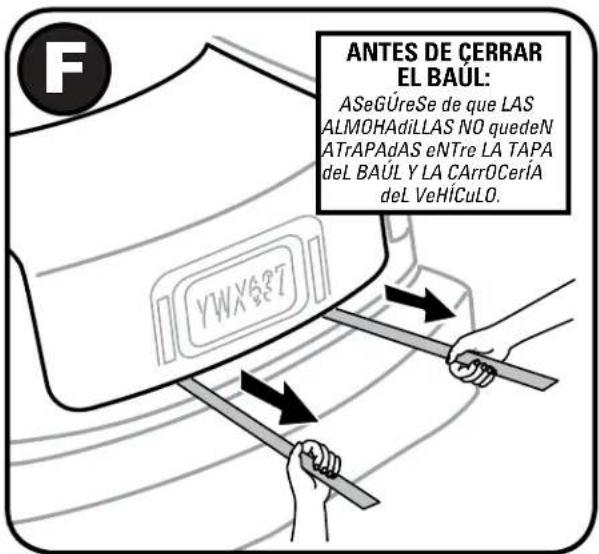
natural_image
Line drawing of a person using a medical or rehabilitation device with arrows indicating movement (no text or symbols)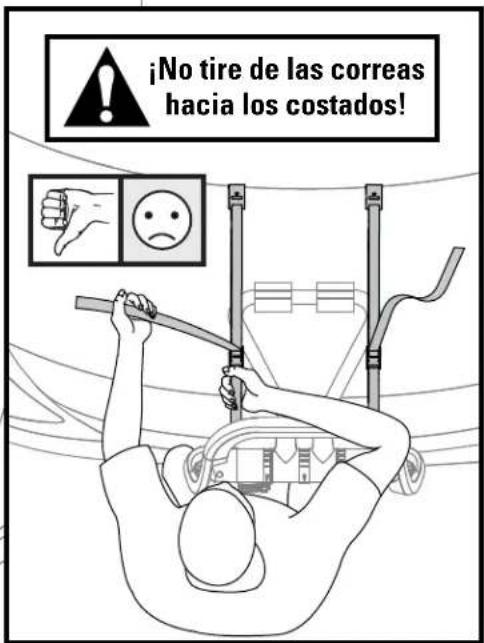
natural_image
Illustration of a hand tying a knot between two vertical poles, with no text or symbols present.2X

natural_image
Line drawing of a hand holding a ribbon near a vehicle's side panel (no text or symbols)2X
natural_image
Line drawing of a person using a vehicle safety harness to adjust the seatbelt (no text or symbols present)natural_image
Side view of a car's dashboard and steering wheel, with two side-view icons showing thumbs and smiley faces (no text or symbols)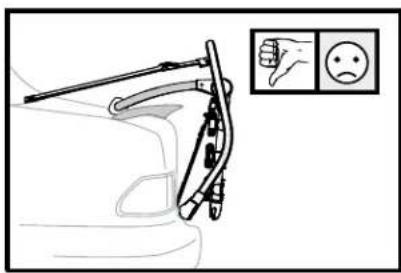
LOADING • CHARGEMENT • CARGA
natural_image
Diagram of a robotic arm with a hand gesture and two side-view smiley icons (no text or symbols)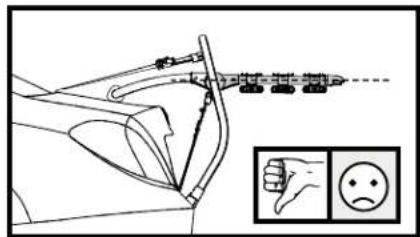
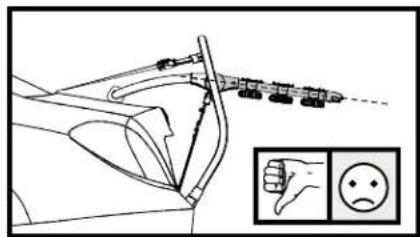
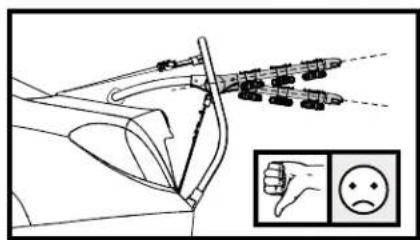
natural_image
Line drawing of a bicycle with visible wheels and suspension components (no text or symbols)
¡IMPORTANTE!
natural_image
Illustration of a shopping bag with an exclamation mark symbol (no text or labels)HalfBack (Bicicleta 2)
natural_image
Diagram of a car rearview showing internal components and a warning symbol (no text or labels present)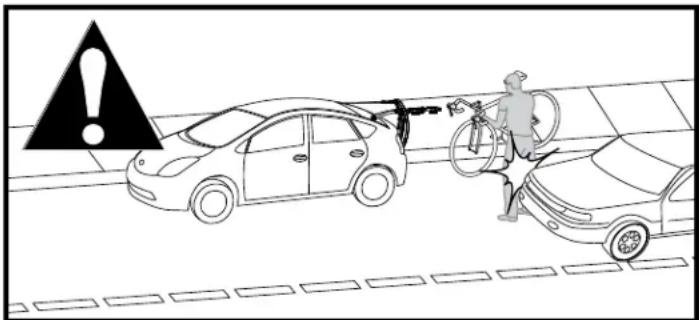
ACCESORIOS RECOMENDADOS (VENDIDOS POR SEPARADO)
natural_image
Technical line drawing of a coiled cable and a mechanical clamp (no text or symbols)natural_image
Technical line drawing of a TUBEPTM mechanical component (no text or symbols on the diagram itself)natural_image
Simple line drawing of a cable or wire with a looped end (no text or symbols)natural_image
Line drawing of a mechanical assembly with three cylindrical components connected by rods (no text or symbols)
- PURCHASE SEPARATELY:
- CONTENTS • CONTENU • CONTENIDO
- INSTALLATION • MONTAGE • INSTALLATION
- Upper Frame:
- Lower Frame:
- TOP HOOKS: Anchor installation instructions
- Attach bottom hooks
- BOTTOM HOOKS: Anchor installation instructions
- REMOVE THE CARRIER FROM THE CAR.
- Fully Tighten top straps
- Fully Tighten bottom straps
- LOADING • CHARGEMENT • CARGA
- Install safety strap
- UNLOADING • DÉCHARGEMENT • DESCARGA
- REMOVAL • DÉPOSE • DESMONTAJE
- STRAP TENSION
- IMPORTANT!
- HALFBACK WEIGHT
- WEIGHT LIMITS
- IMPORTANT GUIDELINES:
- MAINTENANCE:
- CAUTION
- READ THE INSTALLATION CAUTIONS THAT APPLY TO YOUR VEHICLE
- Rear Window Wiper
- Vehicles with a Spoiler
- Spoiler Gap
- Glass Hatches
- Convertibles
- Tight Seams
- Soft Attachment Points
- RECOMMENDED ACCESSORIES (SOLD SEPARATELY)
- YAKIMA
- HalfBack™
- FR
- Poser la sangle longue
- ACCESSOIRES RECOMMANDÉS (VENDUS À PART)
- PARA EVITAR DAÑOS, POSICIONE SIEMPRE EL PORTABICICLETAS DONDE LO INDICAN LAS NOTAS DE MONTAJE ESPECÍFICAS PARA SU VEHÍCULO.
- Armazón superior:
- ¡IMPORTANTE!
- HalfBack (Bicicleta 2)
- ACCESORIOS RECOMENDADOS (VENDIDOS POR SEPARADO)
Brand : Yakima
Model : HalfBack 3
Category : Bike rack