
DMR108 - Radio MAKITA - Free user manual and instructions
Find the device manual for free DMR108 MAKITA in PDF.
| Product Type | Jobsite Radio |
| Brand | Makita |
| Model | DMR108 |
| Power Supply | 12V DC / 1.2A AC adapter (center positive pin); main battery 7.2V - 18V (slide or stick type); 2 backup UM-3 (AA) batteries |
| FM Frequency Range | 87.50 - 108 MHz (0.05 MHz step) |
| Bluetooth | Version 4.0, A2DP/SCMS-T profiles, max 10 m range |
| Speaker | 2 x 3.5 inches, 8 ohms |
| Output Power | Variable depending on battery: 0.5W x 2 (7.2V) to 3.5W x 2 (18V) |
| USB Port | 5V / 1A (charging only, not playback) |
| Auxiliary Inputs | 2 x 3.5mm stereo jack (AUX IN 1 and 2) |
| FM Antenna | Bendable flexible rod |
| AM Antenna | Ferrite (internal) |
| Display | LCD with backlight |
| Main Functions | AM/FM radio with RDS, Bluetooth, AUX, dual alarm (radio + buzzer), sleep timer, gradual wake-up HWS, 5 presets per band |
| Backup Battery | 2 AA batteries (for memory backup) |
| Low Battery Indicator | Yes (displays "POWER FAIL" and symbol) |
| Included Accessories | AC adapter, antenna, instruction manual |
| Maintenance | Clean with a soft cloth only |
| Safety | Read manual before use; avoid short-circuiting batteries; do not expose to rain; do not dispose of in fire; use only specified accessories |
| Repairability | User-replaceable batteries (AA batteries and battery packs) |
Frequently Asked Questions - DMR108 MAKITA
User questions about DMR108 MAKITA
0 question about this device. Answer the ones you know or ask your own.
Ask a new question about this device
Download the instructions for your Radio in PDF format for free! Find your manual DMR108 - MAKITA and take your electronic device back in hand. On this page are published all the documents necessary for the use of your device. DMR108 by MAKITA.
USER MANUAL DMR108 MAKITA
ENJob Site Radio Instruction manual
ENGLISH (Original instructions)
Symbols
The following show the symbols used for the equipment. Be sure that you understand their meaning before use.

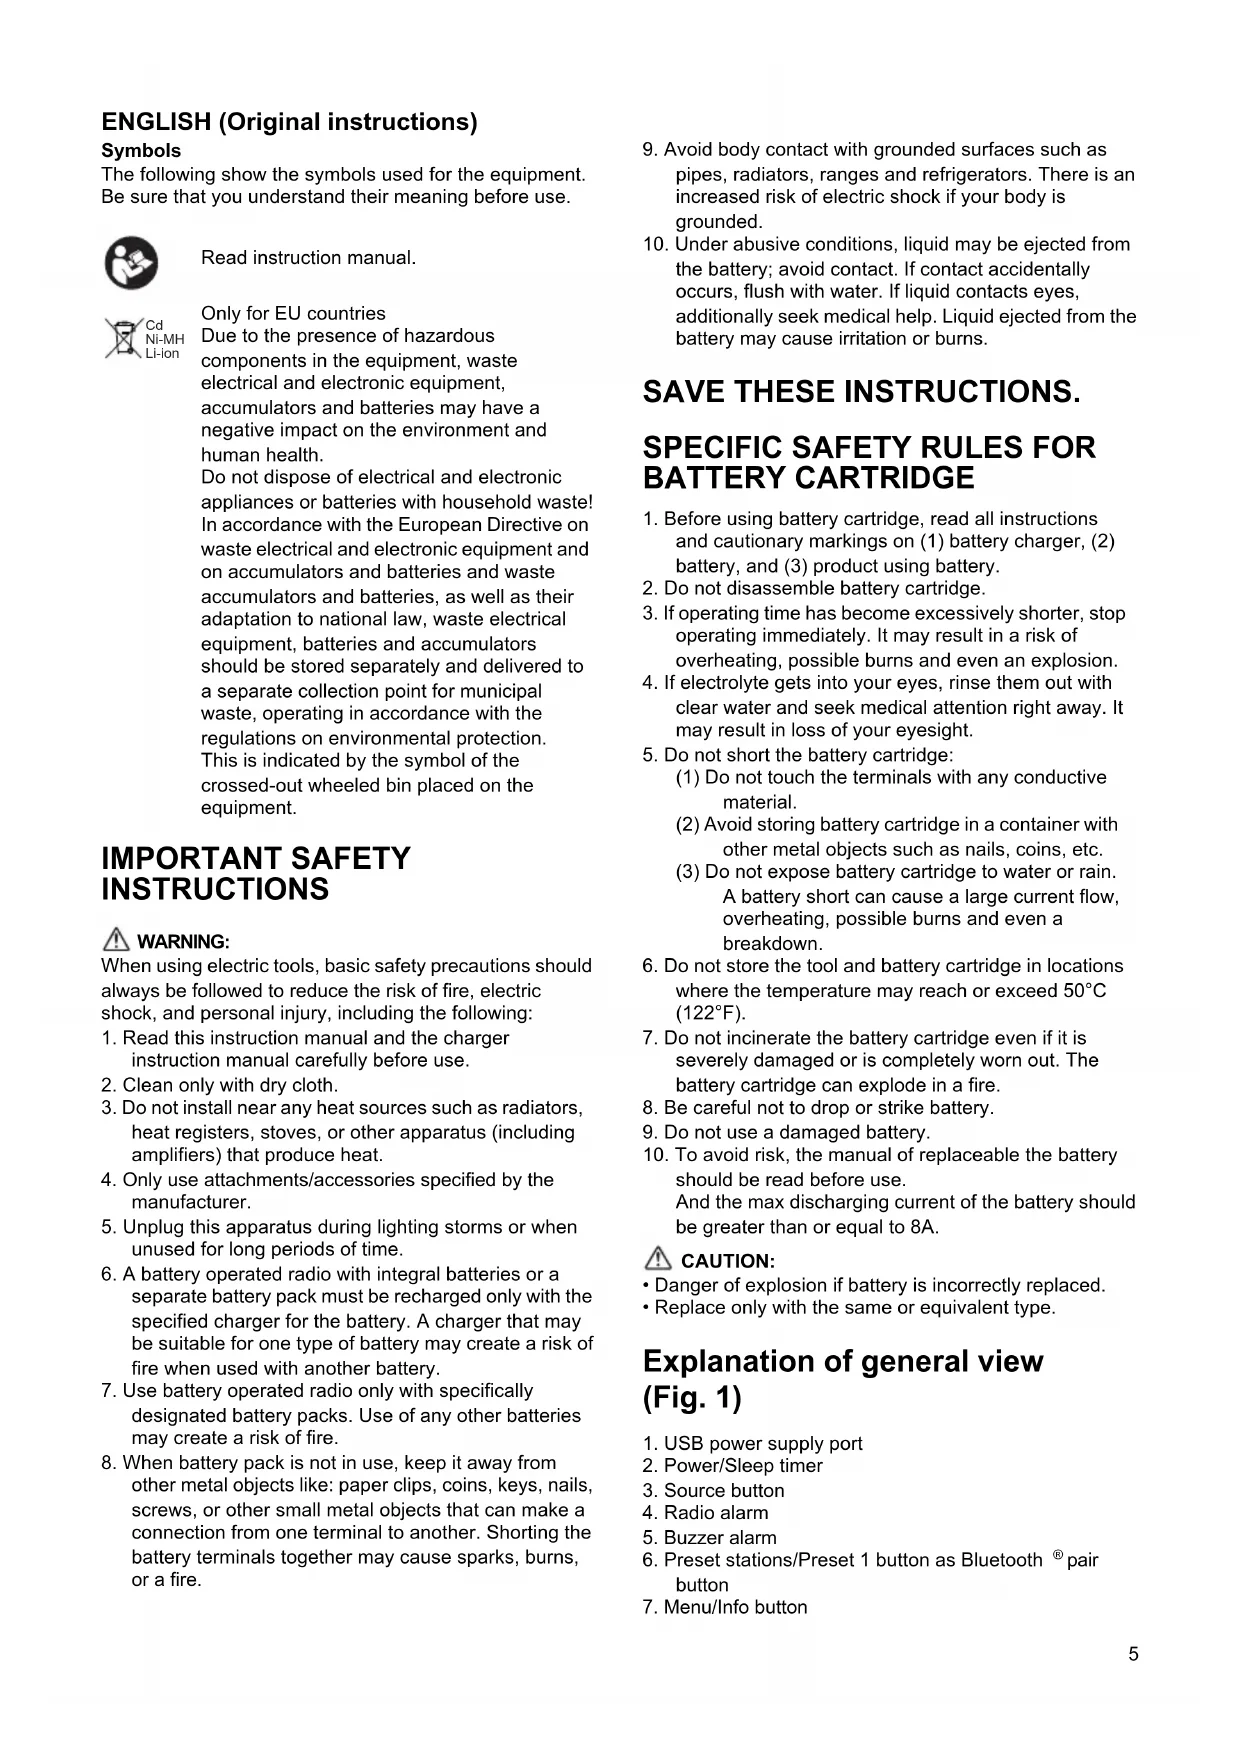
Read instruction manual.

Only for EU countries
Due to the presence of hazardous components in the equipment, waste electrical and electronic equipment, accumulators and batteries may have negative impact on the environment a human health.
Do not dispose of electrical and electronic appliances or batteries with household waste! In accordance with the European Directive on waste electrical and electronic equipment and on accumulators and batteries and waste accumulators and batteries, as well as their adaptation to national law, waste electrical equipment, batteries and accumulators should be stored separately and delivered to a separate collection point for municipal waste, operating in accordance with the regulations on environmental protection. This is indicated by the symbol of the crossed-out wheeled bin placed on the equipment.
IMPORTANT SAFETY INSTRUCTIONS

WARNING:
When using electric tools, basic safety precautions should always be followed to reduce the risk of fire, electric shock, and personal injury, including the following:
- Read this instruction manual and the charger instruction manual carefully before use.
- Clean only with dry cloth.
- Do not install near any heat sources such as radiators, heat registers, stoves, or other apparatus (including amplifiers) that produce heat.
- Only use attachments/accessories specified by the manufacturer.
- Unplug this apparatus during lighting storms or when unused for long periods of time.
- A battery operated radio with integral batteries or a separate battery pack must be recharged only with the specified charger for the battery. A charger that may be suitable for one type of battery may create a risk of fire when used with another battery.
- Use battery operated radio only with specifically designated battery packs. Use of any other batteries may create a risk of fire.
-
When battery pack is not in use, keep it away from other metal objects like: paper clips, coins, keys, nails, screws, or other small metal objects that can make a connection from one terminal to another. Shorting the battery terminals together may cause sparks, burns, or a fire.
-
Avoid body contact with grounded surfaces such as pipes, radiators, ranges and refrigerators. There is an increased risk of electric shock if your body is grounded.
- Under abusive conditions, liquid may be ejected from the battery; avoid contact. If contact accidentally occurs, flush with water. If liquid contacts eyes, additionally seek medical help. Liquid ejected from the battery may cause irritation or burns.
SAVE THESE INSTRUCTIONS.
SPECIFIC SAFETY RULES FOR BATTERY CARTRIDGE
- Before using battery cartridge, read all instructions and cautionary markings on (1) battery charger, (2) battery, and (3) product using battery.
- Do not disassemble battery cartridge.
- If operating time has become excessively shorter, stop operating immediately. It may result in a risk of overheating, possible burns and even an explosion.
- If electrolyte gets into your eyes, rinse them out with clear water and seek medical attention right away. It may result in loss of your eyesight.
- Do not short the battery cartridge:
(1) Do not touch the terminals with any conductive material.
(2) Avoid storing battery cartridge in a container with other metal objects such as nails, coins, etc.
(3) Do not expose battery cartridge to water or rain. A battery short can cause a large current flow, overheating, possible burns and even a breakdown.
-
Do not store the tool and battery cartridge in locations where the temperature may reach or exceed 50^ (122^) .
-
Do not incinerate the battery cartridge even if it is severely damaged or is completely worn out. The battery cartridge can explode in a fire.
- Be careful not to drop or strike battery.
- Do not use a damaged battery.
- To avoid risk, the manual of replaceable the battery should be read before use. And the max discharging current of the battery should be greater than or equal to 8A.
CAUTION:
- Danger of explosion if battery is incorrectly replaced.
- Replace only with the same or equivalent type.
Explanation of general view (Fig. 1)
- USB power supply port
- Power/Sleep timer
- Source button
- Radio alarm
- Buzzer alarm
- Preset stations/Preset 1 button as Bluetooth pair button
-
Menu/Info button
-
Volume/Tuning control/Select knob
- DC IN socket
10.AUX IN 1 - LCD display
- Handle
- Soft bended rod antenna
- Battery compartment locker
- Speaker
- Battery cover
- Input terminal (AUX IN 2)
- Battery compartment (covering main battery pack and back up batteries)
19.Up
20.Left - Front
- Right
- Back; Battery cover closed
- Back; Battery cover opened
- Battery cartridge
- Button
- Indicator lamps
- Check button
LCD display:
A. Radio alarm
B. Buzzer alarm
C. Stereo symbol
D. Low battery indicator
E. Clock
F. Frequency
G.RDS (Radio data system)
H. Sleep status
I. AM/PM for clock
Battery Installation
Note:
Keeping back up batteries inside the compartment prevent stored data in preset memories from being lost.
Back up battery Installation
- Pull out the battery compartment locker to release battery compartment. There are main battery pack compartment and back up battery compartment. (Fig. 2)
- Remove back up battery compartment cover and insert 2 fresh UM-3 (AA sizes). Make sure the batteries are with correct polarity as shown inside the compartment. Replace the battery cover. (Fig. 3)
- After back up batteries are inserted, insert the main battery pack to power radio. The suitable battery packs for this radio listed as the following table.
The following table indicates the operating time on a single charge in Radio mode.
| Battery capacity | Battery Cartridge Voltage | At speaker output = 50 mW + 50 mW (unit: Hour) (Approximately) | |||||
| 7.2 V 10.8 V | 10.8 V - 12 Vmax | 14.4 V 18 | V In radio or | AUX | In Bluetooth® with USB charging | ||
| 1.0 Ah BL701 | 0 6.0 0.8 | ||||||
| 1.3 Ah | BL1013 8.0 1.5 | ||||||
| BL1415 6.5 | 2.0 | ||||||
| BL1815 7.5 | |||||||
| 1.5 Ah | BL0715 9.0 1.0 | ||||||
| BL1015/ BL1016 | 9.5 1.8 | ||||||
| BL1415N 8.5 2.0 | |||||||
| BL1815N 9.5 2.5 | |||||||
| 2.0 Ah | BL1020B/ BL1021B | 12 | 2.5 | ||||
| BL1820/ BL1820B | 13 | 3.5 | |||||
| 3.0 Ah | BL1430/ BL1430B | 14 | 4.5 | ||||
| BL1830/ BL1830B | 18 | 5.0 | |||||
| 4.0 Ah | BL1040B/ BL1041B | 25 | 5.0 | ||||
| BL1440 | 23 | 6.0 | |||||
| BL1840/ BL1840B | 26 | 7.0 | |||||
| 5.0 Ah | BL1450 | 28 | 8.0 | ||||
| BL1850/ BL1850B | 33 | 8.5 | |||||
| 6.0 Ah | BL1460B | 30 | 9.5 | ||||
| BL1860B | 40 | 10 | |||||
: Cluster Battery
:Slide Battery
Note:
Table regarding to the battery operating time above is for reference. The actual operating time may differ with the type of the battery, charging condition, or usage environment.
Installing or removing Slide battery cartridge (Fig. 4 & 5)
- To install the battery cartridge, align the tongue on the battery cartridge with the groove in the housing and slip it into place. Always insert it all the way until it locks in place with a little click.
- If you can see the red indicator on the upper side of the button, it is not locked completely. Install it fully until the red indicator cannot be seen. If not, it may accidentally fall out of the tool, causing injury to you or someone around you.
-
Do not use force when inserting the battery cartridge. If the cartridge does not slide in easily, it is not being inserted correctly.
-
To remove the battery cartridge, withdraw it from the tool while sliding the button on the front of the cartridge or pressing the buttons on both sides of the cartridge.
Installing or removing Cluster battery cartridge (Fig. 6 & 7)
- To insert the battery cartridge, align the tongue on the battery cartridge with the grove in the housing and slip it into place.
- To remove the battery cartridge, take the battery out of the terminal while pressing the buttons on the side of cartridge.
Return the battery compartment locker to the original position.
Reduced power, distortion, "stuttering sound" or when both low battery sign and "POWERFAIL" appear on the display are all the signs that the main battery pack needs to replace.
Note:
The battery pack can't be charged via the supplied AC power adaptor.
When low battery sign appears and an "EMPTY"
keeps on flashing is the time to replace the back up
batteries.
Indicating the remaining battery capacity (Fig. 8)
Only for battery cartridges with "B" at the end of the model number
Press the check button on the battery cartridge to indicate the remaining battery capacity. The indicator lamps light up for few seconds.
| Indicator lamps | Remaining capacity | ||
| Lighted Off Blinking | |||
| 75% to 100% | |||
| 50% to 75% | |||
| 25% to 50% | |||
| 0% to 25% | |||
| Charge the battery. | |||
| The battery may have malfunctioned. | |||
015658
Note:
- Depending on the conditions of use and the ambient temperature, the indication may differ slightly from the actual capacity.
Using the soft bended rod antenna (Fig. 9)
Straight up the soft bended rod antenna as shown in the figure.
Using Supplied AC power adaptor (Fig. 10)
Remove the rubber protector and insert the adaptor plug into the DC socket on the left side of the radio. Plug the adaptor into a standard mains socket outlet. Whenever the adaptor is used, the battery pack is automatically disconnected. The AC adaptor should be disconnected from the main supply when not in use.
Note:
When your radio has any interference in AM band by its adaptor, please move your radio away from its AC adaptor over 30~cm .
Operating your radio - Scan tuning AM/ FM
- Press the Power button to switch on your radio.
- Press the Source button to select AM or FM radio mode.
- Press and hold the Tuning control knob to carry out an auto-tune. Your radio will scan up the AM/FM band from the currently displayed frequency and will stop scanning automatically when it finds a station of sufficient strength.
- After a few seconds the display will update. The display will show the frequency of the signal found.
- To find other station, press and hold the Tuning control knob as before.
- When the end of the waveband is reached your radio will recommence tuning from the opposite end of the waveband.
- Rotate the Tuning control knob to adjust the sound level as required.
Note:
- While adjusting the volume, make sure the FM/AM is NOT flashing on the screen.
-
If AM/FM is flashing on the screen, it allows you to tune the stations manually (see the section of "Manual tuning - AM/ FM" for more detail).
-
To switch off your radio press the Power button

Manual tuning - AM/FM
- Press the Power button to switch on your radio.
- Press the Source button to select AM or FM radio mode.
- Press the Tuning control knob and you will see the FM or AM is flashing on the display.
Note:
FM/AM will flash approx. 10 seconds. Within this period, only manual tuning is allowed.
- If volume adjustment is desired while FM/AM is flashing, press the Tuning control knob to stop the flash and you can rotate the Tuning control knob to adjust sound level.
- Rotate the Tuning control knob to tune to a station.
- When the end of the waveband is reached your radio will recommence tuning from the opposite end of the waveband.
- Use the Tuning control knob to adjust the sound level as required.
Presetting stations in AM/FM mode
There are 5 preset stations each for AM and FM radio.
They are used in the same way for each waveband.
- Press the Power button to switch on your radio.
- Press the Source button to select the desired
waveband. Tune to the required radio station as
previously described.
- Press and hold the required Preset button (1 to 5)
until the display shows "P4" for example after the frequency. The station will be stored using the preset number. Repeat this procedure for the remaining presets as you wish. - Preset stations which have already been stored may
be overwritten by following the above procedure if required.
Display modes - FM
Your radio has a range of display options for FM radio mode.
- Repeatedly press the Menu/Info button to view
the RDS information of the station you are listening to.
a. Station name Displays the name if the station being listened to.
b. Program type Displays the type of station being listened to such as Pop, Classic, News, etc.
c. Radio text Displays radio text message such as new items etc.
d. Year/Day Displays the year and day of the week according to the date setting of your radio.
e. Date/Day Displays the date and day of the week according to the date setting of your radio.
f. Frequency Displays the frequency of the FM for the station listened to.
If the FM radio station being listened to has a weak signal some hiss may be audible. It is possible to reduce this hiss by forcing the radio to play the station in mono rather than stereo.
- Press the Power button as needed to select the FM band and tune to the desired FM station as previously stated.
- Press and hold Menu/Info button to enter the menu setting.
- Rotate the Tuning control knob until the FM Auto/ mono setting shows on the display. If the setting is Auto press the Tuning control knob to switch to Mono mode to reduce the hiss. Press the Tuning control knob to select the option.
Recalling a preset in AM/FM mode
-
Press the Power button to switch on your radio.
-
Press the Source button to select AM or FM radio mode.
- Momentarily press the required Preset button
to cause your radio to tune to one of the stations stored in the preset memory.
Clock and Alarms
Setting the time and date format
The clock display used in stand-by mode and on the playing mode screens can be set to different format. The selected format is then also used when setting the alarms.
- Press and hold the Menu/Info button to enter the menu setting.
- Rotate the Tuning control knob until "CLOCK xxH" appears on the display and press the Tuning control knob to enter the setting. You will see the time format begins to flash.
- Rotate the Tuning control knob to select either 12 or 24 hour format. Press the Tuning control knob to confirm your choice of clock format.
Note: If the 12 hour clock format is chosen, the radio will then use the 12 hour clock for the setting.
- Press and hold the Menu/Info button to enter the menu setting.
- Rotate the Tuning control knob until a date (e.g. THU APR 3) appears on the display and press the Tuning control knob to enter the setting. You will see the date format begins to flash.
- Rotate the Tuning control knob to select the desired date format. Press the Tuning control knob to confirm your choice.
Setting the clock time and date
- Press and hold the Menu/Info button
- Rotate the Tuning control knob until "CLOCK ADJ" appears on the display. Press the Tuning control knob to enter the setting.
- The hour setting on the display will begin flashing. Rotate the Tuning control knob to select the desired hour, and press the Tuning control knob to confirm the setting. Then rotate the Tuning control knob to select the desired minute, and press the Tuning control knob to confirm the setting.
- Rotate the Tuning control knob until "DATE ADJ" appears on the display. Press the Tuning control knob to enter the setting.
- Rotate the Tuning control knob to select the desired year and press the Tuning control knob to confirm the setting. Then rotate the Tuning control knob to select the desired month, and press the Tuning control knob to confirm the setting. Then rotate the Tuning control knob to select the desired
date and press the Tuning control knob to confirm the setting.
Radio Data System (RDS)
When you set the clock time using the RDS function, your radio will synchronize its clock time whenever it tunes to a radio station using RDS with CT signals.
- When tuning to a station transmitting RDS data, press and hold the Menu/Info button
- Rotate the Tuning control knob until "RDS CT" and a clock symbol appear on the display. Press the Tuning control knob to enter the setting.
- Rotate the Tuning control knob until "RDS CT" appears on the display. Press the Tuning control knob to confirm the setting. The clock time of the radio will set up automatically according to the RDS data received.
- When the action is completed, the RDS icon will appear on the LCD display indicating the radio time is RDS clock time. The radio clock time will be valid for 5 days each time the radio time is synchronized with RDS CT.
Setting the alarm clock
Your radio has two alarms which can each be set to wake you to AM/FM radio or buzzer alarm. The alarms may be set while the unit is in standby mode or while playing.
a. Setting radio alarm time:
- The radio can be set either when radio is on or off.
- Press and hold the radio alarm button, the radio alarm symbol and the display hour will flash along with a beep.
- During radio alarm symbol flashes, rotate Tuning control knob to select the hour and press Tuning control knob again to confirm hour setting. Then rotate the Tuning control knob to select the minute and press Tuning control knob to confirm minute setting.
- Rotate the Tuning control knob and the display will show the frequency options for the alarm. The alarm options are as follows: ONCE - the alarm will sound once DAILY - the alarm will sound everyday WEEKDAY - the alarm will sound only on weekdays WEEKEND - the alarm will sound only at weekends Press the Tuning control knob to confirm the setting.
-
During radio alarm symbol is flashing, rotate Tuning control knob to select desired wake-up band and station, then press Tuning control knob to confirm the selection.
-
Rotate Tuning control knob to select the desired volume and press Tuning control knob to confirm the volume. Radio alarm setting is now completed.
Note:
If new radio alarm station is not selected, it will select the last alarm station.
Note:
If the selected AM/FM alarm station is not available when the alarm is sounding, the buzzer alarm will be used instead.
b. Setting HWS (Humane Wake System) buzzer alarm: A beep tone will activate when selecting the HWS buzzer alarm.
The alarm beep will sound shorter every 15 seconds for one minute followed by one minute silence before repeating the cycle.
- The buzzer alarm can be set either when the radio is on or off.
- Press and hold the buzzer alarm button, the symbol and the display hour will flash along with a beep.
- During buzzer alarm symbol flashes, rotate Tuning control knob to select the hour and press Tuning control knob again to confirm hour setting. Then rotate the Tuning control knob to select the minute and press Tuning control knob to confirm minute setting.
- Rotate the Tuning control knob and the display will show the frequency options for the alarm. The alarm options are as follows: ONCE - the alarm will sound once DAILY - the alarm will sound everyday WEEKDAY - the alarm will sound only on weekdays WEEKEND - the alarm will sound only at weekends Press the Tuning control knob to confirm the setting.
Note:
There is no volume adjustment for buzzer alarm.
When the alarm sounds
To cancel a sounding alarm, press the Power button
Disabling/cancelling alarms
To disable an active alarm, either press the Power button
or press and hold the corresponding alarm button to cancel the alarm.
Snoopze
-
When the alarm sounds, press any button other than the Power button will silence the alarm for 5 minutes. "SNOOZE" will appear on the display.
-
To adjust the silence time for the snooze timer, press and hold the Menu/Info button to enter the menu setting.
- Rotate the Tuning control knob until "SNOOZE X" appears on the display, then press the Tuning control knob to enter the setting. Rotate the Tuning control knob to adjust the silence time from 5, 10, 15 and 20 minutes for the snooze timer.
- To cancel the snooze timer while the alarm is suspended, press the Power button
Sleep timer
Your radio can be set to turn off automatically after a preset time has elapsed. The Sleep Timer setting can be adjusted between 60, 45, 30, 15, 120 and 90 minutes.
- Press and hold the Power button to enter the Sleep Timer setting. "SLEEP XX" will show on the display.
- Keep holding the Power button and the Sleep Timer options will start switching on the display. Stop until the desired Sleep Timer setting appears on the display. The setting will be saved and the LCD will return to normal display.
- Your radio will switch off automatically after the preset Sleep Timer has elapsed. The Sleep Timer icon will show on the display indicating an active Sleep Timer.
- To cancel the Sleep Timer function before the preset time has elapsed, simply press the Power button to turn the unit off manually.
Loudness
You can get compensation on lower and higher frequency for your radio by adjusting the loudness function.
- Press and hold the Menu/Info button to enter the menu setting.
- Rotate the Tuning control knob until "LOUD ON" or "LOUD OFF" appears on the display. Press the Tuning control knob to enter the setting.
- Rotate the Tuning control knob to choose ON to turn on the loudness function, then press the Tuning control knob to confirm the setting.
- To turn off the loudness function, select OFF and press the Tuning control knob to confirm the setting.
Auxiliary input socket
Two 3.5mm stereo Auxiliary Input sockets are provided. One is at the front of your radio (AUX IN 1); the other is located in the battery compartment (AUX IN 2).
-
Connect an external audio source (for example, iPod, MP3 or CD player) to the Auxiliary Input socket.
-
Repeatedly press and release the Source button until AUX IN 1 or 2 is displayed.

- Adjust the volume setting on your iPod, MP3 or CD player to ensure an adequate signal level from the player, and then use the Tuning control knob on the radio as needed for comfortable listening.
Listening to Bluetooth® music
You need to pair your Bluetooth device with your radio before you can auto-link to play/stream Bluetooth music through your radio. Paring creates a permanent "bond" so two devices can always recognize each other.
Pairing your Bluetooth® device
- Press the Source button to select Bluetooth function. "BT READY" will be shown on the display and "READY" will flash with every 2 seconds interval.
- Activate Bluetooth on your device according to the device's user manual to allow the paring procedure.
- Press and release the Pair button, then "BT PAIR" will be shown on the display and it will flash with 1 second interval. You can start the search of your radio on your Bluetooth device. Once the name of your radio is appeared on your Bluetooth device, press the item in your Bluetooth list. With some old type mobiles (versions earlier than BT2.1 Bluetooth device), you may need to input the pass code "0000".
- Your Bluetooth device will be linked with the radio.
- Once connected, "BLUETOOTH" will remain on the display and the backlight will be dim-out in 10 seconds.
You can now play the music in your Bluetooth®-enabled device via your radio.
Playing Bluetooth® device which has already paired
- Press the Source button to select Bluetooth function. "BT READY" will be shown on the display and "READY" will flash with every 2 seconds interval.
- Search and link the radio on your Bluetooth device. Some device may link with the radio automatically. You can now play the music in your Bluetooth-enabled device via your radio.
Note:
a) The radio can pair with 8 Bluetooth devices at most. When you pair Bluetooth devices more than this number, pairing history will be overwritten from the oldest pairing history.
b) If there are 2 Bluetooth® devices searching for your radio, it will show its availability on both devices.
c) If your Bluetooth device is temporarily disconnected to your radio, then you need to manually reconnect your device again to the radio.
d) If the name of your radio is appeared on your Bluetooth® device list but your device cannot connect
with it, please delete the item name of your radio from your list and pair the device with your radio again following the steps described previously.
e) The effective operation range between the radio and the paired device is approximately 10 meters (30 feet).
f) Any obstacle between the radio and the device can reduce the operational range.
Disconnecting your Bluetooth® device
Press and hold the Pair button for 2-3 seconds to disconnect with your Bluetooth device. "BLUETOOTH" will disappear from the display indicating deactivation of Bluetooth.
Charging with USB power supply port (Fig. 10)
There is the USB port at the front side of the radio. You can charge USB device trough the USB port.
- Connect the USB device, such as iPod, MP3, or CD player, with USB cable available in the market.
- Press the Power button to switch on your radio.
- No matter if the radio is AC powered or battery powered, the radio can charge the USB device when the radio is switched on and in FM radio mode, or BT mode, or AUX mode, which is appeared when an external audio source is connected.
Note:
You cannot charge USB devices during AM mode because radio signal reception becomes extremely poor when charging USB device.
- The maximum volume of the output power speaker will decrease when your USB is charging.
- The USB socket can provide max 1A5V of electrical current.
Important:
- Before connecting USB device to the charger, always backup your data of USB device. Otherwise your data may lose by any possibility.
- The charger may not supply power to some USB devices.
- When not using or after charging, remove the USB cable and close the cover.
- Do not connect power source to USB port. Otherwise there is risk of fire. The USB port is only intended for charging lower voltage device. Always place the cover onto the USB port when not charging the lower voltage device.
- Do not insert a nail, wire, etc. into USB power supply port. Otherwise a circuit short may cause smoke and fire.
- Do not connect this USB socket with your PC USB port, as it is highly possible that it may cause breakdown of the units.
MAINTENANCE
CAUTION:
- Never use gasoline, benzine, thinner, alcohol or the like. Discoloration, deformation or cracks may result.
Specifications:
Power Requirements
AC power adaptor DC12 V/1,200 mA, center pin positive
Battery UM-3 (AA size) × 2 for back up Cluster battery: 7.2V -10.8 V Slide battery: 10.8V -18 V
Frequency coverage FM 87.50 - 108 MHz (0.05 MHz/step) AM (MW) 522 - 1 (9 kHz/step)
Bluetooth®
(The Bluetooth® word mark and logos are registered trademarks owned by Bluetooth SIG, Inc.)
Bluetooth® version 4.0
Bluetooth® profiles A2DP/SCMS-T
Transmission power Bluetooth ^® specification power Class 2
Transmission range Max. 10m (varies according to usage conditions)
Supported codec SBC
Compatible Bluetooth® profile
A2DP
Maximum radio-frequency power:
BT EDR: 3.95 dBm/
BT LE: 3.97 dBm
Circuit feature
3.5 inches 8 ohm x 2
Output Power 7.2V:0.5Wx2
10.8 V:1.2 W × 2
14.4 V: 2.2 W × 2,
18V:3.5Wx2
Input terminal 3.5 mm dia. (AUX IN1/AUX IN2)
Antenna system FM:softbendedrod antenna AM:bar antenna
Dimension (W× H× D) in mm 282× 294× 163
| Battery cartridge (kg) | |
| (Without battery) 4.3 | |
| BL0715 | 4.4 |
| BL7010 | |
| BL1013 | 4.5 |
| BL1015 | |
| BL1016 | |
| BL1020B | |
| BL1021B | |
| BL1415 | 4.6 |
| BL1415N | |
| BL1815 | |
| BL1815N | |
| BL1820 | |
| BL1820B | |
| BL1040B | 4.7 |
| BL1041B | |
| BL1430 | 4.8 |
| BL1430B | |
| BL1440 | |
| BL1450 | |
| BL1460B | |
| BL1830 | 4.9 |
| BL1830B | |
| BL1840 | |
| BL1840B | |
| BL1850 | |
| BL1850B | |
| BL1860B | |
AM (MW) 522 - 1710 kHz
(9 kHz/pas)
Bluetooth®
RDS - Radio Data System
AM (MW) 522 - 1.710 kHz
(in Schritten zu 9 kHz)
Bluetooth®
Radio Data System (RDS)
A Anything possible.
Nota:
AM (MW) 522 - 1.710 kHz
(9 kHz/passo)
Bluetooth®
VEILIGHEIDSVOORSCHRIFTEN VOOR ACCU'S
Radio Data System (RDS)
AM (MW) 522 - 1.710 kHz
(9 kHz/stap)
Bluetooth®
Afmetingen (b× h× d) in mm
282× 294× 163
| Batterijdoos | (kg) |
| (zonder batterij) | 4,3 |
| BL0715 | 4,4 |
| BL7010 | |
| BL1013 | 4,5 |
| BL1015 | |
| BL1016 | |
| BL1020B | |
| BL1021B | |
| BL1415 | 4,6 |
| BL1415N | |
| BL1815 | |
| BL1815N | |
| BL1820 | |
| BL1820B | |
| BL1040B | 4,7 |
| BL1041B | |
| BL1430 | 4,8 |
| BL1430B | |
| BL1440 | |
| BL1450 | |
| BL1460B | |
| BL1830 | 4,9 |
| BL1830B | |
| BL1840 | |
| BL1840B | |
| BL1850 | |
| BL1850B | |
| BL1860B |
ESPANOL (Instrucciones originales)
Simbolos
AM (MW) 522 - 1.710 kHz
(9 kHz/paso)
Bluetooth®
Table 1. Summary of the main components of the A2DPs
Perfil Bluetooth® compatible
A2DP
Radio Data System (RDS)
AM (MW) 522 - 1.710 kHz
(9 kHz/incremento)
Bluetooth®
Bluetooth®, classe 2
Intervalo de transmissao
Installation of backup-batteries
AM (MW) 522 - 1.710 kHz
(9 kHz/trin)
Bluetooth®
EAHNIKA (Ipwoeyevic oynies)
Σμβoλα
Ta Tnapakatw Tnapouoiacovu Ta cmuoA Tou Xpnoiopoiouvta iTn oukeun. Bebaowte oT Katavoeite nOnuaia touc npiv aTn xpnoi.

AiaβaOTe to Exyεipidio odnyu.

Móvo yia nics xwpe ts EE
Aoyw TnTnapouoia TwEETIKivduWv
ouotatikowepovotov EgoTIAOo, o
aioBANTOC nEeKTPiOc KAI nEeKTPovIOc
EOTIAOoc,oi OuaooWpeUeCs KAI OITAPieC
mTOpei va exov apvntikn EITIDpaon OTO
TEPIALLOV KAI TNY av0pwnivn Uyeia.
Mnv aToppTTETe TIG NAEKTPikeCs KAI
nEeKTPovIKeCS OuaKEuEc n ITATAPiec paiz ie
ta okiakac aToppipmuata!
SigmaVA TE Nv EupwnaiKn Odyia via TOV
aTIOBNTO nEeKTPiKO KAI nEeKTPovIOk
EOTIAIOo KAI YIA TOUC OuaOWpeUTec KAI
MTATAPIECS KAI TOUC ATOBANTouc
OuaOWPeUTEC KAI MTAATAPIECS, Ka0wcs KAI TNY
TPOOAPUOn Touc OTNV E0VIkn VOpOeOia, o
aTIOBANToc nEeKTPiOc EOTIAOoC, OI
MTATAPIECS KAI OI OuaOWpeUTec 0a TpETTEIva
ATOONKEUovTa EEXWPIOTA KAI VA
TAPADIDovTAt OE EExWpiToOnueio SuAAoync
Yia DNIOTAKA aTOBANTA, to OTIOIo AETOUpyei
OuMPwVa ME Touc kavovioouc yia TNY
TPOASTAIA Tou PEPiAlAOvtoc.
Auto UTNODEIKVUEtai ATTO TO OuMuBoLo Tou
diaypaumevou TPOXOpopou KABOU TOUT
BPICKeTAt avaptnMevo EITAVW OTOV
EOTIAOo.
\SHMANTIKE ΣOΔHΓΕΣ AΣΦΑΛΕΙΑΣ

IPOEIAOIOIHsH:
Otav xpooiopoioite nEeKpiKa epaaleia, ppeTl naVtoTe va aokoutheiE oEc Tc baikec Tpoquaaeic aoaaleiac, yia va meiwote tv kivuvo Tnpkayiac, nEeKpottnIgac n atoikou tpaumatioou, TepiaaBavovewv autw Toun Tepiypaoovta otn ouveia:
- AiaβaσTE TTPOeKTiKa auto To EYXεPiδio OδηγιwV KAI TO EYXεPiδio OδηγιwV Tou φοPTiTn TπPiv aTó Tn xpnoŋ.
- Kaθapiotε μόνο με στεγνό παvi.
- Mn v EykataaotneTe KovTa OE TnYeC θερμoTntac oTTwS kaLopiép, avoiyuata ekponc θερou aepa, oμtnc n aAee Ouakeues (ouπepiαβavopévwov Eviaxutw) TTou TAPayov θερoTnta.
- XpnoioutoieIe movo EapntmaT/aEouap Tou kaOpioVTai aTO tv KATAOKeuaOTn.
- ATOOUVDEE TE TNOUKEUN KATA TNI DIAPKEIA KATAIYIDWV ME KEPAUVOUC NOTAV DEV TTPOKEITAI VA TIN XPOIOPTIOHETE YIA EYEALXPOVIKO DIAOTNMA.
- 'Eva paioovo Tnou Aitoupyei eEvowatwvec μTataieç n eexwiotnaT aTataiae, pETTEI va ETTavaopotizetai mOvo eTov kaOpioevo φoptiotni yia tny mTataipia. Evac optiotnc Tnou evai
kataaannaoiya eva tuTOoTATApiaoc TIOpei va TPOkaleoei Tov kivduo TUPKAYIac EAV xpoioutoinOe e eva aAoo tuTOoTATApiac.
AM (MW) 522 - 1.710 kHz (9 kHz/βημα)
Bluetooth®
AM (MW) 522-1 710 kHz
(9 kHz/krok)
Bluetooth®
(Znak sLOWNY i logo Bluetooth® sa zarejestrowanymi znakami towardwymi nalezacymi do Bluetooth SIG, Inc.)
AM(MW)522 - 1,710 kHz
(9kHz/步進)
Bluetooth
(Bluetooth SIG, Inc.
4.0
A2DP/SCMS-T
Bluetooth
2
i1j()
(1)
SBC
A2DP
Bluetooth®
Bluetooth
Bluetooth®
J
Jyj1
p.s.d. 1
Bluetooth®
yol 22j0j0
3.95:BTEDR
3.97:BTLE
jdlalal
a1^2 + a2^2 + a_3^2 无穷得
2x83.5
2x0.57.2
2x1,1.2:10.8
2x+1,2.2:14.4
2x13.5:18
(AUXIN1/AUXIN2)3.5
j:FM
AM
jaiy (x E x jx)
163× 294× 282
Bluetooth
BT"Bluetooth® jj
"READY"
aal psslll lai jiee e Bluetooth@ aipu 2
Paii jie y bao baiol 6jial Caiuall
Aaill sla! jssll O
"SNOOZE X" 1
y
5 5
201510
aill j baili gail l y s jaiil cay aaly.4
gill
jay aabaaalall yy y jaiy baiy y
90,120.15.30.45.60 60
y 1
"SLEEP XX"
2
yaiie 1
LCD 1
jbi. 3
J 1
jI!dle la. aagaaalall jyra aaii 4
j 1
G
aiaa aaiy y jy jy jy g y g y g y g y g y g y
Aaal 1
"LOUD ON" 2
Jgall 1
yjil jie jia jia jia
4
yjai jaii jaii jaii jaii jaii jaii jaii jaii jaii jaii jaii jaii jaii jaii jaii jaii jaii jaii jaii jaii jaii jaii jaii
4ab = 2ab
ydiall jbiylaie yjy jyamAM/FM aiaa
yj jy jy jy jy
: (i) HWS i. b
HWS
15 1
.
1
a e a 2
1
y 3
y
y 1
i#
4
A
ONCE
DAILY
RDS RDS RDS RDS RDS 1
Cgall
"RDS CT" 2
L L D
"RDS CT" .3
Dy D D D D D D D D D D D D D D D D D D D D D D D D D D D D D D D D D D D D D D D D D D D D D D D D D D D D D D D D D D D D D D D D D D D D D D D D D D D D D D D D D D D D D D D D D D D
RDS Cgll
5
FM-
FM 1
RDS cln jn k 1
.1
.
a
b
c
d
e
y/(y) FM
F M 1
FM 1
FM FM F M 1
FM FM F M 1
FM FM F M 1
FM FM F M 1
FM FM F M 1
FM FM F M 1
FM FM F M 1
FM FM F M 1
FM FM F M 1
FM FM F M 1
FM FM F M 1
FM FM F M 1
AM/FM
J 1 FM AM J2 J2 2
aall aclll
1
1
1
1
1
1
1
1
1
1
1
1
1
1
1
1
1
1
1
1
1
AM/FM
j1 j 1
FM AM jn jnn 2
i 3
yamn aAMFM 4000
4
ailll lle
y 5
SLS
Jy 6
4aall jll
1 7
S OBC = S COD + S_ BOC
sJn Jn 1 F M / AM j n s
i 1
Jyall"AM/FM- yjll jill" pgs
(1)
8
AM/FM-
1
FM AM jy
AM FM 3
图
S OBC = S COD + S_ BOC
10 FM/AM
JFAM
sall ydi dlsy
snll s snnssnn
Clllall 1y jil yj sill ssill jy jy
Jy 5
aagall jaijai jai
all gall gian jail gill pail jiai pril .6
AM/FM
FM AM 5
aegglgjglg jll
1
a 2
y
(511j)gall jy
P4"
gall gll gll gll lgl gll gll gll
4.4.15.2
13 4
S OBC = S BOC + S_ CDF
y
(76
y 1
4.15.
111 1
a
a aaa a a a a a a a a a a a a a a a
j 1
“POWERFAIL”
y
4
y
yEMPTY
y
aaiiaaiiie
(8
B
aill glll jll jil 1000
Jad p 5d 5d 5d 5d 5d 5d 5d 5d
jue 22 jial jil jua Jai jia jia jia jia jia jia jia jia jia jia jia jia jia jia jia jia jia jia jia jia jia jia jia jia jia jia jia jia jia jia jia jia jia jia jia jia jia jia
alil
45 = x
JAM
30 251 22 22 all jll
y
LCD
A
B
yduai jao C
yaiiai jaojiaoi D
Aeull E
F
()RDS.G
H
aally jalil AM/PM 1
y
S_ ACD = S_ COD + S_ BDO
gabnall 1y
jll jll 51
ybljnl yjulbll
1
(2gaggl) 1yjy
aLsGaaal 100y CnJbIaI aS (AA
(3)
y 3
y
Ciyjue:
S_ ACD = S_ COD + S_ BDO
Jnnn nn nnnnnnnnnnnnnnnnnnnnnnnnnnnnnnnnnnnnnnnnnnnnnnnnnnnnnnnnnnnnnnnnnnnnnnnnnnnnnnnnnnnnnnnnnnnnnnnnnnnnnnn
ai jiai iipjie jgi j
(54
a
i 1
1 1
y 1
J 1
1
#
y
y
e 1
25 100000000000000000000000000000000000000
1
Ciljieill oig jieial
()
j
Jaii jie jiee ie jaoj jqll aianell jay jy

1
y j 1
C. all classification
aaiall aaii 1
y 5
J 1
Y 6
guln n aal plssy ay jnaa anall yjllnl pssly
y j 1
m = 311
Aal 111
aal 1
y
.
jiay jayil 23
24
25
26
jzjjz.27
sui j.28
Makita Europe N.V. Jan-Baptist Vinkstraat 2, 3070 Kortenberg, Belgium
Makita Corporation 3-11-8, Sumiyoshi-cho, Anjo, Aichi 446-8502 Japan
DMR108-12L-PL-2101
www.makita.com