Baby Kangoo RB204 - Baby monitors Rimax - Free user manual and instructions
Find the device manual for free Baby Kangoo RB204 Rimax in PDF.
Frequently Asked Questions - Baby Kangoo RB204 Rimax
User questions about Baby Kangoo RB204 Rimax
0 question about this device. Answer the ones you know or ask your own.
Ask a new question about this device
Download the instructions for your Baby monitors in PDF format for free! Find your manual Baby Kangoo RB204 - Rimax and take your electronic device back in hand. On this page are published all the documents necessary for the use of your device. Baby Kangoo RB204 by Rimax.
USER MANUAL Baby Kangoo RB204 Rimax
natural_image
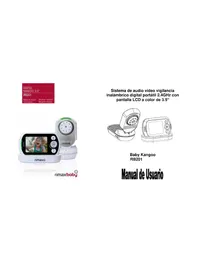
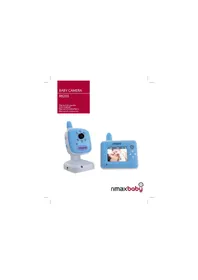
Two modern tele Cameroon devices, one displaying a camera and the other showing a photo of a sleeping baby on a screen (no text or symbols visible)rimaxbaby

INTRODUCCIÓN
We recommend that you read these instructions fully to get the best from your purchase.
This 2.4GHz DIGITAL Colour LCD Wireless Monitor enables you to transmit picture and sound signals cordlessly, which is ideal for many situations such as monitoring a baby, young children or the elderly. It can also be used for household security or as an office or warehouse surveillance system, etc.
MAIN FEATURES
VOX funxtion: When you select the VOX mode on the Monitor and there is no noise around the Camera, the Camera will stop transmitting and may appear to be off but is still listening while using the minimum amount of power.
The monitor screen will turn off when the camera is not transmitting. To disable this feature and view the monitored area continuously, you must turn off the VOX mode on the Monitor.
Your Colour Wireless Monitor can be powered by batteries and/or mains power. When fitting the batteries, please ensure they are inserted correctly.
RADIO INTERFERENCE ADVICE
This equipment has been tested and found to comply with the requirements of the RTT&E Directive 1995/5/EC. These requirements are designed to provide reasonable protection against harmful interference in a residential installation.
This equipment generates uses and can radiate radio frequency energy and if not installed and used in accordance with the instructions, may cause harmful interference to radio communications. If this equipment does cause harmful interference to radio or television reception, which can be determined by turning the equipment off and on, the user is encouraged to try to correct the interference by the following measures:
- Reorient or relocate the receiving antenna.
- Increase the separation between the affected equipment and the Colour Wireless Monitor.
- Connect the equipment into an outlet on a mains circuit different from that to which the receiver is connected.
- Consult the dealer or an experienced radio/TV technician for help.
In order to maintain compliance with RTT&E Directive 1995/5/EC, special shielded cables are used within this equipment. Operation with non-approved equipment or unshielded cables is likely to result in interference to radio or TV reception.
You are advised that changes and modifications made to the equipment without the approval of manufacturer could void your authority to operate this equipment.
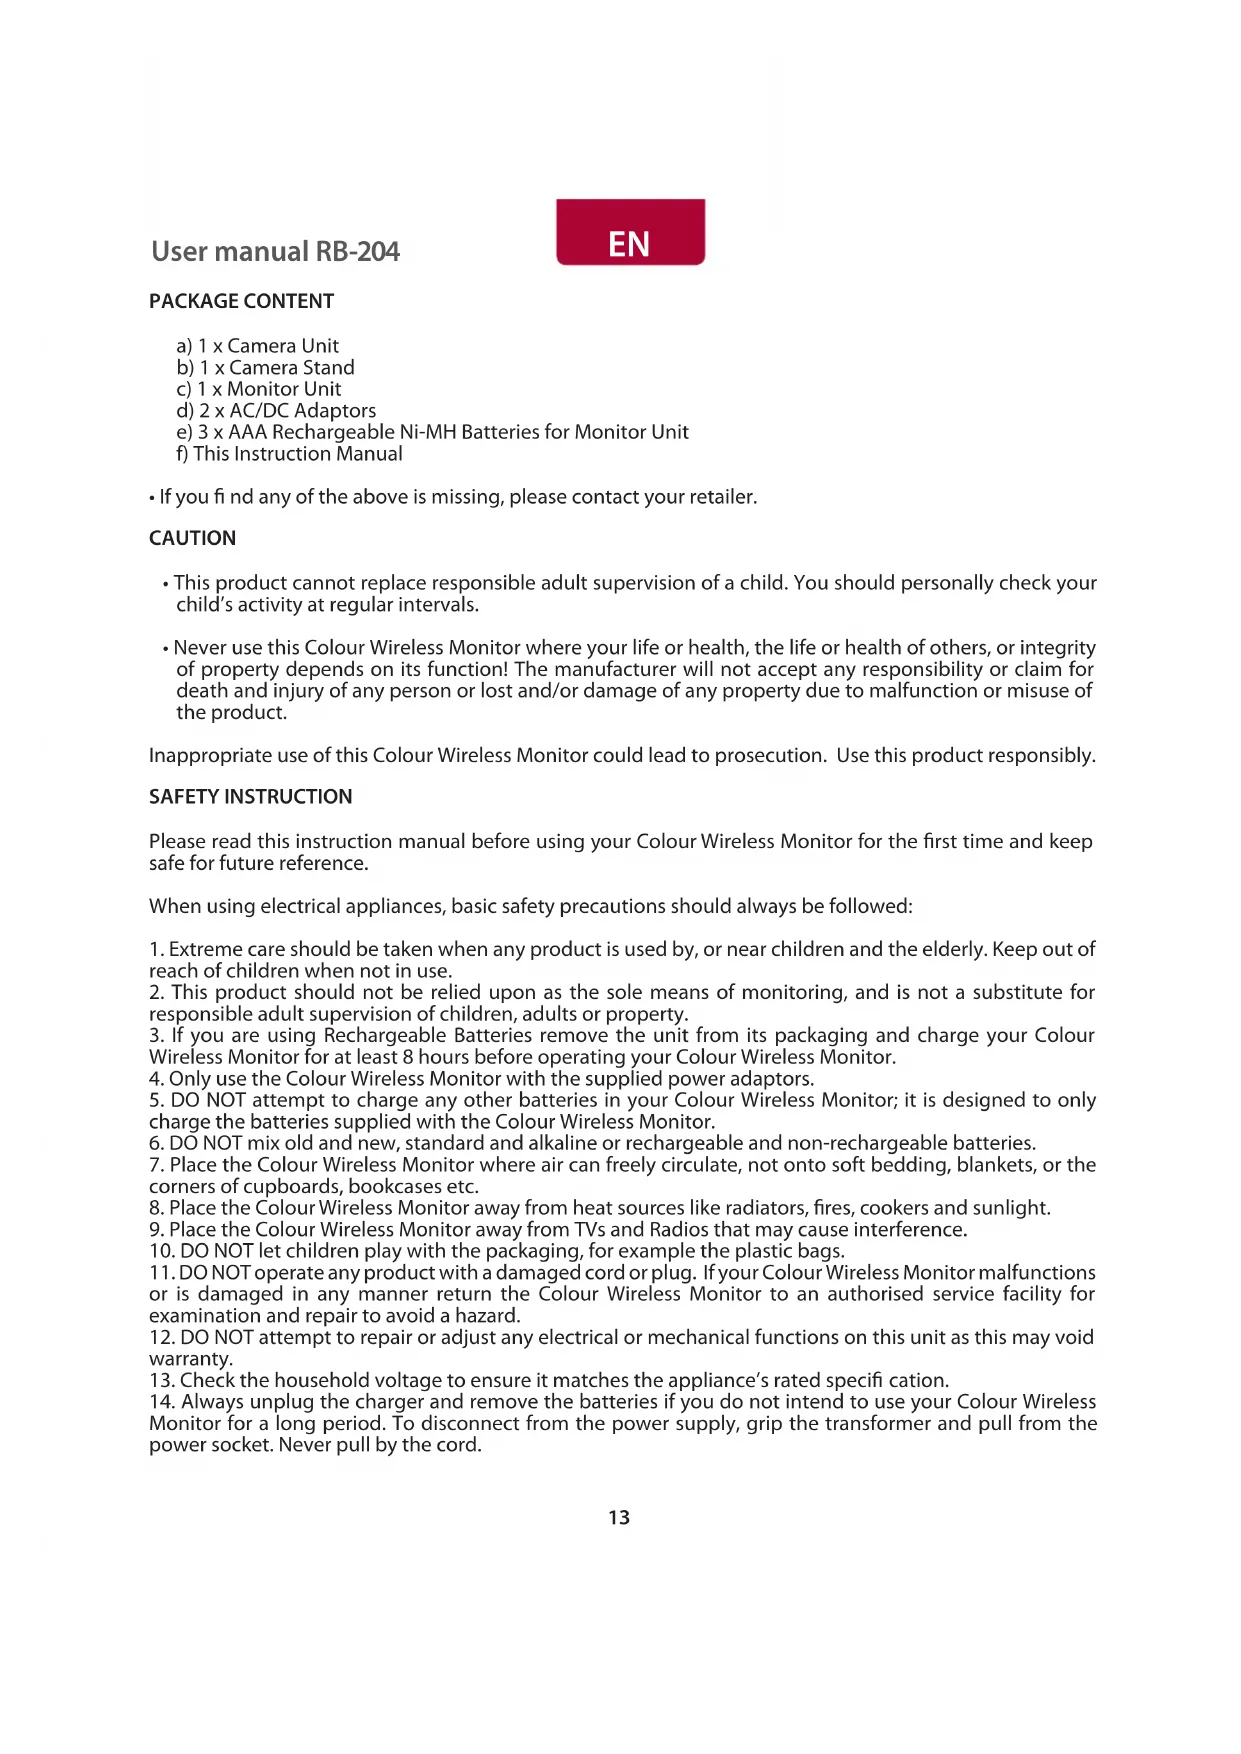
MONITOR FEATURES AND CONTROLS
text_image
1 2 3 4 5 6 7 8 9 10CAMERA FEATURES AND CONTROLS

text_image
11 12 13 14 15 16 17
text_image
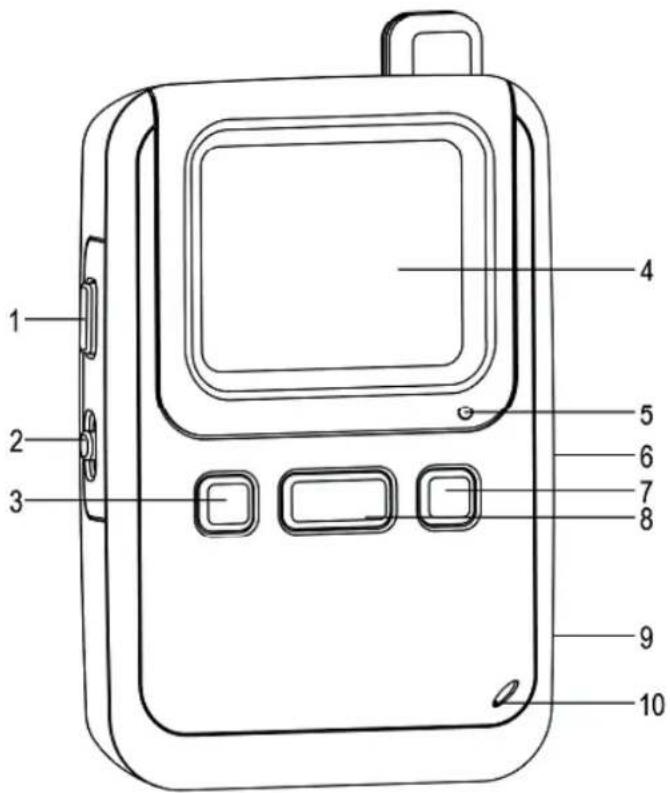
Camera StandFEATURES:
| 1 PUSH-TO-TALK BUTTON 10 MICROPHONE | ||
| 2 POWER AND LCD ON/OFF 11 LIGHT SENSOR | ||
| 3 “ - ” SELECTION BUTTON 12 CAMERA | LENS | |
| 4 2.0” COLOUR LCD 13 POWER LED | ||
| 5 POWER LED 14 MICROPHONE | ||
| 6 VOX CONTROL SWITCH 15 “LINK” PAIRING | BUTTON | |
| 7 “ + ” SELECTION BUTTON 16 POWER ON/OFF | ||
| 8 MENU CONTROL BUTTON 17 DC POWER INPUT JACK | ||
| 9 DC POWER INPUT JACK | ||
PACKAGE CONTENT
a) 1 x Camera Unit
b) 1 x Camera Stand
c) 1 x Monitor Unit
d) 2 x AC/DC Adaptors
e) 3 x AAA Rechargeable Ni-MH Batteries for Monitor Unit
f) This Instruction Manual
- If you find any of the above is missing, please contact your retailer.
CAUTION
- This product cannot replace responsible adult supervision of a child. You should personally check your child's activity at regular intervals.
- Never use this Colour Wireless Monitor where your life or health, the life or health of others, or integrity of property depends on its function! The manufacturer will not accept any responsibility or claim for death and injury of any person or lost and/or damage of any property due to malfunction or misuse of the product.
Inappropriate use of this Colour Wireless Monitor could lead to prosecution. Use this product responsibly.
SAFETY INSTRUCTION
Please read this instruction manual before using your Colour Wireless Monitor for the first time and keep safe for future reference.
When using electrical appliances, basic safety precautions should always be followed:
- Extreme care should be taken when any product is used by, or near children and the elderly. Keep out of reach of children when not in use.
- This product should not be relied upon as the sole means of monitoring, and is not a substitute for responsible adult supervision of children, adults or property.
- If you are using Rechargeable Batteries remove the unit from its packaging and charge your Colour Wireless Monitor for at least 8 hours before operating your Colour Wireless Monitor.
- Only use the Colour Wireless Monitor with the supplied power adaptors.
- DO NOT attempt to charge any other batteries in your Colour Wireless Monitor; it is designed to only charge the batteries supplied with the Colour Wireless Monitor.
- DO NOT mix old and new, standard and alkaline or rechargeable and non-rechargeable batteries.
- Place the Colour Wireless Monitor where air can freely circulate, not onto soft bedding, blankets, or the corners of cupboards, bookcases etc.
- Place the Colour Wireless Monitor away from heat sources like radiators, fires, cookers and sunlight.
- Place the Colour Wireless Monitor away from TVs and Radios that may cause interference.
- DO NOT let children play with the packaging, for example the plastic bags.
- DO NOT operate any product with a damaged cord or plug. If your Colour Wireless Monitor malfunctions or is damaged in any manner return the Colour Wireless Monitor to an authorised service facility for examination and repair to avoid a hazard.
- DO NOT attempt to repair or adjust any electrical or mechanical functions on this unit as this may void warranty.
- Check the household voltage to ensure it matches the appliance's rated specification.
-
Always unplug the charger and remove the batteries if you do not intend to use your Colour Wireless Monitor for a long period. To disconnect from the power supply, grip the transformer and pull from the power socket. Never pull by the cord.
-
This product is not intended for use in wet or damp locations. Never locate the Colour Wireless Monitor or charger where it may fall into a sink or other water container. When not in use always store in a dry area.
- If the supply cord is damaged it must be replaced by the Manufacturer or an authorised service centre in order to avoid a hazard.
- Before you dispose of your Colour Wireless Monitor you must remove the batteries and dispose of them responsibly. Dispose of the batteries and product responsibly.
BEFORE USE
Choose a location
- Choose a location for the camera away from televisions, TV signal boosters and radios. Strong radio signals generated by these products may cause noise or even retransmitted images on the monitor unit. If this happens move the camera to a different location.
Connection of Power Supply
- This Colour Wireless Monitor is designed to be powered by either batteries or the provided AC/DC adaptors. Rechargeable batteries for monitor unit must be charged for at least 8 hours before first use. Remember to connect provided adaptor with camera unit for power supply.
Install the Camera Stand
Secure the camera unit to the camera stand by tightening the screw on the stand to the bottom of the camera. Adjust the angle of the camera using the positioning screw at the bottom of the stand.
Using the Batteries:
- The monitor unit requires 3 x AAA size alkaline batteries, or special AAA rechargeable Ni-MH batteries to operate. Do not use non-approved batteries.
- We recommend the use of the adaptors whenever possible to maintain long term viewing requirement.
Installing/Removing Batteries:
Monitor:
- Undo the screw and remove the battery cover at the back of the unit.
- Insert the supplied batteries in accordance with marking of the battery compartment.
- Refi t the battery cover and secure with the screws.
- Remember to charge the batteries at least for 8 hours before the first use.
Please note:
- When the power indicator on the monitor unit changes to RED or the video image shrinks, it's time to change or recharge the batteries.
- Remove the batteries during long period of non-use.
Use AC/DC adaptor:
- Plug the connector of the AC adaptor to the socket on the unit.
- Plug the adaptor into a mains socket.
- Switch on the power switch of the unit.
Warning:
Improper use of the adaptor may cause malfunction of the units. Please consult your dealer for any queries. Use only the AC adaptors supplied with the packaging.
The monitor of your Colour Wireless Monitor has a built-in recharging circuit.
OPERATING INSTRUCTIONS
Camera ON/OFF
Use the Power ON/OFF button at the side of the Camera unit to turn ON the Camera.
Monitor ON/OFF
Use the Power OFF-AUDIO-ON button at the side of the Monitor unit to turn ON the Monitor.
Infrared Night Vision (Automatic)
- The infrared night vision of the camera is designed to allow the camera to pick up pictures during darkness or periods of very low levels of light.
- In this mode only black and white image will be displayed on the monitor and only objects placed within 6ft/2m will be monitored.
- The camera constantly monitors the light level and switches to the infra-red mode automatically whenever there is insufficient light for normal vision.
Camera VOX (Voice Activated) Switch
- Use the VOX control switch on the Monitor unit to select the Camera VOX mode.
- VOX mode OFF --- the camera transmits continuously, useful for continuous monitoring of your child or secured area.
- VOX mode ON -- the Camera only transmits whenever a noise over and about 50dB is detected around the Camera.
TALK from Monitor to Camera
To talk to the baby, press & hold the TALK button to talk. After talk, release the TALK button to listen to the baby sound again.
Power and LCD ON/OFF
This switch is located on the side of the Monitor. When the Monitor is switched to "LCD OFF" position and the Camera is on, there will be no picture on the Monitor screen.
The unit is using only a small amount of power and you can still hear the sound signal from the monitored area. Turn the LCD to "ON" position to view the picture and to "OFF" position to turn off power of the Monitor.
LCD Display Bar on Top of Screen

Indicating connection signal strength between the Camera and Monitor units
Indicating battery capacity of the Monitor unit
MENU Control on the Monitor:
Press the MENU control button to pull down the menu bar. Move the high-lighting bar up and down the menu by using the “-” and “+” selection buttons. Press MENU control button to confirm the selected function you need to adjust.
Use the “-” and “+” selection buttons to adjust the function selected.
- VOX Sensitivity Level setup for the Camera unit (LO / MID / HI).
- Brightness control on the Monitor unit.
• Volume control for the Camera unit. - Select EXIT and press MENU to exit.
Use the “-” and “+” selection buttons to control the sound level of the Monitor unit directly.
Matching (LINK) the Monitor and the Camera
You can pair the Monitor and Camera units when necessary by the following steps:
- Turn ON both the Monitor and the Camera units.
- On the Monitor: Press and hold the " - " and " + " selection buttons together until its power LED starts blinking.
- On the Camera: Press and hold the LINK button on the side of the camera until its power LED starts blinking.
- The system will complete the matching process automatically.
- The monitor will display the image transmitted from the camera if properly linked.
TECHNICAL SPECIFICATION
Frequency: 2.4 GHz DIGITAL (FHSS)
Power:
Camera: Adaptor 6V 400 mA Polarity Centre (+)
Monitor: 3 x AAA size Alkaline Batteries or 3 x AAA Rechargeable Ni-MH Batteries
Or
Adaptor 6V 400 mA Polarity Centre (+)
TROUBLESHOOTING
| Problem Possible Cause | - things to do/check |
| No reception at Monitor | Unit has not been switched on.AC/DC adaptor has not been connected.Adjust the position of the Camera or Monitor.No Battery Power (check the LED indicator).The Camera may not be transmitting (either not powered on or in VOX (voice activation) mode). |
| No picture display but can hear sound | Check the LCD on/off switch.Low Power (check the LED indicator). |
| Only Black & White picture displayed | Check if the Camera is on night vision/ “Infrared” mode. |
| Batteries cannot be recharged | AC/DC adaptor has not been connected.Non-rechargeable batteries have been used.Only special designed rechargeable batteries can be recharged.Please contact your dealer if you have any queries. |
| No transmission at Camera | Unit has not been switched on.AC/DC adaptor has not been connected.Check if the Camera is on VOX (voice activation) mode and/or if the sound level is under 50dB. |
Statement of compliance
Flamagas S.A. hereby certifi es that the model Baby Kangoo RB-204 complies with the basic requisites and other requirements of Directive 1999/5/EC.
A full copy of the statement of compliance can be found at:
www.electronicafl amagas.com

text_image
CEBATTERY & PRODUCT DISPOSAL INFORMATION
- Remember, when you dispose of the Wireless Monitor, remove the batteries and dispose of them responsibly.
- Do not mix products bearing the crossed out bin symbol with your general household waste. For the correct collection and treatment of these products, take them to the collection points designated by your local authority. Alternatively, contact the retailer who sold you the product.
INTRODUCTION
Ligar/Desligar Câmara (ON/OFF)
Ligar/Desligar Monitor (ON/OFF)