
Foil F9200 - Shaver REMINGTON - Free user manual and instructions
Find the device manual for free Foil F9200 REMINGTON in PDF.

| Product type | Electric razor |
| Brand | Remington |
| Model | Foil F9200 |
| Power source | Rechargeable via included mains adapter |
| Full charge time | 2 hours |
| Quick charge | 5 minutes for 5 minutes of shaving |
| Estimated battery life | Approximately 45 minutes (estimated) |
| Main functions | Dry and wet shaving, Turbo mode, pop-up Intercept trimmer, travel lock, charge indicator display |
| Turbo mode | Increases motor speed for 2-3 day stubble or dense areas |
| Intercept trimmer | Pop-up, 3 positions: lowered, flush, raised for precision |
| Maintenance and cleaning | Rinse head and blades under warm water after each use |
| Replacement parts | Foils and blades recommended every 12 months |
| Safety | Travel lock, automatic shut-off, adapter with transformer |
| Charge indicator | 3 lights flash during charging, turn off when fully charged |
| Underwater use | Yes, with shaving gel, then rinse |
| Foil material | Not specified (typically stainless steel) |
Frequently Asked Questions - Foil F9200 REMINGTON
User questions about Foil F9200 REMINGTON
0 question about this device. Answer the ones you know or ask your own.
Ask a new question about this device
Download the instructions for your Shaver in PDF format for free! Find your manual Foil F9200 - REMINGTON and take your electronic device back in hand. On this page are published all the documents necessary for the use of your device. Foil F9200 by REMINGTON.
USER MANUAL Foil F9200 REMINGTON
Thank you for buying your new Remington® product. Please read these instructions carefully and keep them safe. Remove all packaging before use.
IMPORTANT SAFEGUARDS
- This appliance can be used by children aged from 8 years and above and persons with reduced physical, sensory or mental capabilities or lack of experience and knowledge if they have been supervised/instructed and understand the hazards involved. Children shall not play with the appliance. Cleaning and user maintenance shall not be done by children unless they are older than 8 and supervised. Keep the appliance and cable out of reach of children under 8 years.
The shaver is suitable for cleaning under an open water tap.
- WARNING: Detach the shaver from the charging adapter before cleaning it in water.
- Do not use the product with a damaged cord. A replacement can be obtained via our International Service Centres.
- This product should only be used with the charging adaptor supplied.
- Do not use the shaver, charging adaptor, charging stand or any other part if it is damaged, as this may cause injury. Always replace a damaged charging adaptor or charging stand with one of the original type.
- The charging adaptor contains a transformer. Do not cut off the adaptor to replace it with another plug, as this causes a hazardous situation.
- Do not immerse the charging adaptor or charging stand in water or any other liquid, nor rinse it under the tap.
- This appliance should never be left unattended when plugged into a power outlet, except when charging.
- Keep the power plug and cord away from heated surfaces.
- Do not plug or unplug the appliance with wet hands.
- Do not twist or kink the cable, or wrap it round the appliance.
- This appliance is not intended for commercial or salon use.
PARTS
- Display
- On/off switch
- Pop-up intercept trimmer
- Hair pocket
- Foil
-
Intercept trimmer
-
Foil
- Head lock button
- Charging stand
- Charging adapter (not shown)
- Cleaning brush (not shown)
CHARGING
Charge the shaver:
Before using for the first time.
- When only one indicator light () is showing.
After your shaver has not been used for a long time.
- Ensure the shaver is switched off.
- Connect the charging adapter to the charging stand and then to the mains power outlet.
- Place the shaver into the charging stand (FIG A). The charging adapter can also be connected directly to the shaver.
- Charge for two hours.
- During charging, the indicator lights () will show the level of charge. All three lights will flash for a time and then go out when the shaver is fully charged.
- During use, the indicator lights will go out one at a time to show the level of charge remaining.
QUICK CHARGE
The quick charge feature allows you to charge your shaver for five minutes if the battery is flat. This will give you five minutes of use (enough for one shave) at the normal motor speed (without using the turbo mode).
INSTRUCTIONS FOR USE
It is recommended that you use your new shaver daily for up to four weeks to allow time for your facial hair and skin to become accustomed to the new shaving system.
- Switch the shaver on by pressing the on/off switch.
- Stretch the skin with your free hand so the hairs stand upright.
- Use short linear strokes.
- Only apply light pressure on the shaving head while shaving (pressing too hard can damage the heads and make them vulnerable to breakage).
TURBO MODE
During use, pressing the on/off button a second time increases the motor speed to provide a more powerful shave. This is ideal for shaving facial hair that is 2-3 days old, or heavier parts of the facial hair. When activated, TURBO will be shown on the display.
USING THE POP-UP INTERCEPT TRIMMER
The pop-up intercept trimmer has three positions and can be raised or lowered to suit the shaving task:
- Fully down - use this position when shaving light facial hair.
- Level (trimmer level with the foils) - in this position the trimmer acts as an extra cutting element.
- Fully up - use this position for detail trimming.
HEAD LOCK
Normally, the head pivots freely but its movement can be restricted by sliding the head lock button to the LOCK position.
SWITCHING OFF
Press the on/off button (several times if required) until your shaver stops.
TRAVEL LOCK
The travel lock prevents your shaver from accidentally switching on when it is packed in luggage.
To lock: Press and hold the on/off switch for three seconds. Your shaver will start for three seconds and then switch off. The icon will flash five times.
To unlock: Press and hold the on/off switch for three seconds. After three seconds your shaver will turn on.
TIPS FOR BEST RESULTS
- Always hold the shaver at right angles to the skin so that the shave head is touching the skin with equal pressure.
- Use slow to moderate stroking movements. The use of short linear motions in stubborn areas may obtain a closer shave, especially along the neck and chin line.
- DO NOT press hard against the skin in order to avoid irritation and damage to the intercept heads.
SHAVING WITH SHAVING GEL OR FOAM
- Follow the same instructions as dry shaving if using shaving gel.
- After use with shaving gel, please ensure the head and cutters are rinsed under warm water to clean away any excess gel and debris.
CLEANING
To ensure long lasting performance clean after each use.
- Ensure the shaver is switched off.
- Grasp the shaver head on each side and pull it upwards (FIG B).
- Tap out any excess hair shavings.
- Rinse the cutters (underneath the shaving head) and the shaving head itself under warm running water (FIG C).
- Refit the shaving head once it is dry.
REPLACING FOILS AND CUTTERS
To ensure continued high quality performance from your shaver, we recommend the foils and cutters are replaced every 12 months. Signs that the foils and cutters need replacing are: Irritation - you may experience skin irritation.
Pulling - your shave may not feel as close and you may feel the cutter pulling your hair.
To replace the foils and cutters:
- Ensure the shaver is switched off.
- Grasp the shaver head on each side and pull it upwards. Discard the shaver head (FIG D).
- Grasp the cutters as shown and pull upwards. Discard the cutters (FIG E).
- Snap the new cutters into the holders (FIG F).
- Replace the new shaving head (FIG G).
REMOVING THE RECHARGEABLE BATTERY
We strongly recommend that a professional removes the rechargeable battery. Parts of the shaver case, and tools have sharp edges and may cause injury if not handled correctly.
- The rechargeable battery must be removed from the appliance before it is scrapped.
- Disconnect the charging adapter before removing the battery.
- Ensure that the battery is fully discharged. To do this, operate the shaver until it stops.
- Use an appropriate tool to prise off the front cover trim (FIG H) at the points indicated ( ) .
- Prise off the rear part of the handle (FIG I).
- Prise off the remaining front part of the handle (FIG J).
- Remove the three screws then unclip the circuit board cover (FIG K)
- Lift out the circuit board and turn it over. Cut the two wires (FIG L).
- Cut the fixings at each end of the battery using an appropriate tool (FIG M).
- Used batteries must be removed from the appliance and disposed of at an appropriate official recycling/collection point.
- Do not attempt to operate the shaver once you have opened it.
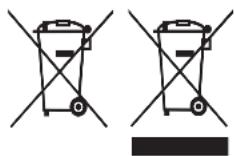
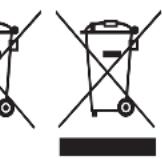
RECYCLING
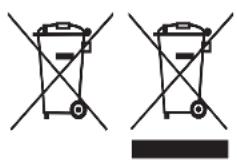
To avoid environmental and health problems due to hazardous substances, appliances and rechargeable and non-rechargeable batteries marked with one of these symbols must not be disposed of with unsorted municipal waste. Always dispose of electrical and electronic products and, where applicable, rechargeable and non-rechargeable batteries, at an appropriate official recycling/ collection point.
NAGRA GODA RÄD FÖR BÄSTA RESULTAT
REMOVERABATERIARECARREGAVEL
RADY, JAK OSIAGNAC NAJLEPSZY WYNIK
Pa3dpaxeHne:MOxHO NOuyBCTBOBaTb pa3dpaxeHne KOxN.
OTTARIBAHNE: 6pntbe yke MOKeT 6bItb He TaKIM rJaIKM, a TaKKe MOxH0 NOyBCTBOBaTb OTTARIBAHNE BOLOCKOB Je3BnEM.
ДЯЗAMeHbI CeTOKиJe3Bn:
- y6eNTecb, yTo 6pntBa BblKloueHa.
- Bo3bMntecb 3a 6pNTBeHHyIO roJOBky c KaKdoI CTOpOHbl I NOTAHnTe ee BBepx. Bbl6pocbTe 6pNTBeHHyIO roJOBky (PNC. D).
- Bo3bMntecb 3a Je3Bn, KaK NOKa3aHo Ha pncyHKe, n NotaHnTe BBepx. Bbl6pocbTe Je3Bn (PNC.E).
- BctabTe HOBbIe Ie3BnB DepKaTeJn Do eJUka (PNC.F).
- YctaHOBnTe Ha MeCTO HOByIO 6pNTBeHHyIO rONOBky (PNC.G).
N3BJIeUHHe IePE3APJXAEMOIBATAPEN
HaCToTeIbHo peKOMeHdyetcay, UTo6bl N3BneueHne nepe3apXaemO 6aTapeN BblONHJI cNeuaJIncr. Ha qactx Kopnyca 6pntbbl n npucnoc6nEHHx ec7b ocTpble KpaJ.
HenpaBnIbHoe 6paueHne MoKeT npNBecTu K TpaBMe.
- Pered ytnn3aunen 6atapeo cneyuT n3Bleueb n3 yctpoiCTBa.
- PpN n3BneHnn 6aTapeu yCTpoiCTBO cIeNyET OTKJIouHTb OT JNeKTPOcETn.
- Y6eIntecb, yTo 6aTape nOIoHocTbIO pa3pJxKeHa.ДЯ 3TOrO DoXdIntecb, noka pa6oTa 6pITbbl He ppeKpaTITcB B npOceCE 3KcnIyatauIN.

- C nOMOuio COOTBeTCTByIOUeRo npucnocO6NeHna CHmnte HaKnaDky nepeHne KpbIuKN (PNC.H) Byka3aHHbIX MeCTax ( )
- ChIMITE 3aHIOU yactb pykoTkn (PNC. I).
- Chmnte octabwyocn nepedHIOu actb pykortkn (PNC.J).
- OTKpyTnTe Tpu BnHTa n OTKpeNnTe KpbIuKy neuaTHoN nlaTbI (PNC.K)
- ɪЗ藓ктіе пачатую пату и перазерніte ee. Пперекьто дba npoboda (PNC. L).
-
Пеерекьткренин ha BCex KOHax 6aTapeN c NOMOuBIO COOTBeTCTByUoero npncnoc6lenn (PNC.M).
-
По okончани срoka слжбы батapestей nx Heo6xodmo дocTaь n3 np6bopa n утллзирobат ллбо OTдать на перра6otky 6e30napchbIM дя Okpyжюшен cpeblcnoco6om.
He nItaTecb 3anyckaTb 6pntBy nocIe BckpbITnEe Kopnyca.
IOBTOPHA IePEPA6OTKA
Bo n36eXaHne BO3DeIcTBnBpeiNbIX BeIeCTB Ha OKpykaIOU cyPeDy n 3IOPOBBe np6Opbl N 6bTapeN ODNHpA3OBOrO IIN MHOropa3OBOrO nCNOJb3OBaHn, NOMEueHHbIe ODNHM I3 3TNX CmMBoIob, Heo6xoIIMo yTNIIN3IPoBaTb OTJeIbHO OT HecOPTnpoBaHbIX 6bITOBbIX OTxODOB. O6aTeJIbHO yTNIIN3IpyIte 3JIeKTPnueckne i 3JIeKTPoHbIe n3DeJIIn, a TAKKe (ecII IN 3TO IIpIMeHMo) 6bTapeN ODNHpA3OBOrO IIN MHOropa3OBOrO IcNoJb3OBaHn B COOTBETCTByIOuNX OΦNiuaJIbHbIX PYNKTax NOBTOPHo Nepepa6OTKn / c6opa OTxODOB.
EN IYI SONUÇLAR IÇIN IPUÇLARI
BUNKOPUCTAHH BUCYBHO TO TPUMEPA INTERCEPT
Дя ВисуВно Тримета Intercept nepeбачен Tpr nopoжehн, zu6 moKha 6yIo NiHЯТn a6o onyctntn Ioro dny BUKOHaHHЯ NeBHOi II niD yac roJIHHa:
KpaHc HxHc -CKOpNCTaTecra cM NIOXeHHa M Ira rOlIHn, kUO BOLOCHN POKpNB Ha oBnqui E He3HaHm;
piBHe (TpIMep Ha oHOMy pIBHi i3 ciTkAMn) - y cIbOMy nOJoxeHHi TpIMep BnKOpNCToBvETbcra JK DoaTKOBni pIXyuN KOMNoHEHT;
KpaHnBepxHc-CKOpNCaTecraNIMnoIOXeHHaMdIaTOHOroPiDpIBHOBAHH BOLOCs.
ΦIKCATOP ΓΟJIIBK
Y 3BnauHomy pexnmi roiBka nobepTaetbca BilbHO, oHaK ii pyx moXHa 6mExnTn, nepecuhyBwn KhoNky fikcaTopa roiBkn B noLoxeHHa fikcau (LOCK).
BUMKHEHHA
HaTnCHiB KHONKy «YBMK./BmK.» Heo6xIDHy KInbKiCtB pa3IB,doKN po6Ota 6pntBn He 3yINHHTbcra.
TPAHCNOPTHNIΦIKCATOP
TpaHcnpTHn fikcatop 3anobirae BUNaIKOBOMy BBIMKHeHHIO 6pntBn B6araXi.
БлOKуВаHHЯ:HaTиСHITb i yTpIMyIe BUMKau npOTaROM Tpbox ceKyHd.БpNTBa 3aNyCTuTBc Ha TpN CEkyHДn Ta BUMKHeTbC.3HaayOK 6nIMHe n'YaTB pa3iB.
Po36nokyBaHHa:HaTnCHiB i yTpmyIe BmNkaq npotraGM Tpbox cekyHd. Ype3 Tprn CeKHyDn 6pntBa BBIMKHeTbcra.
IOPAДN ДЯ ДОСЯгHEHЯ ONTUMALbHOrO PE3yJbTATY
CπiTpmaTn 6pntBy πi npaMM Kytom do shkpN TaKIM YHOM, o6 oBbI roJIbKn TopKaINcA shkpN 3 pIBHomipHM HaTNCOM.
HamaraTecp6nTn nompi HeuBnki pyx6e3 pNBkIB. HeBNIki npami pyxu B Micx, De BOLOCCBaKoPiJaetbcraOJIHHIO, OJOMaRe 3a6e3neyBatn uHCTiWe roIHHa. Oco6NBO ue cTOcyeTbca WII Ta NiHII ni6Opidra.
HE BcHnIe HaMipHO TnCKy Ha uKipy, 06 yHnKHyTn nOpa3HeHH i NOnKOJKeHHra I oJIbOK Intercept.
TOLIHHA13 TELEM JIA TOLIHHA
IiD yac BnKOpNCTaHHra reIIO dIra rOIHHra doTpmyTeca IHcTpyKciI dIra cyxoro roJIHHra.
Iicna BnKOpncTahHb6pntbn pa3om i3 relem dIra roiHHcIa npomntu Tepno BOIO TOJOBky nle3a, uOb Bnucntn 3aIIuKn reIou iHwN 6pyd.
OuHsEHn
.
j_L = 11
i 1
ai a ai 的最小值为 k .
| العربية | .7 |
| العربية | .8 |
| العربية | .9 |
| (العربية) | .10 |
| (العربية) | .11 |
ai^xbj^y = 1
.
(V)b2g
aIy bOjdiAaXaI aIySlaIaIaI
S ACD = S COD + S DCE - S CEA
.2
a + b = 3
4
a 5
JalSly aXaI aiSlo jaiLao iiai gbi gaw laa
.6
lo gag yj jn jy lnd 100d dal aol no n no n no n no
aalaa aaiia aaiia aaiia aaiia aaiia aaiia aaiia aaiia aaiia aaiia aaiia aaiia aaiia aaiia aaiia aaiia aaiia aaiia aaiia aaiia aaiia aaiia aaiia aaiia aaiia aaiia aaiia aaiia aaiia aaiia aaiia aaiia aaiia aaiia
1
1
.2
.3
JSLJI JIJI 1
(KJ) 5
(LJ) 15.6
.7
a a a a a a a a a a a a a a a a a a a a a a a a a a a a a a
y
J 1
J 1
i 1
aalal lalal alal alal alal alal alal alal alal alal
/1y
.
AE


Model No F9200
Remington® is a Registered Trade Mark of Spectrum Brands, Inc., or one of its subsidiaries
VARTA Consumer Batteries GmbH & Co. KGaA, Alfred-Krupp-Str. 9, 73479 Ellwangen, Germany www.remington-europe.com