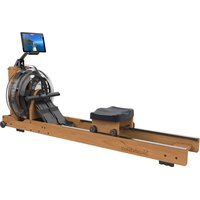
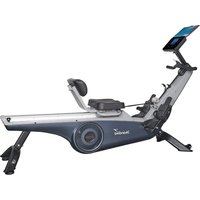
Regatta Multigym Poseidon - Rowing Machine Skandika - Free user manual and instructions
Find the device manual for free Regatta Multigym Poseidon Skandika in PDF.

| Product type | Rowing machine |
| Brand | Skandika |
| Model | Regatta Multigym Poseidon |
| Power | 1 AAA battery 1.5 V |
| Display | LCD screen with time, movements, total, calories, auto scan functions |
| Resistance system | 3 woven belts providing 3 tension levels |
| Movement counter | 0 to 9,999 movements |
| Total movements | 0 to 9,999 movements |
| Training duration | 00:00 to 99:59 minutes |
| Calories | 0 to 9,999 kcal |
| Seat | Adjustable position with an adjustment dial |
| Pedals | With Velcro strap for foot attachment |
| Transport wheels | 2 wheels for easy movement |
| Storage | Rotate the central beam after removing the pin |
| Maintenance | Clean with a damp cloth; do not use harsh solvents |
| Safety | Regularly check wear of belts and parts; replace if necessary |
| Warranty | 24 months against manufacturing defects |
| Spare parts | Available on request from customer service |
| Usage | Private use only (not suitable for studios or professional centers without agreement) |
Frequently Asked Questions - Regatta Multigym Poseidon Skandika
User questions about Regatta Multigym Poseidon Skandika
0 question about this device. Answer the ones you know or ask your own.
Ask a new question about this device
Download the instructions for your Rowing Machine in PDF format for free! Find your manual Regatta Multigym Poseidon - Skandika and take your electronic device back in hand. On this page are published all the documents necessary for the use of your device. Regatta Multigym Poseidon by Skandika.
USER MANUAL Regatta Multigym Poseidon Skandika
natural_image
Modern exercise machine with orange and black body, spool spool, and control arm (no visible text or symbols)
natural_image
Portrait of a man holding a gold medal, wearing a cap and white jacket (no visible text or symbols)SPECIAL EDITION JOEY KELLY
Soey Helly
ASSEMBLY INSTRUCTIONS and USER GUIDE
text_image
Technical diagram showing a hand holding a device with labeled parts and an exploded view of a mechanical assembly with numbered components.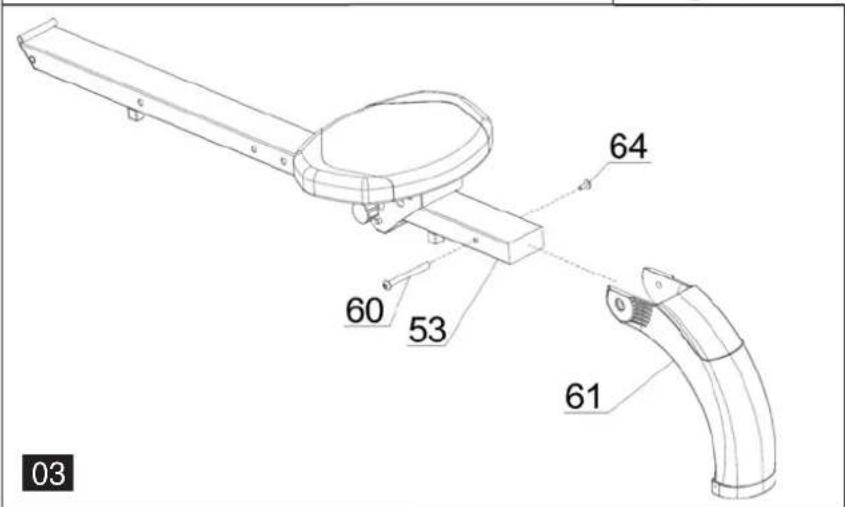
text_image
60 53 61 64 03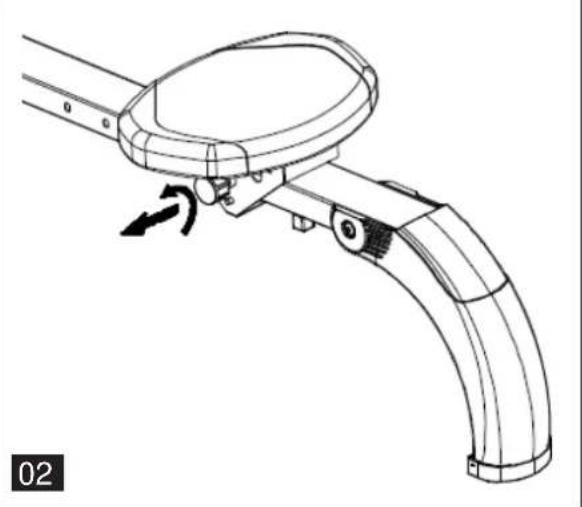
natural_image
Technical line drawing of a mechanical device with curved handle and circular top component, showing motion arrow (no text or symbols)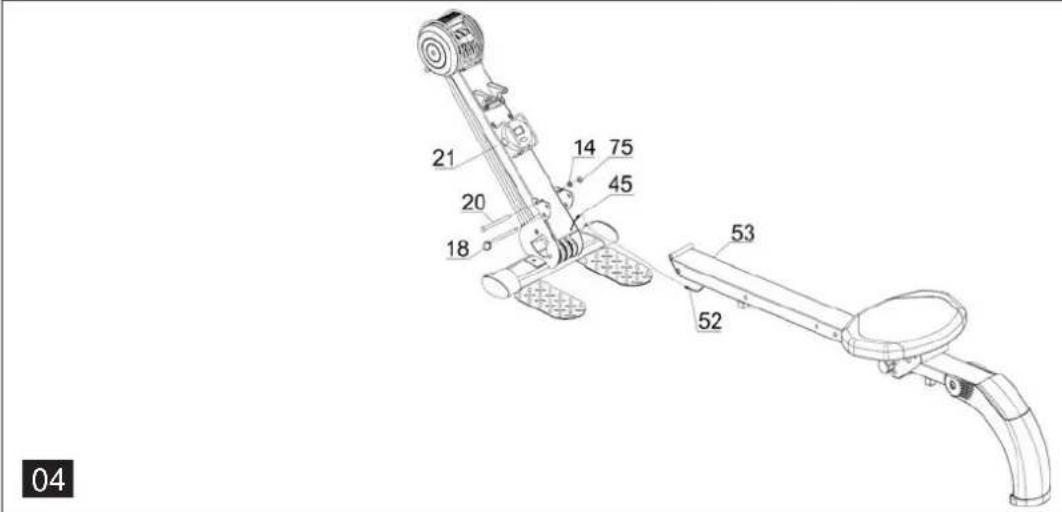
text_image
21 20 18 14 75 45 53 52 04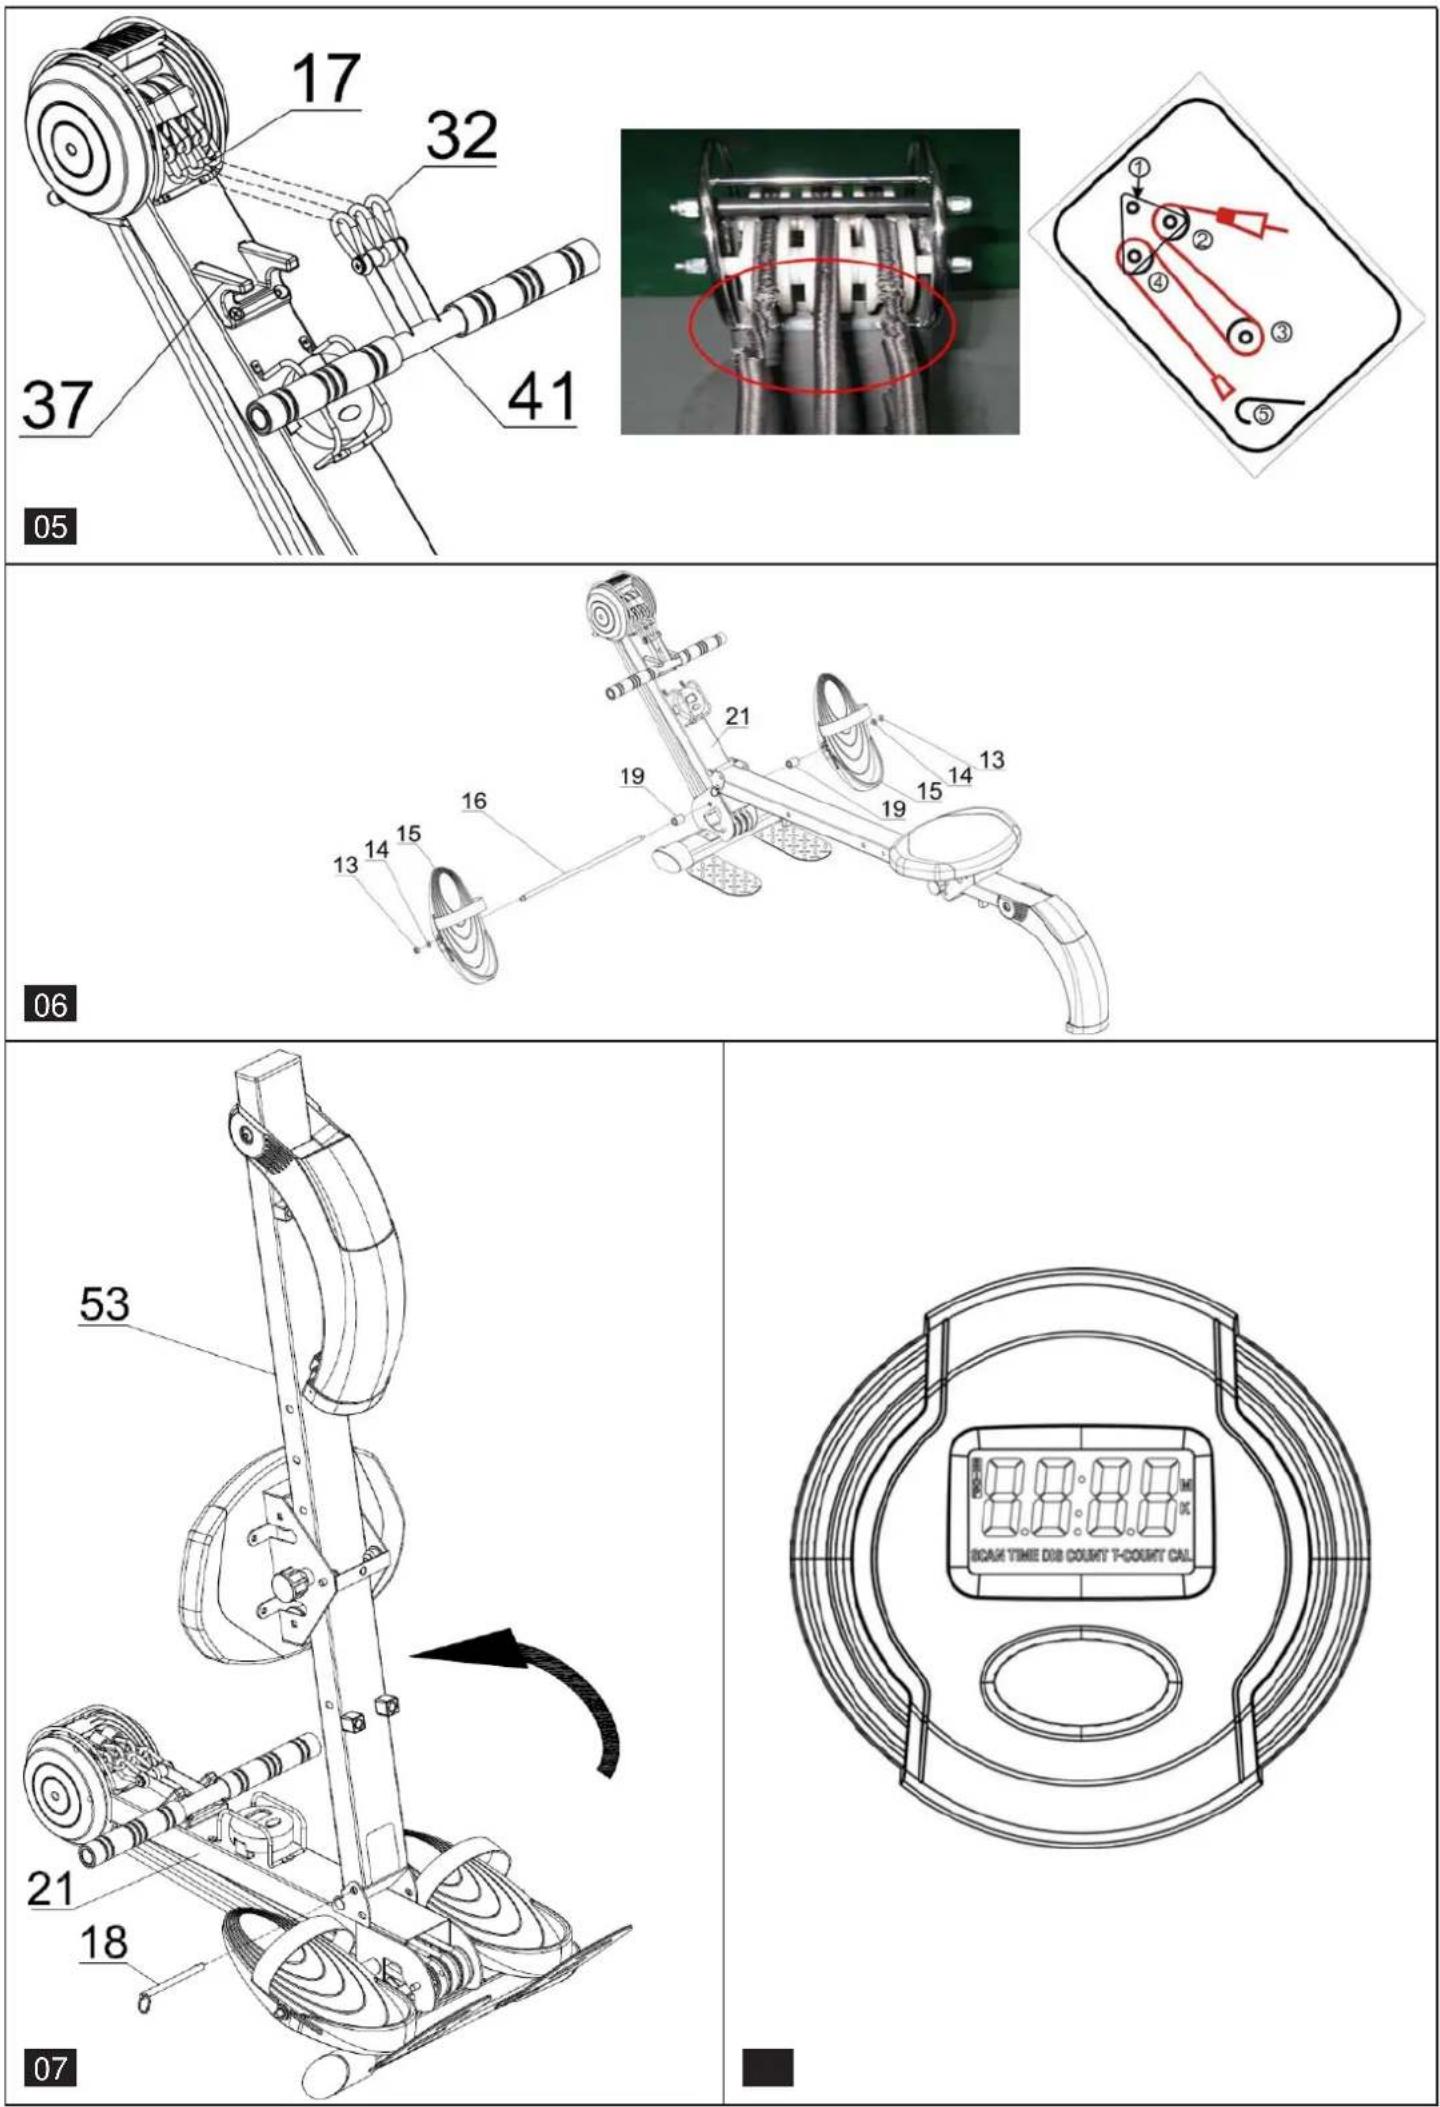
WILLKOMMEN
Bevor Sie beginnen
text_image
QR code image containing encoded data, no visible human-readable textCongratulations on the purchase of your Skandika Regatta Multigym Poseidon!
The Skandika range of training equipment is a high quality and durable product line which appeals to users with top of the line materials and professional workmanship. Skandika equipment is very well suited for fitness training at home.
The Skandika rowing machine strengthens your cardiovascular system, stimulates your metabolism, improves your fitness and well-being, and at the same time it is gentle on your joints.
Table of contents
Part list....11
Assembly instructions....12
Exercise computer....13
Exercise guide....14
Guarantee conditions 15
Exploded drawing....22
Visit our Webseite for more information www.skandika.com

text_image
skandika PROFESSIONELL TRAINIEREN IDNEY KELLY EMPOEIGHT Sieg KelsScan the QR-Code with your smartphone

text_image
QR code image containing encoded data, no visible human-readable text| Part No. | Description Q'ty Part No. Description | Q'ty | |||
| 1 | Rubber pad 2 39 Foam grip 2 | ||||
| 2 | Bolt (M8*48) 2 40 End cap 2 | ||||
| 3 | Front stabilizer 1 41 Handlebar 1 | ||||
| 4 | Screw (ST4.2*10) 4 42 Computer protector 1 | ||||
| 5 | End cap 2 43 Screw (ST2.9*8) 7 | ||||
| 6 | End cap cover 2 44 Computer | 1 | |||
| 7 | Bolt (M6*40) 2 45 Upper computer wire | 1 | |||
| 8 | Transport wheel | 2 46 Wire br | acket | 1 | |
| 9 | Lock nut (M6) | 2 47 Curved | washer (Φ8) | 2 | |
| 10 | Pulley (φ63*29.25) | 2 48 Stopper | 4 | ||
| 11 | Pulley (φ63*20.5) | 1 | 49 | Screw (ST4.2*13) | 6 |
| 12 | Bea ring | 9 50 Screw | (M5*12) | 2 | |
| 13 | Lock nut (M8) 18 51 Sensor | 1 | |||
| 14 | Washer (φ8) | 17 | 52 | Lower computer wire | 1 |
| 15 | Pedal | 2 53 Roller tube | 1 | ||
| 16 | Axle for pedal | 1 54 End cap 1 | |||
| 17 | Weave belt | 3 55 Bolt (Φ10*14.5*M8) | 2 | ||
| 18 | Pin | 1 56 Bushing | 2 | ||
| 19 | Bushing | 2 | 57 | Bolt (φ8*115) | 2 |
| 20 | Bolt (M8*95) 1 58 Adjustment knob | 1 | |||
| 21 | Main frame | 1 59 Magnet | 1 | ||
| 22 | Chain cover (L) | 1 | 60 | Bolt (Φ9.5*94.5*M6) | 1 |
| 23 | Pulley (φ53*29.25) | 2 61 Rear stabilizer 1 | |||
| 24 | Pulley (φ53*20.5) | 1 | 62 | Slip resistance mat | 1 |
| 25 | Pulley (φ73*20.5) | 1 63 Screw | (ST2.9*16) 2 | ||
| 26 | Pulley (φ73*29.25) | 2 | 64 | Screw (M6*10) | 1 |
| 27 | Axle | 4 65 Screw | (M6*15) | 4 | |
| 28 | Bushing | 2 66 Flat washer (φ6) 4 | |||
| 29 | Bushing | 1 67 Seat b | racket | 1 | |
| 30 | Chain cover framework | 1 68 Bushing | 2 | ||
| 31 | Chain cover (R) | 1 69 Sear wheel | 4 | ||
| 32 | Hook | 5 70 Bearing | 4 | ||
| 33 | Bushing | 2 71 Seat | 1 | ||
| 34 | Axle | 1 72 Pull sets | 1 | ||
| 35 | Washer | 2 73 Lock nut | 2 | ||
| 36 | Screw (M5*10) | 2 74 Flat washer | 6 | ||
| 37 | Handlebar bracket | 1 75 Lock nut | 1 | ||
| 38 | Screw (M5*15) | 2 |
ASSEMBLY INSTRUCTIONS
Step 1 (see pic. 1)
Connect the front stabilizer (3) to the main frame (21) by use the bolt M8*47 (2), Curved cushion 8 (47) and lock nut M8 (13).
Connect the computer (44) wire to the upper computer wire (45), then fix the computer on the computer bracket of main frame (21)
Step 2 (see pic. 2)
Connect the seat (71) to the seat bracket (67) by use the Screw M6*15 (65) and flat washer (66) then ock Adjustment knob (58).
PS: Adjust the Seat to the position using Adjustment knob (58).
Step 3 (see pic. 3)
Connect the rear stabilizer (61) to the roller tube (53) by use the bolt (60) and screw (M6*10) (64).
Step 4 (see pic. 4)
- Put the roller tube (53) into main frame (21) and then assemble by use bolt M8*95 (20), Washer (14) and lock nut M8 (75).
-
- Connect the upper computer wire (45) to the lower computer wire (52),
-
- Insert the pin (18).
Step 5 (see pic. 5)
Buckle the handlebar hook (32) with weave belt hook (17) then put on handlebar bracket (37).
Attention: There are 3 levels of tension. Tension level varies on the number of belts, 1 belt for least resistance, 3 belts for highest resistance.
Please change the weave belts (17), a consuming parts when it is damaged or the diameter shrinks. The defect photo and changing procedure are as below:
Step 6 (see pic. 6)
Assembly Pedal (15), Bushing (19) and (Axle for Pedal) (16) to the Main frame (21) by use lock nut M8 (13) and Washer (14).
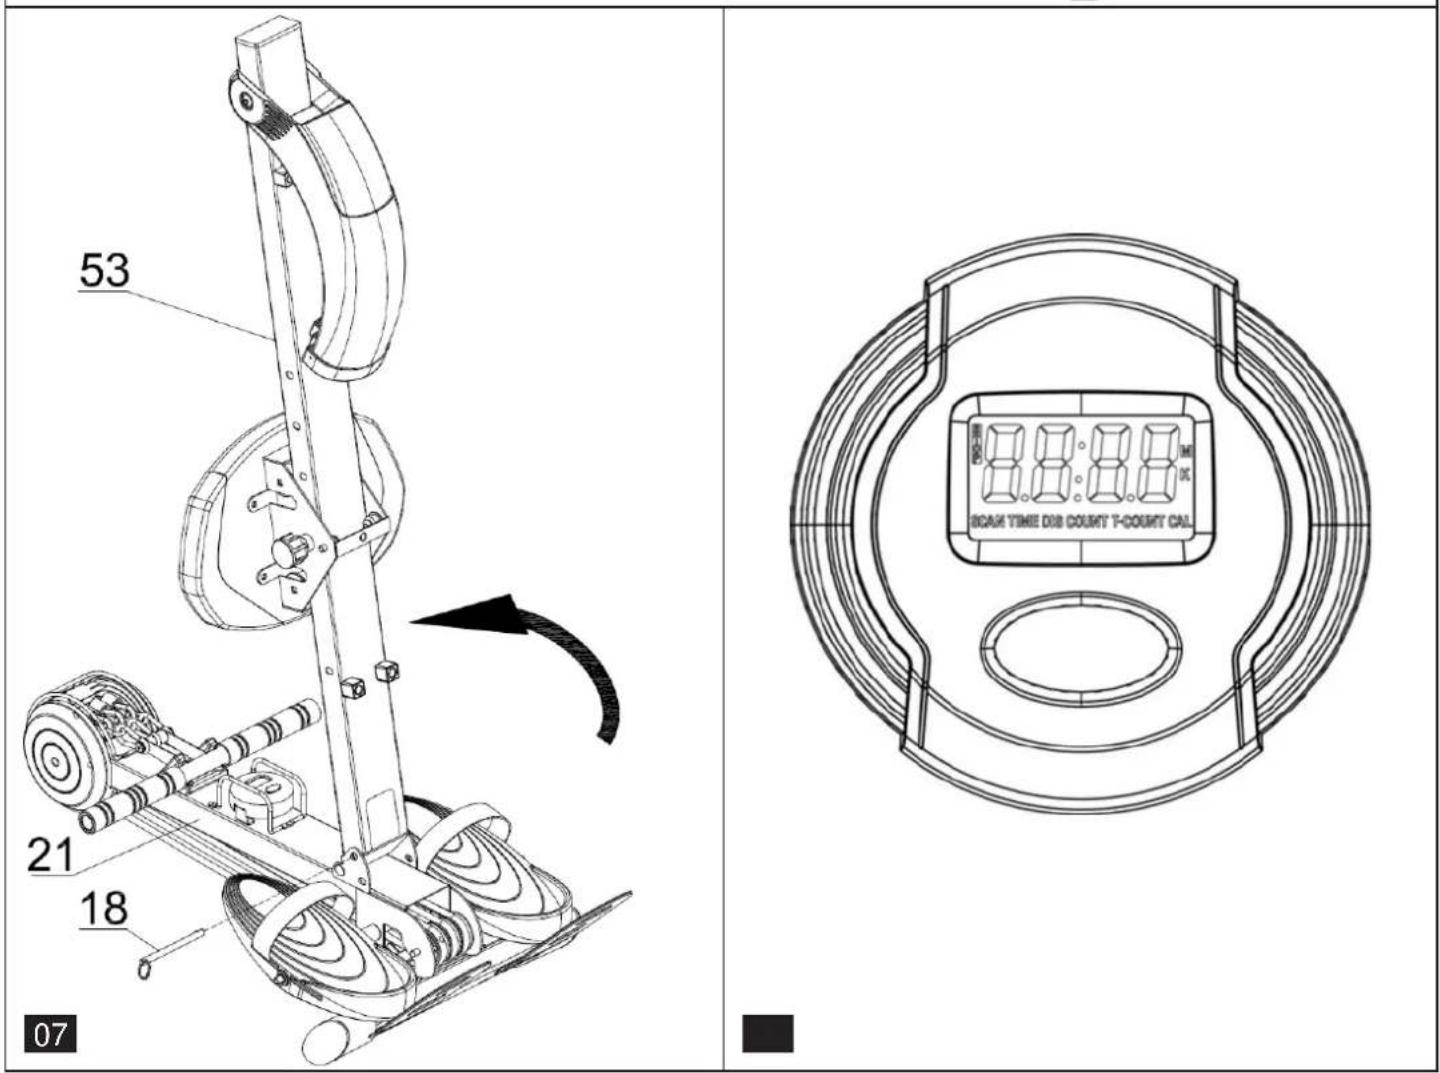
Folding for storage (see pic. 7)
Pull the pin (18) out of the main frame (21), then turn roller tube (53) anticlockwise, insert pin (18) to the hold.
EXERCISE COMPUTER
Exercise Computer (see pic. 8)
Functions and Operations
1. Batteries Installation
Please install 1 piece of AAA 1.5V batteries in the battery case on the back of monitor. (Whenever Batteries are removed, all the functions values will be reset to zero.)
2. Auto On/Off
While the user starts to do exercise, the Display will show out the workout value automatically. Once stop exercising over 256 sec, the Display will turn off. But the workout value of count/total count /cal will be hold. While user starts exercise again, workout value of count/ total count /cal will accumulate continuously.
Press the button for 2 seconds, all the function value except T-COUNT will be reset to zero..
3. Auto Scan
After the monitor is power on or press the button, the LCD will display all functions values from Time-Count- T-Count – Cal. Each value will be held for 6 seconds.
4. Count
Display the step from 0 to 9999.
5. Total Count
Display the total steps from 0 to 9999.
6. Time
Display the workout time from 00:00 to 99:59. User also can press the button to display the workout time value.
7. Calories
Display the calories consumption during training from 0.0 to 9999. User also can press the button to display the calories consumption valuet.
EXERCISE GUIDE
Rowing is an extremely effective form of exercise. It strengthens the heart and improves circulation as well as exercising all the major muscle groups; the back, waist, arms, shoulders, hips and legs.
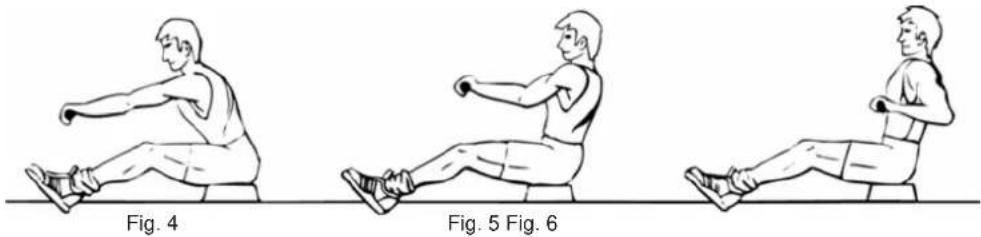
The Basic Rowing Stroke
- Sit on the saddle and fasten your feet to the pedals using the Velcro straps. Then take hold of the rowing bar.
- Take up the starting position, leaning forward with your arms straight and knees bent as shown in (Fig 1).
- Push yourself backwards, straightening your back and legs at the same time (Fig 2).
- Continue this movement until you are leaning slightly backwards, during this stage you should bring your arms out of theside. (Fig 3). Then return to stage 2 and repeat. See attached.
Rowing is a strenuous form of exercise, because of this it is best to start with a short, easy exercise programmed and build up to longer and harder workouts. Start rowing for about 5 minutes and as you progress, increase the length of your work out to match your improving level of fitness. You should eventually be capable of rowing for 15-20 minutes, but do not try to achieve this too quickly. Try to train on alternate days, 3 times a week. This gives your body time to recover between workouts.
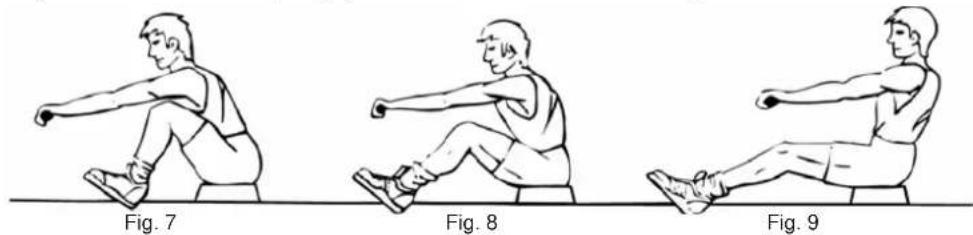
Arms Only Rowing
This exercise will tone muscles in your arms, shoulders, back and stomach. Sit as shown in Fig 4 with your legs straight, lean forward and grasp the handles. In a gradual and controlled manner lean back to just past the up right position continuing to pull the handles towards your chest. Return to the starting position and repeat. See attached.
Legs Only Rowing
This exercise will help tone muscles in your legs and back. With your back straight and arms out stretched, bend your legs until you are grasping the rowing arm handles in the starting position, Fig 7. Use your legs to push your body back whilst keeping your arms and back straight.
GUARANTEE CONDITIONS
We provide guarantee for our devices according to the following conditions.
- We shall rectify the damages or defects - which are verifiably based on a manufacturing defect - in the device free of cost in accordance with the following conditions (numbers 2-5), if you have reported to us immediately after detection and within 24 months after the delivery to the end user. The guarantee does not extend to easily breakable parts like for e.g. glass or plastic. A guarantee obligation does not apply: in case of minor deviations of target quality, which are irrelevant for value and usability of the device; in case of damages due to chemical and electrochemical effects; in case of penetration of water as well as generally in case of damages due to force majeure.
- The guarantee claim is executed whereby defective parts are repaired free of charge or replaced with parts free of defects according to our discretion. We shall bear the costs for material and working time. Repairs on site cannot be demanded. The sales receipt with purchase and/or delivery date is to be submitted. Parts replaced shall become our property.
- The guarantee claim expires if repairs or interventions are carried out by people, who are not authorized by us for this purpose or if our devices are provided with additional parts or accessories, which are not adapted to our devices. Furthermore, if the device is damaged or ruined by the influence of force majeure or by environmental influences, in case of damages which are developed by incorrect handling or maintenance - especially non-observance of instruction manual - or if the device shows mechanical damages of any type. After telephonic consultation, the customer service can authorize you for repairs and/or for exchange of parts which you were sent. In this case, the guarantee claim does not obviously expire.
- Guarantee services does not cause any extension of guarantee period or does not start a new term of guarantee.
- Additional or other claims, particularly on replacement besides the damages arising on the device, shall be excluded to the extent that liability is not legally implied.
- Our guarantee conditions - which include prerequisites and scope of our guarantee conditions - do not affect the contractual guarantee obligations.
- Wear parts are not subject to the guarantee conditions.
- The guarantee claim expires in case of improper use, particularly in fitness-studios, rehabilitation centres and hotels. Even if most of our devices are qualitatively suitable for a professional use, it requires a separate joint agreement.
Packaging
Eco-friendly and recyclable materials:
• External packing made up of corrugated board
- Moulded parts made up of foamed, CFC-free polystyrene (PS)
- Foils and bags made up of polythene (PE)
- Tightening straps made up of polypropylene (PP)
Disposal
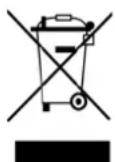
At the end of its operating life, this product should not be disposed via the normal domestic waste but should be handed over to an assembly point for recycling of electrical and electronic devices. The materials are recyclable according to their marking. You will make an important contribution for protecting our environment with the reuse, recycling or other forms of utilizing the old devices.
BIENVENUE
Avant de commencer
text_image
QR code image containing encoded data, no visible human-readable textLISTE DE PIÈCES
INSTRUCTIONS D'ENTRAÎNEMENT
natural_image
Three sequential illustrations of a person performing a stretching exercise with arms and legs, shown in clockwise motion (no text or symbols)fig. 1 fig. 2 fig. 3
natural_image
Three sequential illustrations of a person performing a seated exercise with dumbbells (no text or symbols)fig. 5 fig. 6 fig. 4