
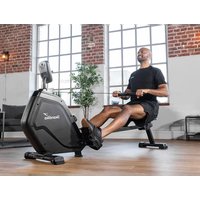
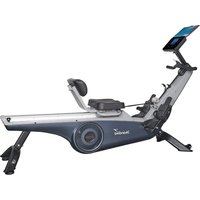
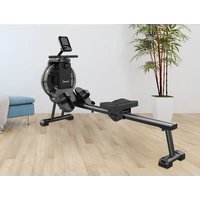
Nemo V Hybrid - Rowing Machine Skandika - Free user manual and instructions
Find the device manual for free Nemo V Hybrid Skandika in PDF.

| Product Type | Rowing Machine |
| Brand | Skandika |
| Model | Nemo V Hybrid |
| Category | Hydraulic Resistance Rowing Machine (Water) |
| Maximum User Weight | 150 kg |
| Resistance | Manually adjustable, 16 levels (1-16) |
| Power Supply | AC adapter 9V / 1A |
| Display | LCD screen with backlight, display of training data |
| Connectivity | Bluetooth 2.4 GHz for Kinomap app |
| Display Functions | Speed, time, distance, calories, strokes, time/500m, frequency, resistance level |
| Resistance Levels | 16 (Level 1-16) |
| Frame Material | Steel |
| Dimensions (L x W x H) | Approx. 210 x 60 x 80 cm |
| Net Weight | Approx. 35 kg (without water) |
| Water Supply | Supplied USB pump for filling/draining the water tank |
| Maintenance | Clean with a damp cloth, no abrasive products. Dry completely before reuse. |
| Safety | Read the manual, use on a flat surface, 2 m clearance around, max weight 150 kg, household use only |
| Spare Parts | Wear parts (cables, pulleys) available via customer service |
| Warranty | 24 months |
| General Information | Manual available in multiple languages, customer service: service@skandika.de |
Frequently Asked Questions - Nemo V Hybrid Skandika
User questions about Nemo V Hybrid Skandika
0 question about this device. Answer the ones you know or ask your own.
Ask a new question about this device
Download the instructions for your Rowing Machine in PDF format for free! Find your manual Nemo V Hybrid - Skandika and take your electronic device back in hand. On this page are published all the documents necessary for the use of your device. Nemo V Hybrid by Skandika.
USER MANUAL Nemo V Hybrid Skandika
natural_image
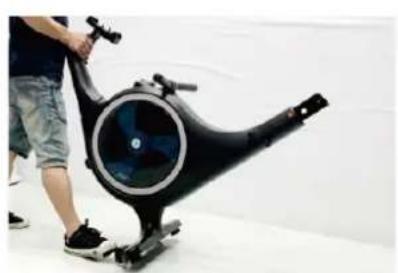
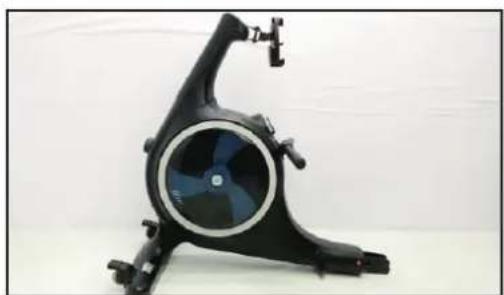
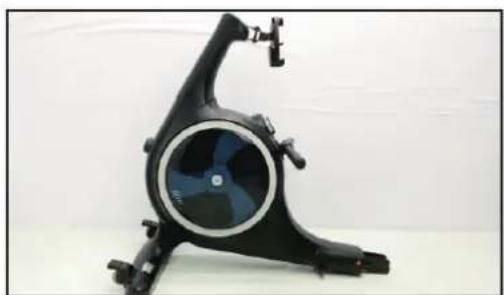
Black stationary bike with blue circular head and control panel, no visible text or symbols on the device itself.Nemo V Hybrid
Inhalt

skandika.com/service
natural_image
Person adjusting a black cylindrical device with a blue sensor (no visible text or symbols)natural_image
Person using a black exercise machine on a white surface (no text or symbols visible)natural_image
Person adjusting a black exercise machine with a circular vent, no visible text or symbolsnatural_image
Black plastic electronic device with attached components and three small screws, shown against a plain white background (no text or symbols visible)natural_image
Close-up of a black stationary exercise machine with a hand adjusting its grip, no visible text or symbols.natural_image
Close-up of a hand inserting a small black component into a black plastic frame (no text or symbols visible)natural_image
Top-down view of a black ergonomic device with wheels and adjustment knobs (no text or symbols visible)natural_image
Person using a black stationary bike with a circular vent, standing on a white surface (no visible text or symbols)

natural_image
Black stationary bike with circular vent and adjustable arms (no visible text or symbols)natural_image
Black plastic mechanical component with a cylindrical pin and a separate handle, shown against a plain background (no text or symbols visible)natural_image
Hand holding a black electronic device with a handle, mounted on a flat surface (no text or symbols visible)natural_image
Close-up of hands installing a black mechanical component with a small bolt (no visible text or symbols)natural_image
Close-up of hands installing a black mechanical component with a handle (no visible text or symbols)natural_image
Close-up of a hand holding a black handheld device with a handle, against a plain white background (no text or symbols visible)natural_image
Collection of metal and black mechanical components on a white background (no text or symbols visible)natural_image
Close-up of hands installing a black cable with a tool, no visible text or symbolsnatural_image
Hand inserting a small object into a black mechanical component (no text or symbols visible)natural_image
Close-up of a hand using a tool to adjust or install a black mechanical component (no visible text or symbols)natural_image
Close-up of hands holding a black tool against a white background, with circular markers labeled L and R in the corner (no text or symbols on the tool itself)natural_image
Close-up of a black metal pipe clamp with two hands holding a white tool, against a plain wall (no text or symbols visible)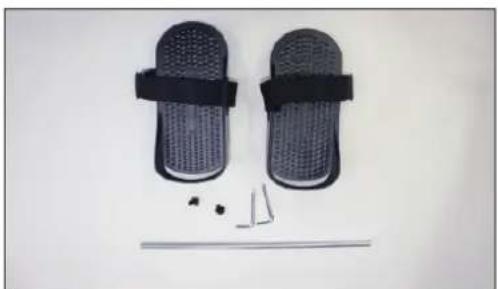
natural_image
Product photo of a pair of black mesh flip-flops with attached straps and small mechanical parts (no text or symbols visible)natural_image
Close-up of hands holding a metal rod against a plain white background (no text or symbols visible)natural_image
Person adjusting a black exercise machine with a red button on the wheel (no visible text or symbols)natural_image
Close-up of a hand holding a black textured object next to a metallic rod, placed on a plain white surface (no text or symbols visible)natural_image
Close-up of hands holding a black wrist strap next to a textured gray object on a white surface (no text or symbols visible)natural_image
Close-up of hands operating a handheld device with a blue indicator light (no visible text or symbols)natural_image
Close-up of hands adjusting a black fitness device with straps and buttons (no visible text or symbols)natural_image
Close-up of a hand inserting a small electronic component into a black appliance (no visible text or symbols)natural_image
Close-up of a hand adjusting a black car air vent (no visible text or symbols)natural_image
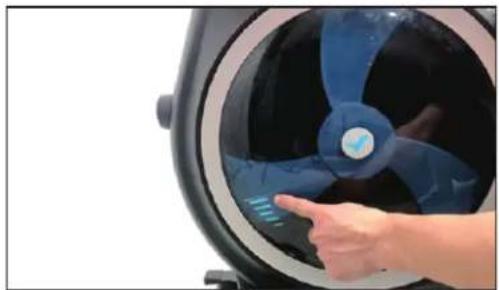
Hand interacting with a blue propeller inside a circular device (no visible text or symbols)natural_image
Three small electronic devices on a plain background: a pen-like tool, a metallic clip, and a black rectangular device (no visible text or symbols)natural_image
Close-up of hands holding a white cylindrical container with a black cylindrical body, no visible text or symbolsnatural_image
Close-up of hands using a handheld device to apply liquid onto a surface (no text or symbols visible)natural_image
Close-up of hands holding a black cylindrical device with a white cable, against a plain white background (no text or symbols visible)natural_image
Close-up of a hand holding a black vacuum cleaner with a white circular component, next to a mechanical device (no visible text or symbols)natural_image
Close-up of a hand using a power tool to clean or install a black vacuum cleaner (no visible text or symbols)natural_image
Close-up of a hand adjusting a black plastic component on a dark gray vacuum cleaner (no visible text or symbols)natural_image
Close-up of a hand pressing down on a black plastic component (no text or symbols visible)HINWEISE:
natural_image
Close-up of a hand adjusting a black ergonomic device with a strap (no visible text or symbols)Riemen öffnen


natural_image
Close-up of a hand adjusting a black athletic seatbelt with a label (no visible text or symbols)natural_image
Close-up of a person using a black seatbelt device to adjust the seat (no visible text or symbols)Riemen schließen

natural_image
Technical line drawing of a mechanical lever assembly with an inset showing a curved component (no text or symbols)natural_image
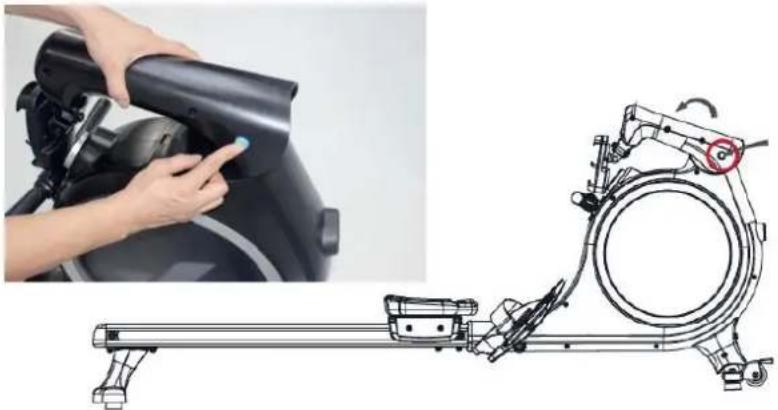
Illustration of a person using a stationary bike with a circular wheel assembly and a red circular marker indicating rotation (no text or symbols present)natural_image
Close-up of a hand holding a small electronic component attached to a black mechanical component (no visible text or symbols)
Abb. 5

Abb. 6

Abb. 7
natural_image
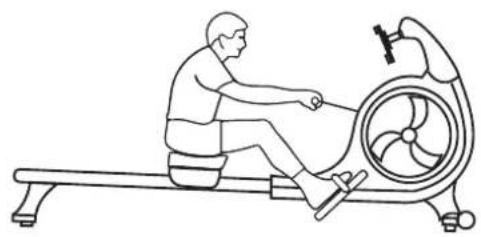
Line drawing of a person using a rowing machine with a fan (no text or symbols)Ausgangsposition
natural_image
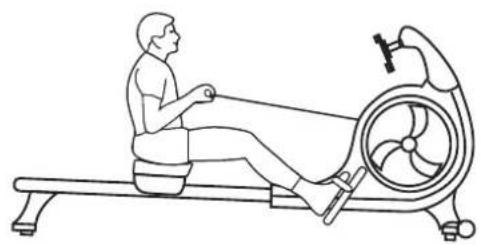
Line drawing of a person using an exercise machine (no text or symbols present)Ruderbewegung
natural_image
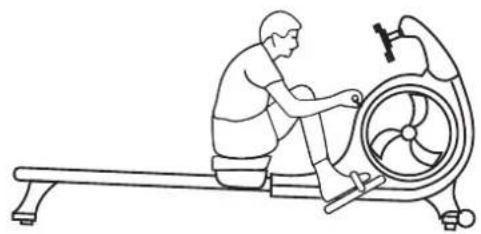
Line drawing of a person using an exercise machine on a row (no text or symbols)Endposition
natural_image
Line drawing of a person using a rowing machine for physical therapy (no text or symbols)23 Safety precautions
24 Explosion drawing
25 Parts list
26 Set-up instructions
31 How to fill/empty the tank
32 Smartphone holder / Pedal strap
33 Level stand / Transportation & storage / Folding
34 Computer instructions
36 Connecting to Kinomap app
37 Warm-up and cool-down
37 Exercise instructions
38 Troubleshooting
39 Cleaning & care
40 Guarantee conditions

skandika.com/service
Please visit the Skandika Service portal on our website for setup & help videos, FAQs and downloadable instructions. For more information about Skandika, simply visit our main page www.skandika.com

WARNING
To reduce risk of injury, read and understand this instruction manual before using the device! This machine is intended for home use only in accordance with the instructions provided in this manual. Read the instruction manual carefully before using this device and keep the instruction manual for future use.
SAFETY PRECAUTIONS
-
Only use the unit in enclosed spaces!
-
Place the device on a solid and level and surface only. Use a floor protection to avoid traces through the device's feet.
-
Only assemble the unit as specified in these instructions. The unit must not be modified.
-
The unit must not be fixed to the floor (e.g. with screws). This could lead to frame damage.
-
Only use in cool, dry environments. Do not store in extreme cold, hot or damp places or in direct sunlight.
-
Cleaning and user maintenance may not be carried out by children without supervision.
-
Before starting any exercise program, consult your physician to determine if you have any medical or physical conditions that could put your health and safety at risk or prevent you from using the equipment properly. Your physician's advice is essential if you are taking any medication that may affect your heart rate, blood pressure or cholesterol level.
-
Your health can be affected by incorrect or excessive training. Consult a doctor before beginning a training program. If you experience dizziness, nausea, chest pain or any other abnormal symptoms, STOP the workout immediately. CONSULT A PHYSICIAN IMMEDIATELY.
-
Keep children and pets away from the appliance. This device is suitable for adult use only.
-
Do not leave children unattended in the same room with the machine.
-
Before using the unit, check all parts (such as screws, nuts, cable pulls) for function and correct fit. The safety of the equipment can only be maintained if it is regularly examined for damage and/or wear and tear.
-
Never use the unit if it is damaged.
-
Do not place fingers or objects in the range of moving parts of the device.
-
Before using the machine to exercise, always do stretching exercises to properly warm up.
-
Do not twist the cable pull and always pull the handle with both hands according to the training instructions.
-
The HC class unit may only be used by one person at a time (max. weight load = 150 kg).
-
Do not use this device directly after meals or drinks. Never use the device under the influence of drugs, alcohol or medication that causes disorientation.
-
This device is not suitable for therapeutically or commercial use. Only use this unit according to the intended purpose and as directed in the instruction manual.
-
Please do not attempt to repair the unit yourself in the event of malfunctions, since this will void all warranty claims. Only have repairs carried out by authorised service centres. Only original spare parts may be used.
-
Ropes, pulleys and connecting parts are wearing parts and should be checked regularly. When parts of the rower are worn or defective, they should be replaced in a timely manner to ensure normal operation of the rower and safe use.
-
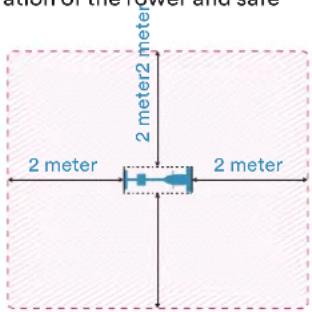
Please only exercise with a minimum clearance area of 2 meters around the device.
-
Always wear appropriate clothing and shoes which are suitable for your workout on the device. The clothes must be designed in a way so that
they will not get caught in any part of the device during the work-out due to their form (for example, length). Be sure to wear appropriate shoes which are suitable for the work-out, firmly support the feet and which are provided with a non-slip sole.
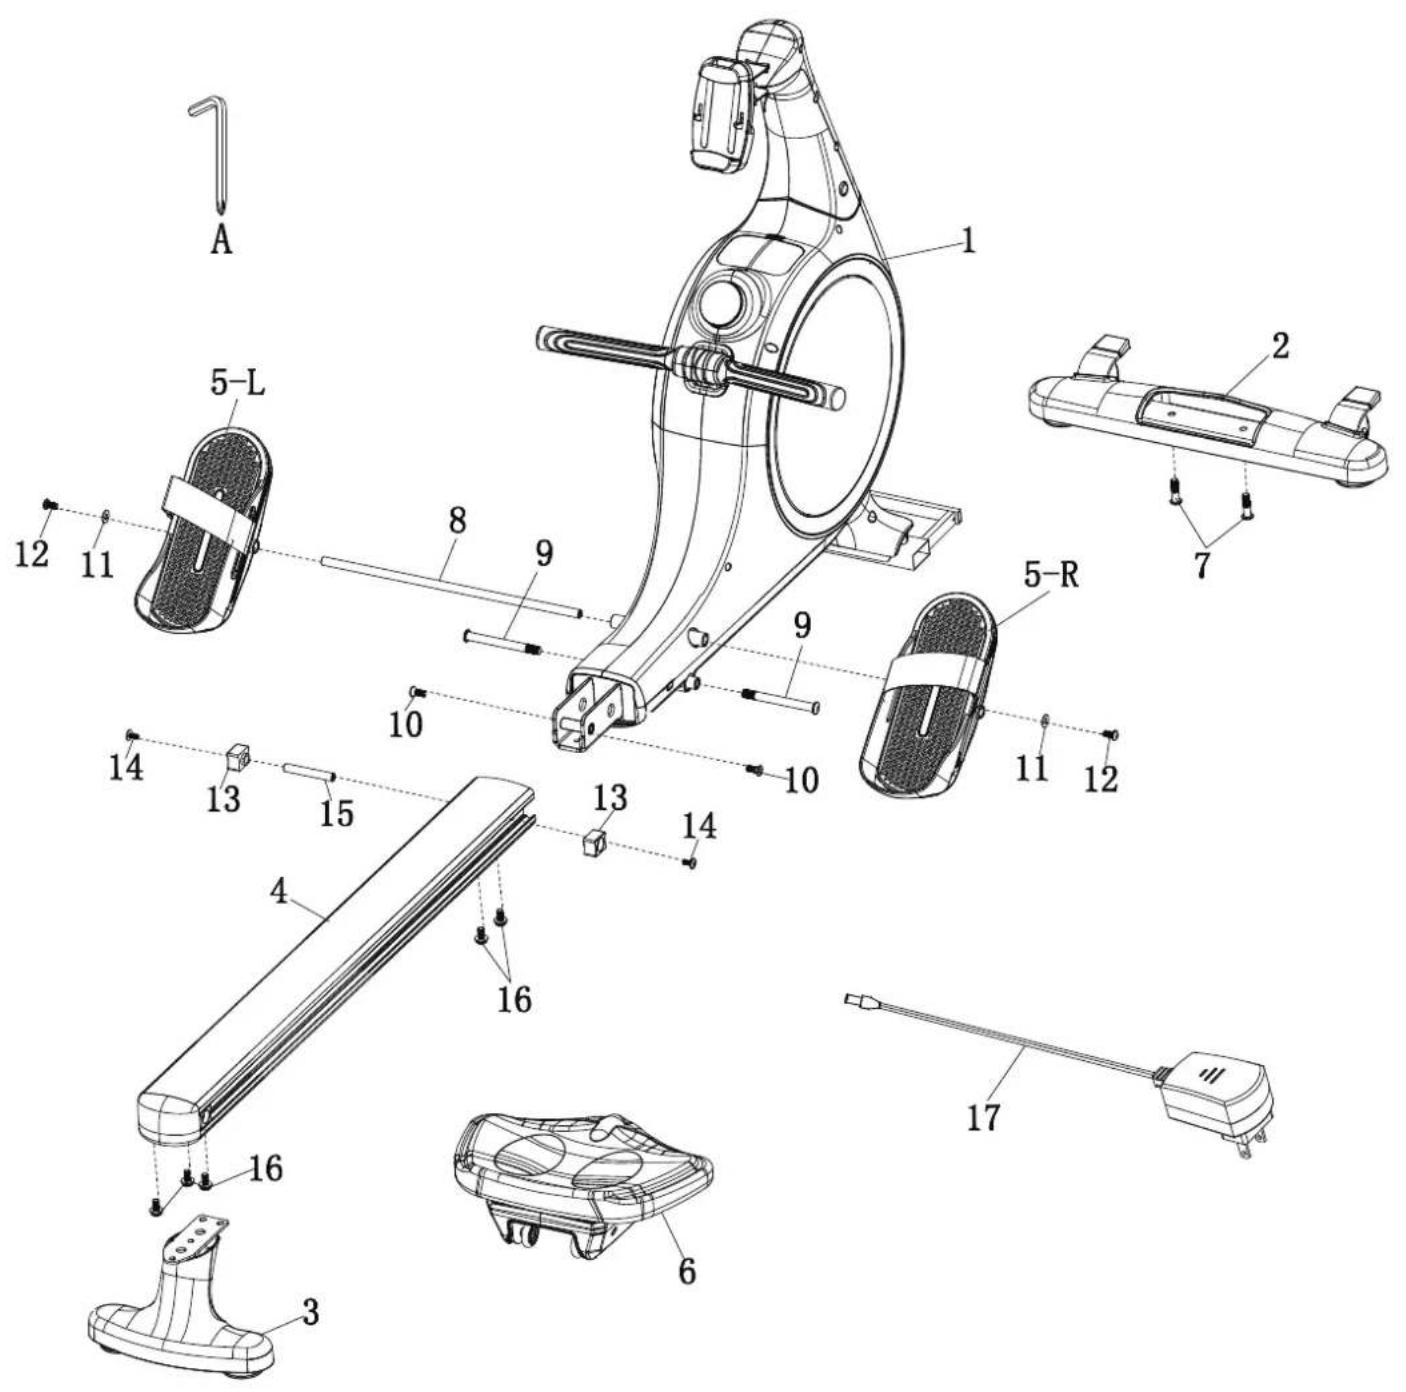
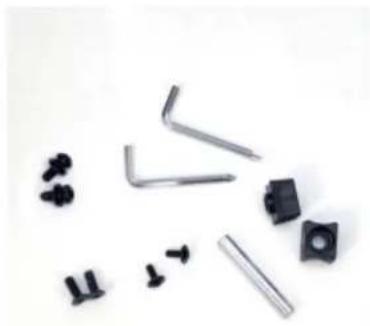
| NO. | Part | Name | QTY | NO. | Part | Name | QTY |
| 1 | 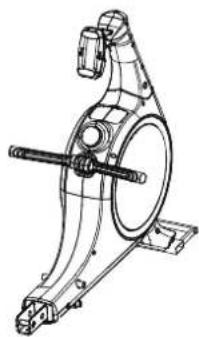 | Main Frame | 1 | 6 |  | Seat | 1 |
| 7 | M10*38 Screw for Front Foot | 2 | |||||
| 2 | 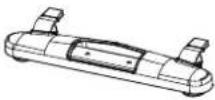 | Front Foot | 1 | 8 |  | Pedal Connector | 1 |
| 9 | 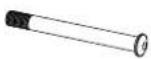 | Pedal Holders | 2 | ||||
| 3 | 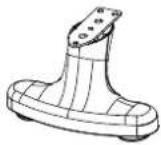 | Rear Foot | 1 | 10 |  | M8*22 Screw | 2 |
| 11 | Φ19 Washer | 2 | |||||
| 4 | 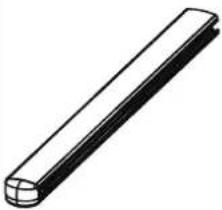 | Rail | 1 | 12 |  | M8*16 Screw | 2 |
| 13 |  | Rubber Pad | 2 | ||||
| 14 |  | M6*15 Screw | 2 | ||||
| 5-L | 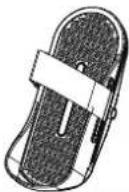 | Left Pedal | 1 | 15 |  | Rail Rod | 1 |
| 16 |  | M8*20 Screw with Washer/Rubber Ring | 5 | ||||
| 5-R | 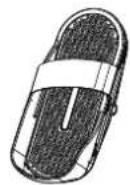 | Right Pedal | 1 | 17 | 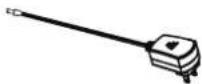 | 9V-1A Adapter | 1 |
| A |  | 6mm Allen Wrench with Phillips Screwdriver Head | 2 |
SET-UP
Remove the appliance from the box and lay all the parts neatly spread out on the floor. Then carry out the following steps:
natural_image
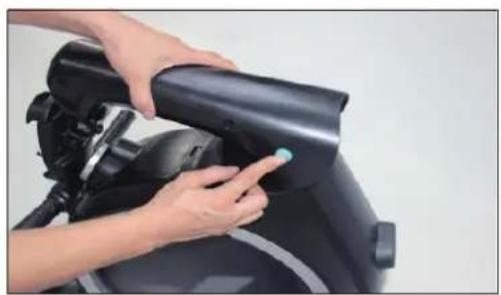
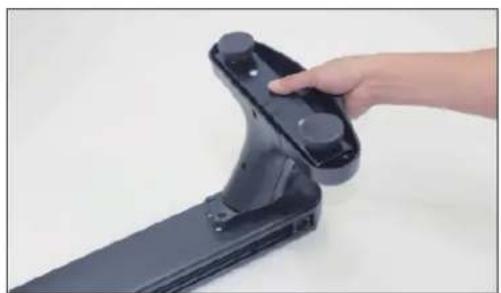
Person using a black exercise bike with a blue sensor on the handle (no visible text or symbols)Prepare Main Frame (#1).Press down the button to upright the tube of rower.

natural_image
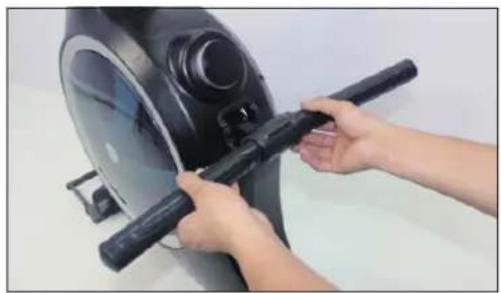
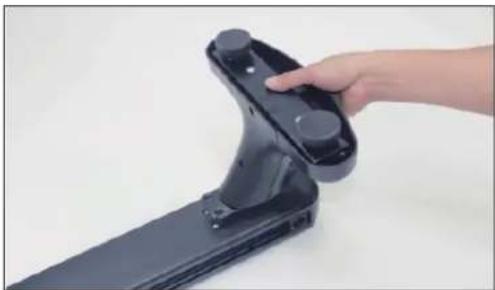
Person using a black exercise machine outdoors (no visible text or symbols)Place the handle bar on the holder.
natural_image
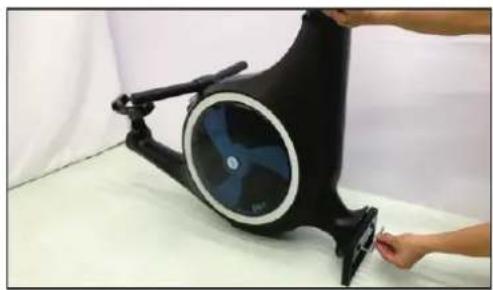
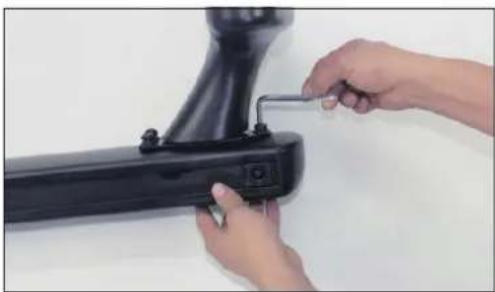
Person adjusting a black ergonomic device with a circular vent and handle, no visible text or symbolsPlace the main frame as photo shows and remove the protective frame with #A wrench.

natural_image
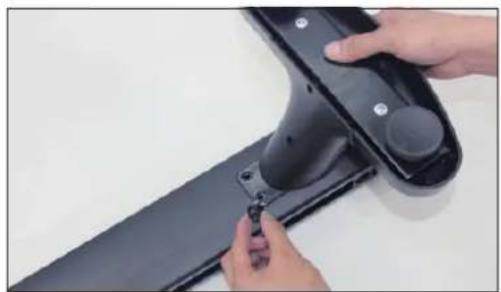
Black plastic guitar body with attached buttons and two small screws, shown against a plain background (no text or symbols)Prepare #2 front foot, #7 screw, #A wrench to assemble front foot.
natural_image
Close-up of a black stationary exercise machine with a blue circular vent, being handled by a hand (no visible text or symbols)Align the holes of front foot to the holes on the arcfoot holder of main frame.

natural_image
Close-up of a hand adjusting a black plastic mechanical bracket (no text or symbols visible)Assemble the screws onto front tube by hand.
natural_image
Close-up of a black ergonomic device with wheels and adjustment knobs (no text or symbols visible)Then make sure that both connections of the front stand (2) are tightened by force, use the tool (A).
natural_image
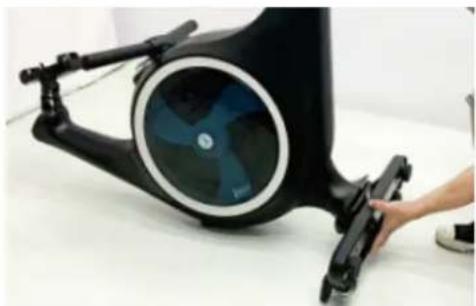
Person using a stationary exercise bike with visible wheel and head (no text or symbols)
natural_image
Black stationary bike with circular vent and handle, no visible text or symbolsNow place the unit carefully as shown so that further assembly can be carried out without any problems.

natural_image
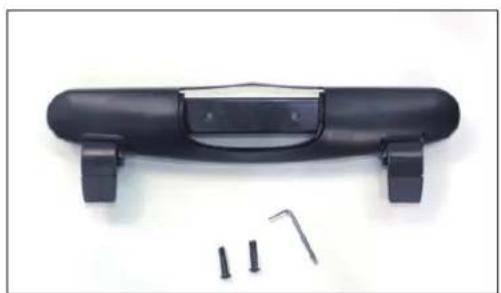
Two black plastic components on a plain surface: a long rectangular rod and a small mechanical bracket (no text or symbols visible)To assemble rear foot, prepare #3 rearfoot, #4 Rail,#16 three screws,#A wrench.

natural_image
Hand holding a black electronic device with a handle, against a plain white background (no text or symbols visible)Align the holes of rear foot to the holes under the rail.
natural_image
Close-up of hands installing a black plastic component with a small bolt (no text or symbols visible)Assemble three screws to rear foot by hand.


natural_image
Close-up of hands installing a black mechanical component with a wrench (no visible text or symbols)Tighten with #A wrench and rear foot assembly is completed.

natural_image
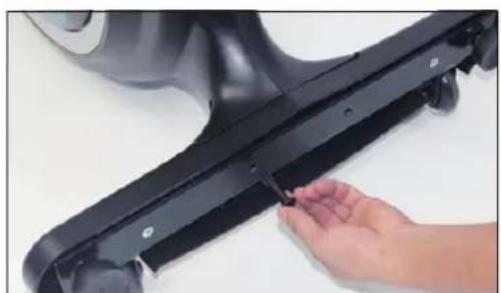
Close-up of hands holding a black handheld device with a handle, against a plain white background (no text or symbols visible)Now push the seat (6) onto the rail (4).
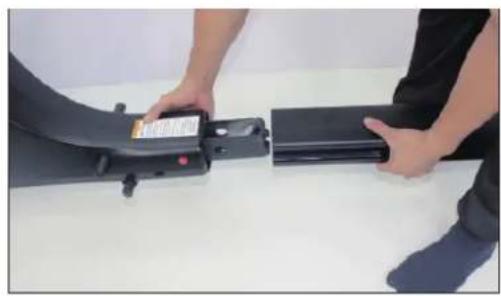
natural_image
Collection of mechanical parts including levers, bolts, and screws (no text or symbols visible)Now the running rail (4) must be mounted.
You will need the 2 rubber buffers (13), 2 screws (14), the sleeve (15), 2 screws (16) and (10) each, and both tools (A).
natural_image
Person holding a device next to a black electronic device (no visible text or symbols)Connect the rail with main frame as photo shows.

natural_image
Close-up of a hand inserting a small black component into a black rectangular device (no visible text or symbols)Tighten #10 two screws.

natural_image
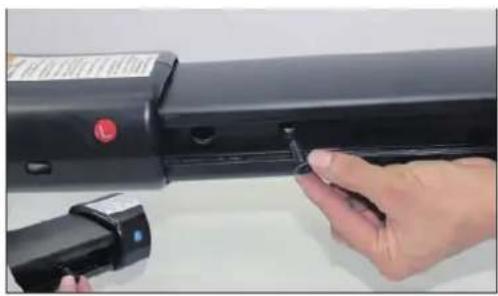
Close-up of a hand holding a black mechanical component with a red circular indicator (no visible text or symbols)Align #13 rubber pad to the hole on rail. (The arc should be on left & right side)

natural_image
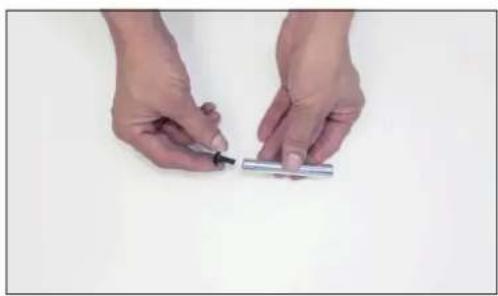
Close-up of hands holding a small metallic object with a pen, against a plain white background (no text or symbols visible)Assemble the #14 screw into #15 rail rod.
natural_image
Close-up of a hand inserting a metallic tool into a black cylindrical device (no visible text or symbols)Place the assemble drail connector through the pad and rail.

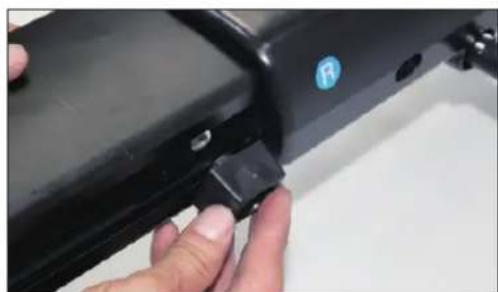
natural_image
Close-up of a hand holding a black plastic clip attached to a black metal bracket (no visible text or symbols)Assemble another #13 rubber pad to another side. (The arc should be on left & right side).
natural_image
Close-up of hands installing a black mechanical component with a screwdriver (no visible text or symbols)Tighten #14 screw to rail with the phillips end of #A wrench.

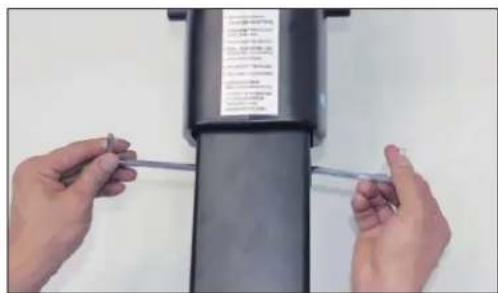
natural_image
Close-up of hands installing a cable on a black cylindrical device (no visible text or symbols)Tighten the screw with two #A wrenches turn simultaneously.

natural_image
Close-up of hands installing a black electronic device with a clip, no visible text or symbolsTighten two #10 screws with two #A wrenches.


natural_image
Hand inserting a small black object into a black mechanical component (no text or symbols visible)Assemble two #16 screws to the bottom of rail by hand.
natural_image
Close-up of a hand adjusting a black mechanical component with a tool (no visible text or symbols)Tighten two #16 screws with #A wrench. Complete the assembly of rail.

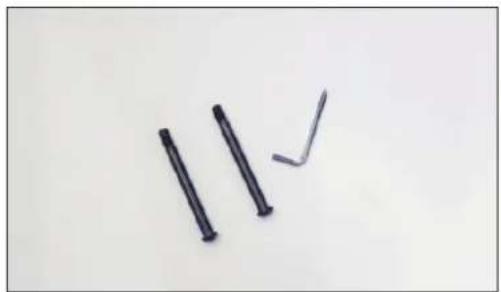
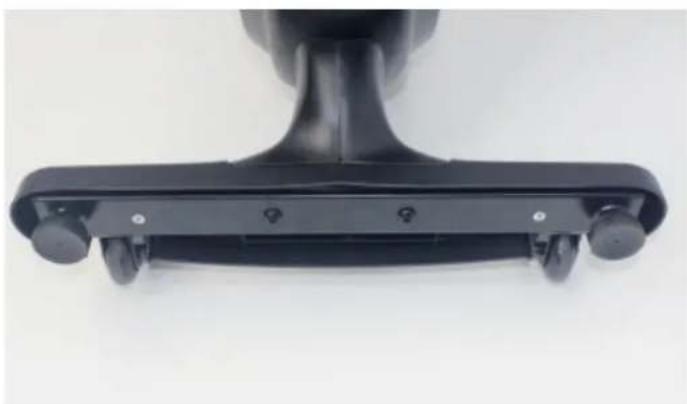
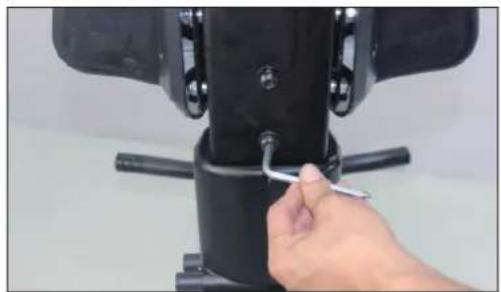
Prepare two #9 screws and #A wrench.
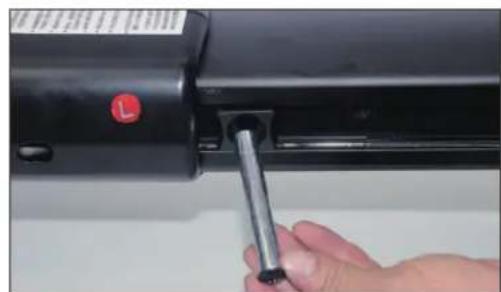
natural_image
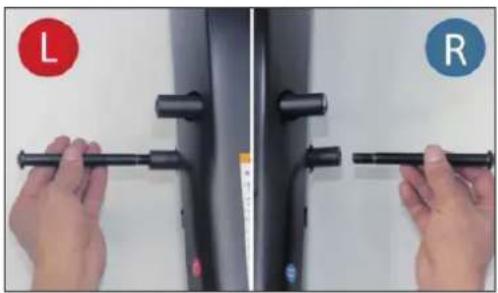
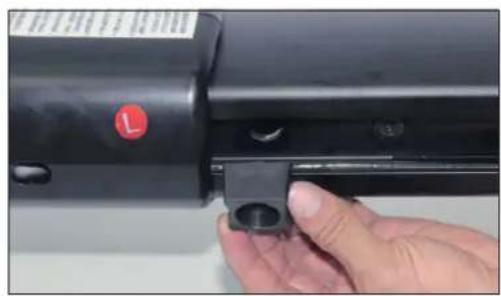
Close-up of hands holding a black tool against a white background, with L and R labels in red and blue circles respectively (no text or symbols on the tool itself)Assemble two #9 pedal holders separately to the sides of rail by hand.

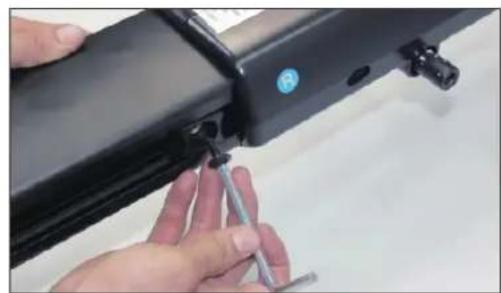
natural_image
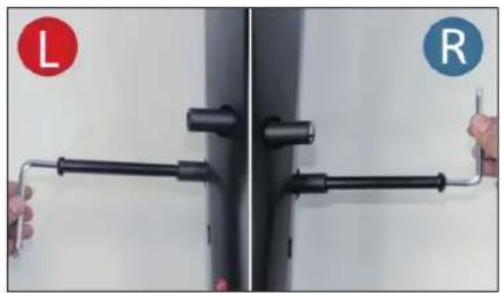
Close-up of a black metal pipe fitting with two hands, one labeled 'L' and the other 'R', against a plain wall (no text or symbols on the object itself)Tighten two #9 pedal holders with #A wrench.
natural_image
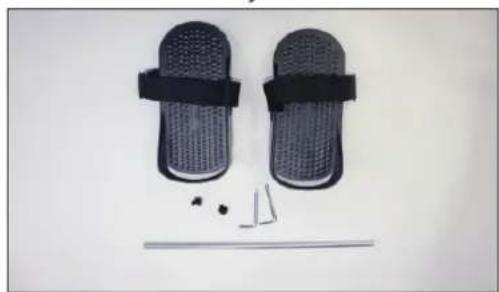
Product photo of two black mesh flip-flops with straps and small mechanical parts below (no text or symbols visible)To assemble pedals, prepare#5-L, #5-R pedals, two #12 screws, two #11 washers, #8 pedal connector and two #A wrenches. (Remove two #11 washers and two #12 screws pre-locked on the #8 pedal connector before the pedal assembly.)

natural_image
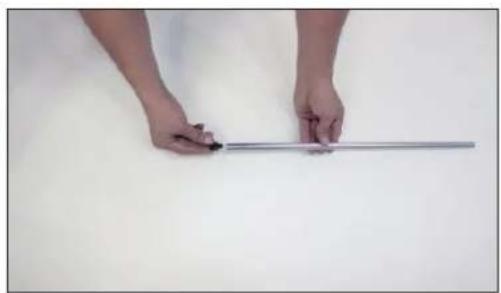
Close-up of hands holding a metallic rod against a plain white background (no text or symbols visible)Assemble #11 washer to #12 screw and assemble them to #8 pedal connector.
natural_image
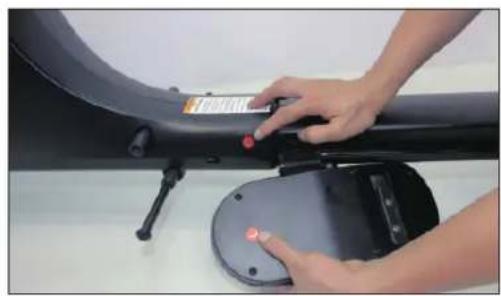
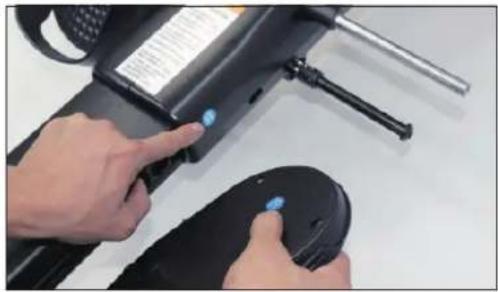
Close-up of hands operating a black electronic device with a red button, no visible text or symbolsPrepare left pedal and check if the L label is the same as the one on main frame.

natural_image
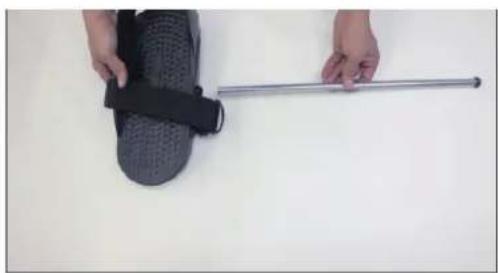
Close-up of a hand holding a black textured object next to a metallic rod on a plain white surface (no text or symbols visible)Assemble the pedal connector through left pedal from the end not screwed yet.
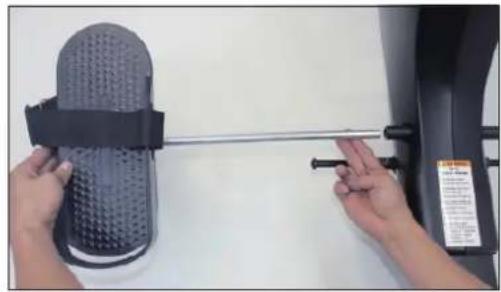
natural_image
Close-up of hands holding a black textured object with a metal rod, next to an industrial machine (no visible text or symbols)Place the assembled left pedal with connector through the rail.

natural_image
Close-up of hands operating a black electronic device with a blue indicator light, no visible text or symbolsPrepare right pedal and check if the label is the same as the one on main frame.
natural_image
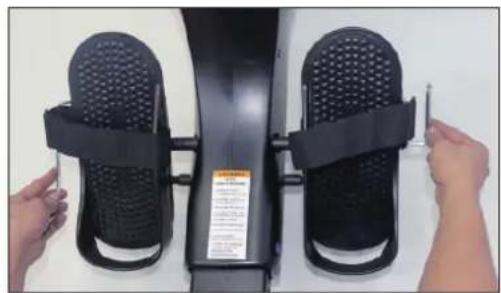
Close-up of hands adjusting a black fitness exercise device with straps and buttons (no visible text or symbols)Tighten two #12 screws with two #A wrenches turning simultaneously. Complete the assembly of pedals.

natural_image
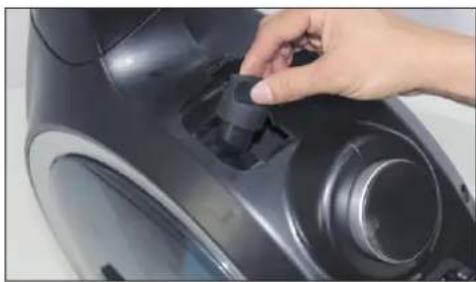
Close-up of a hand inserting a small electronic component into a black appliance (no visible text or symbols)Open the cover of water inlet on main frame.

natural_image
Close-up of a hand adjusting a black mechanical component with a knob (no visible text or symbols)Unscrew the plug of water tank.

natural_image
Close-up of a hand interacting with a blue and black circular device, showing a finger pointing at the screen (no text or symbols visible)Use the supplied siphon pump to pour the water into the tank.
Please note that the amount of water should
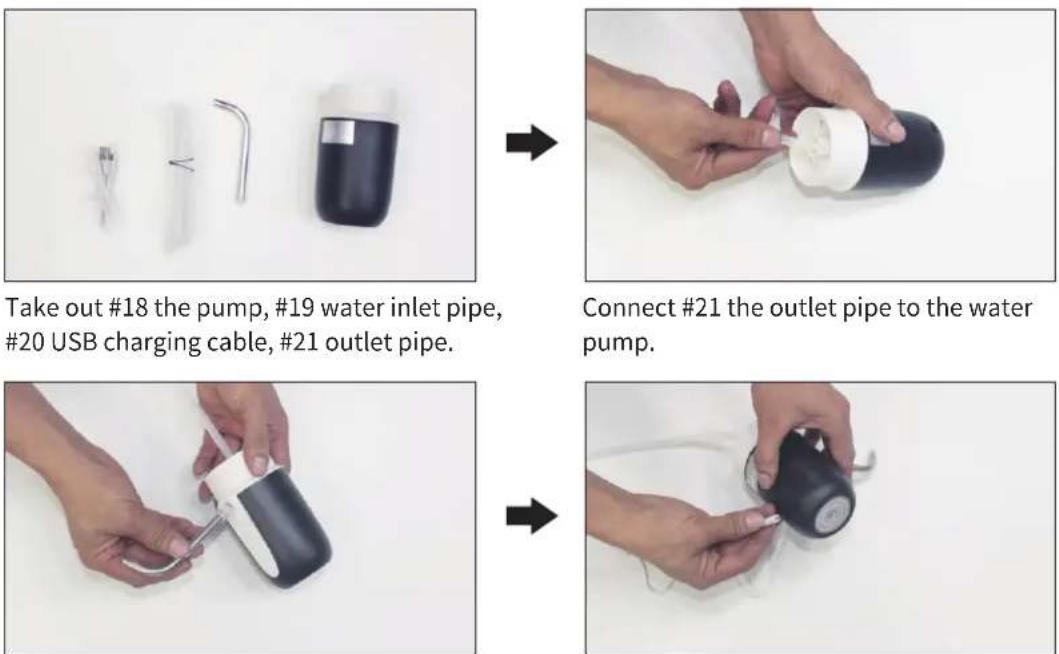
Insert #19 inlet pipe into water pump. Insert #20 the USB charging cable into the
ne USB charging cable into the
natural_image
Close-up of a hand holding a black circular device with a white handle, next to a mechanical component (no visible text or symbols)After the charging inlet pipe into the water (20)k. from the pump and guide the inlet pipe (19) into the water tank.

natural_image
Close-up of a hand using a black vacuum cleaner to clean a car (no visible text or symbols)The those must now be guided into the the most at the other end of the water container with water (e.g. a water bucket). Then press the button on the pump to pump water into the water tank of the appliance.
natural_image
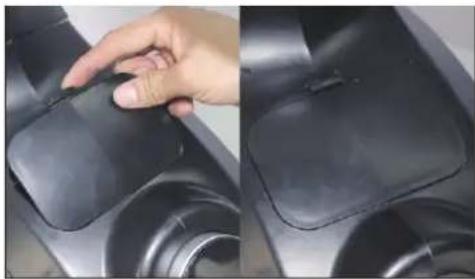
Close-up of a hand adjusting a black vacuum cleaner's air vent (no text or symbols visible)When the water tank is full (do not fill beyond the MAX mark), switch off the pump and put it aside. Close the tank with the cap. Close the cover again.

natural_image
Close-up of a hand pressing down on a black plastic object, showing the pad and rim (no text or symbols visible)HINTS:
- The tank may be filled with tap water or distilled water. Add a water treatment tablet if necessary. Never use chlorine or chlorine bleach - this could damage the tank and void the warranty.
- The tank is emptied in the opposite direction using the pump.
- Depending on the environment of the installation site and the frequency of use, the water should be changed regularly, but at least every 6 months or if there are signs of discolouration, bacteria or algae, etc. If possible, use distilled water!
- Commercially available water purification tablets are suitable for keeping the water clean. One tablet is sufficient for the maximum filled water tank. Stir the water well after adding one tablet. Add one tablet to the tank approximately every 2-3 months.
- The water from the tank is not suitable for consumption. After emptying, pour the water away.

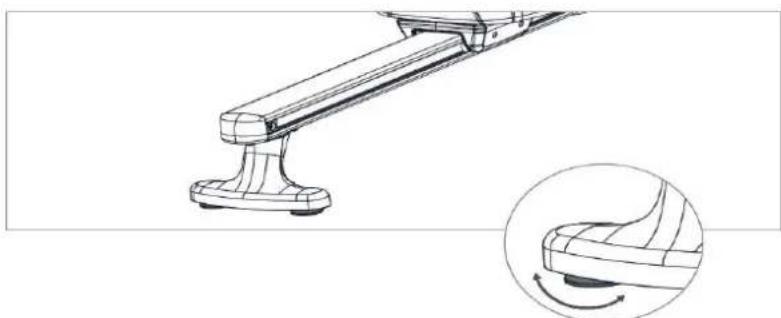
The smartphone holder can be rotated and tilted.
Adjustment of the pedal straps:
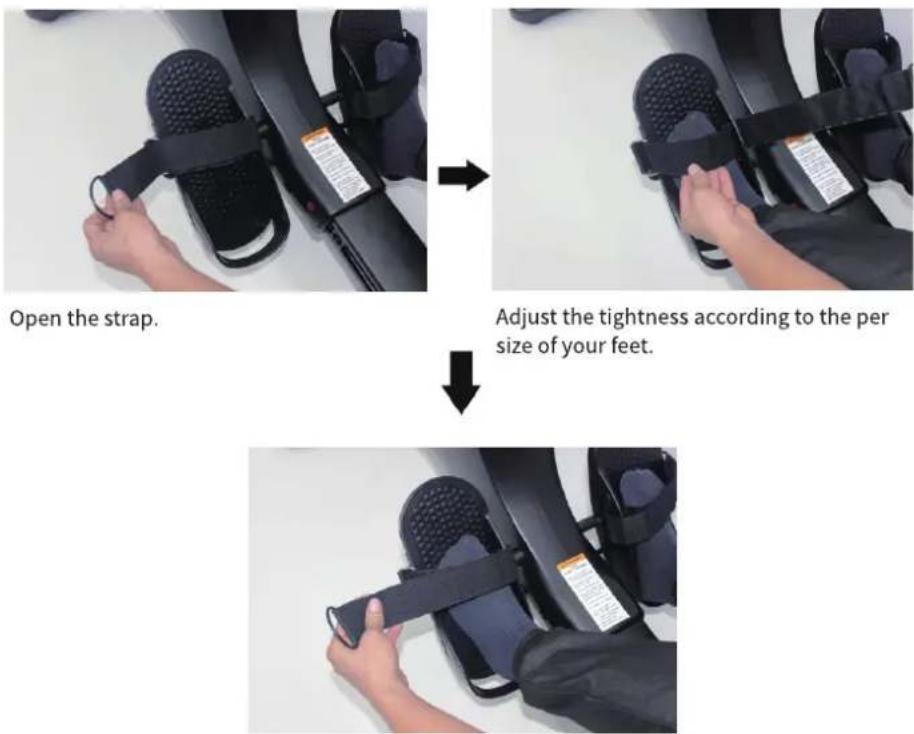
Stick the strap back.
natural_image
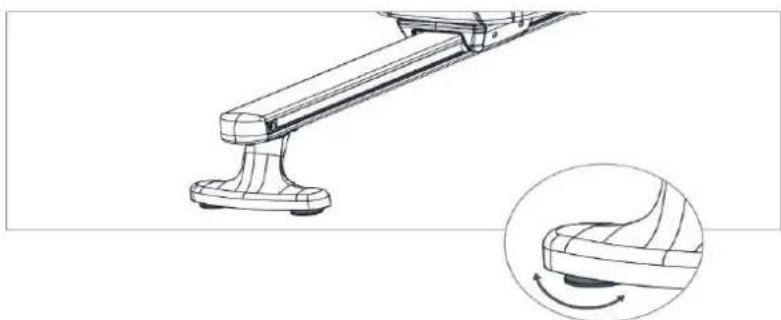
Technical line drawing of a mechanical lever assembly with an inset showing a curved component (no text or symbols)Adjust the two rear footrests so that the unit can stand up straight.
You can fold in the smartphone holder, e.g. to store or transport the unit. To do this, press the button as shown:
natural_image
Technical illustration of a stationary exercise machine with a hand operating the cylinder (no text or symbols visible)TRANSPORT & STORAGE
To move the unit, slide the seat forward and lift the rear stand until the transport wheels at the front touch the floor. This way you can easily roll the unit from place to place.
CAUTION! Moving parts such as the seat could cause injury by slipping.
Do not touch the running rails when moving or exercising on the unit!
The unit should only be stored in a clean, dry and temperature-controlled environment. Empty the tank if you do not use the unit for 1 month or longer.
COMPUTER INSTRUCTIONS
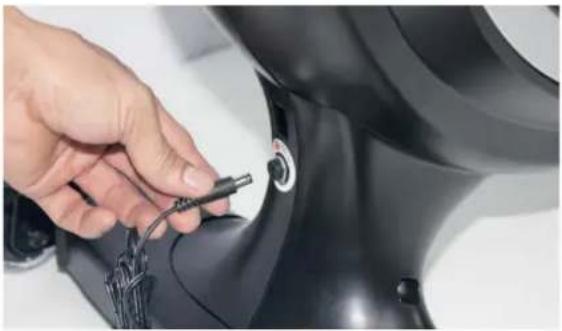
Power supply: Connect the adapter to the unit as shown and plug the adapter into a suitable socket.
natural_image
Close-up of a hand adjusting a black mechanical component with a cable (no visible text or symbols)
- After switching on, all display elements appear briefly (see fig. above) and a beep is emitted. The initial resistance is set to level 1 (light). The computer is then ready for operation (Fig. 1).
- If no training or operation takes place for approx. 3 minutes, the computer automatically switches to standby mode (Fig. 2).
- Pressing a button or starting a rowing workout switches the computer to the display mode for „Level“ (resistance level, Fig. 3).

Figure 1

natural_image
Simple white circle on black background with no text or symbolsFigure 2

Figure 3
- During the training and activated „SCAN“ mode, the different function values are displayed in continuous alternation (change every 3 seconds): speed, time, distance, calories, rowing strokes and 500m time. The rowing frequency and resistance level are displayed alternately (fig. 4 to 7).
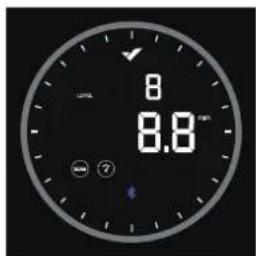
Figure 4

Figure 5

Figure 6

Figure 7
- To display a function value permanently, press the computer briefly (several times if necessary) until the desired value is displayed (fig. 8 to 11).
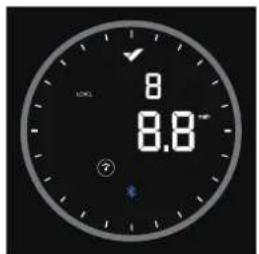
Figure 8

Figure 9
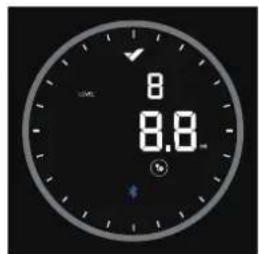
Figure 10
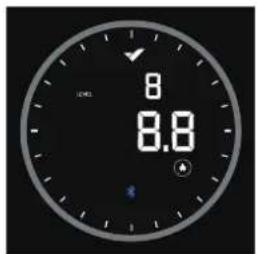
Figure 11
- To adjust the resistance during the workout, you can turn the unit clockwise to increase the resistance and counterclockwise to decrease the resistance. There are a total of 16 levels (Level, see Fig. 12).

Figure 12
DISPLAY SPECIFICATIONS
| Function Display Explanation | ||
| Resistance level |  | 1~16 |
| SCAN carousel |  | Display: Indicating that the data will not be displayed under carousel mode Non-display: Indicating that the data are locked |
| Speed |  | 0.0~9999 mph |
| Time |  | 00:00 ~ 99:59 |
| Distance |  | 0.0~9999 mile |
| Calorie |  | 0.0~9999 Kcal |
| Bluetooth icon |  | Display: Bluetooth has been connected Non-display: Bluetooth is not connected |
KINOMAP
The device computer can be connected to the „KinoMap“ app via Bluetooth (frequency: 2.4 GHz). The free KinoMap app turns your device into a powerful and fun fitness product! Choose from the geotagged video on Kinomap and go! Your position is shown in the video and as icon on the map. Download the Kinomap Fitness app in the app or play store by searching for ‘Kinomap Fitness’ or follow one of the links below.
Install and open the app and register resp. log in. Activate Bluetooth. Now add the training device as follows:
Apple Store

Google Play


-
- Tap „+“ 3. Rowing machine

Now tap on OK and return to main menu. You can now choose a course for your exercise (depending on your type of KinoMap account maybe only some free courses). Press Start and begin to exercise!

WARM-UP and COOL-DOWN
A successful exercise program consists of a warm-up, aerobic exercise and a cool-down. Exercise for at least two or preferably three times a week, resting for a day between workouts. After several months, you may increase the frequency to four or five times per week.
WARM-UP
This stage helps to improve the blood circulation and prepares the muscles for your workout. It additionally helps to reduce the risk of injury or cramps. It is recommended to do some stretching exercises as shown here below. Hold each stretching position for approximately 30 seconds. Never force or jerk yourself into a stretching position – if you feel pain, STOP immediately. Warm-up exercises may also include brisk walking, jogging, jumping jacks, jump rope exercises or running in place.
STRETCHING
Muscles can be stretched more easily when these are warm. This reduces the risk of injury. DO NOT BOUNCE.
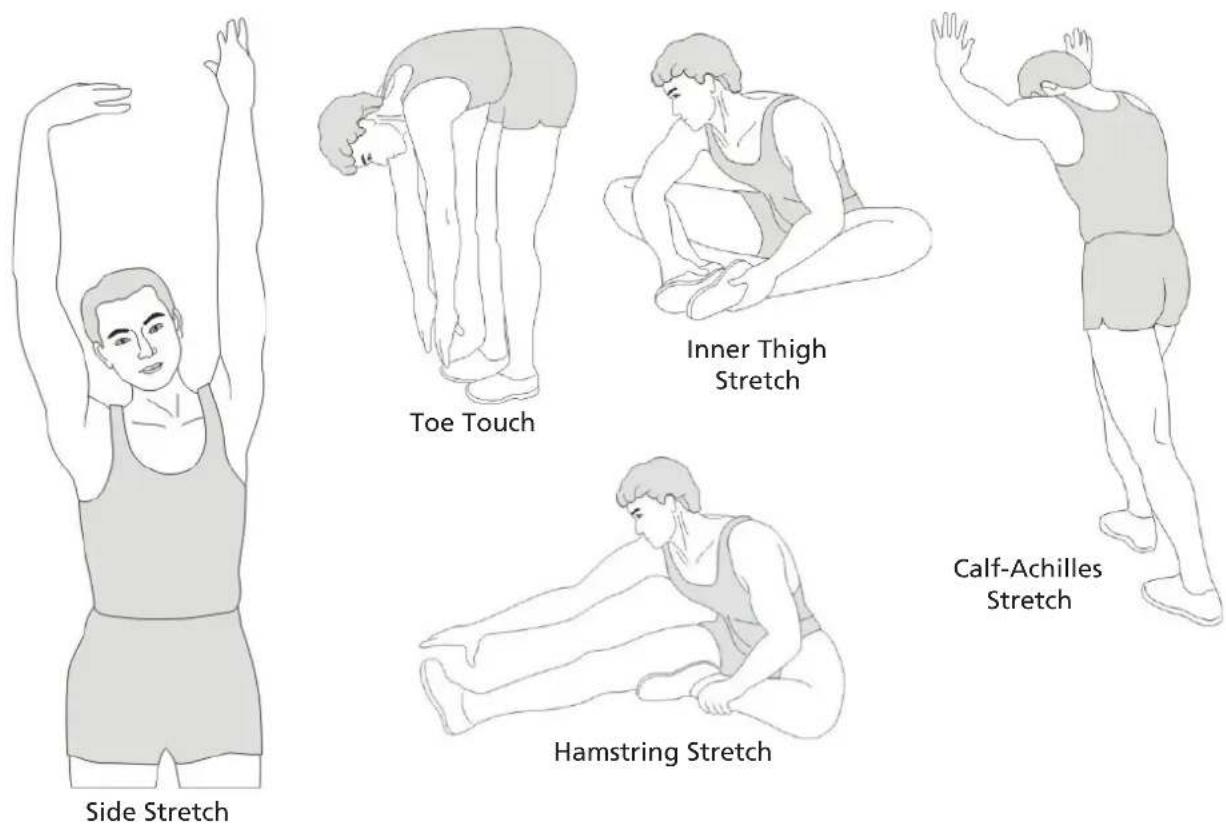
Remember always to check with your physician before starting any exercise program.
COOL-DOWN
This stage helps to soothe your muscles and your cardiovascular system after your workout. At the end of your workout, reduce the speed and exercise for approximately 5 minutes at this lower speed level. Afterwards, repeat the warm-up exercises as described above.
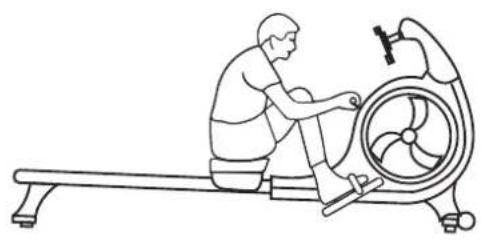
Exercise instructions
Rowing is a very effective form of exercise. It strengthens the heart and circulation as well as all the major muscle groups: The back, abdomen, arms, shoulders, buttocks and legs. To prolong the life of the band, return the handles to the starting position after each use.
natural_image
Line drawing of a person using a rowing machine with a turbine blade (no text or symbols)The Catch
Keep your wrists flat and grip the handle. Place your feet on the footrests and slightly lean forward. Keep your back and arms straight.
natural_image
Line drawing of a person using an equestrian machine (no text or symbols present)The Drive
Begin by using your legs. Press through the foot pedals with your posture firm and upright. When your legs almost reach full extension, start to pull the handle.
natural_image
Line drawing of a person using an RV machine on a stationary platform (no text or symbols)The Finish
Pull the handle to the space between the chest and navel.
natural_image
Line drawing of a person using a rowing machine for physical therapy (no text or symbols)The Recovery
Reverse the motion and return to the starting point. Then repeat.
Problem: The unit stands unsteadily or develops unusual noises
Check the individual connections from the assembly instructions. The connections must be tight and secure. Make sure that the unit is correctly aligned according to the chapter „Level stand“ and is level on the floor. A certain amount of noise is normal and not a sign of a defect.
Problem: The foot pedals are loose or do not fit the shoe size
Check from time to time that the pedals are still firmly mounted. They should not move during the exercise. The pedal size should fit most shoe sizes - unfortunately we cannot guarantee this for all shoe sizes. Even if the foot protrudes slightly, this should not be a problem for the exercise as long as you have fixed the foot with the straps.
Problem: Bluetooth connection does not work
Disconnect the rower from the power supply for approx. 1 minute and then reconnect the power supply. Make sure that Bluetooth is activated and search for „Nemo V Hybrid“ in the app and try to reconnect.
Problem: For which body sizes is the unit suitable?
People with a body height of approx. 1.50m to approx. 2.00m (4'11" to 6'7") should be able to use the device without any problems.
If the above instructions do not solve the problem, please contact Customer Service.
Cleaning and care
- Before cleaning the appliance, make sure that the appliance is switched off and the power supply is disconnected.
- Clean the appliance only with a slightly damp cloth. Never use brushes, strong detergents, petrol, thinner or alcohol. Wipe the unit dry with a clean, soft cloth.
- Do not use the unit again until it is completely dry.
GUARANTEE CONDITIONS
For our devices we provide a warranty as defined below.
- In accordance with the following conditions (numbers 2-5) we repair defect or damage to the device free of charge, if the cause is a manufacturing defect. Therefore, these defects / damages need to be reported to us without delay after appearance and within the warranty period of 24 months after delivery to the end user. The warranty does not cover parts, which easily break (e.g. glass or plastic). The warranty does not cover slight deviations of the product, which are insignificant for usability and value of the device and damage caused by chemical or electrochemical effects and damages caused by penetration of water or generally force majeure damage.
- The warranty achievement is the replacement or repair of defective parts, depending on our decision. The cost of material and labor will be borne by us. Repairs at customer site cannot be demanded. The proof of purchase along with the date of purchase and / or delivery is required. Replaced parts become our property.
- The warranty is void if repairs or adjustments are made,
which are not authorized by us or if our devices are equipped with additional parts or accessories that are not adapted to our devices. Furthermore, the warranty is void if the device is damaged or destroyed by force majeure or due to environmental influences and in case of improper handling / maintenance (e.g. due to non-observance of the instruction manual) or mechanical damages. The customer service may authorize you to replace or repair defective parts after telephone consultation. In this case, the warranty is not void.
- Warranty services do not extend the warranty period nor do they initiate a new warranty period.
- Further demands, especially claims for damages which occurred outside the device, are excluded as long as a liability is not obligatory legal.
- Our warranty terms - which cover the requirements and scope of our warranty conditions - do not affect the contractual warranty obligations of the seller.
- Parts of wear and tear are not included in the warranty.
- The warranty is void if not used properly or if used in gyms, rehabilitation centers and hotels. Even if most of our units are suitable for a professional use, this requires a separate agreement.
ENVIRONMENTAL PROTECTION
The symbol of the crossed-out dustbin on batteries or accumulators indicates that they must not be disposed of in household waste at the end of their life. If batteries or accumulators contain mercury (Hg), cadmium (Cd) or lead (Pb), you will find the respective chemical symbol below the symbol of the crossed-out dustbin. You are legally obliged to return old batteries and accumulators after use. You can do this free of charge at a retail outlet or at another collection point near you. You can obtain addresses of suitable collection points from your city or local government. Batteries may contain substances that are harmful to the environment and human
health. Particular care should be taken when handling batteries containing lithium because of the special risks involved. The separate collection and recycling of old batteries and accumulators is intended to avoid negative impacts on the environment and human health. Please avoid the generation of waste from old batteries as far as possible, e.g. by giving preference to batteries with a longer life or rechargeable batteries. Please avoid littering public spaces by not carelessly leaving batteries or electrical and electronic equipment containing batteries. Please consider ways to reuse a battery instead of disposing of it, for example by reconditioning or repairing the battery.
In accordance with our policy of continual product improvement, we reserve the right to make technical and visual changes without notice.
For spare parts please contact: service@skandika.de Service centre: MAX Trader GmbH, Wilhelm-Beckmann-Straße 19, 45307 Essen, Germany
NOTES

Contenu

skandika.com/service
natural_image
Two-step photo showing hands installing a black exercise bike component on the left and adjusting its backrest with a tool on the right (no text or symbols visible)natural_image
Two-panel image showing a person adjusting a black robotic device and a device with attached hardware components (no visible text or symbols)natural_image
Two-panel image showing a person using a stationary bike with a circular vent, and a close-up of the same device being adjusted (no text or symbols visible)natural_image
Top-down view of a black ergonomic device with wheels and adjustment knobs (no text or symbols visible)natural_image
Person using a black stationary bike with a circular vent, standing on a white surface (no visible text or symbols)
natural_image
Black stationary bike with circular head and side-mounted sensors (no visible text or symbols)natural_image
Black plastic mechanical component with a cylindrical pin and a separate handle, shown against a plain background (no text or symbols visible)
natural_image
Hand holding a black handheld device with a handle, against a plain white background (no text or symbols visible)natural_image
Close-up of hands installing a black plastic component with a small bolt, no visible text or symbols
natural_image
Close-up of hands installing a black mechanical component with a handle (no visible text or symbols)natural_image
Close-up of a hand holding a black handheld device with a handle, against a plain white background (no text or symbols visible)natural_image
Collection of metal and black mechanical components on a white background (no text or symbols visible)natural_image
Person holding a black device with a label, standing on a white surface (no visible text or symbols)natural_image
Hand inserting a card into a black electronic device (no visible text or symbols)Fixez 2 vis (10).
natural_image
Close-up of a hand holding a black mechanical component with a red circular indicator (no visible text or symbols)natural_image
Close-up of hands holding a small metallic object with a black tip, against a plain white background (no text or symbols visible)natural_image
Close-up of a hand inserting a metallic tool into a black cylindrical device (no visible text or symbols)natural_image
Close-up of a hand adjusting a black plastic clip with a blue circular logo (no visible text or symbols)natural_image
Close-up of hands using a tool to adjust or install a black mechanical component (no visible text or symbols)natural_image
Close-up of hands installing a cable on a black cylindrical device (no visible text or symbols)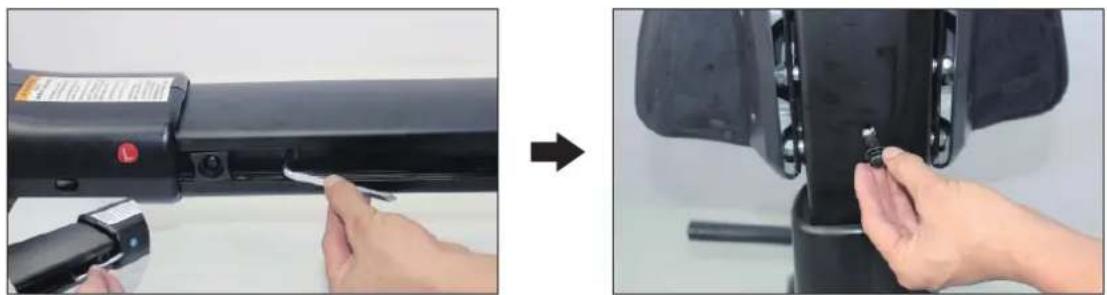
natural_image
Two-step photo showing a hand using a tool to adjust the component of a black cylindrical device, before and after assembly (no text or symbols visible)natural_image
Person using a tool to adjust a mechanical component, then writing on three parallel lines (no text or symbols visible)natural_image
Before-and-after photo showing a pair of flip-flops with black straps and small dots, followed by hands holding a metal ruler (no text or symbols visible)natural_image
Person adjusting a black exercise machine with a red button, no visible text or symbolsnatural_image
Close-up of hands holding a black strap and a metallic rod attached to a textured gray object on a plain white surface (no text or symbols visible)natural_image
Close-up of hands holding a black textured object with a string, next to a small electronic device (no visible text or symbols)natural_image
Close-up of hands using a handheld device to press or install a black electronic device with a blue indicator light (no visible text or symbols)natural_image
Person adjusting a black flip-flop device with straps and a small tool (no visible text or symbols)natural_image
Close-up of a hand inserting a small component into a black appliance (no visible text or symbols)natural_image
Close-up of a hand adjusting a black car air vent (no visible text or symbols)natural_image
Close-up of a hand interacting with a blue and black exercise machine fan (no visible text or symbols)natural_image
Close-up of a hand adjusting a black fitness cap with a strap, next to a device with a label (no visible text or symbols on the device itself)Ouvrir la sangle


natural_image
Close-up of a hand adjusting a black athletic seatbelt with a label (no visible text or symbols)natural_image
Close-up of a person using a black seatbelt device to adjust the seat (no visible text or symbols)Fermer la sangle
natural_image
Technical line drawing of a mechanical lever assembly with an inset showing a curved component (no text or symbols)natural_image
Technical illustration of a stationary exercise machine with a hand operating the wheel (no text or symbols visible)natural_image
Close-up of a hand adjusting a black mechanical component with a cable (no visible text or symbols)
natural_image
Simple white circle on black background with no text or symbolsFigure 2
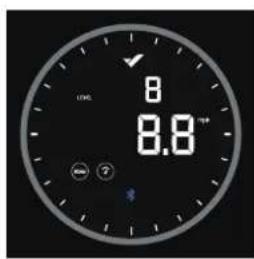
Figure 3
natural_image
Line drawing of a person using an equestrian machine (no text or symbols present)Position de départ
natural_image
Line drawing of a person using an exercise machine on a row (no text or symbols)Mouvement de rame
natural_image
Line drawing of a person using an RV machine on a stationary platform (no text or symbols)Position finale
natural_image
Line drawing of a person using a rowing machine for physical therapy (no text or symbols)
- Nemo V Hybrid
- Inhalt
- HINWEISE:
- Ausgangsposition
- Ruderbewegung
- Endposition
- WARNING
- SAFETY PRECAUTIONS
- SET-UP
- HINTS:
- TRANSPORT & STORAGE
- COMPUTER INSTRUCTIONS
- KINOMAP
- WARM-UP and COOL-DOWN
- WARM-UP
- STRETCHING
- COOL-DOWN
- Exercise instructions
- The Catch
- The Drive
- The Finish
- The Recovery
- Problem: The unit stands unsteadily or develops unusual noises
- Problem: The foot pedals are loose or do not fit the shoe size
- Problem: Bluetooth connection does not work
- Problem: For which body sizes is the unit suitable?
- Cleaning and care
- GUARANTEE CONDITIONS
- ENVIRONMENTAL PROTECTION
- NOTES
- Contenu
- Position de départ
- Mouvement de rame
- Position finale
Brand : Skandika
Model : Nemo V Hybrid
Category : Rowing Machine