
Sonicare ProtectiveClean 4500 - Electric toothbrush PHILIPS - Free user manual and instructions
Find the device manual for free Sonicare ProtectiveClean 4500 PHILIPS in PDF.
 FR
FR
 AZ
AZ
 BG
BG
 CS
CS
 DA
DA
 DE
DE
 EL
EL
 EN
EN
 ES
ES
 ET
ET
 FI
FI
 HE
HE
 HU
HU
 HY
HY
 IT
IT
 KA
KA
 KK
KK
 KY
KY
 LT
LT
 LV
LV
 MK
MK
 NL
NL
 NO
NO
 PL
PL
 PT
PT
 RO
RO
 RU
RU
 SK
SK
 SL
SL
 SQ
SQ
 SV
SV
 TG
TG
 TK
TK
 UK
UK
 UZ
UZ
| Product Type | Sonic electric toothbrush |
| Brand | Philips |
| Model | Sonicare ProtectiveClean 4500 |
| Power | Rechargeable battery, inductive charger (power adapter TCBxxxx, HX6100, HX6110, HX6160 or WAAxxxx) |
| Battery Life | At least 28 brushing sessions of 2 minutes (approximately 14 days with twice-daily use) |
| Charging Time | Up to 24 hours for a full charge |
| Technology | Sonic, BrushSync (handle-head communication) |
| Brushing Modes | 1 mode (Clean) with 2 intensities (Low and High) |
| Functions | EasyStart (gradual power increase), QuadPacer (4-zone timer), SmartTimer (auto shut-off at 2 min), Pressure analysis (orange alert), Head replacement reminder (after 3 months or wear) |
| Indicators | Charging indicator (green/orange), head replacement indicator (orange), audible signal |
| Brush Head | Smart head compatible with BrushSync, replacement recommended every 3 months |
| Included Accessories | Charger, travel case, UV sanitizer (depending on model) |
| Cleaning | Handle is rinseable, do not immerse charger/sanitizer, clean sanitizer regularly |
| Safety | Anti-abrasive pressure sensor, auto shut-off, EMC standards, use under supervision for children |
| Repairability | No user-serviceable parts, battery not user-replaceable (removal only for recycling) |
| Warranty | International warranty (see leaflet) |
Frequently Asked Questions - Sonicare ProtectiveClean 4500 PHILIPS
User questions about Sonicare ProtectiveClean 4500 PHILIPS
0 question about this device. Answer the ones you know or ask your own.
Ask a new question about this device
Download the instructions for your Electric toothbrush in PDF format for free! Find your manual Sonicare ProtectiveClean 4500 - PHILIPS and take your electronic device back in hand. On this page are published all the documents necessary for the use of your device. Sonicare ProtectiveClean 4500 by PHILIPS.
USER MANUAL Sonicare ProtectiveClean 4500 PHILIPS
Welcome to the Philips Sonicare family!
This toothbrush enables you to obtain superior plaque removal, whiter teeth and healthier gums. Using
Sonicare's combination of gentle sonic technology and clinically developed and proven features, you can be confident that you're getting the very best clean, every time.
Further support and product registration are available to you at: www.philips.com/support
Important safety information
Only use the product for its intended purpose. Read this important information carefully before you use the product and its batteries and accessories, and save it for future reference. Misuse can lead to hazards or serious injuries.
Warnings
- Keep the chargers and UV sanitizer away from water.
- After cleaning, make sure the charger and/or sanitizer is completely dry before you connect it to the wall socket.
- This appliance can be used by children and persons with reduced physical, sensory or mental capabilities or lack of experience and knowledge if they have been given supervision or instruction concerning use of the appliance in a safe way and understand the hazards involved. Cleaning and user maintenance shall not be made by children without supervision.
- Children shall not play with the appliance.
- Only use original Philips accessories or consumables. Only use the charger provided with the product. If supplied, only use the original USB cable and USB power supply unit.
- This appliance contains no user-serviceable parts. If the appliance is damaged, stop using it and contact the Consumer Care Center in your country. Devices with cord only: If the cord is damaged, replace the charger with sanitizer with a new one.
- Do not use the charger and/or sanitizer outdoors or near heated surfaces.
- Do not clean any part of the product in the dishwasher.
- This appliance has only been designed for cleaning teeth, gums and tongue.
- Keep the sanitizer out of the reach of children at all times.
- Stop using the sanitizer if the UV light bulb remains on when the door is open. UV light can be harmful to the human eye and skin.
- Only operate the sanitizer with the protective screen in place.
- Do not touch the UV sanitizer's UV light bulb when it is hot.
- Stop using a brush head with crushed or bent bristles. Replace the brush head every 3 months or sooner if signs of wear appear.
- Avoid direct contact with products that contain essential oils or coconut oil. Contact may result in bristles dislodging.
- Stop using the appliance and consult your dentist/doctor if excessive bleeding occurs after use, if bleeding continues to occur after 1 week of use, or if you experience discomfort or pain.
- If you have had oral or gum surgery in the previous 2 months, consult your dentist before you use this appliance.
- If you have a pacemaker or other implanted device, contact your doctor or the manufacturer of the implanted device prior to use.
- If you have medical concerns, consult your doctor before you use this appliance.
- This appliance is a personal care device and is not intended for use on multiple patients in a dental practice or institution.
Battery safety instructions
- This appliance contains batteries that are only to be removed by skilled persons.
- Only use the product for its intended purpose. Read this information carefully before you use the product and its batteries and accessories, and save it for future reference. Misuse can lead to hazards or serious injuries. Accessories supplied may vary for different products.
- Only use original Philips accessories and consumables. Only use detachable supply unit TCBxxxx, HX6100, HX6110, HX6160 or WAAxxxx.
- Keep product and batteries away from fire and do not expose them to direct sunlight or high temperatures.
- If the product becomes abnormally hot or smelly, changes color, or if charging takes longer than usual, stop using and charging the product and contact Philips.
- Do not place products and their batteries in microwave ovens or on induction cookers.
- Do not open, modify, pierce, damage, or dismantle the product or battery to prevent batteries from heating up or releasing toxic or hazardous substances. Do not short-circuit, overcharge, or reverse charge batteries.
- This appliance contains batteries that are non-replaceable. When the battery is at end of life, the appliance shall be properly disposed of, see section on recycling.
- If batteries are damaged or leaking, avoid contact with the skin or eyes. If this occurs, immediately rinse well with water and seek medical care.
- When you handle batteries, make sure that your hands, the product and the batteries are dry.
- To avoid accidental short-circuiting of batteries after removal, do not let battery terminals come into contact with metal objects (e.g. coins, hairpins, rings). Do not wrap batteries in aluminium foil. Tape battery terminals or put batteries in a plastic bag before you discard them.
- Charge, use and store the product at a temperature between 0°C and 40°C (32°F and 104°F).
Storage and transportation conditions
Temperature -10°C to 60°C (14°F to 140°F).
Electromagnetic fields (EMF)
This Philips appliance complies with all applicable standards and regulations regarding exposure to electromagnetic fields.
Radio Equipment Directive
Hereby, Philips declares that electric toothbrushes with radio equipment type (Bluetooth, NFC) are in compliance with Directive 2014/53/EU.
- The Bluetooth radio frequency interface in applicable products operates at 2.4 GHz.
- The maximum output power by the Bluetooth appliance is 3 dBm.
- The NFC radio frequency interface in applicable products operates at 13.56 MHz.
- The maximum RF power transmitted by the appliance is 30.16 dBm.
The full text of the EU declaration of conformity is available at the following internet address:
www.philips.com/support
Note: The features of different models may vary. Some models may not be equipped with Bluetooth or NFC.
The following symbols may appear on the product: Read Operator's Manual.


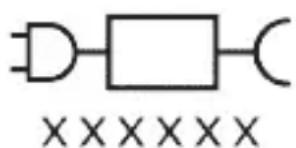
Detachable Power Supply Part: The "xxxxxx" indicates the model number of the approved chargers to be used. (TCBxxxx, HX6100, HX6110, HX6160 or WAAxxxx)
Intended use
ProtectiveClean power toothbrushes are intended to remove adherent plaque and food debris from the teeth to reduce tooth decay and improve and maintain oral
health. ProtectiveClean power toothbrushes are intended for personal use. Use by children should be with adult supervision.
Your Philips Sonicare (Fig 1.)
1 Handle 2 Power on/off button 3 Brush Head Replacement Reminder 4 Battery indicator
Accessories:
5 Brush head cap 6 Smart brush head(s) 7 Charging base 8 Travel case 9 UV sanitizer and charger
Note: Accessories included may vary based on the model purchased.
Getting started
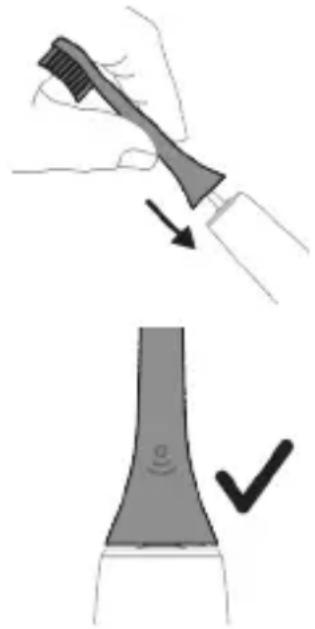
1 Align the brush head so the bristles point in the same direction as the front of the handle. 2 Firmly press the brush head down onto the metal shaft until it will not go any further.
Note: It is normal to see a slight gap between the brush head and the handle.
Using your Philips Sonicare toothbrush
If you are using your Sonicare toothbrush for the first time, it is normal to feel more vibration than when using a non-electric toothbrush. It is common for first-time users to apply too much pressure. Only apply gentle pressure and let the toothbrush do the brushing for you. Please follow the brushing instructions below for the best
experience.
For models without intensities
To help you transition to your new Sonicare power toothbrush, it comes with the EasyStart feature activated. This feature gently increases the power over the first 14 brushings to help you adapt to brushing with a Philips Sonicare toothbrush.
For models with intensities
To help you transition to your new Sonicare power toothbrush, use a lower setting for the first 1-2 weeks then transition to a higher setting.
Brushing instructions
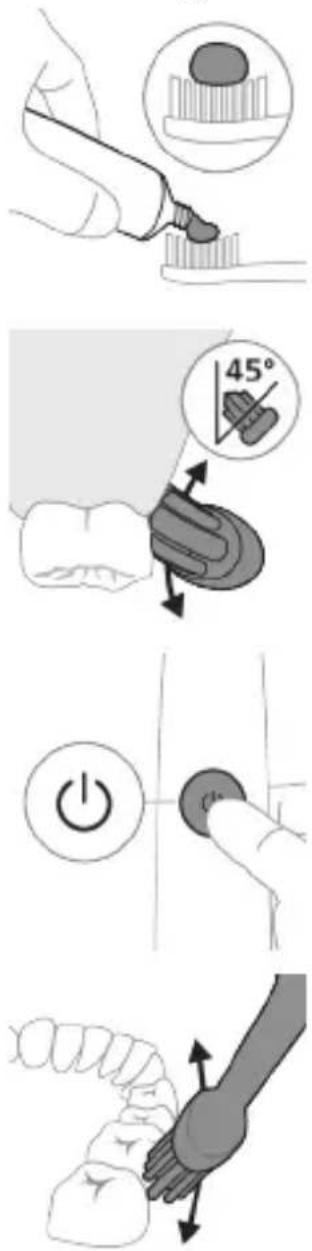
1 Wet the bristles and apply a small amount of toothpaste.
2 Place the toothbrush bristles against the teeth at a slight angle (45 degrees), pressing firmly to make the bristles reach the gumline or slightly beneath the gumline.
Note: Keep the center of the brush in contact with the teeth at all times.
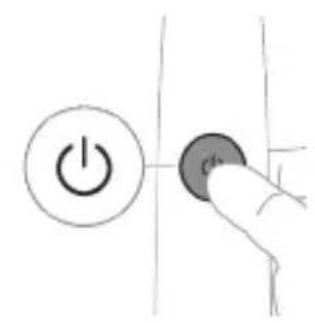
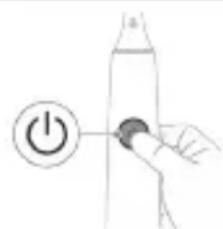
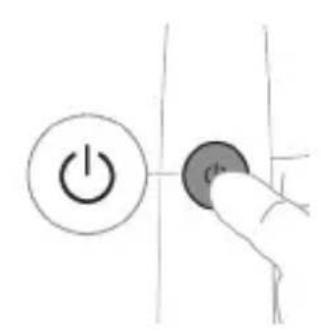
3 Press the power on/off button to switch on the Philips Sonicare.
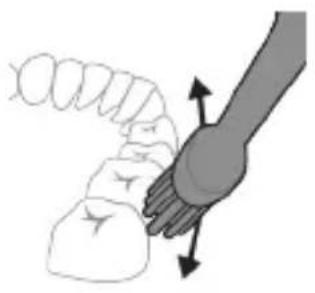
4 Gently keep the bristles placed on the teeth and in the gumline. Brush your teeth with small back and forth motion so the bristles reach between the teeth. Continue this motion throughout your brushing cycle.
Note: The bristles should slightly flare. It is not recommended to scrub as you would with a manual toothbrush.
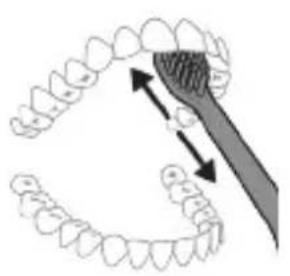
Note: If you apply too much pressure, you will be alerted by a change in vibration of the handle and the brush head replacement reminder flashing amber.
5 To clean the inside surfaces of the front teeth, tilt the brush handle semi-upright and make several vertical overlapping brushing strokes on each tooth. 6 After you have completed the brushing cycle, you can spend additional time brushing the chewing surfaces of your teeth and areas where staining occurs. You can also brush your tongue, with the toothbrush switched on or off, as you prefer.
Note: Your Philips Sonicare toothbrush is safe to use on braces (brush heads wear out sooner when used on braces) and dental restorations (fillings, crowns, veneers) if they are properly adhered and not compromised.
QuadPacer
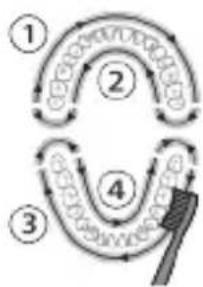
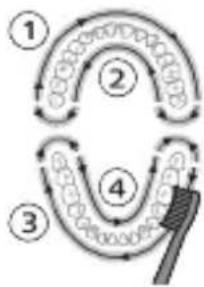
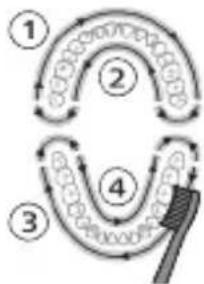
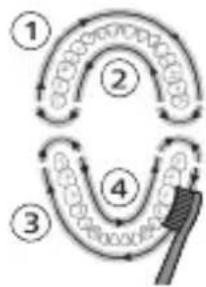
To make sure you brush evenly throughout the mouth, divide your mouth into 4 sections using the QuadPacer feature. The QuadPacer divides the brushing time into 4 equal segments and indicates when you should move to the next area. The segments are indicated with a brief pause in vibration. The toothbrush automatically stops at the end of the brushing session.
Modes
Your power toothbrush is equipped with Clean mode.
Clean
Benefit For exceptional everyday clean
Recommended intensity level (specific models only)
High
Total brushing time 2 minutes
How to brush Brush each segment for 30 seconds.
Intensities (specific models only)
Your power toothbrush comes with 2 different intensity settings:
- Low
- High
Note: When you use the toothbrush for the first time, the default intensity is low intensity.
To change intensity levels:
- Press the power on/off button once to turn on the toothbrush.
- Press a second time within 2 seconds to change the intensity.
- Press a third time within 2 seconds to pause.
- After 2 seconds of brushing, pressing the power on/off button again will also pause the toothbrush.
BrushSync technology
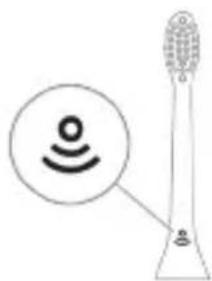
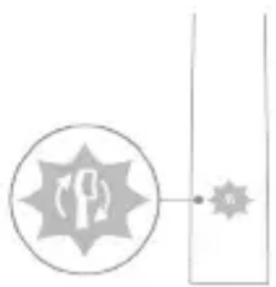
BrushSync technology enables your brush head to communicate with your handle using a microchip. The symbol at the bottom of the brush head indicates that the brush head is equipped with this technology. BrushSync technology enables:
Brush Head Replacement Reminder Philips Sonicare offers a wide range of smart brush heads, equipped with BrushSync technology. To explore our full range of toothbrush brush heads, and find the brush head that is best for you, go to
www.philips.com/toothbrush-heads for more information.
Features
-Pressure Sensor Feedback - Quadpacer - SmarTimer - EasyStart - Brush Head Replacement Reminder
Pressure Sensor Feedback
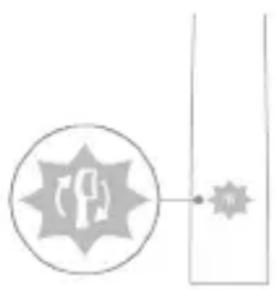
Your Sonicare toothbrush measures the pressure you apply while brushing, to protect your gums and teeth from damage.
If you apply excess pressure, the handle changes its vibration and the brush head replacement reminder icon flashes amber until you reduce the pressure.
Note: Your product comes with the Pressure Sensor activated. To deactivate this feature (see 'Activating or deactivating features').
QuadPacer
The QuadPacer is an interval timer that helps you to brush evenly through the mouth by dividing your mouth into 4 sections. (see 'Brushing instructions')
SmarTimer
The SmarTimer indicates that your brushing cycle is complete by automatically switching off the toothbrush at the end of the brushing cycle.
Dental professionals recommend brushing no less than 2 minutes twice a day.
Note: If you press the power on/off button after you started the brushing cycle, the toothbrush pauses. After a pause of 30 seconds, the SmarTimer resets.
EasyStart
This Philips Sonicare model comes with the EasyStart feature activated (models without intensity options only, models with intensity options can activate the feature). The EasyStart feature gently increases the power over the first 14 brushings to help you get used to brushing with the Philips Sonicare.
Disclaimer
When the Philips Sonicare toothbrush is used in clinical studies, it must be used in clean mode at high intensity with the handle fully charged and the EasyStart feature deactivated.
To deactivate or activate EasyStart (see 'Activating or deactivating features').
Brush Head Replacement Reminder
Your Philips Sonicare is equipped with BrushSync technology that tracks the wear of your brush head.
Note: This feature only works with Philips Sonicare smart brush heads with BrushSync technology.
1 When you attach a new smart brush head for the first time, the handle recognizes that you have a Philips brush head with BrushSync technology and begins tracking brush head wear. 2 Over time, based on the pressure you apply and the total time the brush head has been used, the handle tracks brush head wear in order to determine the optimal time to replace your brush head. This feature guarantees the best cleaning and care of your teeth. 3 When the brush head replacement reminder indicator lights up amber, you should replace your brush head.
All smart brush heads come with the brush head replacement reminder feature activated. To deactivate the brush head replacement reminder see 'Activating or deactivating features'.
Activating or deactivating features
You can activate or deactivate the following features of your toothbrush:
- EasyStart
- Brush Head Replacement Reminder - Pressure Sensor Feedback
Note: You can only activate or deactivate the brush head replacement reminder when a smart brush head is on the handle.
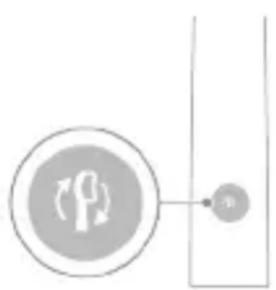
Step 1: Place the handle on the plugged in charger.
| Step 2: Press and hold power on/off button for: | ||
| EasyStart Brush Head | Pressure Sensor | |
| Replacement | Feedback | |
| Reminder | ||
| Up to 3 seconds Up to 5 seconds Up to 7 seconds | ||
| ↓ ↓ ↓ | ||
| Step 3: Let go of the power on/off button when you hear: | ||
| 1 beep 1 beep and then | 1 beep, 2 beep and | |
| 2 beep | then 3 beep | |
| ↓ ↓ ↓ | ||
| If you see the battery indicator and the Brush Head Replacement Reminder light flash green 2 times and hear 3 tones from low to high, then the feature has been activated. | ||
| OR | ||
| If you see the battery indicator and Brush Head Replacement Reminder light flash amber 1 time and hear 3 tones high to low, then the feature has been deactivated. | ||
UV sanitizer
Note: Accessories included may vary based on the model purchased.
With the UV sanitizer you can clean your brush head after every use.
Unplug the sanitizer, discontinue use and call Consumer Care if:
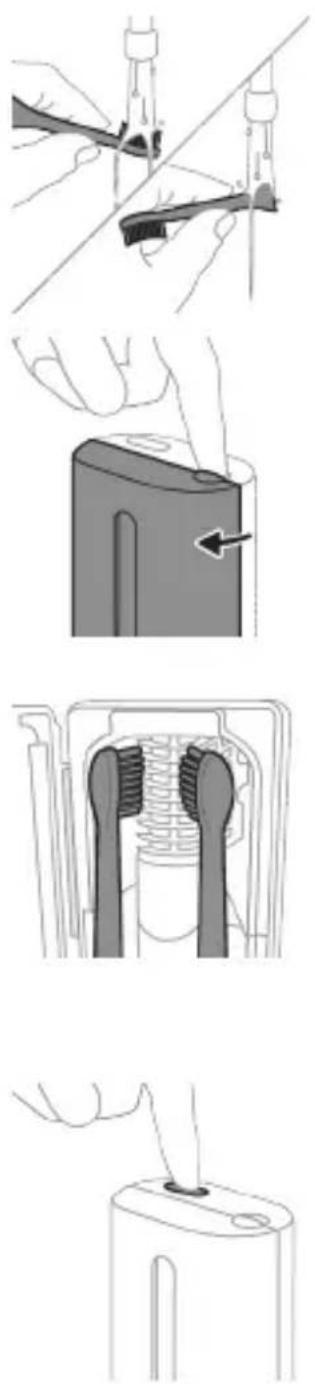
- The UV light bulb remains on when the door is open.
- The window is broken or missing from the sanitizer.
- The sanitizer gives off smoke or a burning smell while it is operating.
Note: UV light can be harmful to the human eye and skin. This device should be kept out of reach of children at all times.
1 After brushing, rinse the brush head and shake off excess water.
Warning: Make sure that the brush head cap is not on the brush head when the brush head is being cleaned in the sanitizer.
2 Place your finger in the door recess on top of the sanitizer and pull open the door. 3 Place the brush head on one of the 2 pegs in the sanitizer with the bristles facing the light bulb.
Note: Only clean Philips Sonicare snap-on brush heads in the sanitizer.
Note: Do not clean Philips Sonicare for Kids brush heads in the sanitizer.
4 Make sure the sanitizer is plugged into a live outlet of appropriate voltage. 5 Close the door and press the green power on/off button once to select the UV clean cycle.
Note: You can only switch on the sanitizer if the door is properly closed.
Note: The sanitizer stops operating if you open the door during the sanitizer cycle.
Note: The sanitizer cycle takes approximately 10 minutes and then switches off automatically.
The sanitizer is in operation when the light glows through the window.
Charging and battery status
This Philips Sonicare toothbrush is designed to provide at least 28 brushing sessions, each session lasting 2 minutes (14 days if used twice per day) on a fully charged battery. The battery indicator shows the battery status when you complete the 2-minute brushing session, when you pause the toothbrush, or while it is charging.
Note: It can take up to 24 hours to fully charge the battery before first use, but you can use the Philips Sonicare toothbrush before it is fully charged.
Charging
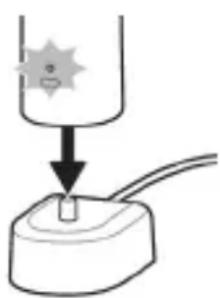
Charging on charger or UV Sanitizer
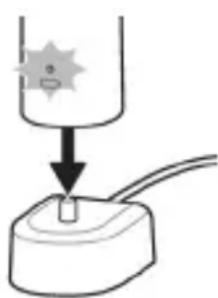
1 Plug the charger or sanitizer into an electrical outlet. 2 Place the handle on the charger or sanitizer.
- The handle emits 2 short beeps to confirm that the handle is placed properly.
- The flashing light of the battery indicator shows that the toothbrush is charging.
- When the handle is fully charged on the charger, the battery indicator lights up green for 30 seconds and then switches off.
Battery status
Battery status (handle on plugged-in charger)
When the handle is placed on the charger, the battery indicator shows the battery level.
Battery status (handle on plugged in charger/charging travel case)
When the handle is placed on the charger or in the charging travel case, the battery indicator shows the battery level.
Battery status Battery indicator
Charging Flashes green
Full Solid green for 30 seconds and then
switches off
Battery status (when handle is not placed on charger)
When the toothbrush is awake, the battery indicator at the bottom of the handle shows the battery level.
Battery status Battery indicator Sound
| Full Solid green - | |
| Partially full Flashes green - | |
| Low Flashes amber The handle emits 3 | beeps after brushing |
| Empty Flashes amber The handle emits 2 sets | of 5 beeps after brushing |
| Note: To save energy, the battery indicator will switch off when not in use. | |
| Note: When the battery is completely empty, the toothbrush switches off. Place the toothbrush on the charger to charge it. | |
| Note: To keep the battery fully charged at all times, you may keep your toothbrush on the charger when not in use. | |
| Battery status (when handle is not placed on charger/in charging travel case) | |
| When the toothbrush is awake, the battery indicator at the bottom of the handle shows the battery level. | |
| Battery status Battery indicator Sound | |
| Full Solid green - | |
| Partially full Flashes green - | |
| Low Flashes amber The handle emits 3 | beeps after brushing |
Battery status Battery indicator Sound
Empty Flashes amber The handle emits 2 sets
of 5 beeps after brushing
Note: To save energy, the battery indicator will switch off when not in use.
Note: When the battery is completely empty, the toothbrush switches off. Place the toothbrush on the charger or in the charging travel case to charge it.
Note: To keep the battery fully charged at all times, you may keep your toothbrush on the charger when not in use.
Cleaning
Toothbrush handle
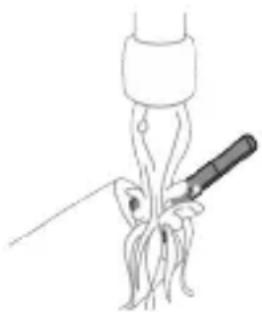
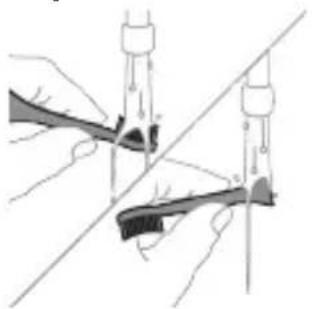
1 Remove the brush head and rinse the metal shaft area with warm water. Make sure you remove any residual toothpaste.
Caution: Do not push on the rubber seal on the metal shaft with sharp objects, as this may cause damage.
2 Wipe the entire surface of the handle with a damp cloth.
Note: Do not tap the handle on the sink to remove excess water.
Brush head
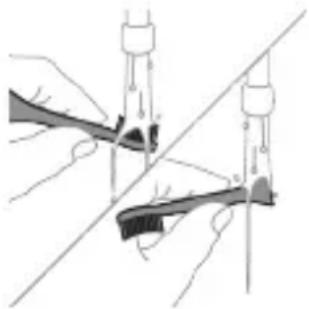
1. Rinse the brush head and bristles after each use. 2. Remove the brush head from the handle and rinse the brush head connection with warm water at least once a week. Rinse the travel cap as often as needed.
Charger
1. Unplug the charger before you clean it. 2. Wipe the surface of the charger with a damp cloth.
Travel case
Rinse with warm water and use a damp cloth to clean the inside of the travel case.
Cleaning the Sanitizer
Warning: Do not immerse the sanitizer in water or rinse it under the faucet.
Warning: Do not clean the sanitizer when the UV light bulb is hot.
For optimal effectiveness, it is recommended to clean your sanitizer weekly.
1. Unplug the sanitizer. 2. Pull the drip tray straight out. Rinse the drip tray and wipe it clean with a damp cloth. 3. Clean all interior surfaces with a damp cloth. 4. Remove the protective screen in front of the UV light bulb.
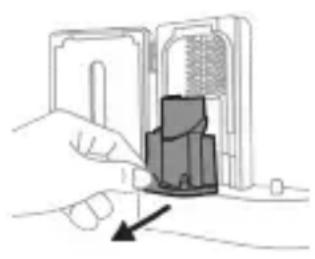
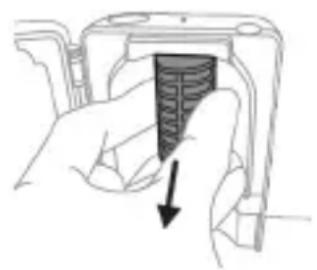
To remove the screen, grasp the edges next to the snaps, gently squeeze and pull out the protective screen.
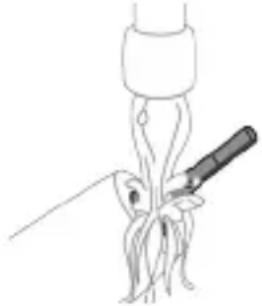
5. Remove the UV light bulb. To remove the light bulb, grasp it and pull it out of the metal clasp. 6. Clean the protective screen and the UV light bulb with a damp cloth. 7. Reinsert the UV light bulb.
To reinsert the light bulb, align the bottom of the light bulb with the metal clasp and push the bulb into the clasp.
8 Reinsert the protective screen. To reinsert the screen, align the pegs on the screen with the slots on the reflective surface near the UV light bulb. Push the screen straight into the slots on the sanitizer. 9 Place the drip tray back in the UV sanitizer. 10 After cleaning, make sure the sanitizer is completely dry before you connect it to the mains.
Storage
If you are not going to use the product for an extended period of time, unplug it from the electrical outlet, clean it and store it in a cool and dry place away from direct sunlight.
Replacement
Replace Philips Sonicare brush heads every 3 months to achieve optimal results. Use only Philips Sonicare replacement brush heads.
Locating the model number
Look on the bottom of the Philips Sonicare toothbrush handle for the model number (HX64XX, HX68XX).
Warranty and support
If you need information or support, please visit www.philips.com/support or read the international warranty leaflet.
Warranty exclusions
What is not covered under warranty:
- In mouth attachments including brush heads and nozzles.
- Damage caused by use of unauthorized replacement parts or unauthorized brush heads.
- Damage caused by misuse, abuse, neglect, alterations or unauthorized repair.
- Normal wear and tear, including chips, scratches, abrasions, discoloration or fading. UV light bulb.
Recycling
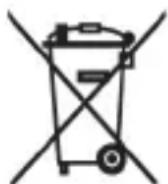
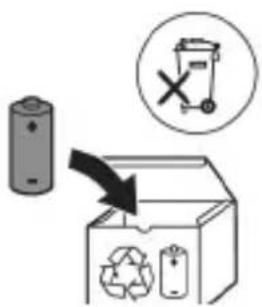
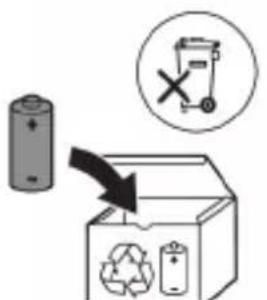
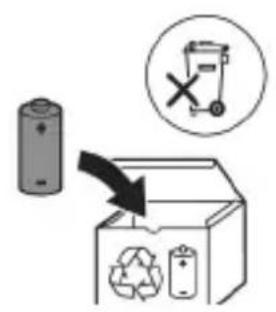
- This symbol means that electrical products and batteries shall not be disposed of with normal household waste.
- Follow your country's rules for the separate collection of electrical products and batteries.
- The UV light bulb of the sanitizer contains mercury. Do not throw the UV light bulb away with the normal household waste at the end of its life. Hand it in at an official collection point for recycling.
Removing the rechargeable battery
The built-in rechargeable battery must only be removed by a qualified professional when the appliance is discarded. Before removing the battery, make sure that the battery is completely empty.
Take any necessary safety precautions when you handle tools to open the appliance and when you dispose of the rechargeable battery. Be sure to protect your eyes, hands, fingers, and the surface on which you work.
When you handle batteries, make sure that your hands, the product and the batteries are dry.
To avoid accidental short-circuiting of batteries after removal, do not let battery terminals come into contact with metal objects (e.g. coins, hairpins, rings). Do not wrap batteries in aluminum foil. Tape battery terminals or put batteries in a plastic bag before you discard them.
To remove the rechargeable battery, you need a towel or cloth, a hammer and a flat-head (standard) screwdriver. Observe basic safety precautions when you follow the procedure outlined below.
1 To deplete the rechargeable battery of any charge, remove the handle from the charger, turn on the toothbrush and let it run until it stops. Repeat this step until you can no longer turn on the toothbrush. 2 Remove and discard the brush head. Cover the entire handle with a towel or cloth.
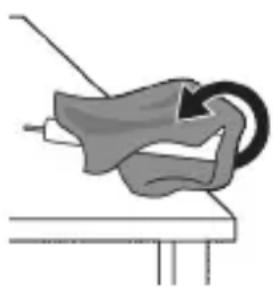
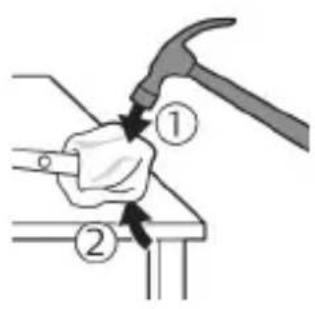
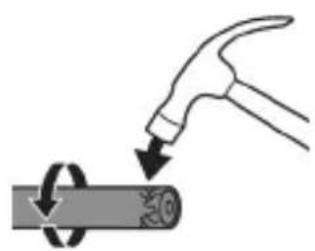
3 Hold the top of the handle with one hand and strike the handle housing 0.5 inch above the bottom end. Strike firmly with a hammer on all 4 sides to eject the end cap.
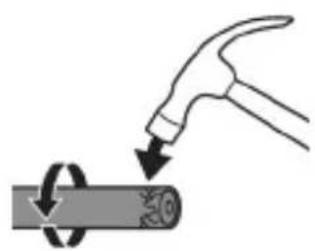
Note: You may have to hit on the end several times to break the internal snap connections.
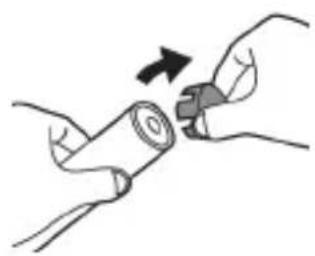
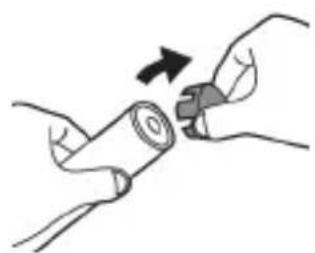
4 Remove the end cap from the toothbrush handle. If the end cap does not release easily from the housing, repeat step 3 until the end cap is released.
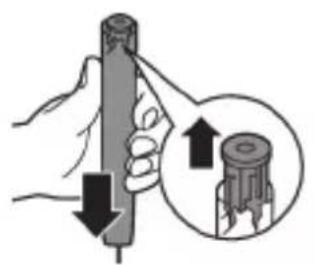
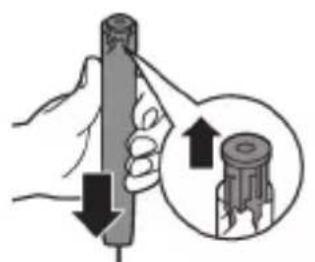
5 Holding the handle upside down, press the shaft down on a hard surface. If the internal components do not easily release from the housing, repeat step 3 until the internal components are released.
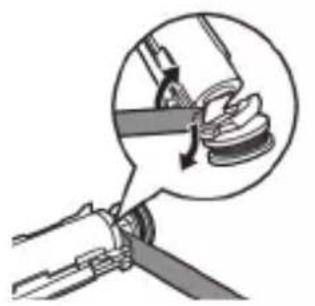
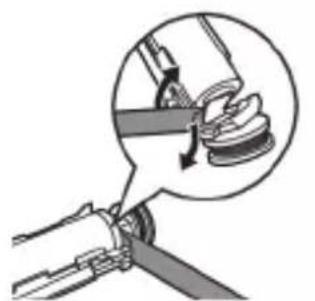
6 Wedge the screwdriver between the battery and the black frame at the bottom of the internal components. Then pry the screwdriver away from the battery to break the bottom of the black frame.
7 Insert the screwdriver between the bottom of the battery and the black frame to break the metal tab connecting the battery to the green printed circuit board. This will release the bottom end of the battery from the frame.
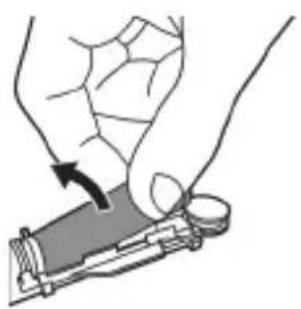
8 Grab the battery and pull it away from the internal components to break the second metal battery tab.
Caution: Be aware of the sharp edges of the battery tabs so as to avoid injury to your fingers.
9 Cover the battery contacts with tape to prevent any electrical short from residual battery charge.
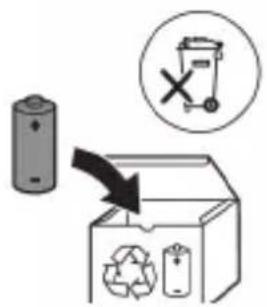
The rechargeable battery can now be recycled and the rest of the product discarded appropriately.
Note: Do not throw away the appliance with the normal household waste at the end of its life, but hand it in at an official collection point for recycling. By doing this, you help to preserve the environment.
Introduction
www.philips.com/support
Note: Features may vary among different models. Some models may not be equipped with Bluetooth or NFC.
The following symbols may appear on the product:

Address: www.philips.com/support
www.philips.com/support
Model without intensity regulation
www.philips.com/support
www.philips.com/support
www.philips.com/toothbrush-heads.
Features
- Pressure sensor feedback
- QuadPacer
- SmarTimer
- EasyStart
- Brush head replacement reminder
Pressure sensor feedback
www.philips.com/support
www.philips.com/support
Note. Functions may differ for different models. Some models may not be equipped with Bluetooth or NFC.
The following symbols may appear on the product: Read the user manual.

Battery status Battery indicator
Battery status Battery indicator
Charged Lights green for 30 seconds and then turns off
Battery status (when the handle is not placed on the charger)
If the toothbrush is active, the battery indicator at the bottom of the handle shows the battery charge level.
Battery status Battery indicator
Charged Lights green -
Partially charged Flashes green -
Low Flashes yellow After brushing
www.philips.com/support
Website: www.philips.com/support
Using your Philips Sonicare toothpaste
If you are using Sonicare toothpaste for the first time, it is normal to feel more vibration than with a non-electric toothbrush. First-time users often apply too much pressure. Press gently and let the toothbrush do the cleaning for you. For best results, follow the brushing instructions.
For models without intensity settings
The EasyStart feature is activated to help you transition to your new Sonicare power toothbrush. This feature gradually increases the power of the handle over the first 14 brushing sessions to help you get used to the Philips Sonicare toothbrush.
For models with intensity settings
To help you transition to your new Sonicare power toothbrush, use a lower setting for the first 1-2 weeks, then switch to a higher setting.
Brushing instructions
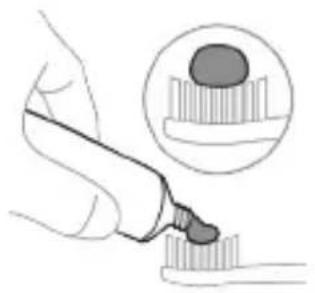
1. Wet the brush and apply a small amount of toothpaste.
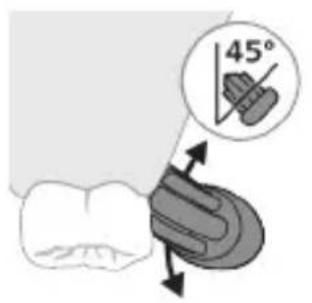
2. Hold the toothbrush at a small (45-degree) angle against the teeth and press firmly so the bristles reach the gum line or just below it.
Note: Keep the center of the brush in constant full contact with the teeth.
3. Press the on/off button to turn on the Philips Sonicare device.
4. Gently hold the brush against the teeth and gum line. Use small back-and-forth motions to clean your teeth, allowing the bristles to reach between teeth. Continue these motions until the brushing cycle is complete.
www.philips.com/support
www.philips.com/support
www.philips.com/support
Important safety information
www.philips.com/support
www.philips.com/support
Note: Functions may vary by model. Some models may not be equipped with "Bluetooth" or "NFC".
www.philips.com/toothbrush-heads For more information.
Functions
- Pressure sensor alert
- Quadpacer
- SmarTimer
- EasyStart Brush head replacement reminder
Pressure sensor alert
For models with adjustable intensity
Adjusting the intensity level:
www.philips.com/support
www.philips.com/support
www.philips.com/toothbrush-heads.
Features
www.philips.com/support
Note: Different models may have different features. Some models may not be equipped with Bluetooth or NFC.
The following symbols may appear on the product: Read the operator's manual.

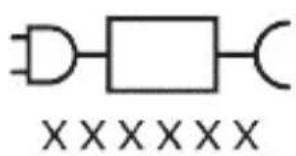
Charging block: "xxxxx" indicates the model number of approved chargers for use. (TCBxxxx, HX6100, HX6110, HX6160 or WAAxxxx)
Intended use
ProtectiveClean electric toothbrushes are intended to reduce plaque and maintain oral health by removing dental plaque and food debris. ProtectiveClean electric toothbrushes are intended for personal use. Children should use them under adult supervision.
Your Philips Sonicare device (Fig. 1)
1 Handle 2 On/off button 3 Reminder to replace brush head 4 Battery indicator
Accessories:
5 Brush head cap 6 Smart brush head(s) 7 Charging base 8 Travel charger 9 UV sanitizer and charger
Note: Accessories may vary by model purchased.
Getting started
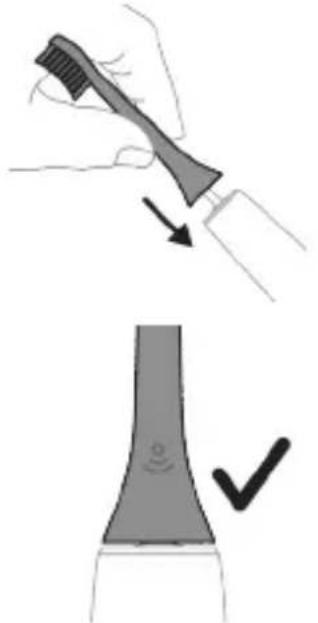
1 Align the brush head so the bristles point in the same direction as the front of the handle. 2 Press the brush head onto the metal shaft until it stops.
Note: It is normal to see a small gap between the brush head and the handle.
Using your Philips Sonicare toothbrush
If you are using a Sonicare toothbrush for the first time, you may experience more vibration than with a manual toothbrush; this is normal. First-time users may press too hard. Apply only light pressure and let the toothbrush do the brushing. For best results, follow the brushing instructions below.
Clean your teeth thoroughly every day.
Recommended brushing time: 2 minutes (on select models only).
Total brushing time: 2 minutes.
Brushing method: Brush each segment for 30 seconds.
- Brush head replacement reminder.
Philips Sonicare offers a wide range of smart brush heads with BrushSync technology. To view the full assortment of brush heads and find the one that suits you best, for more
information, visit www.philips.com/toothbrushheads.
Features
- Pressure sensor feedback
- QuadPacer
- SmarTimer
- EasyStart
- Brush head replacement reminder
Brush head replacement reminder
Your Philips Sonicare is equipped with BrushSync technology that tracks brush head wear.
Note: This feature works with Philips Sonicare smart brush heads that have BrushSync technology.
1 When you attach a new smart brush head for the first time, the handle recognizes that you have a Philips brush head with BrushSync technology and starts tracking the wear of the brush head. 2 Over time, based on your brushing pressure and the total time you have used the brush head, the handle tracks its wear to determine the optimal time to replace the brush head. This feature ensures that you get the best cleaning and care for your teeth. 3 When the brush head replacement reminder light turns yellow, you need to replace the brush head.
Smart brush heads come with the brush head replacement reminder feature activated by default. To deactivate the brush head replacement reminder,
see "Activating or deactivating features".
Activating or deactivating features
You can activate or deactivate the following features of your toothbrush:
- EasyStart
- Brush head replacement reminder
- Pressure sensor feedback
Note: You can activate or deactivate the brush head replacement reminder only when a smart brush head is attached to the handle.
Step 1: Place the handle on the charger.
Step 2: Press and hold the on/off button for the following time:
| EasyStart Nasadkany calşirmagy yatladyş | Basyş sensory seslenmesi | |
| 3 sekunda çenli 5 sekunda çenli 7 sekunda çenli | ||
| ↓ ↓ ↓ | ||
| Adim 3: Şuny eşideninizde, ac/öçür Düwmesini goþberiñ: | ||
| 1 bipleme 1 bipleme we soñra 2 bipleme | 1 bipleme, 2 bipleme we soñra 3 bipleme | |
| ↓ ↓ ↓ | ||
| Eger batareya görkezijisiniñ we Nasadkany calşirmagy yatladyş cyrasynyn 2 gezek yası reñkde yanyp sönenini gõrseniz we caladan gata 3 signal eşitseñiz, onda ol aýratynlyk isjeñleşen bolyar. | ||
| YA-DA | ||
| Eger batareya görkezijisiniñ we Nasadkany calşirmagy yatladyş cyrasynyn 1 gezek sary reñkde yanyp sönenini gõrseniz we gatydam cala 3 signal eşitseñiz, onda ol aýratynlyk deaktiwirlenen bolyar. | ||
Ultraviolet sanitizer
www.philips.com/support
www.philips.com/support
Safety instructions for the battery
- Only use the battery charger for the purpose it was designed for. Use the product only as intended. Before using the product and its accessories, read and follow this information carefully. Incorrect use may lead to dangerous situations or serious injury. The accessories included may differ from those shown.
- Use only original accessories from Philips. Use only the detachable power supply units TCBxxxx, HX6100, HX6110, HX6160, or WAAxxxx.
- Keep the product and battery away from fire. Do not expose them to direct sunlight or high temperatures.
- If the product becomes abnormally hot or emits smoke, or if the color of the battery changes or charging takes longer than usual, stop using and charging it and contact Philips.
- Do not place the product and battery in microwave ovens or on induction cooktops.
- Do not throw, modify, puncture, damage, or disassemble the product or battery to avoid causing battery leakage or release of toxic or hazardous substances. Do not short-circuit the battery, do not overcharge it, and do not charge it in reverse.
- The battery is non-replaceable. When the battery's service life has ended, the device must be disposed of properly. See the recycling section. If the batteries are damaged or leaking, avoid contact with skin or eyes. In case of such contact, rinse with water and seek medical help immediately.
- When handling the batteries, keep your hands, the product, and the batteries dry.
- To avoid accidental short-circuiting of the battery during removal, do not let the battery terminals come into contact with metal objects (such as coins, clips, rings). Do not put the battery in aluminum foil. Tape the battery terminals or place the battery in a plastic bag before disposing of it.
- Charge, use, and store the product at a temperature between 0°C and 40°C.
Storage and transport conditions
Temperature: -10°C to 60°C.
Electromagnetic field (EMF)
This Philips appliance complies with all standards and regulations regarding exposure to electromagnetic fields.
For less intensive brushing
For your comfort when switching to the new Philips Sonicare toothbrush, it comes with the EasyStart function. This function gradually increases
the brushing power over the first 14 sessions, helping you get used to brushing with the Philips Sonicare toothbrush.
For more intensive brushing
When switching to the new Sonicare electric toothbrush, use a lower setting for the first 1-2 weeks, then switch to a higher one.
Brushing instructions
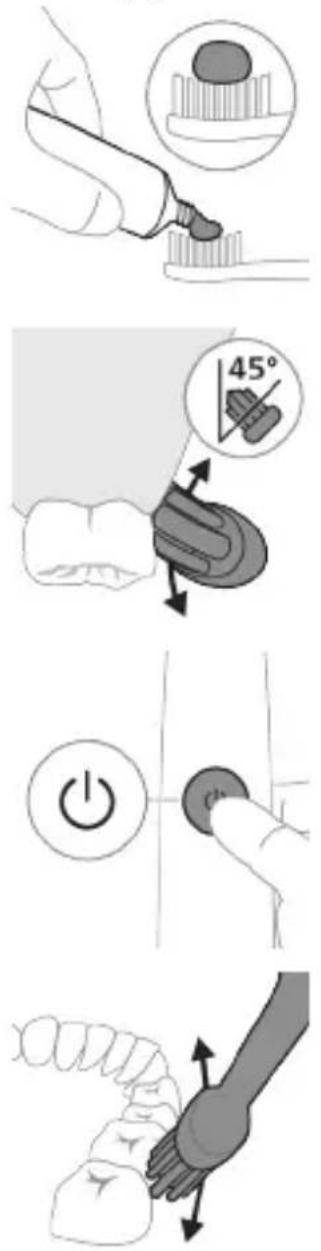
1 Wet the bristles of the toothbrush and apply a small amount of toothpaste.
2 Place the bristles of the toothbrush at a 45-degree angle against the teeth, press gently, so that the bristles reach the gum line or slightly below it.
Note: The center of the toothbrush should constantly touch the teeth.
3 Press the on/off button to turn on the Philips Sonicare toothbrush.
4 Carefully hold the bristles against the teeth and the gum line. Brush the teeth with a back-and-forth motion, so that the longer bristles reach between the teeth. Continue this motion throughout the brushing cycle.
Note: The bristles should gently spread. Do not press hard as with a manual toothbrush.
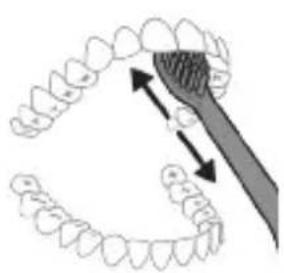
Note: If you press too hard, you will be alerted by a change in the vibration frequency, and the reminder indicator for replacing the brush head will blink in the handle.
5. Gently place the bristles on the outer surfaces of the front teeth, tilt the handle of the toothbrush to an almost upright position and brush each tooth with gentle vertical strokes. 6. After you finish brushing, you can take additional time to brush the inner surfaces of the teeth and the areas where staining occurs. You can brush your tongue - with the brush on or off, as you prefer.
Note: Your Philips Sonicare toothbrush is safe to use with braces (the brush head wears out sooner when used with braces) and dental restorations (fillings, crowns, veneers), if they are properly fitted and not damaged.
QuadPacer
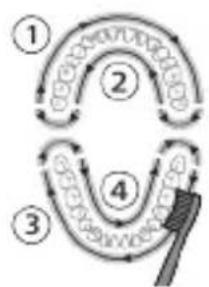
To help you brush evenly throughout your mouth, divide your mouth into 4 sections using the QuadPacer feature. The QuadPacer divides brushing time into 4 equal segments and signals when it is time to move to the next section. The segments are indicated by a short pause with vibration. The toothbrush automatically stops at the end of the brushing session.
Modes
Your electric toothbrush has different brushing modes.
Clean
For superior everyday cleaning
Intensive cleaning (only for specific models)
Your electric toothbrush comes with 2 different intensity levels:
- Low
- High
Note: When using your toothbrush for the first time, the default setting is low intensity.
To change the intensity level:
- Press the on/off button to turn on the toothbrush.
- Press the button twice within 2 seconds to change the intensity.
- Press the button a third time within 2 seconds to pause.
- Hold for 2 seconds to toggle the button for turning on/off the pause function.
BrushSync technology
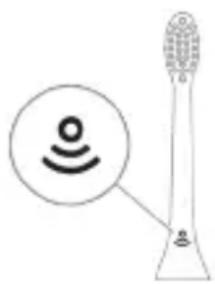
BrushSync technology allows the brush head to send a signal to the handle via microchip. The symbol on the bottom part of the brush head indicates that the head is equipped with this technology.
BrushSync technology allows for:
- Reminder for brush head replacement. Philips Sonicare offers a wide range of intelligent brush heads equipped with BrushSync technology. To see the full range of brush heads and find the best one for you, visit
www.philips.com/toothbrush-heads for more information.
Functions
- Pressure sensor feedback
- QuadPacer
- SmartTimer
- EasyStart
- Brush head replacement reminder
Pressure sensor feedback
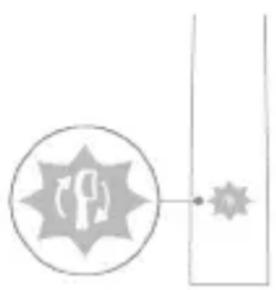
Your Sonicare toothbrush measures the pressure you apply while brushing, to protect your gums and teeth from damage.
If the bristles are splayed, the handle will vibrate differently and the reminder to replace the brush head will blink in the brush head, until you reduce the pressure.
Note: Your product is equipped with a pressure sensor that is activated by default. To deactivate this function (see "Activating or deactivating functions").
QuadPacer
QuadPacer is an interval timer that helps you brush your teeth evenly by dividing your mouth into 4 zones. (See "Brushing instructions")
SmarTimer
The SmarTimer shows that the recommended brushing time of 2 minutes has been completed, by automatically turning off the toothbrush at the end.
Dentists recommend brushing your teeth at least 2 minutes twice a day.
Note: If you press the on/off button during charging, the toothbrush pauses. After a pause of 30 seconds, the SmarTimer resets.
EasyStart
This Philips Sonicare model is delivered with the EasyStart function activated (only for models without intensity options; for models with intensity options, the function can be activated). The EasyStart function gradually increases the power over the first 14 sessions, to help you get used to brushing with Philips Sonicare.
Disclaimer
When the Philips Sonicare toothbrush is used in clinical studies, it must be used in Clean mode with high intensity, with the handle fully charged, and the EasyStart function must be deactivated.
To deactivate or activate EasyStart (see "Activating or deactivating functions").
Reminder to replace the brush head
The Philips Sonicare brush head with BrushSync technology monitors the wear of the brush head.
Note: This function works only with smart Philips Sonicare brush heads with BrushSync technology.
1 When you attach a new smart brush head for the first time, the handle will recognize that you have a Philips brush head with BrushSync technology, and it will start tracking the wear of the brush head.
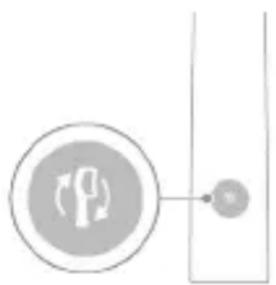
2 Meanwhile, based on the pressure applied and the total time of use of the brush head, the handle will track the wear of the brush head to determine the optimal time for replacing the brush head. This function guarantees the best cleaning and care for your teeth. When the reminder to replace the brush head lights up in the handle, you should replace the brush head.
All new smart brush heads are delivered with the brush head replacement reminder activated. To deactivate the brush head replacement reminder, see "Activating or deactivating functions".
Activating or deactivating functions
You can activate or deactivate the following functions of your toothbrush:
- EasyStart
- Brush head replacement reminder
- Pressure sensor feedback
Note: You can activate or deactivate the brush head replacement reminder only when the handle has a smart brush head attached.
Step 1: Place the handle on the charging base connected to a power outlet.
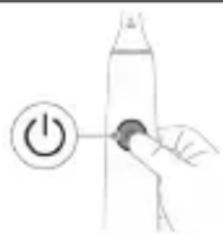
Step 2: Press and hold the on/off button for:
Warranty and support
If you need information or support, visit www.philips.com/support or read the international warranty leaflet.
The battery is a rechargeable battery.
The rechargeable battery must be removed only by a qualified specialist when the device is being disposed of. Before removing the battery, make sure the battery is completely discharged.
Take all necessary safety precautions when handling tools for removing the device and when disposing of the battery. Be sure to read the instructions, and keep your hands and fingers, as well as the surface you are working on, clean and dry.
When handling the battery, keep your hands, the product, and the battery dry.
To avoid accidental short circuit of the battery after removal, do not let the battery terminals come into contact with metal objects (such as coins, jewelry, or fingers). Do not place the battery in an aluminum foil. Cover the battery terminals or place the battery in a plastic bag before disposing of it.
Removing the rechargeable battery
To remove the rechargeable battery, you will need a Phillips screwdriver or a flat (standard) screwdriver. Follow the basic safety precautions when performing the procedure described below.
1. To fully discharge the battery, unplug the charger from the power outlet, turn on the toothbrush and let it run until it stops by itself. Repeat this step until the toothbrush can no longer be turned on.
2. Remove and discard the brush head. Cover the opening with a cloth or paper towel.
3. Hold the top part of the handle with one hand and tap the handle body about 1 cm above the bottom edge. Tap firmly with a hammer on all 4 sides to release the end cap.
Note: You may need to tap the end cap several times to loosen the internal retaining clips.
4. Remove the end cap from the handle of the toothbrush. If removal from the body is not easy, repeat step 3 until it is released.
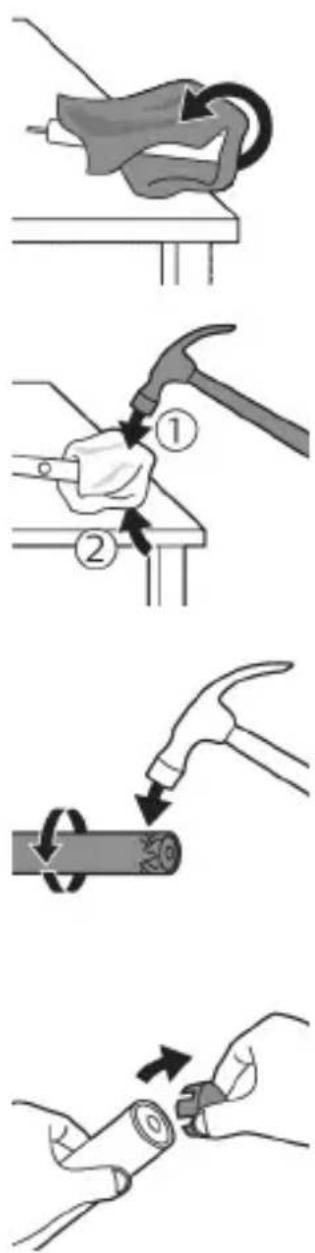
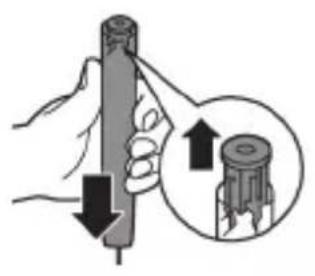
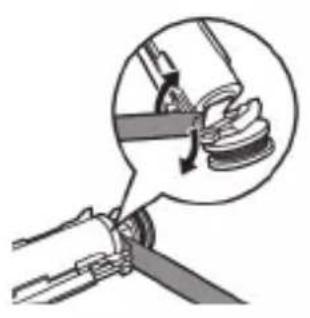
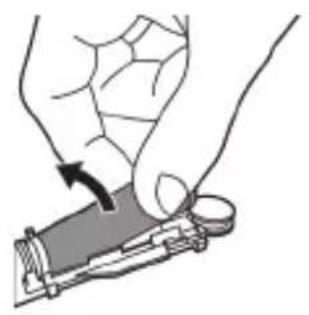
5. While holding the handle with the bottom part facing up, press the button firmly against a hard surface. If the internal components do not release easily from the body, repeat step 3 until they are released. 6. Insert the screwdriver between the battery and the black frame at the bottom part of the internal components. Then pry the screwdriver away from the battery to release the bottom part of the black frame. 7. Insert the screwdriver between the bottom part of the battery and the gray frame to release the metal clip connecting the battery to the green circuit board. This will release one side of the battery from the frame. 8. Grasp the battery and pull it out of the internal components to release the second metal clip on the battery.
Caution: Be careful of the sharp edges of the battery clips to avoid cutting your fingers.
9. Cover the battery contacts with tape to prevent short circuit from the remaining charge of the battery.
According to the regulations, this device can be repaired and the rest of the product can be disposed of according to the applicable rules.
Note: At the end of the service life, do not dispose of this device with normal household waste, but hand it in at an official collection point for recycling. In this way you help to protect the environment.
Recycling
Philips Sonicare electric toothbrush
This toothbrush is designed to remove plaque and to improve oral health. Sonicare's unique sonic technology, combined with clinically proven oscillating-rotating action, helps you achieve a cleaner mouth.
Support and warranty If you need information or support, visit www.philips.com/support
Warranty restrictions
The warranty does not cover damage caused by misuse or improper use. The warranty does not cover damage caused by accidents, misuse, or failure to follow the instructions in the user manual. Using the device in a way not intended may result in injury.
Experts
- Keep the charger and/or the charging base away from water. - Do not clean the charger or the charging base with water or disinfectant. - Children should be supervised to ensure that they do not play with the appliance. - This appliance can be used by persons with reduced physical, sensory or mental capabilities or lack of experience and knowledge if they have been given supervision or instruction concerning use of the appliance in a safe way and understand the hazards involved. Children shall not play with the appliance. - Cleaning and user maintenance shall not be made by children without supervision.
- Only use Philips Sonicare accessories. Use only the charger provided with the device. If the charger is damaged, use only a USB cable and USB charger that are approved.
- If the device is not working properly, stop using it and contact the service department. If the device is damaged, do not use it and replace the damaged parts.
- Do not use the charger or the charging base near water or in wet conditions.
- This device is intended for use in accordance with the instructions. - It is designed for use with the Shaiman Tish, Tish Etp Kana Tildp Tazalouchun.
- Keep the device away from direct sunlight and high temperatures.
- If the UV lamp starts to flicker or fails to light, stop using the device immediately. UV radiation can be harmful to the eyes and skin.
- Use the device only with the protective glasses provided.
- Do not use the UV lamp if it is cracked or damaged.
- Stop using the device if the bristles are worn or bent. Replace the brush head every 3 months or sooner if signs of wear are visible.
- Do not use the device with essential oils or coconut oil, as this may cause the bristles to fall out. If the bristles become loose or fall out, or if you experience pain or discomfort, stop using the device and consult your doctor. If you have had surgery in the mouth or jaw area within the last 2 months, consult your doctor before using the device. If you have a pacemaker or other implanted device, consult your doctor before using the device.
- If you have any medical conditions, consult your doctor before using the device. This device is intended for use with the Shaiman and is not a substitute for professional dental care.
This appliance contains special batteries which must be replaced by qualified personnel. - Use the appliance for its intended purpose only. You should read this information carefully before using the appliance and its accessories. Incorrect use can lead to dangerous situations. Accessories can be replaced with original ones. - Use only the original Philips accessories and spare parts. Use only the charging unit TCBxxxx, HX6100, HX6110, HX6160 or WAAxxx. - Do not keep the appliance and its batteries away from heat, direct sunlight, or high temperatures. - If the appliance gets abnormally hot, emits smoke, or smells burnt, stop using it and contact Philips. - Do not immerse the appliance or its batteries in water or other liquids, and do not rinse them under the tap. - Do not open, short-circuit, or puncture the batteries, and keep them away from fire and flammable materials. Do not short-circuit the batteries, do not charge them with non-original chargers, and do not mix old and new batteries.
- This appliance contains non-replaceable batteries. When the battery is depleted, the appliance must be replaced. See the section on disposal.
- If the batteries leak or become damaged, avoid contact with skin or eyes. In such cases, rinse with water and seek medical help.
- When handling batteries, be careful and note that new batteries may be dry. - After removing batteries from the packaging, avoid accidental short-circuiting. Do not let the battery terminals touch metal objects (such as coins, pins, keys, or jewelry). Wrap the batteries in aluminum foil or place them in a plastic bag before disposal.
- Use and store the appliance only at temperatures between 0°C and 40°C.
Storage and transport conditions
Temperature: -10°C to 60°C.
Electromagnetic fields (EMF)
This Philips appliance complies with all applicable standards and regulations regarding exposure to electromagnetic fields.
Radio equipment directive
This Philips appliance with radio equipment (Bluetooth, NFC) complies with the essential requirements of Directive 2014/53/EU.
- The Bluetooth radio of this appliance operates at 2.4 GHz. - The maximum transmit power of Bluetooth is 3 dBm. - The NFC radio of this appliance operates at 13.56 MHz.
- The maximum transmit power of the appliance's radio is 30.16 dBm.
The full text of the EU Declaration of Conformity is available at the following internet address:
www.philips.com/support
Note: The functions of the device may differ depending on the model. The device supports Bluetooth and NFC connectivity.
Using the device: Press the operator's button once.

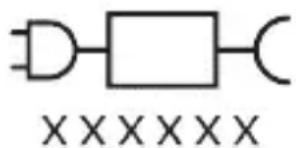
To check the brush head replacement indicator: The brush head replacement indicator shows the brush head number in the "xxxx" column.
(TCBxxxx, HX6100, HX6110, HX6160 and WAAxxxx)
Press the button
ProtectiveClean electric toothbrushes are designed to remove plaque and stains, and to improve oral health and hygiene. ProtectiveClean electric toothbrushes are intended for personal use. Children should use the toothbrush under adult supervision.
Philips Sonicare toothbrush (Fig. 1)
1 Handle 2 Power/off button 3 Brush head release button 4 Battery indicator 5 Brush head
6 Start/stop button 7 Brush head replacement indicator 8 Charger 9 UV sanitizer
Note: The functions may differ depending on the model purchased.
Getting started
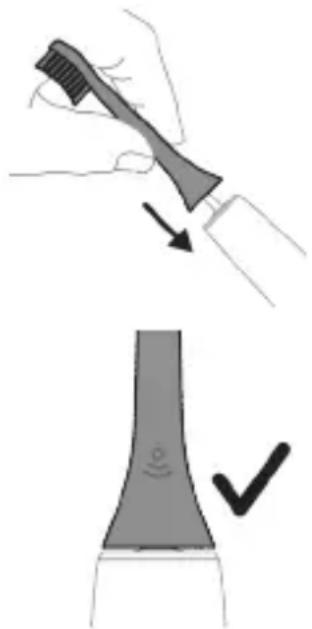
1 Place the brush head on the handle, making sure the bristles are facing the same direction as the front of the handle. 2 Press the brush head down onto the metal shaft until it clicks into place.
Note: There should be a small gap between the brush head and the handle.
Using your Philips Sonicare toothbrush
If your Sonicare toothbrush has a built-in battery, the first time you use it, charge it for 24 hours. The battery indicator will flash until it is fully charged. Then press the power button to turn it on. For optimal performance, follow the instructions below.
The Philips Sonicare toothbrush has been designed to give a safe and effective cleaning. The Philips Sonicare toothbrush meets all standards for electromagnetic compatibility. If you have a pacemaker or other implanted device, consult your physician before using.
Intensive cleaning mode
To use the Sonicare toothbrush in intensive cleaning mode, place the brush head at a 45-degree angle to the teeth and gently move it back and forth.
Brushing instructions
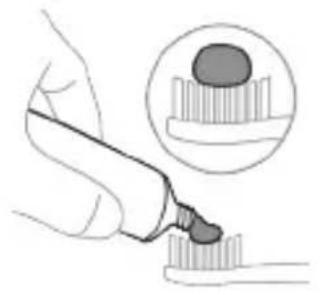
1. Wet the bristles and apply a small amount of toothpaste.
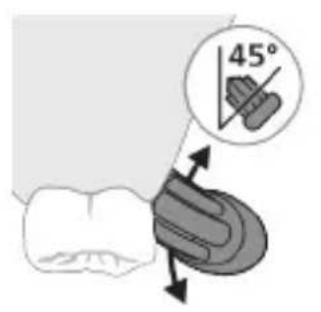
2. Place the brush head at a 45-degree angle to the gum line, gently move the brush back and forth in short strokes.
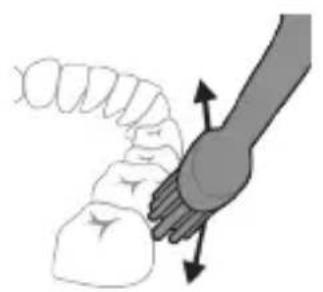
Note: The brush head should be replaced every 3 months.
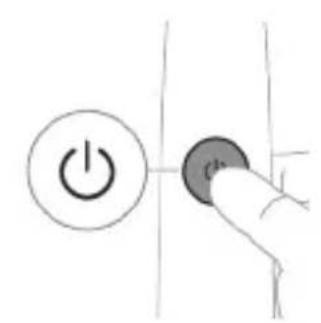
3. Press the power button to turn on the Philips Sonicare toothbrush.
4. Gently guide the brush head along the gum line. To avoid splashing, keep the brush head at a slight angle. Continue brushing for 2 minutes.
Note: Do not press too hard. This may cause gum irritation.
Note: The brush head should be replaced every 3 months for optimal cleaning.
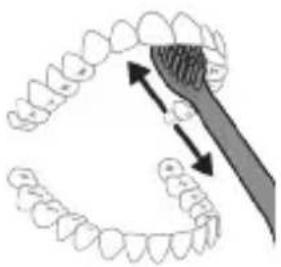
5. After brushing, rinse the brush head and bristles thoroughly. 6. The brush head should be replaced every 3 months for best results.
Note: The Philips Sonicare toothbrush is not intended for use by children or persons with reduced physical, sensory, or mental capabilities, unless they are supervised by a person responsible for their safety.
QuadPacer
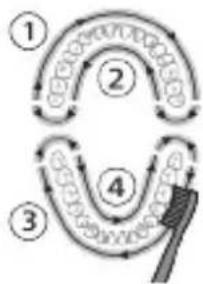
The QuadPacer feature helps you brush for the recommended 4 minutes. The QuadPacer is a 4-minute timer that beeps every 30 seconds to help you brush evenly. The brush handle pulses to signal the start and end of each quadrant. The timer automatically stops after the 4-minute brushing cycle.
Mode
The electric toothbrush has a cleaning mode.
Clean
For a deeper clean
Using the intensity setting (on select models)
Hot
The brush handle pulses every 2 minutes
The brush handle pulses every 30 seconds during each segment.
Intensity (on select models)
The electric toothbrush offers 2 intensity levels:
- Low - High
If the handle is pressed too hard against the teeth, the sanitizer will stop.
QuadPacer and battery life
The Philips Sonicare toothbrush handle is designed to provide 28 brushing sessions (quadrants) per charge, which is approximately 2 minutes per session.
Charging the battery takes 14 hours. When the toothbrush is placed on the charger, the charging indicator light will turn on and remain on until the battery is fully charged.
Note: The first time you charge the battery, it takes 24 hours to fully charge. After that, a full charge takes about 16 hours for the Philips Sonicare toothbrush.
Charging
Charging and battery status
1 Plug the charger into an electrical outlet. 2 Place the toothbrush handle on the charger. - The charging indicator light will blink for about 2 seconds. - The battery indicator light will show the charging status. - When the battery is fully charged, the battery indicator light will turn off after 30 seconds.
Battery status
Battery status (when the toothbrush is on the charger)
When the toothbrush is on the charger, the battery indicator light will show the battery level.
Battery status (when the toothbrush is not on the charger)
When the toothbrush is not on the charger, the battery indicator light will show the battery level.
Battery status indicator
Charging with the USB travel case
A full charge takes about 30 seconds
Turn on and then off
Battery status (when the toothbrush is in the travel case)
Remove the battery from the device before cleaning.
Battery compartment
Battery compartment
| Жарым-жартылай Толук | Жашил түстө 6үлүдөгт | - |
| Темен Кочкул capы түстө 6үлүдөгт | Бүлүдөгт | Шүлүдөгн Тазалагандан кийн Тү�示дэн 3 сиrolан чыгат |
| Бош Кочкул capы түстө 6үлүдөгт | Бүлүдөгт | Шүлүдөгн Тазалагандан кийн Тү�示дэн 5ten 2 төлүм сиrolан чыгат |
| Зөртme: КOLTонлбай түганда знэргияны унөмдө ЧУн батуарегнын чарыгы очөт. | ||
| Зөртme: Батаря түлүу менин бoш бOLTогн do, тиш Чүлүдөгт. КүБATTOOU ChYн тиш оүлүдө Чe КүБATTOOUч саразк TUTSCUHa салын bɪз. | ||
| Зөртme: Батаряны ap дai bim түлүх КүБATTANган Бойdon karmaл түрч ChYн, тиш оүлүдө КOLTONBOGOHdo KүБATTABUчта karmaсан bɪз 6олот. |
Cleaning
Clean the fabric pocket
1 Remove the fabric from the device, wash it with mild soap and water. Rinse the fabric parts.
Do not use bleach: do not wring the rubber bulb of the pump. This may damage it.
2 Dry the pocket completely before reassembling.
Note: To remove excess water, do not twist the pocket.
Fabric base
1 Use a soft brush to clean the fabric base. 2 Remove the fabric base from the pocket, wash the fabric base with a solution of mild soap and water. Rinse thoroughly with clean water.
Cuff
1 Before cleaning, remove the cuff. 2 Dry the cuff completely before reassembling.
Storage
For storage, rinse the device with clean water, dry it, and store it in a cool, dry place.
The batteries must be removed from the device before it is disposed of.
When the batteries are removed, the device must be disconnected from the mains.
Keep the device, the batteries, and the accessories out of the reach of children.
www.philips.com/support
Important safety information
Read this important information carefully before you use the appliance and save it for future reference. Misuse can lead to danger or serious injury.
Warning
- Always place the sterilizer on a flat, stable surface. - After cleaning, make sure the appliance and its parts are completely dry before reassembling. - This appliance can be used by children aged 8 and above and persons with reduced physical, sensory or mental capabilities or lack of experience and knowledge if they have been given supervision or instruction concerning use of the appliance in a safe way and understand the hazards involved. Children shall not play with the appliance. - Children shall not play with the appliance. - Only use original accessories or consumables from Philips. Only use the power adapter supplied. If supplied, use the original USB cable and USB adapter for charging.
- The appliance contains no user-serviceable parts. If the appliance is damaged, stop using it and contact the Consumer Care Center in your country. Only use the appliance with the cable: If the cable is damaged, replace it with a new one from the manufacturer or its service agent.
- Do not place the power adapter or the sterilizer on or near hot surfaces.
- Do not immerse the appliance, the adapter, or the USB cable in water or any other liquid.
- This appliance is designed for household use only. - Keep the sterilizer out of the reach of children at all times.
- Operate the sterilizer only with the lid closed.
- Do not place the device or the sterilizer near a heat source.
- To clean the head, use a soft cloth or a mild detergent. Replace the head every 3 months or sooner if you notice signs of wear. Avoid direct contact with essential oils or coconut oil. Contact may cause damage to the head.
- For use, consult your dentist/doctor if you have had recent oral surgery or if you have had oral surgery in the last 2 months. Consult your dentist before using the device if you have had oral surgery in the last 2 months. If you have a pacemaker or other implanted device, contact your doctor or the manufacturer of the implanted device before use.
If you have a pacemaker or other implanted device, contact your doctor or the manufacturer of the implanted device before use. If you have medical conditions, consult your doctor before using the device. The device is intended for dental use only and is not intended for use by patients in dental clinics or institutions.
Battery safety
- This device contains batteries that can only be removed by qualified personnel.
- Use the product only for its intended purpose. Carefully read all instructions before using the product and its batteries and accessories, and keep them for future reference. Misuse can lead to hazards and serious injury. Accessories may vary for different products.
- Use only original accessories and consumables from Philips. Use only the charging unit specified for model TCVxxxx, HX6100, HX6110, HX6160, or WAAxxxx. Keep the device and batteries away from direct sunlight or high temperatures.
- If the product gets hot, changes color, or if the charging time is unusually long, stop using the product and contact Philips.
- Do not place the product or its batteries in microwave ovens or induction cookers.
- Do not open, modify, puncture, damage, or disassemble the product or battery to prevent batteries from heating up or releasing toxic or hazardous substances. Do not short-circuit, charge, or reverse the batteries.
- The device contains non-replaceable batteries. When the battery is at the end of its life, the device will be properly disposed of, and you should follow the instructions for recycling. If batteries are damaged or leaking, avoid contact with skin or eyes. If contact occurs, rinse thoroughly with water and seek medical help.
- When handling batteries, make sure your hands, the product, and the batteries are dry.
- To prevent the battery terminals from short-circuiting, do not let the battery terminals come into contact with metal objects (e.g., coins, hairpins, rings). Do not insert the batteries into an alkaline battery. Connect the battery terminals and place the batteries in a plastic bag before disposing of them. -Follow the instructions and use the product at a temperature between 0°C and 40°C
Storage and transport conditions
Temperature -10 ° C to 60 ° C .
Electromagnetic fields (EMF)
This Philips device complies with all applicable standards and regulations regarding exposure to electromagnetic fields.
www.philips.com/support
Note: The functions of different models may vary. Some models may not be equipped with Bluetooth or NFC.
The following symbols may appear on the product:
Read the user manual.


Your Philips Sonicare (fig. 1)
1 Handle 2 On/off button 3 Battery charge indicator 4 Brush head replacement reminder
Accessories:
5 Brush head cap 6 Brush head 7 Charging base 8 Travel case 9 UV sanitizer
Note: Brush heads should be replaced every 3 months.
Instructions for use
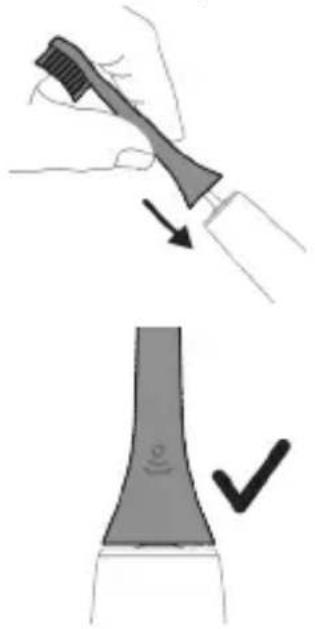
1 Place the brush head on the handle, so that the bristles are positioned in the same direction as the front of the handle.
2 Press the brush head onto the metal shaft until it clicks into place. There should be no gap between the brush head and the handle.
Note: It is normal for there to be a small gap between the brush head and the handle.
Using your Philips Sonicare toothbrush
If you are using your Sonicare toothbrush for the first time, it is normal to feel more vibration than when using a non-electric toothbrush. It is also normal to apply too much pressure during the first few uses. Apply only gentle pressure and let the toothbrush do the brushing for you. Follow the brushing instructions for best results.
For models without intensity settings
To help you get used to your new electric Sonicare toothbrush, it comes with the EasyStart feature. This feature gradually increases the power over the first 14 brushings to help you adapt to brushing with the Philips Sonicare toothbrush.
For models with intensity settings
To help you get used to your new electric Sonicare toothbrush, use the low setting for the first 1-2 weeks, then switch to a higher setting.
Brushing instructions
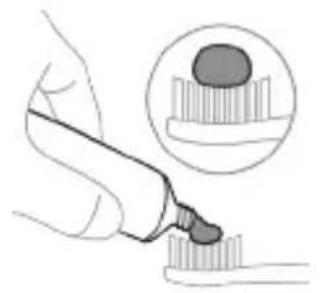
1 Wet the bristles and apply a small amount of toothpaste.
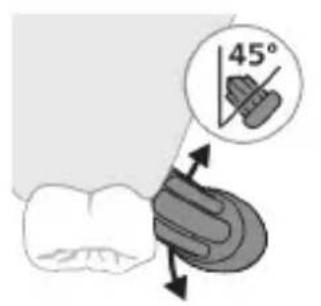
2 Place the toothbrush bristles against your teeth at a 45-degree angle, pressing gently so the bristles reach the gum line and slightly below the gum line.
Note: The brush head must remain in contact with your teeth at all times.
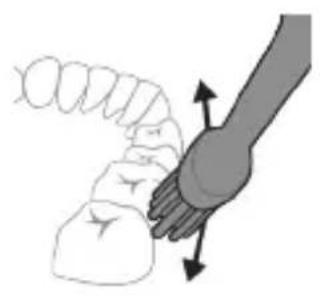
3. Press the on/off button to turn the Philips Sonicare on or off.
4. Then place the brush head on the teeth at a slight angle. Gently move the brush back and forth so that the bristles reach between the teeth. Continue with this motion for the entire brushing time.
Caution: The bristles of the brush should not be pressed too hard. It is not recommended to brush with a hard toothbrush.
Caution: If you apply excessive pressure, you will be alerted by a change in the vibration of the handle, and the indicator for replacing the brush head will light up in a different color.
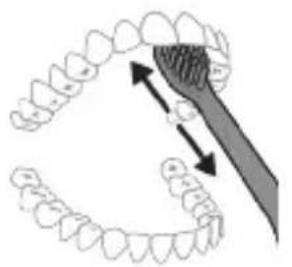
5. To clean the inner surfaces of the front teeth, tilt the brush handle vertically and make several vertical overlapping strokes on each tooth. 6. After finishing the brushing cycle, you can additionally brush the chewing surfaces of the teeth and the areas where stains occur. You can also brush your tongue, with the toothbrush on or off, as you prefer.
Caution: The Philips Sonicare toothbrush is safe for use on braces (brush heads wear out faster when used on braces) and dental restorations (fillings, crowns, veneers) if they are properly attached and not compromised.
QuadPacer
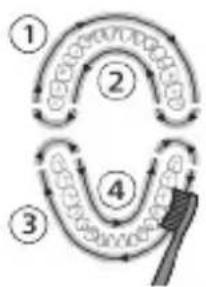
To ensure that you brush evenly in the mouth, you can divide the mouth into 4 sections using the QuadPacer function. QuadPacer divides the brushing time into 4 equal segments and indicates when it is time to move to the next area. The segments are indicated by a brief pause in the vibrations. The toothbrush automatically stops at the end of the brushing cycle.
Modes
Your toothbrush is set to the recommended mode: Clean.
Clean
For everyday cleaning
Recommended intensity level: High (only on specific models)
Total brushing time: 2 minutes
How to brush: Brush each segment for 30
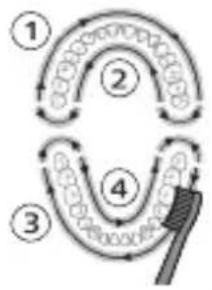
Activate or deactivate EasyStart (see "Activate or deactivate functions").
Brush head replacement reminder
Your Philips Sonicare toothbrush is equipped with BrushSync technology that monitors the wear of the brush head.
Note: This function works only with Philips Sonicare brush heads with BrushSync technology.
1 When you attach a new Philips Sonicare brush head for the first time, the handle detects that you have a Philips brush head with BrushSync technology and starts tracking the wear of the brush head. 2 Over time, based on the pressure you apply and the total time the brush head is used, the handle tracks the wear of the brush head to determine the optimal time for brush head replacement. This function guarantees the best cleaning and care for your teeth.
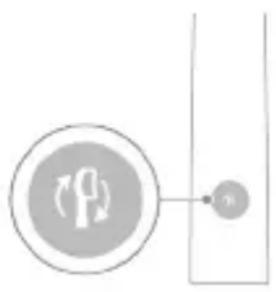
3 When the brush head replacement reminder indicator lights up in an orange color, you should replace the brush head.
All Philips Sonicare brush heads are supplied with the brush head replacement reminder function activated. To deactivate or reactivate the brush head replacement reminder, see "Activate or deactivate functions".
Activate or deactivate functions
You can activate or deactivate the following functions of your toothbrush:
- EasyStart - Brush head replacement reminder - Pressure sensor information
Note: You can activate or deactivate the brush head replacement reminder only when a Philips Sonicare brush head is attached to the handle.
Step 1: Place the handle on the plugged-in charger.
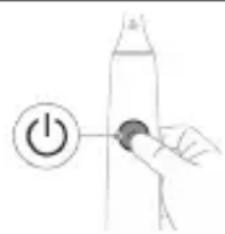
Step 2: Press and hold the on/off button:
When using batteries, make sure that the device, product, and batteries are disposed of properly.
When handling the battery, avoid short circuiting the terminals. Do not allow the battery terminals to come into contact with metal objects (e.g., keys, hairpins, rings). Do not insert the battery into a metal container. Cover the battery terminals or place the battery in a plastic bag before disposing of it.
Removing the battery
To remove the battery, you will need a flat-head (standard) screwdriver. Follow the safety precautions described below.
1. Discharge the battery completely. Remove the handle from the appliance, turn on the toothbrush and let it run until it stops. Repeat this process until you can no longer turn on the toothbrush.
2. Remove the brush head and rinse the handle. Wipe the entire surface of the handle with a cloth or towel.
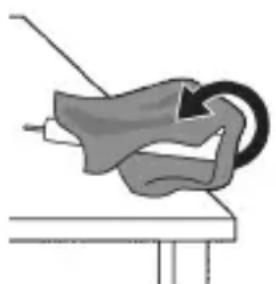
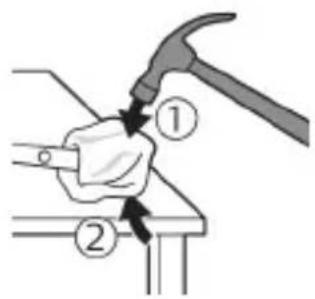
3. Hold the top part of the handle with one hand and twist the handle cap about 1 cm from the bottom end. Twist firmly with a screwdriver for about 4 turns to remove the end cap.
Note: You may need to press on the edges several times to release the internal clips.
4. Remove the end cap from the handle of the toothbrush. If the end cap does not come off easily from the cap, repeat the previous step until the end cap comes off.
5. Hold the handle upside down and press the exposed part against a hard surface. If the internal components do not come out easily from the cap, repeat the previous step until they come out.
6. Insert the screwdriver between the battery and the black frame at the bottom part of the internal components. Then twist the screwdriver away from the battery to release the bottom part of the black frame.
7. Insert the screwdriver under the bottom part of the battery and the black frame to release the metal plate that connects the battery to the green lead wire. This will release the bottom end of the battery from the frame.
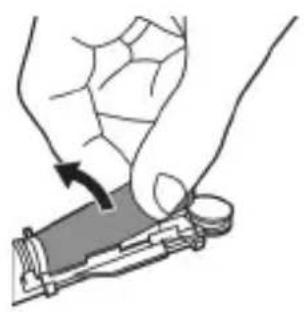
8. Grasp the battery and pull it out of the internal components to release it from the second metal plate on the battery.
Caution: Be careful of the sharp edges on the battery plates to avoid injuring your fingers.
9. Cover the battery contacts with tape to prevent an electrical short circuit from the remaining charge of the battery.
The battery can now be recycled, and the remaining product can be disposed of appropriately.
Please do not throw the device away with normal household waste at the end of its life, but hand it in at an official collection point for recycling. By doing this you help to protect the environment.
Introduction
- Do not let children play with the appliance.
Use only original accessories and consumables from Philips. Use only the charger supplied with the appliance. Use only the original USB cable and USB power adapter if they are included in the delivery. This appliance contains no user-serviceable parts. If the appliance is damaged, stop using it and contact the consumer support center in your country. Only for appliances with a power cord: If the power cord is damaged, replace the charger with a new one. Do not use the charger or the disinfectant outside or near heated surfaces. The parts of the appliance cannot be washed in a dishwasher. This appliance is intended for cleaning teeth, gums, and tongue. Always store the disinfectant out of the reach of children. Stop using the disinfectant if the ultraviolet (UV) lamp continues to burn with the door open. Ultraviolet radiation can be harmful to eyes and skin. Use the disinfectant only with the protective screen installed. Do not look directly at the UV lamp of the disinfectant when it is on. Do not use the brush head with bent or broken bristles. Replace the brush head every three months or sooner if signs of wear appear. Do not allow direct contact with oils that contain essential oils or coconut oil. Such contact can lead to damage of the bristles.
Stop using the appliance and consult your dentist/doctor if you experience excessive bleeding after use, if bleeding does not stop after 1 week of use, or if you experience discomfort or pain. If you have had oral surgery or surgery on your gums in the last 2 months, consult your dentist before using this appliance. If you have a pacemaker or other implanted device, consult your doctor or the manufacturer of the implanted device before use. If you have any doubts, consult your doctor before using this appliance. This product is a personal care device, not intended for use by multiple patients in a dental practice or institution.
Battery safety instructions
www.philips.com/support
Introduction. Functions of different models may vary. Some models may not be equipped with Bluetooth or NFC technology.
The following symbols may appear on the appliance:

Read the operator's manual.
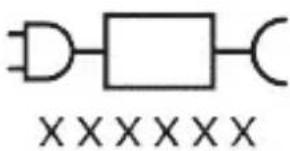
Removable power supply: "XXXXX" indicates the model number of the charger approved for use. (TCBxxxx, HX6100, HX6110, HX6160 or WAAxxxx)
Intended use
Regular brushing and flossing reduce the risk of caries and improve the health of teeth and oral cavity. Sonic toothbrushes ProtectiveClean are intended exclusively for oral use. Use by children is allowed only under adult supervision.
Philips Sonicare handle (fig. 1.)
1 Handle 2 On/Off button 3 Replacement reminder 4 Battery charge level indicator
Additional accessories:
5 Brush head cap 6 Smart brush head 7 Charger 8 Travel case 9 UV sanitizer and charging station
- Low charge - High charge
Changing intensity level:
- Press the on/off button once to turn on the toothbrush.
- Press the button again within 2 seconds to change intensity.
- Press the button a third time within 2 seconds to stop the brush.
- If you press the button again after 2 seconds of brushing, the toothbrush will also stop.
BrushSync technology
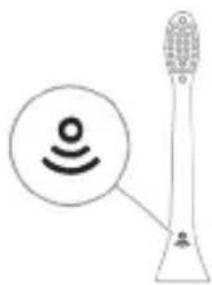
BrushSync technology allows the brush head to communicate with the handle via microchips. The symbol on the lower part of the brush head indicates that the brush head is equipped with this technology.
BrushSync technology features:
- Replacement reminder
Philips Sonicare toothbrush heads with smart BrushSync technology. To get acquainted with the full range of our toothbrush heads and find the most convenient one for you, go to
www.philips.com/toothbrush-heads for more information.
Up to 3 seconds Up to 5 seconds Up to 7 seconds

Step 3. Release the on/off button when you hear:
| 1 3ByKOBОВ CINHаЛ | 1 3ByKOBОВ CINHаЛ, a 3aTeM 2 3ByKOBbIX CINHаЛa | 1 3ByKOBОВ сигнал, 2 3ByKOBbIX сигналa, a 3aTeM 3 3ByKOBbIX CINHаЛa |
| ↓ ↓ ↓ | ||
| Eсли Bы уВиДиTe, чTO ИнДиКаТО зapяда akКуМуЯлТopa и СBEТОВОй ИнДиКаТО замeны наcaДкN 2 pa3a МИгнуЛи ЗелЕнbIM сZВETOM, и уСлышITE 3 TOHaJIbHbIX сиГналa (OT НИЗКОТК ВИСOKOMY), чTO 3NaЧT, чTO ФунКцЯ 6bla akTINВИРоваHA. | ||
| IIПИ | ||
| Eсли Bы уВиДиTe, чTO ИнДиKаТО зapяда akКуМуЯлТopa и СBEТОВОй ИнДиKаТО замeны наcaДкN 1 pa3 MИгнуЛи ЖeЛТыIM сZВETOM, и уСлышITE 3 TOHaJIbHbIX сиГналa (OT ВИЗКОТК HИЗКOMY), чTO 3NaЧT, чTO ФунКцЯ 6bla deaKTINВИРоваHA. | ||
UV sanitizer
When the battery is low, the handle flashes amber and emits 2
series of sonic signals after brushing
When the battery is low, the handle flashes amber and emits 2
series of sonic signals after brushing
2 Remove and discard the brush head. Completely cover the handle with a towel or cloth.
www.philips.com/support
Maximum battery life
Maximum battery life. If you do not use the maximum, the battery will last longer. The maximum battery life is achieved when the battery is fully charged and used for the recommended brushing time.
Disposal
This product contains a UV lamp. Do not dispose of it with regular household waste.
- After use, if you are going to store the device, it is recommended to clean the sanitizer before storing.
Use the device only for its intended purpose, as described in this manual. Do not use it for other purposes, such as industrial, medical, or other uses, if they are not specified in the instructions. The manufacturer is not responsible for damage caused by improper use.
- Use the device only with the accessories provided.
Only use the original Philips accessories or those recommended by Philips. Only use the sanitizer with the original USB cable and USB power adapter. The device is intended for household use only. If the device is damaged, stop using it and contact the Philips service center for repair. Use only with the original: If the cable is damaged, replace it with an original one from Philips. Keep the sanitizer away from water and moisture. Do not use the sanitizer if it has been dropped or damaged. Always unplug the sanitizer before cleaning. Do not use the sanitizer with a damaged cord or plug. Do not use the sanitizer near heat sources. Do not use the sanitizer outdoors. Do not use the sanitizer if it is not working properly. If the sanitizer is not working properly, contact the Philips service center. Do not immerse the sanitizer in water or any other liquid. Do not use the sanitizer if the UV lamp is broken. If the UV lamp is broken, contact the Philips service center. Do not use the sanitizer if the power cord is damaged. If the power cord is damaged, it must be replaced by the manufacturer, its service agent, or similarly qualified persons in order to avoid a hazard.
- If the device is not working properly, check if it is connected to the power supply. If it is still not working after checking, stop using the device and contact the Philips service center. Do not attempt to repair the device yourself.
- If the device is not working properly, check if the USB cable is connected properly. If it is still not working, contact the Philips service center. Do not attempt to repair the device yourself. This device is intended for household use only.
www.philips.com/support
The model number is printed on the bottom of the device. The model number is also printed on the Bluetooth and NFC labels.
The following accessories are included:
Read the user manual.

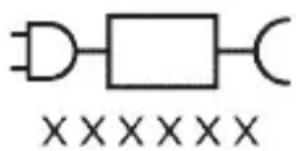
KncmnyoosbaHdaTbMnHOTnbapK: 《XXXXXpaKaMnHamuHaBn6apKnypkyHaHdaXoepo,Kn6oJnCTnfoaShaBaad,HnsohMeDnxaad. (TCBxxxx, HX6100, HX6110, HX6160eWAAxxx)
IcTnΦoJan ne6HnShyda
Uytkaxon DaHOnShyinn BapKn CnilCnlan 6apon HeCT KApdaHn Ka6aTn Yacnap Ba 6OKIMOnDaXon FIn3O a3 DaHDoHXo 6apon KOxN IdoHn NycnShn DaHDoHXo Ba 6exTap HnFOX DoWtAHN
caIomatn daxoh ne6bHn 7ydaan. YyTKaXoN daHOnShyHn 6apKn cnIcHnAn «ProtectiveClean» 6apon nCTnfoan 7axcne6bHn 7ydaan. Nctnfoan KydaKOH 6oJd TaXtN Ha3OpATn KaIohcoLoH cypaT npad.
«Philips Sonicare»-ишуmo (Pacm1)
1ДаCTaK 2 TyrmanФabOJ/xomy 3 Edpacn nBa3KyHnn capaKn yTka 4 HnwoHdxaHdAn 3apyIbTaape
JlabO3NMOt:
5 Capnyu n capa kn yTka 6 CapaK(xo)-n yTkan oKnI 7 NoiroxN 6apKnypkyHaHda 8 KyTTnn caap 9 TaMn3KyuHaHdAn UV Ba 6apKnypKyHaHda
Tab3ex: JIaBo3nMOTxOIN DoXnJUyda MeTaBOHaHd BO6acta 6a MoJeN xapNdUyda fapK KyHaHd.
Ofo3n Kop
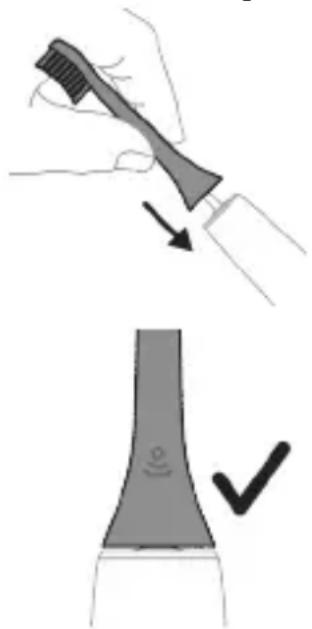
1 Capakn ytkapo poct KyHei, To KI Jnphi n ytka 6a camTN neu nn daCTak 6ap06ap 7aBaJ. 2 Capa kn ytkapo 6a mexbapn metaJI To caTxn noeh caxT naxu KyHei.
Tav3ex:Дарбайни capakn utka Ba dactaKOn OH KameФocnila nidaH Mykappapn act.
3MiHnPiBeHb iHTeHCNBHOCTi:
- HaTnCHiTb KHONKy «YBIMK./BumK.», ΙO6 yBIMKHyTN 3y6Hy ΙiTkY.
- 3miHHTn iHTeHcNBHICTb,HaTNCHiTB KHOKNy pa3 npOTraGM 2 cekyHd.
- To stop the toothbrush, press the button for about 2 seconds. If you press the "ON/OFF" button again after 2 seconds, the toothbrush operation will also be stopped.
BrushSync technology

Thanks to BrushSync technology, the handle communicates with the brush head via a microchip. The symbol on the bottom part of the brush head indicates that it is equipped with BrushSync technology.
BrushSync technology has the following functions:
- Brush head replacement reminder. Philips Sonicare includes a wide range of intelligent brush heads equipped with BrushSync technology. Get acquainted with the full assortment of brush heads and choose the optimal brush head for you at www.philips.com/toothbrushheads.
Specifications
- Pressure sensor feedback
- Quadpacer
- SmarTimer
- EasyStart
- Brush head replacement reminder
Pressure sensor feedback;
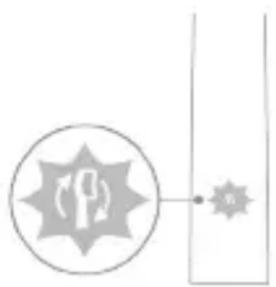
The Sonicare toothbrush detects pressure during brushing to protect gums and teeth from damage. If pressure is excessive, the handle will change vibration characteristics, and the replacement indicator will blink until you adjust the pressure.
Note: This feature is enabled with the pressure sensor. For details on how to enable or disable this function, see "Enabling or disabling functions".
Quadpacer
QuadPacer: This timer divides the workout into 4 intervals, signaling each one evenly. (See "Improvement Tips")
SmarTimer
SmarTimer indicates the end of a session or interval, automatically turning off the device. Dentists recommend using the device for at least 2 minutes twice a day.
Safety instructions
Before using this device, read the following instructions carefully and keep them for future reference. Misuse can cause injury or damage.
Electrical
Do not place the charger or the device in water.
After cleaning, plug the device into a power outlet and check that it is working properly.
This device is not intended for use by persons (including children) with reduced physical, sensory, or mental capabilities, or lack of experience and knowledge, unless they have been given supervision or instruction concerning use of the device by a person responsible for their safety. Children should be supervised to ensure that they do not play with the device.
- Keep the device away from children.
- Only use Philips accessories or consumables. Only use the charger provided. If you use a different charger, only use a USB cable and a USB power adapter that are certified.
- If the device is used by or near children, supervision is required. If the device is damaged, stop using it and contact the service center for assistance. Only use the device with the original parts: if the power cord is damaged, replace it with a cord that has a plug with a grounding contact.
- Spare parts and accessories for the device. The device is intended for use in everyday life.
- This product is intended only for testing, drying, and cleaning.
- This device is intended only for testing, drying, and cleaning. - Store disinfectants out of reach of children.
- If the device is damaged, stop using it. The device may be damaged if dropped. - Operate the disinfectant only with the protective cover closed.
- If the device is damaged, stop using it.
- Do not use the device with wet or damp hands. If the device is dropped or shows signs of damage, stop using it immediately.
- Do not use the device if it has cracks or other visible damage. Do not use the device if it is damaged. - If the device is not working properly, stop using it and contact the service center.
- Before using this device, if you have had surgery on your eyes, face, or neck, consult your doctor.
- If you have a pacemaker or other implanted device, consult your doctor or the device manufacturer before using.
- If you have medical problems, consult your doctor before using this device. - This device is not intended for use by children or persons with reduced physical, sensory, or mental capabilities.
Battery safety warnings
- This device contains batteries that may be hazardous.
- Use the device only for its intended purpose. Before using the device and its accessories, read these instructions carefully and keep them for future reference. Misuse may result in injury or damage. Using non-approved accessories may be hazardous.
- This Philips appliance is not intended for use by persons with reduced physical, sensory or mental capabilities. TCBxxxx, HX6100, HX6110, HX6160 and WAAxxx are not intended for use by children.
- Keep the appliance and batteries out of reach of children and do not let them use the appliance or the charger without supervision. High temperatures can cause burns.
- If the appliance overheats, emits smoke, changes color, or if you notice any unusual smell, stop using and charging it and contact Philips.
- Do not place the appliance or batteries in microwave ovens or on induction cooktops. - To protect against fire or electric shock, do not immerse, expose, or subject the appliance or batteries to water or other liquids. Do not short-circuit, overcharge, or reverse-charge the batteries.
- This device contains non-replaceable batteries. When the battery life has ended, the device should be disposed of properly. See the 'Disposal' section. - If batteries leak or are damaged, avoid contact with skin or eyes. If contact occurs, rinse with water and seek medical help. - When using batteries, ensure they are inserted correctly. - To prevent short circuits, do not allow battery contacts to touch metal objects (e.g., coins, paperclips, keys). Store batteries in a cool, dry place. When disposing of batteries, do not throw them into fire; place them in a plastic bag.
- Charge, use, and store the appliance at a temperature between 0-40°C.
Storage and transport conditions
Temperature: -10°C to 60°C.
Electromagnetic fields (EMF)
This Philips appliance complies with all applicable standards and regulations regarding exposure to electromagnetic fields.
Radio Equipment Directive
Philips Sonicare toothbrush heads (Bluetooth, NFC) comply with Directive 2014/53/EU.
- The Bluetooth radio interface operates in the 2.4 GHz frequency band.
- The maximum Bluetooth transmit power is 3 dBm.
- The NFC radio interface operates in the 13.56 MHz frequency band.
- The maximum NFC transmit power is 30.16 dBm. For more information, visit the following website:
www.philips.com/support

Note: The features of some models may differ. Some models may not have Bluetooth or NFC functionality.
Before using the product, please read the user manual.
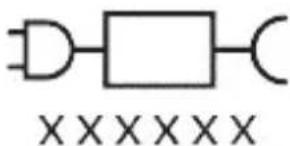
The power rating label shows the model number of the device (e.g., TCBxxxx, HX6100, HX6110, HX6160, or WAAxxxx).
Intended use
ProtectiveClean electric toothbrushes are designed to remove plaque and improve oral health. ProtectiveClean electric toothbrushes are also suitable for children. Children should be supervised during use.
Philips Sonicare (Figure 1)
1 Handle 2 Brush head release button 3 Brush head 4 Battery indicator
Accessories:
5 Charging base 6 Start brush head 7 Charging adapter 8 Handle 9 UV sanitizer and charger
Accessories may be sold separately.
Attaching the brush head
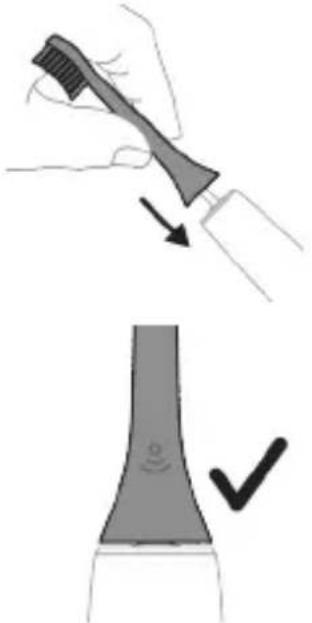
1 Align the brush head so that the bristles face the same direction as the front of the handle. 2 Press the brush head onto the metal shaft until it clicks into place.
Note: There should be a small gap between the brush head and the handle.
Philips Sonicare Easy-start
Your Sonicare toothbrush has an Easy-start feature that gradually increases the power over the first 14 brushing sessions. This helps you get used to the brushing sensation. The Easy-start feature is activated by default. For best results, use the Easy-start feature for the first 14 brushing sessions.
For models with Easy-start
Your Sonicare electric toothbrush has an Easy-start feature that gradually increases the power over the first 14 brushing sessions. This feature helps you get used to brushing with the Sonicare toothbrush.
For models without Easy-start
Your Sonicare electric toothbrush has an Easy-start feature that gradually increases the power over the first 1-2 weeks of use. After that, it will increase to the normal power setting.
Brushing instructions
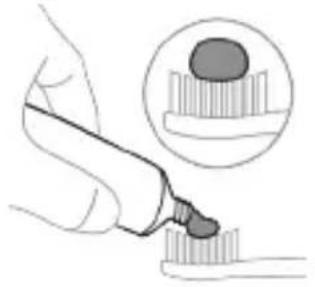
1 Wet the bristles and apply a small amount of toothpaste.
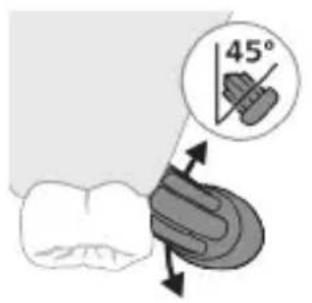
2 Place the toothbrush bristles against the teeth at a slight angle (45 degrees). Apply gentle pressure and move the brush back and forth in a sweeping motion along the gum line.
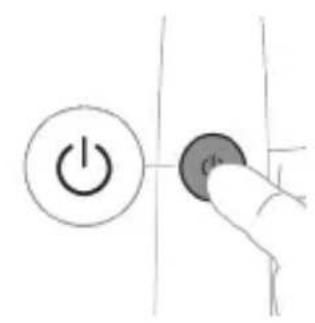
Note: The center of the brush head should be placed against the teeth.
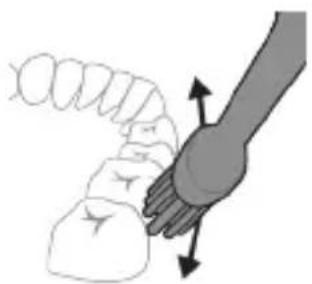
3 Philips Sonicare brush heads are intended for personal use.
4 Do not use these brushes for other purposes. To ensure proper contact between the brush heads, gently press the brush against the teeth. Do not brush with this brush too vigorously.
Note: Brush heads wear out. Do not use the toothbrush with worn brush heads.
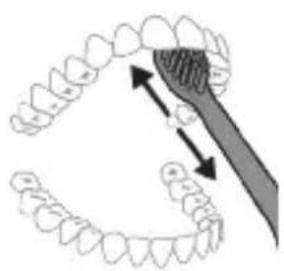
Note: If you have sensitive teeth or gums, or if you have had oral surgery or are undergoing treatment for gum disease, consult your dental professional before using this toothbrush.
5 To clean the inside surfaces of the front teeth, hold the brush handle vertically and gently move the brush up and down over each tooth.
6 After cleaning with the brush, rinse the brush head, the handle, and the battery compartment with water. Do not immerse the brush handle or the charging base in water.
Note: Braces (when braces are attached to the teeth, the brush heads wear out faster) and dental restorations (crowns, bridges, implants) may be damaged if not properly maintained. Consult your dental professional before using the Philips Sonicare toothbrush.
QuadPacer
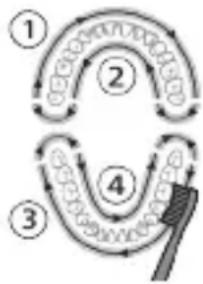
For optimal cleaning, the QuadPacer feature divides your mouth into 4 sections. The QuadPacer feature divides the brushing time into 4 equal segments, each segment indicating the time you should spend on that section. The segments are indicated by a short pause. At the end of the brushing session, the brush automatically stops.
EasyStart
The brush is activated with the EasyStart feature.
Clean
Charging and battery status
This Philips Sonicare toothbrush is designed to operate for at least 2 minutes per charge, providing up to 28 brushing sessions (if you brush twice a day, this lasts up to 14 days). The battery indicator shows the battery level when the 2-minute brushing session is activated, when the toothbrush is turned on, or when it is charging.
Note: It may take up to 24 hours to fully charge the battery for the first use, but you can use the Philips Sonicare toothbrush before it is fully charged.
Charging and disinfecting device
1 Plug the charger or disinfectant into the electrical outlet.
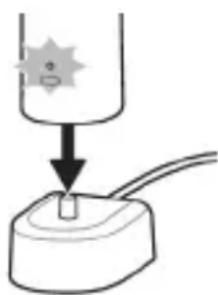
2 Connect the device to the charger or disinfectant.
- To ensure proper charging, press the device for 2 seconds until the indicator lights up.
- While the battery indicator is lit, the brush is charging and the device is disinfecting.
- When the device is fully charged, the battery indicator will remain lit for 30 seconds and then turn off.
Battery charging
Charging (when the device is plugged in)
When the device is connected to the charger, the battery indicator shows the battery level.
Battery charging (when the device is placed in the charging/disinfecting station)
When the device is placed in the charging station, the battery indicator shows the battery level.
Battery charging indicator
The device is fully charged and ready to use.
The indicator will remain lit for 30 seconds and then turn off.
Battery compartment (when charging is not required)
When the battery is fully charged, the battery indicator lights up green.
Battery compartment cover
Indicators
Display
Full charge
Type
Charging time full
Lifetime
| Баразецьи Куй Баразец Индikatopы | Дыбыс |
| Темен Capы Түпен ЖылblыКтайды | Шүкамен Тазалayдан keiH canTaH 3 дыбыс шылды |
| Бoc Capы Түпен ЖылblыКтайды | Шүкамен Тазалayдан keiH canTaH 5 дыбыстан 2 pet шылды |
| Еckeши: Куат уhemdeу ушin бразец Иndikatopы Колданылмаган KeЗде ошени. | |
| Еckeши: Бразец Куаты Толык тayсылfasн KeЗдe, tic шеткасы ошin калады. Tic šeteхасын заюдай ушin оны зардытышka коьынд. | |
| Еckeши: Бразец Куаты Барык уakсытta Tolык, зардыталган Куйинустай ушin пайданылмайын уakсытta tic šeteхасын заюдай уstай boлды. | |
| Бразец Куй (can Зараятышka/зардай ужел семесин Коьлмаган KeЗдe) | |
| Тic šeteхасы оянfasн KeЗдe, canын acсыдыfa Бразец Иndikatopы бразец Deнгейн керсetimei. | |
| Баразецьи Куй Баразец Индikatopы | Дыбыс |
| Толык Хасы Доглін Ханын Тур | - |
| Жарылай Түлык Хасы Доглін ЖылblыКтайды | - |
| Төmen Capы Түпен ЖылblыКтайды | Шүкамен Тазалayдан keiH canTaH 3 дыбыс шылды |
| Бoc Capы Түпен ЖылblыКтайды | Шүкамен Тазалayдан keiH canTaH 5 дыбыстан 1 peT шылды |
Note: The battery indicator lights up when the battery is fully charged.
Note: When the battery is fully charged, the indicator lights up. To charge the battery, insert the charger or charging cable.
Note: To use the battery at all times, charge the battery fully before first use.
Cleaning
Brush head
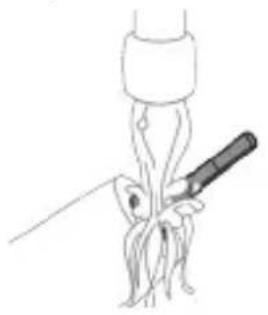
1. Remove the brush head and rinse it with warm water. Check the bristles for wear.
Attention: The filter must be cleaned with a soft brush, otherwise it may become clogged.
2 Rinse the filter under running water.
Caution: Do not press the filter to speed up drying.
Cleaning the filter
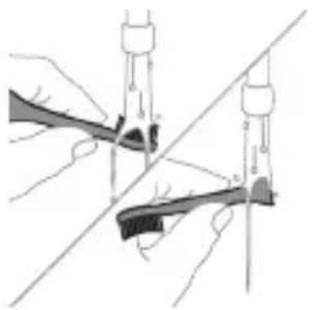
1 After turning off the device, unplug it and let it cool down.
2 Remove the filter by turning it counterclockwise, then pull it out of its housing. Clean it with a soft brush or rinse it under running water.
Replacing the filter
1 Turn off the device and unplug it.
2 Rinse the new filter under running water.
Water tank
Rinse the water tank with clean water and dry it with a soft cloth.
Cleaning the dehumidifier
Attention! Do not immerse the dehumidifier in water or spray it with water.
Attention! Do not clean the dehumidifier with sharp objects.
To ensure proper operation, clean the dehumidifier regularly.
1. Remove the plug from the socket. 2. Clean the brush head and the brush head shaft. Clean the brush head and the brush head shaft with a damp cloth. 3. Do not use sharp objects to clean the brush head. 4. Do not remove the protective screen.
To remove the screen, install the brush head on the handle, turn it on, and pull the protective screen off.
5. Remove the handle. To remove the handle, install the brush head and pull it off with a metal tool. 6. Clean the protective screen and the handle with a damp cloth. 7. Do not immerse the handle in water.
To remove the handle, insert a metal tool into the gap between the handle and the brush head, and pull the handle off.
8. Remove the protective screen.
To remove the screen, insert the tips of the brush head into the openings on the handle and pull. Insert the screen into the detector and turn it.
9. Put the brush head back on the detector.
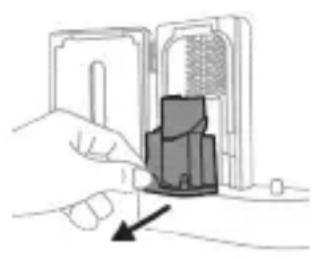
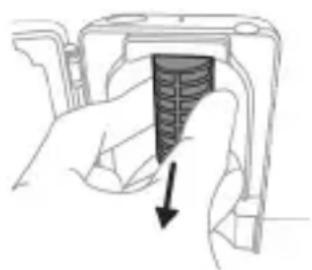
10. After cleaning, let the detector dry completely before reassembling.
Cleaning
If the device is accidentally dropped, unplug it from the socket, clean it, and then store it in a dry place away from direct sunlight.
Storage
To replace the brush head, pull the Philips Sonicare brush head off the handle. Only use Philips Sonicare replacement brush heads.
Cleaning
The ProtectiveClean handle is designed to protect the brush head from bacteria and to keep the brush head clean. The ProtectiveClean handle is easy to clean. The brush head can be removed for cleaning.
2. Philips Sonicare (U4.1.)
Uputuniwuptn.
5 lunquuwuh quhuh yuwhunh 6 hnqwuwuh hutwugh qhuhy(utn) 7 Lhgpwunpuu hup 8 4wuhnnnnyu wunjw 9nhUwhunwhuuhuuhgpuu nph
L2nui 3aun nnwuwunnuu npubuniunutn yunnn bu unwnptnulq uwo unnguhuwo:
hu2hg ulutl
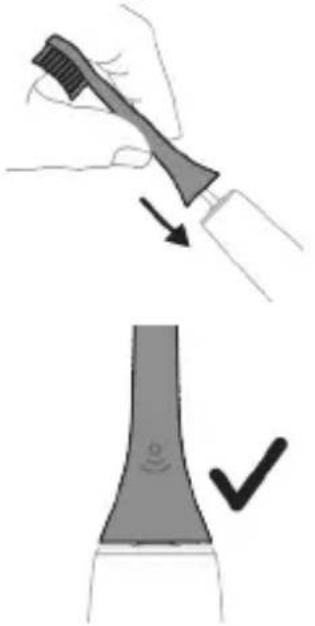
1 hnquwuh quhun hwuwwntgnp wjuwu, nn uwhuyutn nnnuwo hutu unju ninnnpaewup, hu2 pruwuh nhwugh yunn:
2 Uunn utnubp hnquuulh quhun utnpu utunwnuwwu hutnh u, uwu yuq unuh: L2nu hnquuwuh quhh u pruwuh ughu u npn wugph wnywnpuyn unnuwU5:
2tp Philips Sonicare wunuwutnh lunquwuh oqunwqnpnwn
tpwuwghu wquwu bp oqwnqnnnun atn Sonicare wnuwh hnquwwun, wutih 2wn pnan ng qquwn unnuwl hwhubuwunno n2 luynnwyyu hnquwwuh htn: UnnuwI, bp unwughu wquwu oqwnqnnnonutnp zwhg 2wn bu utnunu qnnouwnni: Uhwju yhnwnp t unnp utnunu u any unbp, nnwuqh wnuwh hnquwwun atn unnhuwntbu uwph: Hwnnnu tup htnutl uannu utnyomega hanquwuyhg oqunbngnignuiutnhu luwqnyu wnnuiipun unwwwni hwuwn:
Unwug hunttuuhunjniutn unntutnh wuwu Sonicare luynnuwu hunquwuwhu wugnu wultih ht2un nunadubini hwuw, wju wnupunu I wunhuguW EasyStart qnpwnnyanu: Uju qnnwnnyan nwnwnnntu wutuguni I hnuwupu wnwghu 14 uwpnnuiutn dhuwuow oqutni atq ununrt Philips Sonicare wunwuh hnquwuhyg oqunutniu:
runtuuhunpiutnn unntutnh huaun Uugn an unn Sonicare taynnwuw uwnwh hnquwwhuht2unugutni hwun wunghu 1-2 2upwauu npawgnui oqunqnnotip wultgh won
ywnquuunnu, wjunhtunu wugtp wutih puonn ywnquuunwu:
Uwpuu hnuhuiqutn
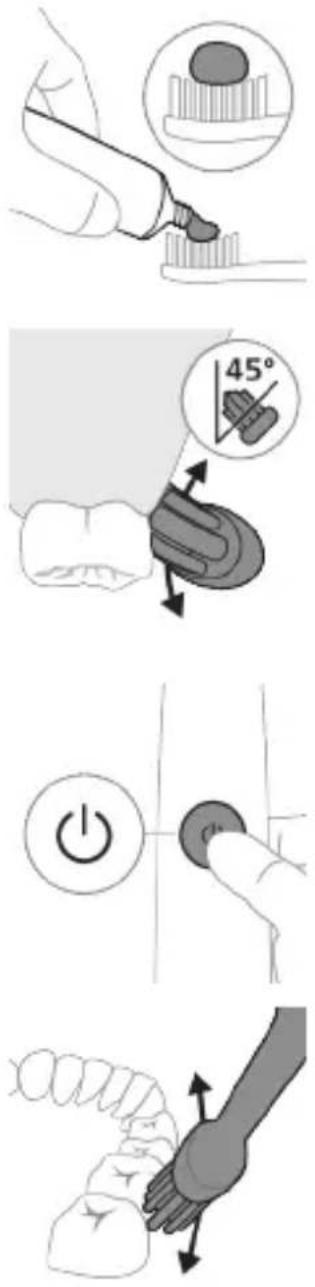
1 0ngtp hnquwuh uwhuyutn u yangnp wunwuh uwniuh phpuuynjniu:
2 Stnwnntp wunwuh hnquwuwuh uwhuyutnn wunwutnh unw uh hnnp wulwu unw (45 wunhawu) u ndttn utnubp, nnuuagh uwhuyutn hwuutu unganh tqnwqohu ywu untanh tqnwqohg uh unnp utnpu:
To use the toothbrush, follow the instructions below:
3. Press the power button to turn on the Philips Sonicare toothbrush.
4. Apply a small amount of toothpaste to the bristles. Do not press too hard or scrub; let the brush do the work. Gently guide the brush along the teeth.
The Sonicare toothbrush is not intended for use by children. Do not use the toothbrush if the bristles are worn or damaged.
The Sonicare toothbrush is designed to be safe and effective when used according to the instructions. It is important to charge the battery fully before first use.
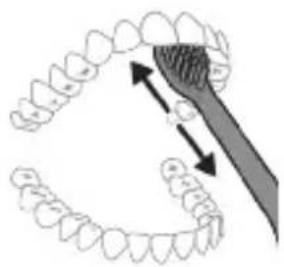
5. Brush for at least two minutes, spending equal time on each quadrant of your mouth. 6. After brushing, rinse the brush head and bristles thoroughly with water. Do not use boiling water or harsh chemicals to clean the brush.
The Philips Sonicare toothbrush comes with a brush head (with bristles) and a charging base. It is designed to be used with the included brush head and charger.
QuadPacer
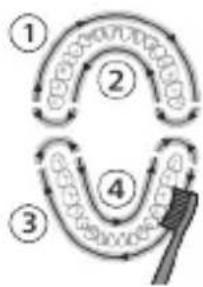
The QuadPacer feature helps you brush evenly by dividing your mouth into four sections. It beeps every 30 seconds to remind you to move to the next quadrant. This ensures a thorough clean.
Modes
The toothbrush has a Clean mode.
Clean
Settings
Intensive cleaning for a deeper clean
Sensitive mode for gentle cleaning (for sensitive teeth)
__SUPPIMER__
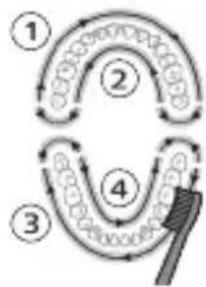
BrushSync indicator
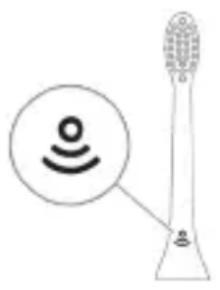
The BrushSync indicator tells you when it is time to replace your brush head. The brush head should be replaced every 3 months for optimal results. The BrushSync indicator works with Philips Sonicare brush heads that have the BrushSync (brush head replacement) indicator. To check if your brush head is compatible, or to learn more about brush heads, visit www.philips.com/toothbrush-heads.
Features
- Easy-start handle - Quadpacer - SmarTimer - EasyStart - Brush head replacement reminder
Easy-start handle
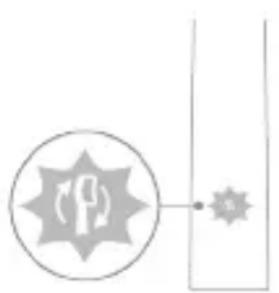
The Sonicare handle is designed to be comfortable to hold and easy to use. It has a non-slip grip and a simple one-button operation. The handle is also waterproof, so you can use it in the shower. For more information, see the section 'Getting started'.
Quadpacer
QuadPacer: This feature helps you gradually get used to brushing for 4 seconds. (See "QuadPacer" section)
SmarTimer
SmarTimer: This feature helps you brush for the recommended 2 minutes. It also helps you ensure that you brush all areas of your mouth equally. The SmarTimer is activated when the handle is turned on. It will beep at 30-second intervals to remind you to move to the next quadrant.
EasyStart
Philips Sonicare is equipped with the EasyStart feature (for gradual power increase and comfort. This feature helps you get used to the brushing sensation). EasyStart gradually increases the power over the first 14 brushing sessions to help you get used to the Philips Sonicare toothbrush.
EasyStart
The Philips Sonicare toothbrush is designed to provide a gentle cleaning experience, but the EasyStart feature helps you adapt to the brushing sensation.
To activate or deactivate EasyStart (see "Activating or deactivating features"):
Brush head replacement
Your Philips Sonicare toothbrush is equipped with BrushSync technology, which monitors your brush head usage.
This feature is only compatible with Philips Sonicare brush heads with BrushSync technology.
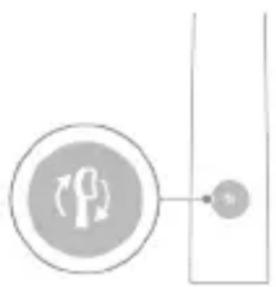
1. To replace your brush head, pull it straight off the handle. To attach a new brush head, slide it onto the handle until it clicks into place. 2. When you use your toothbrush, the handle will emit a sound and the brush head will vibrate to remind you to replace it. This feature helps you maintain optimal brushing performance. 3. To replace the brush head, simply pull it off and push a new one on.
The brush head replacement reminder is activated by default. To deactivate it, see "Activating or deactivating features".
Activating or deactivating features
Your toothbrush has the following features that you can activate or deactivate:
- EasyStart
The EasyStart automatic starter is designed for starting engines with a displacement of up to 2 liters, which are equipped with a manual choke.
Step 1. Connect the red wire of the device to the positive terminal of the battery.
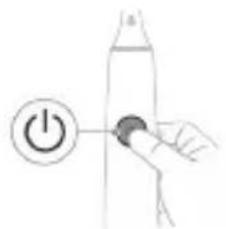
Step 2. Connect the black wire to the negative terminal or to the engine ground.
| EasyStart lvnquwuh qihuhy unhhuunhuw hh2tgniu | zhu2wu utunph wnδwqwup | |
| Uhuglu 3 yuwrjw unlunnnpjwup | Uhu5 7 uwrjw unlunnpjwup | |
| ↓ ↓ ↓ | ||
| PwJ 3. Fug rannp hnuwuph uhwgufw/wwgwmuw Unawln, bp ntp. | ||
| 1 wqnw2wu 1 wqnw2wu, wqw2 wqnw2wu | 1 wqnw2wu, 2 wqnw2wu, wqw3 wqnw2wu | |
| ↓ ↓ ↓ | ||
| tpat unwnlungh gniighs u hnquwuh qihuh Unhhuunhuwuh hh2tgwugnighs 2 wqwpu awpatau lwlw2 Injunu l utp 3 awjwuhw qnw2wu' gwohhg uhzlu pwnan, wqw qnnouwnjau wunhugwlu: | ||
| 4uu | ||
| tpat unwnlungh gniighs u hnquwuh qihuh Unhhuunhuwuh hh2tgwugnighs 1 wqwpu awpatau ntanhu Injunu l utp 3 awjwuhw qnw2wu' pwnohhg uhzlu guo, wqw qnnouwnjau wunwulhnlgwlu: | ||
See diagram
The EasyStart 3Bunn controller is designed to work with engines that have a manual choke.
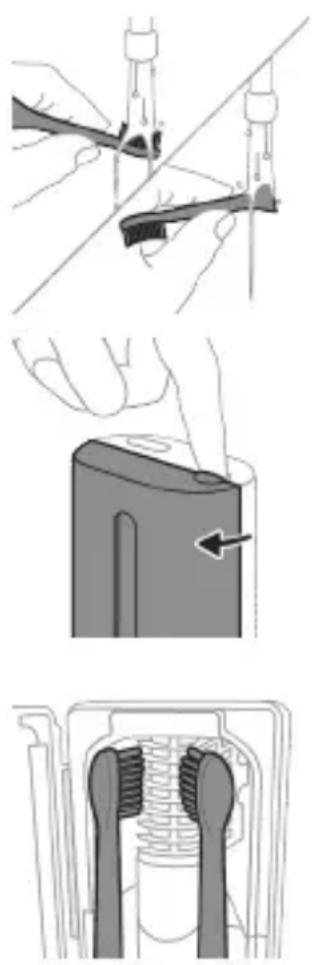
The automatic starting system is designed for engines that have a manual choke and are equipped with a starter motor.
The device is intended for use in vehicles with a 12-volt electrical system, and it is recommended to install it in a dry place, e.g.
- under the dashboard or in the engine compartment, away from heat sources: -The device should be mounted securely.
- The installation of the device should be done by a qualified technician or a person with sufficient knowledge.
The device must be connected to the battery and to the ignition switch and the starter motor. This connection should be made with appropriate wires.
1. Connect the red wire to the positive terminal of the battery and the black wire to the negative terminal.
2. Connect the blue wire to the starter motor solenoid, which is located near the starter motor.
2. Connect the yellow wire to the ignition switch wire that is live when the ignition is on. 3. The blue wire of the device should be connected to the starter motor solenoid, which is usually located on the starter motor.
The Philips Sonicare toothbrush is intended for the following:
The Philips Sonicare for Kids toothbrush is intended for the following:
4. The brush head should be replaced every 5 months.
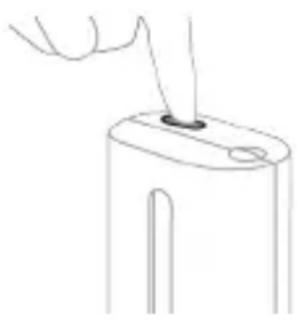
5. The toothbrush is intended for cleaning teeth and gums, and for removing plaque and stains.
If you have any questions about the toothbrush, please contact the manufacturer.
If you have any questions about the toothbrush, please contact the manufacturer.
If you have any questions about the toothbrush, please contact the manufacturer.
The toothbrush is intended for cleaning teeth and gums.
Cleaning and maintenance
This Philips Sonicare toothbrush has a 2-year warranty from the date of purchase (14 days for consumables such as brush heads) and a 2-year warranty on the handle. The warranty does not cover damage caused by misuse, if the toothbrush is used with unauthorized brush heads, or if the toothbrush is not used in accordance with the instructions.
If you have any questions about the toothbrush, please contact the manufacturer.
Cleaning
Cleaning and maintenance
1. Clean the toothbrush handle with a damp cloth.
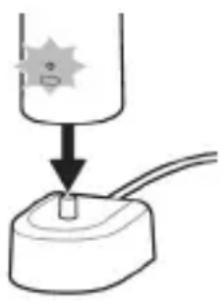
2. Rinse the brush head with water.
- Remove the 2 screws and washers, then carefully lift the cover upward. -Use the supplied wrench to loosen the nut, then remove the cover.
- 30 cm of cable length
- for the connection.
Cover installation
Install the cover in the reverse order of removal (tighten the screws securely).
If the cover is not installed within 5 minutes, the internal components may overheat.
Cover installation (for models with a cable entry on the side or bottom)
Route the cable through the opening, then install the cover and tighten the screws.
Cover installationCover screws
Screws (4 places)
Tighten the 30 screws evenly
in a crisscross pattern.
Cover installation (if the cover is warped)
If the cover is warped, gently bend it back into shape before installing it.
Cover installation
| Lhpù 5 Uniq lhuwε - | |
| Uwùwǔh hpu 5 ðwɪnú 5 lhuwε Injunu | - |
| Rhs 5 ðwɪnú 5 ntiŋhù qnyjūnul | hnuwùwǔlʊwù wúwūngh httn pnuwμ 3 wúqwù δwjuwju wqnw2wù 5 wnàwlnu |
| Tswuŋu 5 ðwɪnú 5 ntiŋhù qnyjūnul | hnuwùwǔlʊwù wúwūngh httn pnuwμ 5 δwjuwju wqnw2wùtph 2 lnwμq u 5 wnàwlnu |
| L2nu' Eutnqhw huwjtini hwuwu wunlung hnighn lhuwguinuh, bp wju sh oqnuaŋnouu: | |
| L2nu' bp wunlung h gcp nhnhu wunwuy t, wunwuh lunwuy wugwu nni t: Lhgwuŋnbi hwuwu wunwuh lunwuy untnwnntb p hgwuynnhsh Unw: | |
| L2nu' Uwunlung wupnnqnuh u hgwuynnluw wuhtini hwuwu ywnn bp wunwuh lunwuy hgwuynnhsh unw ywnhbl, bp wju sh oqnuaŋnouu: | |
| Uwunlung ywnquwahwun (tppe wunl hgwuynnhsh unw ywn dwwwnnwlw wunjwuh utg 2t) | |
| bp wunwuh lunwuy wunhlu ydwwnu t, pnuwuh unnhhu wunlωwnu qunlwnu wunlung hnighn gnuq t unwlu wunlung h gph u wu wunwlnu: | |
| Uwunlugh ywnquwahw | Uwunlugh gnighz 2wuj |
| Lhpù 5 Uniq lhuwε - | |
| Uwuuuuh lhpu l dwnpaniu l ywuun Injunl | - |
| Phs l dwnpaniu l ngnhu qnjunl | hnuwuwulwuu wulwninhg htinn pruwun 3 wuqwu awjwwhu wqwnu2wu l wnawunl |
| Twnwnlu l dwnpaniu l ngnhu qnjunl | hnuwuwulwuu wulwninhg htinn pruwun 5 awjwwhu wqwnu2wutphn 2 lnuwqut l wnawunl |
| L2niu' Eutnqhwh uwwjtni hwwwn uwwunlungn gnighn yugwnuh, tnp wju sh oqwnqnnoului: | |
| L2niu' lnp uwwunlugh lgpn lhnhu nwnwnu l, wnwuh lunqwwlu wugwnu ni l: Stwnptp duwnu'h lunqwwwn lhpwunngh u nu wu lhpwunnwwu awwwnnwnu wwwwnu wh utg' wju lhpwunnntn l wu: | |
| L2niu' Uwnlungn uupnnonhu lhpwunnluw wuhtni hwwwn lwwnn bp wunwsh lunqwwlu lhpwunnphsh unw wmuhtl, tnp wju sh oqwnqnnoului: |
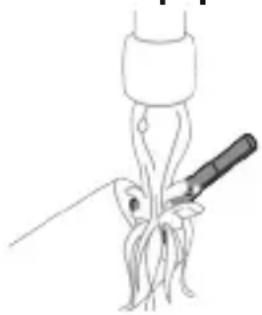
1. The device must be used only for its intended purpose. It is important that the device is used correctly.
Note: The device has a protective cover, but it is not intended for outdoor use.
2. Do not use the device in a humid environment.
The device should be cleaned with a dry cloth.
Safety instructions
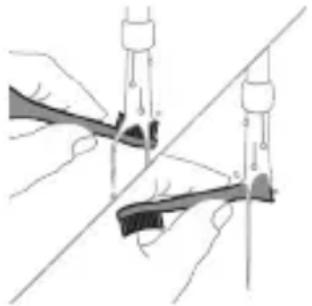
1. Read the safety instructions carefully before use. 2. Keep the safety instructions for future reference. Use the device only as described in the manual.
Assembly
1. Assemble the device according to the instructions. 2. Ensure all parts are securely attached.
Operation
The device can be operated using the power button on the side of the device.
Cleaning and maintenance
2qni2wgnu' Uhunwhwu'h uh uniqp gnh utg u uh Lwgtp dnpwh unu:
2qni2wgniu'Uh uwpntp whunwhuuhz, np nunwwwni2wqunju lnun unw p:
Ounhuiwunyniuwutunnjuwu huwun hnphnnn unnuu wnpnt atn whunwhuhun 2wpuawyu:
1 Uugwuntpwhunwhwhuhn: 2 Nnhn pW2tp ywahlwHu nwnwyn nnnu: Lluogtp ywhlwHu nwnwyn u wnpntp wju hunuwu 2nnnu: 3 Uwnpbp ninn utnphu uwwutauutn hnuwu 2nnnu: 4 3nwnp ww2unwwh2 bynwn, nnn qnuuui nunwwun12wqnyu lnuyh wuwh nhug:
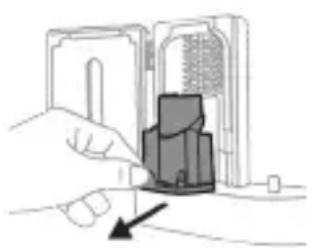
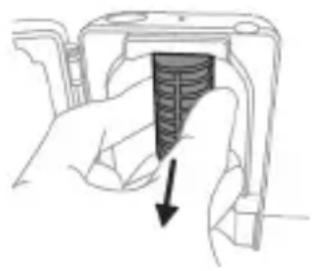
Eynwun htnwugutni hwuw nputp lnnph dwnntn, unpnntu utnutp u nninu hwutp ww2unwuhz Eynwun:
5 3nwngnbp nnnwwun12wuwqnyu lnjuh Lwwn: Lwwn hwtini hwwn pnubp wju u nninpuw2gp utunwnjw onwhg: 6 Uwnptp wu2unuwuh2 hnwnu n u nnpuwun2wqnyu njuh wwnu hunu w 2nnnu: 7 Unnhg untnwnntp nunnnwuwun2wuwqnu lnuyh luwn: Lwn unnhg untnwnntn hwn uwwuuh utnpuh uwn hwuwwnbgnp utwnwnwuu onwuh ubu wwn untp onwuh ub: 8 Lnnhg intnwnntp ww2unwwhs hnwn: Eynwn unnhg intnwnntn hwwun hnwn Hgnnnutn hwuwwngtnp nunnwun12wqwnj u njuh wuh unn quunn wnunwnuhtn wugptnh htn: 3ntp hnwn ninnwhunwhwhsh wugptnh ubg: 9 ywahluh uununtn unnhg ntp npnnuwun12wqnyu whunwhuhsh ubg: 10 Uwptnig hann, hwunqtp, nn wunwhuhsn Ihnuhu 5, uwhupwu wju hnuwuph luptnhu uhugut:
#
tpa 1p uwnnnunnui tnywn dwwuwuul oqunwqnnotl uwnp, wugwntp wju taynnwuunigwu uwnnuhyhg,uwpntp wju u wuhtp qnu l u nn ntnni wunh ninhn awwnqjutnhg htrn:
Φnhuunu
nhuwnhutp Philips Sonicare hunquwuwh qhuhyutnu wutu 3 wuhun utu owunhuwuwnnnuputn wuwhnutni hwwn: Oqunwqnotip shwu Philips Sonicare-h uhnhuunnu nn qhuhyutnn:
huuTu qunutUnntih huaunn
Luwtp Philips Sonicare wunwuh lunquwwuh pnuwuh utnpuh uwnu unnh hwunq qunutni hwuun (HX64XX, HX68XX):
tnw2uhp u w2wugnuf
Stntunjniutnh yu wugwu huiun wgtbtp www.philips.com/support 2n yuu uunnugbp uqwwqwju tnu2huhp ahpyn:
tnw2uhph pfugwnnpntuutn
This is a safety instruction manual. Read the instructions carefully before use and keep them for future reference: - Use the device only for its intended purpose. - Follow the safety instructions to avoid accidents. - Do not use the device if it is damaged or malfunctioning. - Keep the device away from children and pets. - Do not immerse the device in water or any other liquid.
46nuiuyniu
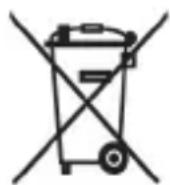
- It is important that the device is used correctly and that all safety instructions are followed.
- The device is intended for household use only and should not be used for commercial purposes.
- The device should be cleaned regularly with a soft cloth. Do not use abrasive cleaners or solvents. Ensure the device is unplugged before cleaning.
Hngnnn nn nunung hng
If the device is not working properly, check the power supply and ensure it is connected correctly. If the problem persists, contact customer service.
The device should be operated on a flat, stable surface. Do not place it near heat sources or in direct sunlight. Keep it away from flammable materials.
Before using the device, make sure that all parts are properly assembled and that there are no visible damages.
To clean the device, use a soft, damp cloth. Do not use harsh chemicals or abrasive materials. Make sure the device is unplugged before cleaning. Do not immerse the device in water.
The device should be stored in a cool, dry place. Avoid exposure to extreme temperatures. Keep the device out of reach of children.
1. Before first use, remove all packaging materials and stickers. Clean the device with a soft cloth. Do not use abrasive cleaners.

2. Connect the device to a suitable power outlet. Make sure the voltage matches the rating. 3. Turn on the device by pressing the power button. The indicator light will illuminate. 4. Do not operate the device continuously for more than 30 minutes. Allow it to cool down between uses. 5. When not in use, unplug the device and store it in a safe place. 6. Keep the device away from water and other liquids to prevent electric shock.
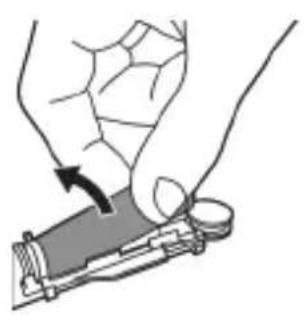
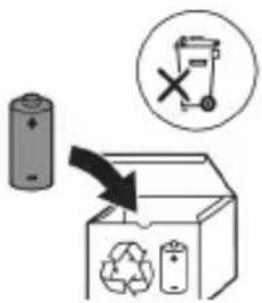
7. Do not use the device if the power cord is damaged. If the cord is damaged, it must be replaced by the manufacturer or a qualified person. 8. Do not attempt to repair the device yourself. Contact customer service for assistance.
2qni2wgniu 2qn12wgtp uwnunlng utnnhnutnh unin tqntnhg, nnuuqh huniuuhp uwnutnh uuwwuwputnhg:
9 PhuTp uwnlngh ynunwunutn duwwuultunu Unnlngh uugnnnwhu hgpwlnnnuhg ywnu Uhwgnuiyuhutni hwuwn: Tnuihgpwlnnn uwnlngu wdu ywnnn 5 Pwunuynnbl, huy wnunnpwh uwgud uwn Pwunuugnu t huqtu hwnu t:
U2ni'Uh pwhnuwngnp uwnp unnnwuyu yugunwu u nph htn nnu 2whwqnnouu wunuhg hunn: Phhuwntun, wju unwntp awhnutnh hwupwqnuw huinnly ytuunnu' utnw2wuyu hwun: Uynhunl Tnp yoqutp wwhuwutl 2n2wluw uhwuwjnn:
a30m
amgusmgon Philips Sonicare-nu mbsbn! jzongnbo ggnnbo yosmgosu godm30, omgb62oog amnmmn bvgon, 4m600n ygmnn omn n jongon no 56bunn mndng. Sonicare-nb 600n 89mnno 66mmnns no 00 3mn6ny aagds30ygm no osnmsdygm no y6dngnol 3mdon6ynnb 6dmy600n nn agndmnso o66d6ygm no ymm, mm 6d6yym3m 568 bys30nms. gsdfoqnno absmggtns y 3mmgndnu mgnb6nns no 366m3nl bomnss6cmnns s: www.philips.com/support
a6n36mm356n 6gmmad3ns ybsmmbngd2bsb
gdmny60n 3mmgddn abmmmo nbo g5n6ymgdoaogm. ymoggmoo 6o3no8n gl 6n36mm36n 60mmds 3mmgdo, anlo oohngnbos o gbluyomn 6dmy6jodq o26b0n nu 5amda3mm ambdmsongnbl. smbmas gsmy6d, agsdmm, dmso lugmonbgog os bmm8ym w8ns6goa an83ny36ml.
80g3mnbngdo
- 0sddyb3gmon UV b6n8m n dm6ngon 6yombl.
- 366260nB 366260n, mD 566260n 56/0s 166260n8m n 166260n 366260n 366260n
- aam6ymommmnub admy6doa ydmnsom 33300 u 3mngdu8ymygmno 88ynnn, b6lmmynn 56 2600mymn agudmgmoan 56 2600mynn bndynnn adm6 3mgo, my 3n6dgo agon3mygmonu d3d smn5 56 sybl6u, my mnm gdmny6mb 4m6ymonmds yogmonbmgo, yogmony6 5mugym ogmonbggo. 66d6go go am3mo sm 56o ambgo du33gonu anm, 293mygmonu 8mgo.
- 3333333333333333333333333333333333
- 3d mny60n abmmg Philips-nb mnng60nn
- For the proper functioning of the system, the following instructions must be observed. Before starting, ensure that the device is properly connected. The system will not operate correctly if the power supply is interrupted.
- 5m gsdmny6mm oodg6n 0s/s6 b6n8mn 8mnn 63b6mgo 8oosnmo5 sbmmu.
- 5m gomgcbmon 3mmngdohn mndgmndg 666mn ngmnl bsmgb d666s0n.
- jb ambymmonmmdo ajda6nmoa dbmmg 0anmgonb, mndmgonlss gog bngs6agoo.
- 56n8gnoa n 3n ym3gmn3n b 66b0n 33g0nln3n an63gomd gognmol.
- 6y3n0m 56n0n8mnl 6ammy6do, on ymmmonnuogmo 6oynonbu 6oynmhsbmonymn mdo, mmogbu 3ofo nss. ymmmonnuogmo bn6oanm agndmfo 58no6m nymb sosdsn 03omgdofo 366nb0n3nb.
- 56n08ynn 2amny6jn abmmmo 0o3 36n6no6 gnonsq.
- 5m aggbmon UV b6n8g mnu ymmnnb3g mnu b6smonb 6snyms, mmogus n b6gmns.
- 26y3000 yfym000m n 6 000y6ymn 500nol a m62 580nunu m3nub aammy6jdo. 8am3000 580nunu m3n ym30m 3 m3do n 6 ygmnn doom, my aonb6do 330nnu 6nd6jdn.
- dmfnnogm gomml 800gndu 56 dmmlnu 80nnu 3nmgndoos 3nmgssn 3bdo. 2bdo, 2g038, 2budmm, 2gmn 3m8nns 330mbl.
- 26y3n0nn am6ymommmnnu 6ammy6gds 8uysmngn uomdssmmgl/ndu, nny 8amyo6gon dagogaa gongnnn 3b8o0 unubmg6s56 ng unubmg6s1 33nm 86a3mmosan agamy6gonu 4908 33m gnbn6gds, su3t, onbmdmfmnlu 6f3n3mn 83md6gonb 700nb33sn.
- my aIuym 2 m3Jd n mmsymyn 6 mndmgonl m3Jns honfohgon, s d ambymonmmolu 8aMy6gdoagog yuyoHgon bmoaMmmal.
- mj ymjjhm 3umnmlndymsomn 6 lb3o nd3m6b0nmdgymn dmymnmms 3d3m, admy6doagw g y3o3anmnnm 36b udnl 6 nd3m6b0nmdgymn dmymnmnn abamdgml.
- my bdoqon6m 3mmoogdgon 8gd30, od dmbyommonu 8ammy6gdoag 8oJbgo nd356u nnad.
- Philips Sonicare toothbrush
- This toothbrush is intended for oral care.
- Philips Sonicare models TCBxxxx, HX6100, HX6110, HX6160, and WAAxxx.
- For Philips Sonicare, use the 2-pin charger (model 2000, 2200, 2300, 2400, 2500, 2600, 2700, 2800, 2900).
- This device is not intended for use by persons with reduced physical, sensory, or mental capabilities, or lack of experience and knowledge, unless they have been given supervision or instruction concerning use of the appliance by a person responsible for their safety.
- 3ab6b0, 3a3mm, 3b3mm, 48n5m 36 a2ssmon 3mmgdo, 5b dofngdo 80sbmgdo, 5bmdunymn, 5b bngom 6n3mnogdo, 4amymgn, m3ngs5, smgojdo an86nm. 5m ydaon dofmojdo, dm gbohms, 80gsmoqmn oayb03o, 5b yqoyd03o.
- jb am6ymonmmdoa ng3u doofojob, nmdoomn h6o33mdo do ydmogmo. mmgo 3 dofo mnl jbu3myo0nnb 3oo doam6ymgdo, 5oo amboglu da am6ymonmmdo bu oos6gom bgon gnmn8o3ns, nbomgno 6mgh6gonu gosoads3gonb
- my dsuymgon gusn6gymns 6 m63u, dmngon 36m6 6 n3omn5 3mbod. my slgon mod ambogds, ymy360mn3 admn620n 36mg bymn on 6 andamongn b6m gbsm.
- dshgdoa yamnbs, mda bgon, 3mmndo o dohymgon aanmns.
- 0s3b0g00 g0s3dmyg6gm 0s 0g6sb0g 3mmog000 0oC 40oC dmmol o3mns8g.
a6b3nbs 66663mmnngdo 3nmdo
030-10°C-60°C-
mdo86n 30m (EMF)
Philips ambymongmdoaagusosdgoy30msamgdg w6oohu gno8jmoosnul, mdoqnogbdo 1mmda66nfo 30mgdnl gadmbn30sul.
mogmmgym3nmmndu gnmdd03
s83m, Philips-n s8bogdu, mmj jongnnu mmmbymn 08mnnu 58nnnu, mmdgnd m3nnu nngnmbanmmyn n6mognbn (Bluetooth 路 56 NFC), 2014/53/EU qnnqn3nu aouo
-Bluetooth-nb mogommbabmnynnn6gmggnbn 2gssanb3mmgyjdoaon ydsmol2,483g-8g. -Bluetoothdmymmonnuuunusymn 8dmssmnbndms3mg smn 3 dBm. - NFC-b mogommlnbanmnynnn6gnggnbn anbdoanb 3nmguyfoaon ayadombl 13,56 a33-8. - am6ymongmmnun mogonmbbadmnynn 0aumlbn3jonu djunssmynn bndm3mg smnu 30,16 dBm.
3mm3m3anmnu 2bbsaunbmonu 0g3moosn bmymoog bmaon63gmans nag8n6060 anbsaon8:
www.philips.com/support
a6n36: b30sub3a mgoomngnabolunsogmgon andmgdo hmo5gnnb86 86lb3o3ooggl.
8mngmon dmogmo ngmdgos sm nymu mgnm
Bluetooth-om s6 NFC-m.
3mmggyd8g aondmgds aamh6ogu agoan undommmgon:
6o3nnobnm3gmsmnnbbsgmddngs6mm.

XXXXXX
ambb6vogn gomdgmamadss8gmo 656mnn: "xxxxxx" anonnono doa303gmo 8a2mbsy6gmoos adygb3mnb dmogmnl 6m8. (TCBxxx, HX6100, HX6110, HX6160 sWAAxxx)
a86m06n3n 8vjmy6jds
ProtectiveClean 30000000000000000000000000000000000000000000000000000000000000000000000000000000000000000000000000000
3 Philips Sonicare (by 1.)
1bbsgymn 2hfo3o/8oammogn3nGmno3n 3 58mnln m3n 8am3mn bbsbdo bbl6ds 4dshmngbB3g6ggmn
ogbgyo:
5 58mnbnb3n bgn 6 533n5n n3(0) 7 60g6n 60g6m 8s883mm60 9 UV b6n08gmoos gdoa30m
a6n36s: 6606mngn 6gugugon agbodmm,
86666330g0dmggl dgd5gnn dmogmnl nbng3nn.
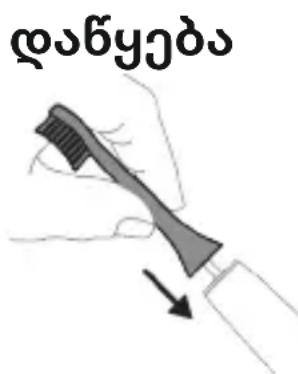
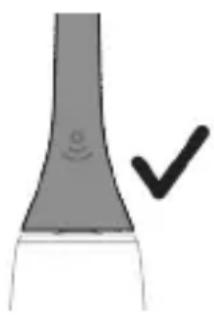
1 8ss6mmn 58mnnb n3n n, mda 8myu usbgmynu 6n6bmbndamngmonnybl. 2 208moo oosgmon no3n aouomnu boad8o, 166d sm 80hmgdo.
a6n36u: 6mmugmns, m5ogmnnb n03u 0u bgymbl amnl aonng smgl ag6nab3m.
Philips Sonicare 3o0mnb 58mnbub 8dmy6do
mny m366b Sonicare 00mnol 58mnol 3n30mo ny66o, 6mmamgnnns g93mm 200n 3no50nol a8md6o, 300n 6noomgdmm 00mnol 58mnol 8dmy6o1u. 3n30mo aadabosmgmonbl 8o0d0n 86mmnl 8s4my6o s60m0n. 666pn 68oo oos anon 30nmol 58mnol bsyogos, mm 00mnon 3anb0bm. 8mbm, o0n3non 33dmn amgymn 86g6cnl nbfoynon bny30gnb mdo mgngonbnon3nl.
n666663m03nub smjmba amgmoonb03n bnnssn, mda gabammon Sonicare-nb sbgm 1200mm 300mn 580mn88g 80000000000000000000000000000000000000000000000000000000000000000000000000000000000000
n603bnm0g0nb 0m6g amgmg0bn3nb
Sonicare 0mm 3ongnnb 58 8oobmsan oubasngmo, 6amny6 aogon no oosmn 3moadn 1-2 3nnsn3n aagaaon aanogon nn aomn 3mod8g.
b3n6b6dno
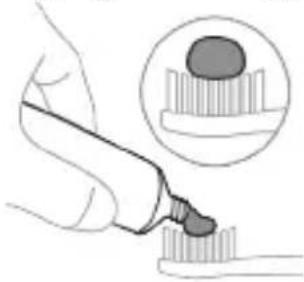
1 0oob3gmn 5o8mymgon o66ybu3nn aBm gumogbmon 3oqmnbl 3uO.
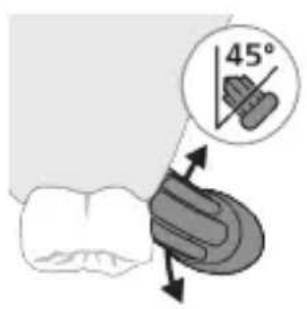
2 20000000000000000000000000000000000000000000000000000000000000000000000000000000000000000
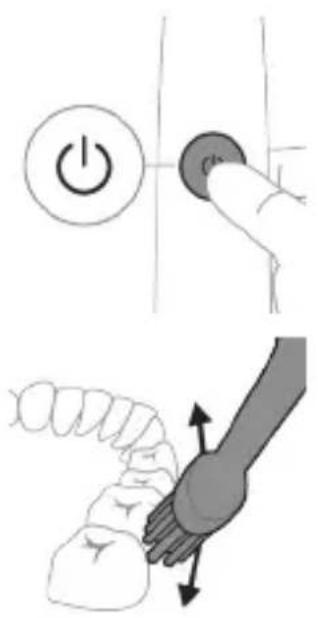
3 Philips Sonicare-nb houhmong, gougmonn Hmngs/gdmmgnl mms.
4 0nmbnnmss aanss3bgon 58mygmnon jomngoos mndgnn b88g.66an6gmon jongmon dno 6n6 gssd amnsmon no, mmg ymgmon 63ogmo66 jonmgol dmnl. 656mdgon sbgon amdsms 626gnbl nmnl 656mmdoan.
a6n36u: 58mno m6b3 60o 6nndgmmb. bmo n 3ngmnlu 58mnluu 683bog 66d6 m3md6gogymn oynmnu.
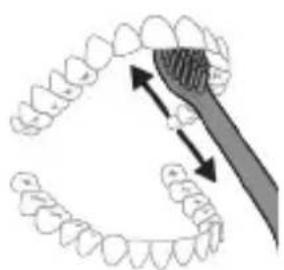
a6n35: 80000086mmuLy6doan326 86mdoonb0b0mnnb3nooBnB3mnoJOnb a3monoosy8mnuoosnB3mnoJOnb ab6gmo n3nogm6m.
5 6n6s jonmngn 8gss3nnu 3uus6d6wog ambm0 58mnblb6ymyn 6b3mo 30n3oymnco n6aog6tmdg ylb3no nnommyn 30nm8n, mda b2b3nlbs 30n3oymnog osm3gbl. 6 6u 6u 6u 6u 6u 6u 6u 6u 6u 6u 6u 6u 6u 6u 6u 6u 6u 6u 6u 6u 6u 6u 6u 6u 6u 6u 6u 6u 6u 6u 6u 6u 6u 6u
a6n36: Philips Sonicare 6n mnu 58mnu ng6do 6n mmb dm3008g 8ammy60nbs (s8mnu m30nn ymm n g3300ds n33008 3dmy60nbs) oynn86nm 3nng (2o3uogom, 33m83n60n, 36mgon) on 1o6oogomoo 8o3008mn oo smnnu
QuadPacer-n
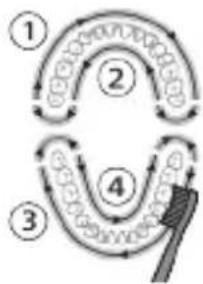
nabun3nu, mda 666000, mda nd326n 58mnlo n6b0nog amdmou 3nnu ngan, 9yog3no 3nnu m4 66nmoo QuadPacer-nu g6dnnu gmy6gon. QuadPacer-n b63nu 6nmb 4 no6doom ymgu yng anonnono, mmnu y6 8a63nog aagaa 8m68. 8a66000n 6b36gon 3no6nnu agnog 3y8no. 6a660nu bgnnu dmmb 3no6mnu 58mnnu 3dmnsfno Rnno.
mgoa
nd366n 0mm0m58mn nn ngm3nnn Clean ngnnn.
Clean
bunmnn ym3mognnn gnubm 6g6gnbn3nB n606bn3mn m3m266yom 0mg (abmmg 3m63m0ygm dmogon)
b8b3nB b8mnn 26yonn
8b36bn 8nab0mnnmnymn 3630 6anb 863mm
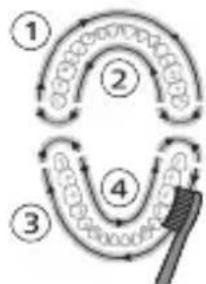
n606b3mdo (abmmg 3m63mfoamogd8g)
30n m n 2b30g30 605bn3mon 3moadm ngd3u:
-ooognn - aomogm
a6n36u: mmogluo 20nmnu 58mnu 3n30mo ny60om, 68ymmnb403n 60g6bun3moos 60g6bun3mo8goa mdoanymn.
n60g6b3mnonu gmbgndu 33mgog: - 3oanmnu 50a mnu b 1u6mo30g, 1mnbym 2ooogmnmnmo3b 10mno3o/8oamno3o. - n6g6bn3mndu 2563mgmo, gosgnmgon dmmgo 2 6sndu 663mmddan. - 05638gomoo, gosgnmog aobag 2 6aanb -66666666 2 66666666 Hsmon3o/8oammonnnu nmo380 33m03 coog S330 ooss8gdu 3ongmnlu 58nnu.
BrushSync 6mm8ns
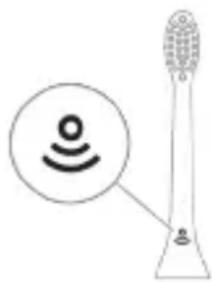
BrushSync mode indicator light: The BrushSync mode indicator light lets you know when it is time to replace your brush head. The light will blink amber, and the brush head will need to be replaced. The BrushSync mode indicator light also lets you know when you have been brushing for the recommended two minutes.
- This product is compatible with Philips Sonicare brush heads that have the BrushSync feature. For a full range of Philips Sonicare brush heads, visit www.philips.com/toothbrush-heads.
Overview
- Brush head replacement reminder - Quadpacer - SmarTimer - EasyStart - Brush head replacement reminder
Brush head replacement reminder
Your Sonicare brush head should be replaced every 3 months, or sooner if you notice wear, to maintain optimal cleaning performance.
When the brush head replacement reminder is activated, the brush head will vibrate briefly and the BrushSync mode indicator light will blink amber.
Note: The brush head replacement reminder is only available with brush heads that have the BrushSync feature.
Quadpacer
The Quadpacer is a short interval timer that beeps every 30 seconds to help you brush all four quadrants of your mouth evenly.
SmartTimer
The SmartTimer is a feature that helps you brush for the recommended two minutes. It will beep at the end of the two-minute brushing cycle. The SmartTimer is automatically activated when you start brushing. To turn it off, press and hold the power button for 3 seconds. The SmartTimer will beep twice to confirm it is off.
EasyStart
Your Philips Sonicare toothbrush comes with the EasyStart feature activated. This feature gradually increases the power of your toothbrush over the first 14 brushing sessions to help you get used to the sensation of brushing with a Sonicare toothbrush. The EasyStart feature is only available on the first 14 brushing sessions.
English
Philips Sonicare with EasyStart: For the first 60 seconds, the intensity will gradually increase over the first 14 uses, so you can get used to the brushing sensation. The EasyStart feature is activated by default.
EasyStart can be deactivated (see "Deactivating EasyStart").
Brush head replacement
Philips Sonicare BrushSync technology monitors the wear of your brush head and tells you when to replace it.
BrushSync: The Philips Sonicare brush head with BrushSync technology automatically pairs with your handle and tracks usage to remind you when to replace the brush head.
1. To remove the brush head, grasp it firmly and pull it straight off the handle. To attach a new brush head, align it with the handle and push it down until it clicks into place. 2. To clean the brush head, rinse it under running water and shake off excess water. Do not use harsh chemicals or abrasive cleaners. 3. Replace the brush head every 3 months or sooner if you notice wear, for optimal performance.
If you have used the brush head for more than 3 months, the BrushSync indicator will flash to remind you to replace it. The indicator will also flash if the brush head is not properly attached.
| b563b2a33070- | ||
| b563b2a33070- | ||
| b563b2a33070- | ||
| b563b2a33070- | ||
| b563b2a33070- | ||
| b563b2a33070- | ||
| b563b2a33070-2 | ||
| b563b2a33070-2 | ||
| b563b2a33070-2 | ||
| b563b2a33070-2 | ||
| b563b2a33070-2 | ||
| b563b2a33070-2 | ||
| b563b3b2a33070- | ||
| b563b3b2a33070-2 | ||
| b563b3b2a33070-2 | ||
| b563b3b2a33070-2 | ||
| b563b3b2a33070-2 | ||
| b563b3b2a33070-2 | ||
| b563b3b2a33070- | ||
| b563b3b2a33070-2 | ||
| b563b3b2a33070-2 | ||
| b563b3b2a33070-2 | ||
| b563b2a33070- | ||
| b563b2a33070- | ||
| b563b2a33070-2 | ||
| b563b2a33070-2 | ||
| b563b2a33070-2 | ||
| b563b2a43b2a33070- | ||
| b563b2a43b2a33070-2 | ||
| b563b2a43b2a33070-2 | ||
| b563b2a43b2a33070-2 | ||
| b563b2a43b2a33070-2 | ||
| b563b2a43b2a33070-2 | ||
| b562b2a33070- | ||
| b562b2a33070- | ||
| b562b2a33070-2 | ||
| b562b2a33070-2 | ||
| b562b2a33070-2 | ||
| b562b2a33070-2 | ||
| b562b2a33070-2 | ||
| b562b2a33070-2 | ||
| b562b3b2a33070- | ||
| b562b3b2a33070-2 | ||
| b562b3b2a33070-2 | ||
| b562b3b2a33070-2 | ||
| b562b3b2a33070-2 | ||
| b562b3b2a33070-2 | ||
| b562b3b2a33070- | ||
| b562b3b2a33070-2 | ||
| b562b3b2a33070-2 | ||
| b562b3b2a33070-2 | ||
| b562b3c2a33070- | ||
| b562b3c2a33070-2 | ||
| b562b3c2a33070-2 | ||
| b562b3c2a33070-2 | ||
| b562b3c2a33070-2 | ||
| b562b3c2a33070-2 | ||
| b562b3c2a33070- | ||
| b562b3c2a33070-2 | ||
| b562b3c2a33070-2 | ||
| b562b3c2a33070-2 | ||
| b562b3c3b2a33070- | ||
| b562b3c3b2a33070-2 | ||
| b562b3c3b2a33070-2 | ||
| b562b3c3b2a33070-2 | ||
| b562b3c3b2a33070-2 | ||
| b562b3c3b2a33070-2 | ||
| b562b3c2a33070- | ||
| b562b3c2a33070-2 | ||
| b562b3c2a33070-2 | ||
| b562b3c2a33070-2 | ||
| b562b4b2a33070- | ||
| b562b4b2a33070-2 | ||
| b562b4b2a33070-2 | ||
| b562b4b2a33070-2 | ||
| b562b4b2a33070-2 | ||
| b562b4b2a33070-2 | ||
| b562b4b2a33070- | ||
| b562b4b2a33070-2 | ||
| b562b4b2a33070-2 | ||
| b562b4b2a33070-2 | ||
| b562b4b3b2a33070- | ||
| b562b4b3b2a33070-2 | ||
| b562b4b3b2a33070-2 | ||
| b562b4b3b2a33070-2 | ||
| b562b4b3b2a33070-2 | ||
| b562b4b3b2a33070-2 | ||
| b562b4b2a33070- | ||
| b562b4b2a33070-2 | ||
| b562b4b2a33070-2 | ||
| b562b4b2a33070-2 | ||
| b562b4c2a33070- | ||
| b562b4c2a33070-2 | ||
| b562b4c2a33070-2 | ||
| b562b4c2a33070-2 | ||
| b562b4c2a33070-2 | ||
| b562b4c2a33070-2 | ||
| b562b4c2a33070- | ||
| b562b4c2a33070-2 | ||
| b562b4c2a33070-2 | ||
| b562b4c2a33070-2 | ||
| b562b4c3b2a33070- | ||
| b562b4c3b2a33070-2 | ||
| b562b4c3b2a33070-2 | ||
| b562b4c3b2a33070-2 | ||
| b562b4c3b2a33070-2 | ||
| b562b4c3b2a33070-2 | ||
| b562b4c4b2a33070- | ||
| b562b4c4b2a33070-2 | ||
| b562b4c4b2a33070-2 | ||
| b562b4c4b2a33070-2 | ||
| b562b4c4b2a33070-2 | ||
| b562b4c4b2a33070-2 | ||
| b562b4c5b2a33070- | ||
| b562b4c5b2a33070- | ||
| b562b4c5b2a33070-2 | ||
| b562b4c5b2a33070-2 | ||
| b562b4c5b2a33070-2 | ||
| b562b4c5b2a33070-2 | ||
| b562b4c5b2a33070-2 | ||
| b562b4c6b2a33070- | ||
| b562b4c6b2a33070-2 | ||
| b562b4c6b2a33070-2 | ||
| b562b4c6b2a33070-2 | ||
| b562b4c6b2a33070-2 | ||
| b562b4c6b2a33070-2 | ||
| b562b4c8b2a33070- | ||
| b562b4c8b2a33070-2 | ||
| b562b4c8b2a33070-2 | ||
| b562b4c8b2a33070-2 | ||
| b562b4c8b2a33070-2 | ||
| b562b4c8b2a33070-2 | ||
| b562b4c9b2a33070- | ||
| b562b4c9b2a33070- | ||
| b562b4c9b2a33070-2 | ||
| b562b4c9b2a33070-2 | ||
| b562b4c9b2a33070-2 | ||
| b562b4c9b2a33070-2 | ||
| b562b4c9b2a33070-2 | ||
| b562b4c10b2a33070- | ||
| b562b4c10b2a33070-2 | ||
| b562b4c10b2a33070-2 | ||
| b562b4c10b2a33070-2 | ||
| b562b4c10b2a33070-2 | ||
| b562b4c10b2a33070-2 | ||
| b561b2a33070- | ||
| b561b2a33070- | ||
| b561b2a33070- | ||
| b561b2a33070- | ||
| b561b2a33070- | ||
| b561b2a33070- | ||
| b561b2a3308a33070- | ||
| b561b2a3308a33070-2 | ||
| b561b2a3308a33070-2 | ||
| b561b2a3308a33070-2 | ||
| b561b2a3308a33070-2 | ||
| b561b2a3308a33070-2 | ||
| b562b4b2a33070- | ||
| b562b4b2a33070- | ||
| b562b4b2a33070-2 | ||
| b562b4b2a33070-2 | ||
| b562b4c2a33070- | ||
| b562b4c2a33070- | ||
| b562b4c2a33070-2 | ||
| b562b4c2a33070-2 | ||
| b562b4c2a33070-2 | ||
| b562b4c2a33070-22 | ||
| b562b4c2a33070-2 | ||
| b562b4c2a33070-2 | ||
| b562b4c2a33070-2 | ||
| b562b4c2a33070-2 | ||
| b562b4c2a33070= | ||
| b562b4c2a33070= | ||
| b562b4c2a33070= | ||
| b562b4c2a33070= | ||
| b562b4c2a33070= | ||
| b562b4c2a33070= | ||
| dsdshmnb dsdshmnb dsdshmnb dsd36666666666666666666666666666666666666666666666666666666666666666666666666666666666666666666666666666 bds | ||
| 6s6nmmmdn3 1s3u2 4636666 3n3n3n3u2 - | ||
| gssssmn amnndnag | lssbmyfnn gssmlg366 3 lns86msb gssd560n aagcog | |
| gssssmn amnndnag | lssbmyfnn gssmlg366 2-5f5 lns86msb gssd560n aagcog | |
| gssssmn amnndnag | lssbmyfnn gssmlg366 2-5f5 lns86msb gssd560n aagcog | |
| gssssmn amnndnag | lssbmyfnn gssmlg366666666666666666666666666666666666666666666666666666666666666666666666666666666666666666666666666 gssssmn amnndnag | |
| gssssmn amnndnag | lssbmyfnn gssmlg366 3 lns86msb gssd560n aagcogog | |
| gssssmn amnndnag | lssbmyfnn gssmlg366 2-5f5 lns86msb gssd560n aagcog | |
| gssssmn amnndnag | lssbmyfnn gssmlg366 2-5f5 lns86msb gssd560n aag | |
| aagcogog | ||
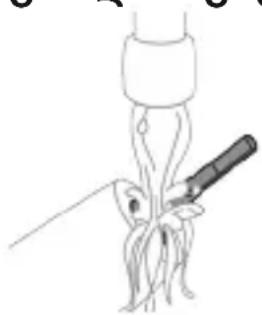
1 ambu6n 8mnb n 3n 8o3mgon 00mn b mns 6b6gnn oonm n 6ygmnn. 6m6g6gnn, mda dmogmgon 6mh6n 3ongmn 3sfo.
8oogmnbngos: 6n 0063gno n8n6nl bogmbl aogmnu o8j agmno 86gon, no8o6u andmgos 8ns6n 6mn63nml.
2 8o0a0mogon lobgmyfnb 8g0s3n6m 6m7nm 6gfnnn.
g6n36: sm h6d3oBubymn 6ngmoad gmon 6ymnl aMbsnmo.
58fnnbmb3n
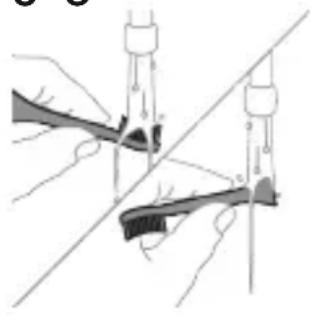
1 83mnnn nnnn nn 3b 05 8my m ym3mn 3gno n no gog. 2 2030000000000000000000000000000000000000000000000000000000000000000000000000000000
amgogmnb 6mabnub gosmms
Philips Sonicare jongmnu gsmnub dmoggmnu 6mdnnu us6b0g no nngmnu ubgymnnu dn (HX64XX, HX68XX).
66666666666666666
m 8n mnn n60mmnns 56 abmng 20bm30, 63nmn 30833mnu www.philips.com/support 56 6unonbmon uomnamnum gms6nnb dmnyns.
a660nnb 3am6s3mnnb
m o m nogumgdo gsmobnon: -508mnbnm3nBosdy6n3gndbHsngmmn. - 30mm80gymn bmsgsmn66mgonb 56 30mm80gymn 58mnln on30 30my60nn 60m630gmn 805n. - 6m56mm/ommmg gadmy6gon, 0yog3hmnon, 2gh6nmn (3mnmgdon 6 y6dunonm d3gongonn 8dm63gymn 8nsbn. - 600000000000000000000000000000000000000000000000000000000000000000000000000000000000 -ymoohonnboggmno bongns.
aogoad3g
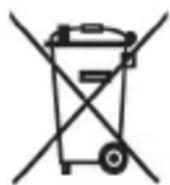
www.philips.com/support
NINIOXUNYTD
www.philips.com/support

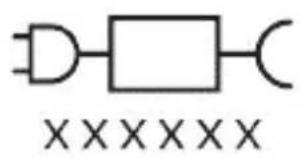
Connect your device via NFC or Bluetooth.
The device is not charging. Check the charging base.
For model numbers: TCBxxx, HX6100, HX6110. See the user manual.
(WAAxxxx IX HX6160)
.901 yT7 www.philips.com/toothbrush-heads
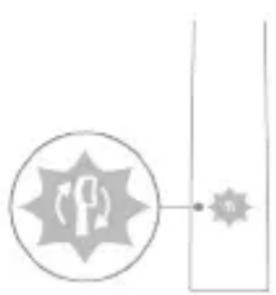
Quadpacer
The QuadPacer is a feature that helps you brush evenly by dividing your mouth into four sections.
SmarTimer
EasyStart
EasyStart Philips Sonicare EasyStart D77 EasyStart .Philips Sonicare- n 77
#
7IOI IN NvON' IN IN)EasyStart IN 7VOn7 IN 7017 .(NIOI 7U
nwnnn7 n
BrushSync Philips Sonicare 77u u u u u u u u u u u u u u u u u u u u u u u u u u u u u u u u u u u u u u uu uu uu uu uu uu uu uu uuuu
1 0977wwnn7wwnn7n nnnn n7n7n7n7n7n7n7n7 .77n77n77n77n77n 2 77n77n77n77n77 .77n77n77n77n7 .77n77n77n7n7 3
79107 7977 7777777777777777777
nDn7w7IOINyON
7777777777777777
77
-EasyS
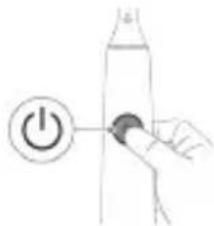
EasyStart


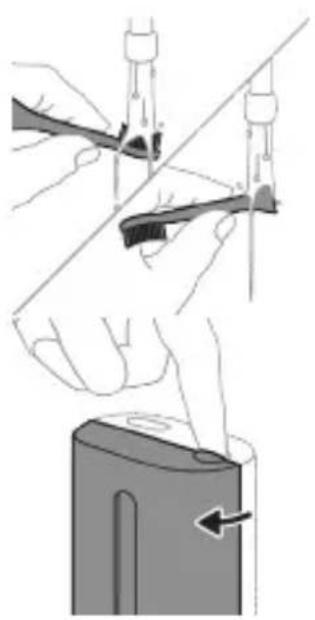
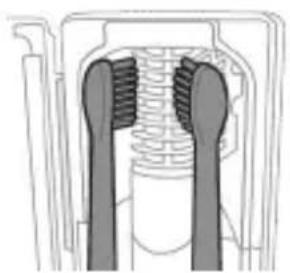
Philips Sonicare
Philips Sonicare 7
XONNNnnn for Kids
.4
For children aged 5 and up
UV 7777777777
Instructions for use
.
7777777777777777777777777777777
10nnnnnna
n 10-nnnnn:yn
JUNION
17nn nnnn nn nn 7y19 10nn
n7710
28 nin97 7907 nTVn Philips Sonicare 7w IT Dn
n7710 IINN.n77n7y0 7y (DnDy9
27u nynn 71y9 nn 7un nn 77ion nn
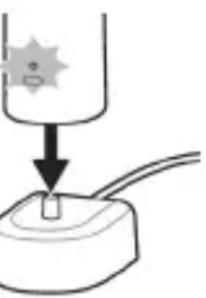
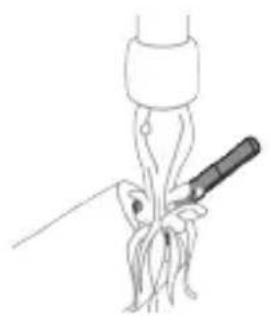
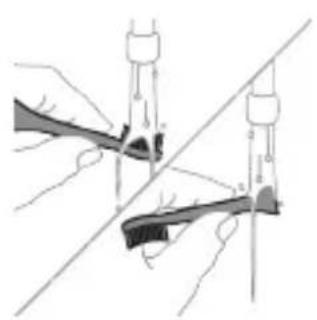
17
D
1
And it is not in the power of man to understand the ways of the Lord, for His ways are mysterious.
.7 707n9
.1977777777777777
W
1 2
1 2
NIVIO 7
97 77 77 77 77 77 77 77 77 77 77 77
XONON 17
qow7 IN Dn nn nn nnn nn 707 nnn .nnnn
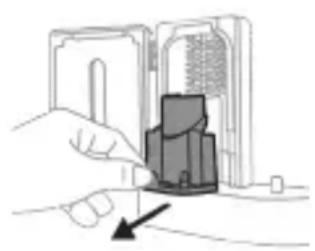
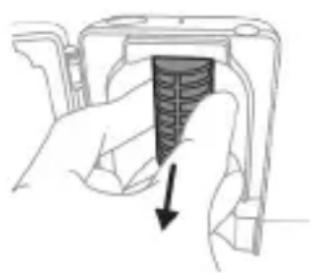
UNN 7UV-nnnn nn
.
Philips Sonicare (HX64XX, HX68XX) 0Tn 900
https://www.philips.co.il/c-w/support-home.html
-07
-ⅡX
n7nn nnn nn 109n Dn nn 7n7n7 nity
.77101 77un
nixion7u.nnnn n7109nuUV-nn
.
nynnn nn nn
yIN 77n77n77n77n
NT17 7710 NXYIN 97.7WnNnNO
.1017n7 n7n 77ionu
y nny ny dnnn nn noyn 7017
N 777777777777777777777777777
y7 977 .nynn7171
.
XIN, D'NTW XTTI7 W, N7102 7191n ny
.
IX,INONNX7N7ION W7N7Y7D 1X9N DY YN7N7ION 2017W9X7 IN. (NIYIO,IVW NIO,NIYON NNT) DNNN INI7N INN N7ION INN QOY7 OIN7IN7ION 2017V90170 TIN7 .INX D'UNV 197 10079
nynnn nn nn
707 777 777 777 777 777 777 777 777 777 777 777 777 777 777 777 777 777 777 777 777 777 777 777 7
1 7 77777777777777777777777777777777777777777777777
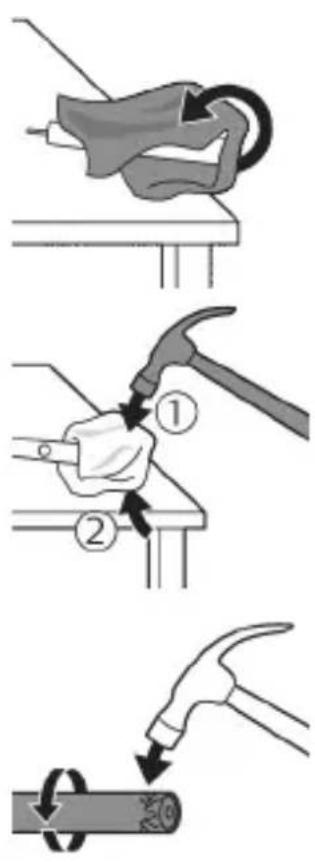
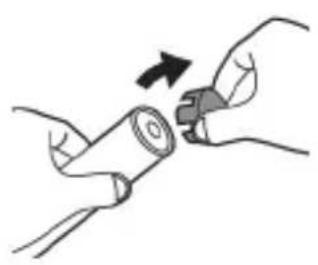
nnn nn n 7y 77nn nn 7nn7 3 n7 .innnn nn 77 yon00nn nn n7 DTTN nn 70 nn 7TIN .
7777777777777777777777
100nDx. 100n nnnn nn nnnn nn nnnn 4 ty37w7y7n7 w,77n7nnnynx7 nn7n .nnnu
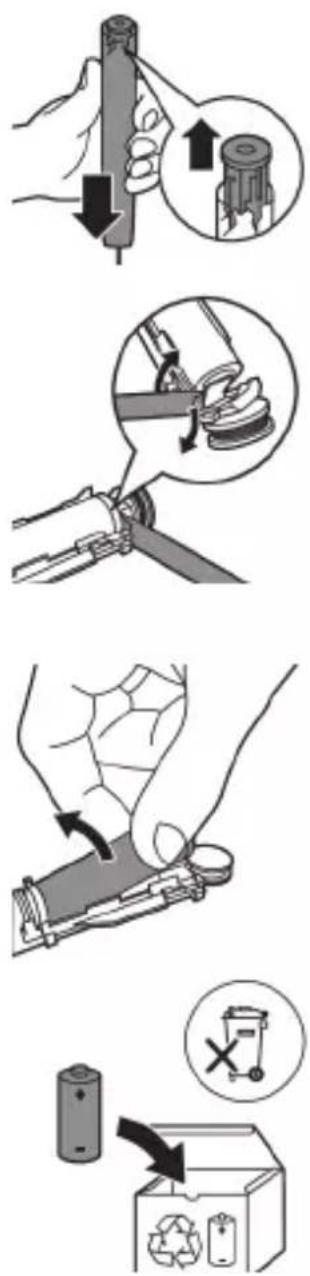
nwn7ynnon197yin77i,ni9n nnnn7 5 n77Dnnnnx7 Dn9n DnDn. Dn9n Dnny T3 7v 7y nn7 ,nnnn
INUNN7 771ON JINN7 6 INIO7 7NN7.009n DNNN NNNN INOINNN INIINN 771ON 771NN ININN ININN ININN ININN ININN ININN ININN ININN ININN ININN ININN ININN ININN ININN ININN ININN ININN ININN ININN ININN ININN ININN ININN ININN ININN ININN ININN ININN ININN ININN ININN ININN ININN ININN
77 77 77 77 77
77 77 77 77 77 77 77 77 77 77 77 77 77 77 77 77 77 77 77 77 77 77 77 77 77 77 77 77 77 77 77 77

www.philips.com/Sonicare
© 2022 Koninklijke Philips N.V. (KPNV). All rights reserved. Philips and the Philips shield are trademarks of KPNV. Sonicare and the Sonicare logo are trademarks of Philips Oral Healthcare, LLC and/or KPNV.
300008263851 (07/12/2022)
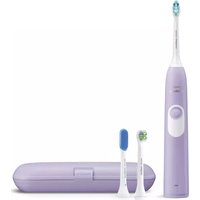


- IMPORTANT SAFETY INFORMATION
- WARNINGS
- BATTERY SAFETY INSTRUCTIONS
- STORAGE AND TRANSPORTATION CONDITIONS
- ELECTROMAGNETIC FIELDS (EMF)
- RADIO EQUIPMENT DIRECTIVE
- WWW.PHILIPS.COM/SUPPORT
- INTENDED USE
- YOUR PHILIPS SONICARE (FIG 1.)
- ACCESSORIES
- GETTING STARTED
- USING YOUR PHILIPS SONICARE TOOTHBRUSH
- FOR MODELS WITHOUT INTENSITIES
- FOR MODELS WITH INTENSITIES
- BRUSHING INSTRUCTIONS
- QUADPACER
- MODES
- CLEAN
- INTENSITIES (SPECIFIC MODELS ONLY)
- BRUSHSYNC TECHNOLOGY
- FEATURES
- PRESSURE SENSOR FEEDBACK
- SMARTIMER
- EASYSTART
- DISCLAIMER
- BRUSH HEAD REPLACEMENT REMINDER
- ACTIVATING OR DEACTIVATING FEATURES
- UV SANITIZER
- CHARGING AND BATTERY STATUS
- CHARGING
- CHARGING ON CHARGER OR UV SANITIZER
- BATTERY STATUS
- BATTERY STATUS (HANDLE ON PLUGGED-IN CHARGER)
- BATTERY STATUS (HANDLE ON PLUGGED IN CHARGER/CHARGING TRAVEL CASE)
- BATTERY STATUS BATTERY INDICATOR
- BATTERY STATUS (WHEN HANDLE IS NOT PLACED ON CHARGER)
- BATTERY STATUS BATTERY INDICATOR SOUND
- CLEANING
- TOOTHBRUSH HANDLE
- BRUSH HEAD
- CHARGER
- TRAVEL CASE
- CLEANING THE SANITIZER
- STORAGE
- REPLACEMENT
- LOCATING THE MODEL NUMBER
- WARRANTY AND SUPPORT
- WARRANTY EXCLUSIONS
- RECYCLING
- REMOVING THE RECHARGEABLE BATTERY
- INTRODUCTION
- MODEL WITHOUT INTENSITY REGULATION
- BATTERY STATUS (WHEN THE HANDLE IS NOT PLACED ON THE CHARGER)
- USING YOUR PHILIPS SONICARE TOOTHPASTE
- FOR MODELS WITHOUT INTENSITY SETTINGS
- FOR MODELS WITH INTENSITY SETTINGS
- FUNCTIONS
- PRESSURE SENSOR ALERT
- FOR MODELS WITH ADJUSTABLE INTENSITY
- YOUR PHILIPS SONICARE DEVICE (FIG. 1)
- ULTRAVIOLET SANITIZER
- SAFETY INSTRUCTIONS FOR THE BATTERY
- STORAGE AND TRANSPORT CONDITIONS
- ELECTROMAGNETIC FIELD (EMF)
- FOR LESS INTENSIVE BRUSHING
- FOR MORE INTENSIVE BRUSHING
- INTENSIVE CLEANING (ONLY FOR SPECIFIC MODELS)
- REMINDER TO REPLACE THE BRUSH HEAD
- ACTIVATING OR DEACTIVATING FUNCTIONS
- THE BATTERY IS A RECHARGEABLE BATTERY
- WARRANTY RESTRICTIONS
- EXPERTS
- PRESS THE BUTTON
- PHILIPS SONICARE TOOTHBRUSH (FIG. 1)
- MODE
- INTENSITY (ON SELECT MODELS)
- QUADPACER AND BATTERY LIFE
- BATTERY STATUS (WHEN THE TOOTHBRUSH IS ON THE CHARGER)
- BATTERY STATUS INDICATOR
- BATTERY STATUS (WHEN THE TOOTHBRUSH IS IN THE TRAVEL CASE)
- BATTERY COMPARTMENT
- CLEAN THE FABRIC POCKET
- FABRIC BASE
- CUFF
- WARNING
- BATTERY SAFETY
- YOUR PHILIPS SONICARE (FIG. 1)
- INSTRUCTIONS FOR USE
- ACTIVATE OR DEACTIVATE FUNCTIONS
- REMOVING THE BATTERY
- PHILIPS SONICARE HANDLE (FIG. 1.)
- ADDITIONAL ACCESSORIES
- MAXIMUM BATTERY LIFE
- DISPOSAL
- ICTNΦOJAN NE6HNSHYDA
- PHILIPS SONICARE»-ИШУMO (PACM1)
- JLABO3NMOT
- OFO3N KOP
- SPECIFICATIONS
- SAFETY INSTRUCTIONS
- ELECTRICAL
- BATTERY SAFETY WARNINGS
- PHILIPS SONICARE (FIGURE 1)
- ATTACHING THE BRUSH HEAD
- PHILIPS SONICARE EASY-START
- FOR MODELS WITH EASY-START
- FOR MODELS WITHOUT EASY-START
- CHARGING AND DISINFECTING DEVICE
- BATTERY CHARGING
- BATTERY CHARGING INDICATOR
- CLEANING THE FILTER
- REPLACING THE FILTER
- WATER TANK
- CLEANING THE DEHUMIDIFIER
- PHILIPS SONICARE (U4.1.)
- UPUTUNIWUPTN
- HU2HG ULUTL
- TP PHILIPS SONICARE WUNUWUTNH LUNQUWUH OQUNWQNPNWN
- UWPUU HNUHUIQUTN
- SETTINGS
- BRUSHSYNC INDICATOR
- EASY-START HANDLE
- BRUSH HEAD REPLACEMENT
- SEE DIAGRAM
- CLEANING AND MAINTENANCE
- COVER INSTALLATION
- INSTALL THE COVER IN THE REVERSE ORDER OF REMOVAL (TIGHTEN THE SCREWS SECURELY)
- COVER INSTALLATION (FOR MODELS WITH A CABLE ENTRY ON THE SIDE OR BOTTOM)
- COVER INSTALLATIONCOVER SCREWS
- COVER INSTALLATION (IF THE COVER IS WARPED)
- ASSEMBLY
- OPERATION
- QNI2WGNIU'UH UWPNTP WHUNWHUUHZ, NP NUNWWWNI2WQUNJU LNUN UNW P
- ΦNHUUNU
- HUUTU QUNUTUNNTIH HUAUNN
- TNW2UHP U W2WUGNUF
- TNW2UHPH PFUGWNNPNTUUTN
- NUIUYNIU
- HNGNNN NN NUNUNG HNG
- A30M
- A6N36MM356N 6GMMAD3NS YBSMMBNGD2BSB
- G3MNBNGDO
- MDO86N 30M (EMF)
- MOGMMGYM3NMMNDU GNMDD
- A86M06N3N 8VJMY6JDS
- PHILIPS SONICARE (BY 1.)
- OGBGYO
- PHILIPS SONICARE 3O0MNB 58MNBUB 8DMY6DO
- N603BNM0G0NB 0M6G AMGMG0BN3NB
- B3N6B6DNO
- QUADPACER-N
- MGOA
- N606B3MDO (ABMMG 3M63MFOAMOGD8G)
- BRUSHSYNC 6MM8NS
- OVERVIEW
- SMARTTIMER
- ENGLISH
- FNNBMB3N
- AMGOGMNB 6MABNUB GOSMMS
- A660NNB 3AM6S3MNNB
- AOGOAD3G
- NINIOXUNYTD
- NWNNN7 N
- NDN7W7IOINYON
- N
- D
- W
- UNN 7UV-NNNN NN
- NYNNN NN NN
Brand : PHILIPS
Model : Sonicare ProtectiveClean 4500
Category : Electric toothbrush