TAM 6202 W - Toaster BEKO - Free user manual and instructions
Find the device manual for free TAM 6202 W BEKO in PDF.
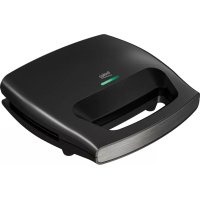
| Product type | 2-slot toaster |
| Model | TAM 6202 W |
| Brand | Beko |
| Power supply | 220-240 V ~ 50/60 Hz |
| Power | 730-870 W |
| Number of slots | 2 |
| Browning setting | 7 levels (1 = light, 7 = dark) |
| Functions | Toasting, defrost, reheating, emergency stop |
| Reheating rack | Yes, for rolls |
| Automatic shut-off | Yes |
| Crumb tray | Yes, removable |
| Cord storage | Yes, under the device |
| Housing material | Plastic and metal |
| Dimensions (L x D x H) approx. | 28 x 18 x 19 cm |
| Weight approx. | 1.2 kg |
| Cable length approx. | 1 m |
| Safety | Overheat protection, automatic shut-off, hot surface indicator |
| Maintenance | Clean with a damp cloth, empty crumb tray after each use |
| Repairability | Spare parts available through Beko after-sales service |
| Warranty | Consult the retailer or Beko customer service |
Frequently Asked Questions - TAM 6202 W BEKO
User questions about TAM 6202 W BEKO
0 question about this device. Answer the ones you know or ask your own.
Ask a new question about this device
Download the instructions for your Toaster in PDF format for free! Find your manual TAM 6202 W - BEKO and take your electronic device back in hand. On this page are published all the documents necessary for the use of your device. TAM 6202 W by BEKO.
USER MANUAL TAM 6202 W BEKO
Please read this user manual first!
Dear Customers,
Thank you for selecting an Beko product. We hope that you get the best results from your product which has been manufactured with high quality and state-of-the-art technology. Therefore, please read this entire user manual and all other accompanying documents carefully before using the product and keep it as a reference for future use. If you handover the product to someone else, give the user manual as well. Follow all warnings and information in the user manual.
Meanings of the symbols
Following symbols are used in the various section of this manual:
| i | Important information and useful hints about usage. |
| ! | WARNING:Warnings for dangerous situations concerning the safety of life and property. |
| WARNING:Warning for hot surfaces. | |
| Suitable for contact with food. | |
| Do not immerse the appliance in water. |

This product has been produced in environmentally-friendly, state-of-the-art facilities.
CONTENTS
| ENGLISH | 04-11 |
| DEUTSCH | 12-21 |
| FRANÇAIS | 22-32 |
| TÜRKUAGE | 33-40 |
| ESPAÑOL | 41-52 |
| POLSKI | 53-66 |
| ROMÁNÁ | 67-77 |
| ITALIANO | 78-87 |
1 Important instructions for safety and environment
This chapter contains safety instructions that will help protect from risk of personal injury or material damage.
Failure to follow these instructions will void the granted warranty.
1.1 General safety
- This appliance complies with the international safety standards.
- This appliance can be used by children who are at the age of 8 and above and by people who have reduced physical, perceptual or mental abilities or by people who are deficient in terms of experience and knowledge as long as they are supervised and given the instructions regarding the safe use of the appliance and dangers encountered. Children should not play with the appliance.
- Cleaning and maintenance should not be performed by children unless they are older than 8 years old and supervised.
-
Keep the appliance and its power cable so that they are inaccessible by children under 8 years old.
-
Do not use the appliance if the power cable or the appliance itself is damaged. Contact an authorised service.
- Your mains power supply should comply with the information supplied on the rating plate of the appliance.
- For additional protection, this appliance should be connected to a household residual current device with a rating of 30mA maximum.
- Use the appliance with a grounded outlet only.
- Do not use the appliance with an extension cord.
- Prevent damage to the power cord by not squeezing, bending, or rubbing it on sharp edges.
- Do not touch the plug of the appliance with damp or wet hands.
- Do not unplug the appliance by pulling the power cable.
- Do not immerse the appliance or its cable in water.
- Do not leave the appliance unattended while it is plugged in.
1 Important instructions for safety and environment
- Exterior surface gets hot while the appliance is in use. Do not touch hot surfaces to avoid risk of burning.
- Do not leave metal cooking utensils and items on cooking plates.
- Operate and store the appliance on a stable surface.
- Do not attempt to dismantle the appliance.
- Only use the original parts or parts recommended by the manufacturer.
- Unplug the appliance before cleaning and let it completely dry after cleaning.
- The appliance is not suitable for outdoor use.
- Food items can catch fire due to overheating. Do not allow the appliance to get in contact or be covered with flammable items such as curtains, fabric, wall panels and etc.
-
Do not use the appliance in or near the areas where combustible or inflammable places and materials exist.
-
Do not operate the appliance with an external timer or with another remote control system.
If you keep the packaging materials, store them out of the reach of children. - Keep the appliance and its power cable so that they are inaccessible by children under 8 years old.
- Allow the appliance to cool before storing it in a cupboard, on a shelf and etc.
1
Important instructions for safety and environment
1.2 Compliance with the WEEE Directive and Disposing of the Waste Product:
This product complies with EU WEEE Directive (2012/19/EU). This product bears a classification symbol for waste electrical and electronic equipment (WEEE).
This product has been manufactured with high quality parts and materials which can be reused and are suitable for recycling. Do not dispose of the waste product with normal domestic
and other wastes at the end of its service life. Take it to the collection center for the recycling of electrical and electronic equipment. Please consult your local authorities to learn about these collection centers.
1.3 Compliance with RoHS Directive
The product you have purchased complies with EU RoHS Directive (2011/65/EU). It does not contain harmful and prohibited materials specified in the Directive.
1.4 Package information

Packaging materials of the product are manufactured from recyclable materials in accordance with our National Environment Regulations. Do
not dispose of the packaging materials together with the domestic or other wastes. Take them to the packaging material collection points designated by the local authorities.
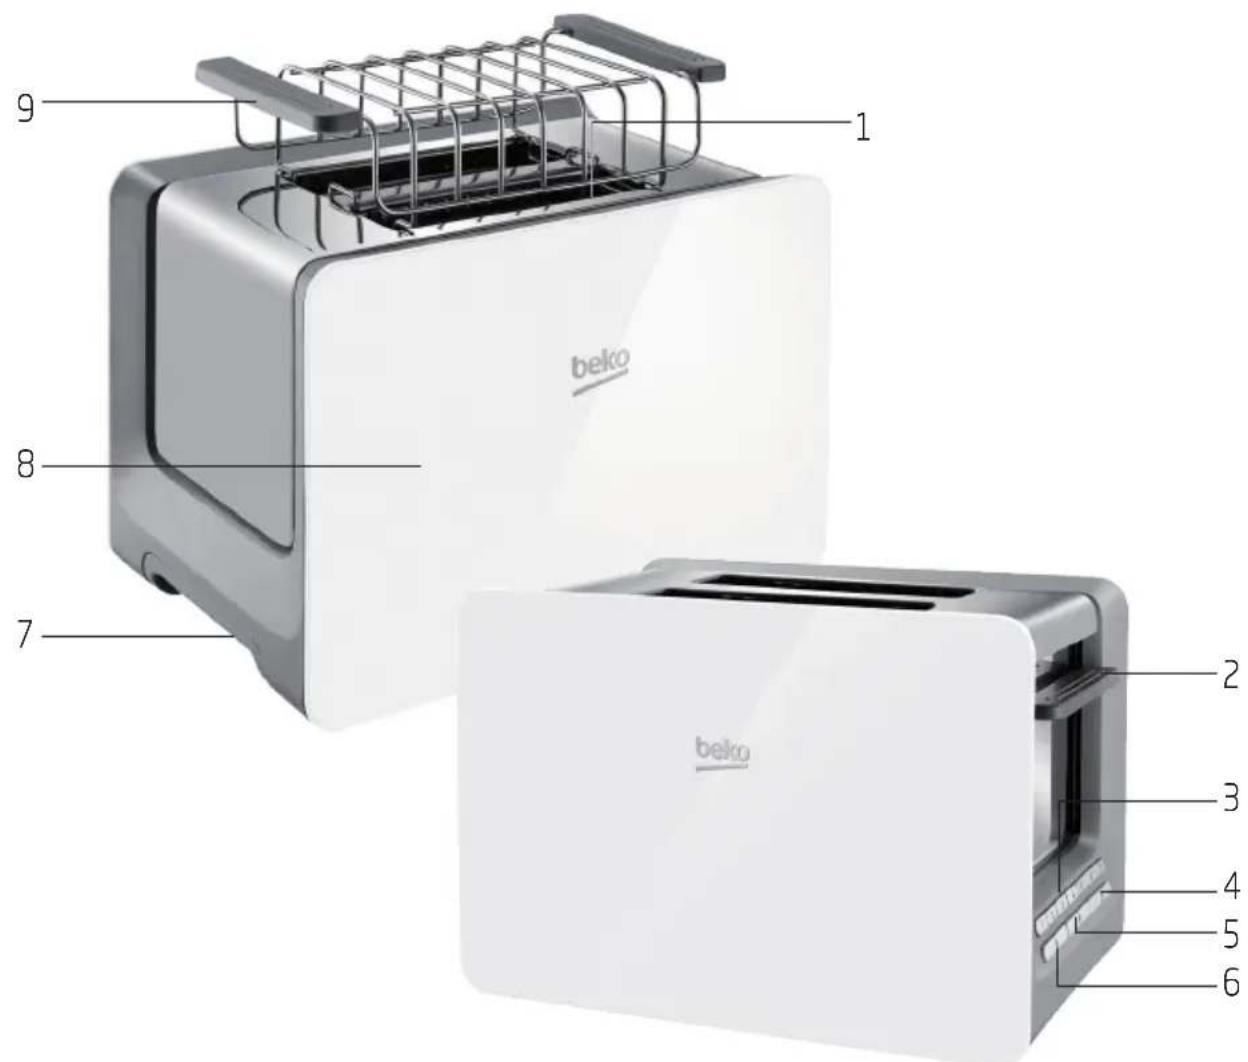
2 Toaster
2.1 Overview
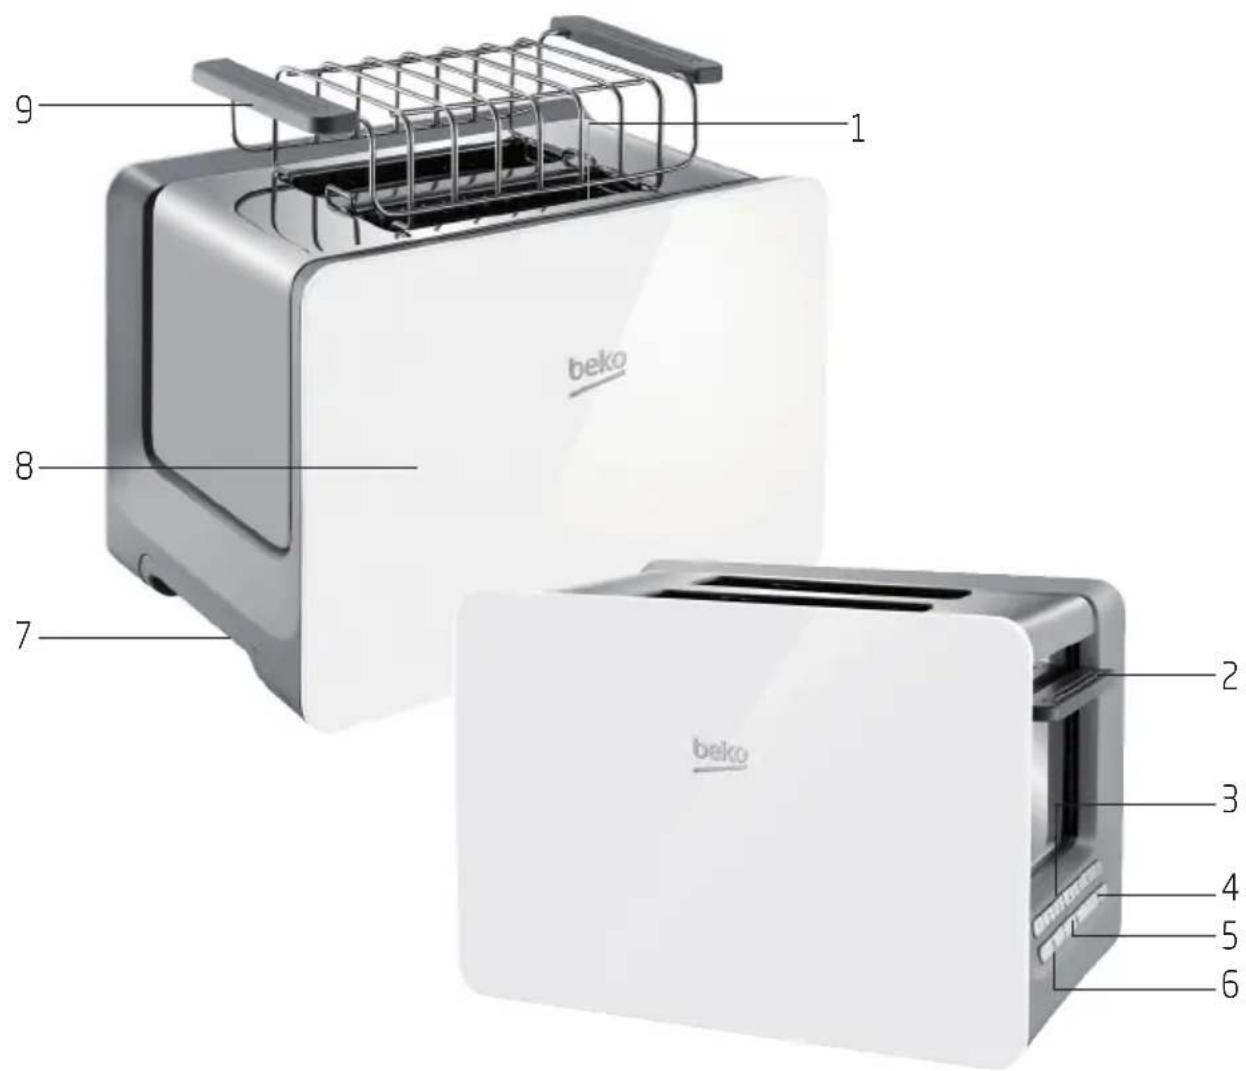
- Bread slot
- Start lever
- Browning control
- Reheat button
- Defrost button
- Stop button
- Crumb tray
- Housing
- Warming rack
2.2 Technical data
Power supply: 220 - 240V^,50 / 60Hz
Power: 730-870 W
Technical and design modifications reserved.
The values which are declared in the markings affixed on your appliance or the other printed documents supplied with it represent the values which were obtained in the laboratories pursuant to the pertinent standards. These values may vary according to the usage of the appliance and ambient conditions.
3.1 Preparation
- Remove all packaging and sticker materials and dispose of them according to the applicable local regulations.
- Before using the appliance for the first time, clean the appliance (See the "Cleaning and care" section).
- Make sure that the appliance is in an upright position and on a stable, flat, clean, dry and nonslip surface.

When using the appliance for the first time, smoke can develop due to production residues. However, this does not mean the appliance is defective. The first time you switch it on use the appliance as you normally would but without bread. It is recommended to use the medium setting of the browning control (3). Ensure for proper room ventilation.
3.2 Toasting
- Connect the power plug into the wall socket.
- Insert only one slice of bread in each of the two bread slots (1).
3.Using the browning control (3) select the desired degree of browning between 1 and 7.

Pushing 1 from the browning control (3) will give the lightest degree of browning and pushing 7 the darkest.

The browning degree can vary depending on the type of bread.

When toasting several slices of bread consecutively, the toaster will become hotter and therefore the bread will gradually become darker. Therefore select an appropriate browning degree. Let the toaster cool down after each toasting process for minimum 30 seconds.

The browning degree of one slice is darker than two slices, although the browning control (3) is set to the same level.
-
Press the start lever (2) until it automatically snaps into place.
-
The toasting process begins. The indicator light of the stop button (6) and the button of the browning control level (3) illuminates during the toasting process.

If the power plug is not connected to the wall socket, the start lever (2) does not snap into place.

The degree of browning can also be adjusted during the toasting process with the browning control (3).
-
The appliance automatically switches off as soon as the set degree of browning has been reached.
-
The start lever (2) springs back up and the stop button (6) light goes off. The toast slices are pushed upwards and can be taken out of the toaster.

To cancel the toasting process before it has finished, press the stop button (6). The start lever (2) springs back up and the toast slices can be taken out of the toaster.

After the start lever (2) springs back up, you can use the high-lift function by pushing the start lever (2) upwards.

WARNING: Be very careful when taking the toast slices out of the toaster as the metal parts of the toaster and also the bread can become very hot.
- Disconnect the appliance from the wall socket.

If toast slices get stuck in the toaster, switch the toaster off immediately by pressing the stop button (6). Pull the power plug out of the wall socket. Let the toaster cool down completely. Carefully try to take the bread out of the toaster without damaging the sensitive heating elements and other parts. Do not use any electroconductive objects to remove the bread from the toaster.
3.3 Toasting frozen bread
- Follow the steps from 1 to 4 of the "Toasting" section.
-
Press the defrost button (5).
-
The indicator lights of the defrost button (5) and stop button (6) illuminate and the toasting process begins.

When the defrost button (5) is pressed, the toasting process takes longer than with normal toasting.
-
The appliance automatically switches off as soon as the set degree of browning has been reached.
-
The start lever (2) springs back up; defrost button (5) and the stop button (6) lights go off. The toast slices are pushed upwards and can be taken out of the toaster.

To cancel the toasting process before it has finished, press the stop button (6). The start lever (2) springs back up and the toast slices can be taken out of the toaster.

After the start lever (2) springs back up, you can use high-lift function by pushing the start lever (2) upwards.

WARNING: Be very careful when taking the toast slices out of the toaster as the metal parts of the toaster and also the bread can become very hot.
- Disconnect the appliance from the wall socket.
3.4 Warming up already toasted bread
- Follow the steps from 1 to 4 of the "Toasting" section.
-
Press the reheat button (4).
-
The indicator lights of the reheat button (4) and stop button (6) illuminate and the warming up process begins.
-
The appliance automatically switches off as soon as the set degree of warming has been reached. The start lever (2) springs back up; reheat button (4) and the stop button (6) lights go off. The toast slices are pushed upwards and can be taken out of the toaster.

To cancel the toasting process before it has finished, press the stop button (6). The start lever (2) springs back up and the toast slices can be taken out of the toaster.
3 Operation

After the start lever (2) springs back up, you can use high-lift function by pushing the start lever (2) upwards.

Be very careful when taking the toast slices out of the toaster as the metal parts of the toaster and also the bread can become very hot.
- Disconnect the appliance from the wall socket.
3.5 Warming up buns
This toaster is equipped with an external warming rack (9).

Do not toast bread and warm up buns at the same time.

Do not warm up toast slices on the warming rack (9). The toast slices hinder sufficient ventilation.

If you accidentally activate the wrong mode (defrost instead of reheat or reheat instead of defrost), then the selected mode must be cancelled first by pressing the stop button (6) before you can select the right mode.
- Put the warming rack on the housing (8) and place it into the gaps
- Place the buns on the warming rack (9).
- Connect the power plug into the wall socket.
- Using the browning control (3) select the desired degree of warming.
-
Press down the start lever (2).
-
The indicator light of the stop button (6) illuminates and the warming up process begins.
-
Turn the buns in order to reach a consistent browning.
-
The appliance automatically switches off as soon as the set degree of warming has been reached.
-
The start lever (2) springs back up; and the stop button (6) light goes off.

To stop the warming up process before it has finished press the stop button (6).
- After warming up the buns take them off the rack and and put the warming rack by the warming rack handles off.
- Disconnect the appliance from the wall socket.

WARNING: The buns and the housing (8) of the toaster can become very hot during and directly after the toasting process. Do not touch them with bare hands.
4 Information
4.1 Cleaning and care

WARNING: Never use petrol solvents, abrasive cleaners, metal objects or hard brushes to clean the appliance.

WARNING: Never put the appliance or power cord in water or any other liquids.
- Turn the appliance off and disconnect it from wall socket.
- Let the appliance cool down completely.
- Remove the crumbs after each use by pulling out the crumb tray (7). Before pushing back the crump tray in the appliance make sure that the tray is dry. Do not let bread crumbs accumulate inside the toaster, they may cause fire.
- Turn the toaster upside down and shake it slightly to remove bread crumbs from inside.
- Use a damp soft cloth and a small mild cleanser to clean the housing (8) of the appliance. Dry the housing thoroughly.

Before using the appliance after cleaning, dry all parts carefully using a soft towel.
4.2 Storage
If you do not plan to use the appliance for a long period of time, please store it carefully.
- Make sure the appliance is unplugged, cooled down and completely dry.
- Wrap the power cord around the cable coil on the bottom of the toaster.
- Store the appliance in a cool, dry place.
- Make sure the appliance is kept out of the reach of children.
4.3 Handling and transportation
- During handling and transportation, carry the appliance in its original packaging. The packaging of the appliance protects it against physical damages.
- Do not place heavy loads on the appliance or the packaging. The appliance may be damaged.
- Dropping the appliance will render it non-operational or cause permanent damage.
2 Stainless steel toaster
2.1 Opis ogólny
m = 311
.
.
.
1yjLjglJg 1e jbj .
Jg Jol 4.3
g jglj 1000 Jaiu Jaleil cii .
a
j j 8 j 8 j 8 j 8 j 8
.
J 1
i 1
blb bai jydi yjg jc jz d 1
jusill j. jnssill nJybjj)
aI JnJy laie .(jlll all j! Jy
ally jz le biwiBdall boill
.2all boill dybiw j

(8)(204
2.(9)
3. bitai
(3) 4
5.(2)
(6) 10
6.
Ljll Jell jg 7.
(2)(6)
i
8 1
Sll l jn jn Sall n nn jnnn 8) w g uii i. .g .
bila 1
3.4
“41 1
(4) jzil 1j zle 2
(4) jzill 1j jy ggs - .zill aLac (6) aly jg
Jgssll Jzjll jgl 3. 1 (2) 1
(4)j(5)
aannnnn nn aaed
eiliei jia aaiill ylaac 1y
gss.6) 1j j ic biin
sir jao jl (2) cllg j
no aaaall jr j

(2)(20 1
(2) S ACD = 13S CDE = 12 × 12 × 3 × 4 = 3

i 1
j j 100000000000000000000000000000000000000000000
aJnJnJnJnJnJnJn

bila 1
1051 3.5
(9)
y

J 10
a ≤ b ≤ 1

cbwJc jgljg jzg jzg Jc
A
jglal gl
y
.
. 1
jbnnnaa aee
y
Jg
1
.
aolll 1.1
.
Jib
aBwUg 8 Jn
J 1
Ia jJ 1
J 1
yabaiial jbiol g jglaln y1 pdiin
jlll jil 1
j
j 8 j
1
i 1
jglj jglj jglj
.1
.
aalalalalalalalalalal