
Mini Electric - Breast Pump MEDELA - Free user manual and instructions
Find the device manual for free Mini Electric MEDELA in PDF.
| Product type | Electric breast pump |
| Brand | Medela |
| Model | Mini Electric |
| Category | Breast pump |
| Power supply | Mains (3 V adapter) or batteries (2 × LR6 AA) |
| Main functions | Breast milk expression, suction adjustment (from MIN to MAX) |
| Bottle capacity | 150 ml |
| Breast shield included | PersonalFit size M (24 mm) |
| Available breast shield sizes | S (21 mm), M (24 mm), L (27 mm), XL (30 mm), XXL (36 mm) |
| Cleaning | Hand washing with soapy water, dishwasher (top rack), boiling for 5 minutes, microwave with Quick Clean bags |
| Maintenance | Wipe the motor unit with a damp cloth; check battery condition regularly |
| Safety | Do not immerse; do not use if damaged; unplug before cleaning; keep out of reach of children |
| Contraindications | None known |
| Operating life | 150 hours |
| Service life | 2 years |
| Warranty | International (see brochure) |
| Recycling | Do not dispose of with household waste; use WEEE collection points |
| Batteries | 2 LR6 AA batteries (not included) |
| Optional accessories | Mains adapters for different regions, 250 ml bottles, storage bags, Calma, etc. |
| Intended use | Breastfeeding women, to express and store breast milk, relieve engorgement, sore nipples, etc. |
| Target audience | Breastfeeding adolescent or adult women |
| Electromagnetic compatibility | Complies with standards; mobile phones may affect operation |
Frequently Asked Questions - Mini Electric MEDELA
User questions about Mini Electric MEDELA
0 question about this device. Answer the ones you know or ask your own.
Ask a new question about this device
Download the instructions for your Breast Pump in PDF format for free! Find your manual Mini Electric - MEDELA and take your electronic device back in hand. On this page are published all the documents necessary for the use of your device. Mini Electric by MEDELA.
USER MANUAL Mini Electric MEDELA
No. 1 choice of hospitals &mothers
Thank you for choosing the Mini Electric breast pump. Breast milk is the natural choice for your baby, but there are reasons and situations where breastfeeding is not possible. For over 50 years, it has been Medela's conviction that these mothers and babies can be supported. In close cooperation with breastfeeding experts, Medela, one of the market leaders, has researched and developed breast pumps that perfectly meet breastfeeding mothers needs. For mothers who insist on the best for their babies and themselves. Because you care.
- Intended use/Population - Contraindication 5
- Meaning of symbols 6
- Important safety information
4.Product description 10 - Cleaning 12
5.1 Before using for the first time and after every use 12
5.2 Before using for the first time and once a day 14
5.3 Cleaning the motor unit 15
6.Preparing for pumping 16
6.1 Mains operation 16
6.2 Battery operation 16
6.3Assembling the pump set 18
- Expression 20
7.1 Preparing for pumping 20
7.2 Pumping 20
- Storing and thawing breast milk 24
8.1 Storage 24
8.2 Freezing 24
8.3 Thawing 24
- Feeding breast milk 25
10.Troubleshooting 26
11. Warranty/disposal 27
12. Complete care during breastfeeding time 28
13. EMC/Technical description 160
14. Technical specifications 166
1. Intended use / Population - Contraindication

The intended use and indications of breast pumps
Breast pumps are intended to be used by lactating women in the hospital or home environment for expressing breast milk. Breast pumps are indicated to alleviate the symptoms of engorgement by expressing milk. In case of mastitis breast pumps support the healing process by removing breast milk from the affected breast. Breast pumps are indicated to relieve sore and cracked nipples and to bring out flat or inverted nipples. Also breast pumps enable mothers to provide breast milk for babies who cannot feed directly at the breast for a variety of reasons such as latch-on problems, cleft palate or premature babies.
Intended patient population/user
Adolescent paediatric or adult lactating women. Many women find it convenient, or even necessary, to use a breast pump to express and store their breast milk once they have returned to work, are travelling or are otherwise separated from their baby. Women are often delighted to learn that a breast pump can be used as a supplement to breastfeeding and that some pumps are designed to mimic the suckling of a nursing baby.
Contraindications
There are no known contraindications for the Mini Electric breast pump.
2. Meaning of symbols
6
The warning symbol identifies all instructions that are important for safety. Failure to observe these instructions can lead to injury or damage to the breast pump! When used in conjunction with the following words, the warning symbol stands for:

Warning
Can lead to serious injury or death.

Caution
Can lead to minor injury.

Note
Can lead to material damage.

Info
Useful or important information that is not related to safety.
Symbols on the packaging

This symbol indicates that the material is part of a recovery/recycling process.

This symbol indicates a carton package.

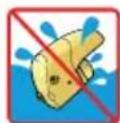
This symbol indicates to keep the device away from sunlight.

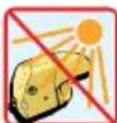
This symbol indicates to handle the fragile device with care.

This symbol indicates the temperature limitation for operation, transport and storage.

This symbol indicates the humidity limitation for operation, transport and storage.

This symbol indicates the atmospheric pressure limitation for operation, transport and storage.

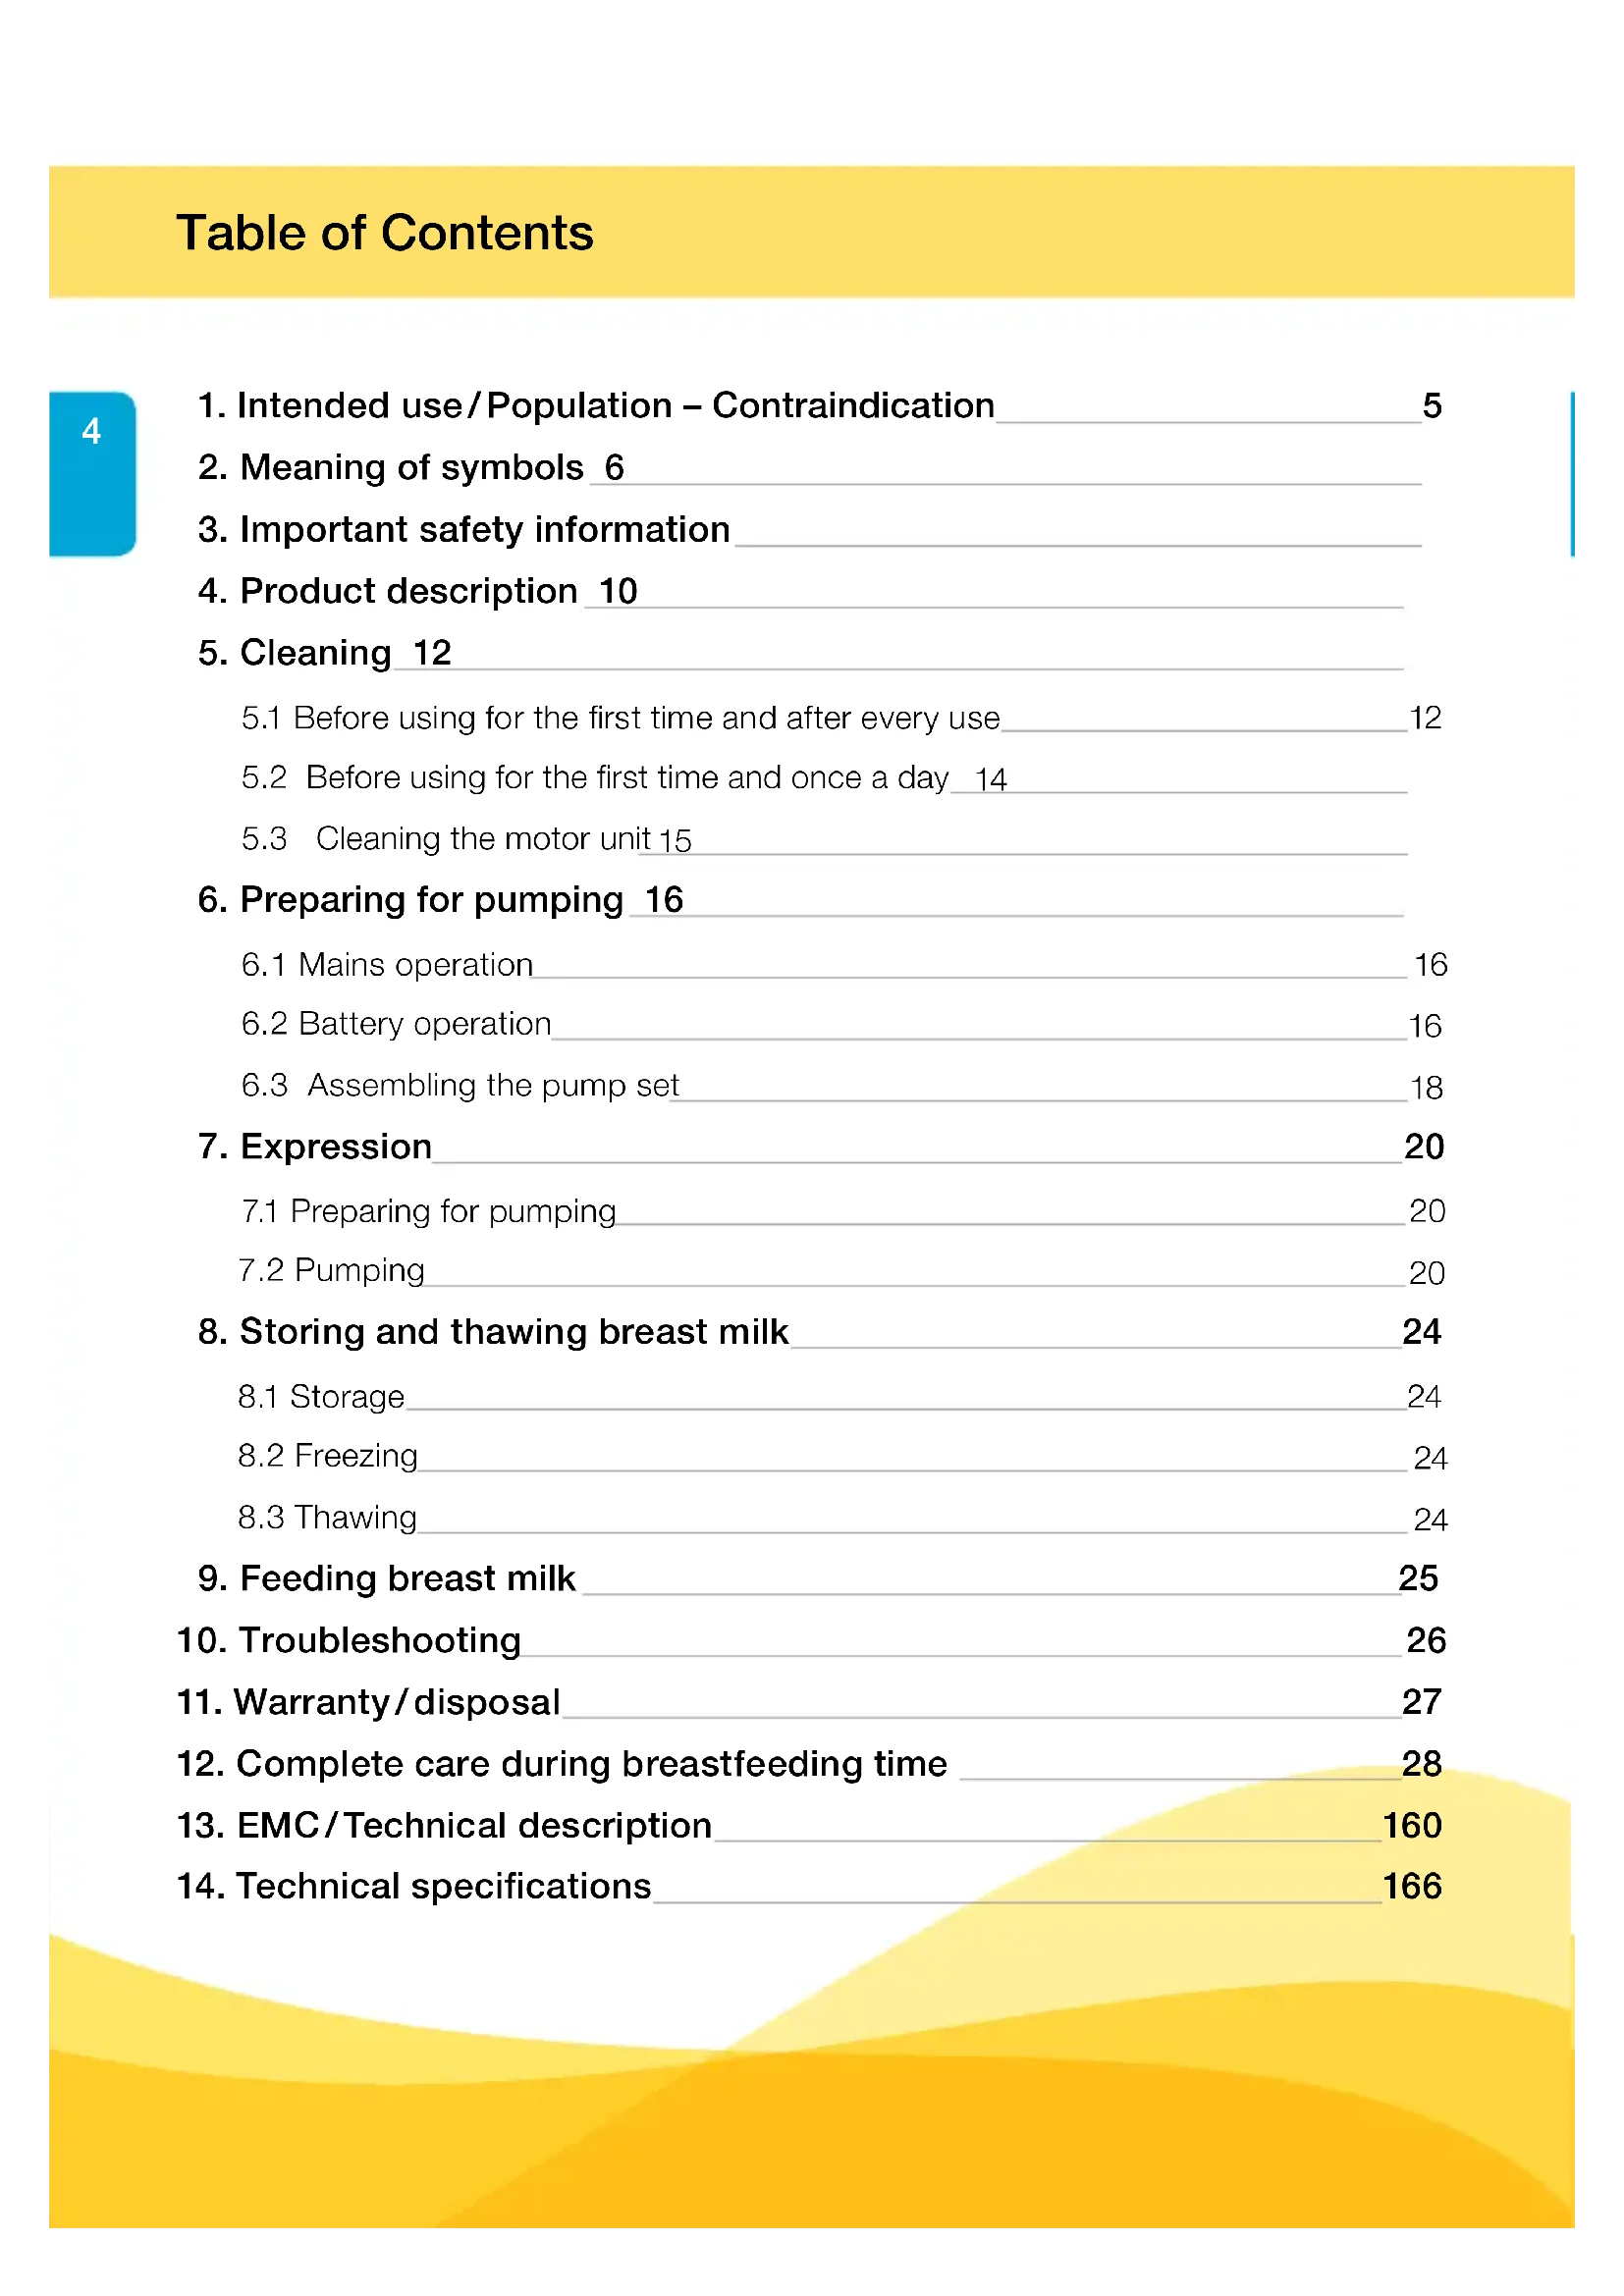
This symbol indicates to keep the device dry.

This symbol indicates that the packaging contains products intended to come in contact with food according to regulation 1935/2004.

This symbol indicates unique GSI Global Trade Item Numbers (GTIN)

This symbol indicates do not dispose the device together with unsorted municipal waste (for EU only).

This symbol indicates to follow instructions for use.

This symbol indicates the date of manufacture (four digits for the year and two digits for the month).
Symbols on the device

This symbol indicates to follow instructions for use.

This symbol indicates the compliance with the essential requirements of the Council Directive 93/42/EEC of 14 June 1993 concerning medical devices.

This symbol indicates the manufacturer.

This symbol indicates do not dispose the device together with unsorted municipal waste (for EU only).

This symbol indicates a type BF applied part.

This symbol indicates the positioning of battery cell.
IP22
This symbol indicates the protection against ingress of solid foreign objects and against harmful effects due to the ingress of water.
Symbols on the mains adapter

This symbol indicates that the mains adapter is a class II device.

This symbol indicates the compliance with China Compulsory Certification.

This symbol indicates that the mains adapter is safety tested.

This symbol indicates that the mains adapter is for indoor use only.

This symbol indicates the compliance with Canada safety requirements.

This symbol indicates the compliance with USA and Canada safety requirements.

This symbol indicates the compliance with USA safety requirements.

This symbol indicates the mains adapter is fitted with thermal cut-out (number indicates cut-out temperature)

This symbol indicates polarity of d.c. power connector.

This symbol indicates isolating safety transformer.

This CE-mark indicates the compliance with the low voltage and electromagnetic compatibility directive.

This symbol indicates to not dispose the device together with unsorted municipal waste (for EU only). The solid bar symbol indicates that mains adapter is put on the market after 13 August 2005.

This symbol indicates the compliance with Japanese safety requirements.

This symbol indicates alternating current.

This symbol indicates direct current.

This symbol indicates the compliance with the essential requirements of the Council Directive 93/42/EEC of 14 June 1993 concerning medical devices.
3. Important safety information
8

Failure to follow these instructions/safety information can lead to danger from the device. Subject to technical changes.
Device
Danger of electrocution! Keep the device dry! Never immerse in water or other liquids!

The Mini Electric breast pump is not heat-resistant: keep away from radiators and open flames.
Do not expose the motor unit to direct sunlight.

Repairs must be performed only by an authorised service agency. Do not repair yourself! No modifications to the device are permitted.
Never use a damaged device. Replace damaged or worn parts.
The operating life of the Mini Electric breast pump is 150 hours. The service life is two years.
Electrical use

Separation from the mains is only assured through the disconnection of the mains adapter from the wall socket outlet.

Keep the mains adapter away from heated surfaces.
Do not reach for any electrical device if it has fallen into water. Unplug immediately.
The breast pump should never be left unattended when plugged into a power source.
Use

Use the Mini Electric breast pump only for its intended use as described in this manual.
Never operate an electrical device if it has a damaged cord or plug, if it is not working properly, if it has been dropped or damaged, or dropped into water.
Do not use the Mini Electric breast pump while bathing or showering.

Do not use the Mini Electric breast pump while sleeping or overly drowsy.
This is a single user product. Use by more than one person may present a health risk.
Do not drive whilst hands-free pumping.

Supervision is necessary when the Mini Electric breast pump is used in the vicinity of children.

Contact your lactation consultant or physician if you experience problems or pain.
Portable and mobile radio frequency communications equipment can affect the Mini Electric breast pump.
Important:
1 Plastic bottles and component parts become brittle when frozen and may break when dropped.
I Also, bottles and component parts may become damaged if mishandled, e.g. dropped, over-tightened, or knocked over.
I Take appropriate care in handling bottles and components.
I Do not use the breast milk if bottles or components become damaged.
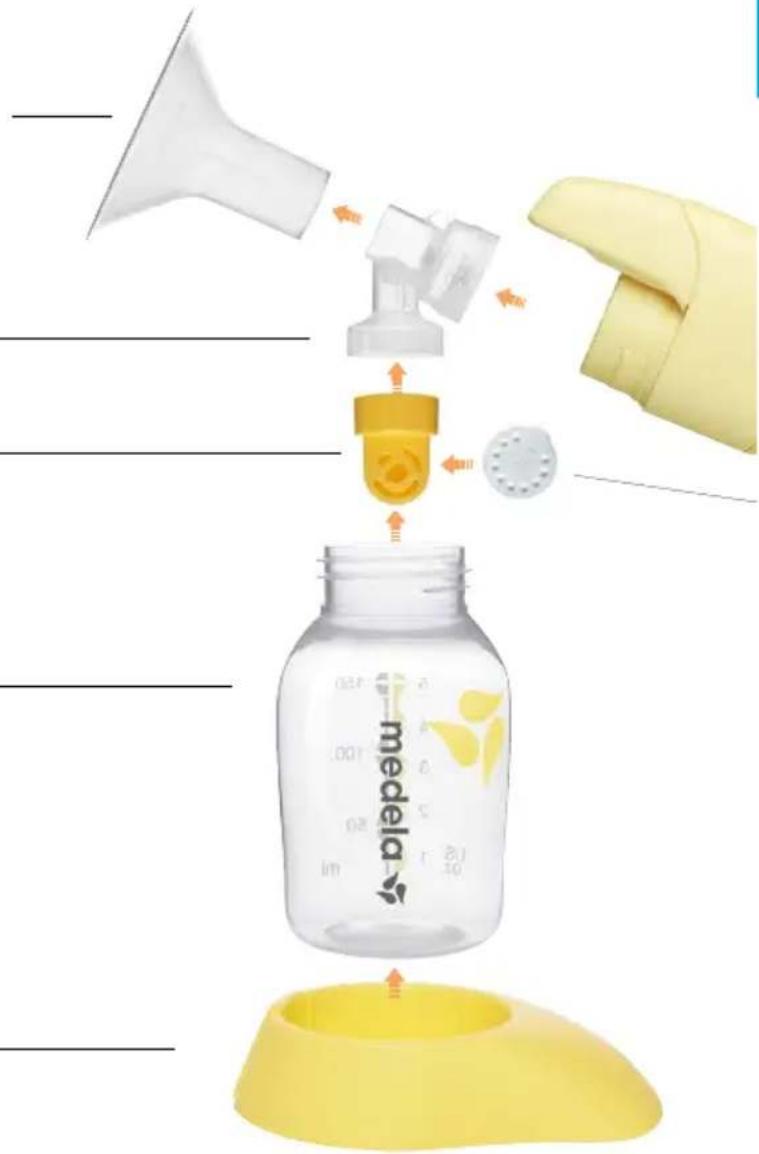
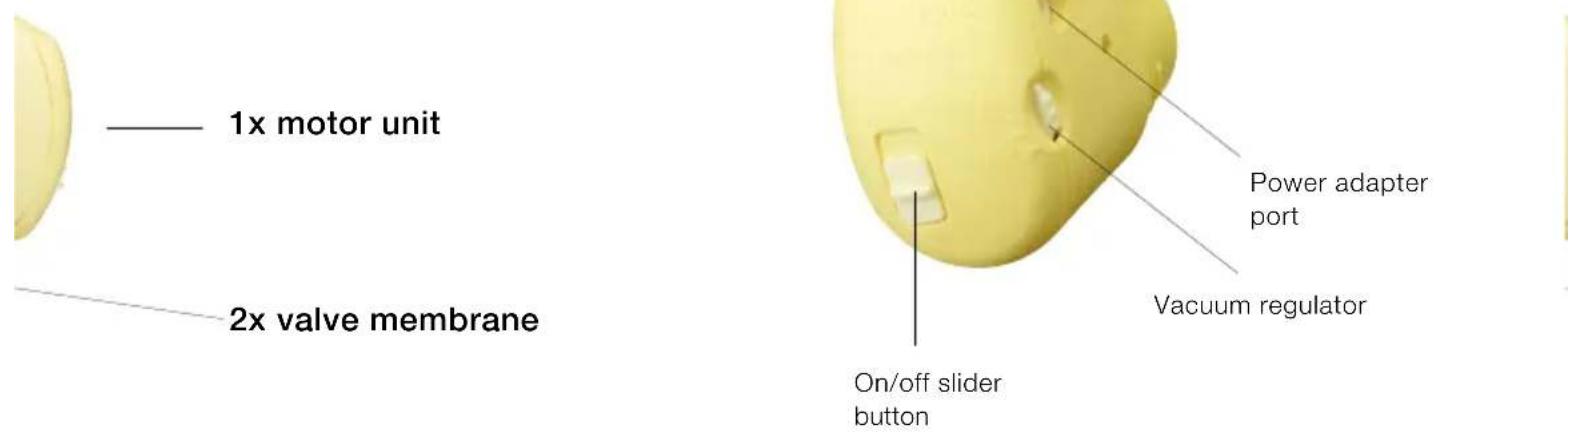
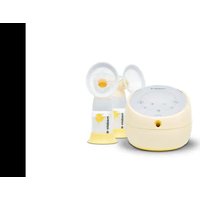
4. Product description

Spare parts and accessories available for order can be found on page 28.
1x PersonalFit breast shield M (24 mm) (for other breast shield sizes see Chapter 12, page 28)
1x PersonalFit connector
1x valve head
1x bottle
1x bottle stand


5. Cleaning
1

Caution
Only use drinking-quality water for cleaning.
Take apart and wash all parts that come in contact with the breast and breast milk immediately after use to avoid dry up of milk residues and to prevent growth of bacteria.
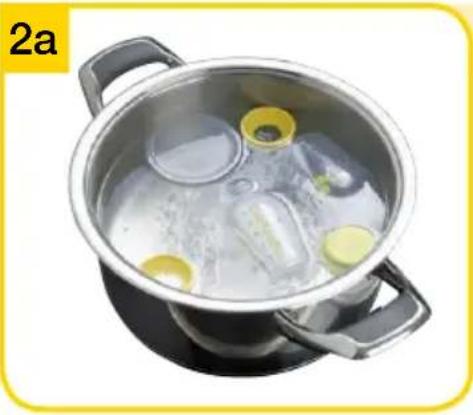
5.1 Before using for the first time and after every use
Disassemble the pump set into individual parts.

Note
The pump set requires no maintenance.
Take care not to damage parts of the pump set during cleaning.
If the individual components of the pump set are cleaned in a dishwasher parts may be discoloured by food pigments. This has no impact on the function.
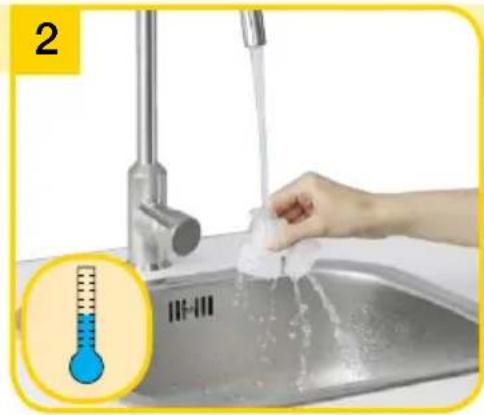
Rinse all parts with cold, clear water (approx. 20^ ) for 10-15 seconds.
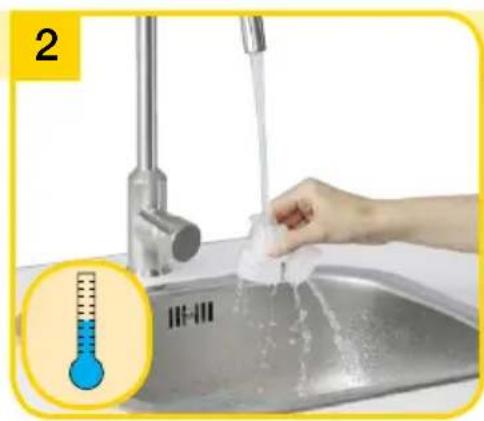
Rinse all parts with cold, clear water (approx. 20^ ).
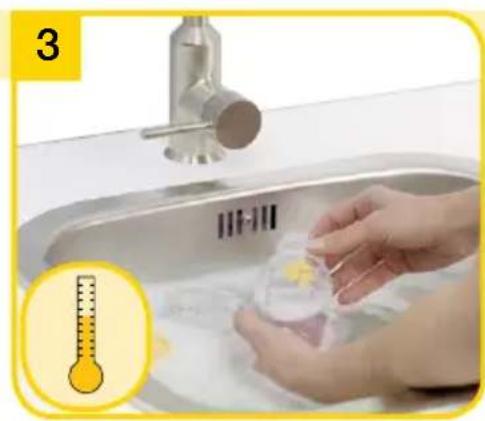
Clean all parts with plenty of warm soapy water (approx. 30^ ).

Dry with a clean cloth or leave to dry on a clean cloth.
or
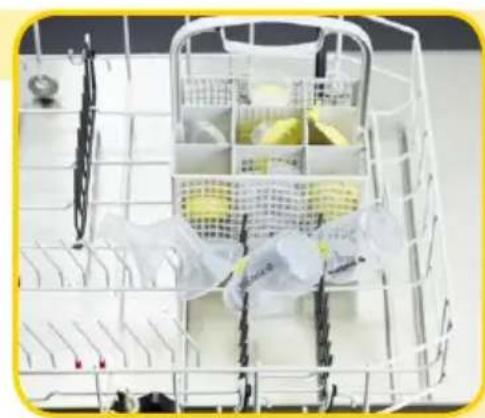
If you clean the individual parts of the pump set in the dishwasher, place them on the top rack or in the cutlery section.
aannnnnne
rnnnne nnnnne
5. Cleaning
1

Caution
Only use drinking-quality water for cleaning.
Take apart and wash all parts that come in contact with the breast and breast milk immediately after use to avoid dry up of milk residues and to prevent growth of bacteria.
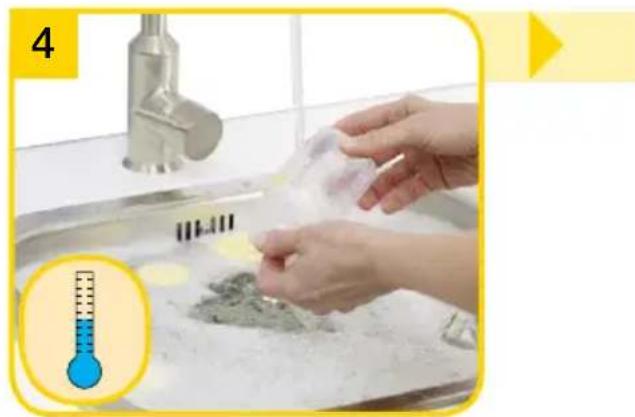
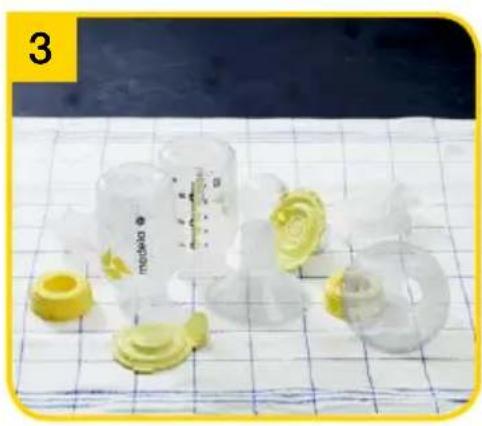
5.2 Before using for the first time and once a day
Disassemble the pump set into individual parts.
!
Note
When boiling, a tea spoon of citric acid may be added to avoid a buildup of limescale.
I Store the pump set in a clean bag/ container until next use. Or store it in clean paper or a cloth.
Dry with a clean cloth or leave to dry on a clean cloth.
Cover all parts with water and boil for five minutes.
or
2b

Use Quick Clean* microwave bags in accordance with the instructions.
5.3Cleaning the motor unit
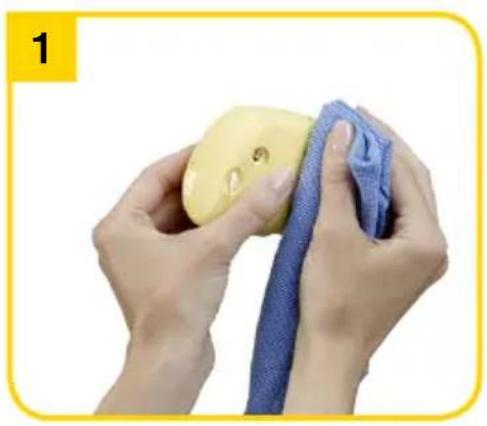
Wipe off with a clean, damp cloth.
6. Preparing for pumping


Warning
I re 6.1 Mains operation:
Follow the exact order of the steps.
I Only use the mains adapter supplied with the Mini Electric.
I Make sure the voltage of the mains adapter is compatible with the power source.
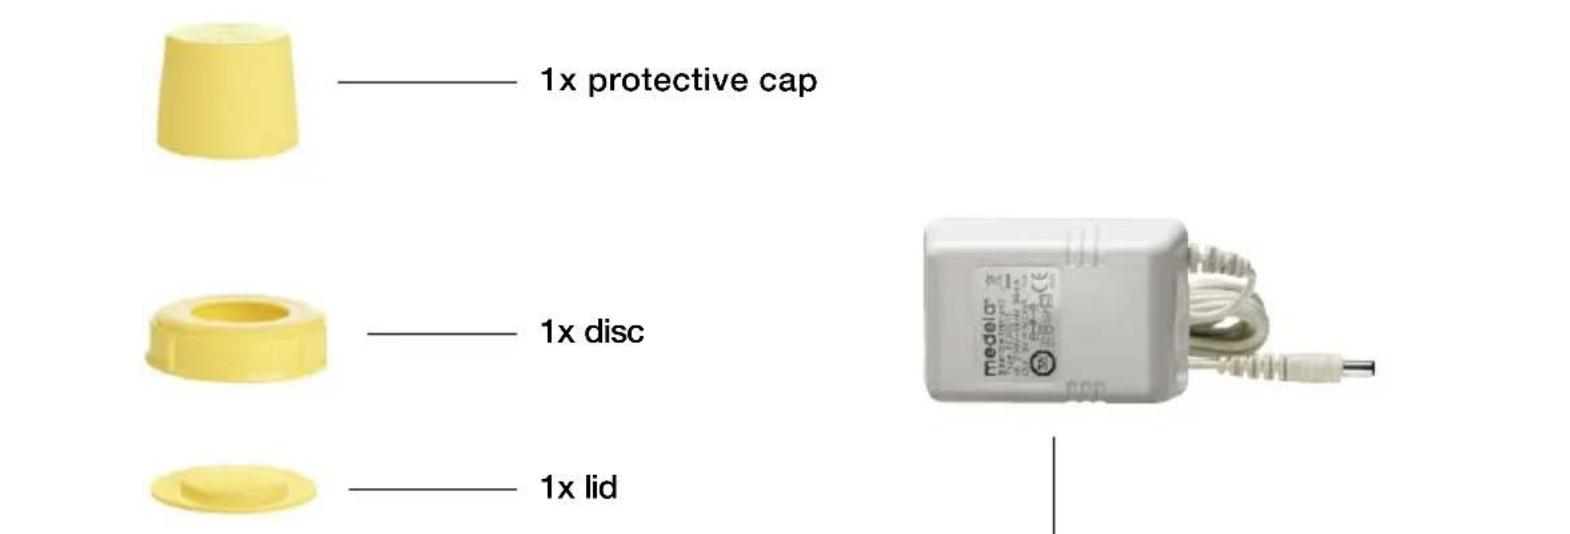
6.1 Mains operation
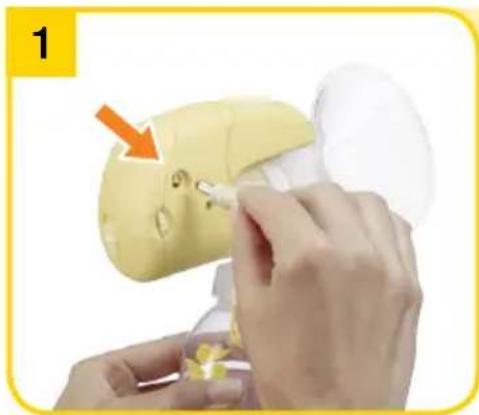
Plug the mains adapter cord into the motor unit.

Info
I re 6.2 Battery operation:
The batteries do not need to be removed when the main adapter is used for pumping.
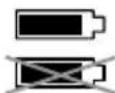
Regularly check the condition of the batteries in the motor unit.
If Mini Electric will remain unused for a longer period of time, remove the batteries from the battery compartment.
6.2 Battery operation
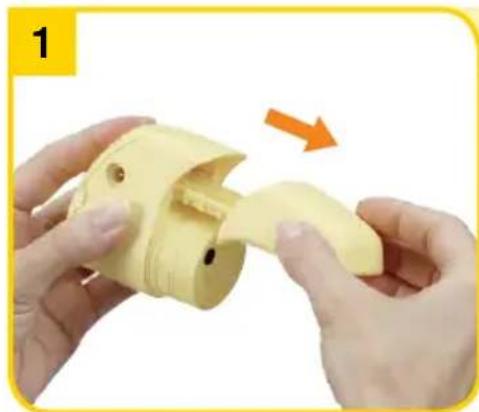
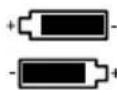
Remove the battery compartment cover.

2
Plug the mains adapter into the mains socket.
2

3
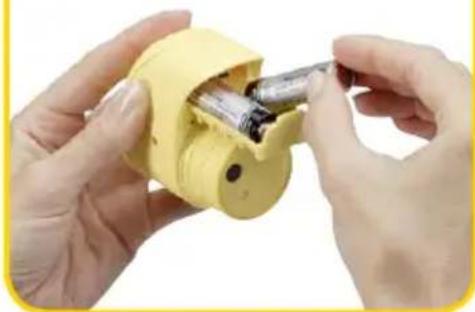
Insert two AA LR6 batteries. Slide the cover back.
6. Preparing for pumping


Caution
I Wash hands thoroughly (at least one minute) with soap and water before touching the breast and pump parts.
! Note
I Use Medela original accessories only.
Check pump set components for wear or damage before use and replace if necessary.
All components must be completely dry before use.
i Info
I Carry out all the steps with care and assemble the pump set correctly. Otherwise a good vacuum may not be achieved.
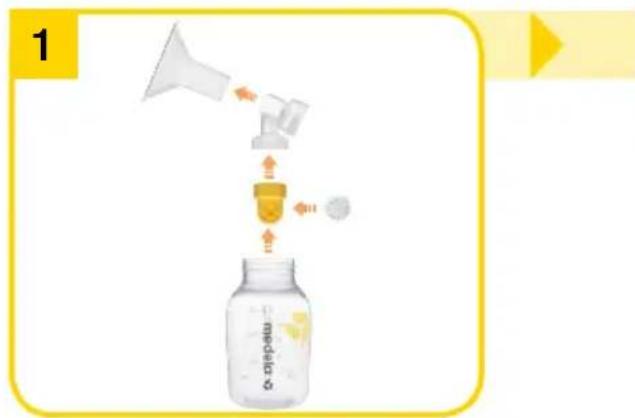
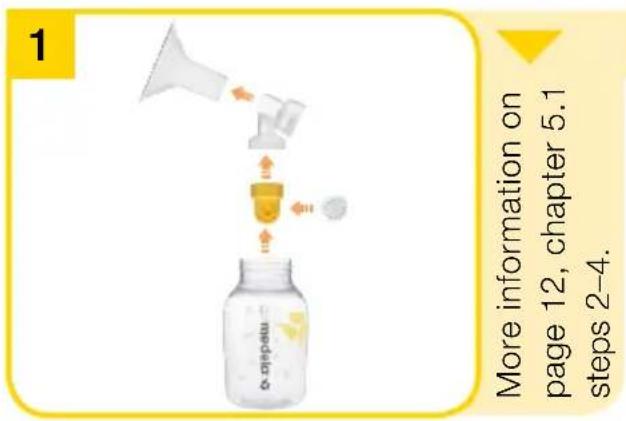
6.3Assembling the pump set
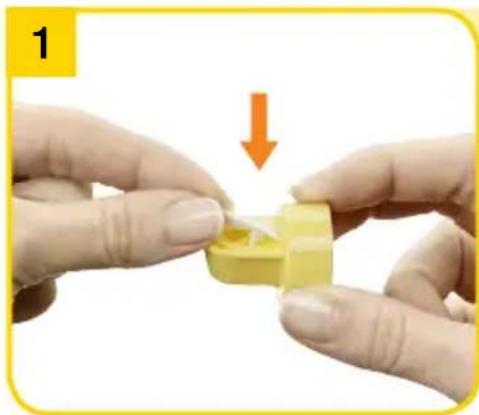
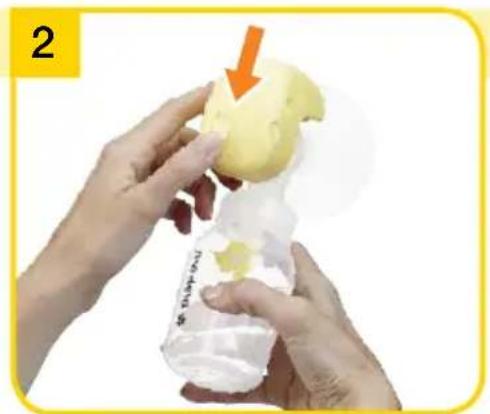
Carefully push the valve membrane onto the valve head until it engages.
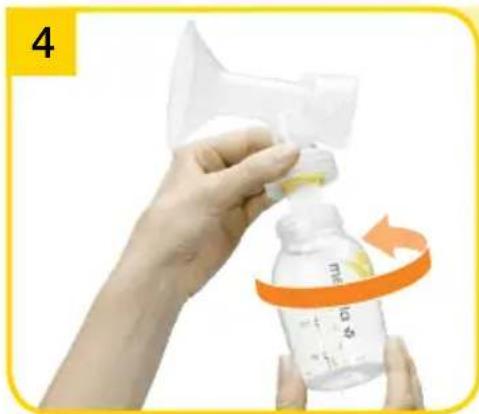
Screw the bottle onto the breast shield.
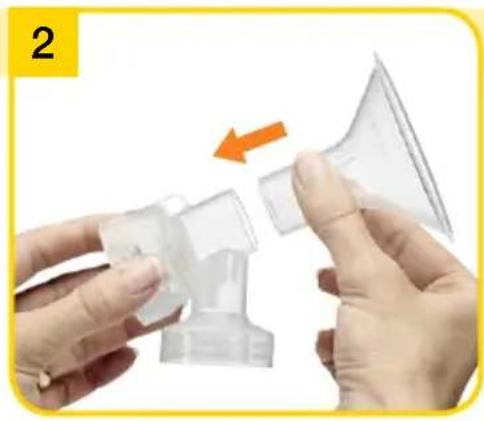
Push the breast shield onto the connector.
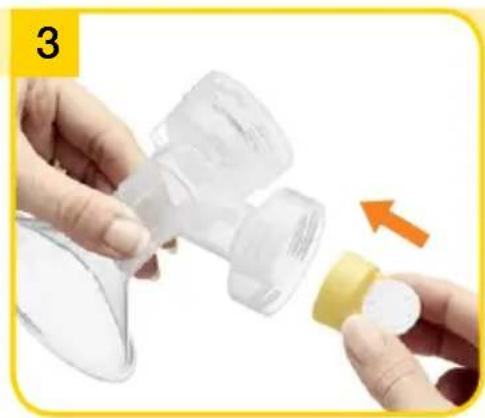
Push the valve head and membrane onto the connector.
Position valve head laterally.
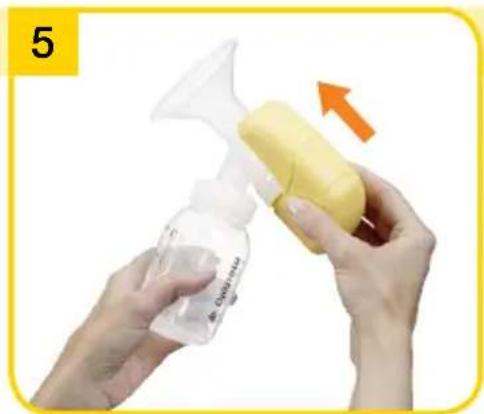
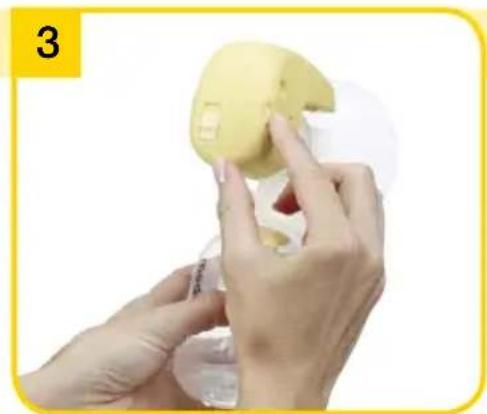
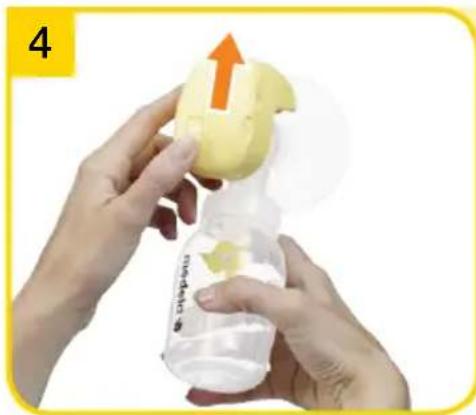
Insert the motor unit into the connector.
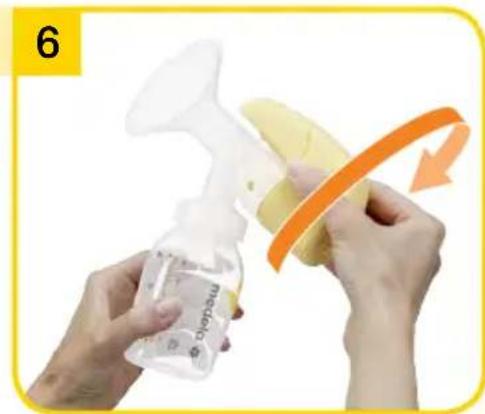
Rotate motor unit clockwise until the long battery compartment is located over the bottle.
7. Expression
2

Caution
I re step 2 (chapter 7.1):
Answer the following questions to find out whether the available breast shield size will fit:
Is your nipple moving freely in the tunnel?
Is minimal or no areolar tissue being pulled into the tunnel of the breast shield?
Do you see a gentle, rhythmical motion in the breast with each cycle of the pump?
I Do you feel the breast emptying all over?
Is your nipple pain-free?
If the answer to any of these questions is "No" or if you experience problems or pain during expression, consult your breastfeeding and lactation consultant or midwife.
!
Note
I re step 2 (chapter 7.1):
Do not hold the pump set by the bottle. This can lead to blockage of the milk ducts and engorgement.
I Wipe the breast with a warm washcloth (do not use alcohol).
7.1 Preparing for pumping
1
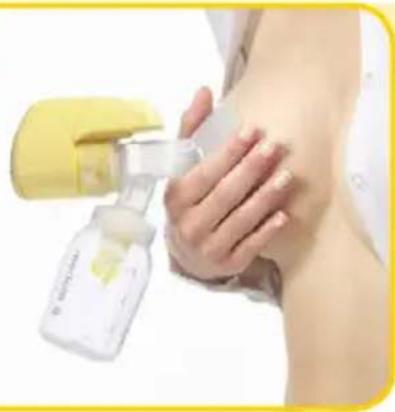
Place the breast shield on your breast so that your nipple is properly centred in the tunnel.
7.2 Pumping
1

Set the vacuum control to minimum.
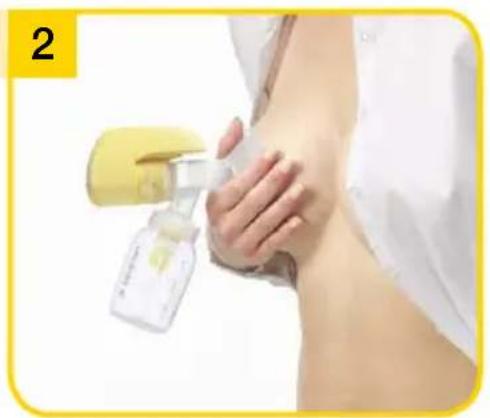
Hold the breast shield onto your breast with your thumb and index finger. Support your breast with the palm of your hand.
Switch on the breast pump. Slide the switch to Start.
Turn the vacuum control up towards MAX until it is slightly uncomfortable. Then turn down slightly towards MIN. Make sure that the milk flows into the bottle properly.
7. Expression
2

Caution
I Contact your midwife or lactation consultant if you can express only minimal or no milk or if expression is painful.

Note
I Always disconnect the Mini Electric from the mains after expression.
I Only fill the bottle to the 150 ml mark.
Turn off breast pump.
Slide switch to Stop.

5
Use the stand to prevent the bottle from tipping over.

6
aannnnnne aannnnnne
wth wth
paaee
Close the bottle with a lid.
Follow the instructions in
Chapter 8 "Storing and thawing breast milk".
8. Storing and thawing breast milk
2
8.1Storage
Storage guidelines for freshly expressed breast milk (for healthy terms babies)
| Room temperature | Refrigerator | Freezer | Thawed breast milk |
| 4-6 hours at 19 to 26 °C (66 to 78 °F) | 3-8 days at 4°C (39 °F) or lower | 6-12 months -18 to -20 °C (0 to -4 °F) | In refrigerator for 10 h max. Do not refreeze! |
- Do not store breast milk in the door of the refrigerator. Instead choose the coldest part of the refrigerator (this is at the back of the glass shelf above the vegetable compartment).
8.2Freezing
You can freeze expressed breast milk in milk bottles or "Pump & Save*" bags. Do not fill the bottles or bags more than 3/4 full to allow space for possible expansion.
I Label the bottles or "Pump & Save" bags with the date of expression.
8.3Thawing

Warning
Do not thaw frozen breast milk or do not warm breast milk in a microwave or a pan of boiling water to avoid loss of vitamins, minerals and other important components and to prevent burns.
In order to preserve the components of the breast milk, thaw the milk in the refrigerator overnight. Alternatively, you can hold the bottle or "Pump & Save" bag under warm water (max. 37^ ).
Gently swirl the bottle or "Pump & Save" bag to mix any fat that has separated. Avoid shaking or stirring the milk.
9. Feeding breast milk
Info
Medela recommends Calma for feeding breast milk.
With Calma
I your baby can feed, pause and breathe regularly.
I milk will flow when a vacuum is created.
I your baby's natural feeding behaviour will be maintained, supporting easy transition back to the breast.
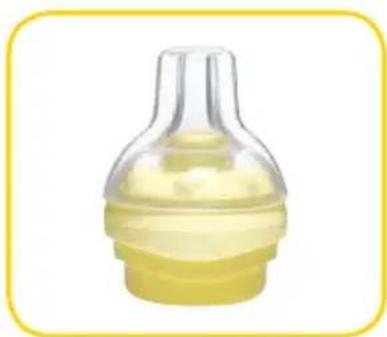
Calma - unique feeding solution for breast milk.
You can find detailed information about Calma on the Medela website (www.medela.com).
10. Troubleshooting
2
| Problem Solution | |
| If the motor is not running | Check presence of mains current. Check that the device is switched on. |
| If there is loss of power during battery operation | Replace batteries. |
| If there is low or no suction | Ensure the breast shield forms a complete seal around the breast. All the connections are secure. The valve membrane is lying flat against the valve head. Check that the valve membrane and valve head are clean and undamaged. Motor must be properly secured to the connector. All components must be completely dry. |
11. Warranty/disposal
Warranty
The "International Warranty" brochure contains detailed warranty information.
Disposal
The unit is made of various metal and plastics. Before disposal, the device is to be rendered unusable and it must not be disposed of as unsorted municipal waste in accordance with local regulations. Use your local return and collection system for waste electrical and electronic equipment (incl. batteries). Improper disposal may have harmful effects on the environment and on public health.
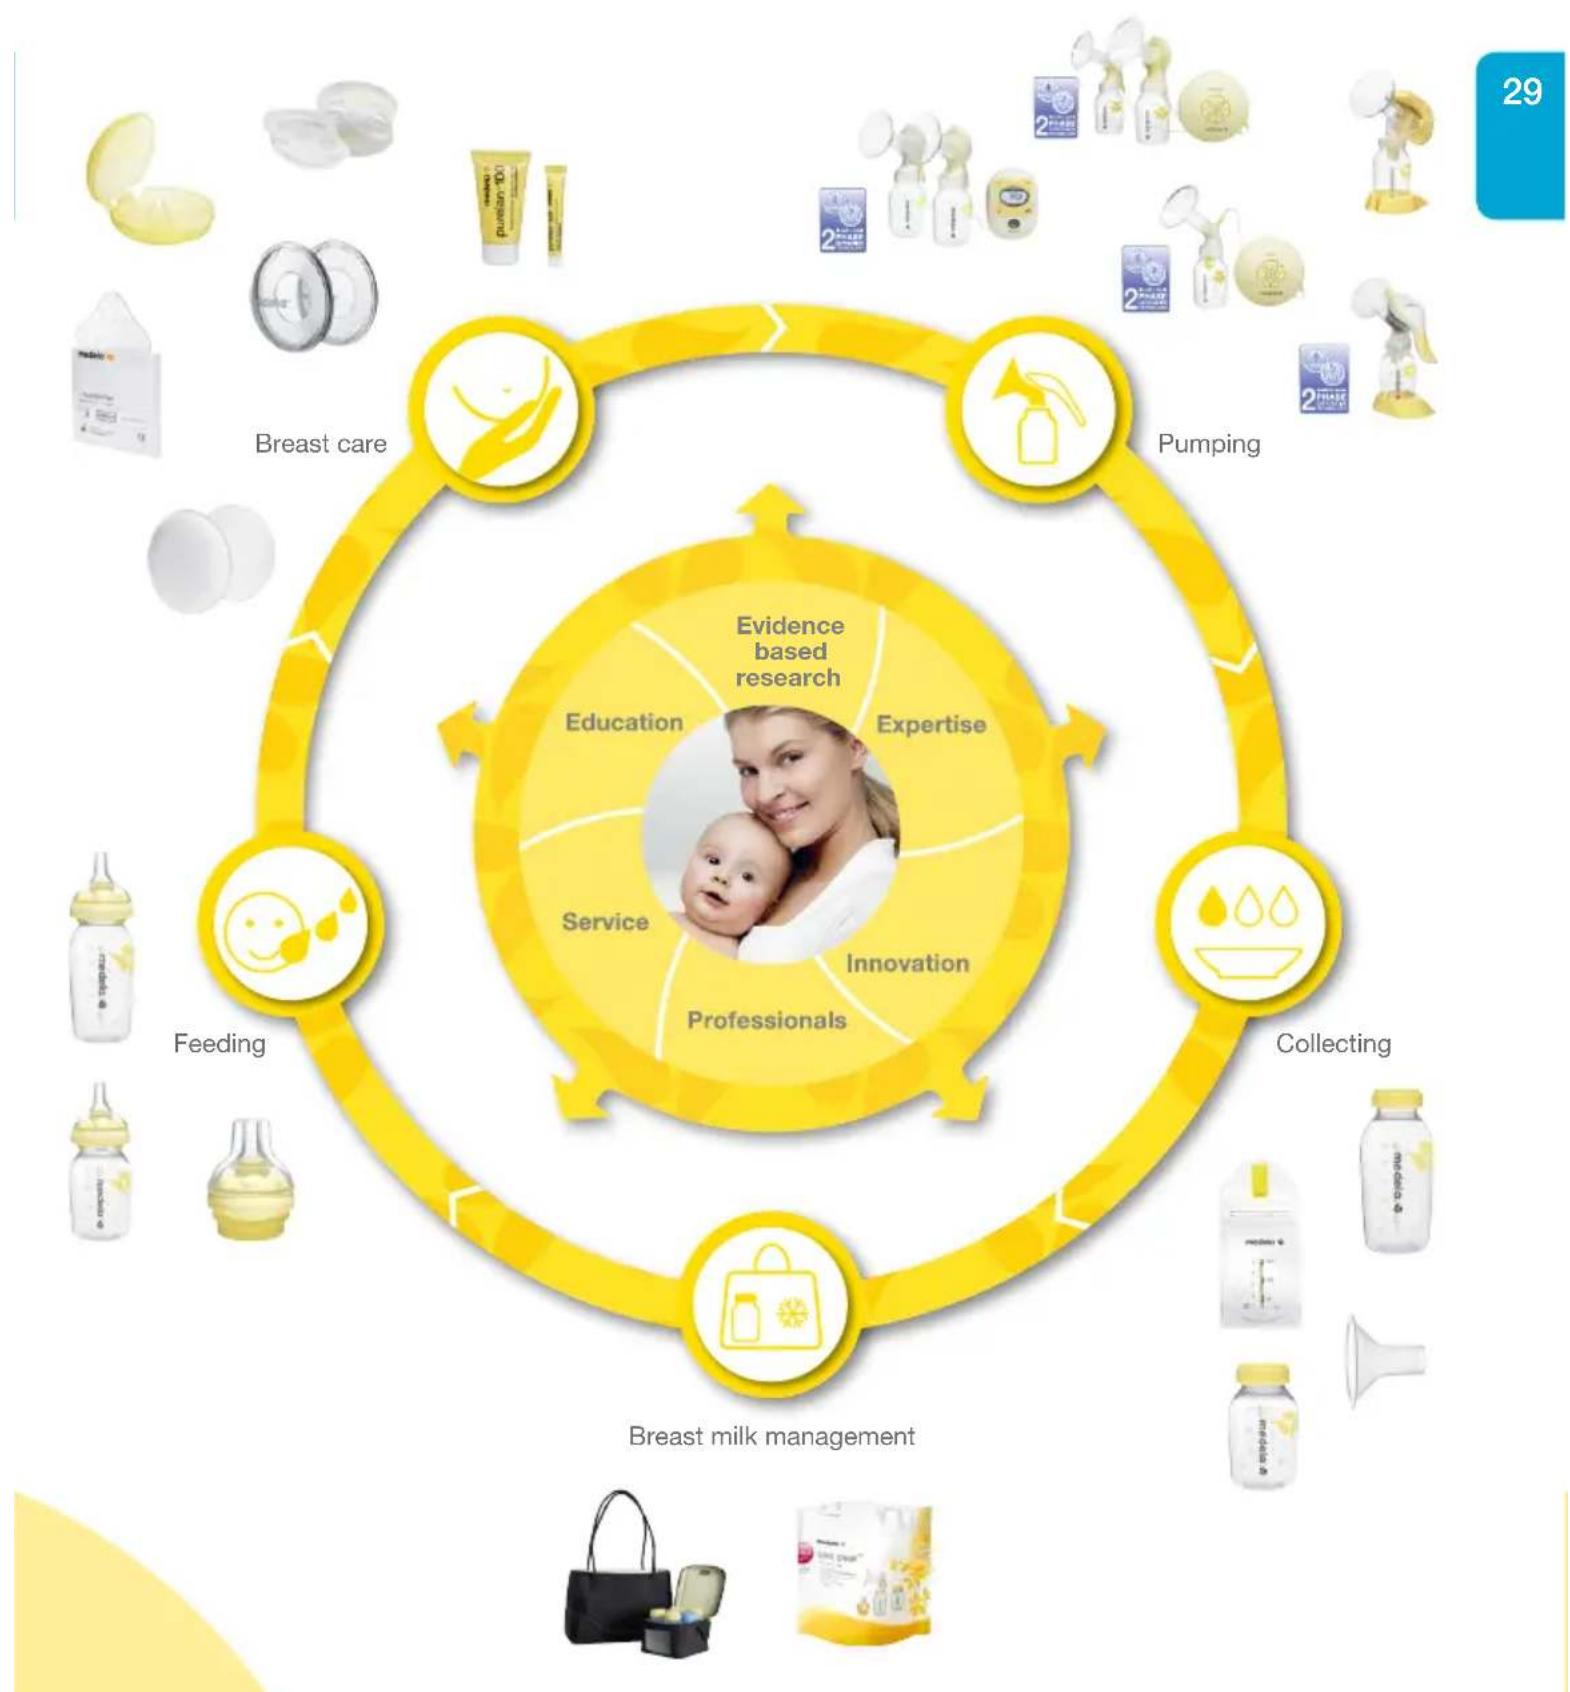
12. Complete care during breastfeeding time
28
The following accessories for the Mini Electric are available from Medela distribution partners by specifying the product number.
Spare parts
| Article number | Product |
| 099.0032 | Mini Electric Adapter (120V; 3V) US / JP |
| 099.0033 | Mini Electric Adapter (230V; 3V) Euro |
| 099.0034 | Mini Electric Adapter (240V; 3V) AUS / NZ |
| 099.0035 | Mini Electric Adapter (240V; 3V) AUS / UK |
| 099.0030 | Mini Electric Motor Unit |
Accessories
| Article number | Product |
| 008.0337* | PersonalFit 2 breast shields S (21 mm) |
| 008.0338* | PersonalFit 2 breast shields M (24 mm) |
| 008.0339* | PersonalFit 2 breast shields L (27 mm) |
| 008.0340* | PersonalFit 2 breast shields XL (30 mm) |
| 008.0341* | PersonalFit 2 breast shields XXL (36 mm) |
| 800.0796 | Breast milk bottle 150 ml (3 pcs) |
| 200.1659 | Breast milk bottle 250 ml (2 pcs) |
| 008.0139 | Calma Solitaire |
| 200.1756 | Cooling Bag |
| 200.0625 | CityStyle breast pump Bag |
Other Medela products are available on the www.medela.com web site.
- If the result of expression is unsatisfactory or expression is painful, contact your midwife or lactation consultant. A different size of PersonalFit breast shield may help make expression more comfortable and successful.

Inhaltsverzeichnis
Spoel alle onderdelen 10-15 seconden in koud, schoon water van circa 20^
Spoel alle onderdelen in koud, schoon water van circa 20^

Maak alle delen schoon in ruim warm zeepwater (circa 30^ ).
I re langkah 2 (bab 7.1):
I re langkah 2 (bab 7.1):
The Mini Electric breast pump needs special precautions regarding EMC (Electromagnetic compatibility) and needs to be installed and put into service according to the EMC information provided in these instructions for use. Wireless communications equipment such as wireless home network devices, mobile phones, cordless telephones and their base stations, walkie-talkies can affect the electric breast pump. Mini Electric and should be kept at least a distance 1.0m away from the equipment. Electromagnetic Compatibility (EMC, IEC 60601-1-2:2007, Table 1)
The electric breast pump Mini Electric is intended for use in the electromagnetic environment specified below. The customer or the user of the electric breast pump Mini Electric should assure that it is used in such an environment.
Electromagnetic emissions
| Emission tests Compliance | Electromagnetic environment – guidance | |
| RF emissions CISPR 11 | Group 1 | The electric breast pump Mini Electric uses RF energy only for its internal function. Therefore, its RF emissions are very low and are not likely to cause any interference in nearby electronic equipment. |
| RF emissions CISPR 11 | Class B | |
| Harmonic emissions IEC 61000-3-2 | Class A | The electric breast pump Mini Electric is suitable for use in all establishments, including domestic establishments and those directly connected to the public low-voltage power supply network that supplies buildings used for domestic purposes. |
| Voltage fluctuations / flicker emissions IEC 61000-3-3 | Not applicablea | |
a No significant voltage changes
Warning - The electric breast pump Mini Electric should not be used adjacent to or stacked with other equipment. If adjacent or stacked use is necessary, the electric breast pump Mini Electric should be observed to verify normal operation in the configuration in which it will be used.
Electromagnetic Compatibility (EMC, IEC 60601-1-2:2007, Table 2)
Electromagnetic immunity
The electric breast pump Mini Electric is intended for use in the electromagnetic environment specified below. The customer or the user of the electric breast pump Mini Electric should assure that it is used in such an environment.
| Immunity test | IEC 60601 test level | Compliance level | Electromagnetic environment - guidance |
| Electrostatic discharge (ESD) IEC 61000-4-2 | ± 6 kV contact ± 8 kV air | ± 6 kV contact ± 8 kV air | Floors should be wood, concrete or ceramic tile. If floors are covered with synthetic material, the relative humidity should be at least 30%. |
| Electrical fast transient / burst IEC 61000-4-4 | ± 2 kV for power supply lines ± 1 kV for input / output lines | ± 2 kV for power supply lines Not applicablea | Mains power quality should be that of a typical commercial or hospital environment. |
| Surge IEC 61000-4-5 | ± 1 kV line(s) to line(s) ± 2 kV line(s) to earth | ± 1 kV differential mode Not applicableb | Mains power quality should be that of a typical commercial or hospital environment. |
a No input/output lines
b No earth, class II equipment
13. EMC/Technical description
| Voltage dips, short interruptions and voltage variations on power supply input lines IEC 61000-4-11 | <5 %UT(>95 % dip in UT) for 0,5 cycle40 %UT(60 % dip in UT) for 5 cycles70 %UT(30 % dip in UT) for 25 cycles<5 %UT(>95 % dip in UT) for 5 s | <5 %UT(>95 % dip in UT) for 0,5 cycle40 %UT(60 % dip in UT) for 5 cycles70 %UT(30 % dip in UT) for 25 cycles<5 %UT(>95 % dip in UT) for 5 s | Mains power quality should be that of a typical commercial or hospital environment. If the user of the electric breast pump Mini Electric requires continued operation during power mains interruptions, it is recommended that the electric breast pump Mini Electric is powered from an uninterruptible power supply or a battery. |
| Power frequency (50/60 Hz)magnetic field IEC 61000-4-8 | 3 A/m 3 A/m | Power frequency magnetic fields should be at levels characteristic of a typical location in a typical commercial or hospital environment. | |
| NOTE UTis the a.c. mains voltage prior to application of the test level. | |||
Electromagnetic Compatibility (EMC, IEC 60601-1-2:2007, Table 4)
Electromagnetic immunity
The electric breast pump Mini Electric is intended for use in the electromagnetic environment specified below. The customer or the user of the electric breast pump Mini Electric should assure that it is used in such an environment.
| Immunity test | IEC 60601 test level | Compliance level | Electromagnetic environment - guidance |
| Conducted RF IEC 61000-4-6 Radiated RF IEC 61000-4-3 | 3 Vrms 150 kHz to 80 MHz 3 V/m 80 MHz to 2,5 GHz | 3 Vrms 3 V/m | Portable and mobile RF communications equipment should be used no closer to any part of the electric breast pump Mini Electric, including cables, than the recommended separation distance calculated from the equation applicable to the frequency of the transmitter. Recommended separation distance d = 1.2√P d = 1,2√P 80 MHz to 800 MHz d = 2,3√P 800 MHz to 2,5 GHz where P is the maximum output power rating of the transmitter in watts (W) according to the transmitter manufacturer and d is the recommended separation distance in metres (m). Field strengths from fixed RF transmitters, as determined by an electromagnetic site survey,a should be less than the compliance level in each frequency range.b Interference may occur in the vicinity of equipment marked with the following symbol: |
13. EMC/Technical description
Note 1 At 80 MHz and 800 MHz, the higher frequency range applies.
Note 2 These guidelines may not apply in all situations. Electromagnetic propagation is affected by absorption and reflection from structures, objects and people.
a Field strengths from fixed transmitters, such as base stations for radio (cellular/cordless) telephones and land mobile radios, amateur radio, AM and FM radio broadcast and TV broadcast cannot be predicted theoretically with accuracy. To assess the electromagnetic environment due to fixed RF transmitters, an electromagnetic site survey should be considered. If the measured field strength in the location in which the electric breast pump Mini Electric is used exceeds the applicable RF compliance level above, the electric breast pump Mini Electric should be observed to verify normal operation. If abnormal performance is observed, additional measures may be necessary, such as re-orienting or relocating the electric breast pump Mini Electric.
b Over the frequency range 150kHz to 80MHz , field strengths should be less than 3V / m .
Recommended separation distances between portable and mobile RF communications equipment and the electric breast pump Mini Electric
The electric breast pump Mini Electric is intended for use in an electromagnetic environment in which radiated RF disturbances are controlled. The customer or the user of the electric breast pump Mini Electric can help prevent electromagnetic interference by maintaining a minimum distance between portable and mobile RF communications equipment (transmitters) and the electric breast pump Mini Electric as recommended below, according to the maximum output power of the communications equipment.
| Rated maximum output power of transmitter W | Separation distance according to frequency of transmitterM | ||
| 150 kHz to 80 MHz d = 1,2√P | 80 MHz to 800 MHz d = 1,2√P | 800 MHz to 2.5 GHz d = 2,3√P | |
| 0,01 0.12 0.12 0.23 | |||
| 0,1 0.37 0.37 0.74 | |||
| 1 1.2 1.2 2.3 | |||
| 10 3.7 3.7 7.4 | |||
| 100 12 12 | 23 | ||
For transmitters rated at a maximum output power not listed above, the recommended separation distance d in metres (m) can be estimated using the equation applicable to the frequency of the transmitter, where P is the maximum output power rating of the transmitter in watts (W) according to the transmitter manufacturer.
Note 1 At 80 MHz and 800 MHz, the separation distance for the higher frequency range applies.
Note 2 These guidelines may not apply in all situations. Electromagnetic propagation is affected by absorption and reflection from structures, objects and people.
14. Technical specifications

vacuum (approx.)
-0....-295 mmHg
-0....37 kPa
0...34cpm

In Out
EURO 230V~50Hz
AUS/NZ 230-240V-50Hz UK 220-240V-50Hz
JP/CN 100-240V~50/60Hz
3V 0.5A
2x1.5V,Alkaline
AA, Mignon, LR6
370g
270g
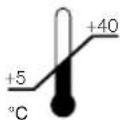
Operation
Betrieb
En Service
Utilizzo
Gebruik
Pengoperasian
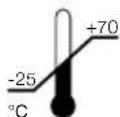
Transport/Storage
Transport / Stockage
6341 Baar, Switzerland
www.medela.com
International Sales
Medela AG
Lattichstrasse 4b
6341 Baar
Switzerland
Phone +41 41 562 51 51
www.medela.com
Australia
Medela Australia Pty Ltd,
Medical Technology
3 Arco Lane, Heatherton, Vic 3202
Australia
Phone +61 3 9552 8600
Fax +61 3 9552 8699
contact@medela.com.au
www.medela.com.au
France
Medela France Sarl
Netherlands & Belgium
Medela Benelux BV
Uilenwaard 31
5236 WB's-Hertogenbosch
Netherlands
Phone +31 73 690 40 40
Fax +31 73 690 40 44
info@medela.nl
info@medela.be
www.medela.nl
www.medela.be
Switzerland
Medela AG
Lattichstrasse 7
6341 Baar
Switzerland
Phone +41 848 633 352
Fax +41 41 769 51 00
contact@medela.ch
www.medela.ch
United Kingdom
Medela UK Ltd.
Huntsman Drive
Northbank Industrial Park
Irlam, Manchester M44 5EG
United Kingdom
Phone +44 161 776 0400
Fax +44 161 776 0444
info@medela.co.uk
www.medela.co.uk

- Intended use / Population - Contraindication
- The intended use and indications of breast pumps
- Intended patient population/user
- Contraindications
- Meaning of symbols
- Symbols on the packaging
- Symbols on the device
- Symbols on the mains adapter
- Important safety information
- Device
- Electrical use
- Use
- Important:
- Product description
- Cleaning
- Caution
- Note
- Before using for the first time and once a day
- 5.3Cleaning the motor unit
- Preparing for pumping
- Warning
- I re 6.1 Mains operation:
- Mains operation
- Info
- I re 6.2 Battery operation:
- Battery operation
- ! Note
- i Info
- 6.3Assembling the pump set
- Expression
- I re step 2 (chapter 7.1):
- Preparing for pumping
- Pumping
- Storing and thawing breast milk
- 8.1Storage
- 8.2Freezing
- 8.3Thawing
- Feeding breast milk
- With Calma
- Troubleshooting
- Warranty/disposal
- Warranty
- Disposal
- Complete care during breastfeeding time
- Inhaltsverzeichnis
- I re langkah 2 (bab 7.1):
- Electromagnetic immunity
- EMC/Technical description
- Recommended separation distances between portable and mobile RF communications equipment and the electric breast pump Mini Electric
- Technical specifications
Brand : MEDELA
Model : Mini Electric
Category : Breast Pump