
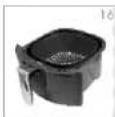
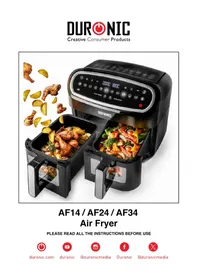
Jet Fryer AF1 - Deep fryer Duronic - Free user manual and instructions
Find the device manual for free Jet Fryer AF1 Duronic in PDF.
| Product Type | Oil-free fryer (Air fryer) |
| Brand | Duronic |
| Model | Jet Fryer AF1 |
| Power | 1500 W (estimated) |
| Voltage | 220-240 V ~ 50/60 Hz |
| Temperature Range | 80 °C to 200 °C |
| Timer | Up to 60 minutes |
| Basket Capacity | Approximately 700 g (frozen fries) |
| Automatic Shut-off | Yes, when the timer reaches 0 |
| Functions | Oil-free frying, cooking, reheating, roasting, baking (with provided tray) |
| Included Accessories | Frying basket, frying drawer, additional baking tray, heat-resistant mat |
| Material | Non-stick coating on basket, drawer, and interior |
| Cleaning | Basket and drawer dishwasher safe; exterior cleaned with a damp cloth |
| Safety | Hot surface, do not immerse, do not cover air inlets/outlets, minimum 10 cm clearance around appliance |
| Power Cord | Retractable, with integrated storage under the appliance |
| Warranty | 1 year (by Shine-Mart Ltd) |
| Usage | Household use only |
Frequently Asked Questions - Jet Fryer AF1 Duronic
User questions about Jet Fryer AF1 Duronic
0 question about this device. Answer the ones you know or ask your own.
Ask a new question about this device
Download the instructions for your Deep fryer in PDF format for free! Find your manual Jet Fryer AF1 - Duronic and take your electronic device back in hand. On this page are published all the documents necessary for the use of your device. Jet Fryer AF1 by Duronic.
USER MANUAL Jet Fryer AF1 Duronic
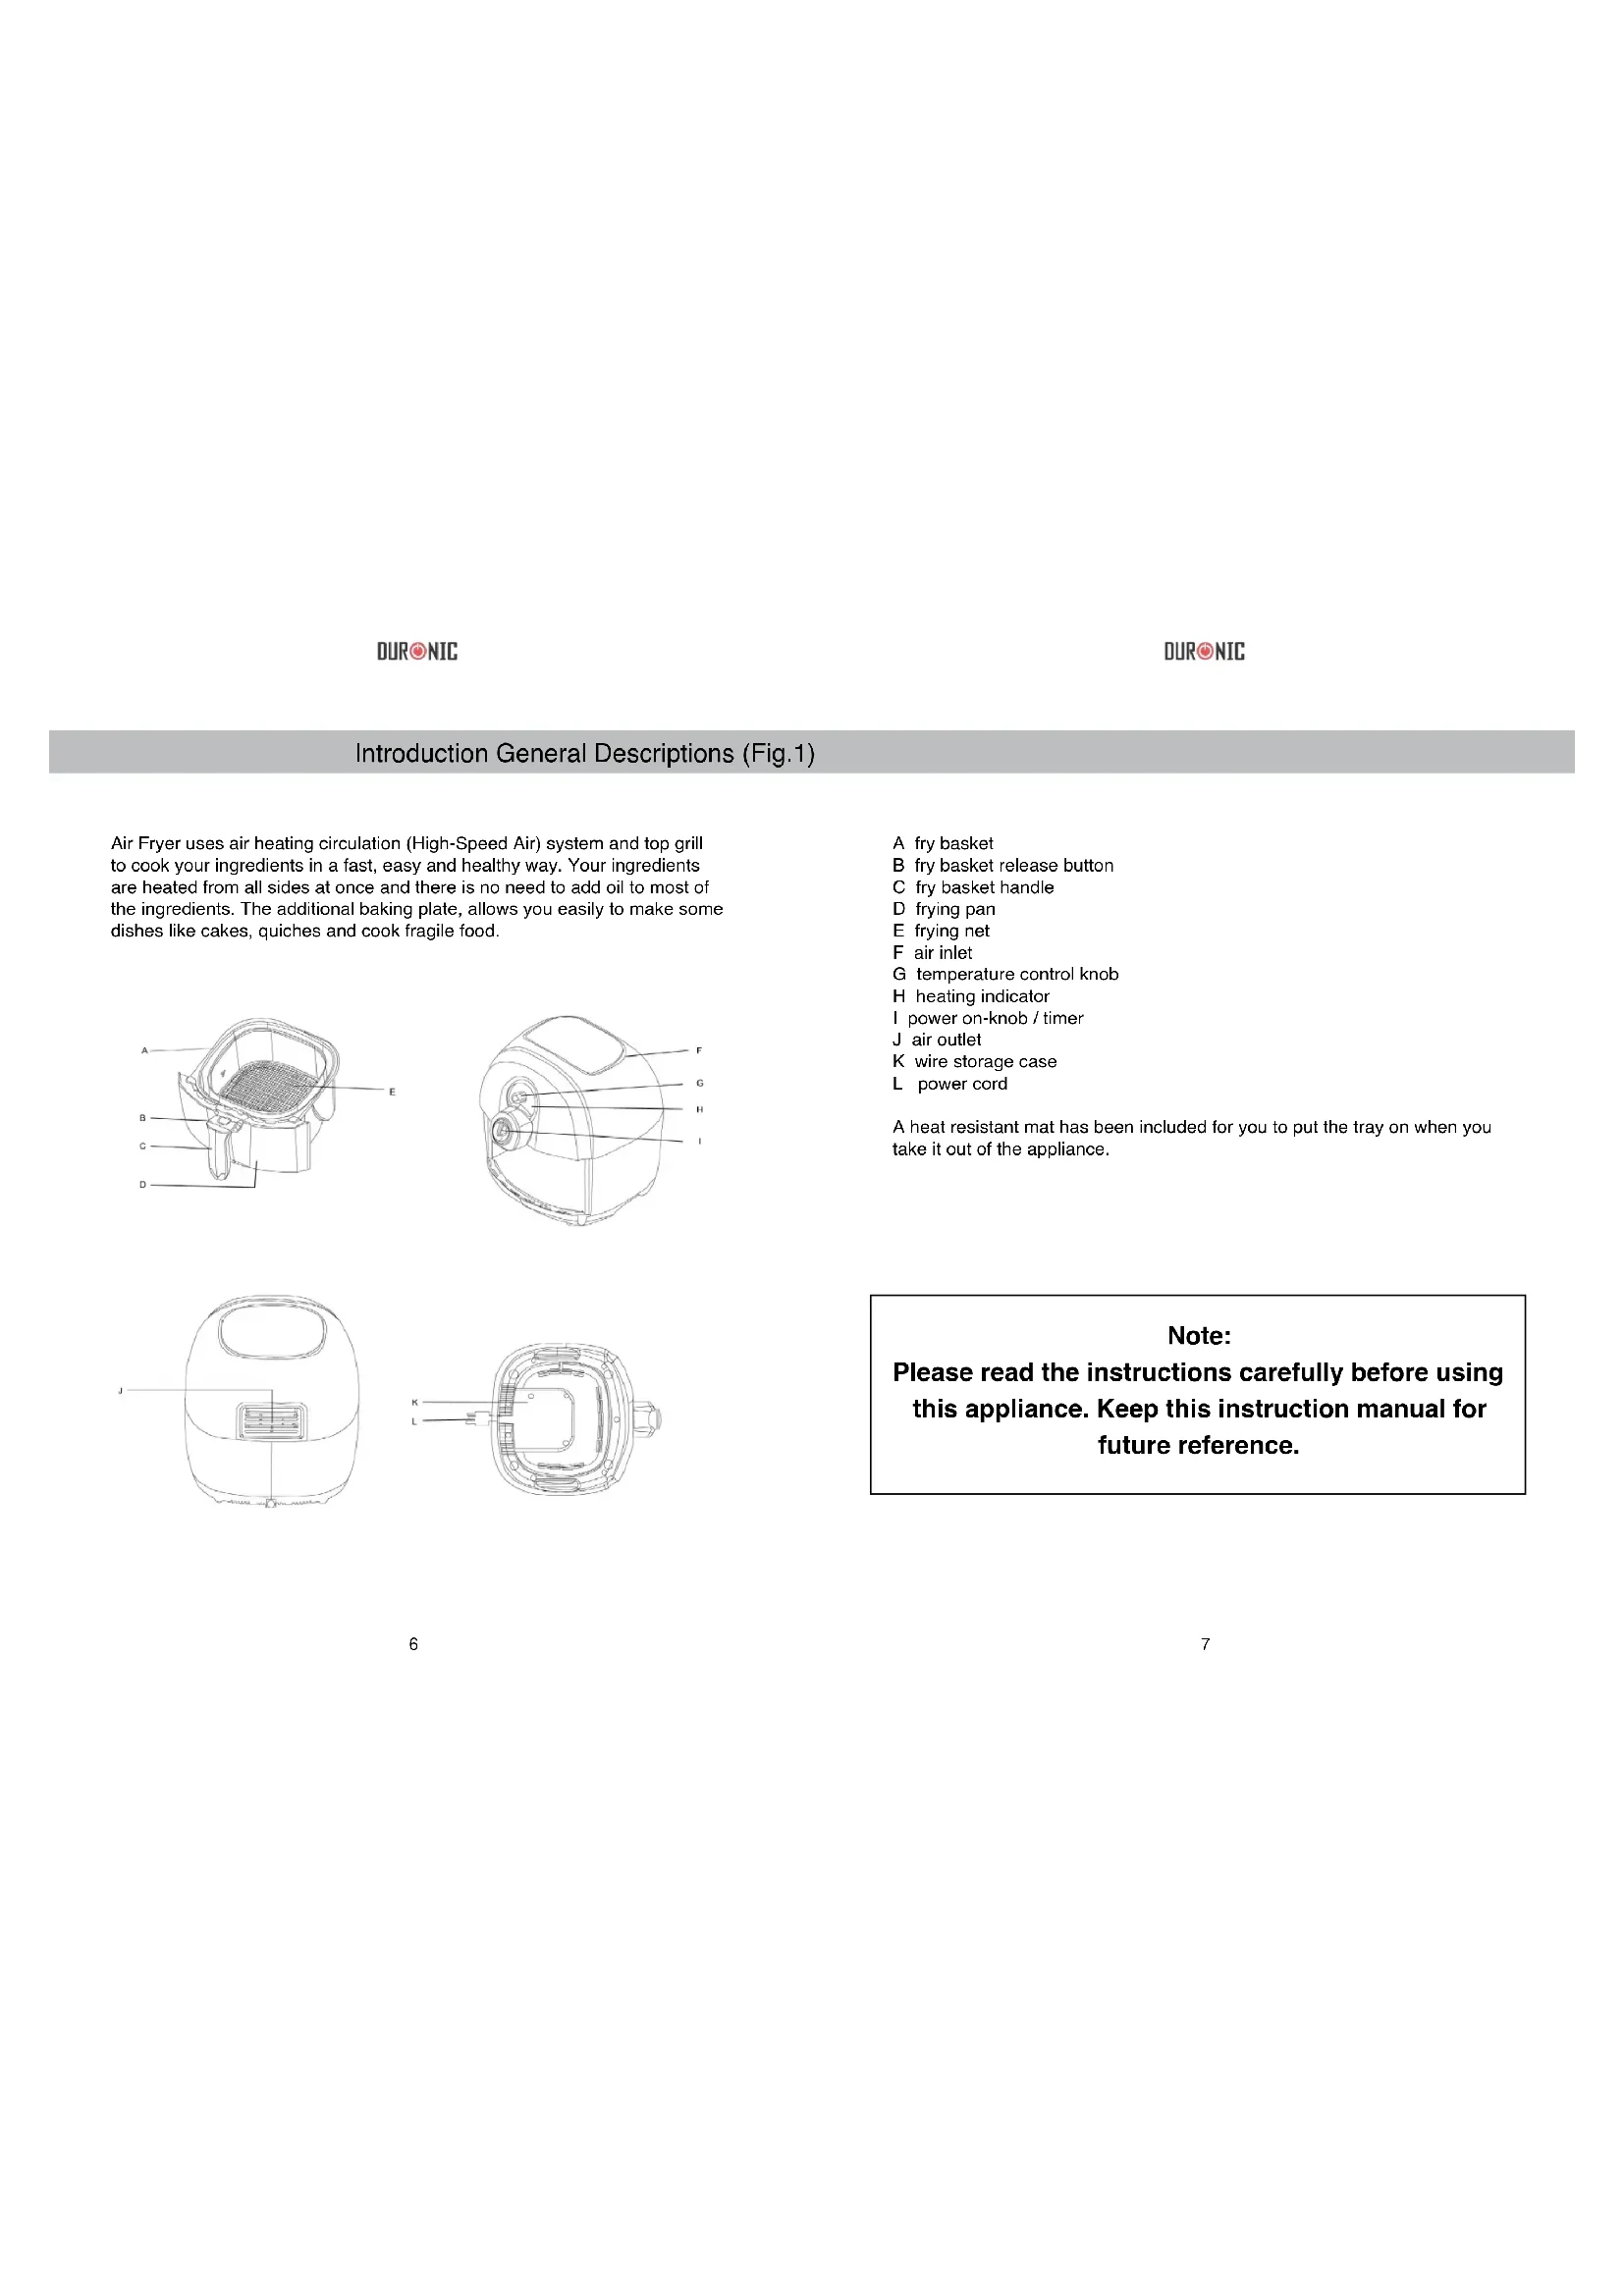
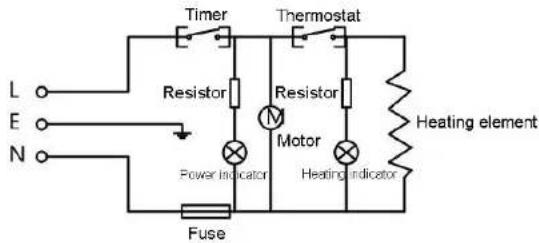
Air Fryer uses air heating circulation (High-Speed Air) system and top grill to cook your ingredients in a fast, easy and healthy way. Your ingredients are heated from all sides at once and there is no need to add oil to most of the ingredients. The additional baking plate, allows you easily to make some dishes like cakes, quiches and cook fragile food.

6
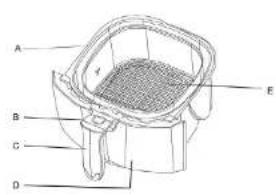
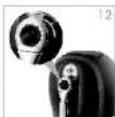
A fry basket
B fry basket release button
C fry basket handle
D frying pan
E frying net
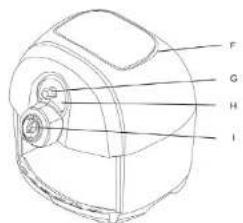
F air inlet
G temperature control knob
H heating indicator
I power on-knob / timer
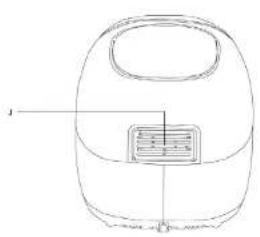
J air outlet
K wire storage case
L power cord
A heat resistant mat has been included for you to put the tray on when you take it out of the appliance.
Note:
Please read the instructions carefully before using this appliance. Keep this instruction manual for future reference.
7
DURONIC
Dangerous
-Never submerged in water or clean it under the tap because the appliance contains electronic components and heating elements
-Do not let the water or liquid enter into the appliance this will prevent electric shock.
-Always place the ingredients in the fry basket, to prevent any contact with the heating elements.
-Do not cover the air inlet or air outlet while the appliance is in operation.
-Do not fill the pan with oil that may cause a fire hazard.
-Do not touch the inside while the appliance is operating.
DURONIC
-Make sure the plug is inserted into the wall socket properly.
-Do not intend to operate the appliance by means of an external timer.
-Do not place the appliance on or nearby the flammable material, such as a tablecloth or curtain.
-Never place the appliance against the wall or others appliance. Keep a distance at least 10cm free space on the back and sides and 10cm free space above the appliance. Never place any item on top of the appliance.
- Never use this appliance for any other purpose than described in this instruction manual.
-Appliance must be used in a sensible manner.
-Hot steam will be released through the air outlet during frying. Keep your hand and face from a safe distance. Also be careful of hot steam and high temperatures when removing the pan.
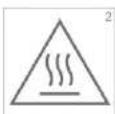
- The surface of the appliance may become very hot when in use. (figure 2)
- Immediately switched off the power or unplug the appliance if you see dark smoke coming out from the appliance. Wait for the smoke emission to stop before you remove the frying pan.
Warning Note
-Please check the appliance voltage and your country power supply voltage are match before connecting the appliance.
-Do not use the appliance if the power cord is damage.
- If the power cord is damaged, you must have it replaced by a qualified electrician, in order to avoid a hazard.
This appliance can be used by children from 8 years old or above and by people with reduced physical, sensory or mental capabilities, or lack of experience and knowledge, provided they are supervised or guided by a person to ensure their safety.
-Children should be supervised to ensure that they do not play with the appliance
-Keep the appliance and the power cord out of reach of children when the appliance is switched on or is cooling down
-Keep the power cord away from the surface of high temperature.
-Do not insert the plug of the appliance or operate control panel with wet hands.
-Place the appliance on a horizontal or a stable surface.
-Return the appliance to manufacturer or authorised service centre for repair or inspection. Do not repair the appliance yourself; otherwise the guarantee will become invalid.
-Be sure to unplug the appliance after use.
-Let the appliance cool down for about 30 minutes before you clean it.
-Ensure the ingredients presented in golden brown, not dark or brown.
Automatically Shut Off
This appliance is equipped with a timer. When the timer has countdown to 0, the appliance will ring a bell and automatically shut off. If manually shut off, please turn the timer knob to 0.
DURNIC
DURONIC
Electromagnetic Fields (EMF)
The Use Of This Product
This product conforms to the electronic magnetic field (EMF) related standards. If used correctly according to the instructions of the user manual, this product is safe.
BeforeFirstUse
1 Take away all the packaging material.
2 Remove the sticker or label from the appliance.
3 Use hot water, washing liquid and non-abrasive sponge to thoroughly clean the frying basket and pan.
Note: You can also use the dishwasher to clean the components part.
4 Wipe the appliance inner part and outer part with a wet cloth.
This is a no oil Air Fryer. Do not fill the frying pan with oil.
To Use
1 Place the appliance on a horizontal or a stable surface.
Do not put the appliance on non-heat resistance surface.
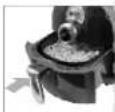
2 Properly place the fry basket in frying pan. (figure 3)
Pull the power cord out of the cord storage part in the bottom of the appliance.
Do not fill the frying pan with oil or other liquid.
Do not place any item on top of the appliance to cut off the airflow and influence the hot air heating.
Air Fryer can be used for cooking many ingredients. The enclosed recipe book will help you understand the product and what is made with it. Please check image figures at the end of this manual to relate to the below points.
1 Insert the plug into the earthed wall socket
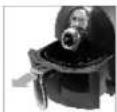
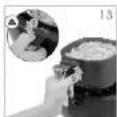
2 Carefully pull the frying pan from the appliance. (figure 4)
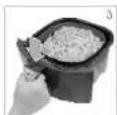
3 Put the ingredients in the fry basket. (figure 5)
Note: Do not put the ingredient exceeding the MAX indicator line or more than indicator table (refer to the chapter of the "Setting"), because this may affect the frying result.
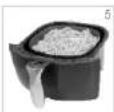
4 Slide the frying pan back to the Air Fryer. (figure 6)
Never use the frying pan without the fry basket.
Note: Do not use or touch the frying pan, because it is very hot. Kindly hold the handle when removing the frying pan.
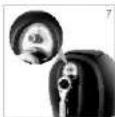
5 Adjust the temperature control knob to the required temperature. Please refer to the chapter of the "Setting" part to determine the right temperature (figure 7)
6 Determine the time required for cooking ingredients (please refer to the chapter of the "Settings" part)
7 To switch on the appliance, please adjust to the necessary timer knob to cooking time. (figure 8)
If the appliance is cold, the cooking time should be increased by 3 minutes.
Note: You can also preheat the appliance before putting in the ingredients by adjusting the timer knob about 3 minutes, and wait for the heating indicator light goes out (about 3 minutes). Then put in the frying basket and adjust the timer knob to the cooking time.
-
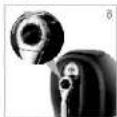
at this time, the power cord indicator and the heating indicator will light up. (figure 9)
-
timer will countdown from set cooking time.
- Appliance process when heating indicator light up and goes out from times to times. This means that heating element in constant on and off, in order to maintain the temperature.
- Excess oil is collected on the bottom of frying pan.
DURNIC
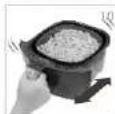
8 Some ingredients in the cooking process need to shake halfway (refer to the chapter of the "Setting" part). Pull the frying pan from appliance and shake it, then slide back the pan into the appliance. (figure 10)
Note: Do not press the fry basket remove button during shaking the frying pan. (figure 11)
Tip: You can remove the fry basket from pan and shake only to reduce the weight. Pull the pan out of appliance and place it on a heat-resistance surface and press the fry basket remove button.
Tip: If you set the timer to half of the cooking time, listen to the timer bell when you want to shake the ingredients. However, this means that you have to set the timer again for the remaining cooking times after shaking.
9 If you listen the timer bell, said the cooking times has elapsed. Pull the frying pan out of the appliance and place it on heat-resistance surface.
Note: You can also manually stop frying. Adjust the timer control knob to 0. (figure 12)
10 Check whether the ingredients are cooked.
If still need to cook, slide the frying pan back to the appliance and set the timer for a few minutes.
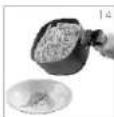
11 To pour out small ingredients (such as French fries), please press fry basket remove button (1) and then lift the fry basket out of frying pan. (2). (figure 13)
Do not turn the frying basket upside down with the pan still attach to it as it may cause excess oil that has collected at the bottom of the frying pan will leak onto the ingredients.
After frying, the pan and the ingredient are still hot. It is depending on the different ingredients; hot steam may escape from the frying pan.
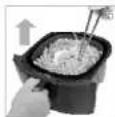
12 Empty the ingredient from fry basket onto a plate or bowl. (figure 14)
Tip: To remove the large or fragile ingredients, can use a pair of tongs to lift the ingredients out of the basket. (figure 15)
13 The Air Fryer is instantly ready for cook the next batch of ingredients after a batch of ingredients is ready. (figure 16)
DURONIC
Settings
Below table will help you to choose the basic settings for the ingredients you want to cook.
Note: Please remember these Settings are only reference. We cannot guarantee the best setting for your ingredients because there is difference in source, size, shape and brand.
Because the high-speed air circulation technology instantly reheats the air inside the appliance, pull out the pan briefly from appliance during hot air frying barely disturbs the process.
Tip
-Slightly shorter the cooking time for smaller ingredients.
-Slightly longer the cooking time for larger amount of ingredients.
-Shift the smaller ingredients halfway of cooking time, this can optimise the end result and can prevent unevenly fried of the ingredients.
-Add small volume of oil to fresh potatoes for crispy and crunchy result and fry it within a few minutes after added oil.
-Do not cook some ingredient with extremely greasy, such as sausage.
-Snacks that can be cook in oven can be cook in this appliance as well.
-To cook crunchy French fries the best ingredients for that quantity is 500 grams.
-Use pre-made dough to cook filled snack in fast and convenient way.
Compared with homemade dough, the pre-made also need a shorter cook.
-Set the temperature to 150^ for up to 10 minutes to reheat ingredients.
DURNIC
DURONIC
PotatoesandFrenchfries
Snacks
| Category | Min-Max ingredients (g) | Time (minutes) | Temperature (℃) | Shake | Additional information |
| Frozen thin potato chips | 300-700 | 12-16 | 200 | Shake | |
| Frozen thick potato chips | 300-700 | 12-20 | 200 | Shake | |
| Homemade fries (8 * 8) mm | 300-800 | 18-25 | 180 | Shake | Add 1/2 TBSP oil |
| Homemade chips | 300-800 | 18-22 | 180 | Shake | Add 1/2 TBSP oil |
| Homemade chips | 300-750 | 12-18 | 180 | Shake | Add 1/2 TBSP oil |
| Potato | 250 | 15-18 | 180 | ||
| Cream | 500 | 18-22 | 180 |
Meat and Poultry
| Category | Min-Max Ingredients (g) | Time (minutes) | Temperature (℃) | Shake | Additional information |
| Steak | 100-500 | 8-12 | 180 | ||
| Pork chops | 100-500 | 10-14 | 180 | ||
| Hamburger | 100-500 | 7-14 | 180 | ||
| Sausage, | 100-500 | 13-15 | 200 | ||
| Drumsticks | 100-500 | 18-22 | 180 | ||
| Chicken breast | 100-500 | 10-15 | 180 |
| Category | Min-Max Ingredients (g) | Time (minutes) | Temperature (℃) | Shake | Additional information |
| Spring roll | 100-400 | 8-10 | 200 | Shake | Use oven-ready |
| Frozen chicken nuggets | 100-500 | 6-10 | 200 | Shake | Use oven-ready |
| Frozen fish fingers | 100-400 | 6-10 | 200 | Use oven-ready | |
| Frozen bread crumbs cheese snacks | 100-400 | 8-10 | 200 | Use oven-ready | |
| Stuffed vegetable | 100-400 | 10 | 180 |
Note: If the appliance is still cold, add another 3 minutes the cooking time.
Homemade French-fried
For best result, we suggest you to use pre-baked (such as frozen fries). If homemade French-fries, please follow the steps as below.
1 Peel the potatoes and cut them into small sticks.
2 Soak the potatoes sticks in a bowl at least 30 minutes and then dry them with kitchen paper.
3 Put 12 spoon of olive oil into a bowl and smear over the potatoes sticks.
4 Take out the potatoes sticks from bowl by hand or a kitchen utensil so the excess oil left in the bowl. Put the potatoes sticks in the fry basket.
Note: Do not put all potatoes sticks into fry basket in one go, to prevent excess oil on the bottom of frying pan.
5 Fry the potatoes sticks by following the instruction of chapter 5.
Meat and Poultry
Troubleshooting
Immediately clean the appliance after use. Give 30 minutes for everything to cool down.
The frying pan, baking tray, fry basket and inside of the appliance have a non-stick coating. If you use metal kitchen utensils or abrasive materials to clean them will damage the non-stick coating.
1 Unplug the power cord from socket and let the appliance cool down.
Note: Take out the frying pan from appliance to let the appliance cool down more quickly.
2 Clean the outer part of the appliance by wet cloth.
3 Use hot water, washing liquid and non-abrasive sponge thoroughly cleans the fry basket and frying pan and soaks for about 10 minutes.
4 Use hot water and non-abrasive sponge to clean the inner part of appliance.
5 Use cleaning brush to clean the food residues at the heating elements.
Storage
1 Unplug the power cord from socket and let the appliance cool down completely.
2 Ensure all parts have clean and dry.
3 Place the power cord into the cord storage compartment and fix it by insert into power cord fixing slot.
| Question | Possible reasons | Solution |
| Air Fryer does not function | Appliance is not plugged in | 1. Insert the plug into the earthed wall socket 2. Adjust the timer knob to the required cooking time. |
| Ingredients are not done after cooked with Air Fryer | 1. Too much ingredients in fry basketTemperature is too low | 1. Divided ingredients into smaller batch to cook in fry basket. Smaller batch can be fried more evenly. 2. Adjust the temperature control knob to required temperature setting (refer to the "use of the appliance") chapter "Setting" part. Adjust the timer knob to the required cooking time (refer to the "use of the appliance") chapter "Setting" part. |
| 2. Cooking time is too short | ||
| Ingredients are not cook evenly | Some Ingredients need to be shake halfway during the cooking time. | Some ingredients that on top and fold over (such as French fries) need to be shake halfway during the cooking time (refer to the "use of the appliance") chapter "Setting" part. |
| Snacks are not crispy | Some snacks shall fry in traditional method. | Use oven snack, or brush some oil on the snack for crispy result. |
| Cannot slip the frying pan into the appliance | Too much of ingredients in fry basket | Do not put the ingredients more than the MAX indicator line. |
| White smoke come out from appliance | 1.Cooking the greasy ingredient 2. Frying pan remains the greasy residues from previous use. | 1. If fry greasy ingredients in Air Fryer, large amount of oil will leak into the frying pan. Oil will produces white smoke and the frying pan is heat up than normal. 2. White smoke is because greasy is heating up in the pan. Properly clean the pan after every use. |
| French fries are not cook evenly. | Did not soak the potatoes stick properly before fried by Air Fryer. | Make sure to use the fresh potatoes to fries. |
| French fries are not crispy. | Crispiness is depend on the oil water volume when fries. | 1. Properly dry the potatoes stick before fry. 2. Cut the potatoes stick smaller for crisper result. 3. Add little volume of oil for crisper result. |
DURONIC
Image Figures


Warranty and Service
1 Year Guarantee from Shine-Mart Ltd, Trademark owners of Duronic Products.
NOTE: THESE STATEMENTS DO NOT AFFECT YOUR STATUTORY RIGHTS AS A CONSUMER
DURNIC
This product has been manufactured under the strictest or quality control procedures, and using the highest quality of materials, to ensure excellent performance and reliability. It will give very good and long lasting service, provided it is properly used and maintained.
The product is guaranteed for 1 years from the date of original purchase. If any defect arises due to a faulty materials or poor workmanship, the faulty product must be returned to the original place of purchase. Refund or replacement is at the discretion of that company.
Duronic Products are offered with a 1 year guarantee under the following conditions:
- The product must be returned to the retailer with original proof of purchase.
- The product must be installed and used in accordance with the instructions contained in this operating manual.
- It must be used only for domestic purposes.
- It does not cover wear and tear, malicious damage, misuse, neglect, inexpert repairs or consumable parts.
- Shine-Mart Ltd has no responsibilities for accidental or consequential loss or damage.
- Shine-Mart Ltd are not liable to carry out any type of servicing work, under the guarantee
- Valid in the UK only
C
This product is fitted with BS:1363 plug and fuse
Imported by Shine-Mart Ltd, RM3 8SB

Information on waste Disposal for Consumers of Electrical & Electronic Equipment.
This mark on a product and/or accompanying documents indicates that
when it is to be disposed of, it must be treated as
Waste Electrical & Electronic Equipment, (WEEE).
Any WEEE marked products must not be mixed with general household waste, but kept separate for the treatment, recovery and recycling of the materials used.
For proper treatment, recovery and recycling; please take all WEEE marked waste to your Local Authority Civic waste site, where it will be accepted free of charge.
If customers dispose of Waste Electrical & Electronic Equipment correctly, they will be
helping to save valuable resources and preventing any potential negative
effects upon human health and the environment, of any hazardous materials
that the waste may contain.
DURNIC
DURONIC


- Note:
- DURONIC
- Dangerous
- Warning Note
- Automatically Shut Off
- Electromagnetic Fields (EMF)
- The Use Of This Product
- BeforeFirstUse
- To Use
- If the appliance is cold, the cooking time should be increased by 3 minutes.
- DURNIC
- Settings
- Tip
- PotatoesandFrenchfries
- Snacks
- Meat and Poultry
- Troubleshooting
- Storage
- Image Figures
- Warranty and Service
Brand : Duronic
Model : Jet Fryer AF1
Category : Deep fryer