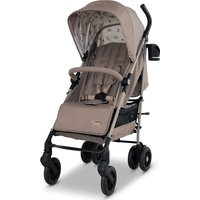
Supa Go - Stroller COSATTO - Free user manual and instructions
Find the device manual for free Supa Go COSATTO in PDF.

| Product Type | Pushchair |
| Brand | Cosatto |
| Model | Supa Go |
| Usage | From birth up to 15 kg |
| Safety standard | BS EN 1888:2012 |
| Maximum child weight | 15 kg |
| Safety harness | 5-point harness adjustable in height, with D-rings for accessories |
| Brake | Foot brake, automatic locking when folded |
| Swivel front wheels | Yes, with locking latch |
| Backrest | Reclining in multiple positions, including flat for newborn |
| Leg rest | Adjustable in multiple positions |
| Canopy | Removable, with visibility window and extension |
| Rain cover | Included, removable |
| Storage basket | Under the seat, capacity up to 2 kg |
| Handle | Height adjustable, ergonomic foam |
| Folding | Compact folding with automatic locking |
| Care and cleaning | Clean with warm water and mild detergent; covers can be washed (remove inner panels) |
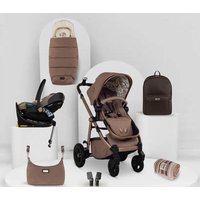
| Spare parts available | Yes: handle, canopy, seat cover, harness, wheels, etc. |
| Included accessories | Canopy, rain cover, basket |
Frequently Asked Questions - Supa Go COSATTO
User questions about Supa Go COSATTO
0 question about this device. Answer the ones you know or ask your own.
Ask a new question about this device
Download the instructions for your Stroller in PDF format for free! Find your manual Supa Go - COSATTO and take your electronic device back in hand. On this page are published all the documents necessary for the use of your device. Supa Go by COSATTO.
USER MANUAL Supa Go COSATTO
baby stuff with personality®
SUPA 60
PUSHCHAIR
NITTY GRITTY

Important: Keep these instructions for future reference. Important safety Information.
General:
- The pushchair is suitable for children from birth up to a maximum user weight of 15kg .
WARNING: Never leave your child unattended. - WARNING: Ensure that all the locking devices are engaged before use.
- WARNING: To avoid injury ensure that your child is kept away when unfolding and folding this product.
- WARNING: Do not let your child play with this product.
- WARNING: This product is not suitable for running or skating.
- WARNING: Always use the restraint system.
- WARNING: Always use the crotch strap in combination with the waist belt.
- Do not use replacement parts or accessories other than those approved by Cosatto.
- Use the seat in the most reclined position for new born babies until they can sit up unaided.
- A basket is provided for the carriage of 2kg of goods, evenly distributed.
- Any additional load attached to the handle or on the back of the backrest or on the sides of the vehicle will affect the stability and safety of the vehicle.
- Do not use a platform with this product as it may render the product unsafe.
Always apply the brake when placing or removing a child from vehicle. - Never carry a second child on the product.
This product complies with BS EN 1888:2012. - Ensure your child wears a correctly fitted and adjusted harness at all times. D-rings are provided for the attachment of a separate safety harness approved to BS EN 13210 should this be required.
Care & Maintenance:
- Your pushchair has been designed to meet comprehensive safety standards, and with correct use and maintenance will give many years of trouble free performance.
- Storage - Always store your pushchair dry. Storing a damp pushchair will encourage mildew to form, so always wipe away any moisture with a soft cloth and allow to dry thoroughly before storing. Never leave in sunlight for prolonged periods - some fabrics may fade
- Cleaning - Refer to wash care labels on soft goods for cleaning instructions. Plastic and metal parts may be sponged clean with warm water and a mild detergent. Never clean with abrasive, ammonia based, bleach based or spirit type cleaner.
- Wear & Tear - Continual impact can cause damage. The chassis is strong but will weaken should the back wheels be bumped down stairs or kerbs. Tyres will wear with use and wheel units should be replaced if necessary. If your child wears hard shoes these might damage the soft fabric.
- Maintenance - Regularly inspect the locking devices, brakes, wheels, harness assembly, catches, seat adjusters, joints and fixtures to ensure they are secure and in full working order. They should move freely at all times and minimum maintenance should be required. However a regular light application of a spray lubricant e.g. silicone (do not use oil or grease) will extend the life of your pushchair and make opening and folding easier. Your pushchair should be serviced and reconditioned before using it for a second baby, or after 18 months, whichever is the sooner.
Visual language Key:
| XX | Refer to warning XX | XX | Repeat action x times | C | Press and hold |
| ✓ | Correct action | General action arrow | ! | Check | |
| X | Incorrect action | Lock | Cont.xx | Continue to step XX | |
| CLICK! | Audible sound | Unlock | ← | Repeat on other side |
Parts:
P1:Pushchair
P2:Hood
P3: Raincover
Replacement Parts:
The replacement parts shown below are available for your product. For UK & Ireland
customers, order through our website: http://www.cosatto.com/service-centre/spares
For customer outside UK & Ireland, contact information for your local distributor can be found on http://www.cosatto.com/stockists
If you require any further assistance, please contact us at cuddle@cosatto.com
S1: Foam handle
S6: Harness
S11: Basket
S2: Handle pip
S7: Raincover
S12: Rear wheel
S3: Hood
S8: Front wheel
S13: Autocatch
S4: Seat unit
S9: Footrest
S5: Backrest board (Set)
S10: Wheel cap
Fitting & Operation information:
Please refer to the following diagrams:
Pushchair 1-Opening
Release auto lock (1) then pull the handles upwards (2).
Press down on the locking lever (3) until a 'Click' is heard and the secondary lock bar
(4) is locked in place.
Check the chassis has locked in place.
Brake 2-Applying
3- Releasing
Front swivel lock 4-Applying
5-Releasing
Handle 6-Raising
7-Lowering
Harness 8-Opening
9-Closing
10- Adjusting the strap length
Slide the strap adjustor to suitable length (1, 2 & 3).
11- Adjusting the shoulder strap position
12- Removing
Push shoulder strap retainer through backrest (1).
Push crotch strap retainer through seat (2).
Rotate "C" clip to expose its opening (3) and slide waist strap out of clip (4).
Refitting is a reversal of this procedure.
Backrest 13-Lowering
14- Raising
Calf support 15-Lowering
16- Raising
Basket 17- Removing
Hood 18-Fitting
Push the brackets onto the mounts on the chassis (1).
Attach the fabric fasteners to the outside of the seat unit (2).
Fit the rear of the hood behind the backrest and attach the fabric fastener (3).
Attach the straps to the front chassis tubing (4).
19- Opening
20- Extending
21- Using the viewing window flap
22- Removing
Removal is a reversal of step 18.
Raincover 23-Fitting
Seat cover Removal
24- Release primary lock (1) & secondary folding lock (2).
25- Release fabric fasteners at rear of backrest (1).
26- Rotate "C" clip to expose gap (1) and slide waist strap out (2).
27- Fold retainer flat (1) and push through slot in mounting block (2).
There are three retainers on each side of the pushchair. One on the front chassis tubing (3) and two on the underside of the seat (4).
28- Disconnect "C" clip from under seat (1).
29- Disconnect double "D" ring strap under the calf support (1).
30- Slide seat cover off calf support end (1) and off the backrest tubing (2).
31- Prior to washing, unzip the top of the backrest section (1) and remove the three
backrest boards (2).
Refitting is a reversal of this procedure.
Pushchair 32-Closing
Ensure backrest is in the upright position 14.

Always remove the raincover, placing it in the basket and fold the hood completely back.
Pull the ring upwards (1) then press down the secondary lock bar (2).
Push the handles forwards (3) until the auto lock engages (4).
Osha nHΦopMaζηa:
JIaTHaTaIeTcKaKoIuKh eNoDxOJa7a3aHOBOpOJeHnIeua15Kr.
- ПЕДУПЕЖDEHNE: НИКORA He OCTавайTe DeTeTo си 6e3 надзор.
- ПЕДУПЕЖDEHNE: Прени уноТpe6а повереTe дали BCNUKIN 3akliouBauni yctpoiCTBa ca 3aJeICTBaHn.
- ПЕДУПЕЖDEHNE: 3a Да се ИЗБERHe риСka OT НаряВаHe, увepete ce, чe Baшeto DeTe He e B 6ЛИЗОCT Do npOДуКТа пи HerOBOTO crbBaHe n pa3rBBAHe.
- ПЕДУПЕЖDEHNE: He поЗвогаяпту На DeTeTo Дa си Играe C To3ИnpodукT.
- ПЕДУПЕЖDEHNE:Този пюдукт He e podхODяц 3a 6яганe илпьрзалянe.
- ПЕДУПЕЖDEHNE: Виаги полз Bavіte обeзпастенhaТа сИСтema.
- ПЕДУПЕЖDEHNE: Виharу ИЗползBAйTe Y-образни ремьК в
Комбиага с посни (хоризотални) колан.
He n3noJ3BaIte pe3epBn yactn nn akcecoapn, pa3nnuHn ot Te3n, KOnTo ca oDo6peHn ot Cosatto.
- 3n0n3BaIte cdaIkata BbB b3MOxHO ha-NaKIOHeHaTa nO3uZna HOBOPOeHO, DOKaTO DeTeTo He 3aONUHe da cya 6e3 yXka IOMoU.
Koobt 3a 6araXn3dxbpXa terNo do 2 Kr.npi paBHomepHo pa3npedeJHe Ha cTOKITE.
Bcekn donbHnHTeHn TOBap, 3aKpeHn Ha npkKaTa, rbp6a Ha o6nerankata nn OTCpaHn Ha KOINyKaTa, ce OTPa3raBa HnHa HeHnata cta6uHnOCT n 6e3onacHOCT.
He nocTabaIte To3n npOdyKT Bbpyx NlaTfOpMa, TbN KaTO TOBa MoKe da rO HapabN OnaceH.
BnHa n aKtNbUpaNte cnpaKaTa, KOraTo NoCTabYTe NIn B3eMaTe DeTeTO OT KOINyKaTa.
Ta3n KOnuKa e npedHa3NaYeHa da Bo3n cAmo eHDo dTe.
To3n npoodykT otrobaPra Ha BS EN 1888:2012.
Bunhar npobepaIte daIIIObe3OpaTeHHTe peMbci Ha deTeTo ca peryIipaHI n IOCTaBeHn npabInHO. Ako e Heo6xoJIMO, MoKe Da ce doctABT D-06pa3HN pIHROBE 3a3AkpeINBaHe KbM CbIeCTByBaIHTe oBe3OpaTeHNI peMbci Ha OTdJIHa oBe3OpaTeHNA CNCTema, KOrTO e B CbOTBeTCTBNE c BS EN 13210.
S10: CtpaHnueh nnck 3a KOJEno
S2:Tana3aДрьжкata
S7:ДьжДо6paH
S11:Kouch
S3:CeHHNK
S8: PpeHNO KOJIeNo
S12:3aJHoKoJIeNo
5- For at slippe bremse
6- For at rette det op
kunnen bestellen via once website: http://www.cosatto.com/service-centre/spares
http://www.cosatto.com/stockists.
于:http://www.cosatto.com/service-centre/spares
国
奉加罗托用云日京cuddle@cosatto.com码的他
S1: 求πi
S6: 贝贝
S11: 南国
S2: 冒険はの云長道を呎。
S7: 雷尔専専
S12: 贝卡尅
S3:
S8:
S13:自行车
54:
S9: 背腔
S5: 通韩日(
S10: 非同胞
試証結果暨通過報:
daiy
| 유모chu | 1- 썸류기 (1) auto stopgae목에요. 'chedak' 사물가 훔고 기재지 썸류버(3)을 턱리면 auto stopgae목에요. francelmirize내로고성은지학일에요. |
| 드래이트 | 2- 썸기 3- 썸기 4- 썸기 5- 썸기 |
| 원버회회전목gcd | 6- 썸우기 7- 썸하기 8- 썸지기 9- 썸그기 10- 썸드워지조울 하기 benzel triol/glycine triol/glycine triol/glycine triol/glycine triol/glycine triol/glycine triol/glycine triol/glycine triol/glycine triol/glycine triol/glycine triol/glycine triol/glycine triol/glycine triol/glycine triol/glycine triol/glycine triol/glyceride triol/glyceride triol/glyceride triol/glyceride triol/glyceride triol/glyceride triol/glyceride triol/glyceride triol/glyceride triol/glyceride triol/glyceride triol/glyceride triol/glyceride triol/glyceride triol/glyceride triol/glyceride triol/glyceride triol/glyceride triol/glyceride triol/glyceride triol/glycerde triol/glycerde triol/glycerde triol/glycerde triol/glycerde triol/glycerde triol/glycerde triol/glycerde triol/glycerde triol/glycerde triol/glycerde triol/glycerde triol/glycerde triol/glycerde triol/glycerde triol/glycerde triol/glycerde triol/glycerde triol/glycerde triol/glycerde triol/glycer de triol/glycerde triol/glycerde triol/glycerde triol/glycerde triol/glycerde triol/glycerde triol/glycerde triol/glycerde triol/glycerde triol/glycerde triol/glycerde triol/glycerde triol/glycerde triol/glycerde triol/glycerde triol/glycerde triol/glycerde triol/glycerde triol/glycerde triol/glyceride triol/glycerde triol/glycerde triol/glycerde triol/glycerde triol/glycerde triol/glycerde triol/glycerde triol/glycerde triol/glycerde triol/glycerde triol/glycerde triol/glycerde triol/glycerde triol/glycerde triol/glycerde triol/glycerde triol/glycerde triol/glycerde triol/glycer de triol/glycer de triol/glycerde triol/glycerde triol/glycerde triol/glycerde triol/glycerde triol/glycerde triol/glycerde triol/glycerde triol/glycerde triol/glycerde triol/glycerde triol/glycerde triol/glycerde triol/glycerde triol/glycerde triol/glycerde triol/glycerde triol/glycerde triol/glycer de triol/glycer deg triol/glycerde triol/glycerde triol/glycerde triol/glycerde triol/glycerde triol/glycerde triol/glycerde triol/glycerde triol/glycerde triol/glycerde triol/glycerde triol/glycerde triol/glycerde triol/glycerde triol/glycerde triol/glycerde triol/glycerde triol/glycerde triol/glycerde triol/glycer DE triol/glycer DE triol/glycer DE triol/glycer DE triol/glycer DE triol/glycer DE triol/glycer DE triol/glycer DE triol/glycer DE triol/glycer DE triol/glycer DE triol/glycer DE triol/glycer DE triol/glycer DE triol/glycer DE triol/glycer DE triol/glycer DE triol/glycer DE triol/glycer DE triol/glycer DE triol/glycerDE triol/glycer DE triol/glycer DE triol/glycer DE triol/glycer DE triol/glycer DE triol/glycer DE triol/glycer DE triol/glycer DE triol/glycer DE triol/glycer DE triol/glycer DE triol/glycer DE triol/glycer DE triol/glycer DE triol/glycer DE triol/glycer DE triol/glycer DE triol/glycer DE triol/glycer DE triol/glycer De triol/glycer DE triol/glycer DE triol/glycer DE triol/glycer DE triol/glycer DE triol/glycer DE triol/glycer DE triol/glycer DE triol/glycer DE triol/glycer DE triol/glycer DE triol/glycer DE triol/glycer DE triol/glycer DE triol/glycer DE triol/glycer DE triol/glycer DE triol/glycer DE triol/glycer DE triol/glycer DBL/TR/TR/TR/TR/TR/TR/TR/TR/TR/TR/TR/TR/TR/TR/TR/TR/TR/TR/TR/TR/TR/TR/TR/TR/TR/TR/TR/TR/TR/TR/TR/TR/TR/TR/TR/TR/TR/TR/TR/TR/TR/TR/TR/TR/TR/TR/TR/TR/TR/TR/ TR/TR/TR/TR/TR/TR/TR/TR/TR/TR/TR/TR/TR/TR/TR/TR/TR/TR/TR/TR/TR/TR/TR/TR/TR/TR/TR/TR/TR/TR/TR/TR/TR/TR/TR/TR/TR/TR/TR/TR/TR/TR/TR/TR/TR/TR/TR/TR/TR/TR/Tr |
| 通訊比 | 13- 썸하기 14- 썸우기 15- 썸하기 16- 썸우기 17- 썸리하기 18- 썸학하기 (1) auto stopgae목에요. (2) auto stopgae목에요. (3) "C" 썸류의aprogress사고성만에요. auto stopgae목에요. Streltet被打die triel triel triel triel triel triel triel triel triel triel triel triel triel triel triel triel triel triel triel triel triel triel triel triel triel triel triel triel triel triel triel triel triel triel triel triel triel triel triel triel triel triel triel triel triel triel triel triel triel triel tri |
| 상품수比 | 19- 썸류기 20- 썸상품수 21- auto stop汽油比 22- auto stop汽油比 23- auto stop汽油比 24- auto stop汽油比 25- auto stop汽油比 26- "C" 썸류의aprogress사고성만에요. (1) auto stop汽油比 (2) auto stop汽油比 (3) auto stop汽油比 (4) auto stop汽油比 (5) auto stop汽油比 (6) auto stop汽油比 (7) auto stop汽油比 (8) auto stop汽油比 (9) auto stop汽油比 (10) auto stop汽油比 (11) auto stop汽油比 (12) auto stop汽油比 (13) auto stop汽油比 (14) auto stop汽油比 (15) auto stop汽油比 (16) auto stop汽油比 (17) auto stop汽油比 (18) auto stop汽油比 (19) auto stop汽油比 (20) auto stop汽油比 (21) auto stop汽油比 (22) auto stop汽油比 (23) auto stop汽油比 (24) auto stop汽油比 (25) auto stop汽油比 (26) auto stop汽油比 (27) auto stop汽油比 (28) auto stop汽油比 (29) auto stop汽油比 (30) auto stop汽油比 (31) auto stop汽油比 (32) auto stop汽油比 (33) auto stop汽油比 (34) auto stop汽油比 (35) auto stop汽油比 (36) auto stop汽油比 (37) auto stop汽油比 (38) auto stop汽油比 (39) auto stop汽油比 (40) auto stop汽油比 (41) auto stop汽油比 (42) auto stop汽油比 (43) auto stop汽油比 (44) auto stop汽油比 (45) auto stop汽油比 (46) auto stop汽油比 (47) auto stop汽油比 (48) auto stop汽油比 (49) auto stop汽油比 (50) auto stop汽油比 (51) auto stop汽油比 (52) auto stop汽油比 (53) auto stop汽油比 (54) auto stop汽油比 (55) auto stop汽油比 (56) auto stop汽油比 (57) auto stop汽油比 (58) auto stop汽油比 (59) auto stop汽油比 (60) auto stop汽油比 (61) auto stop汽油比 (62) auto stop汽油比 (63) auto stop汽油比 (64) auto stop汽油比 (65) auto stop汽油比 (66) auto stop汽油比 (67) auto stop汽油比 (68) auto stop汽油比 (69) auto stop汽油比 (70) auto stop汽油比 (71) auto stop汽油比 (72) auto stop汽油比 (73) auto stop汽油比 (74) auto stop汽油比 (75) auto stop汽油比 (76) auto stop汽油比 (77) auto stop汽油比 (78) auto stop汽油比 (79) auto stop汽油比 (80) auto stop汽油比 (81) auto stop汽油比 (82) auto stop汽油比 (83) auto stop汽油比 (84) auto stop汽油比 (85) auto stop汽油比 (86) auto stop汽油比 (87) auto stop汽油比 (88) auto stop汽油比 (89) auto stop汽油比 (90) auto stop汽油比 (91) auto stop汽油比 (92) auto stop汽油比 (93) auto stop汽油比 (94) auto stop汽油比 (95) auto stop汽油比 (96) auto stop汽油比 (97) auto stop汽油比 (98) auto stop汽油比 (99) auto stop汽油比 (100) auto stop汽油比 (101) auto stop汽油比 (102) auto stop汽油比 (103) auto stop汽油比 (104) auto stop汽油比 (105) auto stop汽油比 (106) auto stop汽油比 (107) auto stop汽油比 (108) auto stop汽油比 (109) auto stop汽油比 (110) auto stop汽油比 (111) auto stop汽油比 (112) auto stop汽油比 (113) auto stop汽油比 (114) auto stop汽油比 (115) auto stop汽油比 (116) auto stop汽油比 (117) auto stop汽油比 (118) auto stop汽油比 (119) auto stop汽油比 (120) auto stop汽油比 (121) auto stop汽油比 (122) auto stop汽油比 (123) auto stop汽油比 (124) auto stop汽油比 (125) auto stop汽油比 (126) auto stop汽油比 (127) auto stop汽油比 (128) auto stop汽油比 (129) auto stop汽油比 (130) auto stop汽油比 (131) auto stop汽油比 (132) auto stop汽油比 (133) auto stop汽油比 (134) auto stop汽油比 (135) auto stop汽油比 (136) auto stop汽油比 (137) auto stop汽油比 (138) auto stop汽油比 (139) auto stop汽油比 (140) auto stop汽油比 (141) auto stop汽油比 (142) auto stop汽油比 (143) auto stop汽油比 (144) auto stop汽油比 (145) auto stop汽油比 (146) auto stop汽油比 (147) auto stop汽油比 (148) auto stop汽油比 (149) auto stop汽油比 (150) auto stop汽油比 (151) auto stop汽油比 (152) auto stop汽油比 (153) auto stop汽油比 (154) auto stop汽油比 (155) auto stop汽油比 (156) auto stop汽油比 (157) auto stop汽油比 (158) auto stop汽油比 (159) auto stop汽油比 (160) auto stop汽油比 (161) auto stop汽油比 (162) auto stop汽油比 (163) auto stop汽油比 (164) auto stop汽油比 (165) auto stop汽油比 (166) auto stop汽油比 (167) auto stop汽油比 (168) auto stop汽油比 (169) auto stop汽油比 (170) auto stop汽油比 (171) auto stop汽油比 (172) auto stop汽油比 (173) auto stop汽油比 (174) auto stop汽油比 (175) auto stop汽油比 (176) auto stop汽油比 (177) auto stop汽油比 (178) auto stop汽油比 (179) auto stop汽油比 (180) auto stop汽油比 (181) auto stop汽油比 (182) auto stop汽油比 (183) auto stop汽油比 (184) auto stop汽油比 (185) auto stop汽油比 (186) auto stop汽油比 (187) auto stop汽油比 (188) auto stop汽油比 (189) auto stop汽油比 (190) auto stop汽油比 (191) auto stop汽油比 (192) auto stop汽油比 (193) auto stop汽油比 (194) auto stop汽油比 (195) auto stop汽油比 (196) auto stop汽油比 (197) auto stop汽油比 (198) auto stop汽油比 (200) auto stop汽油比 (201) auto stop汽油比 (202) auto stop汽油比 (203) auto stop汽油比 (204) auto stop汽油比 (205) auto stop汽油比 (206) auto stop汽油比 (207) auto stop汽油比 (208) auto stop汽油比 (209) auto stop汽油比 (210) auto stop汽油比 (211) auto stop汽油比 (212) auto stop汽油比 (213) auto stop汽油比 (214) auto stop汽油比 (215) auto stop汽油比 (216) auto stop汽油比 (217) auto stop汽油比 (218) auto stop汽油比 (219) auto stop汽油比 (220) auto stop汽油比 (221) auto stop汽油比 (222) auto stop汽油比 (223) auto stop汽油比 (224) auto stop汽油比 (225) auto stop汽油比 (226) auto stop汽油比 (227) auto stop汽油比 (228) auto stop汽油比 (229) auto stop汽油比 (230) auto stop汽油比 (231) auto stop汽油比 (232) auto stop汽油比 (233) auto stop汽油比 (234) auto stop汽油比 (235) auto stop汽油比 (236) auto stop汽油比 (237) auto stop汽油比 (238) auto stop汽油比 (239) auto stop汽油比 (240) auto stop汽油比 (241) auto stop汽油比 (242) auto stop汽油比 (243) auto stop汽油比 (244) auto stop汽油比 (245) auto stop汽油比 (246) auto stop汽油比 (247) auto stop汽油比 (248) auto stop汽油比 (249) auto stop汽油比 (250) auto stop汽油比 (251) auto stop汽油比 (252) auto stop汽油比 (253) auto stop汽油比 (254) auto stop汽油比 (255) auto stop汽油比 (256) auto stop汽油比 (257) auto stop汽油比 (258) auto stop汽油比 (259) auto stop汽油比 (260) auto stop汽油比 (261) auto stop汽油比 (262) auto stop汽油比 (263) auto stop汽油比 (264) auto stop汽油比 (265) auto stop汽油比 (266) auto stop汽油比 (267) auto stop汽油比 (268) auto stop汽油比 (269) auto stop汽油比 (270) auto stop汽油比 (271) auto stop汽油比 (272) auto stop汽油比 (273) auto stop汽油比 (274) auto stop汽油比 (275) auto stop汽油比 (276) auto stop汽油比 (277) auto stop汽油比 (278) auto stop汽油比 (279) auto stop汽油比 (280) auto stop汽油比 (281) auto stop汽油比 (282) auto stop汽油比 (283) auto stop汽油比 (284) auto stop汽油比 (285) auto stop汽油比 (286) auto stop汽油比 (287) auto stop汽油比 (288) auto stop汽油比 (289) auto stop汽油比 (290) auto stop汽油比 (291) auto stop汽油比 (292) auto stop汽油比 (293) auto stop汽油比 (294) auto stop汽油比 (295) auto stop汽油比 (296) auto stop汽油比 (297) auto stop汽油比 (298) auto stop汽油比 (300) auto stop汽油比 (301) auto stop汽油比 (302) auto stop汽油比 (303) auto stop汽油比 (304) auto stop汽油比 (305) auto stop汽油比 (306) auto stop汽油比 (307) auto stop汽油比 (308) auto stop汽油比 (309) auto stop汽油比 (310) auto stop汽油比 (311) auto stop汽油比 (312) auto stop汽油比 (313) auto stop汽油比 (314) auto stop汽油比 (315) auto stop汽油比 (316) auto stop汽油比 (317) auto stop汽油比 (318) auto stop汽油比 (319) auto stop汽油比 (320) auto stop汽油比 (321) auto stop汽油比 (322) auto stop汽油比 (323) auto stop汽油比 (324) auto stop汽油比 (325) auto stop汽油比 (326) auto stop汽油比 (327) auto stop汽油比 (328) auto stop汽油比 (329) auto stop汽油比 (330) auto stop汽油比 (331) auto stop汽油比 (332) auto stop汽油比 (333) auto stop汽油比 (334) auto stop汽油比 (335) auto stop汽油比 (336) auto stop汽油比 (337) auto stop汽油比 (338) auto stop汽油比 (339) auto stop汽油比 (340) auto stop汽油比 (341) auto stop汽油比 (342) auto stop汽油比 (343) auto stop汽油比 (344) auto stop汽油比 (345) auto stop汽油比 (346) auto stop汽油比 (347) auto stop汽油比 (348) auto stop汽油比 (349) auto stop汽油比 (350) auto stop汽油比 (351) auto stop汽油比 (352) auto stop汽油比 (353) auto stop汽油比 (354) auto stop汽油比 (355) auto stop汽油比 (356) auto stop汽油比 (357) auto stop汽油比 (358) auto stop汽油比 (359) auto stop汽油比 (360) auto stop汽油比 (361) auto stop汽油比 (362) auto stop汽油比 (363) auto stop汽油比 (364) auto stop汽油比 (365) auto stop汽油比 (366) auto stop汽油比 (367) auto stop汽油比 (368) auto stop汽油比 (369) auto stop汽油比 (370) auto stop汽油比 (371) auto stop汽油比 (372) auto stop汽油比 (373) auto stop汽油比 (374) auto stop汽油比 (375) auto stop汽油比 (376) auto stop汽油比 (377) auto stop汽油比 (378) auto stop汽油比 (379) auto stop汽油比 (380) auto stop汽油比 (381) auto stop汽油比 (382) auto stop汽油比 (383) auto stop汽油比 (384) auto stop汽油比 (385) auto stop汽油比 (386) auto stop汽油比 (387) auto stop汽油比 (388) auto stop汽油比 (389) auto stop汽油比 (390) auto stop汽油比 (391) auto stop汽油比 (392) auto stop汽油比 (393) auto stop汽油比 (394) auto stop汽油比 (395) auto stop汽油比 (396) auto stop汽油比 (397) auto stop汽油比 (398) auto stop汽油比 (400) auto stop汽油比 (401) auto stop汽油比 (402) auto stop汽油比 (403) auto stop汽油比 (404) auto stop汽油比 (405) auto stop汽油比 (406) auto stop汽油比 (407) auto stop汽油比 (408) auto stop汽油比 (409) auto stop汽油比 (410) auto stop汽油比 (411) auto stop汽油比 (412) auto stop汽油比 (413) auto stop汽油比 (414) auto stop汽油比 (415) auto stop汽油比 (416) auto stop汽油比 (417) auto stop汽油比 (418) auto stop汽油比 (419) auto stop汽油比 (420) auto stop汽油比 (421) auto stop汽油比 (422) auto stop汽油比 (423) auto stop汽油比 (424) auto stop汽油比 (425) auto stop汽油比 (426) auto stop汽油比 (427) auto stop汽油比 (428) auto stop汽油比 (429) auto stop汽油比 (430) auto stop汽油比 (431) auto stop汽油比 (432) auto stop汽油比 (433) auto stop汽油比 (434) auto stop汽油比 (435) auto stop汽油比 (436) auto stop汽油比 (437) auto stop汽油比 (438) auto stop汽油比 (439) auto stop汽油比 (440) auto stop汽油比 (441) auto stop汽油比 (442) auto stop汽油比 (443) auto stop汽油比 (444) auto stop汽油比 (445) auto stop汽油比 (446) auto stop汽油比 (447) auto stop汽油比 (448) auto stop汽油比 (449) auto stop汽油比 (450) auto stop汽油比 (451) auto stop汽油比 (452) auto stop汽油比 (453) auto stop汽油比 (454) auto stop汽油比 (455) auto stop汽油比 (456) auto stop汽油比 (457) auto stop汽油比 (458) auto stop汽油比 (459) auto stop汽油比 (460) auto stop汽油比 (461) auto stop汽油比 (462) auto stop汽油比 (463) auto stop汽油比 (464) auto stop汽油比 (465) auto stop汽油比 (466) auto stop汽油比 (467) auto stop汽油比 (468) auto stop汽油比 (469) auto stop汽油比 (470) auto stop汽油比 (471) auto stop汽油比 (472) auto stop汽油比 (473) auto stop汽油比 (474) auto stop汽油比 (475) auto stop汽油比 (476) auto stop汽油比 (477) auto stop汽油比 (478) auto stop汽油比 (479) auto stop汽油比 (480) auto stop汽油比 (481) auto stop汽油比 (482) auto stop汽油比 (483) auto stop汽油比 (484) auto stop汽油比 (485) auto stop汽油比 (486) auto stop汽油比 (487) auto stop汽油比 (488) auto stop汽油比 (489) auto stop汽油比 (490) auto stop汽油比 (491) auto stop汽油比 (492) auto stop汽油比 (493) auto stop汽油比 (494) auto stop汽油比 (495) auto stop汽油比 (496) auto stop汽油比 (497) auto stop汽油比 (498) auto stop汽油比 (500) auto stop汽油比 (501) auto stop汽油比 (502) auto stop汽油比 (503) auto stop汽油比 (504) auto stop汽油比 (505) auto stop汽油比 (506) auto stop汽油比 (507) auto stop汽油比 (508) auto stop汽油比 (509) auto stop汽油比 (510) auto stop汽油比 (511) auto stop汽油比 (512) auto stop汽油比 (513) auto stop汽油比 (514) auto stop汽油比 (515) auto stop汽油比 (516) auto stop汽油比 (517) auto stop汽油比 (518) auto stop汽油比 (519) auto stop汽油比 (520) auto stop汽油比 (521) auto stop汽油比 (522) auto stop汽油比 (523) auto stop汽油比 (524) auto stop汽油比 (525) auto stop汽油比 (526) auto stop汽油比 (527) auto stop汽油比 (528) auto stop汽油比 (529) auto stop汽油比 (530) auto stop汽油比 (531) auto stop汽油比 (532) auto stop汽油比 (533) auto stop汽油比 (534) auto stop汽油比 (535) auto stop汽油比 (536) auto stop汽油比 (537) auto stop汽油比 (538) auto stop汽油比 (539) auto stop汽油比 (540) auto stop汽油比 (541) auto stop汽油比 (542) auto stop汽油比 (543) auto stop汽油比 (544) auto stop汽油比 (545) auto stop汽油比 (546) auto stop汽油比 (547) auto stop汽油比 (548) auto stop汽油比 (549) auto stop汽油比 (550) auto stop汽油比 (551) auto stop汽油比 (552) auto stop汽油比 (553) auto stop汽油比 (554) auto stop汽油比 (555) auto stop汽油比 (556) auto stop汽油比 (557) auto stop汽油比 (558) auto stop汽油比 (559) auto stop汽油比 (560) auto stop汽油比 (561) auto stop汽油比 (562) auto stop汽油比 (563) auto stop汽油比 (564) auto stop汽油比 (565) auto stop汽油比 (566) auto stop汽油比 (567) auto stop汽油比 (568) auto stop汽油比 (569) auto stop汽油比 (570) auto stop汽油比 (571) auto stop汽油比 (572) auto stop汽油比 (573) auto stop汽油比 (574) auto stop汽油比 (575) auto stop汽油比 (576) auto stop汽油比 (577) auto stop汽油比 (578) auto stop汽油比 (579) auto stop汽油比 (580) auto stop汽油比 (581) auto stop汽油比 (582) auto stop汽油比 (583) auto stop汽油比 (584) auto stop汽油比 (585) auto stop汽油比 (586) auto stop汽油比 (587) auto stop汽油比 (588) auto stop汽油比 (589) auto stop汽油比 (590) auto stop汽油比 (591) auto stop汽油比 (592) auto stop汽油比 (593) auto stop汽油比 (594) auto stop汽油比 (595) auto stop汽油比 (596) auto stop汽油比 (597) auto stop汽油比 (598) auto stop汽油比 (600) auto stop汽油比 (601) auto stop汽油比 (602) auto stop汽油比 (603) auto stop汽油比 (604) auto stop汽油比 (605) auto stop汽油比 (606) auto stop汽油比 (607) auto stop汽油比 (608) auto stop汽油比 (609) auto stop汽油比 (610) auto stop汽油比 (611) auto stop汽油比 (612) auto stop汽油比 (613) auto stop汽油比 (614) auto stop汽油比 (615) auto stop汽油比 (616) auto stop汽油比 (617) auto stop汽油比 (618) auto stop汽油比 (619) auto stop汽油比 (620) auto stop汽油比 (621) auto stop汽油比 (622) auto stop汽油比 (623) auto stop汽油比 (624) auto stop汽油比 (625) auto stop汽油比 (626) auto stop汽油比 (627) auto stop汽油比 (628) auto stop汽油比 (629) auto stop汽油比 (630) auto stop汽油比 (631) auto stop汽油比 (632) auto stop汽油比 (633) auto stop汽油比 (634) auto stop汽油比 (635) auto stop汽油比 (636) auto stop汽油比 (637) auto stop汽油比 (638) auto stop汽油比 (639) auto stop汽油比 (640) auto stop汽油比 (641) auto stop汽油比 (642) auto stop汽油比 (643) auto stop汽油比 (644) auto stop汽油比 (645) auto stop汽油比 (646) auto stop汽油比 (647) auto stop汽油比 (648) auto stop汽油比 (649) auto stop汽油比 (650) auto stop汽油比 (651) auto stop汽油比 (652) auto stop汽油比 (653) auto stop汽油比 (654) auto stop汽油比 (655) auto stop汽油比 (656) auto stop汽油比 (657) auto stop汽油比 (658) auto stop汽油比 (659) auto stop汽油比 (660) auto stop汽油比 (661) auto stop汽油比 (662) auto stop汽油比 (663) auto stop汽油比 (664) auto stop汽油比 (665) auto stop汽油比 (666) auto stop汽油比 (667) auto stop汽油比 (668) auto stop汽油比 (669) auto stop汽油比 (670) auto stop汽油比 (671) auto stop汽油比 (672) auto stop汽油比 (673) auto stop汽油比 (674) auto stop汽油比 (675) auto stop汽油比 (676) auto stop汽油比 (677) auto stop汽油比 (678) auto stop汽油比 (679) auto stop汽油比 (680) auto stop汽油比 (681) auto stop汽油比 (682) auto stop汽油比 (683) auto stop汽油比 (684) auto stop汽油比 (685) auto stop汽油比 (686) auto stop汽油比 (687) auto stop汽油比 (688) auto stop汽油比 (689) auto stop汽油比 (690) auto stop汽油比 (691) auto stop汽油比 (692) auto stop汽油比 (693) auto stop汽油比 (694) auto stop汽油比 (695) auto stop汽油比 (696) auto stop汽油比 (697) auto stop汽油比 (698) auto stop汽油比 (700) auto stop汽油比 (701) auto stop汽油比 (702) auto stop汽油比 (703) auto stop汽油比 (704) auto stop汽油比 (705) auto stop汽油比 (706) auto stop汽油比 (707) auto stop汽油比 (708) auto stop汽油比 (709) auto stop汽油比 (710) auto stop汽油比 (711) auto stop汽油比 (712) auto stop汽油比 (713) auto stop汽油比 (714) auto stop汽油比 (715) auto stop汽油比 (716) auto stop汽油比 (717) auto stop汽油比 (718) auto stop汽油比 (719) auto stop汽油比 (720) auto stop汽油比 (721) auto stop汽油比 (722) auto stop汽油比 (723) auto stop汽油比 (724) auto stop汽油比 (725) auto stop汽油比 (726) auto stop汽油比 (727) auto stop汽油比 (728) auto stop汽油比 (729) auto stop汽油比 (730) auto stop汽油比 (731) auto stop汽油比 (732) auto stop汽油比 (733) auto stop汽油比 (734) auto stop汽油比 (735) auto stop汽油比 (736) auto stop汽油比 (737) auto stop汽油比 (738) auto stop汽油比 (739) auto stop汽油比 (740) auto stop汽油比 (741) auto stop汽油比 (742) auto stop汽油比 (743) auto stop汽油比 (744) auto stop汽油比 (745) auto stop汽油比 (746) auto stop汽油比 (747) auto stop汽油比 (748) auto stop汽油比 (749) auto stop汽油比 (750) auto stop汽油比 (751) auto stop汽油比 (752) auto stop汽油比 (753) auto stop汽油比 (754) auto stop汽油比 (755) auto stop汽油比 (756) auto stop汽油比 (757) auto stop汽油比 (758) auto stop汽油比 (759) auto stop汽油比 (760) auto stop汽油比 (761) auto stop汽油比 (762) auto stop汽油比 (763) auto stop汽油比 (764) auto stop汽油比 (765) auto stop汽油比 (766) auto stop汽油比 (767) auto stop汽油比 (768) auto stop汽油比 (769) auto stop汽油比 (770) auto stop汽油比 (771) auto stop汽油比 (772) auto stop汽油比 (773) auto stop汽油比 (774) auto stop汽油比 (775) auto stop汽油比 (776) auto stop汽油比 (777) auto stop汽油比 (778) auto stop汽油比 (779) auto stop汽油比 (780) auto stop汽油比 (781) auto stop汽油比 (782) auto stop汽油比 (783) auto stop汽油比 (784) auto stop汽油比 (785) auto stop汽油比 (786) auto stop汽油比 (787) auto stop汽油比 (788) auto stop汽油比 (789) auto stop汽油比 (790) auto stop汽油比 (791) auto stop汽油比 (792) auto stop汽油比 (793) auto stop汽油比 (794) auto stop汽油比 (795) auto stop汽油比 (796) auto stop汽油比 (797) auto stop汽油比 (798) auto stop汽油比 (799) auto stop汽油比 (800) auto stop汽油比 (801) auto stop汽油比 (802) auto stop汽油比 (803) auto stop汽油比 (804) auto stop汽油比 (805) auto stop汽油比 (806) auto stop汽油比 (807) auto stop汽油比 (808) auto stop汽油比 (809) auto stop汽油比 (810) auto stop汽油比 (811) auto stop汽油比 (812) auto stop汽油比 (813) auto stop汽油比 (814) auto stop汽油比 (815) auto stop汽油比 (816) auto stop汽油比 (817) auto stop汽油比 (818) auto stop汽油比 (819) auto stop汽油比 (820) auto stop汽油比 (821) auto stop汽油比 (822) auto stop汽油比 (823) auto stop汽油比 (824) auto stop汽油比 (825) auto stop汽油比 (826) auto stop汽油比 (827) auto stop汽油比 (828) auto stop汽油比 (829) auto stop汽油比 (830) auto stop汽油比 (831) auto stop汽油比 (832) auto stop汽油比 (833) auto stop汽油比 (834) auto stop汽油比 (835) auto stop汽油比 (836) auto stop汽油比 (837) auto stop汽油比 (838) auto stop汽油比 (839) auto stop汽油比 (840) auto stop汽油比 (841) auto stop汽油比 (842) auto stop汽油比 (843) auto stop汽油比 (844) auto stop汽油比 (845) auto stop汽油比 (846) auto stop汽油比 (847) auto stop汽油比 (848) auto stop汽油比 (849) auto stop汽油比 (850) auto stop汽油比 (851) auto stop汽油比 (852) auto stop汽油比 (853) auto stop汽油比 (854) auto stop汽油比 (855) auto stop汽油比 (856) auto stop汽油比 (857) auto stop汽油比 (858) auto stop汽油比 (859) auto stop汽油比 (860) auto stop汽油比 (861) auto stop汽油比 (862) auto stop汽油比 (863) auto stop汽油比 (864) auto stop汽油比 (865) auto stop汽油比 (866) auto stop汽油比 (867) auto stop汽油比 (868) auto stop汽油比 (869) auto stop汽油比 (870) auto stop汽油比 (871) auto stop汽油比 (872) auto stop汽油比 (873) auto stop汽油比 (874) auto stop汽油比 (875) auto stop汽油比 (876) auto stop汽油比 (877) auto stop汽油比 (878) auto stop汽油比 (879) auto stop汽油比 (880) auto stop汽油比 (881) auto stop汽油比 (882) auto stop汽油比 (883) auto stop汽油比 (884) auto stop汽油比 (885) auto stop汽油比 (886) auto stop汽油比 (887) auto stop汽油比 (888) auto stop汽油比 (889) auto stop汽油比 (890) auto stop汽油比 (891) auto stop汽油比 (892) auto stop汽油比 (893) auto stop汽油比 (894) auto stop汽油比 (895) auto stop汽油比 (896) auto stop汽油比 (897) auto stop汽油比 (898) auto stop汽油比 (900) auto stop汽油比 (901) auto stop汽油比 (902) auto stop汽油比 (903) auto stop汽油比 (904) auto stop汽油比 (905) auto stop汽油比 (906) auto stop汽油比 (907) auto stop汽油比 (908) auto stop汽油比 (909) auto stop汽油比 (910) auto stop汽油比 (911) auto stop汽油比 (912) auto stop汽油比 (913) auto stop汽油比 (914) auto stop汽油比 (915) auto stop汽油比 (916) auto stop汽油比 (917) auto stop汽油比 (918) auto stop汽油比 (919) auto stop汽油比 (920) auto stop汽油比 (921) auto stop汽油比 (922) auto stop汽油比 (923) auto stop汽油比 (924) auto stop汽油比 (925) auto stop汽油比 (926) auto stop汽油比 (927) auto stop汽油比 (928) auto stop汽油比 (929) auto stop汽油比 (930) auto stop汽油比 (931) auto stop汽油比 (932) auto stop汽油比 (933) auto stop汽油比 (934) auto stop汽油比 (935) auto stop汽油比 (936) auto stop汽油比 (937) auto stop汽油比 (938) auto stop汽油比 (939) auto stop汽油比 (940) auto stop汽油比 (941) auto stop汽油比 (942) auto stop汽油比 (943) auto stop汽油比 (944) auto stop汽油比 (945) auto stop汽油比 (946) auto stop汽油比 (947) auto stop汽油比 (948) auto stop汽油比 (949) auto stop汽油比 (950) auto stop汽油比 (951) auto stop汽油比 (952) auto stop汽油比 (953) auto stop汽油比 (954) auto stop汽油比 (955) auto stop汽油比 (956) auto stop汽油比 (957) auto stop汽油比 (958) auto stop汽油比 (959) auto stop汽油比 (960) auto stop汽油比 (961) auto stop汽油比 (962) auto stop汽油比 (963) auto stop汽油比 (964) auto stop汽油比 (965) auto stop汽油比 (966) auto stop汽油比 (967) auto stop汽油比 (968) auto stop汽油比 (969) auto stop汽油比 (970) auto stop汽油比 (971) auto stop汽油比 (972) auto stop汽油比 (973) auto stop汽油比 (974) auto stop汽油比 (975) auto stop汽油比 (976) auto stop汽油比 (977) auto stop汽油比 (978) auto stop汽油比 (979) auto stop汽油比 (980) auto stop汽油比 (981) auto stop汽油比 (982) auto stop汽油比 (983) auto stop汽油比 (984) auto stop汽油比 (985) auto stop汽油比 (986) auto stop汽油比 (987) auto stop汽油比 (988) auto stop汽油比 (989) auto stop汽油比 (990) auto stop汽油比 |
Hnke yka3aHbI 3aIacHbI yeactN, KOToPbIE Bbl MoXeTe npNo6peCTn dIra 3TOrO yCTpOiCTBa. Ecnn Bbl HaxoJntecb B BeIInko6puTaHn nnB InpaHdnn, cdeJaTe 3aKa3 uepe3 haw Be6-caIT http://www.cosatto.com/service-centre/spares
EcnBbHaxoNTecb 3a npedenamn BeNKOBpTaHnn nnnpaHnn, o6paTNEcb K BaWemy MeCTHomy
Inctpn6bIOTopy. KoHTaKTbIe daHHbIe dNcTpn6bIOTopa DoCTynHbI no aDpecy http://www.cosatto.com/stockists
Ecn y Bac octanbc BOpocbl, HanuHte Ham Ha aDpec cuddle@cosatto.com
S1:Pyka n3 neHOMatepna
S2: 3aŋnyuška Na pyúky
S3: Kaniooh
S4:Yexon cndeHb8
S5:cnnnna onopa (Bc6ope)
56: YdepKnBaHoune peMHn
S7:Дождевик
S8:передные конеса
S9: PndTaBka Ira Hor
S10:Konnak Koneca
S11:Kop3nHa
S12:3aHneKoJeca
S13: ABTomatnueckn 6JoknpaTop
Информацnia по установке и Исторьаню:
Cm. cneyuunc xembl:
KoJЯcka
1-OTKpbBaHne
BbICBO6OJNTe aBTOMaTHueckn 6IOKnPaTOP (1), 3aTeM nOTAHnTe pyuKn BBepx (2). Haxmnte Ha pbUar 6IOKnPOBkn (3) do uenka n do fHKcaun BCnOMoratJIbHoro 6IOKnPaTopa (4).
Y6eHnTeCb, yTo paMa paKpbIaCb Do KOHua.
TopMo3
2-Фнкацья
БлokираTop nobopoTa нередимero koneca Ручka
3-BbICBO6OKeHne
4-Фнкcaцnia
5-BbICBO6OXKeHne
6-Поднманne
7-OnyckaHne
8-OTKpbIbHaHne
9-3aKpbIbHaHne
10-Perynnpobka dInhbpemna
PpOraHnTe HaTaeKnteIb pemHa Do HyxHoN dInHbI (1,2,3)
11-Perynnpobka noJoxehna nJeueBoro pemhra
12-ChaTne
PpOraHnTe nKcaTOp nIueeBoro pEmHa uepe3 cnnHky (1).
IpoTaNHeΦnKcAtOp naxOBOro pemHry uepe3 cnJeHbe (2).
http://www.cosatto.com/service-centre/spares
http://www.cosatto.com/stockists
Laiy gai jia jia lii (j) jia jia jia jia jia jia jia jia jia jia jia jia jia jia jia jia jia jia jia jia jia jia jia jia jia jia jia jia jia jia jia jia jia jia jia jia jia jia jia jia jia jia jia jia jia
aill lalil aclll gll 0gall llll
aiaaii iiaial g aill clll jaoil gaii jai iaii jai
y
gaiy
y 1
j 1 j 1 1 1 1 1 1 1 1 1 1 1 1 1 1
ailll llll llll llll llll
aiai jaiiaial pailily ciilal, Jaiaiall, xieall J jao cai bll jao jao jao jao jao jao jao jao jao jao
1 2
aalllnnae aee eae
JlJIyIyJe Jae IaJIyIe (pajil j yjll gaiiia) piaia kui jn jyaiuill jia jyai aaiaiia iayaiia
111 111 111 111 111 111 111
81 81 81
i
http://www.cosatto.com/service-centre/spares
e 1
http://www.cosatto.com/stockists
cuddle@cosatto.com
http://www.cosatto.com/service-centre/spares
i 1
.11111111111111111111111111111111111111111111111111
cuddle@cosatto.com 15
2 2s8:58
S9
:S10
S11
2 2:S12
S13
S1
S2
S3
S4
()S5
iiS jlaa: S6
jL:S7
:odai g oai oai d jd ciebl
2j12 = 2j12 + 2j12
.(4) (3)
Cosatto Ltd, Bentinck Mill, Bentinck Street, Farnworth, Bolton, BL4 7EP, England
UK FREEPHONE: 0800 014 9252* International T: +44 120 486 1007
Email: cuddle@cosatto.com
- Calls from BT landlines are free but calls from mobiles and other networks may vary
All the design and trademarks contained herein are the property of Cosatto Limited.
No part of this document may be reproduced without the permission of Cosatto Limited.