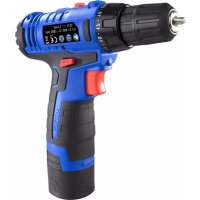
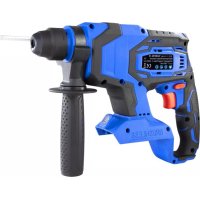
34 07 45 - Drill Westfalia - Free user manual and instructions
Find the device manual for free 34 07 45 Westfalia in PDF.
| Product type | Rotary hammer (hammer drill) |
| Brand | Westfalia |
| Model | 34 07 45 |
| Supply voltage | 230 V ~ 50 Hz |
| Power consumption | 800 W |
| No-load speed | 0 – 3000 rpm |
| Impact rate | 0 – 48000 bpm |
| Functions | Drilling, hammer drilling, chiseling |
| Handle | Auxiliary handle included |
| Hand-arm vibration level | 23.49 m/s² |
| Recommended protection | Safety goggles, dust mask, hearing protection |
| Instruction manual | 22 pages (French) |
| Weight | 2.5 kg |
| Dimensions (L × W × H) | 300 × 200 × 80 mm |
| Chuck | SDS-plus |
| Drilling capacity steel | 13 mm |
| Drilling capacity wood | 30 mm |
| Maintenance and cleaning | Unplug before cleaning; clean ventilation slots |
| Safety | Check for absence of cables (water, gas, electricity) before drilling |
| Spare parts and repairability | Do not disassemble yourself; contact customer support |
Frequently Asked Questions - 34 07 45 Westfalia
User questions about 34 07 45 Westfalia
0 question about this device. Answer the ones you know or ask your own.
Ask a new question about this device
Download the instructions for your Drill in PDF format for free! Find your manual 34 07 45 - Westfalia and take your electronic device back in hand. On this page are published all the documents necessary for the use of your device. 34 07 45 by Westfalia.
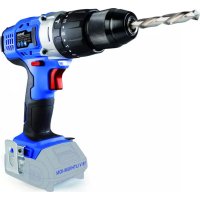
USER MANUAL 34 07 45 Westfalia
Article No. 34 07 45


This machine can be used for drilling in stone and concrete, chiselling seams and joints in concrete and masonry, tearing down masonry and similar work. The hammer function is pneumatic; a longitudinally moving impactor hits the rotating drill.
The impactor is driven pneumatically by a piston, which is powered by an electric motor. This operating principle provides an elastic hammer function with comparatively light recoil. Opposed to impact drills, the hammer function, the performance does not depend on the pressure.
Please read this manual carefully before operating the unit. Keep this manual for further reference.

Safety Notes. Page 4
Before first Use. Page 13
Inserting Tools.. Page 13
Auxiliary Handle . Page 14
Depth Limiter Page 14
ON/OFF Switch Page 14
Operating Mode.. Page 14
Maintenance and Cleaning . 15
Technical Data Page 16


Sicherheitseinweise

Please note the included General Safety Notes and the following safety notes to avoid malfunctions, damage or physical injury:
-
Persons with limited physical, sensorial or mental abilities are not allowed to use the unit, unless they are supervised and briefed for their safety by a qualified person.
-
Make sure, the operating voltage stated on the type label corresponds to the power mains available in your area.
-
Before each use please check the power cable for any damages. If there are any damaged spots have the power cable replaced by a professional.
-
Before starting any work on walls, floors or similar, make sure that all power lines in the work area are switched off at the main switchboard. Inspect the proposed drill hole location for any utility lines (e.g. water, gas, power) before drilling. Use a suitable device such as a metal or electricity line detecting device.
-
Make sure the cord cannot get caught in any way.
-
Do not jam the cord or wind the cord around the unit and do not bend it.
-
Do not pull the cord around edges. Do not pinch the power cord in any way and keep it away from hot surfaces.
-
Make sure that the ventilation louvers are clean and free from obstructions.
-
Please switch OFF the unit and unplug from the power supply before cleaning, maintaining or when not in use.
-
Use the auxiliary handle delivered with the unit. Loss of control of the pneumatic impact drill can cause injuries.
-
Always wear ear protection when working with the pneumatic impact drill. The noise can head to ear damage. Wear a dust mask to protect yourself from potentially hazardous dust. When chiselling, prefer goggles to protect your eyes against thrown particles.

-
The drill hammer has a hand arm vibration of 23.49m / s^2 . To avoid injuries due to the hand arm vibration, take sufficient rest breaks.
-
Before undertaking any work on the machine, pull out the power plug to avoid unintentional start-up.
-
Please notice: Only Change the operating mode (drilling/impact drilling/chiselling) when the machine is at a complete standstill.
-
If the machine was dropped and becomes damaged, immediately switch off the unit and do not use it further. Do not disassemble the unit and do not try to repair it yourself. Contact our customer service.

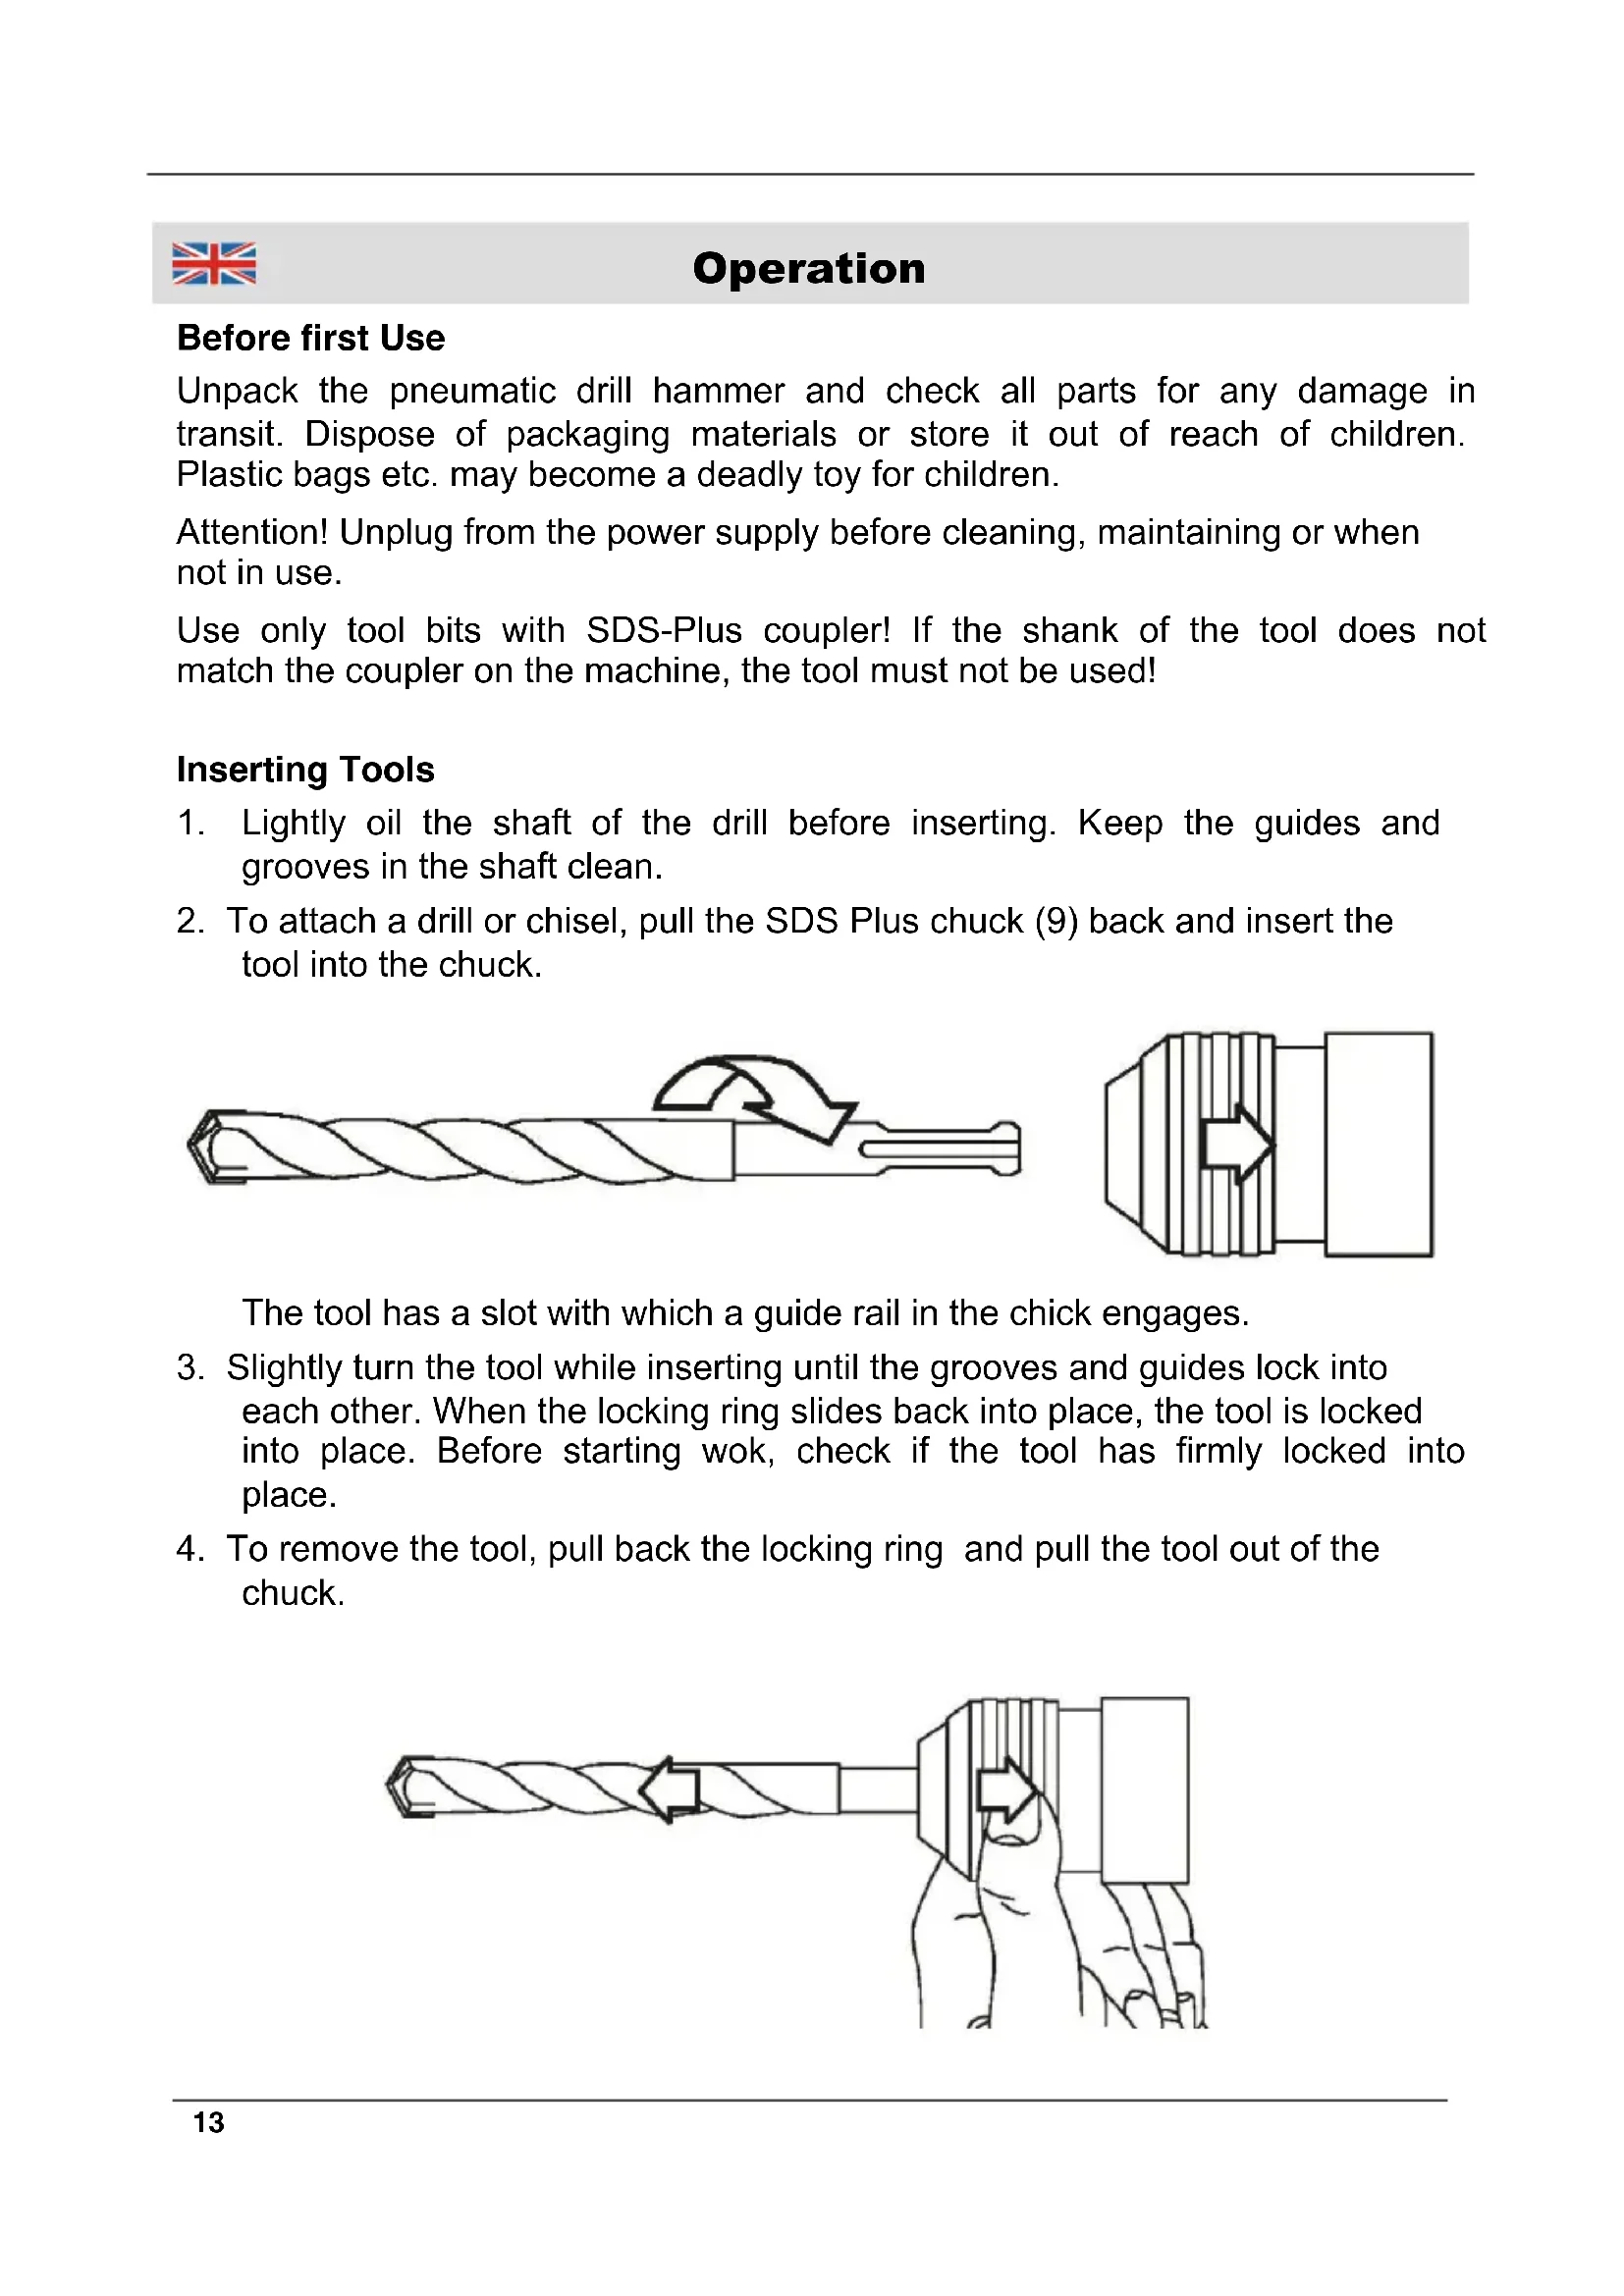
Unpack the pneumatic drill hammer and check all parts for any damage in transit. Dispose of packaging materials or store it out of reach of children. Plastic bags etc. may become a deadly toy for children.
Attention! Unplug from the power supply before cleaning, maintaining or when not in use.
Use only tool bits with SDS-Plus coupler! If the shank of the tool does not match the coupler on the machine, the tool must not be used!
Inserting Tools
- Lightly oil the shaft of the drill before inserting. Keep the guides and grooves in the shaft clean.
- To attach a drill or chisel, pull the SDS Plus chuck (9) back and insert the tool into the chuck.

The tool has a slot with which a guide rail in the chick engages.
- Slightly turn the tool while inserting until the grooves and guides lock into each other. When the locking ring slides back into place, the tool is locked into place. Before starting wok, check if the tool has firmly locked into place.
- To remove the tool, pull back the locking ring and pull the tool out of the chuck.

Auxiliary Handle (7)
For your own safety, always use the auxiliary handle with the drill hammer.
It is attached to the cylindrical part on the front of the housing and can be attached in various positions. Make sure it is securely attached.
Depth Limiter (8)
- To attach the depth limiter, loosen the screw on the auxiliary handle.
- Insert the depth limiter into the mounting hole and set the desired depth and retighten the handle.
ON/OFF Switch (3)
The unit is turned on by pressing the ON/OFF switch.
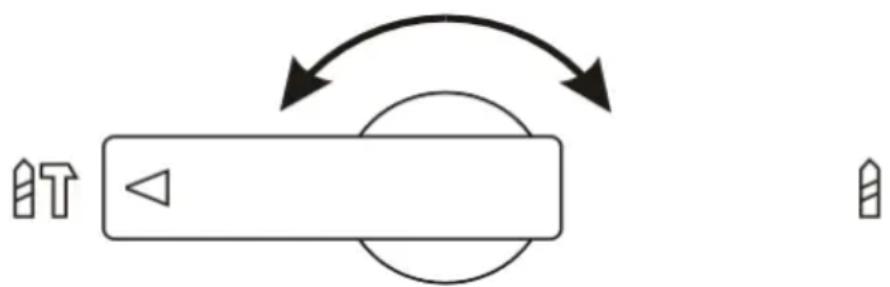
Operating Mode
The unit is equipped with two toggle switches:
"Hammer Drill/Chisel" (1) and "Drill/Chisel" (4).
- The toggle switch "Hammer Drill/Chisel" engages and disengages the rotation function, while the toggle switch "Drill/Chisel" engages or disengages the hammer function.
- These switches can be set in combination for 3 different modes of operation: "drill only", "hammer drill" and "chisel only".
- With the switch "Hammer Drill/Chisel" the operating mode of the unit is set. For drilling or hammer drilling the switch is set to the drill and hammer drill symbol, for chiselling set it to the hammer symbol.
Please Notice! Operate the switches only while the motor is at a complete standstill, because otherwise the gearbox may be damaged.
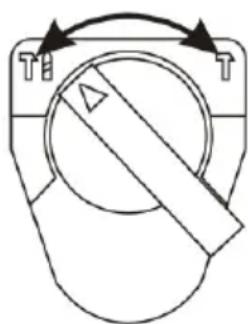
- Set the switch "Drill/Chisel to the drill symbol for "drill only" (no hammer function).
- Set the switch to the hammer drill symbol for hammer drilling or chiselling.
Maintenance and Cleaning
- Always keep the unit clean, dry and free from oil.
- Use only a dry or slightly moist cloth for cleaning the housing.
- Do not use abrasives or flammable substances such as benzene, solvents, turpentine or similar.
- Keep the ventilation louvers clean and free from obstructions to prevent overheating the unit.
- A box with gear grease is included with the unit. If the hammer function deteriorates, grease should be added to the gear box. Open the gear box cover and loose a small scapula of similar to feed grease into the gear box.
- If any sort of malfunction occurs, immediately stop using the machine. Have the machine repaired by a professional or contact our customer support department. Do not attempt to repair the unit yourself.
| Technical Data | |
| Rated Voltage | 230 V ~ |
| Rated Frequency | 50 Hz |
| Nominated Power | 620 Watt |
| Revolutions (idle) | 800 min-1 |
| Hammering Frequency | 3150 min-1 |
| Tool Fitting | SDS Plus |
| Drilling Power | |
| Concrete | 26 mm |
| Wood | 30 mm |
| Metal | 13 mm |
| Weight | 3.8 kg |
| Protection Class | II |
| Sound Pressure Level | 92.6 dB(A) |
| Sound Power Level | 103.6 dB(A) |
| Hand Arm Vibration for Main Handle | 23.49 m/s2 |
| Hand Arm Vibration for Auxiliary Handle | 12.35 m/s2 |


EC-Declaration of Conformity
We, the Westfalia Werkzeugcompany,
declare by our own responsibility that the product
Pneumatic Hammer
Article No. 34 07 45
is according to the basic requirements, which are defined in the European Directives
2004/108/EC Electromagnetic Compatibility (EMC)
2006/42/EC Machinery
2000/14/EC Noise Emissions (L WA = 103,6 dB)
2011/65/EU Restriction of the Use of certain hazardous
Substances in electrical and electronic
Equipment (RoHS)
and their amendments.
Hagen, December 22nd, 2011
Jhon 立inebeil
(Thomas Klingbeil, QA Representative)


CH-3425 Koppigen 8 Fairfax Road, N. Abbot TQ12 6UD
Telefon: (034) 4 13 80 00 Phone: (0844) 557 5070
Telefax: (034) 4 13 80 01 Fax: (0870) 066 4148
Internet: www.westfalia-versand.ch Internet: www.westfalia.net


Please help avoid waste materials.
If you at some point intend to dispose of this article, then please keep in mind that many of its components consist of valuable materials, which can be recycled.
Please do not discharge it in the rubbish bin, but check with your local council for recycling facilities in your area.