Fly FCOIII - Action camera CamOne - Free user manual and instructions
Find the device manual for free Fly FCOIII CamOne in PDF.

| Product type | Sports camera (sportscam) |
| Video resolution | 640 x 480 pixels (VGA) |
| Photo resolution | 640 x 480 pixels (VGA) |
| Video format | AVI |
| Photo format | JPEG |
| Video frame rate | 28 frames per second |
| Storage | Micro SD card (min. write speed 6 MB/s) |
| Screen | 2-inch TFT (detachable) |
| Battery | 500 mAh LiPo with protection circuit |
| Power supply | USB 5 V or mains adapter |
| Charging time | 2 hours with adapter, 5 hours via USB |
| Orientable head | 90° automatic rotation on startup, manual adjustment via potentiometers |
| Main functions | Video recording, photo, audio, motion detection, loop recording |
| Video transmission | Optional 2.4 GHz (10 mW) or 5.8 GHz (25 mW) modules up to 300 m |
| Remote control | LinX remote control, RX cord, V-Eyes headset with head tracking |
| Included accessories | Screen, battery cover, mounting plate, wrist strap, USB cable, mains adapter |
| Maintenance | Clean the lens with a soft cloth, avoid shocks |
| Safety | Do not expose the battery to more than 65 °C, do not short-circuit, keep out of reach of children |
| Spare parts | LiPo battery (FC3010), USB cable, mounting plate |
| Repairability | Replaceable battery, software update via website |
| Warranty | Legal warranty, excluding damage due to improper use |
Frequently Asked Questions - Fly FCOIII CamOne
User questions about Fly FCOIII CamOne
0 question about this device. Answer the ones you know or ask your own.
Ask a new question about this device
Download the instructions for your Action camera in PDF format for free! Find your manual Fly FCOIII - CamOne and take your electronic device back in hand. On this page are published all the documents necessary for the use of your device. Fly FCOIII by CamOne.
USER MANUAL Fly FCOIII CamOne
Please read carefully before using the camera!
Copyright ©2010 by ACME the game company GmbH
Packungsinhalt FCOE Core Set V2
Thank you for purchasing the FCOIII. Enjoy the countless features of the camera. Find most answers for support a tour Homepage: www.FlyCamOne.com
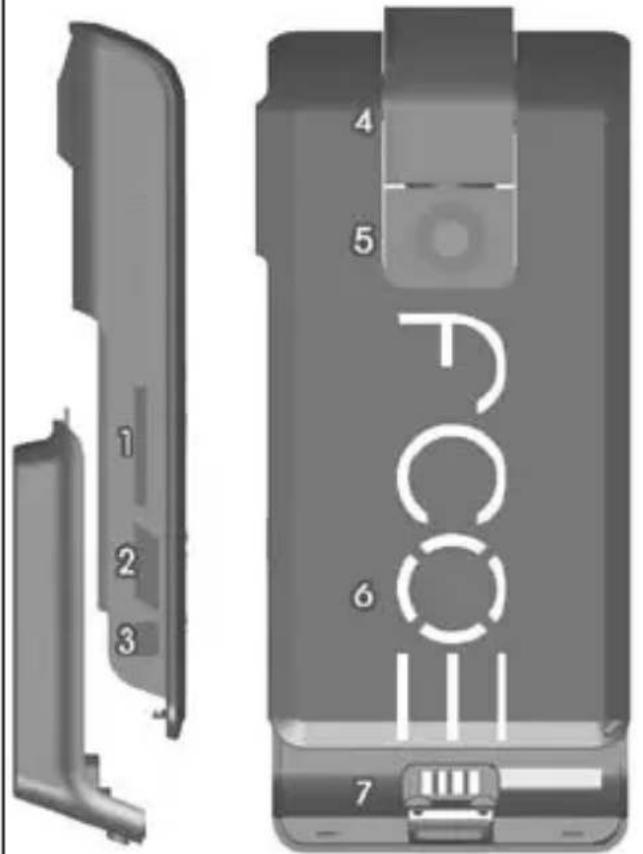
Functions of the FCOIII

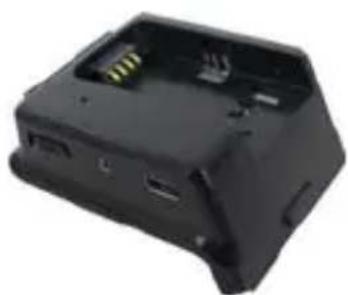
1 Micro SD Card Slot
2 On/Off Switch
3 RX socket
4 Pivot Head
5 Camera sensor
6 Control buttons for head movement
7 Contacts at the screen module
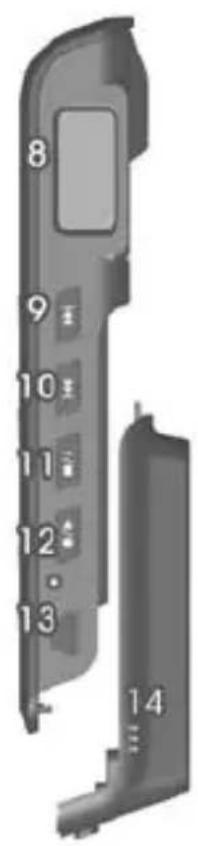
8 LCD panel
9 forward (right)
11 Stop/down
13 Mini USB socket
14 Internal loudspeaker
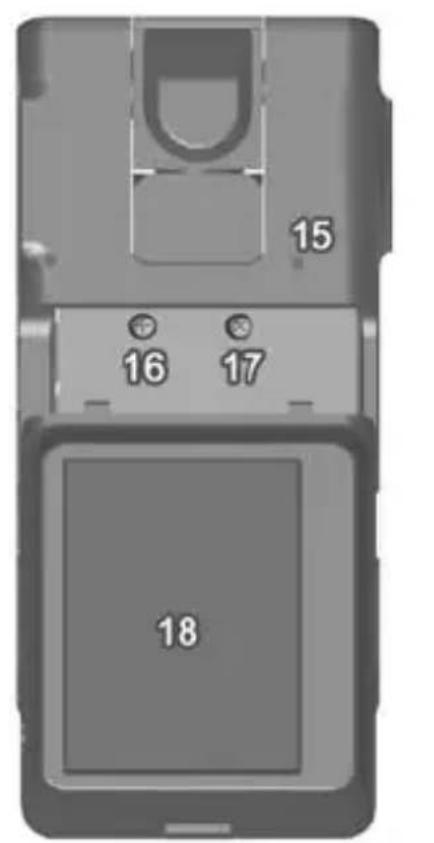
16 Trim poti tilt
18 TFT 2" Screen
20 Safety eyelet
10

back (left) | Speaker on/off
12
Record/Play | Screen flip (1 cons on/off (3 Sec)
15 Microphone
17 Trim poti pan
19 Screen release
Preparation
Charge the Camera with the power adaptor or with the USB-lead at your PC before use! Please note that the menu of the Camera is locked once connected!
Remove the protection film in front of the lens. It surface is high glossy when removed!
Insert a suitable SD-Card (e.g. FCOIII Micro SD Rapid Rush 8GB) into the card slot of the FCOIII. Use flat item to let it get in to the click. The writing speed should be minimum 6MB/Sec!.
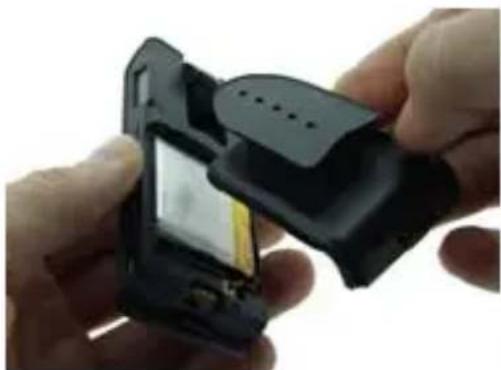
Connect the screen module to the cam. Remove the protection foil of the screen (optional). The screen is matt once the foil is removed!
Switch on your FCOIII. The head moves 90^ out of the shell and does a self adjustment. Move the head with the buttons of the logo. Never turn the head by hand. It will damage the gear set and manipulates the adjustment!
If the head will not get into the upright position, or if the head looks side wards, you can set it by the two trim potis (16 and 17) behind the battery.
Due to its setup, the Camera is showing the live picture 90^ turned. A comfortable control function will be given, using the FCOIII Transmission Set.
Replace the screen by the battery cover plate with base. Depending on how you are going to use the Camera, standing on the base or hanging on it, it is necessary to turn the picture. Press the
button for 1 second . The LCD-screen shows "Flip" to indicate, the picture is turned.
Recording your first video
After switch on the camera, "VID" appears on the LCD-Panel. Press the button once to get to the sub menu where "REC" is displayed. Press the button to start recording, indicated by turning bars in the LDC-Panel. Press the button to stop the recording and return back to the main menu by pressing the button. Press the button to move through the main menu, up to "PLY" in the display. Replace the battery cover again by the screen and press the button to start the last video. Do so as well with all other modes!
Download the Videos onto the Computer
To enjoy the just recorded video at your PC, select „PC“ at the LCD-Panel first. Connect the Camera to the USB-Port. The known jingle indicates the known unit. In common, a new opened window will show the card and its files or your PC
suggests different programs to open the files. Select the file explorer if you are not sure which one to take. To watch the videos always copy the files to your computer before playing. It might be possible that the movies stops or the player shut down. Do so as well with photos or audio files. In case no window appears, click to „computer“ to find the camera as a drive there.
Using at a model
To fix the camera to a model exchange the screen again by the battery cover. Save the cam, fixing it to the model using the eyelet (20) as well.
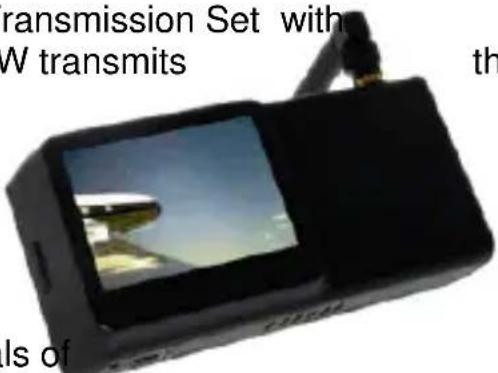
Live Video transmission
The optional available FCOIII Transmission Set with 2,4GHz/10mW or 5,8GHz/25mW transmits
Video signal up to a range of 300m
Due to the application;
interferences may cause
the live stream. The recorded video stored at the card will not be affected! The signals of the cameras sender might interfere the control signals of other units. (2,4GHz Transmission Set and use of
2,4GHz RC-Set).
Avoid errors by doing a range test and make sure not to affect other systems!
The Camera sender has the same base and will be fixed in the same way.
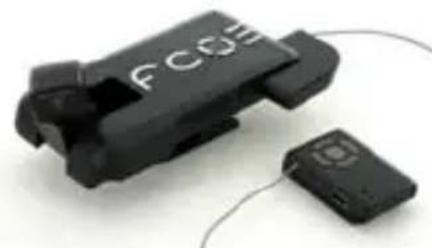
Remote the FCOIII:
The cameras head can be controlled in two ways: The FCOIII LinX is a tiny remote controller, moves the head and starts and stops the selected mode.
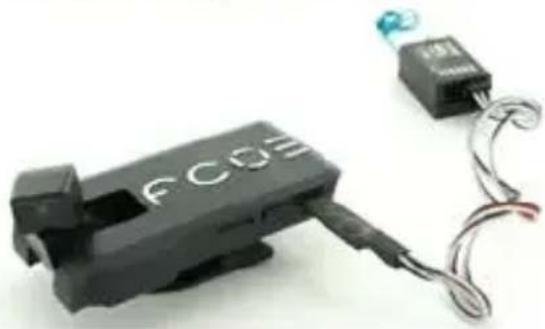
The FCOIII RX Cable will be connected to the models receiver, occupying up to 3 channels; two to move the head pan and tilt, one to release the selected mode.
Both of them will be connected to the RXport of the camera.
Setup a new Zero-Position
To have the best viewing direction set a new Zero Position: move the head to the the selected place and press the left and right button of the logo for 5 seconds.
Connect the FCOIII RX-Cable or the receiver of the FCOIII LinX after that.
FPV / First Person View with FCOIII
Complete the FCOIII Set by the FCOIII V-Eyes! Look to the ground out of the cockpit of your own model! Fitted with sensors for pan and tilt, your own head movement will be transferred to the movement of the camera head!
The data can be send through the Linx remote that will be put into the V-Eyes port, or by the trainer port of the RC set
With its VGA Resolution the V-Eyes offers a first
class live experience. The play mode of the FCOIII offers an exciting flight again and again to you or your friends!

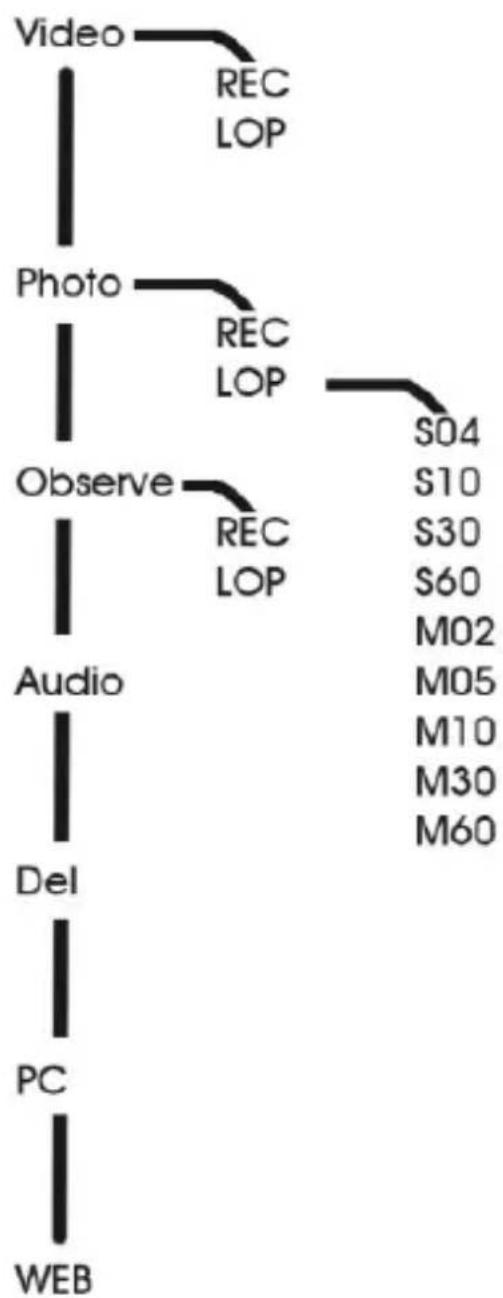
Menu structure in the LCD Panel
The panel is divided into 1 main menu, 2 battery status, and 3 memory status of the SD-card 4 the sub menu.

Select the image orientation turned 180^ by pressing first.
Switch on/off the loudspeaker with
Using the buttons
you will move through the menu displayed at the LCD panel. The structure is similar to the known tree structures of your PC's file browser (e.g. Windows-Explorer):
Video is displayed in the main menu.
Press to get to the sub menu of this point. "REC" will be displayed. Use to get the second available mode: ,LOP" for loop recordings. Learn more about this in "Modes overview". Start the elected mode pressing the recording button . Stop it with the stop button Pressing return you will get back into the main menu.
Modes overview
Within the main menu following elections can be done:
Video Video recording with 30FPS/VGA (Avi)
Photo still photo taking VGA (Jpeg)
Observe Video recording with 30BPS/VGA (Avi) controlled by the motion detection
Audio Audio only
Play Displays videos, photos and starts audio files
Del Deletes the last file
PC Configures the cam as disc drive at you computer
WEB Let the cam work as web cam. Drivers to be downloaded at www.FlyCamOne.com
CH blinking indicates to charge the battery
In the sub menu find the following:
REC Regular recording
Loop recording where the memory will be divided and the oldest
file will be deleted. In the photo mode the "LOP" will have another
sub menu where you select the time between two pictures starting
from S04 for 4 seconds, S10 for 10 seconds,..., M02 for 2 minutes, ...
First picture will be taken after 10 seconds. Use external power longer periods of recording!
The recoding will be displayed by moving bars in video mode, by a frame in photo mode.
Software update
Update your FCO3 with software updates from www.FlyCamOne.com
Limited warranty of the LiPo battery.
The included LiPo battery's capacity is reduced due every discharge /charging circle and belongs to the wearing parts. Improper use storage and handling as well as wearing and consumption is not covered by the warranty.
Modes detailed
Video recording REC
The recording takes place with 30 pictures per second (30 FPS) with 720x480 px and a consumption of storage of approx. 70 MB/min.
Recording is indicated by running dots" "FPS rate can be reduced by a dark or indoor environment.
Video loop LOP
Recording as above - however the free storage (min. 200 MB) of the SD-card is shared and the old part will be overwritten consecutively.
The recording will be stopped not until gets pressed.
Photo REC
The recording takes place with 720x480 px, one photo needs approx. 120 KB storage on the SD-card. The FCOIII indicates the recording with a frame, [3].
Photo Loop 504 - 160
The FCOIII takes pictures every 4 seconds to 60 minutes. Modes displayed as follows S04, S10, S20, S30, S60, M02, M10, M30, and M60 while S is for seconds, M for minutes.
Observation REC
The motion detection of the FCOIII activates the recording as long motion can be detected in front. Please note that different Voltage Hertz-Systems need different firmware - default Setup is 50Hz for Europe and 60Hz for America.
Observation LOP
Recording as above - however the free storage (min. 200MB) of the SD-card is shared and the old part will be overwritten consecutively. The recording will be stopped not until gets pressed.
Audio recording RUD
Records sound only.
PlayPLY
Will allow watching the recorded videos and photos. Use and play 0 / 1 , stop 0 / 4 in this mode.

Detele Files DEL
Will delete the last file by pressing

Downloading files and simultaneously charging PC
Connection to the PC in drive mode. FCOIII will be charged covally when connected - charging will take approximately 5 hours.
Web Cam
Use FCOIII as Webcam. Download drivers before: www.FlyCamOne.com
Control the FCOIII's head
Three different solutions to move the head:
A The circle , of the FCOIII logo controls the head.
B It can be controlled by the optional available FCOIII LinX hand sender (Art.No: FC3005). Insert the receiver into the RX socket.
C With the optional FCOIII RX cable (Art.No: FC3009).
You need up to three free channels at your R/C receiver for head movement (Pan/Tilt) and shutter release.
Charging the FCOIII
Charge the camera at your computer's USB-Port (5h) or with the included adaptor (2h). Charging will be indicated by a pulsing battery symbol in the LCD panel. Charging is finished when all elements of the symbol are filled.
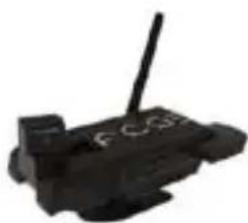
Using FCOIII Transmitter Sets (Art.No:FC3002)
Adding the FCOIII Transmitter Set the video signal will be transferred to the receiver at 2.4GHz up to a range of 300m / 980ft . The screen module will be exchanged against the sender, and the screen will be fixed to the receiver now. Interferences will not be recorded because the camera will record, not the ground station.
The FCOIII V-Eyes Video glasses
(Art.No.FC3004)
Instead of the screen, the V-eyes battery pack will be fixed to the receiver now. See the picture on two screens in front of your eyes now. The integrated Head Tracking System combined with a R/C controller is moving the camera's head now.

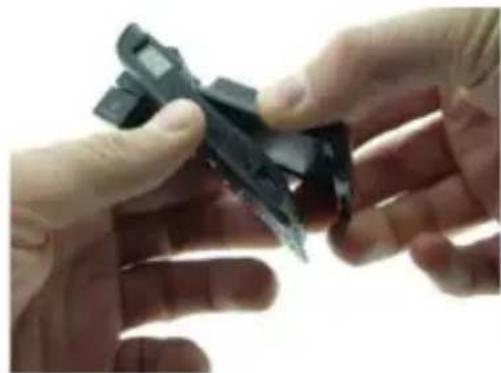
Replacing the LiPo Battery of the FCOIII
Lift the battery and disconnect the plug. Insert the new one. Dispose empty Batteries at a recycling centre.
Important! Only use the original FCOIII LiPo battery 600mAh with integrated LiPo-Saver!
ATTENTION!
Through a collision at a high speed, the record can be deleted.
Please note!
The privacy of others is protected by law and should be taboo. The recording of third party can be an illegal act. You are responsible for your acting.
Warnings Lithium Polymer Battery Pack
- Mishandling may occur explosion, fire and smoke including damage of health or goods. It will also reduce battery performance.
- Capacity of the LiPo battery pack will be reduced with every discharging circle. After 50 circles the capacity is reduced to 60 - 80% .
- Charge and store the LiPo battery pack at a temperature of 0^ to 40^ - avoid a temperature higher than 65^ when discharging.
- Never charge a damaged LiPo battery pack. Stop charging if the LiPo battery packs is getting deformed (blown up).
- Never charge with reversed polarity – permanent damage, fire and smoke may occur!
- Do not shortcut - Risk of explosion and fire!
- Never carry a LiPo in pockets of your trousers or jacket – in case of fire, taking them out will not be in time!
- Avoid contact to any kind of liquids.
The LiPo battery pack is not a toy! Keep away from children!
If electrolyte contacts your skin or eyes, immediately wash it off using plenty of clean water. Consult a doctor!
Note that deep-discharged batteries will be damaged permanent. Charge in time! - Dispose used batteries in the appropriate manner.
Note:
ACME the game company is unable to ensure correct use according to these instructions. For this reason ACME the game company is obliged to refute any claim under guarantee.

Information for disposal of crossed Bin marked products
This symbol is marked on a product or packaging, it means that the product must not be disposed of with your general household waste. Only discard electrical/electronic items in separate collection schemes, which cater for the recovery and recycling of materials contained within. Your co-operation is vital to ensure the success of these schemes and for the protection of the environment.
Contenu de la FCOÉ Core Set
Icono on/off (3 Sec.)
PC Configura la camera alwhose PC
Herewith we declare that this item is in accordance with the essential requirements and other relevant regulations of the directive 1999/5/EC. A copy of the original declaration of conformity can be obtained at the following address.
ACME the game company GmbH
Industriestr. 10A
33397 Rietberg - Germany
© copyright 2010 ACME the game company