A 4040 - Laminating machine OLYMPIA - Free user manual and instructions
Find the device manual for free A 4040 OLYMPIA in PDF.

Frequently Asked Questions - A 4040 OLYMPIA
User questions about A 4040 OLYMPIA
0 question about this device. Answer the ones you know or ask your own.
Ask a new question about this device
Download the instructions for your Laminating machine in PDF format for free! Find your manual A 4040 - OLYMPIA and take your electronic device back in hand. On this page are published all the documents necessary for the use of your device. A 4040 by OLYMPIA.
USER MANUAL A 4040 OLYMPIA
natural_image
Front view of a silver Olympus air conditioner unit (no visible text or symbols on body)Important Safety Information....11
Recommendation....12
Exemption From Liability....12
Intended Use....12
Features 13
Hot Laminating....15
Cold Laminating....15
Clearing Foil Jams 15
Cleaning and Servicing 16
Troubleshooting 16
Disposal Notes....17
Warranty 17
Français
Recommendation....19
Exclusion de la garantie....19
Utilisation conforme aux prescriptions....19
Service-Center Hattingen
Zum Kraftwerk 1
45527 Hattingen
Please observe the following information to ensure reliable operation of the laminator:
1 Read this manual thoroughly and observe the instructions and information in it when operating the unit.
2 Keep the operating instruction manual available for future reference.
3 Prevent damage to the power plug and power cable. Never twist the power cable. Do not operate the unit if the power cable or power plug is damaged.
4 Do not use the unit in the vicinity of hot surfaces or in damp environments and protect it from direct sunlight and dusty conditions.
5 Disconnect the power plug before starting to clean the unit. Never use any solvents or aggressive cleaning agents.
6 Metallic objects cannot be laminated.
7 Children must not be allowed in the vicinity of the equipment when it is ready to operate.
8 Disconnect the power plug when the unit is not in use.
9 Always switch the unit off immediately if it emits a strong smell or it is not in operation.
10 Do not touch the power plug with moist hands.
11 Ensure that the On/Off switch is in the "OFF" position before connecting the laminator to the mains power supply.
12 Only insert recommended foil pockets, as specified in the Section "Features", in the unit. Using foil pockets which are too large could lead to the unit jamming.
13 Do not laminate heat-sensitive materials, such as thermal paper, in the unit.
14 Lamination of moist documents produces poor results.
15 Do not use foil pockets, intended for cold lamination, for hot lamination. This could damage the machine, foil pockets and document.
16 Do not cut foil pockets to size. The resulting cut edges could cause the foil pockets to jam.
17 Keep loose clothing, ties, jewellery, long hair and other loose objects away from the infeed opening. Risk of injury!
18 The socket and the mains connection of the device must be freely accessible for safety reasons so that the power supply can be disconnected in emergencies.
19 The device may only be used indoors in dry rooms.
Recommendation
If very soft materials (such as serviettes) or small formats are to be laminated, then we recommend placing these within a folded piece of paper to avoid possible jamming. The piece of paper has to be placed in the lamination device with the folded edge first.
Identification papers and documents can lose their validity if they are laminated, because they can then no longer be checked.
In case you wish to let another person use this product, please include these instructions.
Exemption From Liability
We cannot guarantee that the information on the technical properties and that contained in this document is correct. The product and, where applicable, its accessories, described in this document are subject to constant improvement and further development. For this reason, we reserve the right to modify components, accessories, technical specifications and related documentation of the product at any time without notification.
Intended Use
This laminator has been conceived for use processing hot and cold laminating foil. It is possible to laminate pictures, maps, documents, paper etc. up to a total thickness of 1,0 mm. Any other use is considered unintended use. Unauthorised modifications or reconstructions are not permitted.
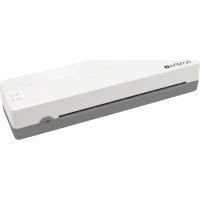
Features
Protection and refinement of your documents.
Laminate photographs, documents, graphics, identity cards etc. up to A2 size. The unit operates using 2 heating rollers, has a quick warm-up phase and laminates without a carrier.
• 2 LED lamps indicate the operating states
• Automatic switch-off in the event of overheating
• High quality heating system prevents smudging and blistering
• Warm-up phase only about 4-8 minutes
• Cool down phase to room temperature, 40-60 minutes
• Foil thickness, minimum 75 μm and maximum 250 μm
Laminating system: Hot roller technology,
4 transport rollers
Laminating temperature: 110 °C – 150 °C
Maximum laminating width: 490 mm
Maximum lamination thickness: 1.0 mm
Laminating speed: 350 mm/min
Power supply: 220 - 240 Volt, 50 Hz
Power consumption: 2.3 A, 500W
Dimensions (LxWxH): 665 x 195 x 118 mm
Weight: Approx. 7,7 kg
Hot Laminating
1 Connect the power cable to an easily accessible, standard electrical socket.
Caution: Check that the voltage specifications of the unit correspond to that of your power supply network (220 - 240 V, 50 Hz).
2 Switch on the On/Off switch on the right-hand side of the unit (I).
3 The drive motor for the transport rollers starts up, the red indicator lamp (POWER) lights up and the warm-up phase begins. The correct operating temperature is reached after about 3 minutes (75 m); 4 minutes (100 m); 5 minutes (125 m); 6 minutes (175 m); 7 minutes (250 m) and the green indicator lamp (READY) lights up.
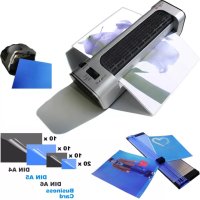
4 Insert the document to be laminated in the pouches so that there is a margin of approx. 3 - 5 mm to the edge of the foil on all sides.
Caution: Only use foil intended for hot laminating.
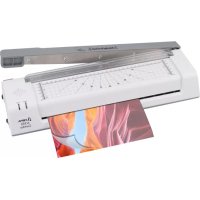
5 Insert the foil containing the document in the laminator's insertion slot. Insert the ready closed side of the pouch first.
Note: To prevent the laminating foil from creasing, never insert the open end of the foil pocket in the insertion slot of the laminator first. When inserting the foil, observe the instructions on the insertion slot. The laminating process occurs automatically.
Caution: The foil is very hot and soft when ejected following lamination. Therefore, handle the laminated product with extreme care.
Note: To flatten the laminated product, place a book or similar heavy, flat object, on it.
Cold Laminating
1 Connect the power cable to an easily accessible, standard electrical socket.
Caution: Check that the voltage specifications of the unit correspond to that of your power supply network (220 - 240 V, 50 Hz).
2 Switch on the On/Off switch on the top, right-hand side of the unit (I).
3 The drive motor for the transport rollers starts up, the red and green indicator lamps (POWER and READY, respectively) light up.
Caution: If the laminator was switched to hot laminating shortly before, allow it to cool down. The equipment takes about 60 minutes to cool down.
4 Remove the protective foil from the pouch.
5 Insert the document to be laminated in the pouch so that there is a margin of approx. 3 - 5 mm to the edge of the foil on all sides.
6 Insert the foil containing the document in the laminator's insertion slot. Insert the ready closed side of the foil first.
Note: To prevent the laminating foil from creasing, never insert the open end of the pouch in the insertion slot of the laminator first. When inserting the foil, observe the instructions on the insertion slot. The laminating process occurs automatically.
Clearing Foil Jams
The laminator is provided with a "Jam Release" function in order to clear foil jams quickly.
1 If the foil jams, switch the equipment off and set the switch on the right top side of the unit to its "REW" position.
2 Hold the laminator firmly and pull the foil together with the document to be laminated out of the laminator's insertion slot.
3 Set the switch on the right top side of the unit to its "FWD" position.
4 It will probably be necessary to then clean the unit several times as described in the Section "Cleaning and Servicing".
5 If foil jams occur repeatedly or jammed foil cannot be removed from the laminator, please contact our hotline.
Cleaning and Servicing
Deposits and residual adhesive on the transport rollers can influence the results of the laminating process. Therefore, the transport rollers must be cleaned periodically after use:
To do this, insert a folded piece of paper in the insertion slot. Residual adhesive is removed and taken up by the paper when ejected. Repeat the process several times.
Disconnect the power plug before starting to clean the unit with a damp cloth. If necessary, the housing can be cleaned using a cloth moistened with clean water with a little mild soap applied. Never use any solvents or aggressive cleaning agents.
Troubleshooting
| Fault | Corrective |
| Red LED (POWER) does not light upUnit does not respond | Check that the power plug has been properly connected to the power socket.If the fault cannot be cleared, contact our hotline. |
| Foil jam | Check the foil pockets being used are the correct size.Only use pouches of the size specified.Ensure that the pouch has been inserted correctly in the unit.To clear the fault, follow the instructions in the Section "Clearing Foil Jams". |
| Laminated foil is not completely transparent | Laminate the same foil again to improve the lamination result. |
measures

Conformity of the equipment to the EU directives is confirmed by the CE symbol.
Disposal Notes
This symbol [the crossed-out wheeled bin/PICTURE] means that the product should be brought to the return and or separate collection systems available to end-users, when the product has reached the end of its lifetime. This symbol applies only to the countries within the EEA. EEA = European Economic Area, which comprises the EU Member States plus Norway, Iceland, and Liechtenstein.
Warranty
In the case of a defect, please return the device together with the receipt and original packing material to the point-of-sale.
GB The manufacturer hereby declares that the equipment complies with the stipulations defined in the following guidelines and standards:
Heinz Prygoda, Managing Director
Ort, Datum