
4SE6E - Tumble drier EDESA - Free user manual and instructions
Find the device manual for free 4SE6E EDESA in PDF.
| Product type | Tumble dryer |
| Brand | Edesa |
| Model | 4SE6E |
| Maximum loading capacity | 6 kg for cotton/linen, 3 kg for delicate/synthetics |
| Drying programs | 8 programs with electronic humidity control, 4 timed programs (15 to 60 min), 1 daily program, 1 cold ventilation program (10 min) |
| Control system | Electronic humidity control with sensors in the drum |
| Delayed start | 3, 6, 9 or 12 hours |
| Anti-crease | Yes, duration 60 minutes with intermittent rotation |
| Cold ventilation | Yes, dedicated 10-minute program |
| Electrical safety device | Immediate drum stop if door opened |
| Thermal safety device | Overheating protection |
| Lint filter | Removable, clean after each cycle – do not wash with water |
| Humidity sensor | Clean with a cloth soaked in vinegar if limescale deposits |
| Door reversal | Possible, procedure described in the manual |
| Installation | On floor (adjustable feet) or stacked above a front-loading washing machine (optional accessory) |
| External vent connection | Possible with supplied flexible hose to expel moist air |
| Minimum ambient temperature | +10 °C for optimal operation |
| Recommended spin speed | Minimum 700 rpm for effective drying |
| Power supply | 230 V ~ 50 Hz (check rating plate) |
Frequently Asked Questions - 4SE6E EDESA
User questions about 4SE6E EDESA
0 question about this device. Answer the ones you know or ask your own.
Ask a new question about this device
Download the instructions for your Tumble drier in PDF format for free! Find your manual 4SE6E - EDESA and take your electronic device back in hand. On this page are published all the documents necessary for the use of your device. 4SE6E by EDESA.
USER MANUAL 4SE6E EDESA
MANUAL DE INSTRUÇÕES
E INSTALAÇÃO
F
NOTICE D'UTILISATION
D
GEBRAUCHSANLEITUNG
GB
OPERATING INSTRUCTIONS

natural_image
Abstract black and white logo design with curved shapes (no text or symbols)edesa
4 SE - 6 E
SECADORA DE ROPA
SECADOR DE ROUPA
SECHE LINGE
WÄSCHETROCKNER
TUMBLE DRYER
E
INDICE
PAG.
natural_image
Diagram showing a device with two circular chambers and a downward arrow indicating rotation or change (no text or symbols present)natural_image
Line drawing of a hand holding a tool inside a circular device with a handle, no text or symbols presentnatural_image
Diagram of a double door with circular openings and a central container, showing an upward arrow (no text or symbols)
natural_image
Diagram of a container with internal structure and an arrow indicating rotation (no text or symbols)LIMPEZA DA SONDA DE CONTROLE DA HUMIDADE
natural_image
Line drawing of a hand inserting a component into a circular device (no text or symbols)text_image
Raccord Tube CollierINSTALLATION EN COLONNE
natural_image
Diagram of a double door with circular openings and a bucket, showing an upward arrow (no text or symbols)
natural_image
Diagram of a container with internal structure and an arrow indicating rotation (no text or symbols)NETTOYAGE DE LA SONDE DE CONTROLE DE L'HUMIDITE
natural_image
Line drawing of a hand inserting a component into a circular device (no text or symbols)natural_image
Diagram of a double door with circular openings and a bucket, showing an upward arrow (no text or symbols)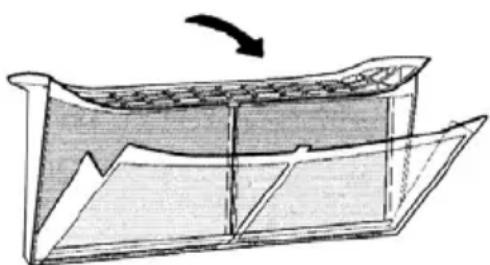
natural_image
Diagram of a container with internal structure and an arrow indicating rotation (no text or symbols)REINIGUNG DER SONDE ZUR FEUCHTIGKEITSKONTROLLE
natural_image
Line drawing of a hand inserting a component into a circular device (no text or symbols)THIS APPLIANCE COMPLIES WITH THE FOLLOWING EC DIRECTIVES:

- EEC 89/336 - EMC
- EEC 73/23 - LOW VOLTAGE
- EEC 93/68 - EC MARKING

ENVIRONMENTAL INFORMATION
This appliance is designed and built with the utmost care for environmental safety. To ensure the same care at the time of demolition, we recommend contacting the local authorities charged with collection and disposal. Never abandon the dryer in the environment.
Don't throw the packaging from your appliance in the rubbish but separate the various materials (eg. polystyrene, plastic bags) according to local regulations on waste disposal and current law.
INSTALLATION
This dryer must be installed in a well ventilated space so that the damp air the dryer produces during the drying cycle is easily expelled.
Such ventilation may be obtained by simply opening a window or with the aid of a fan. Alternatively, damp air may channelled outside by means of a hose.
The dryer can be installed on the floor using the four adjustable feet or be placed on top of a front loading washing machine to form a column.
EXTERNAL CONNECTION
If you want to discharge damp air from the dryer outdoors, you must connect the hose provided to the outlet on the rear of the machine.
text_image
Connection Hose Jubilee clipCOLUMN INSTALLATION
This dryer is easy to install on top of a front loading washing machine to form a column.
THIS REQUIRES A KIT OR FRAME WHICH CAN BE SUPPLIED ON REQUEST.

text_image
FrameSuction padsTIPS
- To get the best out of the dryer, don't install it in a room where the ambient temperature is under 10^ C.
- Before using the dryer for the first time, clean the inside of the drum with a damp cloth to remove any dust which may have accumulated during transport.
CAUTION
- The dryer must under no circumstance be connected to a chimney flue.
- There must be no lint around the dryer, as it could be sucked into the appliance.
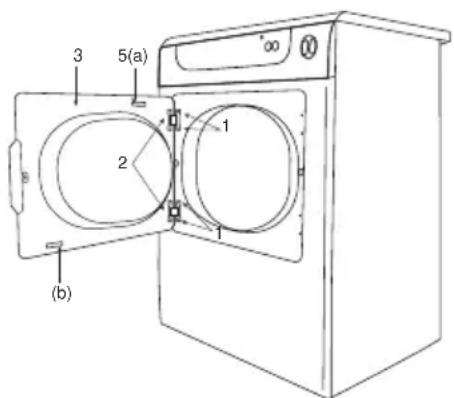
REVERSING THE DOOR
If you need to reverse the door, follow these instructions:
- On the front panel, unscrew the 4 screws (1) supporting the hinges (2) of the door (3).
- Invert the position of the micro-switch (5) from (a) to (b).
- Invert the position of the plugs covering the door mounting.
- Mount the door using the holes left open.
text_image
3 5(a) 2 1 (b)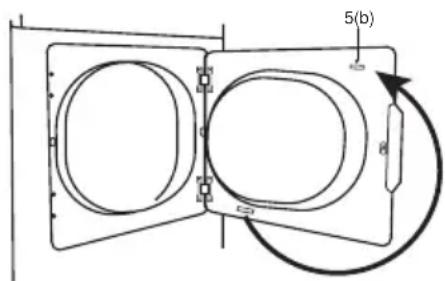
text_image
5(b)ELECTRICAL CONNECTION
Before plugging the dryer into a power outlet make sure that:
- the value of your mains voltage is the same as the value indicated on the rating plate on the front of the machine;
- the counter, limiter valve, supply line and power outlet are all to standard and suitably sized to resist the maximum load required; the power and input current values are given on the rating plate;
- the power outlet and plug are compatible without using reductions, multiple sockets, adapters or extensions;
It is a legal requirement that the appliance be connected to an earth system.
If the power line is damaged, it must be replaced with a special cable or kit available from the manufacturer or customer service.
THE MANUFACTURER DECLINES ALL RESPONSIBILITY FOR DAMAGE CAUSED TO PERSONS OR PROPERTY THROUGH NON OBSERVANCE OF THESE BASIC SAFETY REGULATIONS.
LAUNDRY
Before running the first drying cycle we recommend cleaning the inside of the drum with a damp cloth. On the labels on articles of laundry you will find the following symbols, which mean:
Normal drying

ate Do drying

tumble dry

Only put spin-dried laundry in this dryer.
The faster your washing machine's spin-dry is, the shorter the drying time will be, meaning energy saving as well.
The drum of this dryer can take up to 6 kg of resistant laundry (cotton, linen) or 3 kg of delicate laundry (synthetic fabrics).
Remember that to dry laundry successfully, you should load a smaller weight of large items than you would of smaller items.
Small items should be put in a cloth bag.
Remember to close all zips, tie up any lacing and button up pillowcases.
Drying will be more uniform if you remember to untangle the items taken from the washing machine, especially the larger ones, and segregate them, roughly, by size, type of fabric and drying required.
Avoid adding damp laundry when the drying programme has already started, as this may compromise results.
CAUTION
Do not put the following in the dryer:
- pure-wool items (they will felt);
• very delicate items such as curtains; - satin items;
- rubber or plasticized items;
- items that have been cleaned with inflammable products, eg. stain removers);
- and make sure that pets or other foreign bodies haven't got into the dryer by mistake.
Don't put laundry that's too wet in the dryer.
If your washing machine spins at under 700 rpm, we recommend splitting the load in two and drying each half with a complete cycle.
THE DRYER MUST ONLY BE USED TO DRY LAUNDRY WASHED WITH WATER
ENERGY SAVING
- Only put spun laundry in the dryer. The faster your washing machine's spin-dry is, the shorter the drying time will be. Wringing is not enough. Clothes which are too damp may damage the appliance. The faster the spin (800 rpm or more), the better the results will be. Spin-drying at 500 rpm will considerably lengthen drying time.
- Delicate items should also be spun. Avoid adding damp items when the drying programme has already started. Use the maximum load right from the start, as this will save time and energy.
- Clean the filter after each drying cycle.
- As far as possible, try not to use softeners in your wash, as the dryer itself will soften your laundry. It is better to dry 100% synthetic items outdoors, where they dry very quickly and without accumulating static. This also saves energy.
PROGRAMMES
This dryer has 8 different drying programmes with electronic humidity control (so all you have to do is set the degree of dampness you want), 4 preset time programmes for supplementary drying without the electronic humidity control, 1 daily programme and 1 cooling programme.
You thus have the following drying programmes at your disposal:
5 programmes for normal laundry (resistant fabrics: cotton and linen).
3 programmes for delicate laundry (mixed synthetic fabrics, acrylics).
4 pre-set time programmes
(lasting from 15 to 60 minutes, eg. for fabrics requiring extra drying because very thick).

1 daily programme
1 cooling programme (10 min.)
Use programme switch (1) to select the drying programme you want.
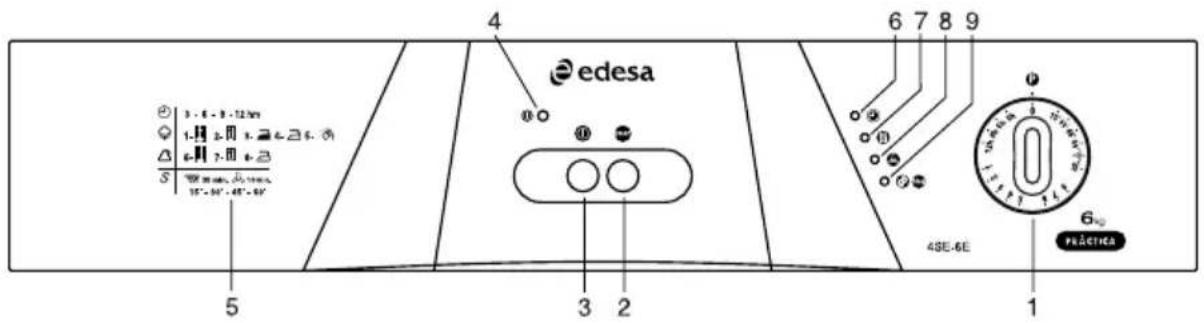
CONTROL PANEL
text_image
4 edesa 6 7 8 9 1 5 3 2 1 6 PRACTICA 4SE-6E- PROGRAMME SWITCH
- START BUTTON
- ON-OFF BUTTON
- POWER LED
-
PROGRAMME CHART
-
DELAYED START LED
- DRYING LED
- COOLING LED
- ANTI-CREASE / END OF CYCLE LED
PROGRAMME SWITCH (1)
This is used to set the programme most suitable for the type of laundry and the degree of drying desired.
The duration of the drying cycle is automatically determined by electronic control irrespective of the programme selected. The humidity of the laundry is constantly measured by sensors inside the drum. So it's normal for drying cycle times to vary even for the same programme, as they depend on the type of laundry, the speed of the washing machine's spin drying and the ambient temperature.
START BUTTON (2)
This is to start the machine when the desired programme has been set.
ON-OFF BUTTON (3)
This is to switch the dryer on and off.
POWER LED (4)
When on, this indicates that the dryer is connected to a power outlet.
CYCLE LEDS (6 - 7 - 8 - 9)
SAFETY DEVICES
This dryer has two safety devices:
- an electric safety device that immediately stops the drum turning if the door is opened during the drying cycle;
- a thermal safety device that eliminates the risk of overheating.
The table below details the drying programmes, with fabric types, maximum loads, degrees of drying, programme numbers and relative symbols.
| PROGRAMMES WITH DAMPNESS CONTROL | |||
| TYPE OF LAUNDRY MAX LOAD DEGREE OF DRYING PROGRAMME | |||
NORMAL LAUNDRY  COTTON COTTON | |||
| Thick cotton fabrics (e.g. cotton dressing gowns, bath sheets). Not cotton jumpers. | 6 Kg Very dry 1 |  | |
| Cotton fabrics, jersey items, cotton jumpers, children's clothes. | 6 Kg Dry to be put away 2 |  | |
| Table or bed linen in general | 6 Kg | Slightly damp for light ironing | 3  |
| Table or bed linen in general | 6 Kg | Damp for ironing by hand | 4  |
| Table or bed linen in general | 6 Kg | Damp for machine ironing | 5  |
| DELICATE LAUNDRY | |||
| Shirts, blouses | 3 Kg Very dry 6 |  | |
| Delicate laundry | 3 Kg Dry to be put away 7 |  | |
| Mixed synthetic | 3 Kg | Damp for ironing by hand | 8  |
| COMPLETELY SYNTHETIC LAUNDRY | |||
| Synthetic fabrics, fibres | 3 Kg Very dry 6 |  | |
| Acrylics, very delicate fabrics | 3 Kg Dry to be put away 7 |  | |
| SPECIAL PROGRAMMES | |||
| Daily, Ideal for drying mixed cotton/delicate loads quickly | 3 Kg | Damp for ironing by hand |  |
| Cold ventilation, Ideal for airing any type of laundry | 6 Kg |  | |
| Very thick fabrics which require further drying | 6 Kg | Maximum drying time 60 min. | Max 60 min |
| START DELAYEDBY 3 - 6 - 9 - 12 HOURS | |||
| Programme start selected with 3 hours delay | 3 h | ||
| Programme start selected with 6 hours delay | 6 h | ||
| Programme start selected with 9 hours delay | 9 h | ||
| Programme start selected with 12 hours delay | 12 h | ||
IMPORTANT
- Laundry must be properly spun before drying.
-
Drying times and consequently energy consumption depend on:
-
type of laundry;
- quantity of laundry;
- your washing machine's spin-dry speed;
- the temperature in the room where the dryer is.
- In selecting programmes, follow the instructions supplied by the makers of the laundry items very closely, especially in the case of synthetic fabrics or any other fibres that don't tolerate high temperatures.
OPERATION
Before running the drying cycle:
- Check that the plug is in the power outlet.
- Check that the filter is in place.
- Put the spun laundry in the drum without compacting it.
- Check that pets or other foreign bodies haven't got into the drum by mistake.
- Close the door.
At this point you can select the drying programme you want, as follows:
Starting a normal cycle
Press on-off button (3). Power led (4) starts flashing and an acoustic signal is emitted.
Turn programme switch (1) clockwise to the desired drying programme, an acoustic signal is emitted.
Press "start" button (2); an acoustic signal is emitted and power led (4) stops flashing and stays on in steady mode as the drying programme starts.
Starting a delayed cycle
Press "on-off" button (3). Power led (4) starts flashing and an acoustic signal is emitted.
Before setting the desired cycle, turn programme switch (1) clockwise to one of the four delayed start positions and press start button (2) to confirm the delay time. Power led (4) and delay led (6) start to fast flash, indicating that a delay time has been selected; an acoustic signal is emitted. Now turn programme switch (1) clockwise to the desired drying programme. An acoustic signal is emitted. Press "start" button (2). Delay led (6) and power led (4) are now steady on indicating that the delay time has started; a longer acoustic signal is now heard. On completion of the delay time the machine starts the programmed cycle, delay led (6) goes off and drying led (7) comes on.
At the end of the chosen drying time the machine automatically enters a 10 minute cooling phase, which gradually lowers the temperature of the laundry. In this phase cooling led (8) is on.
The end of this phase is marked by four acoustic signals indicating that the cycle is over.
The 60 minute anti-crease phase now starts (anti-crease led (9) comes on), during which the drum turns intermittently one way and the other to keep the laundry in continual motion and prevent creasing.
In this phase an intermittent acoustic signal will remind you that the laundry can now be taken out at any time.
At the end of the anti-crease phase, end of cycle led (9) comes on to indicate that the cycle is over.
If any items aren't sufficiently dry, put them back in the dryer and finish off with one of the time programmes (from 15 to 60 minutes).
NB.: Remember to switch the dryer off, using the ON-OFF button, at the end of each drying cycle.
To modify the programmed cycle or delay time once the dryer has started turn the programme switch to "0" reset position, wait for the acoustic signal and repeat the procedure described above.
WARNING
If there is a power failure during the drying cycle or the delay period, when the power returns, the dryer restarts the cycle where it stopped.
If the door is opened during the drying cycle, press the "start" button again to restart the machine.
IMPORTANT
Never use the set-time programmes for delicate or completely synthetic fabrics. Remember to clean the filter after each drying cycle.
CLEANING AND MAINTENANCE
CLEANING THE BODY
Never use aggressive or abrasive products to clean the body or control panel. A damp cloth is sufficient, with some soap if necessary.
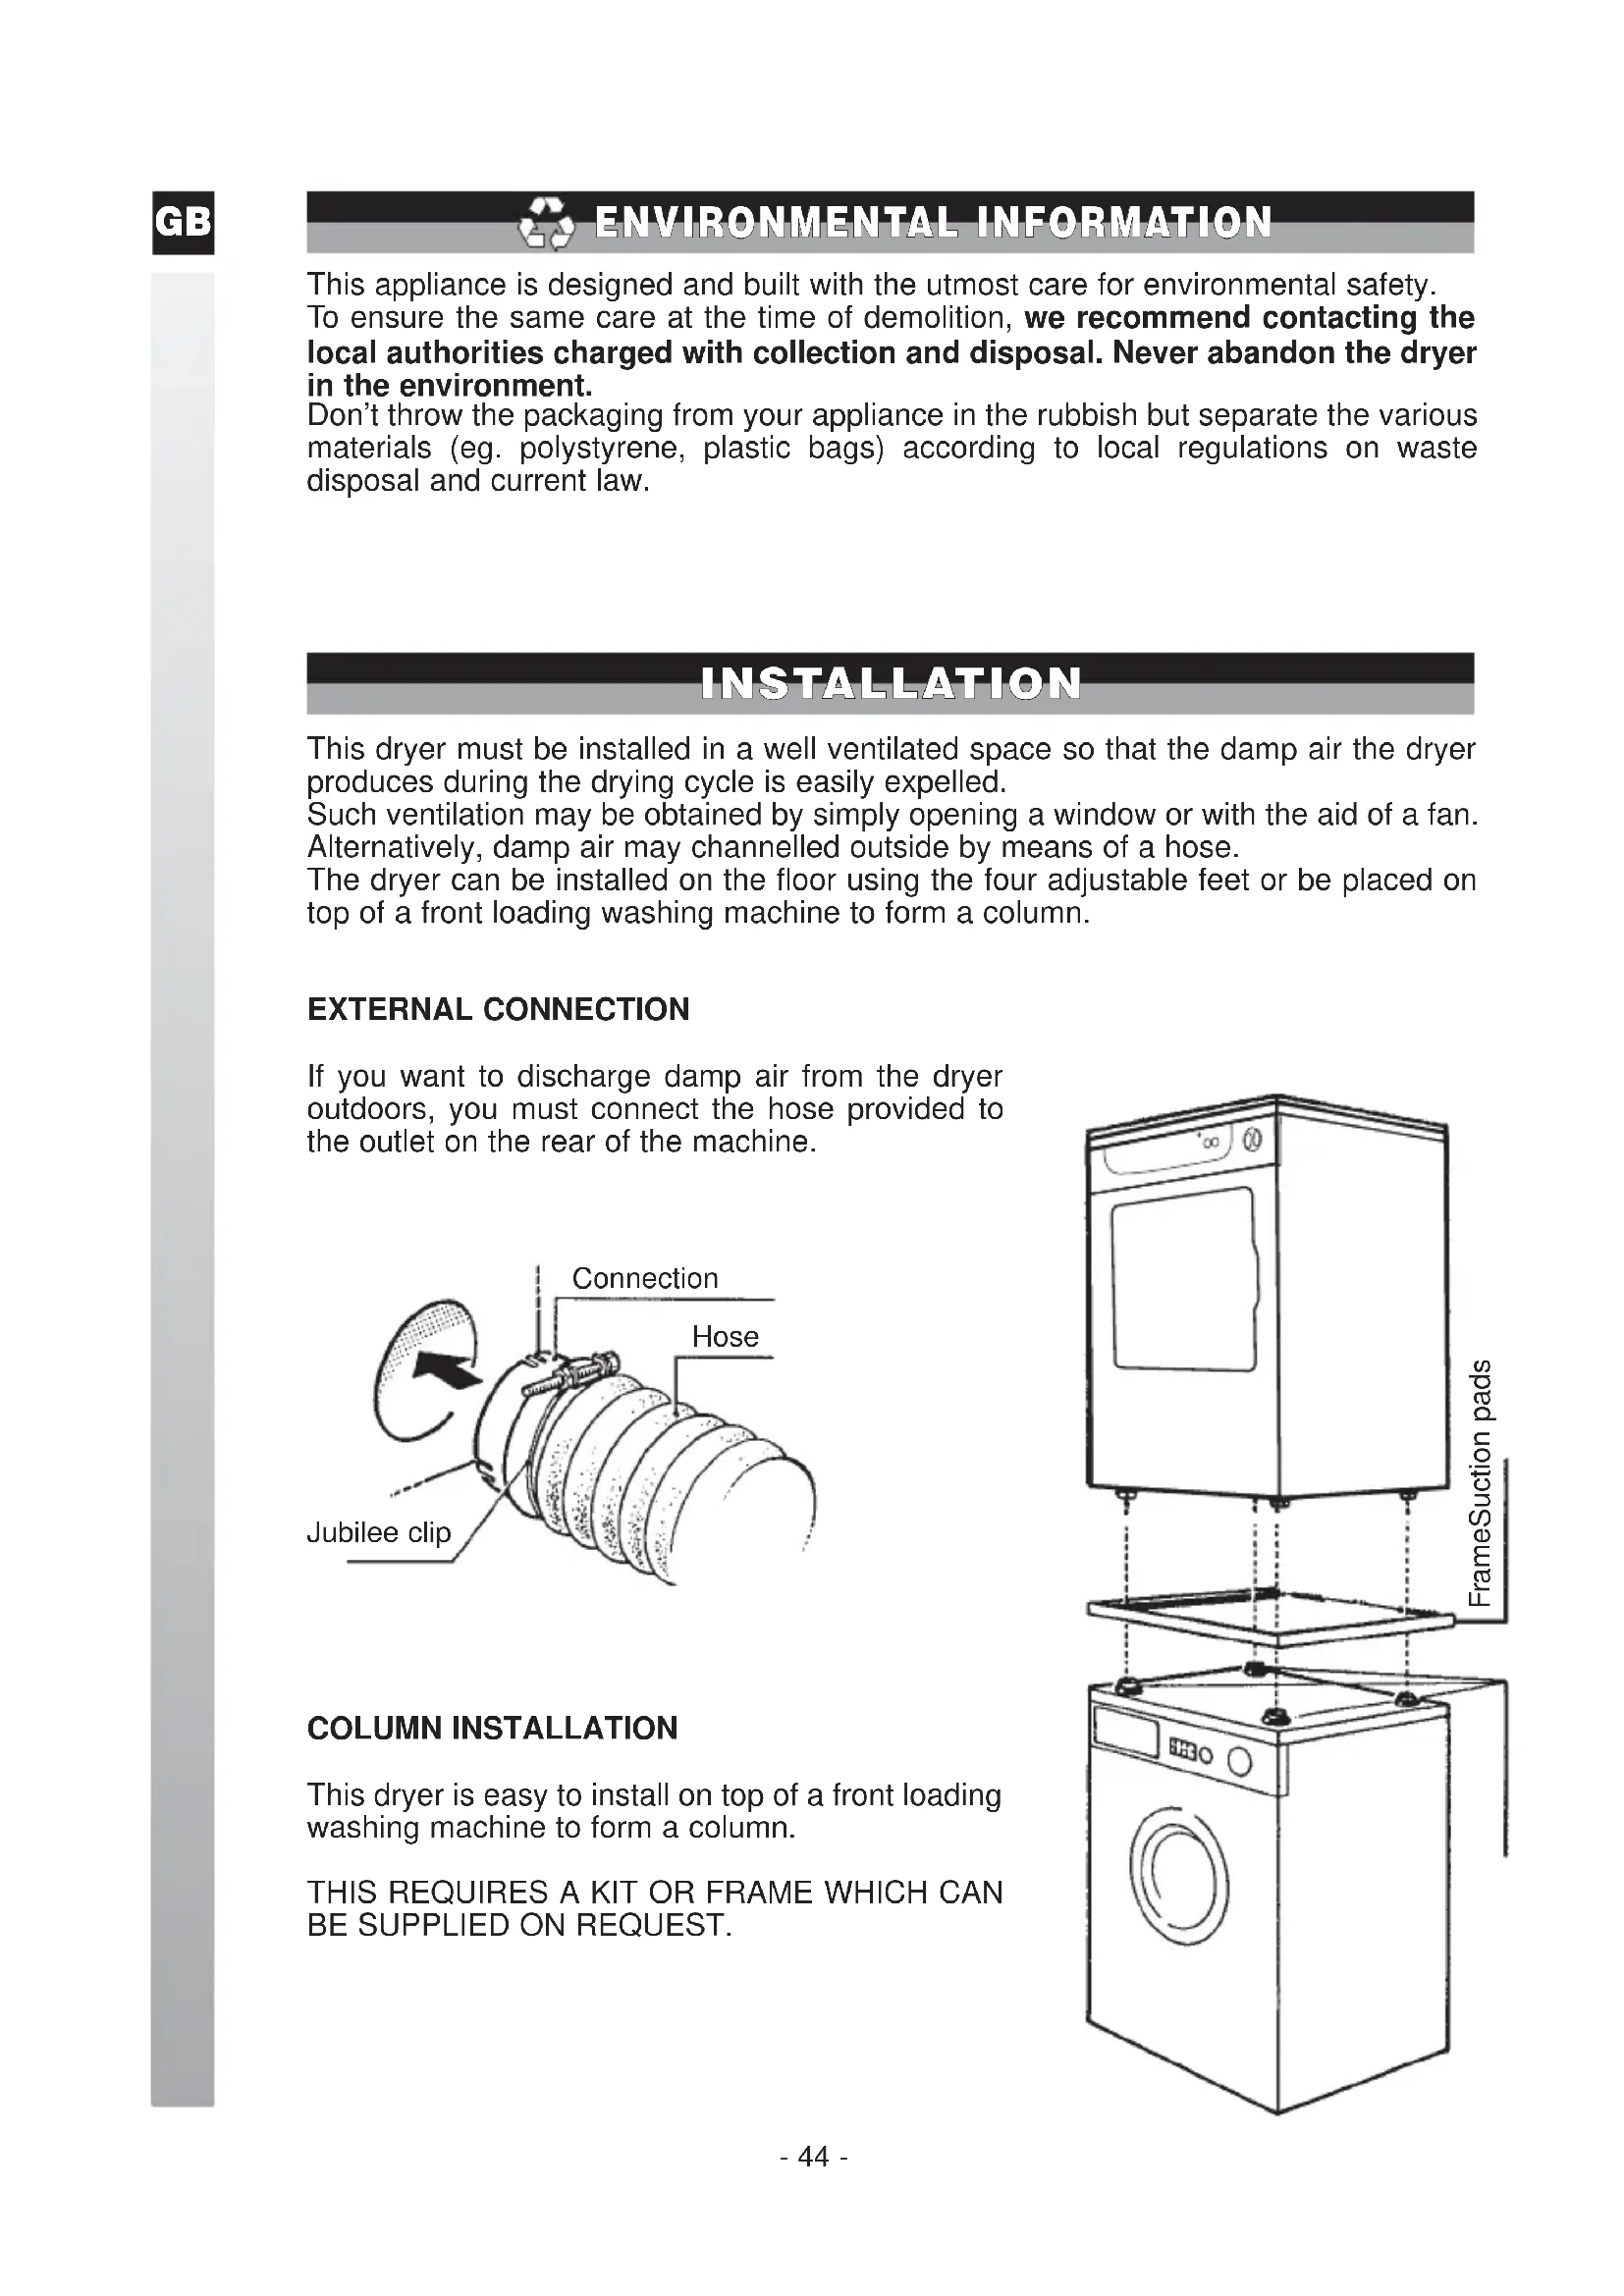
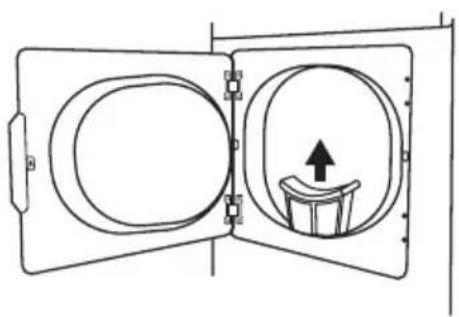
The filter system in this dryer is a removable element sunk into the lower part of the hatch and is removed by lifting up and out.
The fibres that collect inside the filter are normal wear from the fabrics and are not the result of any malfunctioning of the dryer. The filter can be cleaned with a toothbrush or a damp cloth.
N.B. DO NOT CLEAN WITH WATER
natural_image
Diagram of a double door with circular opening and a cup holder, showing an upward arrow (no text or symbols)
natural_image
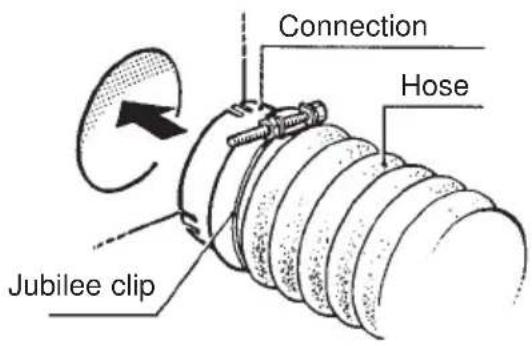
Cross-sectional diagram of a container with internal compartments and an arrow indicating flow direction (no text or symbols)CLEANING THE HUMIDITY CONTROL PROBE
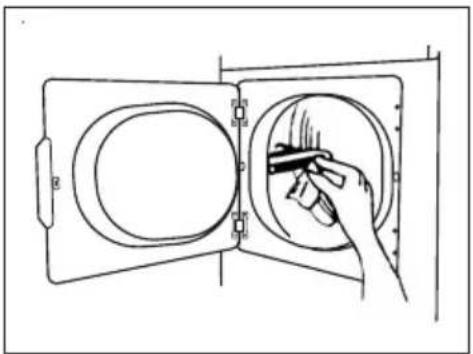
After numerous drying cycles a thin film of scale may deposit on the humidity control probe inside the drum.
This film may compromise drying performance. Clean the scale off the stainless steel probe with a cloth and a solution of vinegar and water.
natural_image
Line drawing of a hand cleaning a circular component with a brush (no text or symbols)N.B. Failure to implement these safety and maintenance recommendations may cause serious accidents and irreparable damage to the dryer (corrosion and fire).
WHAT TO DO IF...
If your dryer isn't working properly, make sure that:
- it's plugged in properly;
- you've pressed the "start" button;
- you've closed the door properly;
- you've put the filter in its housing properly;
- your home's automatic circuit breaker hasn't operated;
- it isn't too cool in the room where the appliance is installed (ie. under 10^ );
- the air outlets and flexible hose (if installed) are not blocked.
If your drying results aren't satisfactory, check that:
- you've haven't put too much laundry in the dryer;
- you've selected the laundry appropriately and chosen the right programme for the type of laundry you want to dry;
- you've cleaned and fitted the filter properly;
- it isn't too cool in the room where the appliance is installed (ie. under 10^ );
- the air outlets and flexible hose are not blocked.
