ERM 1742 G - Lawn mower Grizzly - Free user manual and instructions
Find the device manual for free ERM 1742 G Grizzly in PDF.
| Product type | Electric lawn mower |
| Brand | Grizzly |
| Model | ERM 1742 G |
| Motor power | 1700 W |
| Supply voltage | 220-240 V~, 50 Hz |
| Protection class | II |
| Protection rating | IP24 |
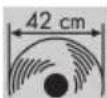
| Cutting diameter | 42 cm |
| Cutting height | 6 adjustable positions from 35 to 85 mm |
| Collection bag volume | 53 L |
| Weight | 22 kg |
| Rotation speed (no load) | 3300 min⁻¹ |
| Sound pressure level | 72.4 dB(A) (K=1.84 dB) |
| Guaranteed sound power level | 96 dB(A) |
| Vibrations | max. 1.7 m/s² (K=1.5 m/s²) |
| Blade type | Steel rotary blade |
| Handle | Foldable loop handle |
| Maximum extension cable length | 75 m (cross-section ≥1.5 mm², type H05VV-F/H05RN-F) |
| Bag filling indicator | Yes, level indicator |
| Safety | Unlock button + start lever |
| Warranty | 24 months (domestic use) |
Frequently Asked Questions - ERM 1742 G Grizzly
User questions about ERM 1742 G Grizzly
0 question about this device. Answer the ones you know or ask your own.
Ask a new question about this device
Download the instructions for your Lawn mower in PDF format for free! Find your manual ERM 1742 G - Grizzly and take your electronic device back in hand. On this page are published all the documents necessary for the use of your device. ERM 1742 G by Grizzly.
USER MANUAL ERM 1742 G Grizzly
Translation of the original instructions for use
GB Translation of the original instructions for use 67
Before initial start-up, please read through these operating instructions carefully prior to using the machine. Keep the instructions safe and pass them on to any subsequent user so that the information is always available.
Grizzly Service-Center 107

Grizzly Service-Center 107

1 Beugelhandgreep, darthefboom
Scope of Delivery 67
Intended Use 67
Safety Information 68
Pictorial Diagrams on the Equipment ...68
Symbols used in the instructions ....68
General Safety Information 68
General Description 71
Function Description 71
Summary 71
Assembly 72
Assembling the Curved Handle 72
Installing the grass catcher 72
Operation 72
Mounting / removing the grass catcher 73
Adjusting the Cut Height 73
Switching On and Off 73
Level gauge 73
Working with the Lawnmower 73
Cleaning, Maintenance and Storage . 74
General Cleaning and Maintenance Work . 74
Changing the Blade . 74
Storage . 75
Waste disposal and environmental protection 75
Spare parts 75
Technical Specifications 75
Guarantee 76
Repair Service. 76
Trouble Shooting 77
EC Declaration of Conformity 104
Exploded Drawing 106
Grizzly Service-Center 107

Before initial use, please read the operating instructions carefully, in order to avoid incorrect handling. Keep the instructions in a safe place and pass them on to any subsequent user so the information is available at all times.
Scope of Delivery
Carefully remove the equipment from the packaging and check whether the following parts are complete:
- Lawn mower with mounted lower bar and curved handle with connection cable
- Grass catcher (in two parts)
- Strain relief
- 2 cable hooks
- Mounting material, curved handle
- Mounting material, grass catcher
- Instruction Manual
Intended Use
The equipment is designed only for mowing domestic lawns and grass areas. Any other use that is not expressly permitted in these instructions may result in damage to the equipment and represent a serious risk to the user.
The equipment is intended for use by adults. It is not to be used by children or people who are unfamiliar with these instructions. The use of the equipment is prohibited in the rain or a damp environment.
The manufacturer will not be liable for damages caused by use other than for the intended purpose or by incorrect operation.
Safety Information
This section covers the basic safety regulations when working with the electric lawnmower.
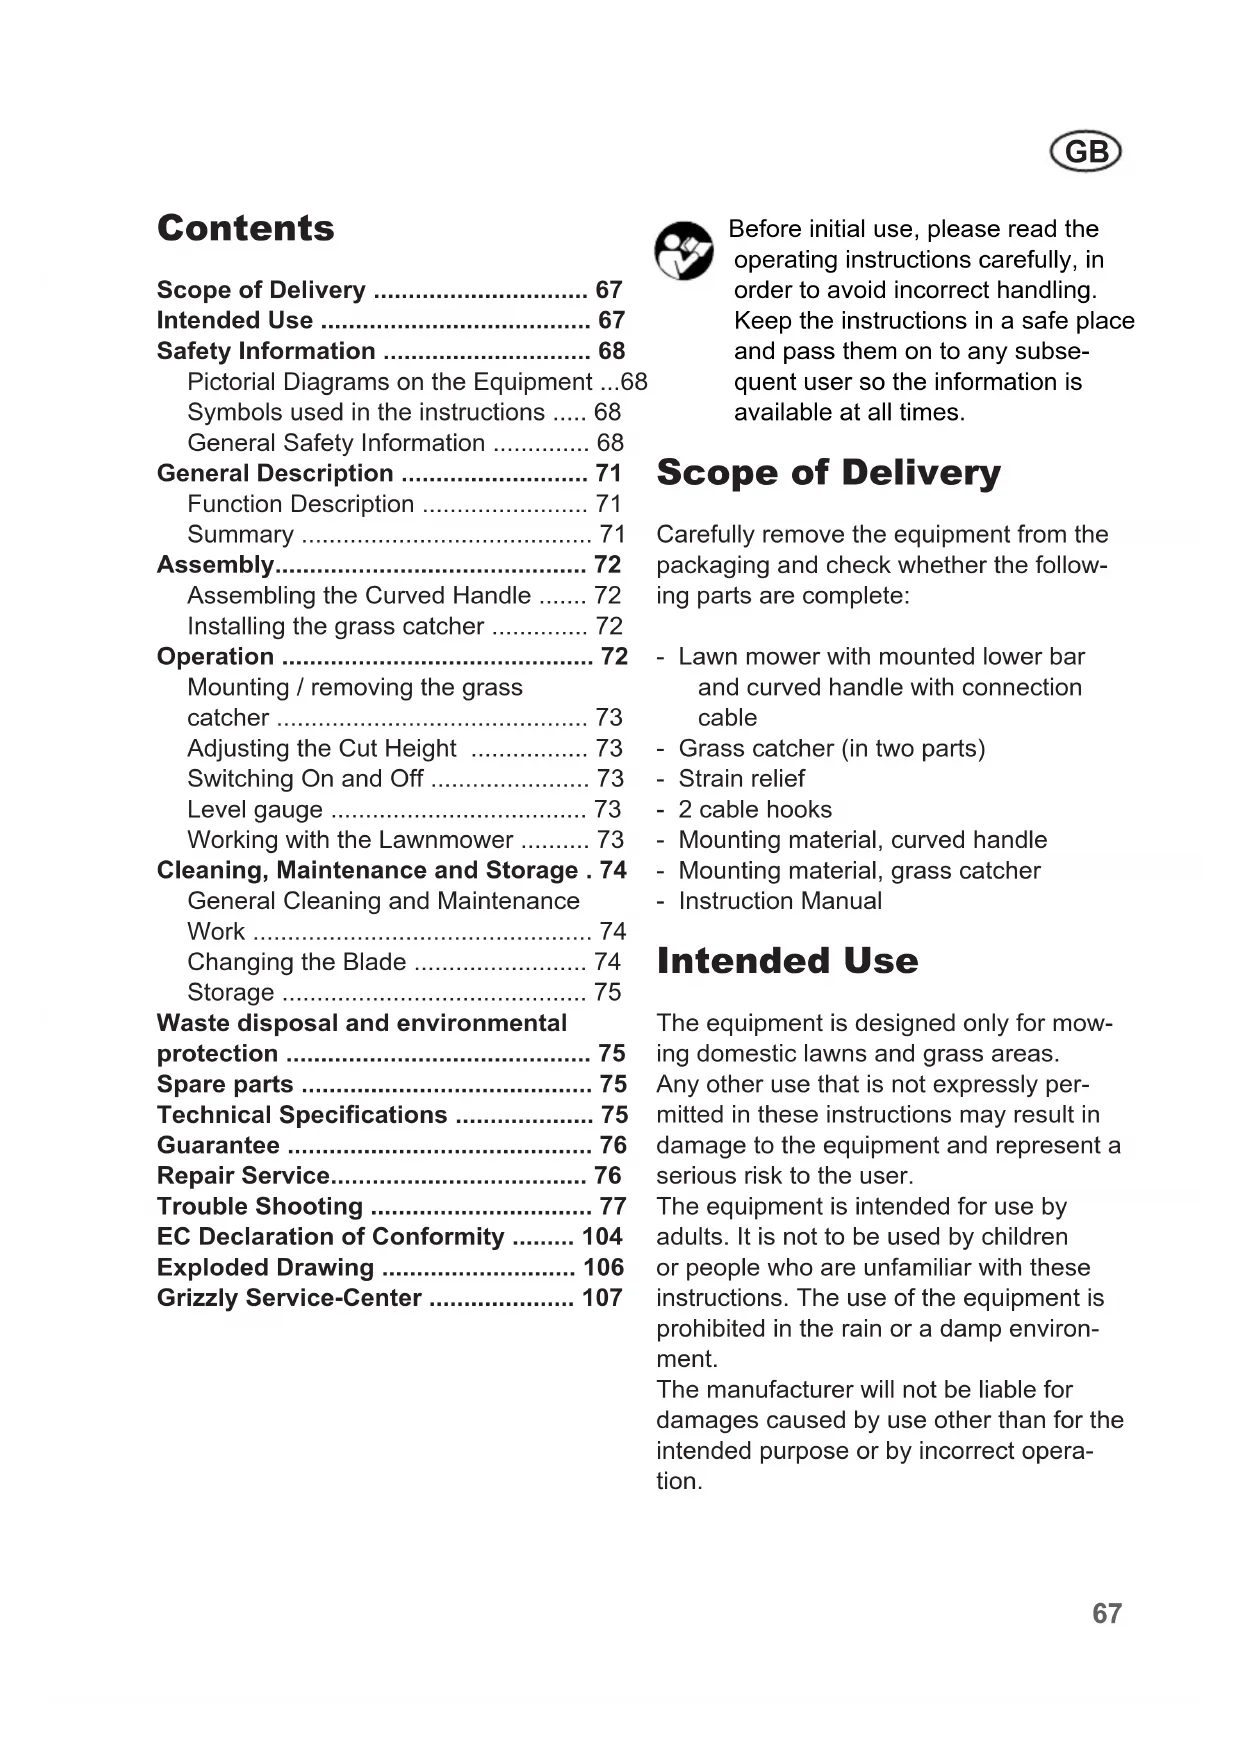
Pictorial Diagrams on the Equipment

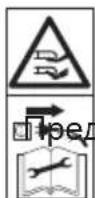
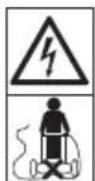
Caution!
Read the operating instructions carefully.

Wear eye and ear protection.

Do not expose the equipment to the damp. Do not work in the rain and do not cut wet grass.

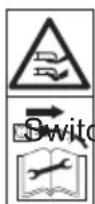
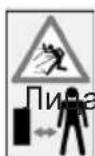
Risk of injury from parts being thrown up.
Keep nearby people away from the mower.
Caution - sharp cutting blade! Keep feet and hands away. Risk of injury!
ch off the motor and disconnect the plug before adjustment or repair work or if the power cable is caught or damaged.
Danger of damaged power cable. Keep the power cable away from the cutting blade!
Caution!
The lawnmower blade continues to run after switching off.

Noise level specification L_wa in dB.

Protection class II
Do not dispose of electrical equipment in domestic waste.
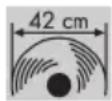
Cutting circle
Symbols used in the instructions

Hazard symbols with information on prevention of personal injury and property damage.

Precaution symbol (explanation of precaution instead of exclamation mark) with information on prevention of harm / damage.

Notice symbol with information on how to handle the device properly.
General Safety Information

This equipment may cause serious injury in the case of improper use. In order to avoid injury to people and damage to property, the following safety information must be observed and users must familiarise themselves with all operating parts.
Preparation:
-
This appliance is not intended for use by persons (including children) with reduced physical, sensory or mental capabilities, or lack of experience and knowledge, unless they have been given supervision or instruction concerning use of the appliance by a person responsible for their safety.
-
Do not allow the use of this equipment
by children or others who are unfamiliar with these operating instructions. Local regulations may specify the minimum age of the operator.
- Do not use the equipment when people and particularly children or pets are nearby.
Children should be supervised to ensure that they do not play with the appliance. - The operator or user is responsible for accidents, injuries to other people or damage to the property of others.
- Check the terrain on which the equipment is to be used and remove stones, sticks, wires and other foreign objects that could become caught and thrown up.
- Wear suitable work clothing such as stable shoes with non-slip soles and robust, long trousers. Do not use the equipment when barefoot or when wearing open sandals.
- Before each use, carry out a visual inspection of the equipment. Do not use the equipment if protective devices (e.g. collision guard or grass bag), parts of the cutting device or bolts are missing, worn or damaged. To avoid imbalance, damaged tools and bolts are to be replaced only in sets.
Take care with equipment that has several cutting tools, as the movement of one blade may result in the rotation of the other blades. - Use only spare parts and accessories supplied and recommended by the manufacturer. The use of non-original parts will immediately invalidate the guarantee.
Working with the Equipment:

Do not place feet or hands near or under rotating parts when working. Risk of injury!

Observe the noise protection and local regulations. The use of the equipment may be restricted or prohibited on certain days (e.g. Sundays and public holidays), at certain times of day (lunchtimes, nighttimes) or in certain areas (e.g. health resorts, hospitals etc.).
- Switch on the motor according to the instructions and only when your feet are at a safe distance from the cutting tools.
- Do not use the equipment in the rain, in poor weather, in a damp environment, or on wet grass. Work only in daylight or with good lighting.
- Do not work with the equipment when tired, lacking concentration or under the influence of alcohol or drugs. Always take breaks in good time. Take a sensible approach to the work.
- When working, ensure a firm stance, particularly on slopes. Always work across the slope, never upwards or downwards. Take particular care when changing the direction of travel on the slope. Do not work on excessively steep slopes.
- Run the equipment only at a walking pace. Take particular care when turning the equipment around, pulling it towards you or going backwards.
- Switch on the equipment carefully and in accordance with the directions in these instructions. Ensure sufficient distance between feet and the rotating blades.
GB
- Do not tilt the equipment when starting other than if it is necessary to do so when starting up in long grass. In this case, tilt the equipment by pressing down the handle bar such that the front wheels of the equipment are raised. Always check that both hands are in the working position before returning the equipment to the ground.
- Never work without an collision guard or the grass catcher. Always stay away from the discharge opening.

Caution! Danger! The blade continues to run after switching off. There is a risk of injury.
- The equipment is not to be lifted or transported while the motor is running. Switch off the equipment if it has to be tilted in transit, when crossing surfaces other than grass, and when the equipment is being transported to and from the surfaces to be mowed.
- Always keep the grass ejection hole clean and clear. Remove cut material only when the equipment is stopped.
- Do not leave the equipment unattended in the workplace.
- Do not work with equipment that is damaged, incomplete, or has been modified without the authorisation of the manufacturer. Do not use the equipment with damaged safety devices or screens or with missing safety equipment such as deflection and/or grass collection devices.
- Do not overload the equipment. Work only within the specified power range and do not change the regulator settings on the motor. Do not use low-powered machines for heavy work. Do not use your equipment for purposes other than those for which it is de
signed.
- Do not use the equipment near inflammable liquids or gases. Non-observance will result in a risk of fire or explosion.
- Do not lift or carry the equipment when the motor is running.
-
Switch off the equipment and disconnect the plug:
-
Whenever you leave the machine,
- Before cleaning the ejection hole or removing blockages,
- When the equipment is out of use,
- Before checking, cleaning or working on the equipment,
- If the power cable is damaged or frayed,
-
If the equipment has hit a foreign object or if strange vibrations occur during work. In this case, check the equipment for damage and have it repaired if applicable.
-
Do not place feet or hands near or under rotating parts. Do not stand in front of the grass ejection hole during sickle mowing.
Maintenance and Storage:
- Ensure that all nuts, bolts and screws are tightened firmly and the equipment is in safe working condition.
- Do not attempt to repair the equipment yourself unless you have been trained to do so. Any work not specified in these instructions is to be carried out only by customer service centres that we have authorised.
- Keep the equipment in a dry location and out of reach of children.
- Handle the equipment with care. Keep tools sharp and clean, in order to facilitate better and safer work. Follow the maintenance instructions.
- Wear protective gloves when chang
ing the cutting device.
- Regularly check the grass collection device for wear and strains. For safety reasons, replace worn or damaged parts. When adjusting the blades, take particular care to avoid fingers being trapped between the rotating blades and fixed parts of the machine.
- Check that only replacement tools authorised by the manufacturer are used.
Electrical Safety:
- Ensure that the mains voltage matches the specifications on the rating plate.
- If possible, connect the equipment only to a socked with a residual current-operated protective device (RCD) with a release current of more than 30mA .
- Avoid bodily contact with earthed parts (e.g. metal fences, metal posts).
- Use only authorised power cables of type H05VV-F or H05RN-F, which are no more than 75m long and suitable for outdoor use. The power cable wire cross section must be at least 1.5mm always completely unroll cable drums before use. Check the cable for damage.
- To fix on the power cable, use the cable suspension intended for the purpose.
- Keep the power cable away from the cutting tool when working. The cutting blades may damage the power cable and result in contact with live parts. Always run the power cable behind the operator.
- Do not run the appliance on a damaged or worn cable.
- Switch off the equipment and disconnect the plug from the socket if the power cable is damaged. If the power cable for this equipment is damaged, it must be replaced with a special
power cable, which is available from the manufacturer or a customer service agent of the same.
- Do not connect a damaged power cable to the mains. Do not touch a damaged power cable when it is connected to the mains. A damaged power cable may result in contact with live parts.
General Description
Function Description
The electric lawnmower has a cutting tool, which turns parallel to the cutting level. It features a powerful electrical drive, a sturdy plastic casing, a safety switch, a collision guard as well as a grass catcher with level gauge. Additionally, the equipment is height adjustable to six levels and has smooth-running wheels.
For the function of the operating parts, please refer to the descriptions below.

The illustration how to handle the appliance can be found on page 2-4.
Summary

1 Curved handle
2 Start lever
3 Top clamping levers
4 Lower bar
5 Collision guard
6 Bottom clamping levers
7 Grass catcher
8 Back wheels
9 Front wheels
10 Housing
11 Cutting height adjuster
12 2 carrying handles
13 Cable holder
14 Cable strain relief
15 Connection cable
16 Release button (not visible)
17 Power inlet
18 Power cable
Assembly

Disconnect the plug before any work on the equipment. There is a risk of injury.
Assembling the Curved Handle

Tip up bottom bar:
Tip up the bottom bar (4) to your favourite angular position.
- Lock the bottom clamping levers (6) by pushing them towards the bar (4). Clamping levers to be tightened and contacting the bar such that they clamp at average force. Otherwise you may have to tighten (turn clockwise) or loosen them (turn anticlockwise).

Attach cable strain relief:
Push the cable strain relief (14) over the curved handle (1).

Install curved handle:
-
Use the screws and washers from the package as well as the top clamping levers (3) to mount the curved handle (1) on the right and left ends of the bottom bar (4). Three positions are possible.
-
Turn the clamping levers (3) clockwise.
- Lock the clamping levers (3) by pushing them towards the bar (4). Clamping levers to be tightened and contacting the
bar such that they clamp at average force.
Otherwise you may have to tighten (turn clockwise) or loosen them (turn anticlockwise).
Clip on the cable hook:
Clip on the cable hooks ( , 13) to the bottom bar to fasten the connection cable ( A15).
Installing the grass catcher

Assemble the grass catcher:
① Clip the rubber lip of the grass catcher net (19) into the hard plastic tray of the grass catcher (9).
② Insert the linkage tubes (19) into the grass catcher net (20). Make sure to fully insert the tubes (see ill. detail).
The tube bows fit into the groove (21) at the bottom of the grass catcher
③ Pull the plastic straps (22) over the linkage tubes (20).
Use the screws and washers (23) from the package to mount the linkage tubes (20).
Operation

Attention: Do not operate the appliance until the collision guard and grass catcher are fully installed. Risk of injury!
Mounting / removing the grass catcher

- Lift the collision guard (5).
- Place the grass catcher (7) on the mounting bracket (24) provided at
the back of the lawn mower.
- Lower the collision guard (5) onto the grass catcher (7)-it will keep it in place.
- To remove the grass catcher (7), lift the collision guard (5) and unhook the grass catcher from the mounting bracket. Flap down the collision guard to the housing.

On emptying the grass catcher also refer to section "Disposal/environment".
Adjusting the Cut Height

Switch off the equipment, disconnect the plug and wait for the blade to stop. There is a risk of injury.

Hold the cutting height adjuster (11) and move it to the correct cutting height, as appropriate.
There are six different cutting heights:
35-45-55-65-75-85mm
The correct height is around 30 - 45mm for a decorative lawn and around 30 - 65 mm for a used lawn.

A higher cut height should be selected for the first cut of the season.
Switching On and Off

-
Plug the mains lead (18) into the appliance's power inlet (17).
-
Turn the end of the mains lead into a loop and hook it into the cable strain relief (14).
-
Connect the equipment to the power supply.
- Before switching on, ensure that the equipment is not in contact with any objects.
- To switch on, press the release button (16) on the handle at the same time as pressing the start lever (2). Release the release button (16).
- To switch off, release the start lever (2).

After switching off the equipment, the blade continues to turn for several seconds. Do not touch the moving blade. There is a risk of injury.
Level gauge
The level gauge is located on the side of the grass catcher. The aerodynamic air guidance provided by the flap also optimises the filling.
Flap open: grass catcher empty

closed: grass catcher full
Working with the Lawnmower
Regular mowing encourages increased foliage of the grass and kills off weeds at the same time. Therefore, not only does each mowing increase the density of the lawn, it also produces an evenly resilient lawn. The first cut is to be made in around April, at a growth height of 70 - 80mm . In the main vegetation period, the lawn is to be mowed at least once a week.
The two handles (see ,12) make it easier to carry the appliance.
- Start mowing near the socket and work away from the socket.
Always keep the extension cable behind you and when you turn, move it to the side that has already been mowed.
- Run the equipment at a walking pace, in tracks that are as even as possible. For gap-free mowing, the tracks should always overlap by a few centimetres.
- Adjust the cut height so the equipment is not overloaded. Otherwise, the motor may be damaged.
- On slopes, always work across the slope. Take particular care when going backwards and pulling the equipment.
- Clean the equipment after each use, as described in the chapter on "Cleaning, Maintenance and Storage".

Switch off the equipment after work and in order to transport it, disconnect the plug and wait until the blade stops. There is a risk of injury.
Cleaning, Maintenance and Storage

Have work that is not described in these instructions carried out by a customer service centre that we have authorised. Use only original parts.

Wear gloves when handling the blade

Switch off the equipment before all maintenance and cleaning work, disconnect the plug and wait until the blade stops.
General Cleaning and Maintenance Work

Do not hose down the lawnmower with water.
Always keep the equipment clean. To clean, use a brush or cloth but no detergent or solvent.
- After mowing, use a piece of wood or plastic to remove adherent plant remains from the wheels, ventilation holes, ejection hole and blade area. Do not use hard or pointed objects, as these may damage the blade.
- Oil the wheels from time to time.
- Before each use, check the lawnmower for obvious defects such as loose, worn or damaged parts. Check that all nuts, bolts and screws are sitting firmly.
- Check the covers and protective devices for damage and check that they are sitting correctly. Replace them if necessary.
Changing the Blade
If the blade is blunt, it can be sharpened by a specialist workshop. If the blade is damaged or showing signs of imbalance, it must be replaced (see chapter on "Spare Parts").

-
Turn the equipment over.
-
Use sturdy gloves and hold the blade firmly (25). Turn the blade screw (26) anticlockwise off of the motor spindle using a screwdriver.
-
Install the new blade in the reverse order. Ensure that the blade is positioned correctly and the screw tightened firmly.
Storage

To reduce the space required in storage, loosen the four clamping levers and flap down the curved handle and bottom bar. Make sure the cables are not caught.
- Keep the equipment dry and out of reach of children.
- Allow the motor to cool before storing the equipment in a confined space.
- Do not cover the equipment with nylon bags as moisture could build up.
We will not be liable for damages caused by our equipment where these are caused by improper repair or the use of nonoriginal parts or by use other than for the intended purpose.
Waste disposal and environmental protection
Do not dispose of used oil in the sewage system or drains. Dispose of used oil in an environmentally correct manner - bring it to a waste disposal center.
Be environmentally friendly. Return the tool, accessories and packaging to a recycling centre when you have finished with them.
Machines do not belong with domestic waste.
- The plastic and metal parts employed can be separated out and thus recycled use can be implemented. Ask our Service-Center for details
Defective units returned to us will be disposed of for free.
Spare parts
When ordering spare parts, please use the indicated Service-Center address or fax number. Please indicate the part number with your order.
Spareblade 13700301
Grass catcher 91095402
Technical Specifications
Electric Lawnmower .ERM 1742 G
Motor input power 1700 W
Mains voltage 220-240V\~, 50 Hz
Protection class
Protection type.. IP24
ldling speed 3300 min
Cutting circle 42 cm
Cut height 35/45/55/65/75/85 mm
Weight 22 kg
Lawn bag volume 531
Sound pressure specification
(L_pA) 72,4 dB(A), K = 1,84 dB
Noise level specification (L_WA)
guaranteed 96 dB(A)
measured.....92,3 dB(A), K_wA = 1,84 dB
Vibration (a) ... max. 1,7 m/s, K=1,5 m/s²
Noise and vibration values were determined according to the standards and stipulations mentioned in the declaration of conformity.
Technical and optical changes can be carried out in the course of further development without notice. All dimensions, references and information of this instruction manual are therefore without guarantee.
Legal claims, which are made on the basis of the instruction manual, cannot thus be considered as valid.
Guarantee
- This appliance has a 24-month guarantee; a shorter 12-month guarantee applies if the appliance is to be used for commercial purposes or for replacement appliances according to statutory regulations.
- Damages, which can be attributed to natural wear, overloading or inappropriate use, are excluded from the guarantee. Certain component parts are subject to a normal wear and are excluded from the guarantee. In particular, these include: blade.
- Furthermore, the prerequisite for guarantee services is that the references indicated in the operating instructions regarding cleaning and maintenance have been adhered to.
- Damage, which has been caused from material or manufacturing faults, will be made good free of charge, by replacement delivery or repair.
This requires that the appliance is returned to the merchant undismantled and with proof of purchase and guarantee.
Repair Service
- Repairs, which are not covered by the guarantee, can be carried out for charge by our service center. Our service center will be glad to provide you with a cost estimate.
We can only process devices which have been packaged sufficiently and which have been dispatched with correct stamping.
Note: In case of complaint or service, please deliver your device cleaned, and with an indication of the defect, to our service address.
Devices sent in freight collect - by bulk freight, express or with other special freight - are not accepted.
Defective units returned to us will be disposed of for free.
Trouble Shooting
| Problem Possible Cause | Use Fault Fixing | |
| Equipment does not start | Power is off | Check the socket, cable, wire and plug and have any repairs carried out by an electrician |
| Defective on/off switch | Repair by customer servicesWorn carbon I | |
| Defective motor | ||
| Grass too long | Set a greater cut height. Lift the front wheels slightly by pressing down on the handle bar. | |
| Motor stops Blockage | by foreign object Remove the foreign object | |
| Result unsatisfactory or motor labours | Cut height too low Set a higher cut height | |
| Blade blunt | Have the blade sharpened or replace it | |
| Blade area blocked Clean the equipment | ||
| Blade assembled incorrectly | Install the blade correctly | |
| Blade fails to turn | Blade blocked by grass Remove the grass | |
| Blade screw loose Tightenthe blade screw | ||
| Strange noises, rattling or vibrations | Blade screw loose Tightenthe blade screw | |
| Blade damaged Replace the blade | ||

Spis tresci
PerynipaHe Ha BncouHaTa Ha p3aHe
BkIIOUBaHe n 3KIOUBaHe 98
Hnka3a BncoHaTa Ha
HantbIbaHe 98
Pa6ota c KocaykaTa 3a TpeBa 98
IOnuHCTBaHe/NoDpBxKka/cbXpaHHe..99
Obui DeHocTu 3a NouchTbaHe i
IodpBxka 99
CmHa Ha Hoxa 99
CbxaHHeHne 100
N3XBpbpna/ona3BaHe Ha OKoJHaTa
cpea 100
Pe3epBn Yactn 100
TexHHueckn daHHN 100
TapaHcna 101
DnaarHocTnKa 102
ДeКларачи3a cBOTBeTCTBHe
Ha EO 105
3HaK 3a B3pNBOOnacHocT 106
Grizzly cepBn3eH ueHTbp 107

Molny, npedn nbpBOTO nyskahe B ekcnloataun npooyTe TE BHNMaTeJIH NO, 3a da npedotbpaTne rpeshOTO n3noI3BaHe. 3ana3e Te HNCTpyKcIraT a I npedabaiTe Ha BCEK cJeDbaU, Notpe6ntel, 3a da moKe INOpma- cIyTa Da e HAnuHa No BCsKO BpeMe.
06em Ha doctabkata
I3BaTe BHNMaTeNHO ypeDa OT ONaKOBKaTa I npOBepeTe, DaJI N CNeHnTe YacTn Ca Ha Niue:
- Kocayka 3a TpeBa c MOHTnpaHdoJeHnAdIbXhNK n dpbXkca c Ka6eJ 3a ypeJa
- KOW 3a Cb6upaHe Ha TpeBa (OTДВeЧаCTN)
- Ka6eJHNO 3aUHTHO npucnoc6JeHne
-2 ka6eJHH dIbpxKaUH - MOHTaKeH MaTePnaI npbXkA
- MOHTaXeH MaTePnaJ K0U 3a TpeBa
ПрееднаЗ国有资产
UpebTe npedHa3Hauen Camo 3a Kocene Ha TpeBn IN XpactOBN NIOOIN B DOMAKINCTBOTo. Bcra Ka pyra ynoTpe6a, KOrTO He e CneuaJHO pa3peWeHa B Ta3N INHCTpyKzria, MOKe Da DOBeDe Do NOBpeDa B ypeDa N da NpeDCTabJIba cepNo3Ha 3aJIaxa 3a NOn3BaJnra ro. UpebTe npedHa3Hauen 3a ynoTpe6a OT Bb3paCTH.N Deu, KaKTo N Iuca, KOnTO He ca 3aNo3HaTN C Ta3N INHCTpyKzria, He 6nBa Da n3NoJ3BaT ypeDa. N3NoJ3BaHeTo Ha ypeDa No BpeMe Ha DbxkD NIn MOKpa OKoJNa CpeDa e 3a6paHen. Ppon3BoJnteJIrT He Hocn OTROBOPHOCT 3a NOBpeDi, KOrTO ca npunHeHn OT ynoTpe6a npjko yka3aHnraTa NIn OT HnPaBnHO 6opabeHe.
Инструкци 3a6e30napocT
Ta3n yact ce 3aHIMaBa C OCHOBHTe npedncaHna 3a 6e3oNaChoc T np pa6oTa c eNeKtpuYeckaT Kocayka 3a TpeBa.
TpaФинсMbOЛnВbpxy ypeda

BHHMaHHe!
IpoyeTe BHNMaTeJHNO INHCTpyK- cnaTa 3a ynoTpe6a.

Hocete 3aunTa 3a ouTe n cnyxa.

He octabraye ypeda Ha BnaXHO macto. He pa6oTe Te NO Bpeme Ha IbXn He Kocete MOKpa TpeBa.
OnachocT OT HapaHraHe OT OTCKOuINI ppeMEn.
Hata HaOKOJIO da cTOrT daJeUOT Kocaykata.
BHHMaHHe - octbp HOx! DpbKTe daJeu pbueTe n KpaKaTa. OnacHOCT OT HapaHbAHe!
HacTroKa Nn NouchTbaHe n3KIOUeTe MOTopa n dpbNHete ⅢeNcena oT MpeXaTa, Nn aKO Ka- 6eNbTe 3aIneTe Hn e NOBpeDeH
OnachocT OT NOBpeH eJekTpNueckn Ka6en.
ДрьхтЕ кабета далец OT урета И OT HoxkOBete!

BHHMaHHe!
KeHne NIO INHePcNHa HOKaHa KocaKaTa.

dAHHn 3a HNBOTo Ha 3Byka Lwa in dB.

HnboHa3aunTaII
He n3XBbPnIe eJeKtpoypeDnte c 6HTOBITE OTnaDbuN.

YpeIbT TpI6Ba Da ce n3noJI3Ba CamO B NIMOTN, KOnTO IMaT NOCToHHO TOKOBO HApExeHneNo MpeXaTa > = 100 AHaΦa3aN IMaT pa3npedeJIteJIHa MpeJka C HOMHaJIHO HApExeHne400/230 V.
PekceKpB
Ipn pa6oTa BnMaBaTe pBcTe n KpaKaTa Da He ca B 6n3OCT Nn NOD BbptAunTe ce qactN. CbuectByBa OnaCHOCT OT HapaHBAhe!

BHHMaBaIte 3a ONa3BaHEno Ha TnUHa n Cb6IIOdaBaIte MeCTHnte pa3npoe6n. H3noJI3BaHEno Ha ypeJa MoKe Da e orpaHnueHo IIN 3a6paHEno B ONpeJeHn DHN (Ha np. B HeJeN aJn Ppa3HnUHn DHN), B ONpeJeHn YacOBe Ha DeHra (Ha np. no o6yd nn npE3 HOuTa) INn B ONpeJeHn paOnHn (Ha np. KypOpTN, KInNHKn N dp.).
BknHouBaIe MoTopa cnopei HnCTpyK- Cnnte i camo Toraba, KOrato KpaKaTa Bn ca Ha cnrgpHo pa3ctOraHne ot peXeunTe IHCTpyMeHTN.
He n3noJ3BaIte ypeJa no BpeMe Ha IbXd, npn looB BpeMe, npn BlaJHa OKoJHa cpeJa nn MOKpa TpeBa. Pa6oTe BeHarn ppe3 DeHЯ nIi NODo6po OCBetJeHne.
He pa6oTe c ypea, aKo cTe n3Mo- peHn IJI NHeKOnUeHTpnpaH NII CJIeD yNoTpe6a Ha aJkoXoI IJI MeNkamentn. CBoeBpeMeHHO cn npaBeTe
BG
nouBKn. PoxaTe pa3ymHo KbMa 60ta.
- По врeme Ha pa6oTa BHMaBaIte 3a 6e3oNacHTo nOIOxKeHne, Oco6eHo cnpraMo HAKNoHa. Pa6oTeTe BnHarn Ha-npeuHO Ha HAKNoHa, HNKora Bbpxy CkNo- Ha IJN HaDony. BbTeTe Oco6eHO BHMaTeJHi, KOrato npomeHrTe Nocokata Ha - DvIXeHne No HAKNoHa. He pa6oTeTe no 13BbHpeiHO CTpbMHn HAKNoHn.
- YnpabJIaBaIe ypeDa cAmo 6abHo. BbTe oO6eHOb BHIMaTeJHn, KOraTo o6pbUaTe, O6nJaBaTe KbM ce6e cn INBvpuate ypeDa B o6paTHa nocoka.
BknIOyBaIte ypeDa BnMaTeJIHO, KaKTo e cNopeJ yKa3aHnraTa B Ta3n INHCTpykUra. BnMaBaIte 3a Heo6xo- DImata OTdaJeueHoCt Ha KpaKaTa ot BbPTaIuTE Ce HOXOBe.
He haknaHnTe ypea npn cTapTnpaHETO,OCBEN aKO TOBa He e HEO6xOdmo pnp nPnDnXBaHe BbB BnCoka TpeBa.BTo3n CnyaHnAknOnHe Te ypeDa Ype3 HaTnCK Ha DpbKkata TaKa,Ye npedHnTe KOJIeHa HypeDa Jeko Da ce NobdnHaT. IpOBepraBte BNarN, DaII npbUeTe CeHAMnPaT Bpa6tHO NOJoxKeHne, Ppei Da BbpHeTe ypeDa B N3XODHO NOJoxKeHne Ha 3emrTa.
He pa6oTeTe 6e3 KoU 3a cb6npaHe Ha TpeBaTa IINI ppeDna3nte n Cpeu yda-pn. CToIte BnHaN daJeu ot OTbopa 3a N3XBpJnHe.

BHHMaHHe onaCHOcT! HOxbT ce DnBXn no nHepUra. CbueCTByBa onaCHOcT OT HapaHBAhe.
- YpeIbT He 6nBa Da ce NOBnra nn TpaHCnOpTnpa, DOKaTO MOTOpbT pa60tn. N3KnUoyTe ypeDa, aKO Tp8Ba Da ce CbHe 3a TpaHCnOpTnpaHe, aKO Tp8Ba Da ce PpeKocm MAcTo 6e3 TpeBa n aKO Tp8Ba Da ce PpeHece Do
IINOT PNOUHTe 3a KOceHe.
- Пдьркайт Виаги чсг n OTny-шен OTbopa 3a ИЗВьрлянTo Ha TpeBaT.ОТспанЯВайTe Okocehata TpeBa caMo, KOraTO ypeДБТ E B NOKOJ.
He octabryte ypea 6e3 ha30p Ha MRCTOTO 3a KOceHe.
He pa6oTeTe c nobpeH, Hen3npaBEN nI npemOnTupan 6e3 oO6peHneTo Ha npOn3BoDnTeJypei. He n3PON3BaIte ypeJa C nobpeHn npncnoc6JeHn 3a 6e3OpacHOCT nIIN 3aUNTa IIN JInCBAuN npncnoc6JeHn 3a 6e3OpacHOCT kATO npncnoc6JeHn 3a OTKIOHRAHe N/IIyIaBByHe Ha TpeBaTa.
He npoeotctbnaBae ypea. Pa6oTe camo B nocouehn pa6oTeH 0xbat n He npomehIte hactpoikata Ha peryIaTopa KbM MOTopa. He n3no3BaIte MaunHc MaJIka MoUHOCT 3a TeKKa pa6ota. He n3no3BaIte ypea 3a uei, 3a KOnTO ToH He e npedHa3NaueH.
He n3noJ3BaIte ypea B 6n3ocTdo 3anaIMm TeuHocTn nn ra3OBe. Pnp HeCna3BaHe cBueCTByBa onaCHOCT OT noXap nn ekcnlo3nJ. - Hukora He noBnraIte nIe He hocTe ypeDa, DOKaTO MOTOpBT pa6OTn.
- I3KIOUeTe ypeDa, I3BaIeTe ⅢeNceJIa n ce yBepTe, Ye BCNUKN IOdBUNKHN Yactn Ca B NOKOJ:
XbaHeteNocta(11)3a perylnipaHeHaBncoUHaTaHaPra3aHeIro BODeTe NOKpaNkCaTopaDopeRylnpaHeHaKeJahata BncoUHa Ha Pra3aHe.
UpeT m6 noJoxeHn 3a peyInpaHe Ha BnCOuHaTa Ha p3aHe:
35-45-55-65-75-85mm
Grizzly Service-Center