
Espresso Perfect Ultimate - Coffee machine BEEM - Free user manual and instructions
Find the device manual for free Espresso Perfect Ultimate BEEM in PDF.
| Product type | Espresso coffee machine |
| Brand | BEEM |
| Model | Espresso Perfect Ultimate |
| Main functions | Espresso/coffee preparation, milk froth production, drink warming |
| Usable coffee types | Ground coffee, Senseo pods, E.S.E. pods |
| Included filters | 1-cup filter, 2-cup filter, filter for E.S.E. pods |
| Automatic shut-off | Yes, after 30 minutes of inactivity |
| Hot plate | Yes, on top of the device |
| Drip tray | Removable, with support plate |
| Steam nozzle | Rotatable, with removable plastic cover |
| Indicator lights | Operation light (orange) and machine ready light (green) |
| Function selector | 3 positions: coffee preparation, standby/off, steam |
| Safety | Automatic shut-off, protected hot surfaces, filter holder lock |
| Routine maintenance | Regular cleaning of filter, drip tray, steam nozzle |
| Descaling | Recommended every 80 to 150 cycles depending on water hardness |
| Warranty | Extended manufacturer warranty (see conditions at beem.de) |
Frequently Asked Questions - Espresso Perfect Ultimate BEEM
User questions about Espresso Perfect Ultimate BEEM
0 question about this device. Answer the ones you know or ask your own.
Ask a new question about this device
Download the instructions for your Coffee machine in PDF format for free! Find your manual Espresso Perfect Ultimate - BEEM and take your electronic device back in hand. On this page are published all the documents necessary for the use of your device. Espresso Perfect Ultimate by BEEM.
USER MANUAL Espresso Perfect Ultimate BEEM
Elements of Lifestyle
Bedienungsanleitung
User Manual
Mode d'emploi
Spare parts and accessories are available on our homepage or on request from our customer service.
natural_image
Line drawing of a circular filter or sieve with a perforated inner layer (no text or symbols)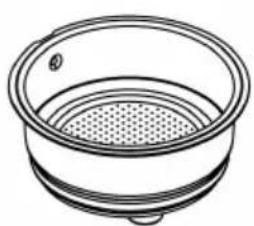
natural_image
Line drawing of a circular container with a perforated inner layer and a small protrusion on the top (no text or symbols)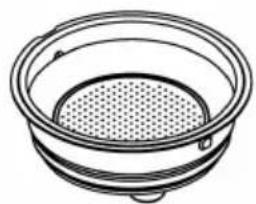
natural_image
Line drawing of a circular container with a perforated interior (no text or symbols)


6b
6a
6c

Urheberrecht
This document is copyrighted. Any duplication or reprinting, in whole or in part, and the reproduction of the illustrations, even in modified form, is only permitted with the written approval of the manufacturer.

Droits d'auteur
natural_image
Simple line drawing of a circular object with a vertical rod and two small icons below (no text or symbols)Safety precautions ....14
Startup 17
Appliance description ..... 1 8
Instructions for making coffee ..... 1 9
Operation and use 19
Recipes for coffeespecialities .....22
After using 23
Cleaning and maintenance ..... 2 3
Storage 24
General aspects....24
Troubleshooting 25
Dear Customer,
Before using the appliance, please read the instructions contained in this user manual on startup, safety, intended use as well as cleaning and care.
Open the fold-out page at the beginning and end of the user manual in order to view the illustrations during reading.
Keep this user manual in a safe place and pass it on to any future owners together with the appliance.
Safety precautions
Inspect the appliance for visible signs of damage before use. Do not use a damaged appliance.
This appliance may be used by children aged 8 years or over and persons with decreased physical, sensory or mental abilities or lack of experience and/or knowledge if they are supervised or were instructed on using the appliance and have understood the resulting dangers.
◆Cleaning and user maintenance may not be performed by children unless they are at least 8 years old and are being supervised.
Keep the appliance and the connecting cable out of the reach of children under 8 years of age.
Children may not play with the appli- ance.
Do not leave the appliance unattended during operation.
Only allow repairs to the appliance to be carried out by an authorised specialist or by the works customer service; this particularly applies to replacing a damaged connecting cable. Unqualified repairs can lead to considerable danger for the user. This will also invalidate the warranty or guarantee.
Repairs to the appliance during the guarantee period may only be carried out by customer service authorised by the manufacturer otherwise the warranty or guarantee will become invalid in the event of damage or subsequent damage.
◆Defective parts may only be replaced with original spare parts. Only original spare parts guarantee that the safety requirements are met.
Only use spare parts from the manufacturer or spare parts that are specifically recommended by the manufacturer. The guarantee will otherwise be invalidated.
Do not use this appliance together with an external timer or a separate remote control system.
◆In the event of a power failure, disconnect the appliance from the mains to prevent the appliance from switching on again unintentionally.
Do not operate the appliance in the dark.

DANGER
Danger of electric current!
Do not use the appliance if the mains cable or plug is damaged.
Do not open the housing of the appliance. Danger from electric current if live connections are touched and/or the electrical and mechanical configuration is changed.
Never immerse the appliance or the plug in water or other liquids.
Take care when filling the water tank that no water gets inside the appliance.
Do not touch the connecting cable with wet hands when disconnecting the appliance from the mains supply.
Escaping steam or liquid may not be directed towards electrical devices and equipment that contain electrical components.
Pull the plug out of the mains socket,
when you fill the water tank, if you are not using the appliance, if a malfunction occurs during op- eration, before you clean the appliance. –
Risk of suffocation!
Never play with packaging material. Risk of suffocation.

WARNING
Danger of burns!
Do not touch the hot surfaces during operation.
▶ Only touch the handles and knobs of the appliance during operation.
Before cleaning, allow the appliance to cool down.
Do not carry or move the appliance during operation.
Keep all parts of your body away from escaping steam.
It is possible that hot steam or hot water escapes from the brewing head and milk frothing nozzle. Therefore, point the milk frothing nozzle to the drip tray. Never put your hands, other parts of your body or objects sensitive to moisture or heat underneath the brewing head or the milk frothing nozzle while the appliance is in operation.
▶ Only grip the plastic parts of the strainer holder or steam nozzle during use.
Never remove the strainer holder during the brewing process.
Do not cover the drain pipe in the drip tray in order to allow the steam to dissipate when the pressure is relieved.
Do not touch the hotplate during operation.
Empty the drip tray regularly. If it is full, it is possible that hot water will squirt out when relieving pressure.
Never take the milk frothing nozzle out of the milk while steam is still being discharged. Otherwise hot milk can squirt out. Always switch the selector switch back to the standby position before remove the container from the milk frothing nozzle.
ATTENTION
Do not pull the connecting cable ▶ to remove the plug from the mains socket.
Never lift or move the appliance with the mains cable.
Do not use abrasive cleaning agents or metal brushes, nylon brushes or other objects that could scratch the surface when cleaning the appliance.
▶Always fill the water tank with cold, clean tap water. Never fill with other liquids.
Never operate the appliance without water, otherwise it will be damaged.
Touching the hotplate can cause burning. The hotplate becomes hot. A sudden unintentional contact could lead to further danger.
▶Descale the appliance regularly.
Intended use
This appliance is only intended to be used for making Espresso as well as frothing milk and heating drinks for use in the household or similar, non-commercial establishments such as staff kitchens in shops, cafés, offices or other business surroundings; agricultural establishments; use by guests in hotels, motels or other residential facilities; bed and breakfast establishments.
Any use other than previously stated is considered as improper use.
WARNING
If not used for its intended purpose and/or used in any other way, the appliance may be or become a source of danger.
Use the appliance only for its intended purpose.
Observe the procedures described in this user manual.
No claims of any kind will be accepted for damage resulting from use of the appliance for other than its intended purpose.
The risk must be borne solely by the user.
Requirements for the place of operation
For safe and trouble-free operation of the appliance, the installation location must satisfy the following requirements:
Place the appliance on a firm, dry, flat, ◆ waterproof and heat-resistant surface.
Do not place the appliance in a hot, wet or very humid environment or in the vicinity of inflammable materials. There must be a gap of at least 15 cm between the appliance and any walls, furniture or other objects.
When operating, do not leave any valuable objects sensitive to moisture or heat in the vicinity of the appliance in order to avoid damage by hot steam and water.
Never place the appliance or parts of the appliance in the vicinity of strong heat sources and hot surfaces (e.g., heating, oven, grill).
Do not put the appliance underneath a wall cupboard.
The mains socket must be easily accessible and allow fast disconnection in the event of an emergency..
The surface finishes on furniture may ◆ contain substances that can be detrimental to the rubber feet of the appliance. If necessary, place a mat under the feet of the appliance.
Top prevent the appliance from slipping away, do not lay tablecloths, cloths or serviettes under the feet of the appliance.
The appliance may not be used or stored outdoors.
Electrical connection
For safe and trouble-free operation of the appliance, the following instructions on the electrical connection must be observed:
Before connecting the appliance, compare the connection data (voltage and frequency) on the rating plate with those of your mains power supply. This data must correspond in order to avoid damage to the appliance. If in doubt, ask your electrical appliance retailer.
The mains socket must be protected by at least a 16 A fuse.
Ensure that the mains cable is undamaged and is not laid over sharp edges.
The mains cable must not be pulled ♦ tightly, bent or come into contact with hot surfaces.
Route the mains cable to prevent risk of tripping.
The electrical safety of the appliance is only assured when it is connected to a properly installed protective earth (PE) conductor system. Connection to a mains socket without PE conductor is forbidden. If in doubt, the electrical system must be checked by a qualified electrician. The manufacturer assumes no liability for injury or damage caused by a missing or interrupted protective earth conductor.
Symbols used
DANGER
This indicates an imminent hazardous situation, which could lead to severe physical injury or death.
Follow these instructions to avoid ▶ danger.
WARNING
This indicates a possible hazardous situation, which could lead to severe physical injury or death.
Follow these instructions to avoid ▶ danger.
ATTENTION
This indicates a potentially hazardous situation, which could lead to minor injuries or material damage.
Follow these instructions to avoid ▶ danger.
NOTE
A note contains additional information to simplify the use of the appliance.
Startup
Unpacking
Remove the appliance, all accessory1. parts and the user manual from the box.
- Remove all packaging materials and protective foils from the product and the accessories before using it for the first time.
- Check for visible signs of damage or missing items.
NOTE
Never remove the rating plate or any warning signs on the appliance.
Keep the original packaging during the warranty or guarantee period in order to return the appliance in the packaging in the event of a warranty or guarantee claim. Transport damage will invalidate the warranty or guarantee.
Appliance description
Overview / Delivery contents
(See illustration on the left fold-out page)
Hotplate1
ON/OFF switch2
Operating indicator (orange)3
Selector switch4
Screen carrier holder5
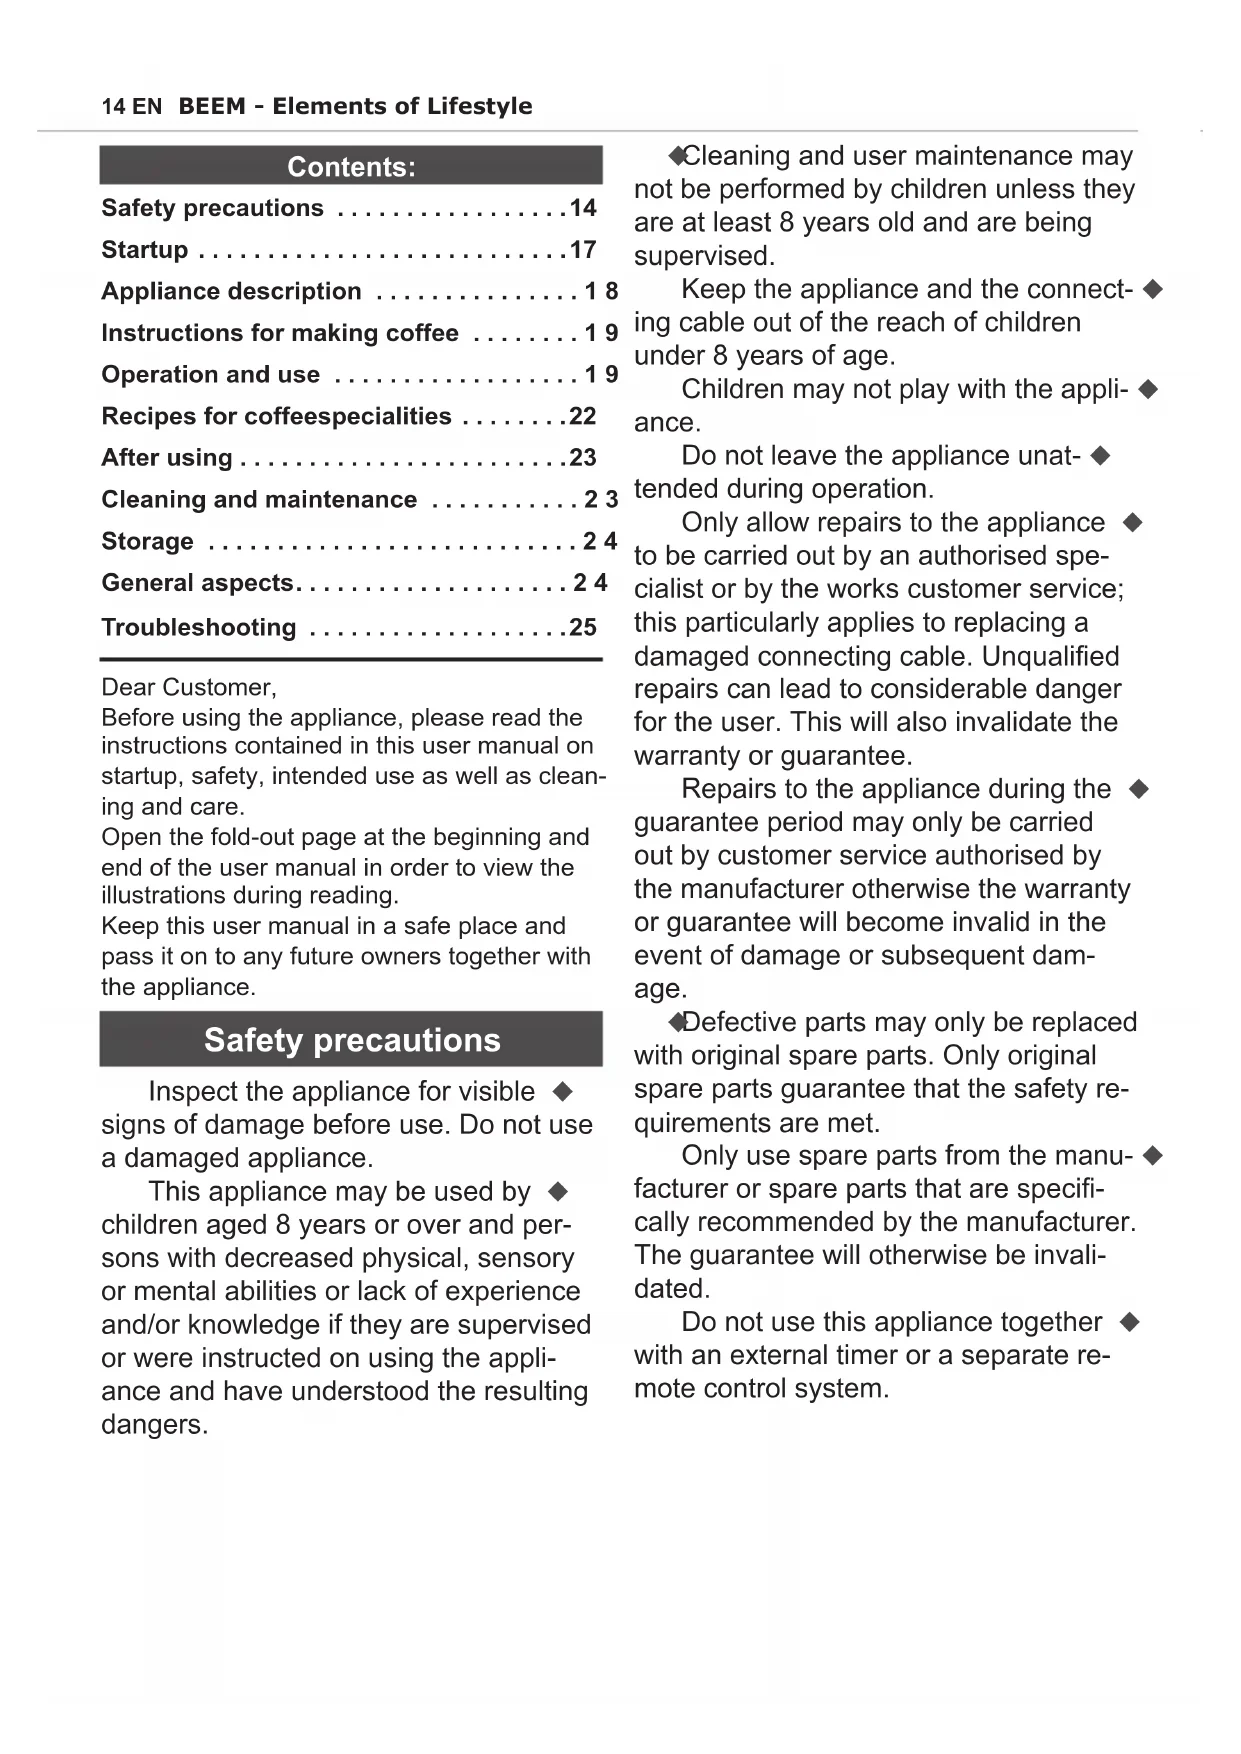
a Strainer insert (2 cups) 6
b Strainer insert (1 cup)
c Strainer insert (E.S.E.pads)
7 Strainer holder
8 Handle
9 Drip tray
10 Resting plate for the drip tray
11 Measuring spoon
12 Compacting aid
13 Espresso machine
14 Retaining clip
15 Steam nozzle
16 Standby indicator (green)
17 Water tank
18 Lid
19 User manual (not illustrated)
Power indicators
Display Colour Meaning
| Operating indicator (3) | orange | Lights up when the appliance is switched on. |
| Standby indicator (16) | green | Lights up when the appliance is ready to brew. |
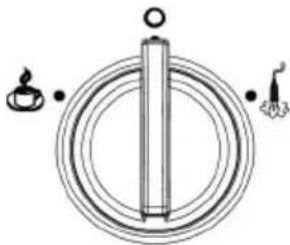
Selector switch
natural_image
Simple line drawing of a circular mechanical component with three small icons below (no text or symbols)The selector switch can be turned to three positions:
Symbol Position Meaning
 | Left | Making coffee/ espresso |
| [TPC8] | Middle | ON (standby)/ OFF |
 | Right | Steam generation |
Switching the appliance ON/OFF
-
Turn the appliance on with the ON/OFF switch (2). The operating control display (3) lights up.
-
To turn the appliance off, press the ON/OFF switch (2) for 3 seconds. Otherwise, the appliance turns off automatically after 30 minutes.
NOTE
▶ When the standby indicator (16) lights up, the appliance is at operating temperature.
Before using for the first time
Insert the hotplate (1) into the top and the 1. drip plate (9) with the rest (10) into the bottom of the appliance.
Move the selector switch (4) to standby2.
- and insert the plug into the mains socket.
Fill the water tank (17) to the 3. — MAX — mark as described in the section Filling the water tank (page 19).
Install the strainer insert (6) without cof-4. fee powder into the strainer insert holder (7) as described in the section Installing the strainer insert (page 20).
Insert the strainer holder (7) into the ap-5. pliance as described in the section Inserting the strainer holder (page 20).
Switch on the appliance as described in6. the section Switching the appliance ON/OFF (page 18).
Place a sufficiently large cup or bowl on 7. the cup rest (10) under the screen carrier (7).
Move the selector switch (4) to the 8° position and allow the water to run through the appliance.
NOTE
During the first pumping process, unusual noises may be heard. These noises will stop once the appliance is filled with water.
Move the selector switch (4) to standby9.
- and pour out the water collected.
Repeat the last steps until roughly half10. the contents of the water tank has run through the machine.
Empty the drip tray as described in chap-11. ter Emptying the drip tray (page 23).
Clean the appliance as described in the12. section Cleaning and care (page 23).
NOTE
When using for the first time, it is ▶ possible that production-related additives such as grease could cause slight odour or smoke. This is completely normal. Ensure sufficient ventilation.
Instructions for making coffee
Observe the following instructions to make an aromatic espresso or coffee at just the right temperature.
◆reheat your cups on the hotplate.
Rinse out cold cups with hot water to pre-heat them before use.
◆fill the water tank with fresh water.
◆ After heating up the appliance, allow hot water to run through the strainer insert and holder.
- leave the empty, cleaned screen insert with screen carrier in the hot appliance to heat up.
Experiment with the amount of coffee powder until you find the flavour you prefer. As a general rule, add approx. 7 grammes of coffee powder for one cup of coffee/espresso and approx. 14 grammes of coffee powder for one large cup of coffee or two cups of espresso.
◆ry various different levels of grinding fineness for the coffee powder. The grinding fineness has an influence on the aroma and the cream of the espresso.
◆ possible, use freshly ground coffee powder to assure optimum flavour.
◆ Press in the coffee powder lightly. If the coffee powder is pressed too firmly, it may become bitter and the percolation time increases.
◆ Empty and clean the strainer insert after each use.
◆Clean and descale the appliance at regular intervals. A dirty and/or scaled appliance impairs the aroma.
Operation and use
Filling the water tank
- Open the lid of the tank (18).
- Lift out the water tank (17) using the black handle.
- Pour water up to the MAX marking.
- Install the tank (17) in the appliance again and close the lid (18).
ATTENTION
Do not tilt the water tank when installing. The valve on the underside of the water tank may be damaged.
Make sure that both holders on the upper edge of the water tank are inserted into the recesses on the rear of the appliance.
Installing the strainer insert (image A1)
Turn the nib on the wall of the strainer1. insert (6) towards the handle and install the strainer insert into the strainer holder (7).
Turn the inserted strainer a quarter-turn to2. the left or right. The nib prevents the strainer insert from falling out.
Removing the strainer insert (image A1)
Empty the strainer insert (6) as described1. in the section Emptying/cleaning the strainer insert (page 23).
Turn the the strainer insert (6) so that the2. nib on the wall of the strainer insert is pointing towards the handle.
Lift the strainer insert (6) out of the strain-3. er holder (7).
Emptying the strainer insert (image B1)
Fold the retaining bracket on the handle1. of the strainer holder to the front over the edge of the strainer insert.
Knock the used coffee powder out of the2. strainer insert into the waste container.
Fold back the retaining bracket on the3. handle of the strainer holder and clean the strainer insert as described in the section Cleaning and care (page 23).
NOTE
Use a spoon if the coffee grounds do not fall out.
Removing the strainer holder (image C1)
Turn the handle (8) of the strainer holder1.
(7) to the left until the handle is under the symbol of the strainer holder mounting.
Pull the strainer holder down out of the2. strainer holder mounting.
Inserting the strainer holder (image C2)
Hold the strainer holder (7) using the1. handle (8) under the ↑ of the strainer holder mounting (5).
Push the strainer holder from below into2. the strainer holder mounting.
Turn the handle (8) of the strainer holder3. (7) to the right until the handle is under the symbol.
NOTE
While inserting, take care not to tilt the strainer holder.
Making espresso/coffee with coffee powder
General instructions
◆The deeper strainer insert (6a) can hold coffee powder for 2 cups of espresso or one large cup of coffee.
◆ Use the shallower strainer insert (6b) for preparing one cup of espresso/coffee.
- Do not overfill the strainer insert. An overfilled strainer insert cannot be inserted into the appliance.
Remove any excess coffee powder on the edge of the strainer holder in order not to contaminate the seal of the strainer holder mounting (5).
◆ you wish to brew two cups of Espresso at the same time, put the cups next to each other on the cup rest so that the lower openings in the strainer holder fill one cup each.
Do not leave the appliance unattended. Coffee dispensing does not stop automatically.
Due to expansion of materials, clicking noises may occur during operation. These operating noises are completely normal.
Preparation
Check the water level in the water tank1. (17) and add water, if necessary.
Remove the strainer holder (7) and insert2. the desired strainer insert (6).
Fill the strainer insert (6) up to the edge3. with coffee powder.
Scrape off excess coffee powder with the4. handle of the measuring spoon.
Press the coffee powder lightly but firmly5. using the compacting aid (12).
Insert the strainer holder (7) into the ap-6. pliance as described in the section Inserting the strainer holder (page 20).
Place a cup on the cup rest (10) under7. the strainer holder (7).
Turn the selector switch (4) to the 8-position and allow the freshly-made coffee to run into the cup.
Turn the selector switch (4) to standby when the desired amount of coffee has run into the cup.
Making espresso/coffee with coffee pads (D1, D2)
General instructions
The appliance can also be used to make coffee using Senseo coffee pads and to make espresso using E.S.E (Easy Serving Espresso) pads. Selection of the different flavours is increased and the cleaning requirement for the strainer insert is considerably reduced.
◆ Use the strainer insert for 1 cup (6b) for preparing coffee/espresso with Senseo type pads (see B in image D1).
For E.S.E. pads (see A in image D1), use the strainer insert for E.S.E. pads (6c).
◆ Sales outlets for E.S.E-Pads can be found on the Internet.
Take care when inserting the pads that the pad does not lie on the edge of the strainer holder.
◆ Used coffee pads are biologically degradable and can be used as compost.
Preparation
Remove the screen carrier (7) and insert1. the flat strainer insert (6b) or the strainer insert for E.S.E. pads (6c).
-
Insert the strainer holder (7) into the appliance as described in the section Inserting the strainer holder (page 20).
-
The rest of the coffee-making process is the same as using coffee powder.
Preparing frothed milk
General instructions
First of all, hold the steam nozzle just under the surface of the milk until the milk in the froth container is lukewarm.
Subsequently immerse the nozzle down to the bottom of the froth container to swirl the milk.
When steam generation is switched off, the appliance discharges excess water into the drip tray.
Preparing
A container with handle (it must be large enough because milk expands during frothing),
Refrigerated milk should contain more ◆ than 2% fat.
Empty the drip tray.1.
Check the water level in the water tank2. (17) and add water, if necessary. The water is required for the generation of steam.
Switch on the appliance and allow it to 3. heat up.
Direct the steam nozzle (15) of the ap-4. pliance towards the drip tray or an empty receptacle.
- Turn the selector switch (4) to the Steam generation begins and existing condensed water is drained off.
Turn the selector switch (4) to standby 6. as soon as steam escapes continuously from the steam nozzle (15).
Preparation
Fill the froth container up to approximate-1. ly one-third with cold milk.
Position the steam nozzle (15) of the ap-2. pliance so that the steam nozzle can protrude into the foaming receptacle.
Immerse the steam nozzle into the milk3. in the froth container and turn the selector switch (4) to the position to start frothing.
When the frothed milk has the desired4. consistency, turn the selector switch (4) to standby ○ and pull out the froth container from below.
Tap the froth container once or twice on5. a firm surface to condense the frothed milk produced.
Pour or skim the frothed milk into the6. drinking receptacle.
Clean the steam nozzle and the metal7. tube immediately after use to prevent deposits and clogging of the steam nozzle. Instructions on cleaning can be found in the section Cleaning the nozzle (page 23).
Heating drinks with steam
The hot steam generated by the appliance can be used to heat milk, drinks and water for tea.
Perform the steps as described in the1. section Preparing frothed milk (page 21).
Position the steam nozzle (15) of the2. appliance so that the steam nozzle can protrude into the receptacle with the drink to be heated.
Completely immerse the steam nozzle3. into the receptacle and turn the selector switch (4) to the position to allow steam to discharge from the nozzle. The hot steam heats up the liquid in the receptacle.
When the drink has reached the desired4. temperature, turn the selector switch (4) to standby ○ and remove the receptacle from under the nozzle.
Clean the steam nozzle and the metal5. tube immediately after use to prevent deposits and clogging of the steam nozzle. Instructions on cleaning can be found in the section Cleaning the nozzle (page 23).
NOTE
Move the receptacle in circles while steam is discharging to achieve quicker heating.
▶ When steam generation is switched off, the appliance discharges excess water into the drip tray.
Recipes for coffee specialities
Cappuccino
Normally, cappuccino is prepared with one-third espresso, one-third hot milk and on-third frothed milk. It is served in a ceramic cup often with a little cocoa powder sprinkled on top of the froth.
NOTE
The cup should be well preheated as preparation takes place in several steps.
Take the cappuccino cup and make the1. espresso first.
- Place the cup onto the hotplate so that the espresso stays hot.
- Pour twice as much milk – compared with the amount of espresso – into the froth container and froth up half the milk. The other half of the milk remains liquid.
Hold back the frothed milk in the froth4. container with a plastic spatula or a knife and pour the hot milk onto the espresso.
-
Scoop the frothed milk out of the froth container and spread a froth topping over the cappuccino.
-
Sprinkle a little cocoa powder onto the frothed milk.
Latte Macchiato
The classic latte macchiato consists of three layers: a bottom layer of hot milk (2/3), a top layer of frothed milk (1/3) and an espresso that is poured through the frothed milk. As fatty milk has a higher density than espresso, the coffee floats on the milk.
The latte macchiato is served in a tall glass with a long spoon.
NOTE
The espresso cup and the glass should be well preheated as preparation takes place in several steps.
Pour the milk into the froth container and 1. froth up roughly one third of the milk. The rest of the milk is only heated and remains liquid.
Pour the hot milk and the frothed milk into2. the glass.
Place the glass onto the hotplate so that3. the milk stays hot.
Take the espresso cup and make the es-4. presso.
Pour the hot espresso down the side of 5. the glass through the milk froth. The espresso floats on the lower milk layer.
After using
- Turn the appliance off by pressing the ON/OFF switch for 3 seconds.
- Unplug the appliance and let it cool.
- Clean the appliance and the accessories used as described in the section Cleaning and care (page 23).
NOTE
▶ The appliance switches itself off automatically after 30 minutes.
Cleaning and maintenance
Before beginning any work, pay attention to the safety instructions in the section Safety instructions (page 14)!
Cleaning the appliance
Wipe down the housing of the appliance,1. the hotplate and the cup rest with a damp cloth. Use washing-up liquid to remove any stubborn stains.
Dry all parts of the appliance thoroughly2. after cleaning.
Emptying/cleaning the strainer insert
Take the strainer holder (7) with the1. strainer insert (6) out of the appliance as described in the section Removing the strainer holder (page 20).
Fold up the retaining bracket (14) on the2. handle of the strainer holder (image B1).
Hold the strainer insert firmly with the3. folded up retaining bracket and tap the used coffee out of the strainer insert (6) over the waste bin.
Remove the strainer insert (6) from the4. strainer holder (7) and rinse the strainer insert and strainer holder under running water.
Emptying/cleaning the drip tray
Remove the cup rest (10).1.
Raise the drip tray (9) slightly at the front2. and carefully pull it out of the appliance to the front.
Empty the drip tray and rinse out with 3. warm water.
Clean the cup rest (10) using a damp4. cloth.
Install the drip tray and cup rest in the ap-5. pliance again after drying.
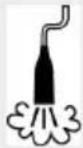
Cleaning the steam nozzle
In order to avoid clogging, the steam nozzle must be cleaned after each use.
- Pull off the plastic cover of the steam nozzle and rinse the cover by hand or in the dish washer.
- Point the metal pipe (15) of the appliance towards the drip tray and turn the electro switch (4) to the position in order to rinse milk and other residue out of the metal pipe.
- Wipe down the metal tube with a damp cloth.
NOTE
If the metal tube has become clogged, you can clear the clogging with a needle.
Descaling the appliance.
In order not to shorten the service life of the appliance and impair the quality of the coffee, the appliance must be descaled at regular intervals. The intervals between descaling depend on the water hardness (in the case of hard water after 80 coffees; and soft water after 150 coffees).
To descale the appliance, proceed as follows:
Fill the water tank with water and citric1. acid (5% solution) up to the MAX mark.
Place a fairly large receptacle under the2. strainer holder mounting.
Turn the selector switch (4) to the 3 position and allow a third of the descaling solution to run into the receptacle.
Turn the selector switch (4) to standby 4. and allow the descaling solution to work for approx. 30 minutes.
Turn the selector switch (4) to the 5-position and allow the rest of the descaling solution to run through the appliance.
Rinse out the water tank thoroughly and 6. flush out the appliance by allowing two tank fillings of clean water to run through the appliance.
Wash all removable parts with warm wa-7. ter and detergent before preparing espresso again.
NOTE
If you use a commercially available ▶ descaling agent, observe the manufacturer's instructions for use.
If the appliance is severely scaled, it may be necessary to repeat the descaling process.
Storage
If you do not intend to use the appliance for a longer period of time, clean it as described in the section Cleaning and maintenance (page 23).
Store the appliance and all accessory parts at a dry, clean and frost-free location, which is protected against direct sunlight.
General aspects
Warranty / Guarantee
In addition to the statutory warranty obligation, BEEM also grants an extended manufacturer's guarantee for some products.
Provided this is granted, the corresponding details for each product can be found either on the product-specific packaging, advertising material or on the BEEM website.
For commercial or equivalent use, e.g. in hotels, guest houses or communal premises, or if the customer is not a consumer as defined by the German Civil Code, the guarantee period is 6 months. This does not infringe the warranty disclaimer.
Please visit our website to obtain more information on comprehensive guarantee conditions, available accessories and spare parts as well as user manuals in various languages
Declaration of Conformity
BEEM hereby declares that this appliance complies with the fundamental requirements and other relevant provisions of 2004/108/EC, 2006/95/EC, 2009/125/EC und 2011/65/EU directives.
Limitation of liability
We cannot assume liability for damage or subsequent damage caused by failure to observe the operating instructions, improper use, improper or unsuitable handling, incorrectly performed repairs, unauthorized modifications, use of third-party parts or replacement parts, use of unsuitable supplementary or accessory parts.
Troubleshooting
The following table helps in localising and remedying minor faults. If you cannot resolve the problem with the steps described, please contact customer service.
| Fault Possible cause Remedy | ||
| The power indicator does not light up after switching on. | Not plugged in. Insert the mains plug. | |
| Fuse in electrical distribution board switched off. | Switch on fuse. | |
| The indicator lamp is defective. | Contact customer service. | |
| The fuse in the distributor box triggers. | Too many appliances connected to the same power circuit. | Reduce the number of appliances on the power circuit. |
| No fault detected. | Contact customer service. | |
| No water in the tank. Fill with water | ||
| Despite pumping noises, no water comes out of the appliance | Water tank incorrectly installed in the housing | Install the water tank properly. |
| Valve on the water tank is clogged | If necessary, call customer service for cleaning the valve. | |
| Water runs out on the underside of the appliance | Drip tray full Empty the drip tray | |
| Valve on water tank leaking | Contact customer service. | |
| The espresso runs into the cup very slowly | Coffee powder pressed in too firmly. | Press in the coffee powder less firmly. |
| The coffee powder is ground too finely. | Grind the coffee powder less finely. | |
| The coffee runs over the outside of the strainer holder | Strainer holder not correctly inserted | Insert the strainer holder correctly |
| The edge of the strainer holder is stained by coffee residue. | Clean strainer holder and strainer insert | |
| Seal of the strainer holder holder is soiled | Clean seal of strainer holder holder | |
| Seal of the strainer holder holder is defective | Contact customer service. | |
Sommaire
natural_image
Simple line drawing of a circular object with a central rod and two small icons below (no text or symbols)Symbole Position Signification
Retirer la plaque-support (10).1.
natural_image
Simple line drawing of a circular object with a vertical rod and two small icons below (no text or symbols)natural_image
Simple line drawing of a circular object with a vertical rod and two small icons below (no text or symbols)natural_image
Simple line drawing of a circular object with a vertical rod and two small icons below (no text or symbols)Notes on environmental protection

The packaging materials used can be recycled. When no longer required, dis- of the packaging materials according to environmental regulations.

This product may not be disposed of in the domestic refuse within the European Union. Dispose of the appliance viaunal collection points.

natural_image
Close-up of a mechanical switch or connector with a black handle and metallic housing, showing a circular opening and directional arrows (no text or symbols)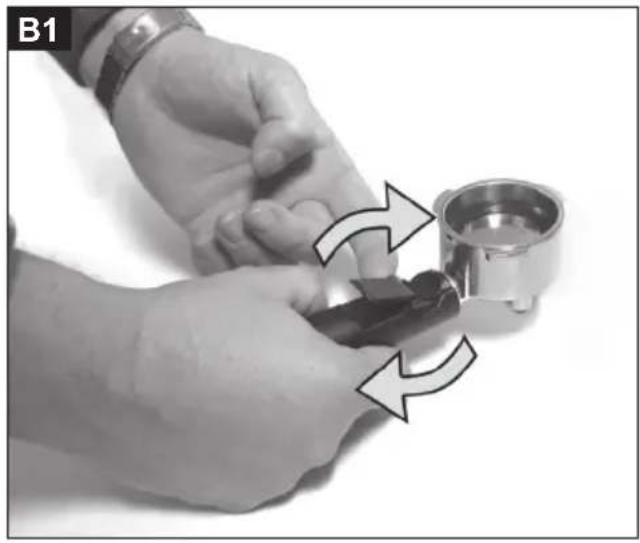
natural_image
Close-up of hands performing a mechanical tool manipulation with directional arrows indicating motion (no text or symbols)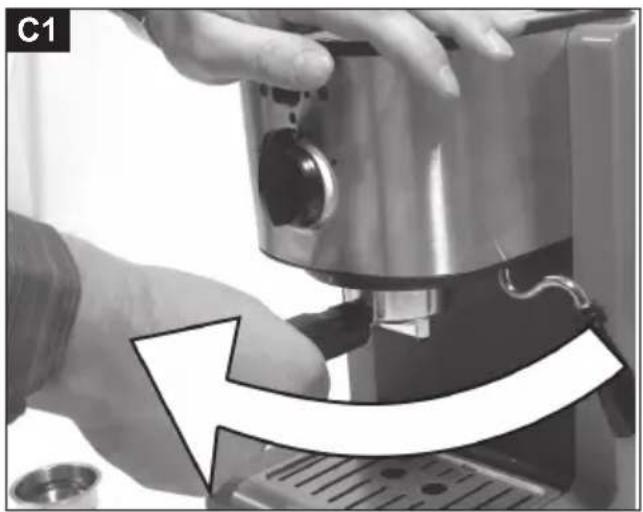
natural_image
Close-up of hands operating a stainless steel coffee maker with a curved arrow indicating process (no text or symbols visible)
natural_image
Close-up of a hand using a espresso machine to press or adjust the cup (no text or symbols visible)
natural_image
Two circular, textured objects labeled A and B, with no visible text or symbols on the objects themselves.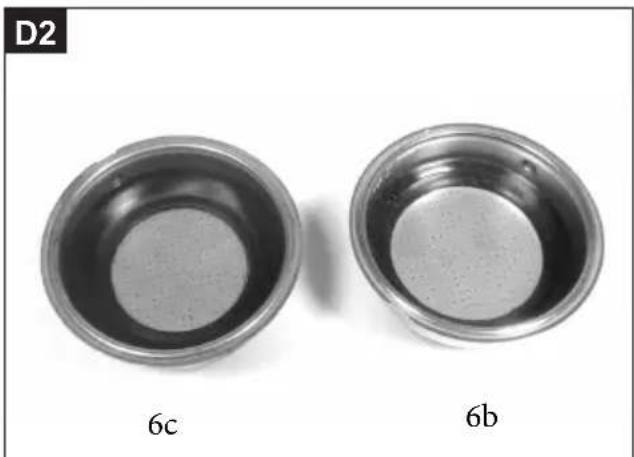
natural_image
Two metallic bowls labeled 6c and 6b, shown side by side (no text or symbols on the bowls themselves)Kundenservice:
Customer service:
Elements of Lifestyle
© 2014 by BEEM
Subject to printing error.
Subject to technical modifications.
For service in other countries contact your local dealer.


- Bedienungsanleitung
- Urheberrecht
- Droits d'auteur
- Safety precautions
- DANGER
- WARNING
- ATTENTION
- Intended use
- Requirements for the place of operation
- Electrical connection
- Symbols used
- NOTE
- Startup
- Unpacking
- Appliance description
- Overview / Delivery contents
- Power indicators
- Selector switch
- Switching the appliance ON/OFF
- Before using for the first time
- Instructions for making coffee
- Operation and use
- Filling the water tank
- Installing the strainer insert (image A1)
- Removing the strainer insert (image A1)
- Emptying the strainer insert (image B1)
- Removing the strainer holder (image C1)
- Inserting the strainer holder (image C2)
- Making espresso/coffee with coffee powder
- General instructions
- Preparation
- Making espresso/coffee with coffee pads (D1, D2)
- Preparing frothed milk
- Preparing
- Heating drinks with steam
- Recipes for coffee specialities
- Cappuccino
- Latte Macchiato
- After using
- Cleaning and maintenance
- Cleaning the appliance
- Emptying/cleaning the strainer insert
- Emptying/cleaning the drip tray
- Cleaning the steam nozzle
- Descaling the appliance.
- Storage
- General aspects
- Warranty / Guarantee
- Declaration of Conformity
- Limitation of liability
- Troubleshooting
- Sommaire
- Notes on environmental protection
Brand : BEEM
Model : Espresso Perfect Ultimate
Category : Coffee machine