
HC 17 R - Lawn mower TEAM - Free user manual and instructions
Find the device manual for free HC 17 R TEAM in PDF.
| Type | Rechargeable hair clipper |
| Brand | Team |
| Model | HC 17 R |
| Power supply | Rechargeable via 230-240 V mains charger |
| Initial charging time | 16 hours |
| Normal charging time | Up to 6 hours |
| Cutting heights | 7 positions: 2.6 mm, 4 mm, 8 mm, 10 mm, 12 mm, 14 mm, 16 mm |
| Cutting guide | Removable with lock |
| Functions | Hair cutting, beard, mustache, thinning, contour drawing |
| Blades | Stainless steel with precision sharpening |
| Maintenance | Regular oiling of blades with special clipper oil |
| Cleaning | Brush provided to remove hair |
| Safety | Do not use in water, near a heat source, or if blades are damaged |
| Battery | Rechargeable integrated, remove before disposal |
| Included accessories | Cutting guide, comb, cleaning brush, charger |
| Spare parts | Replacement blades available, replacement charger |
| Usage | For dry hair only, suitable for domestic use |
| Warranty | Consult authorized after-sales service |
Frequently Asked Questions - HC 17 R TEAM
User questions about HC 17 R TEAM
0 question about this device. Answer the ones you know or ask your own.
Ask a new question about this device
Download the instructions for your Lawn mower in PDF format for free! Find your manual HC 17 R - TEAM and take your electronic device back in hand. On this page are published all the documents necessary for the use of your device. HC 17 R by TEAM.
USER MANUAL HC 17 R TEAM
Rechargeable Hair Clipper
Tondeuse Rechargeable
Oplaadbare Tondeuse
Cortapelo Recargable
natural_image
Illustration of hands holding a small object with arrows indicating motion (no text or symbols)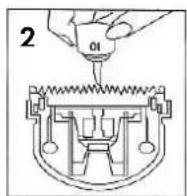
B MONTAGE / MOUNTING / MONTAGE / MONTAGE / MONTAJE / MONTAGEM / MONTAGGIO / MONTAZ / MONTARE / MOHTAX
C GEBRAUCH DES GERÄTES / HOW TO USE / UTILISATION / GEBRUIK / UTILIZACIÓN / UTILIZAÇÃO / FUNZIONAMENTO / SPOSÓB UŻYCIA / CUM SA-L FOLOSITI / УПОТРЕБА

natural_image
Side profile sketch of a human head and neck (no text or symbols)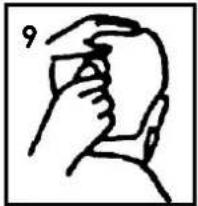
natural_image
Simple line drawing of a human head in profile view (no text or symbols)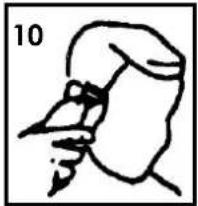
natural_image
Simple line drawing of a person's head and shoulders, no text or symbols present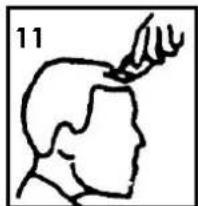
natural_image
Simple line drawing of a human head with a hand holding an object, no text or symbols present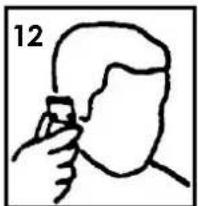
natural_image
Simple line drawing of a person holding a small object, no text or symbols present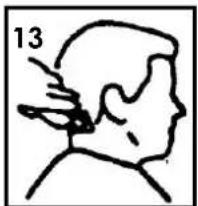
natural_image
Simple line drawing of a person's head and neck with a finger pointing to the ear area (no text or symbols)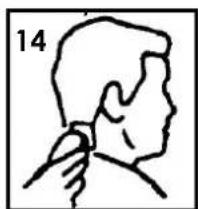
natural_image
Simple line drawing of a human head and neck with a finger pointing to the ear area (no text or symbols)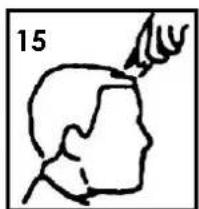
natural_image
Simple line drawing of a human head with a pointing hand, no text or symbols present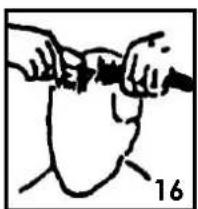
natural_image
Simple line drawing of a hand holding a tool over a human head, labeled with number 16 (no text or symbols on the diagram itself)2 TEAM HC 17 R - 091125
natural_image
Simple line drawing of a hand holding a rock with a black arrow pointing to the surface (no text or symbols)
D
ENTNAHME DER BATTERIE / DISPOSAL OF BATTERY / ENLEVEMENT DE LA BATTERIE / ACCU VERWIJDEREN / QUITAR LA BATERÍA / TIRAR A BATERIA / TOGLIERE LA BATTERIA / ZAKŁADANIE BATERII / BATERIE DETASABILA / ОТДЕЛЯНЕ НА БАТЕРИЯТА
natural_image
Line drawing of a handheld electronic device with a label '21' (no text or symbols on the device itself)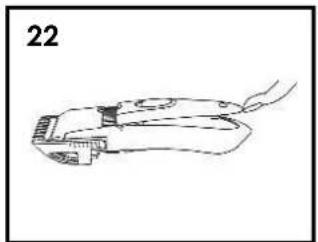
natural_image
Line drawing of a mechanical component with no visible text or symbols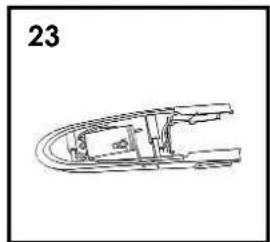
natural_image
Technical line drawing of a mechanical component with no visible text or symbolsE
VERSCHLUSS - ÖFFNUNG / LOCKING - UNLOCKING / FERMETURE - OUVERTURE / SLUITING - OPENEN / CIERRE - ABERTURA / FECHO - ABERTURA / CHIUSURA - APERTURA / BLOKOWANIE - ODBLOKOWANIE / BLOCARE - DEBLOCARE / ЗАКЛЮЧВАНЕ - ОТКЛЮЧВАНЕ
Please read these instructions carefully before using the appliance, and always follow the safety and operating instructions.
Important: People (including children) who are not able to use the appliance in a safe way, due to their physical, sensorial or mental capacity or their lack of experience or knowledge, must never use the appliance except if they are supervised by a person responsible for their safety or if they previously received instructions concerning the safe use of the appliance. Close supervision is necessary to prevent children from using the appliance as a toy.
☐ Check that your mains voltage corresponds to that stated on the appliance.
☐ Never leave the appliance unsupervised when in use.
From time to time check the appliance for damages and should it be damaged, have it checked by a competent qualified electrician (*). If the adapter's cord is damaged, it cannot be repaired but the complete adapter must be replaced by an identical adapter or an adapter similar to the original one and showing the same characteristics. This replacement should be done by a competent qualified electrician (*).
☐ Only use the appliance for domestic purposes and in the way indicated in these instructions.
☐ Never immerse the appliance in water or any other liquid for any reason whatsoever. Never place it into the dishwasher.
☐ Never use the appliance near hot surfaces.
Before cleaning, always unplug the appliance from the power supply.
□ Never use the appliance outside and always place it in a dry environment.
☐ Never use accessories that are not recommended by the producer. They could constitute a danger to the user and risk to damage the appliance.
☐ Never move the appliance by pulling the cord. Make sure the cord cannot get caught in any way. Do not wind the cord around the appliance and do not bend it.
☐ Never use the appliance in bath, shower or above a sink filled with water! However, should the appliance happen to fall into the water:
- immediately unplug it
- do not put your hands into the water
- make sure your appliance is verified by a competent qualified electrician before using it again.
□ Always make sure your appliance is not wet (water splashes...). Never handle it with wet hands.
☐ Unplug the appliance when not in use or even if you put it down only for a moment.
☐ Do not insert any object or piece of paper near the blade.
☐ Do not use the appliance if one of the blades shows any kind of defect, make sure it is verified by a qualified competent electrician (*).
□ Always use the clippers with one of the (supplied) combs. Never use a comb which misses a tooth or which is damaged in any way.
☐ Do not use the clippers on wet hair, as it is designed for cutting dry hair.
☐ Do not set up the charging base on the edge of a sink, a bath or a shower.
Before plugging in the adapter, check that your mains voltage corresponds to that of the adapter. Never use any other adapter than that supplied with the appliance. Never use the adapter for any other purpose.
☐ Do not use the appliance if the adapter or its cord is damaged. The adapter is not repairable, it has to be returned to the seller during guarantee period or thrown away when the guarantee has expired. In that case it has to be replaced by an identical model.
☐ Never use the appliance with its adapter outside and always place it in a dry environment.
10 TEAM HC 17 R - 091125
☐ When you decide to throw away the appliance, make sure to remove the battery and to dispose of it in an ecological manner. For more information contact your town authorities.
□ BE CAREFUL NOT TO TOUCH THE ACCUMULATOR OR THE LEAKING LIQUID.
(*) Competent qualified electrician: after-sales department of the producer or importer or any person who is qualified, approved and competent to perform this kind of repairs in order to avoid all danger. In case of need you should return the appliance to this electrician.
CONNECTING
- The charging base can be connected to any voltage outlet - even to shaver sockets - between 230-240 volts ac (-).
- Place the rechargeable hair clipper, facing the front onto the charging base.
- The red charge indicator will light up, when the power unit is inserted on the plugged-in charging base.
- The hair clipper may warm up somewhat during recharging. This has no significance on the unit's operation. Overcharging is impossible.
- To maintain the hair clipper's full performance, it should always be stored on the charging base after use.
PRESERVING THE RECHARGEABLE BATTERY
To maximise the capacity and life of the rechargeable battery, it should be fully charged for 16 hours before the first use and then fully discharged by using. Then recharge to full capacity (6 hours). This discharging/charging procedure should be done every six months.
BEFORE YOU START
- Make sure that your clipper is clean, properly oiled and in perfect working condition. Caution: if the blade is not oiled correctly, the appliance will not work properly.
- Place a towel around the neck of the person whose hair is to be cut to prevent hair from falling inside the collar.
- Have the person sit on a chair so that his/her head is at your eye's level.
- Comb the hair thoroughly and hold the clipper in a relaxed, comfortable grip. This will help you maintain an accurate cutting control.
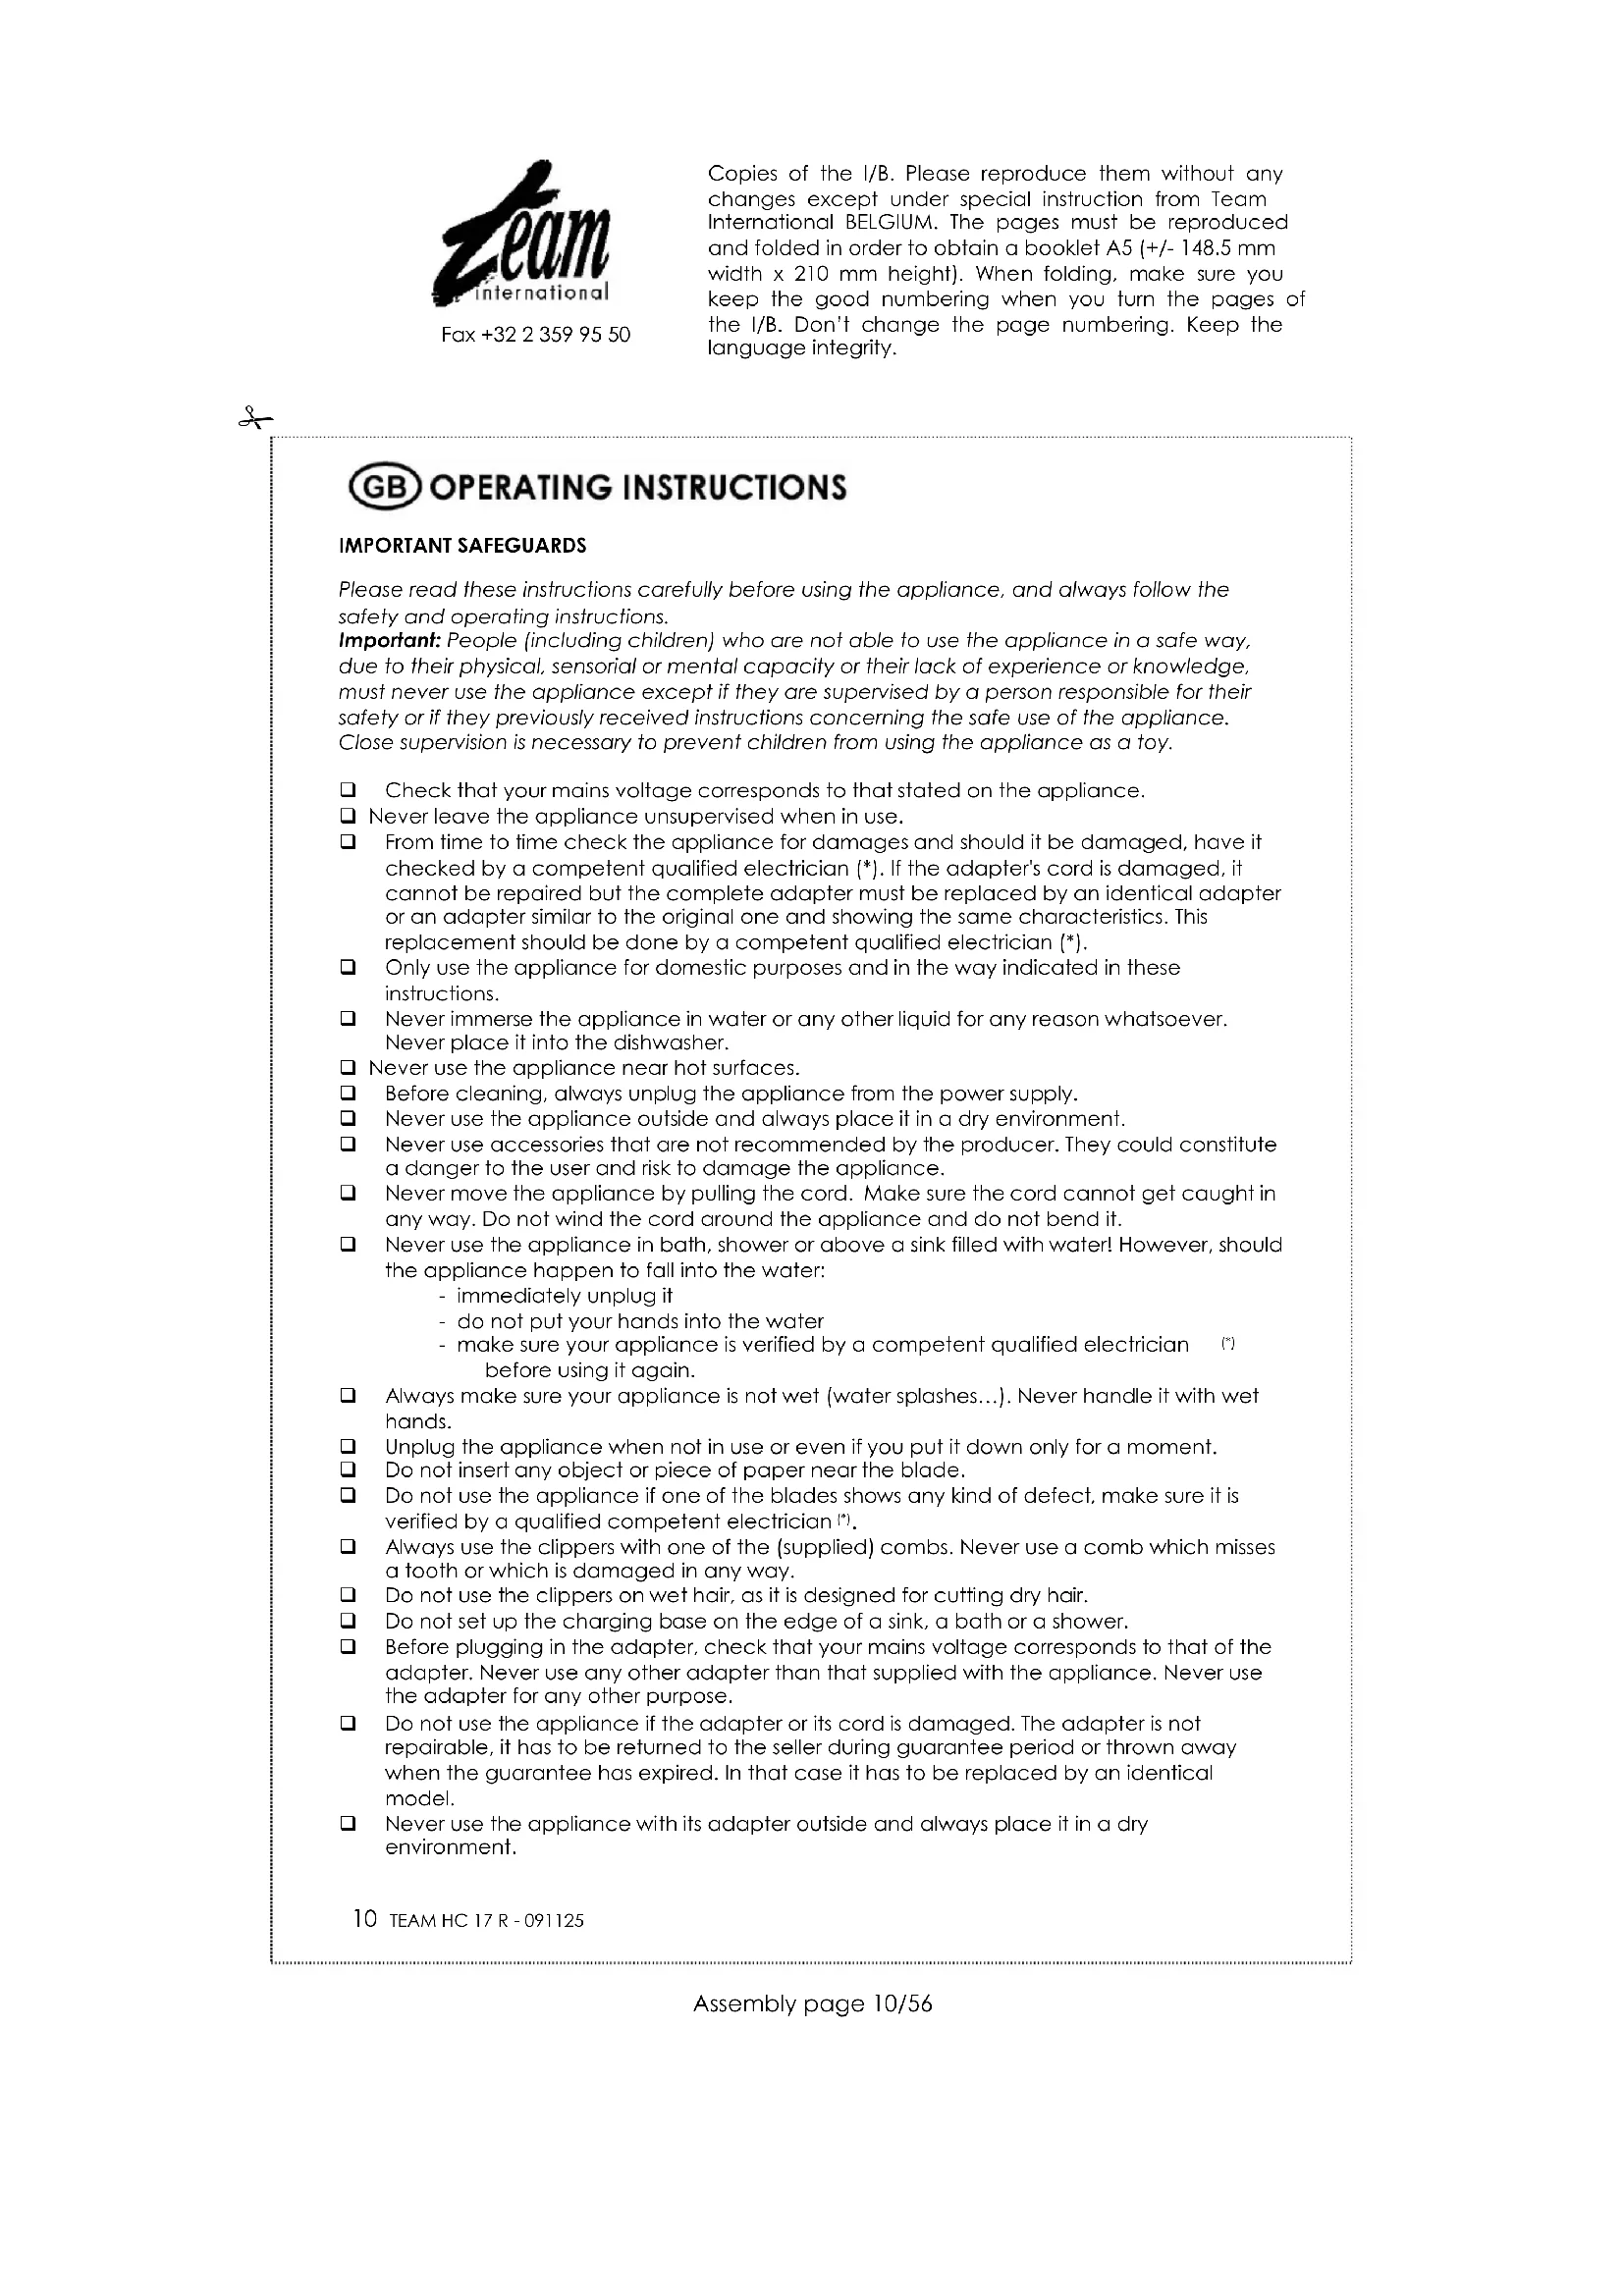
OIL (see page 2: A)
To maintain your clipper in peak condition, the blades should be oiled every few haircuts. Do not use hair oil, grease or oil mixed with kerosene or any solvent, as the solvent will evaporate and leave the thick oil which may slow down the blades' motion.
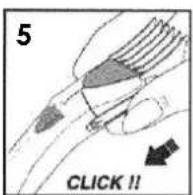
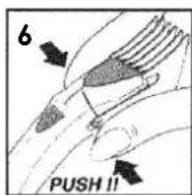
MOUNTING (see page 2: B)
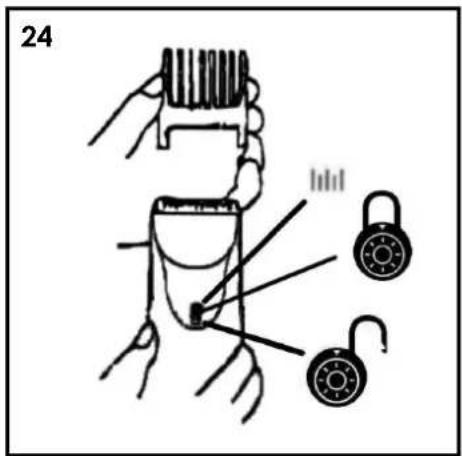
- To mount the comb attachment, put the locking knob in ⚙0 position (see page 3, E 24) and insert the comb attachment as described on page 2, B. The "clicks" that you can hear correspond to the different cutting length settings. Once the comb attachment stops, it means that it is in position "1".
- To remove the comb attachment, proceed the other way around, still making sure that the locking knob is in Ⓞ position.
- Once you have chosen the cutting length, put the locking knob in ⚠ position to block the comb attachment.
11 TEAM HC 17 R - 091125
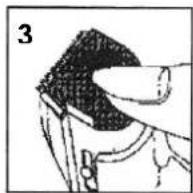
To attach the comb attachment, hold it with teeth up and snap comb attachment firmly to the appliance. The comb attachment can be set to 7 cutting length positions:
- 1/6"
- 1/4"
- 1/3"
- 5/12"
- 1/2"
- 7/12"
- 2/3"
CUTTING HAIR WITH THE COMB ATTACHMENT (SEE PAGE 2: C and PAGE 3)
- Only cut a small amount of hair to start with until you become accustomed to the length the comb attachment gives to the hair.
• We suggest you try the longest comb attachment in position "7" on the clipper first. - For uniform cutting, never push or force the clipper through the hair at a fast pace. The clipper works most efficiently when it works at its own speed.
- Start by combing the hair in its natural direction.
- Place the comb attachment in position "7" to your clipper and start by trimming the sides from the bottom upwards. Hold the clipper lightly against the hair with the teeth of the comb attachment pointing up but flat against the head. Slowly lift the clipper up and outward through the hair, cutting only a small amount at a time (8 and 9).
- If you want shorter hair, either place the comb attachment in position "1" or change the hair length (see B, 6). You can also apply more pressure to the present comb attachment. This procedure requires practice, and it is always better to leave too much hair during the first few haircuts (10).
- For the top of the head, you will give a fairly short cut if you place the comb attachment in position "1". With the teeth flat against the head, slowly start trimming from the front to the back. Again, it is better to leave the hair longer at the beginning (11).
Short cuts
- Always cut from the back of the neck to the crown, placing the comb attachment in position "7". Holding it flat against the head, slowly move the clipper up through the hair. Use the same technique for the sides, cutting from the bottom to the upper side of the head (14).
- For the front of the crown, cut the hair against the direction in which it grows. Then even it up with the sides (15).
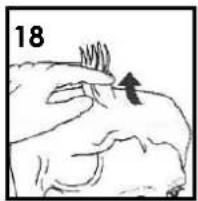
- To taper hair down to the neckline, use attachment comb in position "1". Comb hair, check for uneven spots and outline sideburns and neckline (16).
CUTTING WITHOUT THE COMB ATTACHMENT
To cut the hair with the help of a comb or your fingers as well as to cut the outlines, you do not need the comb attachment.
- Turn the locking knob to the left to the ⚙ position.
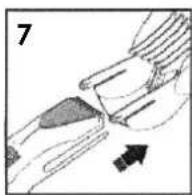
• Take off the comb attachment by pulling it holding it by the sides (see page 2, B 6 and 7).
Cutting hair with the help of a comb or your fingers
Remove the comb attachment carefully, as explained in the previous paragraph.
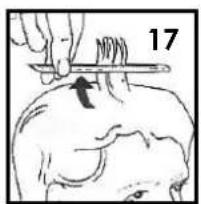
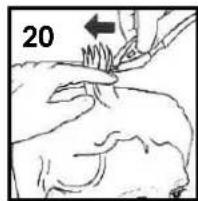
Raise a wisp of hair with the help of the comb (17), or take the wisp between your fingers (18).
Take the wisp through the comb or fingers until only the desired hair length remains under the comb/fingers. Cut the hair that is above the comb or fingers with the hair clipper (19 and 20).
Cutting hair with the integrated thinning function
The thinning function allows you to thin out your hair at some places to change the volume of the hair cut.
- Remove the comb attachment before activating this function (see paragraph "CUTTING WITHOUT COMB ATTACHMENT").
- Turn the locking knob to the llll position (see page 3, E 24). This way, a metal plate comes out of the appliance and partly covers the blades. This reduces the number of teeth and as a consequence it also reduces the amount of hair that will be cut.
- Take the wisp through the comb or fingers until only the desired hair length remains under the comb/fingers and cut the hair that is above the comb or fingers with the hair clipper.
Outlining
- Outlining requires no attachments.
- Comb hair into the required style. Position clipper between the sideburns and the ear. Make sure the outer edge of the blade is against the hairline. With the outline of the hair as your guide, slowly move the clipper around the ears (12). For the back of the neck and the sideburns, hold the clipper upside down (13), and move downwards holding it against the skin at the length desired.
CUTTING A BEARD
- Lead the appliance against the grain of the beard.
- Comb the beard hair with the supplied comb so that it stands as high as possible, all in the same direction.
- Put the comb attachment on the appliance and slide it to the desired cutting setting.
- Switch on the appliance and cut the beard.
Cutting the outlines of the beard
- Remove the comb attachment from the appliance.
- Hold the appliance in diagonal position with the front side pointing away from you.
- Start with the chin and cut backwards.
• Follow the chin line and cut the longer hair at the outside of the beard.
Styling the beard
Hold the appliance vertically in front of your face, with its front side pointing away from you. Start with the shortest areas of the beard and cut the hair directly under the beard line moving down.
Thinning and sharpening
Take the supplied comb and bring the beard hair in the desired shape.
Hold the appliance with its front side pointing away from you and cut the hair tips by moving down.
CUTTING MOUSTACHE
With the comb attachment
• Comb the moustache with the supplied comb so that it is as vertical as possible.
- Slide the comb attachment to the desired cutting setting.
- Hold the appliance horizontally in the hand with its front side pointing at you.
- Cut the moustache by moving down.
Without comb attachment
Put your fingers on the upper lip, so that the hair of the moustache is away from the skin. Cut the hair by moving up.
Then cut the hair by moving down to level possible length differences.
To obtain the desired outline above the upper lip, hold the appliance vertically towards the cutting direction and move sideward.
MAINTENANCE
- Your clipper was carefully examined before leaving our factory to ensure that the blades were oiled and aligned. To maintain your clipper in peak condition, the blades should be oiled every few haircuts.
- Use the small brush to remove remaining hair.
- Change the blades as soon as they become blunt.
DISPOSAL OF BATTERY (see page 3: D)
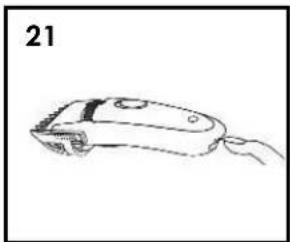
When you decide to throw out your appliance, first remove the battery in order to protect the environment.
- Press the unlocking knob underneath the appliance (21).
- Remove the cover of the appliance carefully with the appropriate tools (22).
• Cut the wires that link the battery with the appliance with a wire cutter. - Remove the battery from the appliance (23) and dispose of it in accordance with the legislature.
PROTECTION OF THE ENVIRONMENT – DIRECTIVE 2002/96/EC
In order to preserve our environment and protect human health, the waste electrical and electronic equipment should be disposed of in accordance with specific rules with the

implication of both suppliers and users. For this reason, as indicated by the symbol on the rating label or on the packaging, your appliance should not be disposed of as unsorted municipal waste. The user has the right to bring it to a municipal collection point performing waste recovery by means of reuse, recycling or use for other applications in accordance with the directive.
FR MODE D'EMPLOI
POUR VOTRE SECURITE
LUBRIFICATION (cf. page 2: A)
- 1/6"
- 1/4"
- 1/3"
- 5/12"
- 1/2"
- 7/12"
- 2/3"
Team International Romania Srl;
Str.Industriilor 56A, sector 3, Bucuresti CUI 16991287; R.C. J40/19685/29.11.2004
BG УПЪТВАНЕ
- 1/6"
- 1/4"
- 1/3"
- 5/12"
- 1/2"
- 7/12"
- 2/3"

- B MONTAGE / MOUNTING / MONTAGE / MONTAGE / MONTAJE / MONTAGEM / MONTAGGIO / MONTAZ / MONTARE / MOHTAX
- C GEBRAUCH DES GERÄTES / HOW TO USE / UTILISATION / GEBRUIK / UTILIZACIÓN / UTILIZAÇÃO / FUNZIONAMENTO / SPOSÓB UŻYCIA / CUM SA-L FOLOSITI / УПОТРЕБА
- D
- E
- CONNECTING
- PRESERVING THE RECHARGEABLE BATTERY
- BEFORE YOU START
- OIL (see page 2: A)
- MOUNTING (see page 2: B)
- CUTTING HAIR WITH THE COMB ATTACHMENT (SEE PAGE 2: C and PAGE 3)
- Short cuts
- CUTTING WITHOUT THE COMB ATTACHMENT
- Cutting hair with the help of a comb or your fingers
- Cutting hair with the integrated thinning function
- Outlining
- CUTTING A BEARD
- Cutting the outlines of the beard
- Styling the beard
- Thinning and sharpening
- CUTTING MOUSTACHE
- With the comb attachment
- Without comb attachment
- MAINTENANCE
- DISPOSAL OF BATTERY (see page 3: D)
- PROTECTION OF THE ENVIRONMENT – DIRECTIVE 2002/96/EC
- FR MODE D'EMPLOI
- POUR VOTRE SECURITE
- LUBRIFICATION (cf. page 2: A)
- BG УПЪТВАНЕ
Brand : TEAM
Model : HC 17 R
Category : Lawn mower